
Articles
How To Install Exterior Shiplap Siding
Modified: May 6, 2024
Learn how to install exterior shiplap siding with our comprehensive articles. Discover expert tips and step-by-step instructions for a successful installation.
(Many of the links in this article redirect to a specific reviewed product. Your purchase of these products through affiliate links helps to generate commission for Storables.com, at no extra cost. Learn more)
Introduction
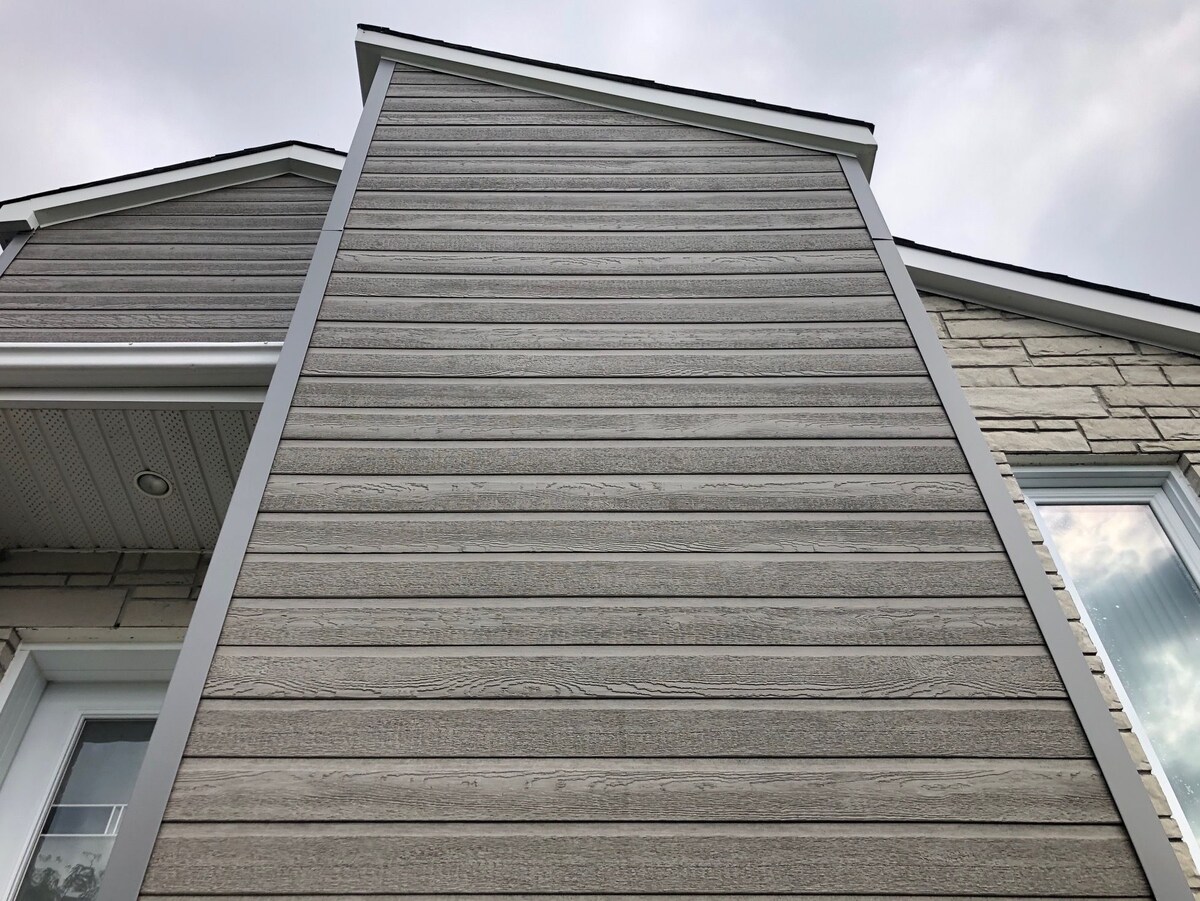
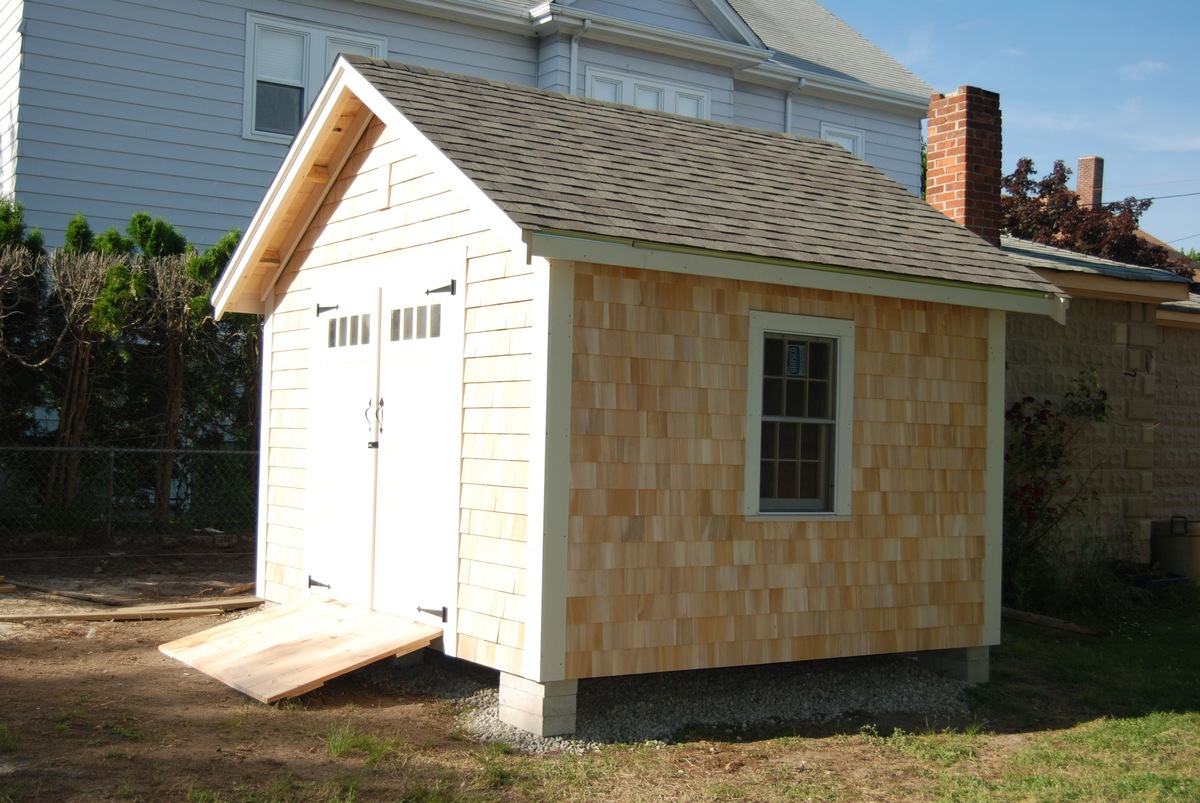
When it comes to transforming the exterior of your home, installing shiplap siding can make a stunning visual impact. With its clean, horizontal lines, shiplap siding adds a touch of elegance and charm to any house. Whether you want to update the look of your home or add a rustic touch, shiplap siding is a versatile and popular choice.
In this step-by-step guide, we will walk you through the process of installing exterior shiplap siding. From gathering materials to finishing touches, we will provide you with all the information you need to successfully complete this project. Whether you are a seasoned DIY enthusiast or a novice, you can follow these instructions to achieve professional-looking results.
Before we dive into the installation process, let’s first understand what shiplap siding is. Shiplap is a type of wooden board that has a rabbet joint along the top and bottom edges. This joint allows the boards to fit together snugly, creating a tight seal. The overlapping design of shiplap siding provides protection against the elements and helps to prevent water infiltration.
Now that we have a basic understanding of shiplap siding, let’s get started on the installation process!
Key Takeaways:
- Transform your home’s exterior with elegant shiplap siding. Follow our step-by-step guide for professional results, from gathering materials to applying finishing touches.
- Enhance curb appeal and increase home value with timeless shiplap siding. Enjoy the visual impact and charm of this versatile installation project.
Step 1: Gather Materials
Before you begin installing exterior shiplap siding, it’s important to gather all the necessary materials. Here’s a list of items you’ll need:
- Shiplap boards: Measure the dimensions of your wall to determine the amount of shiplap boards you’ll need. It’s a good idea to add a little extra to account for any mistakes or cuts.
- Hammer or nail gun: You’ll need either a hammer or a nail gun to secure the shiplap boards to the wall. If using a nail gun, make sure you have the appropriate nails.
- Saw: Depending on the material of your shiplap boards, you may need a handsaw or a circular saw to cut the boards to size.
- Measuring tape: Accurate measurements are crucial when installing shiplap siding. Use a measuring tape to measure the dimensions of your wall and the lengths of the shiplap boards.
- Level: To ensure that your shiplap siding is straight and level, use a carpenter’s level. This will help prevent any crooked or uneven lines.
- Pry bar: If there is existing siding or trim on your wall, you may need a pry bar to remove it before installing the shiplap boards.
- Construction adhesive: Applying construction adhesive to the backs of the shiplap boards can help provide additional strength and stability.
- Finish nails: If you choose to hide the nail heads, you’ll need finish nails to secure the shiplap boards in place.
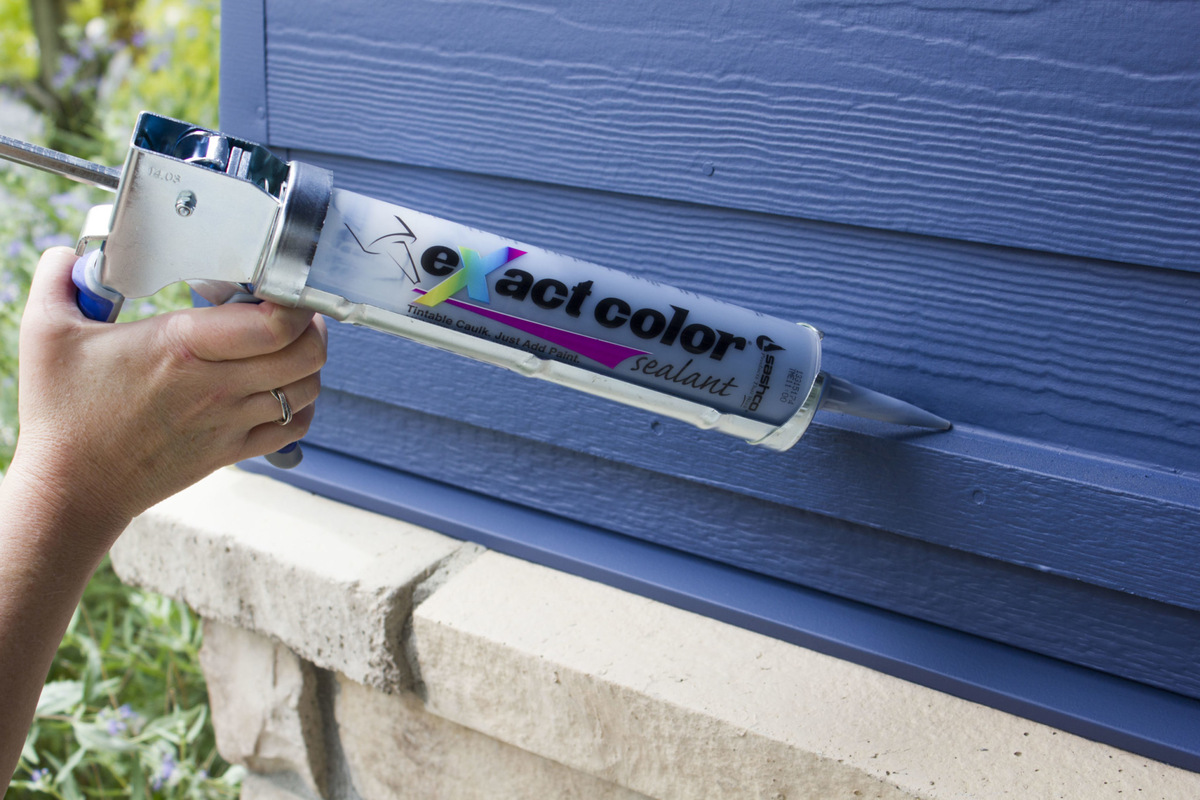
- Caulking gun and exterior caulk: Caulking the gaps between the shiplap boards will help prevent water infiltration and improve the overall appearance of the siding.
- Paint or stain: If you prefer a specific color or finish, you’ll need paint or stain to apply to the shiplap boards after installation.
Once you have gathered all the necessary materials, you’re ready to move on to the next step: preparing the wall.
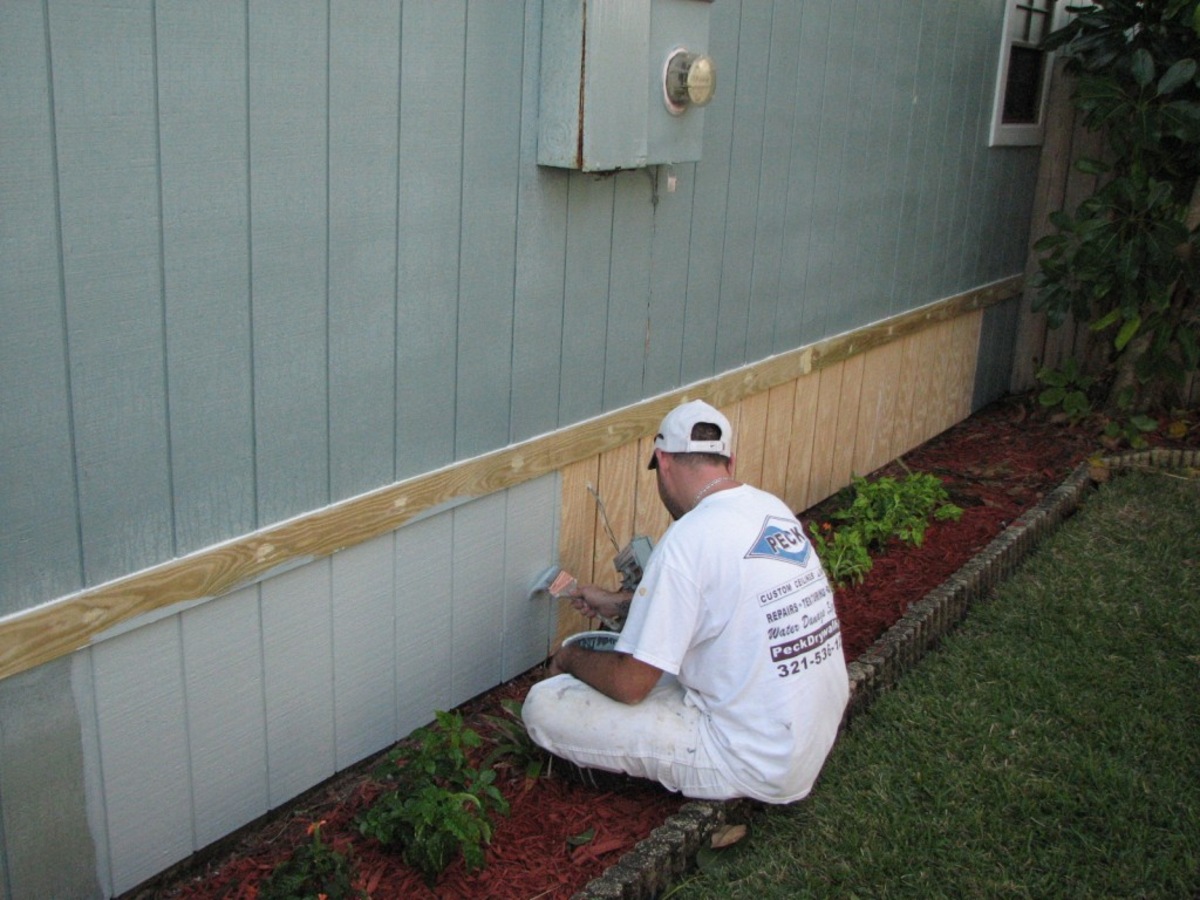
Step 2: Prepare the Wall
Before you can install the shiplap siding, it’s important to properly prepare the wall surface. Here’s how to do it:
- Remove existing siding: If there is any existing siding or trim on the wall, use a pry bar to carefully remove it. Be cautious not to damage the underlying structure or insulation.
- Clean the wall: Thoroughly clean the wall surface to remove any dirt, dust, or debris. Use a stiff brush or a pressure washer to ensure a clean surface for proper adhesion.
- Inspect for damage: Take a close look at the wall for any signs of damage, such as rot or moisture. If you notice any issues, address them before moving forward with the installation.
- Repair and reinforce: If there are any areas of the wall that need repair, such as holes or cracks, patch them with an appropriate filler or sealant. Additionally, reinforce any weak spots or loose boards to ensure a solid base for the shiplap siding.
- Apply a moisture barrier: To prevent moisture from penetrating the wall, apply a layer of moisture barrier. This can be a waterproof membrane or a weather-resistant house wrap.
- Install furring strips (optional): If your wall surface is uneven or you want to create an air gap for improved insulation, you can install furring strips horizontally across the wall. These strips will serve as a level and stable base for the shiplap siding.
Once the wall is properly prepared, you’re ready to move on to the next step: measuring and cutting the shiplap boards.
Step 3: Measure and Cut the Shiplap Boards
Now that the wall is prepared, it’s time to measure and cut the shiplap boards to fit your wall dimensions. Follow these steps:
- Measure the wall: Use a measuring tape to determine the height and width of the wall. It’s important to measure accurately to ensure a proper fit for the shiplap boards.
- Calculate the number of boards needed: Based on the dimensions of the wall and the width of the shiplap boards, calculate the number of boards you’ll need. Remember to account for any extra boards in case of mistakes or cuts.
- Mark the boards: Lay the shiplap boards on a flat surface and mark the desired lengths according to your wall measurements. Use a pencil or a marking tool to make clear and precise marks.
- Cut the boards: Using a saw, cut the shiplap boards along the marked lines. Take your time and make accurate cuts to ensure a proper fit.
- Check the fit: Once you’ve cut the boards, hold them up against the wall to check the fit. Make any necessary adjustments or recuts if needed.
Remember to follow proper safety precautions when cutting the shiplap boards. Wear protective goggles, gloves, and other safety equipment as necessary.
Once all the shiplap boards are measured and cut to size, you’re ready to move on to the next step: applying the first row of shiplap.
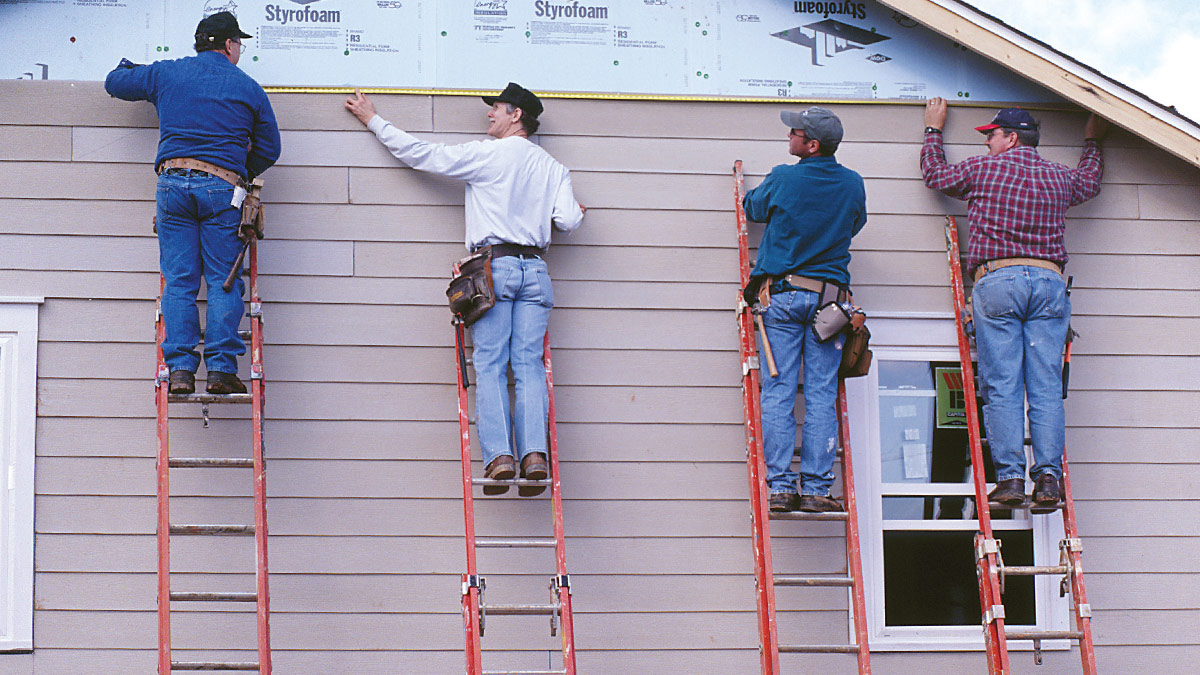
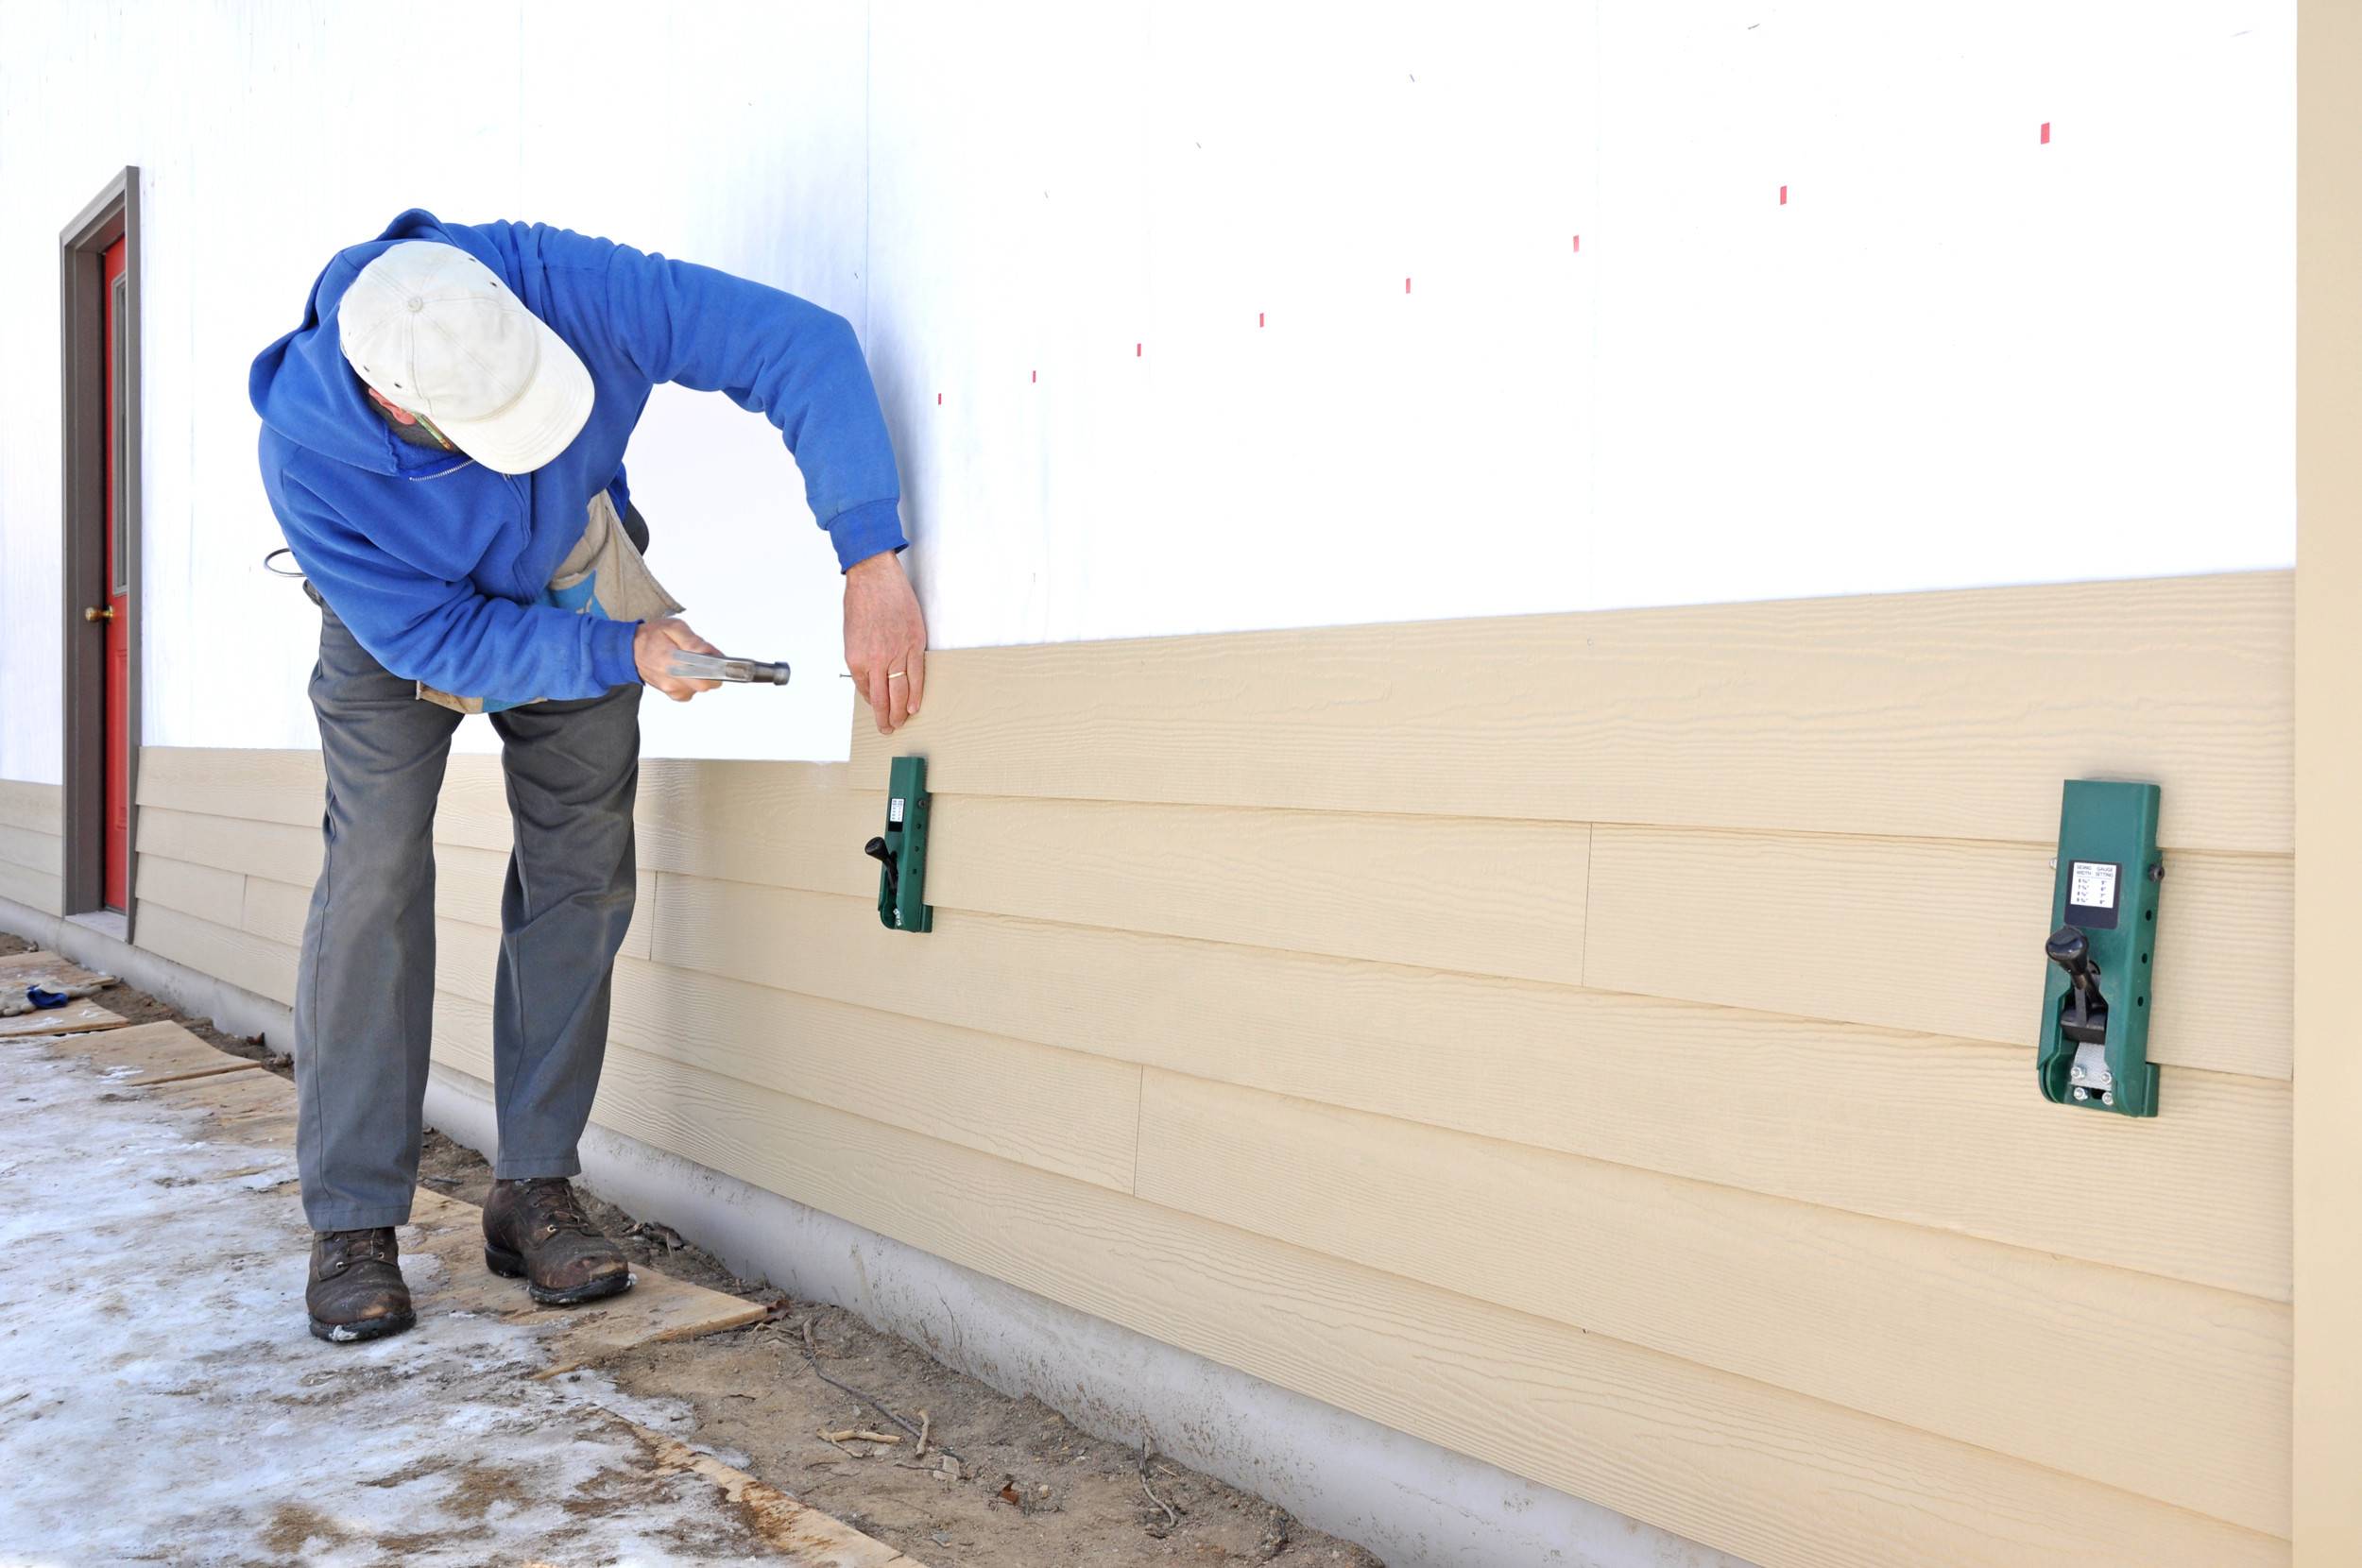
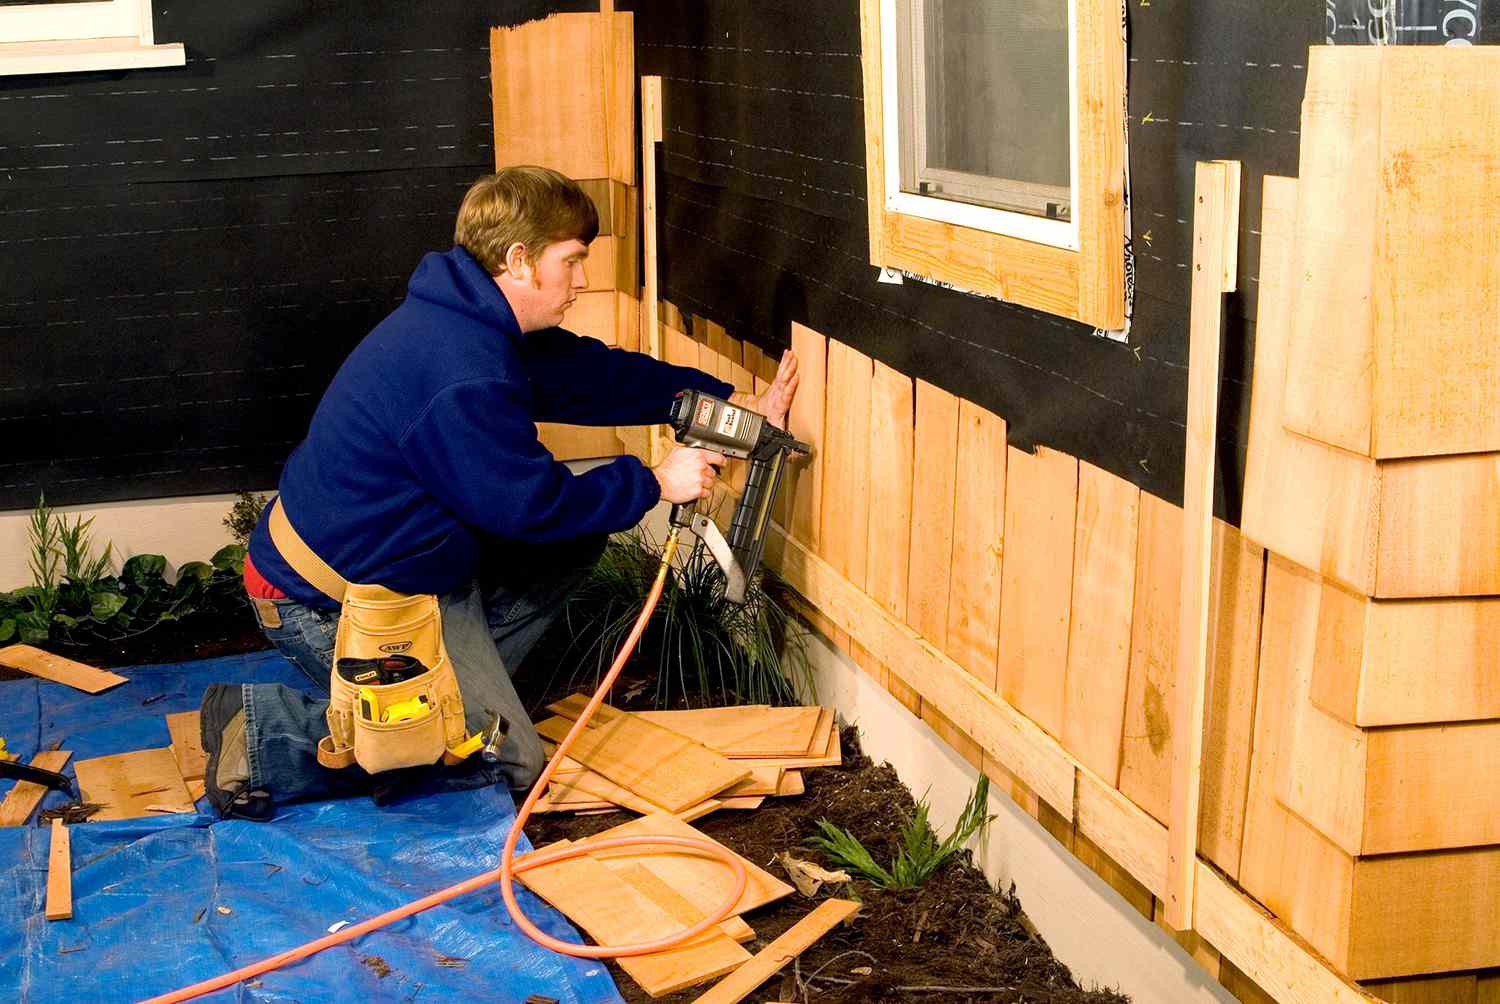
Step 4: Apply the First Row of Shiplap
With the shiplap boards prepared, it’s time to start installing them on the wall. Follow these steps to apply the first row of shiplap:
- Start from the bottom: Begin at the bottom of the wall and work your way up. This will ensure that each row overlaps the previous one to create a watertight seal.
- Apply construction adhesive: Apply a thin layer of construction adhesive to the back of the first shiplap board. This will help provide additional strength and stability.
- Align the board: Place the first shiplap board at the starting point, ensuring that it is level and flush with the edge of the wall. Use a level to double-check and make adjustments if necessary.
- Secure the board: Use a hammer or a nail gun to secure the shiplap board to the wall. Drive nails through the board and into the wall studs or furring strips if you’ve installed them. Space the nails evenly along the length of the board.
- Continue with subsequent boards: Repeat the process for the remaining boards in the first row. Apply adhesive, align the board, and secure it in place. Ensure that each board overlaps the previous one to maintain the shiplap look.
- Check for levelness: Periodically check for levelness as you install each board. Adjust as needed to maintain a straight and even installation.
Take your time during this step to ensure that the first row of shiplap is properly installed. Once the first row is in place, you can move on to installing the remaining rows of shiplap.
Note: If desired, you can use finish nails and a nail set to hide the nail heads by countersinking them slightly below the surface of the shiplap boards.
When installing exterior shiplap siding, be sure to use stainless steel or galvanized nails to prevent rust and corrosion, which can damage the siding over time.
Read more: How To Install Shiplap On A Ceiling
Step 5: Install the Remaining Rows of Shiplap
With the first row of shiplap installed, it’s time to continue with the remaining rows. Follow these steps to install the shiplap siding:
- Apply construction adhesive: Before installing each board, apply a thin layer of construction adhesive to the back. This will provide additional stability and help prevent the boards from shifting over time.
- Overlap the boards: Place the next shiplap board on top of the previous row, ensuring that it overlaps the board beneath it. The amount of overlap will depend on your desired aesthetic and the width of your shiplap boards.
- Align and level: Align the board with the previous row and make sure it is level. Use a level to check for straightness and make any necessary adjustments.
- Secure the board: Use a hammer or a nail gun to secure the board in place. Drive nails through the board and into the wall studs or furring strips for added stability. Space the nails evenly along the length of the board.
- Repeat the process: Continue applying each shiplap board, overlapping and securing them as you go. Ensure that each board is level and aligned with the previous row.
- Trim the last board: When you reach the final row, you may need to trim the last shiplap board to fit. Measure the remaining space and cut the board accordingly. Ensure a snug fit before securing it in place.
As you install the remaining rows of shiplap, take care to maintain a consistent overlap and levelness. This will ensure a professional and visually pleasing result. Double-check your work frequently and make any necessary adjustments as you go.
Once all the rows are installed, you’re ready to move on to the next step: trimming the shiplap edges.
Step 6: Trim the Shiplap Edges
After installing the shiplap siding, it’s time to trim the edges for a clean and finished look. Follow these steps to trim the shiplap edges:
- Measure the length of the walls: Use a measuring tape to determine the length of each wall where shiplap boards were installed. Take accurate measurements to ensure a precise trim.
- Mark the trim lines: Mark the desired trim lines on the shiplap boards using a pencil and a straightedge. This will serve as a guide for cutting.
- Cut the boards: Using a saw, carefully cut along the marked trim lines to remove the excess shiplap. Take your time and make accurate cuts to achieve clean and straight edges.
- Sand the trimmed edges: After cutting the shiplap boards, use sandpaper or a sanding block to smooth out the trimmed edges. This will ensure a seamless transition between the shiplap boards and create a polished finish.
- Remove any burrs: Inspect the trimmed edges for any burrs or rough spots. Use sandpaper or a file to remove any imperfections and create a smooth and even surface.
Take caution when handling tools and cutting the shiplap boards. Wear appropriate safety gear, such as goggles and gloves, to protect yourself during this step.
Once the shiplap edges are trimmed and smoothed, you’re ready to move on to the final step: applying finishing touches.
Step 7: Apply Finishing Touches
With the shiplap siding installed and trimmed, it’s time to add the finishing touches to complete your exterior project. Follow these steps to apply the final touches:
- Fill nail holes: If you chose to use finish nails to secure the shiplap boards, fill the nail holes with wood filler. Use a putty knife to apply the filler and smooth it out. Allow it to dry according to the manufacturer’s instructions.
- Sand and prime: After the wood filler has dried, lightly sand the filled areas to create a smooth surface. Once sanded, apply a coat of primer to the shiplap siding. This will help seal the wood and create a base for the final paint or stain.
- Paint or stain: After the primer has dried, you can apply your chosen paint or stain to the shiplap boards. Use a brush, roller, or sprayer to evenly coat the surface. Follow the manufacturer’s instructions for application and drying times.
- Caulk the gaps: Inspect the gaps between the shiplap boards and any corners or trim. Use an exterior-grade caulk and a caulking gun to fill in these gaps. This will provide a weatherproof seal and enhance the overall appearance of the siding.
- Final inspection: Take a step back and inspect your completed shiplap siding installation. Look for any areas that may need touch-ups or adjustments. Make sure all surfaces are properly painted or stained, and the caulk is neatly applied.
By applying these finishing touches, you will not only protect the shiplap siding from the elements but also enhance its aesthetic appeal.
With the completion of these final steps, the installation of your exterior shiplap siding is finished! Stand back and admire the transformation of your home’s exterior.
Remember, proper maintenance and periodic inspections are essential to ensure the longevity and beauty of your shiplap siding. Keep an eye out for any signs of damage or necessary touch-ups, and address them promptly.
Enjoy the beauty and character that shiplap siding adds to your home, and take pride in your accomplished DIY project!
Conclusion
Installing exterior shiplap siding is a rewarding and visually striking project that can transform the look of your home. By following the step-by-step guide outlined in this article, you can successfully install shiplap siding and achieve professional-looking results.
From gathering materials to applying finishing touches, each step plays a vital role in ensuring a successful installation. Proper measurement, cutting, and alignment of the shiplap boards are essential for a seamless and visually pleasing finish. Taking the time to prepare the wall surface, secure the boards, and trim the edges adds to the durability and aesthetic appeal of the siding.
Additionally, don’t underestimate the importance of proper maintenance and regular inspections to keep your shiplap siding in top condition. This includes addressing any signs of damage, applying fresh paint or stain as necessary, and recaulking any gaps that may form over time.
By installing exterior shiplap siding, you can enhance your home’s curb appeal, add a touch of elegance, and increase its overall value. The clean, horizontal lines of shiplap siding offer a timeless charm that suits various architectural styles and design preferences.
Remember, as with any DIY project, ensure your safety by using proper tools and equipment, following manufacturer’s guidelines, and prioritizing caution. If you feel uncertain or uncomfortable with any step of the installation process, consult a professional for assistance.
So, gather your materials, measure the walls, cut the shiplap boards, and follow each step meticulously to achieve a beautifully installed exterior shiplap siding. Enjoy the sense of accomplishment and the renewed appearance of your home.
Get ready to impress your neighbors and visitors with the timeless elegance and charm of your newly installed shiplap siding!
Ready to take your home's exterior to new heights? After mastering shiplap siding installation, you might be curious about other stylish options available. Dive into our latest guide on "9 Superior Wood Siding For 2024" to uncover various types that could transform your space. Each selection offers unique benefits and aesthetics, ensuring you find the perfect match for your home's vibe.
Frequently Asked Questions about How To Install Exterior Shiplap Siding
Was this page helpful?
At Storables.com, we guarantee accurate and reliable information. Our content, validated by Expert Board Contributors, is crafted following stringent Editorial Policies. We're committed to providing you with well-researched, expert-backed insights for all your informational needs.


0 thoughts on “How To Install Exterior Shiplap Siding”