Articles
How To Clean A Brita Water Dispenser
Modified: May 6, 2024
Learn the best articles on how to clean your Brita water dispenser effectively and keep your drinking water fresh and filtered.
(Many of the links in this article redirect to a specific reviewed product. Your purchase of these products through affiliate links helps to generate commission for Storables.com, at no extra cost. Learn more)
Introduction
Having a Brita water dispenser is a great way to ensure that you have access to clean and filtered water at all times. However, over time, the dispenser can accumulate dirt, grime, and bacteria, which can affect the quality of the water it dispenses. That’s why it’s essential to regularly clean your Brita water dispenser to maintain its efficiency and keep your drinking water clean and refreshing.
In this article, we will guide you through the step-by-step process of cleaning a Brita water dispenser. We’ll cover everything from gathering the necessary supplies to disassembling and cleaning the individual components of the dispenser. By following these simple instructions, you can keep your dispenser in optimal condition and ensure that you and your family enjoy pure and healthy water.
So, let’s dive in and learn how to clean your Brita water dispenser effectively!
Step 1: Gather Supplies
Before you start cleaning your Brita water dispenser, it’s important to gather all the necessary supplies. Here’s a list of items you’ll need:
- Warm water: You’ll need warm water for rinsing and cleaning the dispenser.
- Mild dish soap: Choose a gentle dish soap that is suitable for cleaning kitchen utensils.
- White vinegar: Vinegar is an excellent natural cleaner that can help remove buildup and disinfect the dispenser.
- Clean cloth or sponge: Use a soft cloth or sponge to wipe down the dispenser and its parts.
- Old toothbrush: An old toothbrush can come in handy for scrubbing hard-to-reach areas or removing stubborn stains.
Once you have gathered all the necessary supplies, you’re ready to move on to the next step.
Key Takeaways:
- Regularly cleaning your Brita water dispenser with simple supplies like warm water, vinegar, and mild dish soap ensures clean, refreshing water for you and your family, promoting a healthy lifestyle.
- Disassembling, cleaning, and reassembling your Brita water dispenser, including the filter cartridge, helps maintain its efficiency, extend its lifespan, and improve overall water quality. Cheers to clean hydration!
Read also: 9 Best Brita Water Dispenser for 2025
Step 2: Disassemble the Brita Water Dispenser
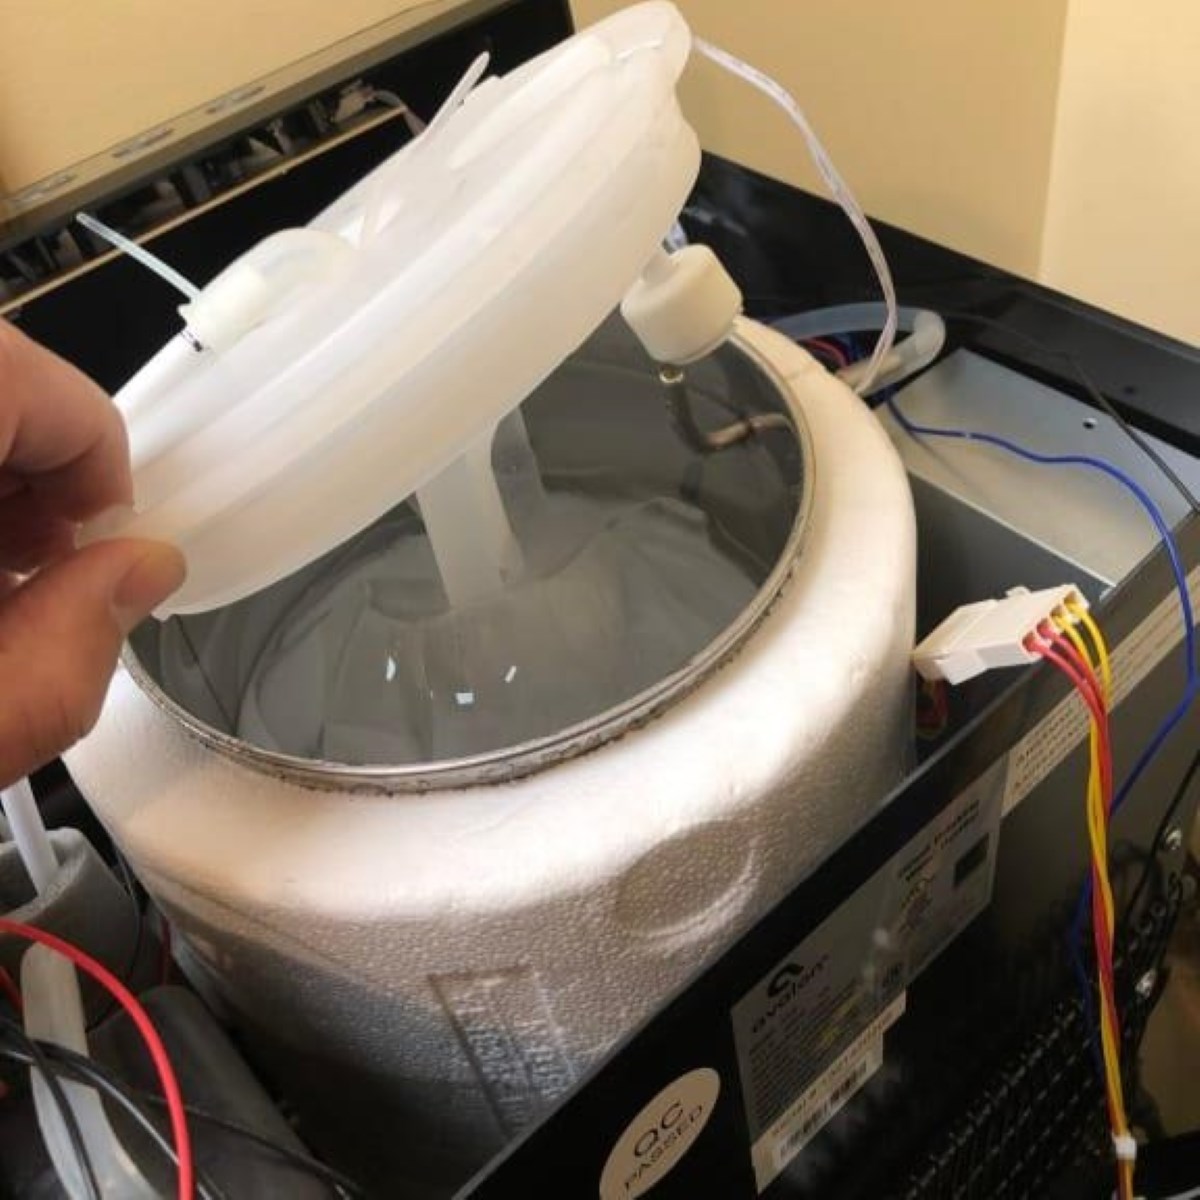
Now that you have all the supplies ready, it’s time to disassemble the Brita water dispenser. Follow these steps:
- Remove the lid: Start by removing the lid from the top of the dispenser. This will give you access to the inside of the dispenser.
- Take out the filter: Carefully remove the filter cartridge from the dispenser. Set it aside for cleaning later.
- Separate the reservoir and pitcher: Next, separate the reservoir (the top part of the dispenser) from the pitcher (the bottom part). Depending on the model of your Brita dispenser, you may need to twist or lift the reservoir to detach it from the pitcher.
- Remove any additional parts: Some Brita dispensers may have additional parts, such as a flow control knob or a filter indicator. If your dispenser has any of these components, remove them as well.
By disassembling the Brita water dispenser, you’ll have easier access to clean each individual component thoroughly. Once you have completed this step, you can move on to the next step: cleaning the various parts of the dispenser.
Step 3: Clean the Brita Water Dispenser Parts
Now that you have disassembled the Brita water dispenser, it’s time to clean each individual part. Follow these steps:
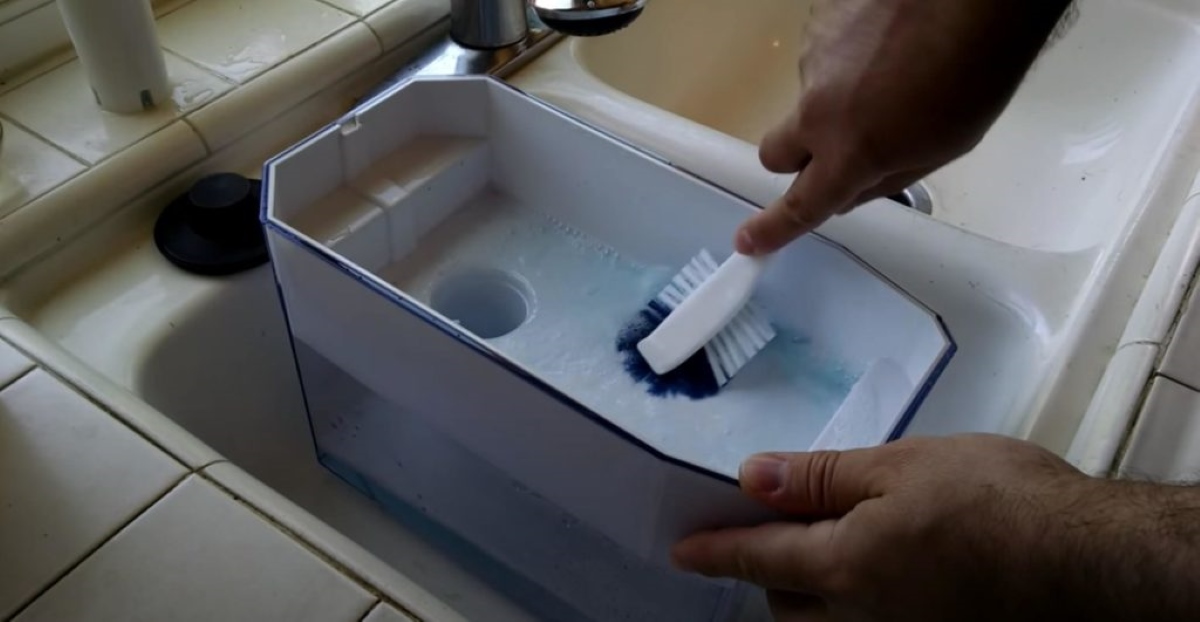
- Reservoir and pitcher: Fill a sink or basin with warm water and add a few drops of mild dish soap. Place the reservoir and pitcher in the soapy water and use a clean cloth or sponge to scrub away any residue, stains, or buildup. Rinse thoroughly with clean water to remove any soap residue.
- Lid and additional parts: Similarly, clean the lid and any additional parts in the soapy water using a cloth or sponge. Pay attention to any crevices or hard-to-reach areas. Rinse well with water.
- Flow control knob and filter indicator: If your Brita dispenser has a flow control knob or a filter indicator, clean them with a damp cloth or sponge. Be careful not to submerge them in water, as they may contain electronic components. Wipe them dry with a clean cloth.
In addition to regular cleaning, it’s also important to sanitize the dispenser periodically to kill any bacteria or germs that may be present. To do this, fill the reservoir with a mixture of one part water and one part white vinegar. Allow it to sit for approximately 15-20 minutes, then rinse thoroughly with clean water.
Remember to always follow the manufacturer’s guidelines and instructions when cleaning your Brita water dispenser, as different models may have specific cleaning recommendations.
Once you have thoroughly cleaned and sanitized all the parts of your Brita water dispenser, you can move on to the next step: cleaning the filter cartridge.
Step 4: Clean the Filter Cartridge
The filter cartridge is an essential component of your Brita water dispenser, as it helps remove impurities and improve the taste of the water. Cleaning the filter cartridge is crucial for maintaining its efficiency and prolonging its lifespan. Follow these steps:
- Remove the filter cartridge from the dispenser if you haven’t done so already.
- Rinse the filter: Hold the filter cartridge under warm running water and gently rinse it for a few seconds. This will help remove any loose debris or particles.
- Soak the filter: Fill a bowl or container with clean water and submerge the filter cartridge in it. Allow it to soak for about 15-20 minutes. This will help loosen any accumulated impurities.
- Gently scrub the filter: After soaking, use an old toothbrush to gently scrub the filter cartridge. Pay attention to both the inside and outside of the filter, as well as the areas around the inlet and outlet. Be careful not to apply excessive force, as this may damage the filter.
- Rinse thoroughly: Rinse the filter cartridge under running water again to remove any remaining debris or particles. Ensure that the water runs clear before moving on to the next step.
It’s worth noting that the filter cartridge needs to be replaced periodically. Refer to the manufacturer’s guidelines for the recommended replacement schedule, as it may vary depending on the type of filter and usage. Cleaning the filter cartridge should be done as a maintenance step between replacements.
With the filter cartridge cleaned and rinsed thoroughly, you’re ready to move on to the next step: reassembling the Brita water dispenser.
To clean a Brita water dispenser, disassemble the parts and wash them with warm, soapy water. Use a brush to scrub the inside of the reservoir and rinse thoroughly before reassembling. Run a few cycles of water through the dispenser to ensure all soap residue is removed.
Step 5: Reassemble the Brita Water Dispenser
Now that you have cleaned the various parts of your Brita water dispenser, it’s time to put everything back together. Follow these steps to reassemble the dispenser:
- Start with the reservoir and pitcher: Carefully place the reservoir back onto the pitcher, ensuring a secure fit. Depending on your dispenser model, you may need to twist or push the reservoir to attach it properly.
- Insert the filter cartridge: Take the cleaned filter cartridge and insert it back into the designated slot in the reservoir. Make sure it is properly aligned and seated securely.
- Reattach any additional parts: If you removed any extra components, such as a flow control knob or filter indicator, reattach them to the dispenser according to the manufacturer’s instructions.
- Secure the lid: Finally, place the lid back onto the top of the dispenser and ensure it is firmly secured.
Take a moment to double-check that all parts are properly assembled and securely in place. This will help prevent any potential leaks or malfunctions when you start using the dispenser again.
With the Brita water dispenser reassembled, it’s time to move on to the final step: rinsing and testing the dispenser.
Read more: How To Clean A Vitapur Water Dispenser
Step 6: Rinse and Test the Dispenser
After reassembling the Brita water dispenser, it’s important to rinse it thoroughly and perform a test to ensure everything is in proper working order. Follow these final steps:
- Rinse the dispenser: Fill the reservoir with clean water and allow it to flow through the dispenser into the pitcher. Empty the pitcher and repeat this rinsing process two to three times. This will help remove any residual soap or vinegar from the cleaning process.
- Inspect for leaks: While rinsing, keep an eye out for any signs of leaks from the dispenser, especially around the connection points. If you notice any leaks, double-check the assembly to ensure all parts are securely attached.
- Test the water quality: Fill the reservoir with fresh water and wait for it to filter through the cartridge into the pitcher. Take a sample of the water and taste it to ensure there are no peculiar flavors or odors. If you notice any abnormalities, it may be a sign that the filter cartridge needs to be replaced.
If everything looks and tastes good, congratulations! You have successfully cleaned your Brita water dispenser and it is now ready for use. Remember to follow the manufacturer’s guidelines for regular maintenance and filter replacement to ensure optimal performance.
By regularly cleaning your Brita water dispenser, you can enjoy clean and refreshing water at home while promoting a healthy lifestyle for you and your family. Cheers to clean and delicious hydration!
Conclusion
Cleaning your Brita water dispenser is an essential maintenance task to ensure the quality and purity of your drinking water. By following the step-by-step process outlined in this article, you can easily clean and maintain your Brita water dispenser, ensuring that it continues to provide clean, filtered water for you and your family.
Remember to gather the necessary supplies, disassemble the dispenser, clean each individual part, including the filter cartridge, and then reassemble the dispenser. Finally, rinse and test the dispenser to ensure everything is in proper working order.
Regular cleaning of your Brita water dispenser not only helps to remove dirt, grime, and bacteria but also extends the lifespan of the dispenser and improves its overall efficiency. It’s important to follow the manufacturer’s guidelines for filter replacement and maintenance to ensure optimal performance.
Enjoy the benefits of clean and refreshing water by incorporating regular cleaning and maintenance of your Brita water dispenser into your household routine. By doing so, you can continue to enjoy the taste and health benefits of filtered water, ensuring the well-being of yourself and your loved ones.
So, take the time to clean your Brita water dispenser today and experience the difference it makes in your everyday life.
Now that you've mastered cleaning your Brita water dispenser, why stop there? Staying updated on methods to keep water pure and taste great is essential. Dive into our comprehensive review of the latest water filtration systems slated for 2024. You'll discover cutting-edge options that promise to enhance your home’s water quality. Don't miss out on securing fresher, cleaner water every day!
Frequently Asked Questions about How To Clean A Brita Water Dispenser
Was this page helpful?
At Storables.com, we guarantee accurate and reliable information. Our content, validated by Expert Board Contributors, is crafted following stringent Editorial Policies. We're committed to providing you with well-researched, expert-backed insights for all your informational needs.


0 thoughts on “How To Clean A Brita Water Dispenser”