Articles
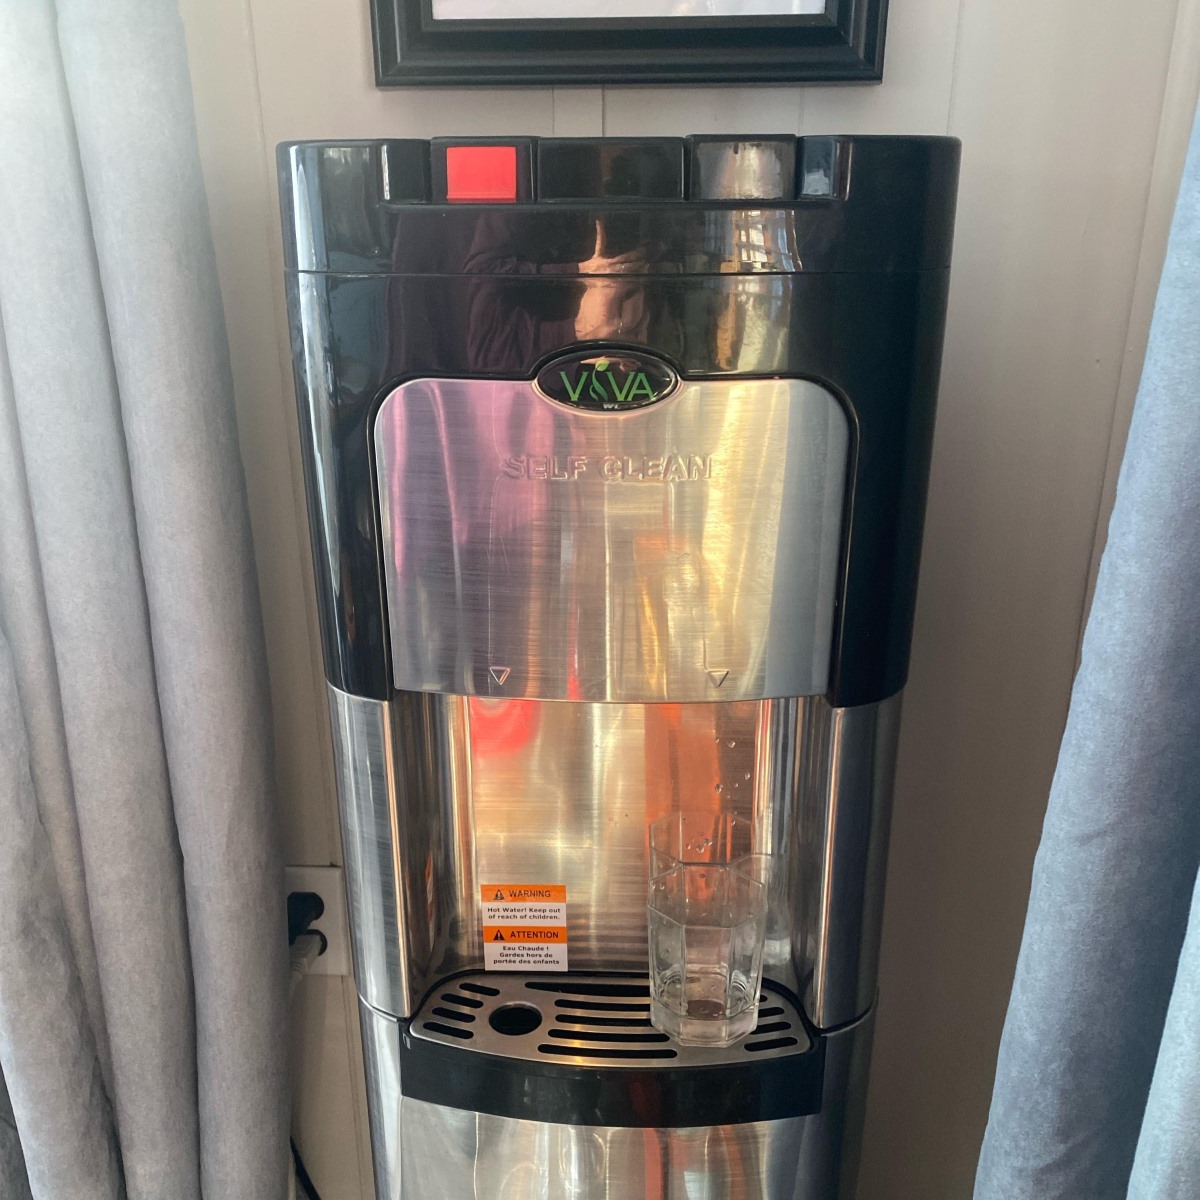
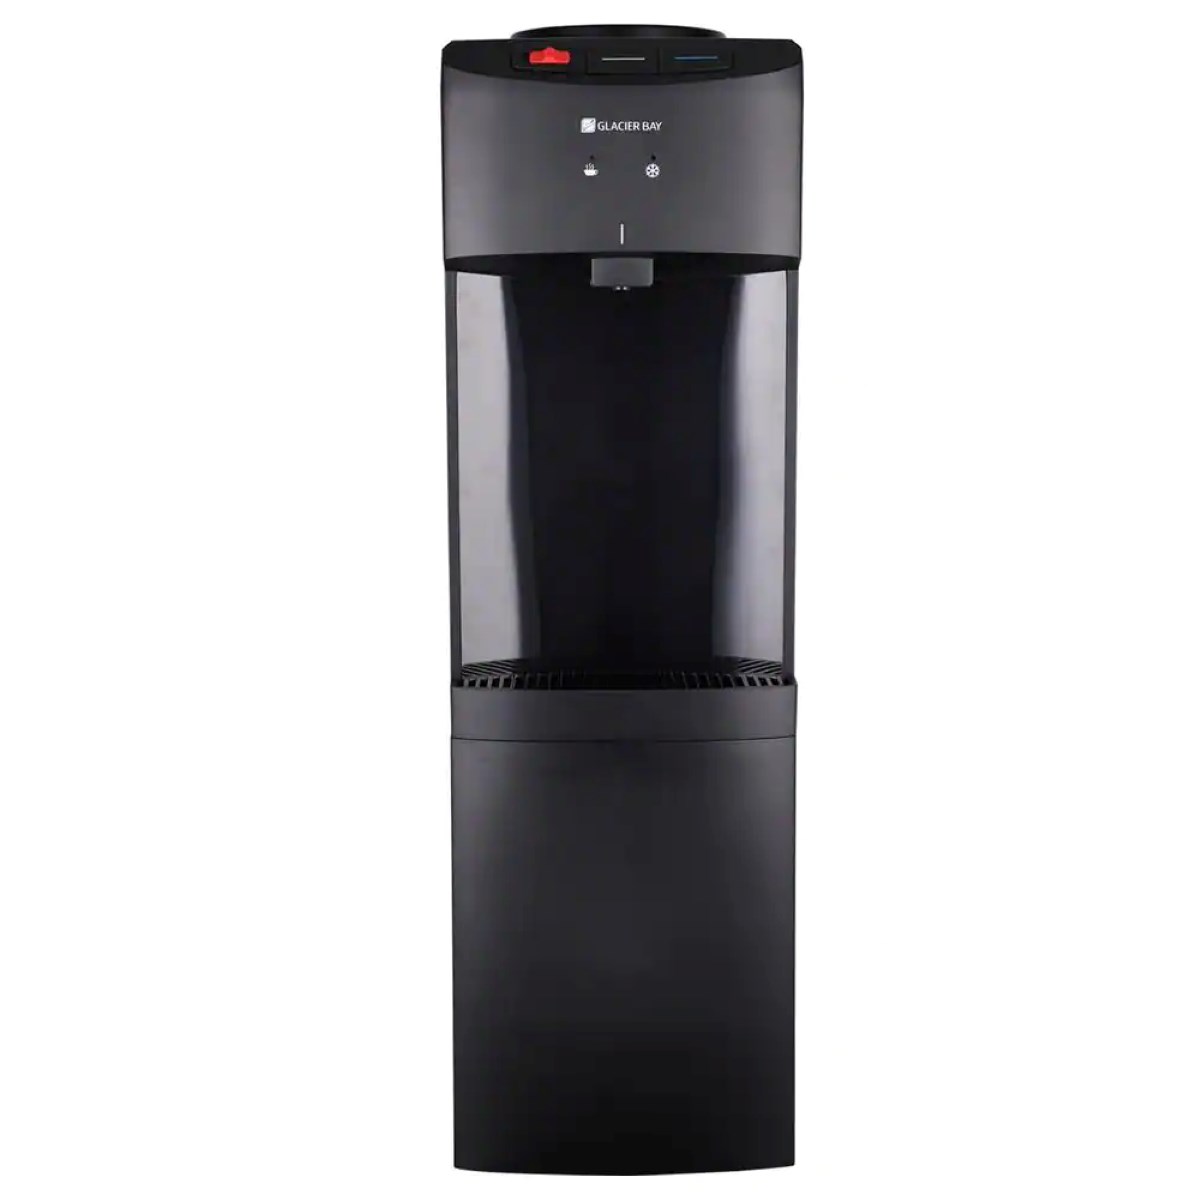
How To Clean Viva Water Dispenser
Modified: August 23, 2024
Learn how to clean your Viva water dispenser with these insightful articles. Find easy step-by-step guides and tips for maintaining your dispenser
(Many of the links in this article redirect to a specific reviewed product. Your purchase of these products through affiliate links helps to generate commission for Storables.com, at no extra cost. Learn more)
Introduction
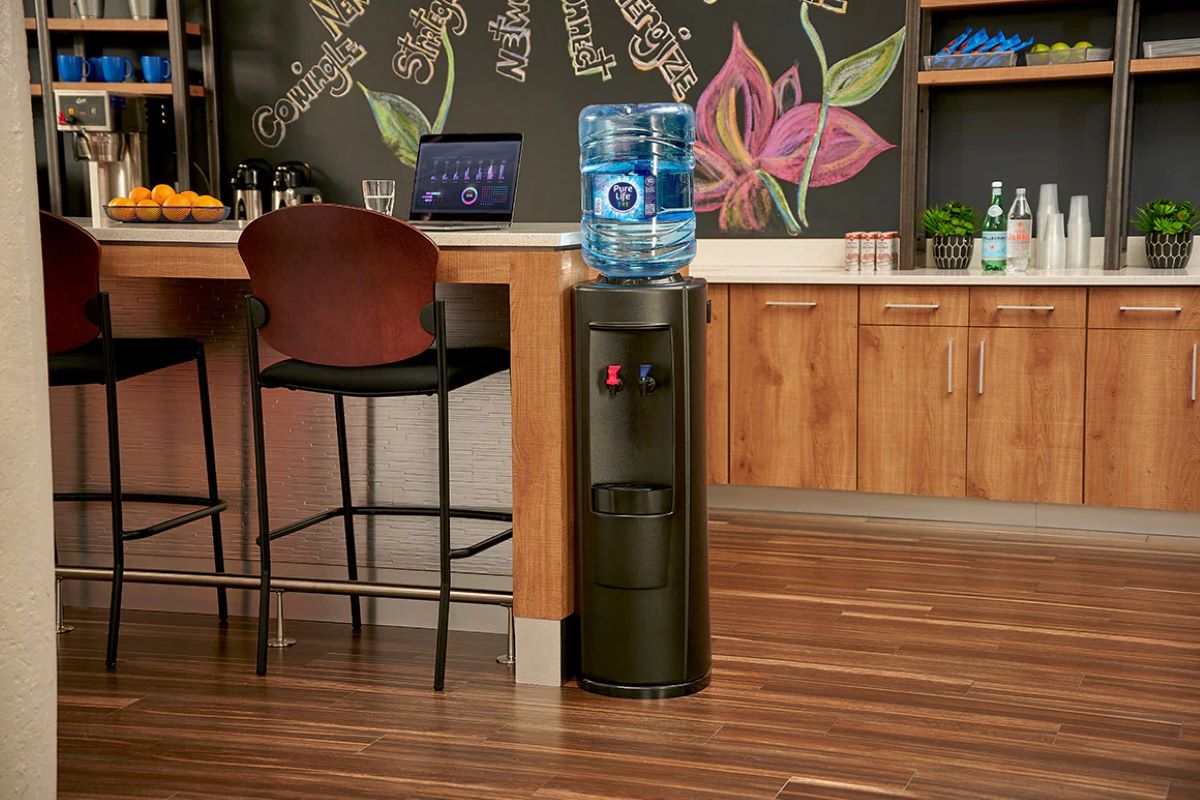
Welcome to the ultimate guide on how to clean your Viva water dispenser. A water dispenser is a convenient and essential appliance that provides you with instant access to clean drinking water. However, over time, mineral deposits, bacteria, and other impurities can accumulate, affecting the performance and quality of the water dispenser. Regular cleaning is crucial to maintain its functionality and ensure the water you consume is safe and refreshing.
In this article, we will walk you through a step-by-step process to effectively clean your Viva water dispenser. We will cover everything from preparing the necessary materials to thoroughly cleaning both the exterior and interior components. By following these instructions, you can keep your water dispenser in top condition, prolong its lifespan, and continue enjoying clean, great-tasting water.
Before we dive into the cleaning process, let’s take a look at the materials you will need:
Key Takeaways:
- Regular cleaning of your Viva water dispenser is crucial to maintain its functionality and ensure the water you consume is safe and refreshing. Follow the step-by-step guide to keep your dispenser in top condition and enjoy clean, great-tasting water.
- Unplugging the dispenser, emptying the reservoir, preparing a cleaning solution, and thoroughly cleaning both the exterior and interior components are essential steps in effectively cleaning your Viva water dispenser. Following these steps will help prolong its lifespan and ensure the quality of the water it dispenses.
Read more: How To Clean A Vitapur Water Dispenser
Required Materials
Before you start cleaning your Viva water dispenser, make sure you have the following materials on hand:
- Mild dish soap or vinegar: These cleaning agents are gentle yet effective in removing dirt, stains, and buildup from the dispenser.
- Clean cloths or sponges: Use soft, non-abrasive cloths or sponges to prevent scratching the dispenser’s surface.
- Water: You will need clean, lukewarm water for rinsing and diluting the cleaning solution.
- Bucket or basin: A bucket or basin will be useful for holding the water and cleaning solution during the cleaning process.
- Toothbrush or small brush: These small brushes will help you reach crevices and corners that are difficult to clean with a cloth.
- Q-tips: Q-tips can be useful for cleaning small and hard-to-reach areas.
- Towel or drying rack: You will need a towel or drying rack to air-dry the removable parts after cleaning.
Having these materials prepared and readily available will ensure a smooth and efficient cleaning process for your Viva water dispenser.
Step 1: Unplug the Dispenser
The first and most crucial step in cleaning your Viva water dispenser is to unplug it from the power source. Safety should always be prioritized, and unplugging the dispenser ensures that you won’t accidentally turn it on during the cleaning process.
Locate the power cord and gently pull it out from the wall socket or power outlet. Make sure to handle the cord itself and not yank it forcefully. This will prevent any damage to the cord and the dispenser’s electrical components.
Once the dispenser is unplugged, double-check to ensure that there is no power flowing to the appliance. You can do this by pressing any buttons or switches on the dispenser to see if it turns on. If there is no response, you can proceed to the next step with confidence.
Please note that unplugging the dispenser is not only for your safety but also to prevent any water leakage or spills while conducting the cleaning process. Removing the power source eliminates the risk of accidental water supply, providing a controlled environment for cleaning.
Now that the dispenser is safely unplugged, you’re ready to move on to the next step: emptying the reservoir.
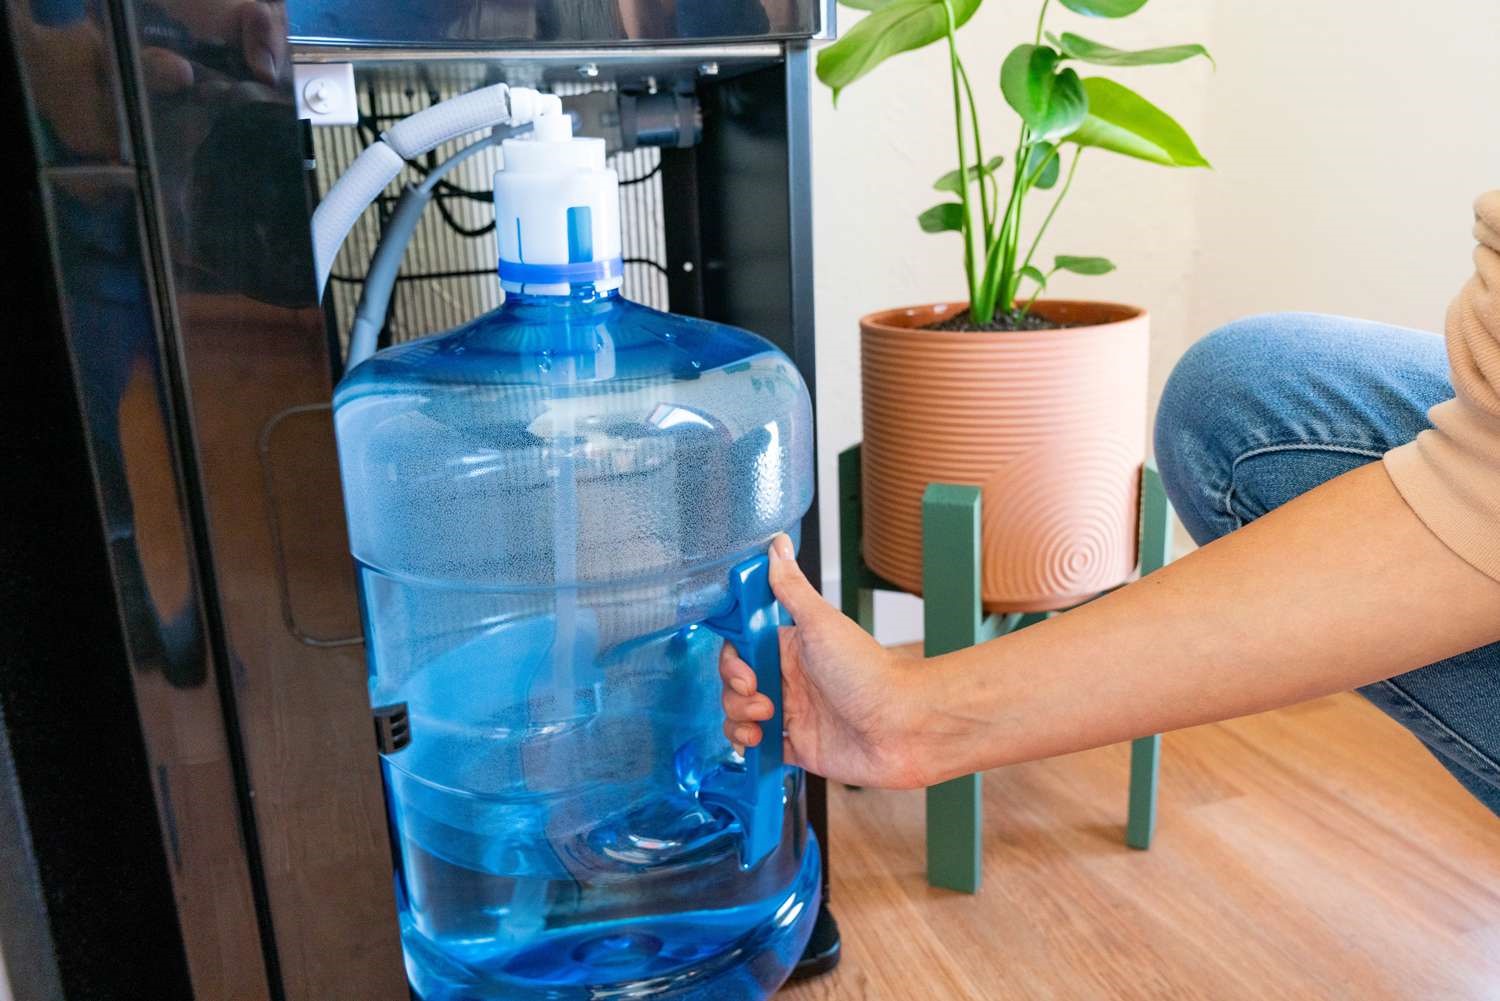
Step 2: Empty the Reservoir
After unplugging the Viva water dispenser, the next step is to empty the reservoir. The reservoir is where the water is stored before it is dispensed. Emptying it ensures that no water is left inside, allowing for a thorough cleaning.
To empty the reservoir, locate the dispensing nozzle or tap. This is usually found on the front or side of the dispenser. Position a container or a large bowl beneath the nozzle to catch the water that will be released.
Once the container is in place, press the dispensing lever or button to initiate the water flow. Allow the water to flow until the reservoir is completely empty. Depending on the size of the reservoir, this may take a few moments.
If there is any remaining water in the reservoir that is not being released through the nozzle, try tipping the dispenser slightly to ensure that all water is drained. Be cautious when doing this, as water might spill from the top of the dispenser.
Once the reservoir is emptied, dispose of the water in an appropriate manner. You can use it for watering plants or household cleaning if it’s free from any contaminants. Otherwise, it’s best to pour the water down the drain to prevent any potential health risks.
With the reservoir now empty, we can proceed to the next step: preparing the cleaning solution.
Step 3: Prepare the Cleaning Solution
Now that the reservoir is empty, it’s time to prepare the cleaning solution for your Viva water dispenser. The cleaning solution will help remove any built-up dirt, mineral deposits, and bacteria from the dispenser’s surfaces.
There are two common cleaning agents you can use for your Viva water dispenser: mild dish soap and vinegar. Here are the steps to prepare the cleaning solution with each option:
Read more: How To Clean Pur Water Dispenser
Cleaning Solution with Mild Dish Soap:
- Fill a bucket or basin with warm water. The water should be lukewarm, not too hot or cold.
- Add a small amount of mild dish soap to the water. You only need a few drops or a teaspoon of dish soap, as too much can leave residue behind.
- Stir the water gently to ensure that the dish soap is dissolved and evenly distributed.
Cleaning Solution with Vinegar:
- In a bucket or basin, mix equal parts of white vinegar and water. For example, if you use 1 cup of vinegar, mix it with 1 cup of water.
- Gently stir the mixture to ensure that the vinegar and water are well combined.
Both the mild dish soap and vinegar solutions are effective in cleaning the dispenser. Vinegar has the added benefit of being a natural disinfectant due to its acidic properties. However, if you prefer to use a different cleaning agent, make sure it is safe for use on the dispenser’s materials and follows the manufacturer’s recommendations.
Once the cleaning solution is prepared, you’re ready to move on to the next step: cleaning the exterior of the dispenser.
Step 4: Clean the Exterior
Now that you have prepared the cleaning solution, it’s time to clean the exterior of your Viva water dispenser. The exterior surfaces can accumulate dust, fingerprints, and other residues that can affect the overall appearance of your dispenser.
Here’s how to clean the exterior:
- Dip a clean cloth or sponge into the cleaning solution you prepared earlier. Make sure the cloth or sponge is damp, not dripping wet.
- Gently wipe down the outside surfaces of the dispenser, including the top, sides, and front panel. Pay special attention to areas that are more prone to dirt buildup, such as around buttons, handles, and edges.
- If there are stubborn stains or grime, you can use a small amount of mild dish soap directly on the cloth or sponge to help remove them. Be gentle and avoid applying excessive force, as this can damage the dispenser’s finish.
- For hard-to-reach areas, such as crevices or corners, you can use a toothbrush or a small brush to scrub away dirt and debris. Dip the brush into the cleaning solution and gently scrub the area until it’s clean.
- Once you have cleaned all the exterior surfaces, use a clean, damp cloth to remove any soap residue. This will ensure that no cleaning solution is left behind on the dispenser.
While cleaning the exterior, it’s important to avoid getting water into any openings or electrical components of the dispenser. Be cautious and take care not to immerse the entire unit in water, as this can cause damage.
With the exterior of your Viva water dispenser sparkling clean, it’s time to move on to the next step: cleaning the interior components.
To clean a Viva water dispenser, mix equal parts water and white vinegar, then run the solution through the dispenser. Follow by rinsing with clean water and wiping down the exterior with a damp cloth.
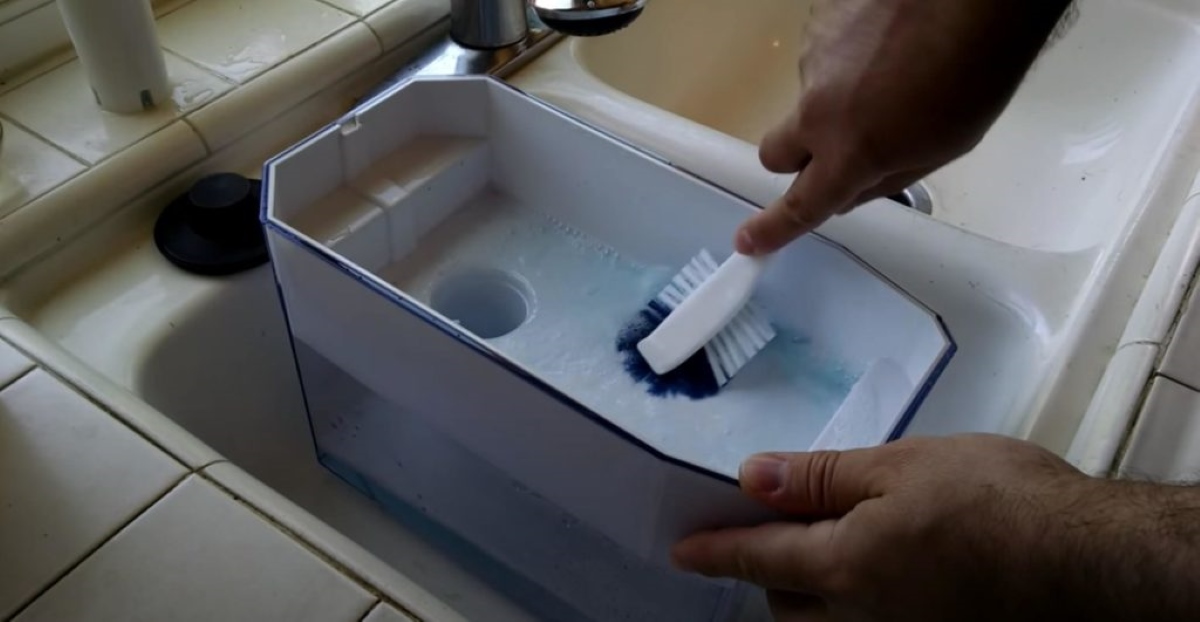
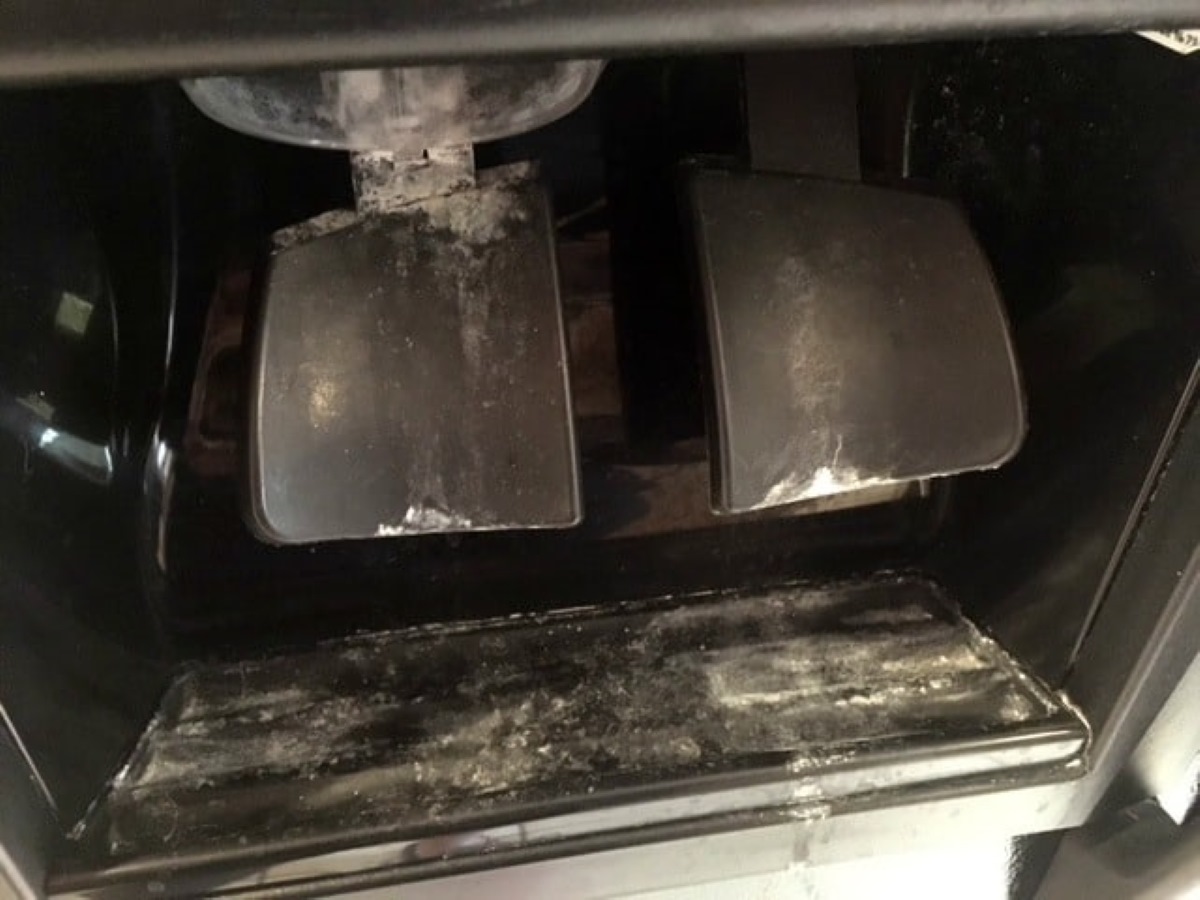
Step 5: Clean the Interior
Now that you have cleaned the exterior of your Viva water dispenser, it’s time to focus on cleaning the interior components. The interior of the dispenser can accumulate mineral deposits, bacteria, and other impurities, which can affect the taste and quality of the water.
Here’s how to clean the interior:
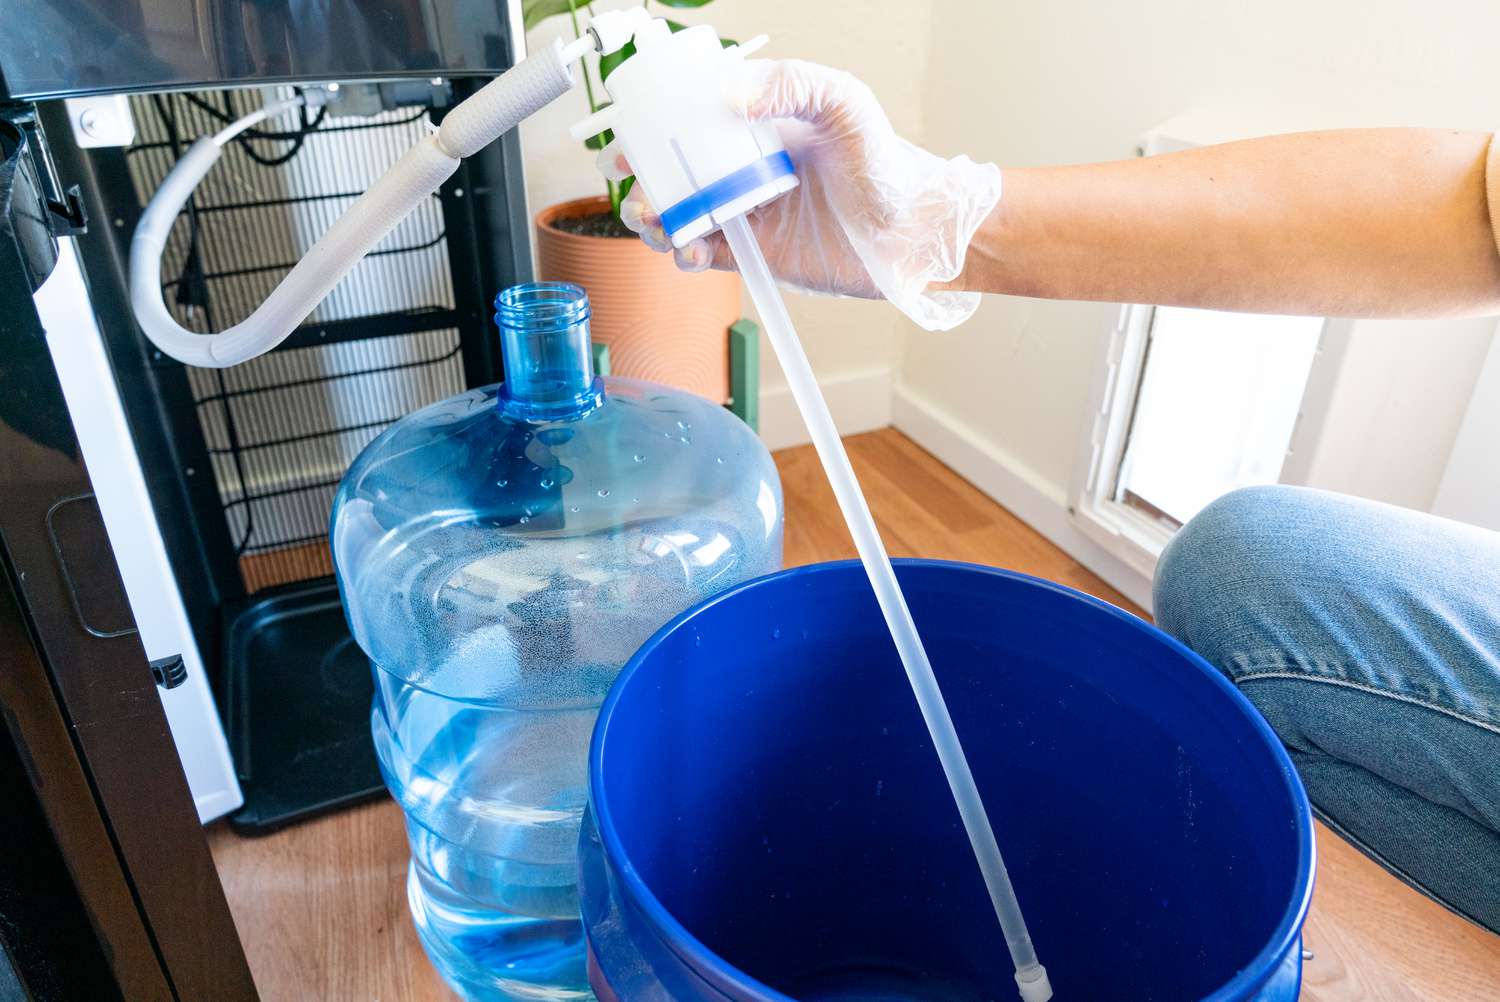
- Remove any removable parts from the interior of the dispenser, such as the drip tray, water reservoir, and water spout. Refer to your dispenser’s user manual for specific instructions on how to remove these components safely.
- Once the removable parts are removed, submerge them in the cleaning solution you prepared earlier. Allow them to soak for a few minutes to loosen any dirt or buildup.
- Using a soft cloth or sponge, clean the interior surfaces of the dispenser. Pay attention to areas that come into contact with water, such as the reservoir opening and spout area.
- If there are any stubborn stains or mineral deposits, you can use a toothbrush or small brush dipped in the cleaning solution to scrub those areas gently. Be extra careful not to scrub too harshly to avoid damaging the interior surfaces.
- For small and hard-to-reach areas, such as the crevices around the water spout, you can use a Q-tip dipped in the cleaning solution to remove any dirt or residue.
- Once you have thoroughly cleaned the interior components, rinse them with clean water to remove any remaining cleaning solution. Make sure to rinse them well to ensure no residue is left behind.
After cleaning, place the removable parts on a towel or drying rack to air-dry completely before reassembling the dispenser. Make sure they are completely dry to prevent any mold or mildew growth.
With the interior components cleaned and drying, you’re ready to proceed to the next step: rinsing and drying the dispenser.
Read more: How To Clean Samsung Water Dispenser
Step 6: Rinse and Dry
After cleaning the interior of your Viva water dispenser, it’s important to thoroughly rinse and dry all components before reassembling the dispenser. This ensures that no cleaning solution or residue remains, guaranteeing the dispenser’s performance and the quality of the water it dispenses.
Here’s how to rinse and dry your Viva water dispenser:
- Fill a bucket or basin with clean, lukewarm water.
- Take each removable component that you cleaned earlier and rinse them thoroughly under running water. Make sure to remove any traces of the cleaning solution.
- Gently shake off any excess water from the components, or pat them dry using a clean towel or paper towels.
- Place the rinsed components on a towel or drying rack and allow them to air-dry completely. Ensure that they are placed in a well-ventilated area to speed up the drying process.
- While the components are drying, you can use a clean, damp cloth to wipe down the interior surfaces of the dispenser. This will help remove any residual cleaning solution or debris.
- Make sure to dry the interior surfaces with a clean cloth to prevent any moisture from lingering, as this can lead to mold or mildew growth.
It’s important to note that air-drying the components thoroughly is crucial before reassembling the dispenser. Moisture left on the components can create an environment for the growth of bacteria or mold, compromising the cleanliness of your dispenser.
With the rinsing and drying complete, you’re now ready for the final step: reassembling the dispenser and plugging it back in.
Step 7: Reassemble and Plug in the Dispenser
Now that you have completed the cleaning, rinsing, and drying process for your Viva water dispenser, it’s time to reassemble the components and plug the dispenser back into the power source.
Follow these steps to reassemble and plug in your Viva water dispenser:
- Take the fully dried components that you set aside and carefully reinsert them into their respective positions within the dispenser. Refer to your dispenser’s user manual if you need guidance on the proper placement of each component.
- Double-check that all components are securely in place and properly aligned. This ensures that the dispenser will function correctly.
- Locate the power cord and gently insert it into the power outlet or wall socket. Ensure that it is plugged in securely.
- Once the dispenser is plugged in, check that the power indicator or display lights up, indicating that the dispenser is receiving power.
- Allow the dispenser to run for a few minutes to ensure that the water is flowing properly through the system. This will help flush out any remaining traces of cleaning solution or debris.
- If your dispenser has a filter, follow the manufacturer’s instructions on replacing or resetting the filter after cleaning.
Once the dispenser is reassembled and functioning, it’s ready to use again. Fill the reservoir with fresh, clean water and enjoy the convenience of instantly accessible, refreshing water from your Viva water dispenser.
Remember to periodically clean your Viva water dispenser to maintain its performance and ensure the water you consume is clean and safe. Regular cleaning will help prevent mineral buildup, bacteria growth, and other potential issues.
Congratulations! You have successfully cleaned and reassembled your Viva water dispenser.
By following these steps and maintaining a regular cleaning routine, you can continue to enjoy clean and great-tasting water from your Viva water dispenser for years to come.
Thank you for reading this comprehensive guide on how to clean your Viva water dispenser. Cheers to good health and hydration!
Conclusion
Keeping your Viva water dispenser clean is essential for maintaining a safe and refreshing supply of water. Regular cleaning not only ensures the dispenser’s longevity but also guarantees the quality of the water it dispenses. By following the step-by-step guide provided in this article, you can easily clean your Viva water dispenser and enjoy clean and great-tasting water at all times.
Remember to unplug the dispenser before starting the cleaning process to ensure your safety. Emptying the reservoir and preparing a suitable cleaning solution are the initial steps to take. Cleaning the exterior of the dispenser with a damp cloth or sponge removes dust and dirt that may have accumulated over time.
Next, focus on cleaning the interior components to eliminate mineral deposits and bacteria. Removing and soaking the removable parts in the cleaning solution helps to loosen any stubborn dirt or buildup. Gently scrubbing with a brush or cloth will ensure a thorough clean.
After cleaning, rinsing and drying the components is crucial before reassembling the dispenser. Thoroughly drying the parts prevents the growth of mold and bacteria. Reassemble the dispenser carefully, ensuring all components are securely in place.
Finally, plug in the dispenser and allow it to run for a few minutes, making sure the water flows smoothly. Regular maintenance and periodic cleaning will keep your Viva water dispenser in optimal condition and ensure the safety and quality of the water you consume.
By following these simple steps, you can maintain a clean and reliable Viva water dispenser that delivers refreshing and great-tasting water whenever you need it. Cheers to staying hydrated and healthy!
Now that you've mastered cleaning your Viva water dispenser, why stop there? Keep your drinking experience top-notch by exploring our latest guide on the best water filtration systems coming in 2024. This guide breaks down the essentials, ensuring your water is not only clean but also perfectly purified. Don't miss out on crisp, refreshing sips every time!
Frequently Asked Questions about How To Clean Viva Water Dispenser
Was this page helpful?
At Storables.com, we guarantee accurate and reliable information. Our content, validated by Expert Board Contributors, is crafted following stringent Editorial Policies. We're committed to providing you with well-researched, expert-backed insights for all your informational needs.


0 thoughts on “How To Clean Viva Water Dispenser”