Articles
How To Clean Inside Of Grill
Modified: October 28, 2024
(Many of the links in this article redirect to a specific reviewed product. Your purchase of these products through affiliate links helps to generate commission for Storables.com, at no extra cost. Learn more)
Introduction
Grilling is a popular cooking method that allows you to enjoy delicious and flavorful meals. Whether you’re cooking up steaks, burgers, or vegetables, a clean grill is essential for achieving optimal flavor and preventing flare-ups. While most people focus on cleaning the exterior of their grills, many often overlook the importance of cleaning the inside.
Cleaning the inside of your grill not only helps maintain hygiene but also improves the performance and longevity of your grilling equipment. Over time, grease, food residue, and carbon buildup can accumulate inside the grill, affecting its heat distribution and potentially causing hot spots. Additionally, neglected grills can become a breeding ground for bacteria, compromising the safety of your meals.
By regularly cleaning the inside of your grill, you can ensure that it operates efficiently, produces consistent heat, and produces flavorful meals every time.
Key Takeaways:
- Regularly cleaning the inside of your grill is crucial for preventing flare-ups, ensuring even heat distribution, and maintaining hygiene. It also extends the lifespan of your grill, leading to safe and flavorful grilling experiences.
- Prioritize safety by disconnecting the propane tank, wearing protective gear, and choosing a well-ventilated area before cleaning the inside of your grill. Gather essential materials like a grill brush, non-abrasive cloth, and warm soapy water for effective cleaning.
Read more: How To Clean The Inside Of Toaster
Why it’s important to clean the inside of your grill
There are several reasons why cleaning the inside of your grill is essential for both safety and performance:
- Prevent flare-ups: Grease and food debris inside the grill can ignite and cause dangerous flare-ups. Regular cleaning helps minimize this risk.
- Ensure even heat distribution: A clean grill allows for better heat circulation, preventing hot spots and ensuring uniform cooking.
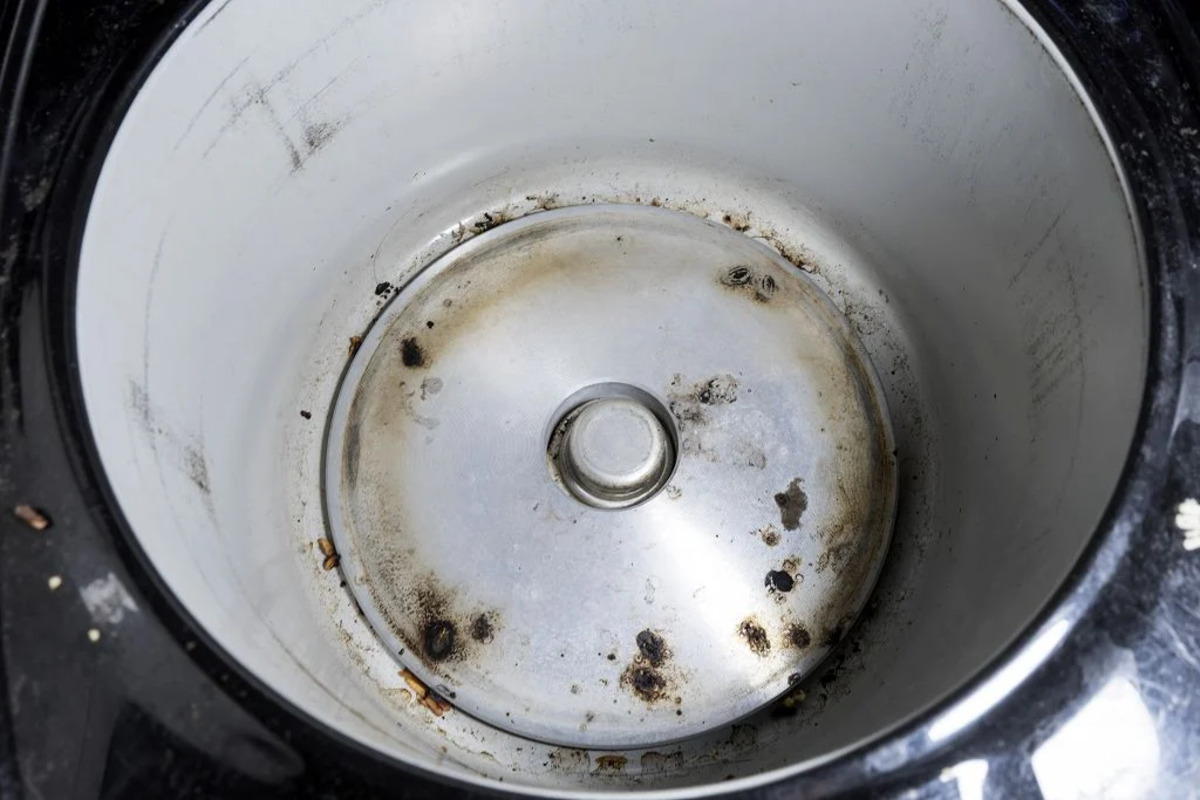
- Remove stubborn residue: Carbon buildup and leftover food particles can stick to the grill grates, affecting their performance and making them harder to clean in the long run.
- Maintain hygiene: Bacteria can thrive in dirty grills, contaminating your food and posing health risks. Proper cleaning helps eliminate these harmful pathogens.
- Extend the lifespan of your grill: Regular maintenance, including cleaning, prevents rust and corrosion, extending the lifespan of your grill.
Now that we understand the importance of cleaning the inside of your grill, let’s explore some essential safety precautions to take before getting started.
Key Takeaways:
- Regularly cleaning the inside of your grill is crucial for preventing flare-ups, ensuring even heat distribution, and maintaining hygiene. It also extends the lifespan of your grill, leading to safe and flavorful grilling experiences.
- Prioritize safety by disconnecting the propane tank, wearing protective gear, and choosing a well-ventilated area before cleaning the inside of your grill. Gather essential materials like a grill brush, non-abrasive cloth, and warm soapy water for effective cleaning.
Read more: How To Clean The Inside Of Toaster
Why it’s important to clean the inside of your grill
Keeping the inside of your grill clean is not just about appearance; it is vital for several reasons that affect both the safety and functionality of your grill.
Prevent flare-ups: One of the primary reasons to clean the inside of your grill is to prevent flare-ups. When grease, fat, and food residue accumulate on the interior surfaces, they become a fire hazard. During cooking, the heat can cause these substances to ignite, resulting in sudden and potentially dangerous flames. Regularly cleaning your grill minimizes the risk of flare-ups, allowing you to grill your food more safely.
Ensure even heat distribution: A clean grill ensures optimal heat distribution. When debris, grease, and food particles build up on the interior surfaces, they can impede the flow of heat, causing uneven cooking. Hot spots and cold spots can make it challenging to cook your food thoroughly and consistently. By cleaning the inside of your grill, you can eliminate these obstructions and enjoy evenly cooked meals.
Remove stubborn residue: Over time, carbon buildup and leftover food particles can adhere to the grates and other internal components of your grill. If left uncleaned, this residue can become stubborn and difficult to remove, affecting the overall performance of your grill. Regular cleaning allows you to prevent the buildup of these substances, making it easier to maintain and keep your grill in peak condition.
Maintain hygiene: A dirty grill can harbor bacteria and other harmful pathogens. The warm and moist environment inside the grill provides an ideal breeding ground for these microorganisms. When you cook on a dirty grill, these bacteria can contaminate your food, potentially leading to foodborne illnesses. Cleaning the inside of your grill thoroughly helps eliminate these health risks, keeping you and your loved ones safe.
Extend the lifespan of your grill: Proper maintenance, including regular cleaning, can significantly extend the lifespan of your grill. Grease, food residue, and moisture can lead to rust and corrosion, causing irreversible damage to the internal components of your grill. By cleaning the inside of your grill, you can prevent these issues and prolong the overall durability and performance of your grilling equipment.
As you can see, cleaning the inside of your grill is not just a matter of aesthetics but a crucial step in maintaining safety, improving cooking results, and extending the lifespan of your grill. Now, let’s dive into some essential safety precautions you should take before you start cleaning.
Safety Precautions Before Cleaning
Before you begin cleaning the inside of your grill, it’s important to prioritize safety to avoid any potential accidents or injuries. Here are some essential safety precautions to keep in mind:
- Turn off and disconnect the propane tank: If you have a gas grill, make sure to turn off the gas supply by closing the propane tank valve. Disconnect the tank from the grill to prevent any accidental gas leakage or ignition.
- Let the grill cool down: Cleaning a hot grill can be dangerous and lead to burns. Allow your grill to cool completely before starting the cleaning process. This ensures your safety and prevents damage to the grill’s interior components.
- Wear protective gear: When cleaning the inside of your grill, it’s advisable to wear protective gear such as gloves and safety glasses. This helps protect your hands and eyes from potential debris, grease, or cleaning agents.
- Choose a well-ventilated area: Cleaning your grill in a well-ventilated outdoor area is essential. Fumes from cleaning agents or burnt residue can be harmful if inhaled in an enclosed space. Adequate ventilation ensures your safety and prevents the buildup of toxic gases.
- Use appropriate cleaning tools: Selecting the right cleaning tools is crucial to avoid damaging the grill’s interior surfaces. Use a grill brush with sturdy bristles for scrubbing the grates and a non-abrasive cloth or sponge for cleaning other components.
- Read and follow manufacturer’s instructions: Different grill models may have specific cleaning instructions provided by the manufacturer. Take the time to familiarize yourself with these guidelines to ensure you’re following the proper cleaning procedures for your specific grill.
- Dispose of cleaning agents properly: If you’re using any cleaning agents or degreasers, make sure to follow the instructions on their proper disposal. Some cleaning agents may be harmful to the environment and should be disposed of in accordance with local regulations.
By taking these safety precautions, you can minimize the risks associated with cleaning the inside of your grill and ensure a safe and successful cleaning process. Now that we’ve covered the safety aspects, let’s move on to the materials you’ll need to effectively clean your grill.
Materials Needed for Cleaning
Before you embark on cleaning the inside of your grill, it’s important to gather the necessary materials to ensure a thorough and efficient cleaning process. Here are the essential materials you’ll need:
- Grill brush: A sturdy grill brush with wire bristles is essential for scrubbing and removing stubborn grease and food residue from the grates. Look for a brush specifically designed for grills to ensure durability and effective cleaning.
- Non-abrasive cloth or sponge: A non-abrasive cloth or sponge will come in handy for wiping down the interior surfaces of your grill. Avoid using abrasive materials that can scratch or damage the surfaces.
- Bucket of warm soapy water: Prepare a bucket filled with warm water and mild dish soap. This will be your primary cleaning solution for wiping down the interior surfaces and removing grease and grime.
- Degreaser (optional): Depending on the level of grease buildup in your grill, you may choose to use a degreaser. Look for a grill-specific degreaser that is safe to use on the interior surfaces of your grill. Follow the instructions on the product for proper application.
- Gloves: It’s always a good idea to protect your hands while cleaning. Wear a pair of gloves to shield your hands from potential debris, cleaning solutions, and hot surfaces.
- Safety glasses: Protect your eyes from any debris or cleaning agents by wearing safety glasses during the cleaning process. This will prevent any potential eye irritation or injury.
- Trash bag or container: Keep a trash bag or container nearby to dispose of any accumulated grease, food particles, or cleaning materials. This will make the cleaning process more convenient and organized.
Having these essential materials on hand will ensure that you have everything you need to effectively clean the inside of your grill. Combining the right tools and cleaning agents will result in a fresher, safer, and more enjoyable grilling experience.
Now that you’re prepared with the necessary materials, let’s dive into the step-by-step guide to clean the inside of your grill.
Read more: How To Clean Inside Of Dryer
Step-by-Step Guide to Clean the Inside of Your Grill
Cleaning the inside of your grill may seem like a daunting task, but with the right approach and a little bit of elbow grease, you can achieve a sparkling clean grill. Here’s a step-by-step guide to help you through the cleaning process:
- Disconnect and remove the gas tank (if applicable): If you have a gas grill, turn off the gas supply and disconnect the gas tank. Safety should always be your top priority when working with a gas grill.
- Let the grill cool down: Allow your grill to cool completely before you start the cleaning process. This ensures your safety and prevents any accidental burns.
- Remove the grates and drip pans: Take out the cooking grates and drip pans from the grill. These can usually be lifted or slid out easily. Place them aside for cleaning separately.
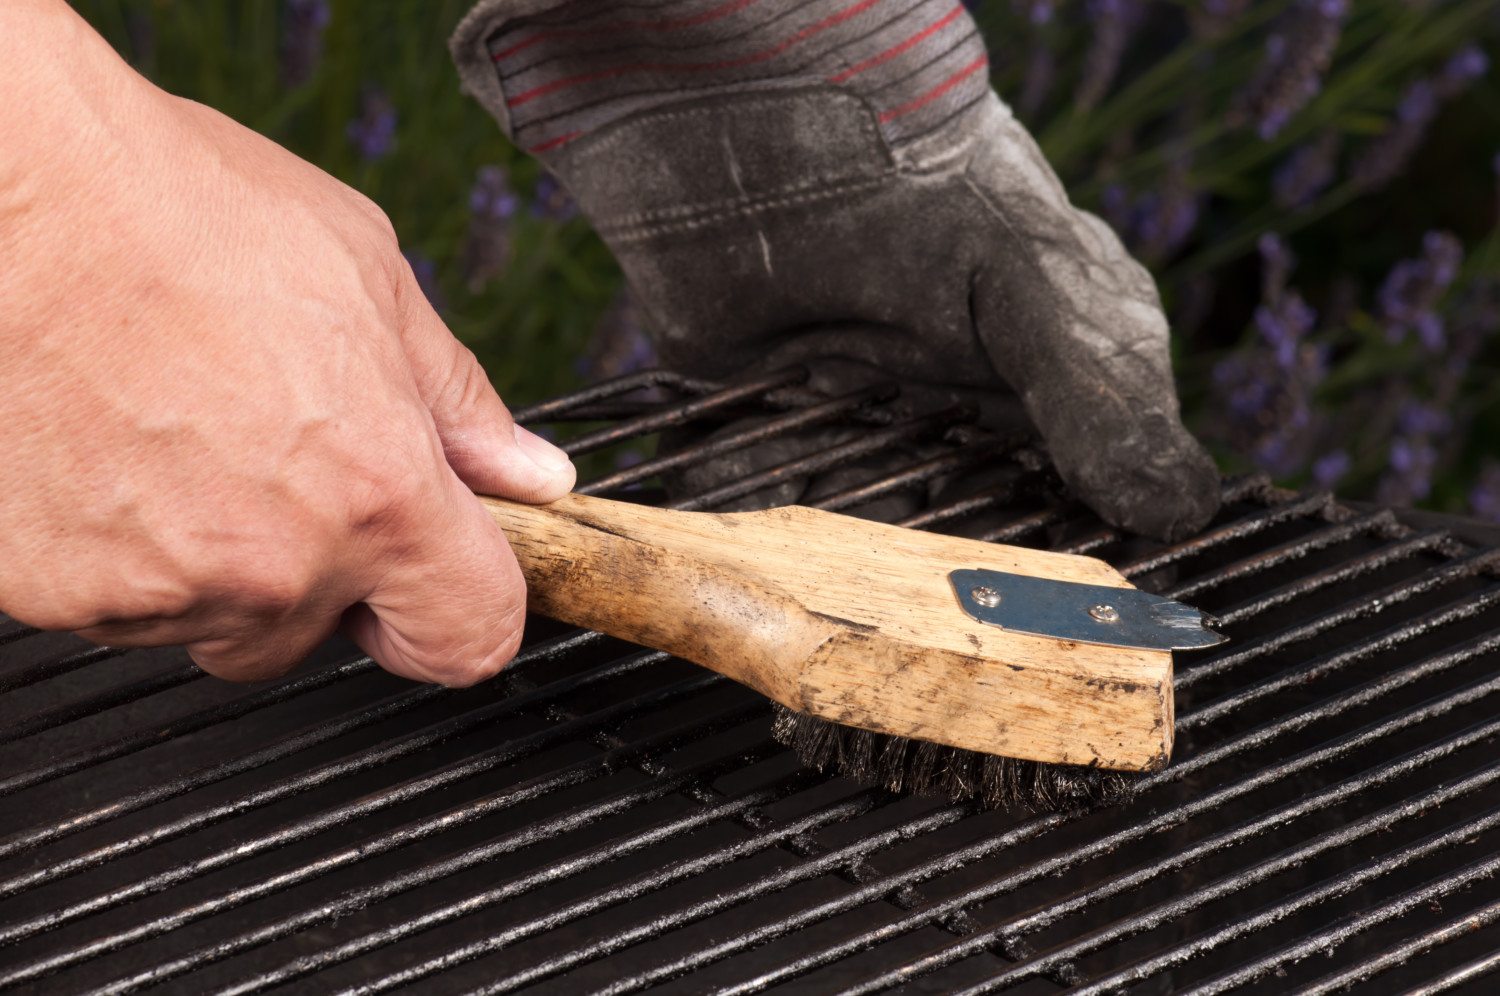
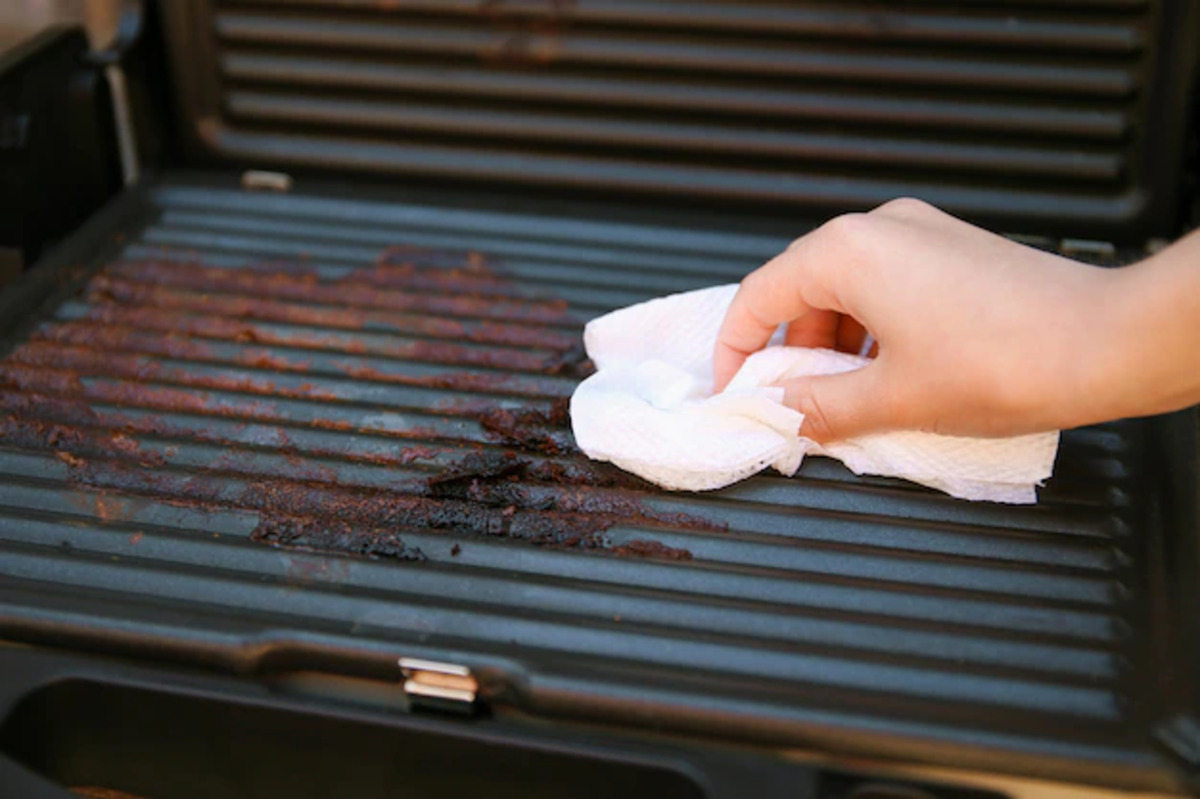
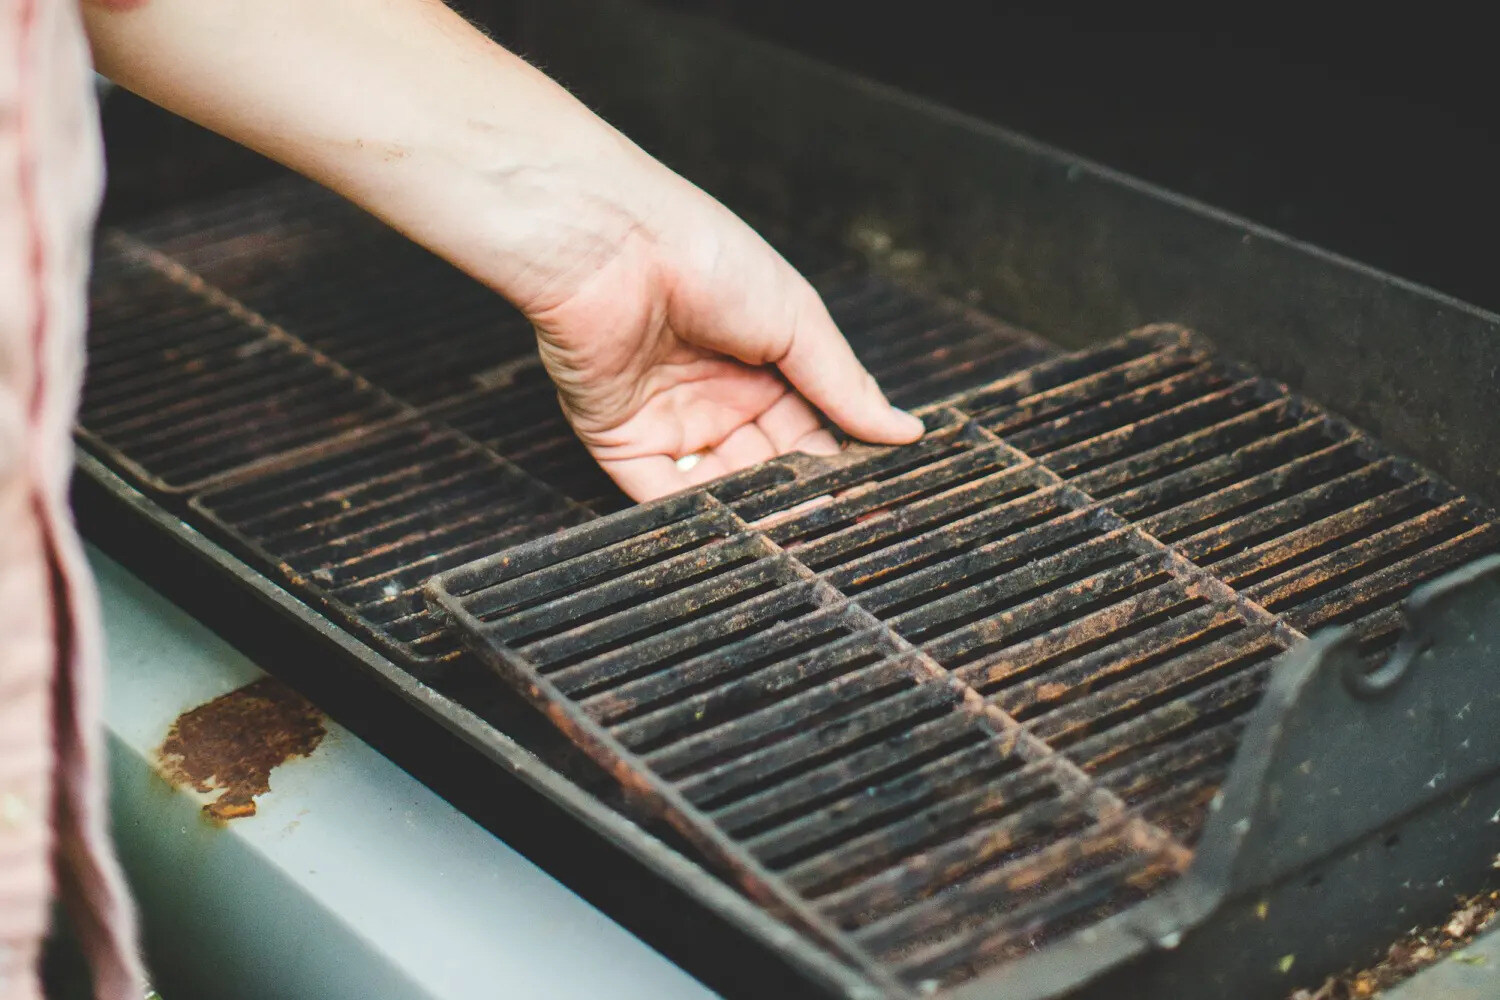
- Scrape the interior surfaces: Use a grill brush with firm bristles to scrape off any loose debris or grime from the interior walls, burners, and other internal components. Be thorough, paying attention to hard-to-reach areas.
- Prepare the cleaning solution: Fill a bucket with warm water and add a mild dish soap. Mix it well to create a soapy cleaning solution.
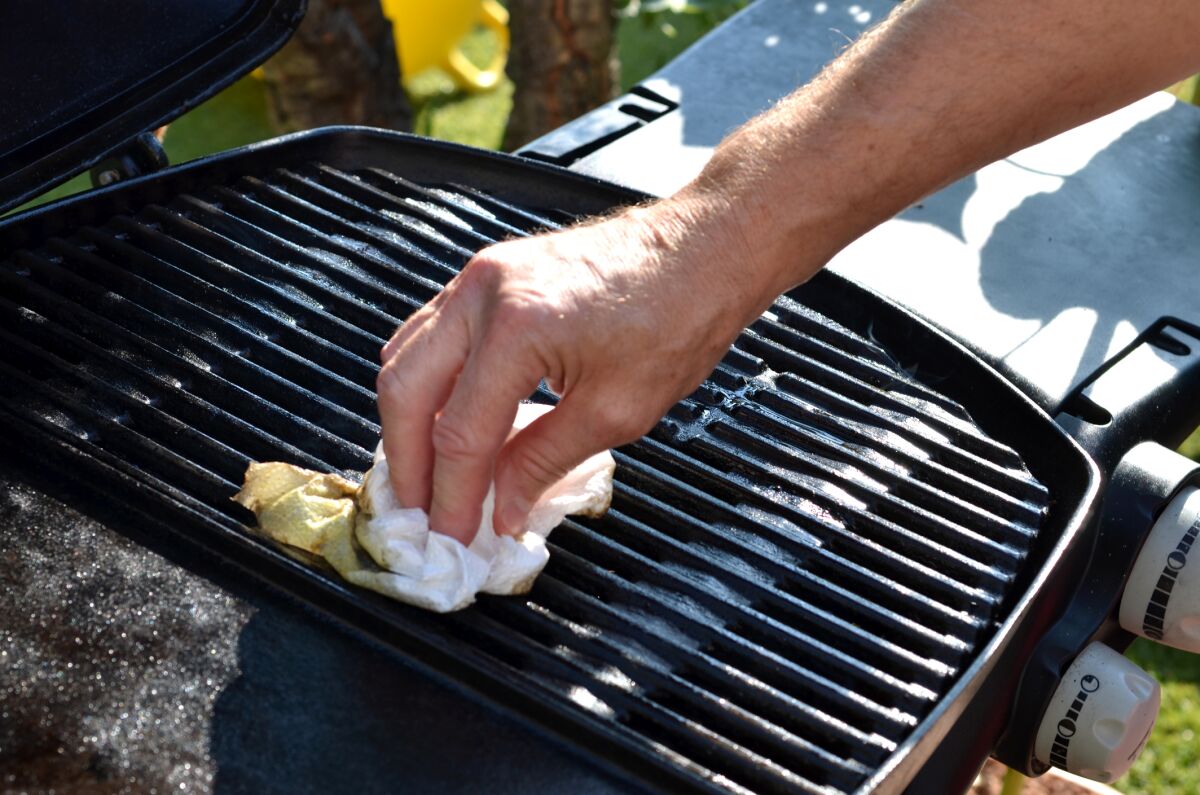
- Scrub the interior surfaces: Dip a non-abrasive cloth or sponge into the soapy water and start scrubbing the interior surfaces of the grill. Pay extra attention to areas with heavy buildup of grease and residue. For stubborn spots, you may use a grill-specific degreaser following the instructions on the product.
- Clean the grates and drip pans: Scrub the cooking grates and drip pans with a grill brush or use a non-abrasive sponge and soapy water. For tough grime, you may soak them in a mixture of warm water and dish soap for a few minutes before scrubbing.
- Rinse the interior and components: Once you’ve thoroughly cleaned the interior surfaces, rinse them with clean water to remove any soap residue. Also, rinse the grates and drip pans to ensure they’re free of any cleaning agents.
- Dry and reassemble: Use a clean cloth to dry the interior surfaces, grates, and drip pans. Once dry, carefully place the grates and drip pans back into the grill. Reattach any removed components, such as the burners and ignitions, following the grill’s specific instructions.
Following these step-by-step instructions will help you effectively clean the inside of your grill, ensuring it’s ready for your next grilling session.
Now that your grill is clean and ready to use, it’s important to implement some maintenance tips to keep it in pristine condition for years to come. Read on for some handy tips on maintaining a clean grill.
Removing Grates and Drip Pans
Before you begin cleaning the inside of your grill, it’s important to remove the grates and drip pans. This allows for easier access to the interior surfaces and ensures a thorough cleaning. Here’s how you can remove the grates and drip pans from your grill:
- Ensure the grill is cooled down: Before attempting to remove the grates and drip pans, make sure your grill has completely cooled down. This will prevent any accidental burns.
- Open the lid: Lift the lid of your grill to expose the cooking surface and the grates.
- Disconnect the gas tank (if applicable): If you have a gas grill, turn off the fuel supply and disconnect the propane tank to ensure safety.
- Remove the grates: The grates are usually located directly above the burners. Depending on the design of your grill, they may be held in place by clips, hooks, or simply resting on supports. Lift the grates straight up and out of the grill. If they are stuck or don’t lift easily, gently wiggle them side to side while lifting to release them.
- Remove the drip pans: The drip pans are typically located beneath the grates, directly above the burners. They may be rectangular or shaped to fit the contours of your grill. Simply slide or lift the drip pans out from their designated slots or holders. If your grill has multiple layers of drip pans, remove them one by one.
- Place the grates and drip pans aside: Once removed, set the grates and drip pans aside for cleaning. It’s recommended to clean them separately from the rest of the grill’s interior.
By following these steps, you can easily remove the grates and drip pans from your grill, allowing you to clean them thoroughly. With the grates and drip pans out of the way, you can now focus on cleaning the interior surfaces of your grill. Grab your cleaning materials and proceed to the next step in the cleaning process.
Now that the grates and drip pans are out, let’s move on to scrubbing the interior surfaces of the grill to remove any built-up grime and residue.
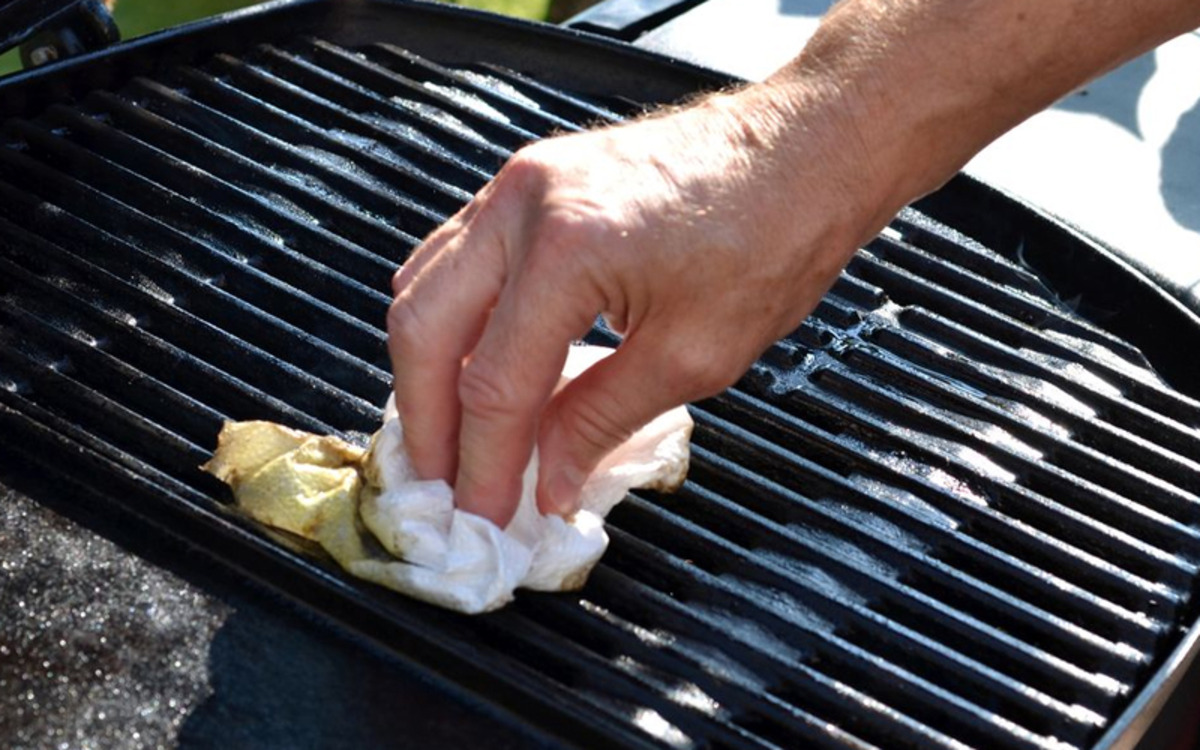
After heating the grill, use a grill brush to scrub the grates and remove any residue. Then, use a damp cloth to wipe down the inside of the grill to remove any remaining debris. Finally, let the grill cool before cleaning out the ash and residue from the bottom.
Scrubbing the Interior Surfaces
Now that you have removed the grates and drip pans from your grill, it’s time to focus on scrubbing the interior surfaces. Over time, grease, food particles, and residue can accumulate on these surfaces, affecting the performance and cleanliness of your grill. Here’s how you can effectively scrub the interior surfaces of your grill:
- Prepare your cleaning solution: Fill a bucket with warm water and add a mild dish soap to create a soapy cleaning solution. This will be used to scrub the interior surfaces of your grill.
- Dip your non-abrasive cloth or sponge: Take a non-abrasive cloth or sponge and dip it into the soapy water. Make sure it is well soaked but not dripping excessively.
- Start scrubbing: Begin scrubbing the interior surfaces of your grill, focusing on areas with heavy grease or residue buildup. Use circular motions and apply gentle pressure to remove stubborn debris. Pay attention to the walls, ceiling, and base of the grill.
- Target stubborn stains: For particularly tough stains or residue, you may need to use a bit more elbow grease or a grill-specific degreaser. Follow the product instructions for proper application and make sure to rinse the area thoroughly afterwards.
- Don’t forget the crevices and corners: Use a brush or toothbrush to clean hard-to-reach areas, such as corners and crevices, where buildup can occur. Ensure all surfaces are thoroughly scrubbed.
- Rinse with clean water: Once you have finished scrubbing, rinse the interior surfaces with clean water to remove any soap residue or loosened debris. Use a clean cloth or sponge soaked in water to wipe down the surfaces.
Remember to be thorough in your scrubbing process, paying attention to all interior surfaces of the grill. Removing grease and residue will not only improve the cleanliness of your grill but also enhance its overall performance.
Now that you have successfully scrubbed the interior surfaces of your grill, it’s time to move on to cleaning the burner tubes and other internal components. This is an important step in ensuring the proper functioning of your grill.
Cleaning the Burner Tubes
After scrubbing the interior surfaces of your grill, it’s crucial to clean the burner tubes and other internal components. Over time, these parts can become clogged with debris, affecting the flow of gas and heat distribution. Here’s how you can effectively clean the burner tubes:
- Ensure the grill is cooled down: Make sure your grill has cooled down completely before attempting to clean the burner tubes. This prevents any potential burns or injuries.
- Locate the burner tubes: The burner tubes are typically metal tubes that run along the bottom of the grill. They are responsible for distributing heat evenly throughout the cooking surface.
- Inspect the burner tubes: Check the burner tubes for any visible signs of debris, such as grease buildup or blockages. Use a flashlight if necessary to get a clear view of the inside of the tubes.
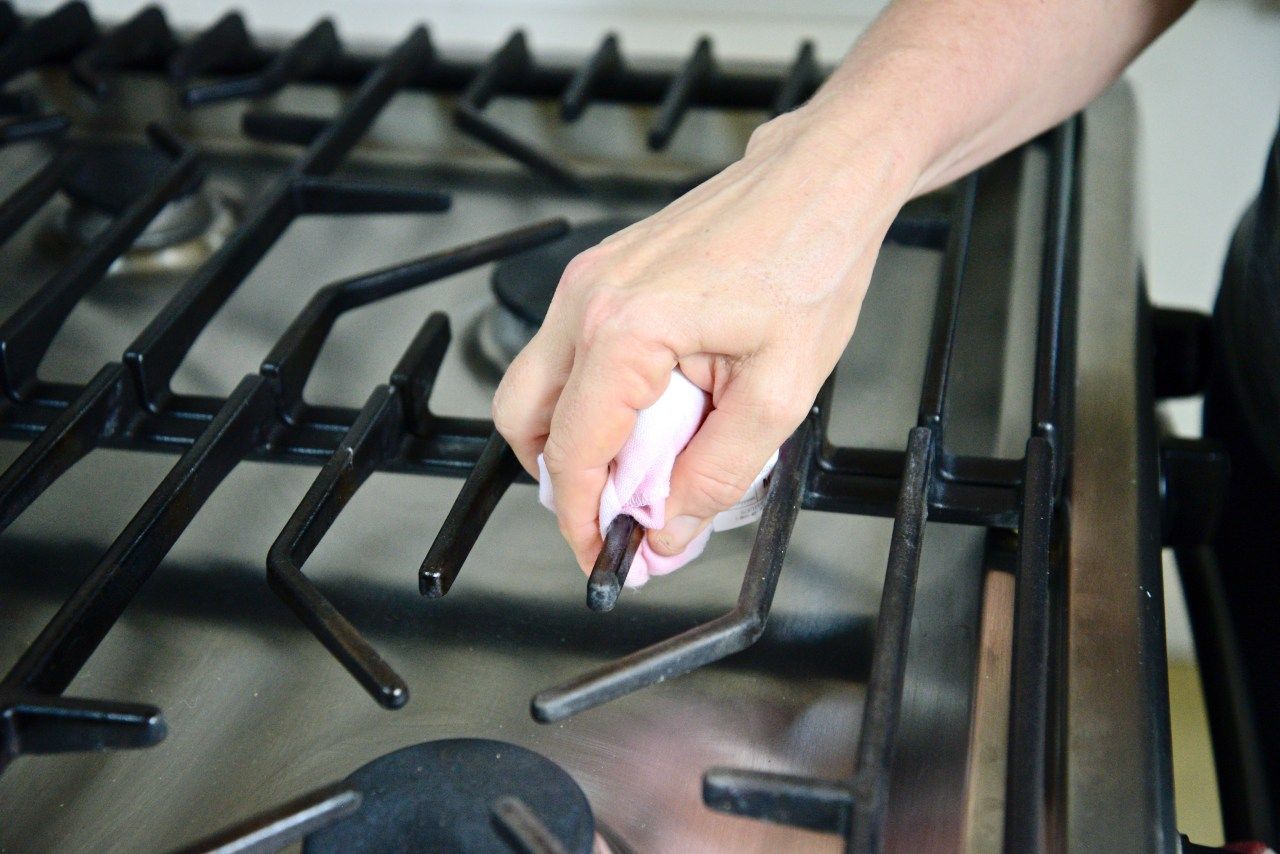
- Remove debris: Use a brush with stiff bristles or a pipe cleaner to remove any debris or blockages from the burner tubes. Gently scrub the interior of the tubes to dislodge any buildup. Be careful not to damage the tubes while cleaning.
- Clear the gas ports: The gas ports on the burner tubes are small openings where gas is released and ignited. Use a thin wire or pin to clear any clogs or obstructions in these ports. Be gentle to avoid damaging the ports.
- Inspect the igniter: While cleaning the burner tubes, check the igniter for any rust or debris. Remove any buildup or corrosion using a soft cloth or a wire brush. Ensure the igniter is clean and in good working condition.
- Reassemble the burner tubes: Once you have cleaned the burner tubes and ensured they are free from debris, carefully reassemble them in their original positions.
Cleaning the burner tubes is vital for maintaining proper heat distribution and ensuring your grill functions optimally. By regularly cleaning these components, you can prevent blockages and extend the longevity of your grill.
Now that you have cleaned the burner tubes, it’s time to move on to cleaning the ignition system to ensure consistent and reliable ignition of your grill.
Read more: How To Clean A Dryer Inside And Out
Cleaning the Ignition System
After cleaning the interior surfaces and the burner tubes, it’s essential to pay attention to the ignition system of your grill. The ignition system is responsible for igniting the gas and starting the grilling process. Over time, it can accumulate dirt, grease, or debris, which may prevent proper ignition. Here’s how you can effectively clean the ignition system:
- Ensure the grill is cooled down: Before you start cleaning the ignition system, ensure that your grill has completely cooled down.
- Locate the ignition system: The ignition system of most grills is typically located near the control knobs and consists of a spark generator or an ignition button.
- Remove any visible debris: Inspect the ignition system for any visible debris or dirt. Use a soft brush or cloth to remove any loose particles.
- Clean the ignition switch: If your grill has an ignition switch, gently wipe it with a soft cloth dampened with water or a mild cleaning solution. Be cautious not to let any liquid enter the switch to prevent damage.
- Clean the spark generator: For grills with a spark generator, use a brush or compressed air to remove debris or buildup around the spark gaps. This ensures that the sparks can ignite the gas effectively.
- Check the battery: If your grill’s ignition system is battery-powered, check the battery and replace it if necessary. A weak battery can affect the ignition performance.
- Test the ignition system: After cleaning, test the ignition system to ensure it is functioning correctly. Turn on the gas and try igniting the grill using the ignition switch or button. If it ignites smoothly, you’ve successfully cleaned and maintained your ignition system.
By regularly cleaning and maintaining your grill’s ignition system, you can ensure reliable and consistent ignition, making your grilling experience more convenient and enjoyable.
Now that you’ve cleaned the ignition system, it’s time to reassemble the grill and implement some tips for maintaining a clean grill in the long run.
Reassembling the Grill
After thoroughly cleaning the interior surfaces, burner tubes, and ignition system of your grill, it’s time to reassemble all the components to ensure your grill is ready for use. Here’s a step-by-step guide for reassembling your grill:
- Ensure all parts are dry: Before reassembling, make sure that all the components, including the grates, drip pans, burner tubes, and ignition system, are completely dry. Use a clean cloth to remove any moisture.
- Place the drip pans back in position: Start by placing the clean and dry drip pans back into their designated slots or holders. Ensure they fit securely and are aligned properly.
- Reattach the burner tubes: Carefully place the burner tubes back into position, aligning them with the gas ports and the openings on the grill’s interior. Ensure they are properly seated and fit securely.
- Replace the grates: Lift the clean and dry cooking grates and position them over the burner tubes. Make sure they are aligned and sit securely on the supports or holders.
- Reconnect the gas tank (if applicable): For gas grills, ensure the propane tank is securely reconnected, following the manufacturer’s instructions. Check for any gas leaks by applying a soap and water solution to the connections. If bubbles form, there may be a gas leak, and you should address it before using the grill.
- Check for proper reassembly: Take a moment to check that all the components are correctly reassembled, in their respective positions, and properly aligned. This ensures that your grill functions safely and efficiently.
- Perform a test run: Before using your grill to cook food, turn the burners on and test the ignition system. Make sure the burners ignite smoothly and the flame appears even across the grates. This allows you to verify that the grill is working correctly after reassembly.
By carefully reassembling your grill, you can ensure that all components are in place and properly aligned. This not only ensures safe and efficient operation but also helps maintain the longevity of your grill.
Now that your grill is clean, reassembled, and ready for use, let’s explore some tips on how to maintain a clean grill and prolong its lifespan.
Tips for Maintaining a Clean Grill
After cleaning and reassembling your grill, it’s important to implement a regular maintenance routine to keep it clean and in optimal condition. Here are some valuable tips to help you maintain a clean grill:
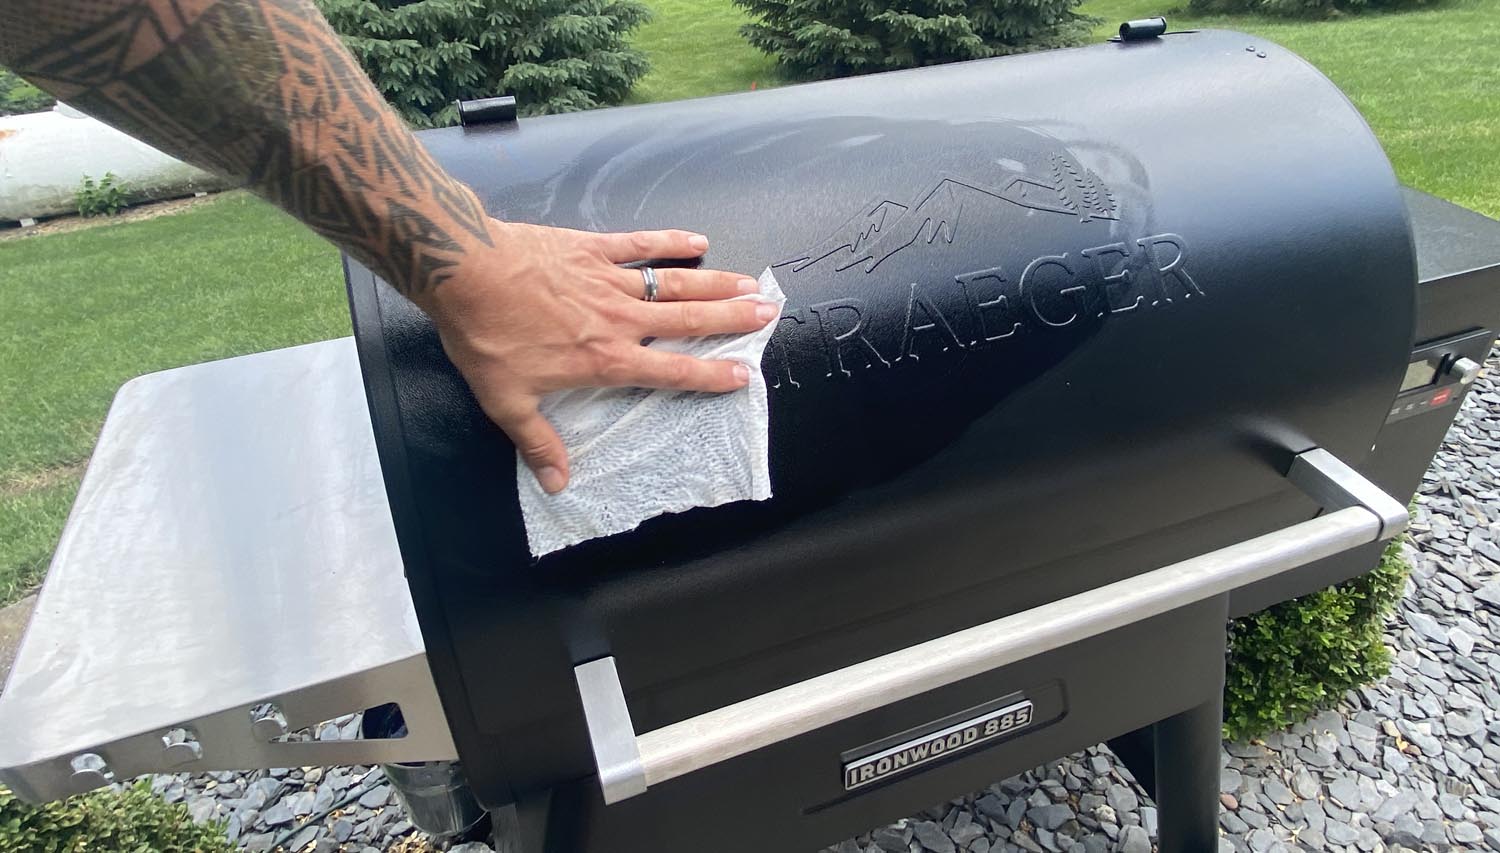
- Clean the grill after each use: It’s best to clean the grill after every use. Allow the grill to cool down slightly and remove any food residue or grease from the grates and interior surfaces. This prevents buildup and makes future cleaning easier.
- Preheat the grill before cooking: Before placing food on the grates, preheat the grill for 10-15 minutes with the lid closed. This helps burn off any remaining debris and sterilizes the cooking surface.
- Regularly clean the grates and drip pans: Give the grates and drip pans a thorough cleaning regularly, even if you don’t use the grill every day. Soak them in warm soapy water, scrub them with a brush, rinse, and dry them before placing them back in the grill.
- Scrub the interior surfaces: Clean the interior surfaces of your grill periodically to remove grease and residue buildup. Use a grill brush or non-abrasive cloth soaked in soapy water to scrub the walls, ceiling, and base of the grill.
- Check for blockages: Regularly inspect the burner tubes and gas ports for any blockages or clogs. Use a brush with stiff bristles or a pipe cleaner to remove any debris and ensure proper gas flow.
- Empty and clean the grease trap: If your grill has a grease trap or tray, empty and clean it regularly to prevent grease buildup and potential flare-ups. Refer to your grill’s instructions for safe removal and cleaning of the grease trap.
- Protect your grill when not in use: Invest in a grill cover to protect your grill from the elements when it’s not in use. This helps prevent rust, corrosion, and debris accumulation.
- Perform regular inspections: Check the overall condition of your grill, including the burner tubes, hoses, and connections. Replace any worn-out or damaged parts to prevent safety hazards and maintain optimal performance.
- Keep the area around the grill clean: Clear away any debris or flammable materials around your grill to reduce the risk of fire and ensure a safe cooking environment.
By following these tips for maintaining a clean grill, you can enjoy a hassle-free grilling experience while extending the lifespan of your grill. Additionally, proper maintenance ensures safe and flavorful meals every time you fire up the grill.
Now that you have a clean grill and the knowledge to maintain it, get ready to impress your family and friends with delicious grilled dishes. Happy grilling!
This concludes our comprehensive guide on how to clean the inside of your grill and maintain its cleanliness. By following these steps and implementing regular maintenance practices, you’ll ensure not only a clean and safe grilling experience but also the longevity of your beloved grill.
Conclusion
Cleaning the inside of your grill is a vital aspect of grilling maintenance that should not be overlooked. By regularly cleaning the interior surfaces, burner tubes, and ignition system, you can ensure safe and efficient grilling while maintaining the longevity of your grill.
Regular cleaning of the inside of your grill offers various benefits. It helps prevent dangerous flare-ups, ensures even heat distribution, removes stubborn residue, maintains hygiene, and extends the lifespan of your grill. By following a few simple steps and incorporating regular cleaning into your grilling routine, you can enjoy tasty and safe meals while maximizing the performance of your grill.
Remember to take essential safety precautions before cleaning, such as disconnecting the propane tank, letting the grill cool down, and wearing protective gear. Gather the necessary materials, including a grill brush, non-abrasive cloth or sponge, and warm soapy water, for an effective cleaning process.
Follow the step-by-step guide to clean the inside of your grill, which includes removing grates and drip pans, scrubbing the interior surfaces, cleaning the burner tubes, and maintaining the ignition system. All of these steps contribute to a clean and well-functioning grill.
Lastly, remember to reassemble your grill properly, perform regular maintenance, and implement tips such as cleaning after each use, preheating the grill, and protecting it when not in use. By following these tips, you can enjoy a clean and efficient grill for years to come.
With a clean grill, you can confidently host backyard barbecues, impress your loved ones with delicious grilled meals, and create unforgettable culinary experiences. So, invest some time and effort into keeping the inside of your grill clean, and reap the rewards of a well-maintained grilling companion.
Now it’s time to fire up your clean grill and savor the mouthwatering flavors that only a well-maintained grill can deliver. Happy grilling!
Frequently Asked Questions about How To Clean Inside Of Grill
Was this page helpful?
At Storables.com, we guarantee accurate and reliable information. Our content, validated by Expert Board Contributors, is crafted following stringent Editorial Policies. We're committed to providing you with well-researched, expert-backed insights for all your informational needs.

0 thoughts on “How To Clean Inside Of Grill”