Articles
How To Frame Porch Roof
Modified: October 21, 2024
Learn how to frame a porch roof with our informative articles. Find step-by-step guides and expert tips to build your dream porch.
(Many of the links in this article redirect to a specific reviewed product. Your purchase of these products through affiliate links helps to generate commission for Storables.com, at no extra cost. Learn more)
Introduction
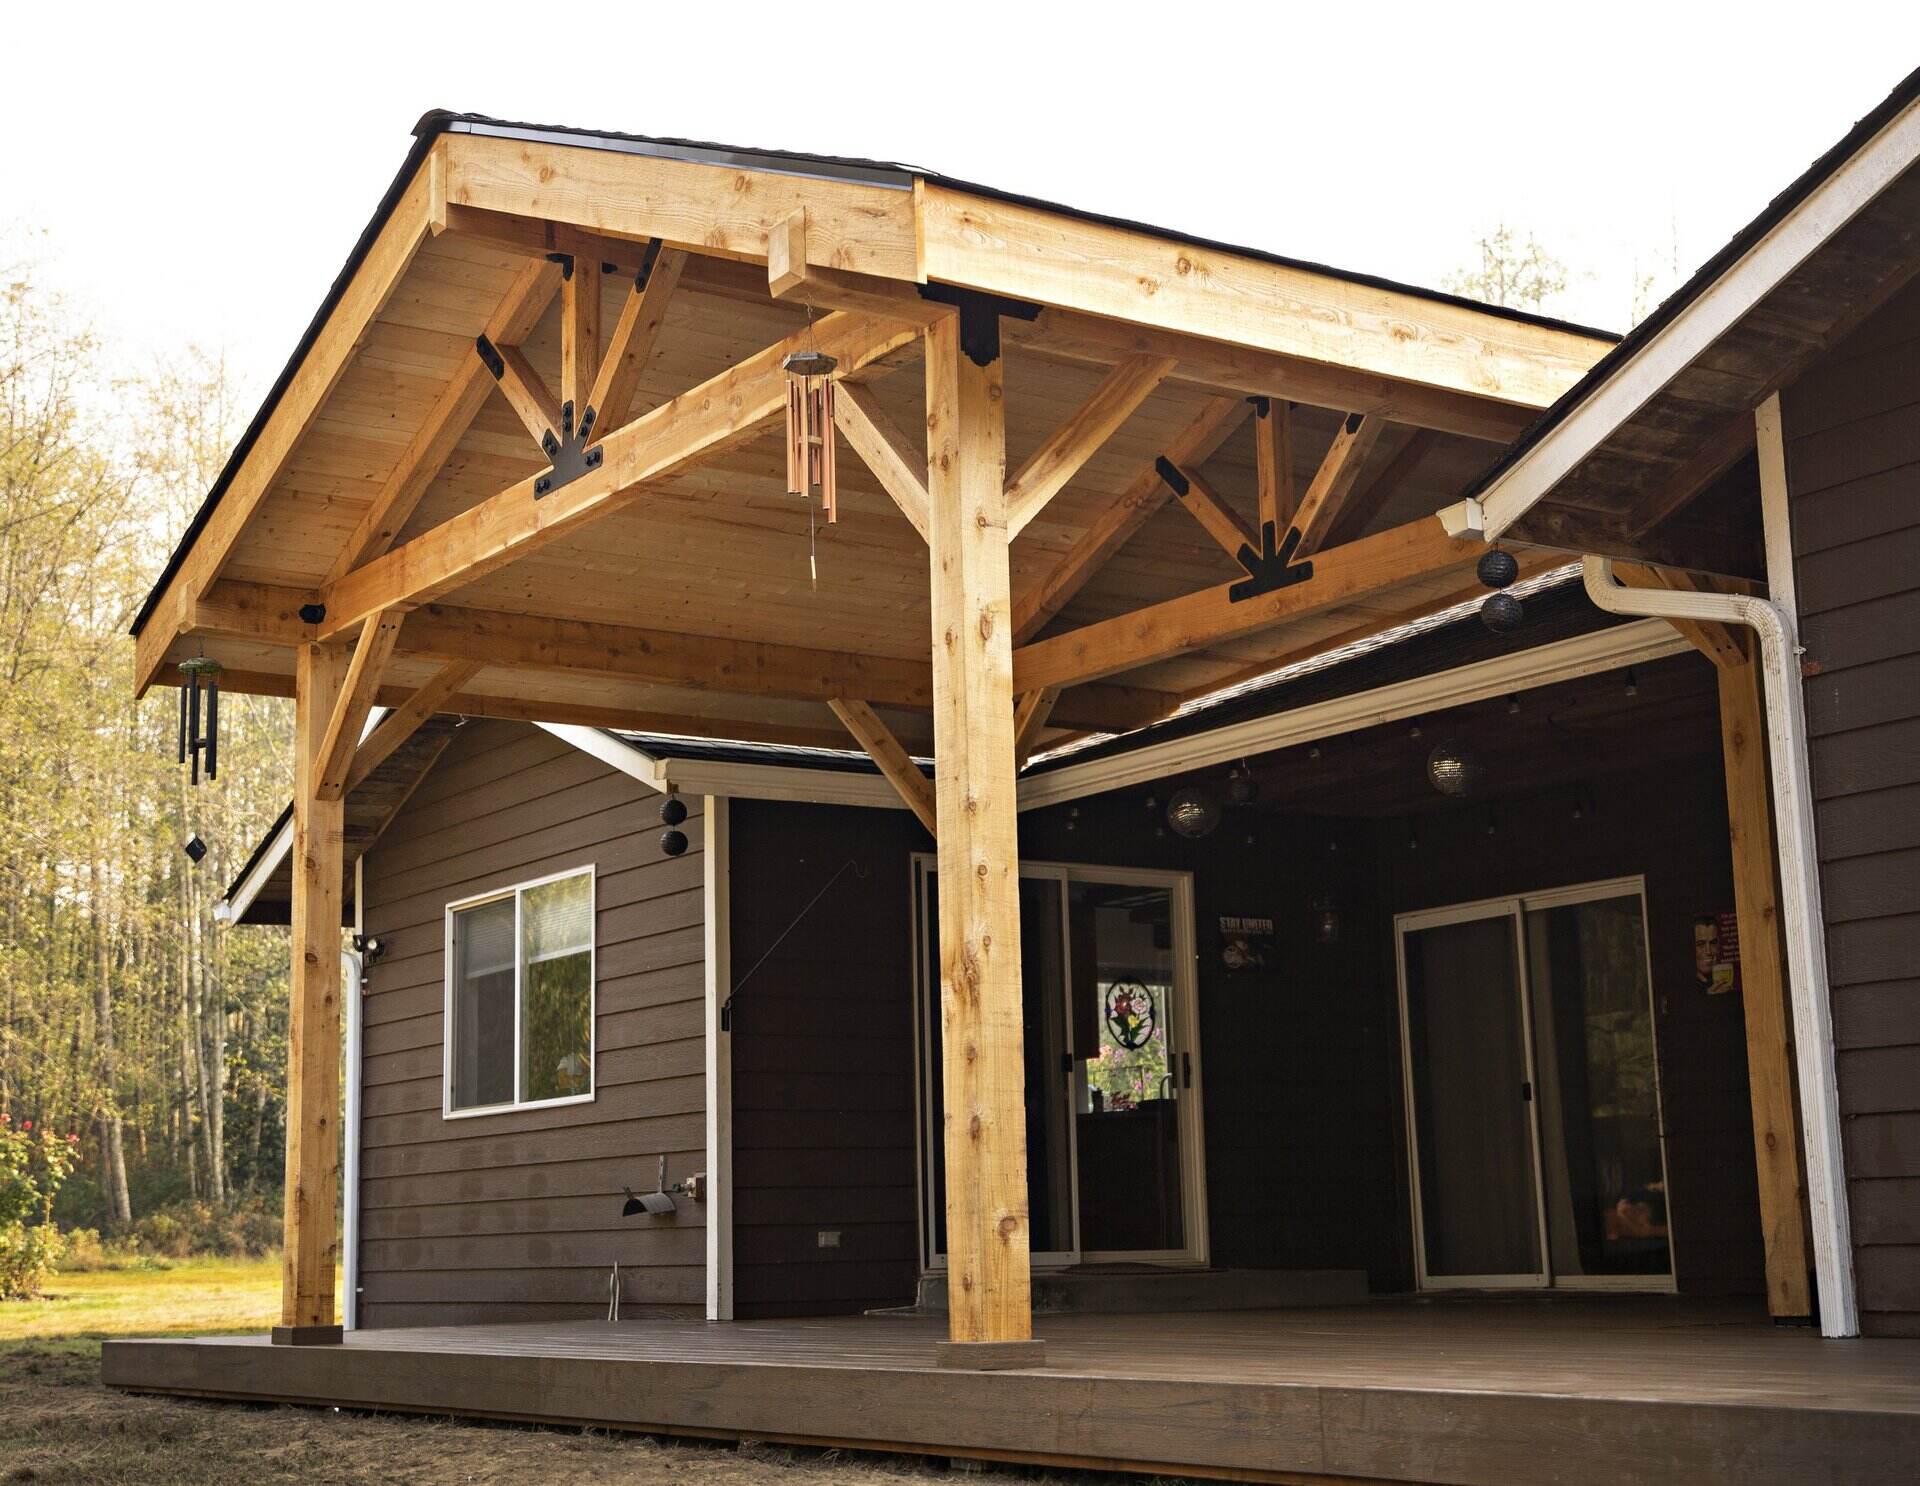
Building a porch roof is a great way to enhance the functionality and aesthetics of your outdoor space. Whether you want to create a shady spot to relax during hot summer days or protect your porch from rain and snow, framing a porch roof is an important step to achieve these goals.
In this article, we will guide you through the process of framing a porch roof, step by step. We will provide you with valuable insights, tips, and techniques to help you successfully complete this project.
Before we dive into the details of framing a porch roof, it’s important to note that this is a project that requires some level of carpentry skills and knowledge. If you are not confident in your abilities, it is highly recommended to consult with a professional or seek assistance from an experienced contractor.
Now, let’s get started on framing your porch roof!
Key Takeaways:
- Framing a porch roof requires careful planning, accurate measurements, and the use of high-quality materials. From gathering tools to adding finishing touches, this step-by-step guide ensures a sturdy and visually appealing outdoor space.
- Safety, precision, and attention to detail are crucial when framing a porch roof. Following local building codes, consulting professionals if needed, and adding final touches like lighting and decorative elements create a welcoming and durable porch roof.
Read more: How To Frame A Roof
Step 1: Gather the necessary tools and materials
Before you begin framing your porch roof, it’s essential to gather all the necessary tools and materials. This will ensure that you have everything you need to complete the project efficiently. Here’s a list of the tools and materials you’ll need:
- Measuring tape
- Pencil
- Saw (Circular saw or miter saw)
- Nail gun or hammer
- Level
- Square
- Safety glasses
- Work gloves
- Ladder
- Pressure-treated lumber for the framing (2×6 or 2×8 boards)
- Rafter boards
- Roofing nails
- Roofing sheathing
- Roofing materials (shingles or metal sheets)
- Flashings
- Tar paper or roofing underlayment
- Rafter ties or hurricane straps for extra support
It’s important to choose high-quality materials for your porch roof framing to ensure its durability and longevity. Pressure-treated lumber is recommended for the framing as it is resistant to decay and insect damage.
Additionally, consider the climate and weather conditions in your area when selecting roofing materials. Asphalt shingles are commonly used for porch roofs, but you can also opt for metal sheets or other suitable materials based on your preferences and local building codes.
Once you have gathered all the necessary tools and materials, you’re ready to move on to the next step of measuring and marking the porch roof dimensions.
Step 2: Measure and mark the porch roof dimensions
Accurate measurements are crucial when framing a porch roof to ensure a proper fit and alignment. Before making any cuts or starting the construction, take the time to measure and mark the dimensions of your porch roof.
Start by measuring the length and width of your porch. Use a measuring tape to determine the exact dimensions and write them down for reference.
Next, consider the desired pitch or slope of your porch roof. The pitch refers to the angle at which the roof slopes. A steep pitch allows for efficient water drainage, while a shallow pitch provides a more gentle slope. The pitch you choose will depend on personal preference, local building codes, and the climate in your area.
Once you have determined the desired pitch, use a level and a pencil to mark the corresponding angle on the porch wall or posts. This mark will serve as a reference point for the height of the roof.
Now, it’s time to transfer the measurements and marks to your lumber. Measure and mark the dimensions on the lumber boards for the rafters, beams, and any other framing members according to your porch roof design.
Remember to account for any overhang you want for the roof. The overhang refers to the extension of the roof beyond the edges of the porch, providing additional protection and aesthetics.
Once you have accurately measured and marked the dimensions, double-check your calculations to ensure everything is correct. Taking the time to measure and mark accurately will save you time and headaches later in the construction process.
With the porch roof dimensions measured and marked, you’re ready to move on to the next step of cutting the rafters to size.
Step 3: Cut the rafters to size
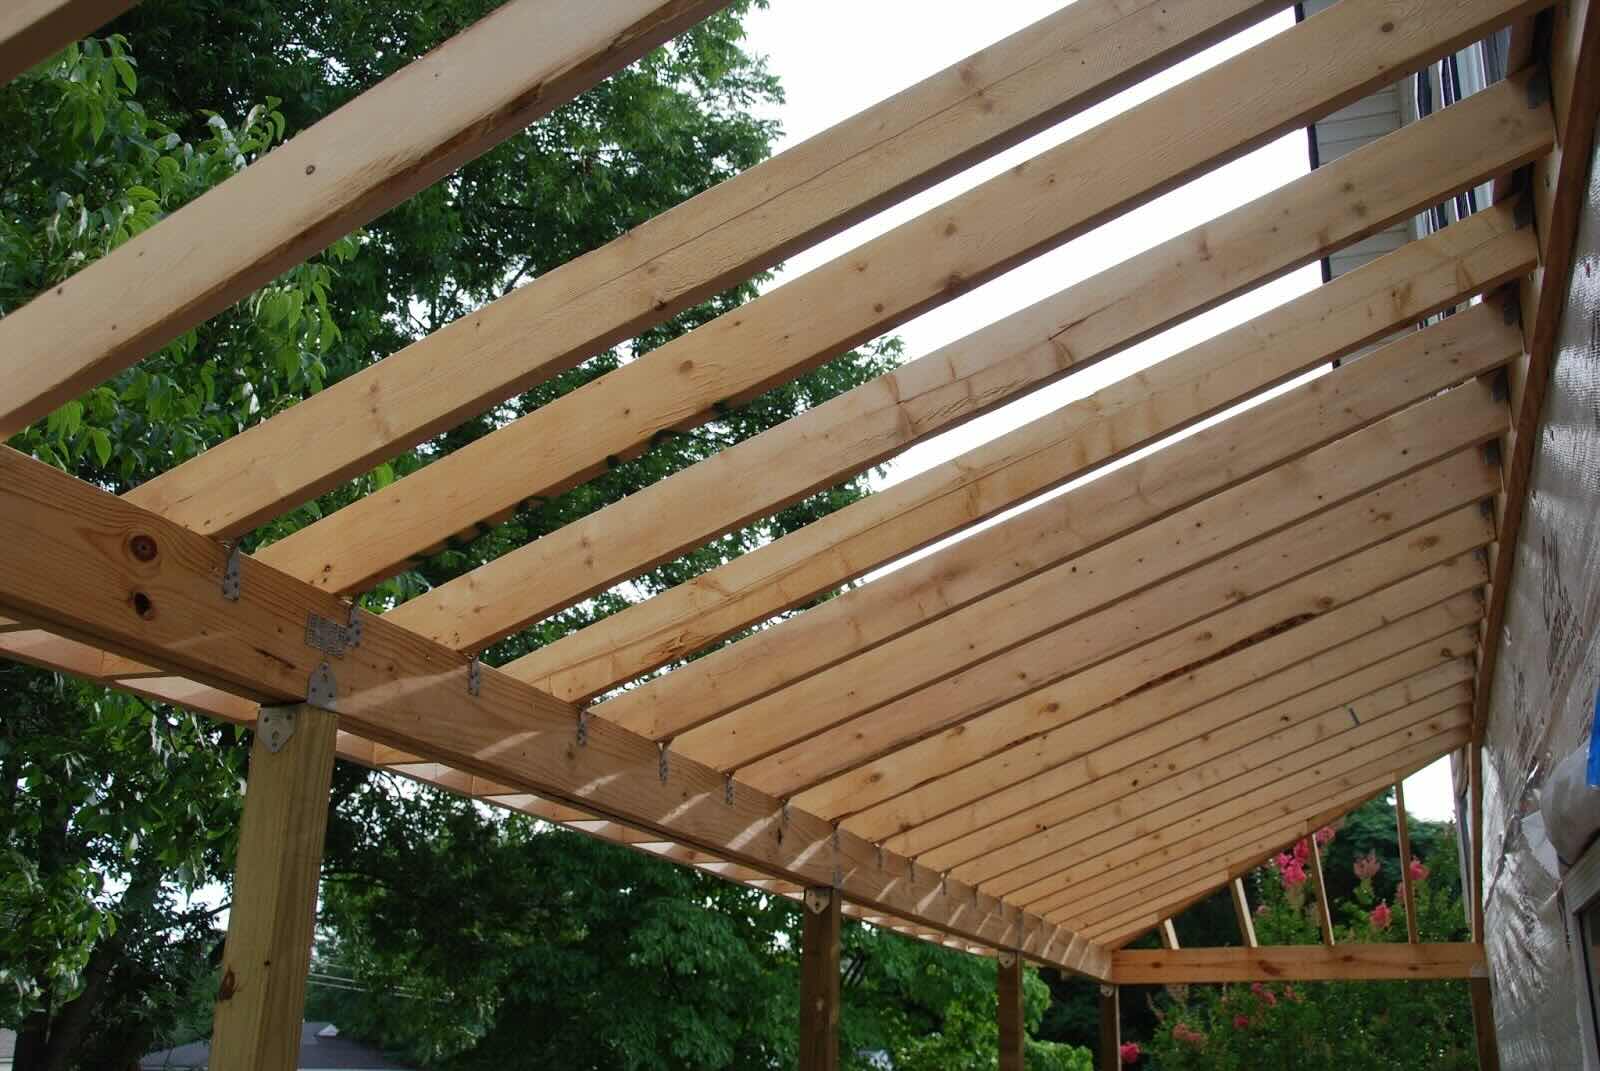
Now that you have measured and marked the porch roof dimensions, it’s time to cut the rafters to the correct size. The rafters are the sloping beams that will support the roof and provide its structure.
Start by placing the first rafter board on a stable surface, such as sawhorses, and measure the length from the bottom of the rafter (where it will attach to the beam) to the top of the rafter (where it will meet the ridge board or the center of the porch roof). Remember to account for any overhang you desire.
Using a circular saw or a miter saw, carefully cut the rafter board to the measured length. Ensure that the cut is straight and clean for a proper fit.
Once you have cut the first rafter, you can use it as a template to cut the remaining rafters. Simply place the cut rafter on top of a new board, aligning the bottom and top, and trace its outline. This will ensure that all the rafters are of the same size and shape.
After all the rafters are cut, mark and cut the bird’s mouth notches on the bottom end of each rafter. A bird’s mouth notch is a V-shaped cut that allows the rafter to sit flush on the beam or wall plate.
Ensure that the bird’s mouth notches are the correct size and depth, providing a secure and snug fit on the support. Use a saw or a chisel to carefully cut out the notches, keeping them aligned with your markings.
It’s crucial to take your time and be precise when cutting the rafters to size. Accurate and well-fitted rafters will contribute to the stability and strength of your porch roof.
With the rafters cut and notched, you’re now ready to move on to the next step of installing the porch roof ledger.
Step 4: Install the porch roof ledger
The porch roof ledger is a horizontal board that acts as a support for the rafters and attaches to the exterior wall of your house or the posts of your porch. It plays a crucial role in providing stability and strength to your porch roof.
Before installing the ledger, ensure that the area where it will be attached is clean and in good condition. Remove any existing siding or trim if necessary, and ensure that the surface is flat and even.
Start by positioning the ledger board against the wall or porch posts in the desired location. Use a level to ensure that it is perfectly horizontal. Mark the locations on the wall or posts where the ledger will be attached.
If attaching the ledger to a masonry wall, you will need masonry anchors and screws designed for this purpose. Drill pilot holes into the marked locations and insert the anchors. Then, align the ledger with the pilot holes and secure it in place using the appropriate screws.
When attaching the ledger to wooden posts or studs, use lag screws or through-bolts for a secure connection. Drill pilot holes through the ledger and into the posts, and insert the screws or bolts. Tighten them securely to ensure a strong attachment.
It’s important to properly seal the ledger board to prevent water intrusion and rot. Apply a generous amount of flashing tape or a waterproof membrane behind the ledger, overlapping it with the ledger and extending it down the wall or posts.
Ensure that the ledger is firmly attached and that there is no movement or wobbling. A secure and stable ledger is essential for the overall strength and durability of your porch roof.
With the porch roof ledger installed, you’re ready to move on to the next step of attaching the porch roof framing to the ledger.
Read more: How To Frame A Screen Porch
Step 5: Attach the porch roof framing to the ledger
With the porch roof ledger securely installed, it’s time to attach the porch roof framing to the ledger. This step will provide the structure and support needed for your porch roof.
Start by positioning the first rafter against the ledger and mark its location. Ensure that the rafter is plumb (vertical) and level (horizontal) before making any markings.
Once you have marked the location for the first rafter, use a drill to create pilot holes through the ledger and into the rafter. Make sure that the pilot holes are slightly smaller than the diameter of the screws or nails you will be using.
Attach the first rafter to the ledger using screws or nails. Ensure that it is firmly secured and properly aligned. Repeat this process for the remaining rafters, evenly spacing them along the ledger.
It’s important to ensure that the rafters are aligned and properly attached to the ledger. This will provide a solid and stable framework for your porch roof.
As you attach each rafter, use a level to check for plumb and level alignment. This will help ensure that your porch roof is straight and even.
If required by local building codes or for additional support, consider installing rafter ties or hurricane straps. These connectors help reinforce the connection between the rafters and the ledger, adding extra strength and stability to the porch roof framing.
Always follow manufacturer’s guidelines and building codes when selecting and installing connectors.
By attaching the porch roof framing to the ledger, you’ve taken a significant step towards completing your porch roof. The strong and secure connection between the rafters and ledger will provide the foundation for the rest of the construction process.
Next, we’ll move on to step 6, which involves installing the porch roof beams.
Step 6: Install the porch roof beams
Installing porch roof beams is an important part of framing your porch roof as they provide additional support and help distribute the weight of the roof evenly. These beams will run perpendicular to the rafters and play a vital role in the overall structural integrity of your porch roof.
Start by measuring and marking the locations where the beams will be installed. The spacing of the beams will depend on the size and design of your porch roof. Consult the construction plans or local building codes for recommended spacing guidelines.
Once you have determined the spacing, use a pencil and a level to mark the locations on the rafters where the beams will be attached. These marks will serve as reference points during the installation process.
Next, cut the porch roof beams to the required length. Ensure that the cuts are accurate and clean for a proper fit. Use a miter saw or a circular saw for this task.
Position the first beam on the marks you made on the rafters. Use a level to ensure that it is perfectly horizontal. Once you are satisfied with the positioning, secure the beam to the rafters using screws or nails.
Repeat this process for the remaining porch roof beams, making sure to maintain the appropriate spacing between them. Always check for levelness and alignment before attaching each beam.
If your porch roof design includes a ridge board, you will need to install it at the peak of the roof. The ridge board provides additional support and stability. Measure and cut the ridge board to the correct length, ensuring a proper fit between the beams.
Attach the ridge board to the beams using screws or nails, ensuring it is plumb and level.
By installing the porch roof beams, you have significantly strengthened the structure of your porch roof. The beams add stability and support, allowing for a more solid foundation for the rest of the construction process.
Next, we’ll move on to step 7, which involves securing the rafters to the beams.
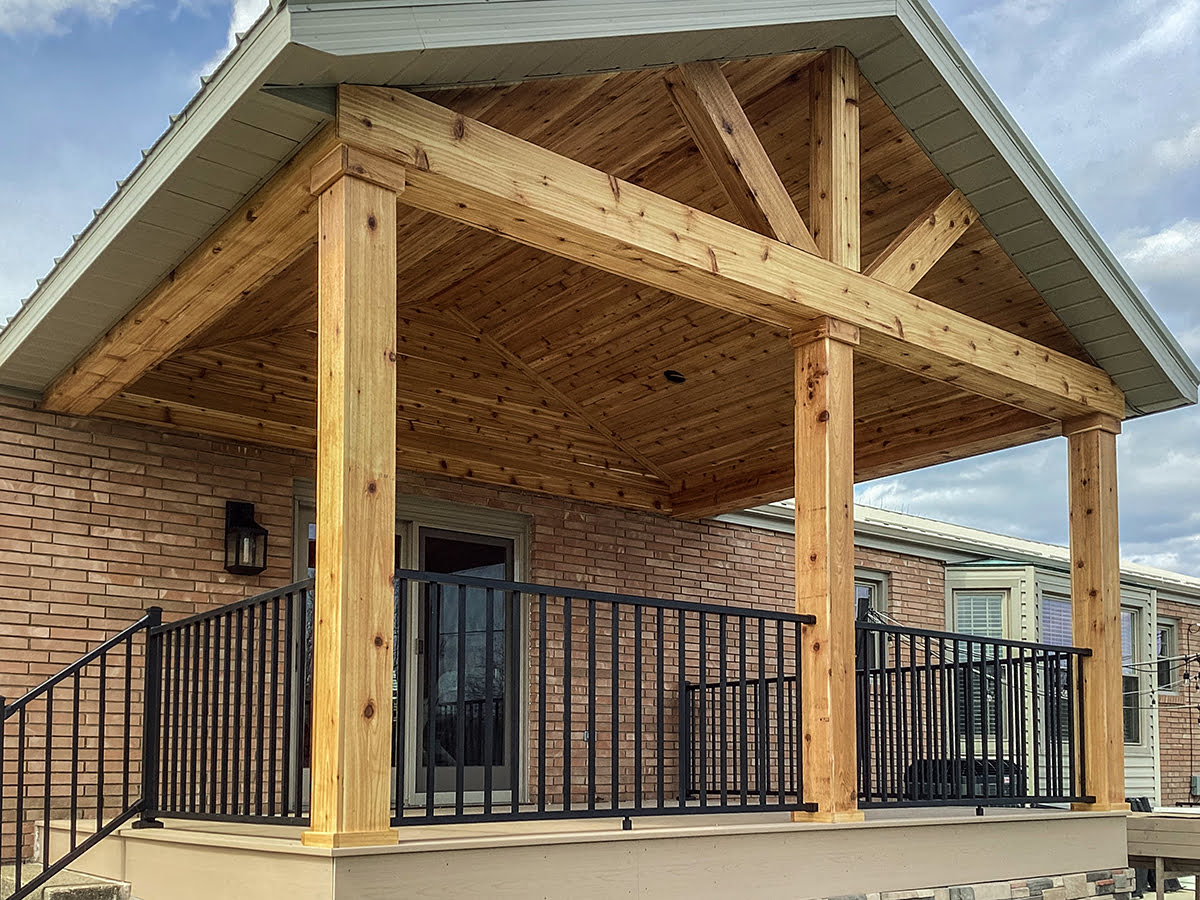
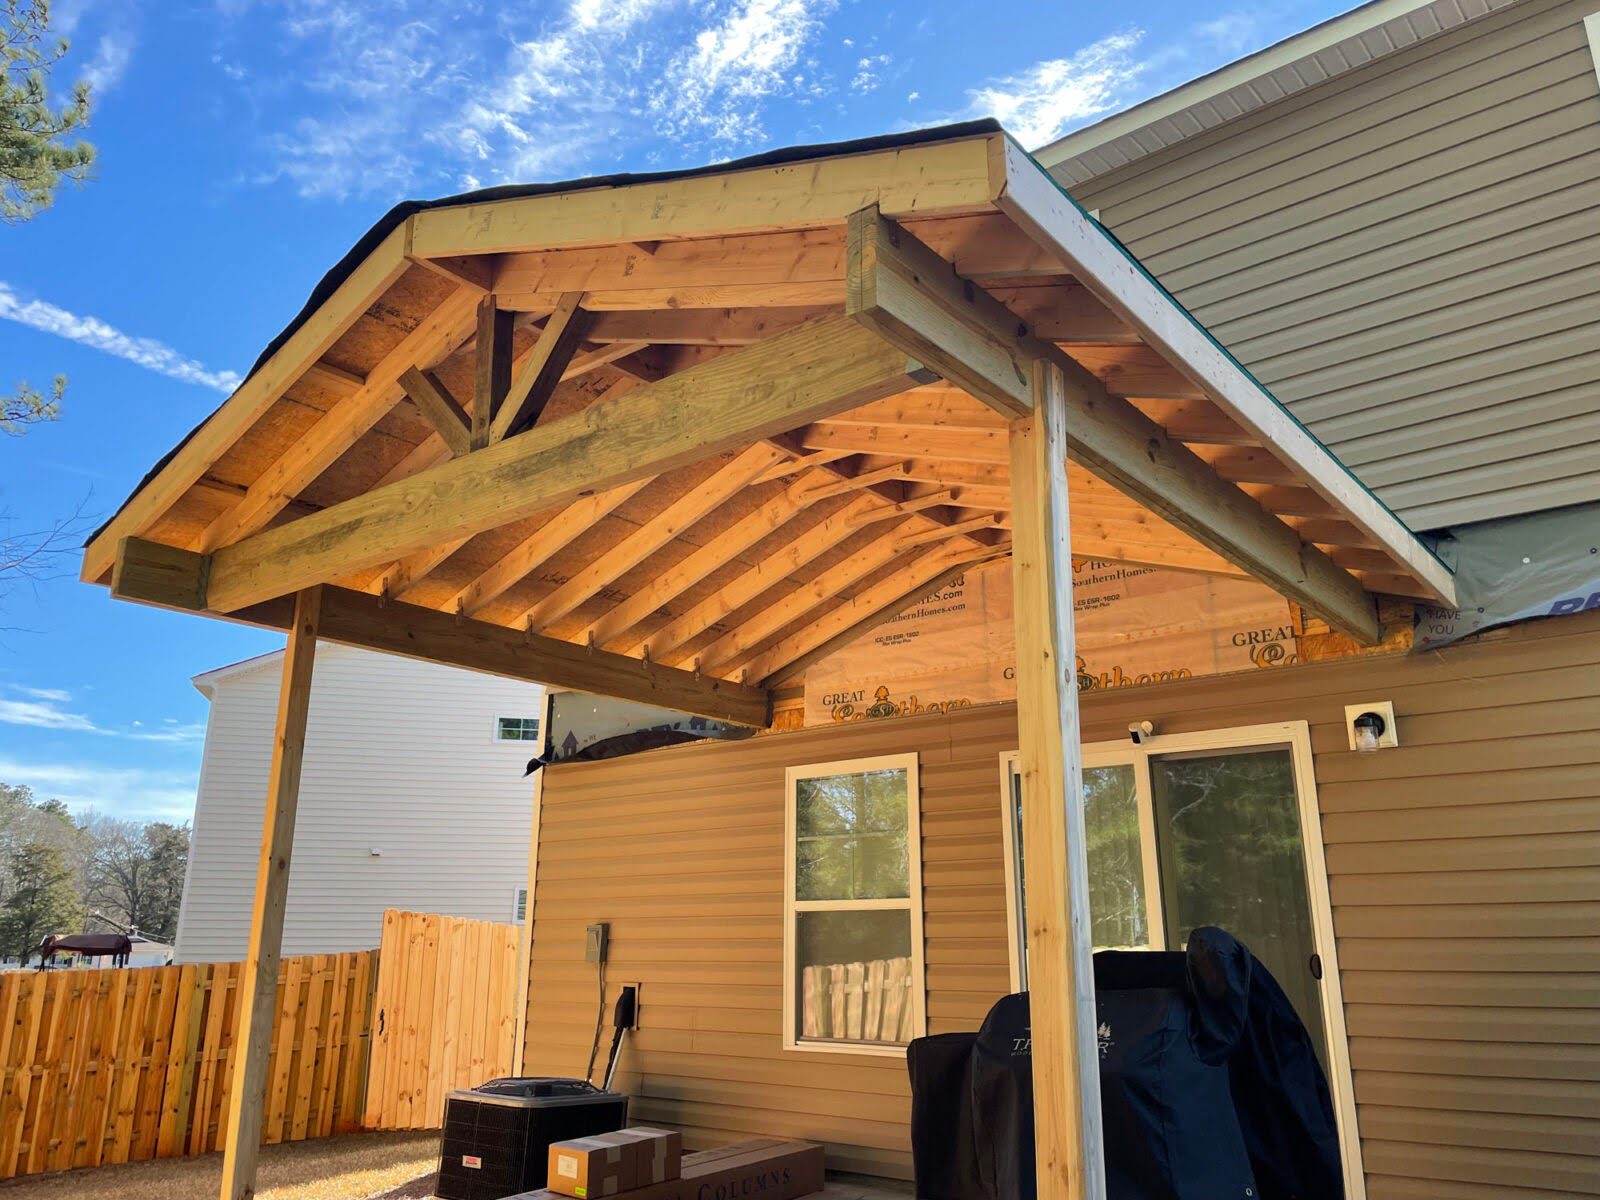
When framing a porch roof, make sure to accurately measure and cut the rafters to ensure a proper fit and support for the roof structure. Use a level to ensure the roof is even and properly aligned.
Step 7: Secure the rafters to the beams
Securing the rafters to the porch roof beams is a critical step in framing your porch roof. This step ensures that the rafters are securely attached and properly supported, creating a solid and stable foundation for the roof structure.
Start by positioning the first rafter on the beam, aligning it with the marked locations on both the rafter and the beam. Use a level to ensure that the rafter is plumb (vertical) and level (horizontal).
Once you have confirmed the proper alignment, attach the rafter to the beam using nails or screws. Drive the fasteners through the rafter and into the beam, securing them tightly.
Continue this process for the remaining rafters, working your way across the porch roof. Make sure to maintain equal spacing between the rafters as specified in your design or local building codes.
As you secure each rafter, periodically check for levelness and alignment. Adjust as necessary to ensure a straight and even roof structure.
In areas of high wind or for additional stability, consider installing hurricane ties or rafter ties. These metal connectors provide extra reinforcement, preventing the rafters from being lifted or shifting during severe weather conditions.
Follow the manufacturer’s instructions for correct installation of the ties, ensuring a secure connection between the rafters and the beams.
By securely attaching the rafters to the porch roof beams, you have completed a crucial step in framing your porch roof. The strong and stable connection between the rafters and beams provides the necessary support for the roof structure.
Next, we’ll move on to step 8, which involves adding additional support if needed.
Step 8: Add additional support if needed
Adding additional support to your porch roof may be necessary depending on the size, span, and design of your structure. This step will ensure that your porch roof has the strength and stability to withstand various weather conditions and other external factors.
If your porch roof is particularly large or has a long span between supports, you may need to install additional intermediate beams or posts. These beams or posts will provide extra support and prevent sagging or bending of the roof structure over time.
Consult the construction plans or local building codes to determine if additional support is required and where it should be placed. Measure and mark the locations for the additional supports on the beams or posts.
Once you have determined the locations, cut and position the additional support beams or posts accordingly. Ensure that they are level and plumb before securing them in place.
Use nails, screws, or appropriate connectors to secure the additional supports to the existing structure. Drive the fasteners through the supports and into the beams or posts, creating a secure connection.
Double-check the alignment and stability of the added supports, making any necessary adjustments to ensure a strong and level porch roof.
In areas prone to high winds or other extreme weather conditions, it may also be beneficial to install diagonal braces. These braces provide additional lateral support, helping to prevent the porch roof from swaying or collapsing during strong gusts of wind.
Follow the recommended spacing and installation instructions for the diagonal braces, ensuring they are securely attached to the beams or posts.
By adding additional support if needed, you ensure that your porch roof is well-reinforced and capable of bearing the load it will experience over time. This step enhances the structural integrity and longevity of your porch roof.
Next, we’ll move on to step 9, which involves installing the porch roof sheathing.
Read more: How To Frame A Porch Deck
Step 9: Install the porch roof sheathing
Installing porch roof sheathing is an important step in the construction process as it provides a solid and stable surface for the roofing materials to be applied. The sheathing also helps distribute the weight of the roof evenly and adds an extra layer of protection to your porch roof.
Start by measuring and cutting the porch roof sheathing panels to fit the dimensions of your roof. Use a circular saw or a table saw to make straight and clean cuts.
Position the first sheathing panel on one end of the porch roof, aligning it with the outer edge of the rafter and the top plate of the wall or beam. Leave a small gap of about 1/8 inch between the panels to account for expansion.
Secure the sheathing panel to the rafters using nails or screws, driving them through the sheathing and into the rafters. Space the fasteners evenly along the edges of the panels, following the manufacturer’s recommendations or local building codes.
Continue this process for the remaining sheathing panels, overlapping the edges to create a solid and continuous surface. Stagger the seams between the panels to enhance the structural integrity of the sheathing.
For added strength and stability, consider using construction adhesive between the sheathing panels and the rafters. Apply a generous bead of adhesive along the edges of the panels before securing them in place.
Once all the sheathing panels are installed, check for any loose or raised areas. Use additional fasteners or adhesive as necessary to ensure a flat and smooth surface.
Inspect the porch roof sheathing for any signs of damage or weakness. Repair or replace any damaged panels before proceeding to the next step.
With the porch roof sheathing installed, you have created a sturdy and reliable base for the roofing materials. The sheathing provides a secure surface for the final step of installing the porch roof covering.
Next, we’ll move on to step 10, which involves installing the porch roof covering.
Step 10: Install the porch roof covering
The porch roof covering is the final layer that not only protects your porch from weather elements but also adds aesthetic appeal to your outdoor space. There are various options available for porch roof coverings, such as shingles, metal sheets, or even a roofing membrane. Choose the option that best suits your design preferences and the climate in your area.
Before you begin installing the porch roof covering, ensure that the sheathing is in good condition and properly secured to the rafters. Repair any damaged or loose areas and address any potential issues that may affect the installation of the roof covering.
Start by laying out a layer of roofing underlayment or tar paper over the porch roof sheathing. This provides an additional layer of protection against water penetration. Fasten the underlayment using roofing nails or staples, making sure to overlap the edges by a few inches to ensure proper water drainage.
If you are using shingles as your porch roof covering, begin by installing a starter strip along the edges of the porch roof. This helps ensure a straight and neat appearance as you work your way up the roof.
Place the first row of shingles along the bottom edge of the roof, aligning them with the starter strip. Fasten them using roofing nails, following the manufacturer’s recommendations for the correct placement and number of nails per shingle.
Continue installing the remaining shingles, overlapping them according to the manufacturer’s instructions to ensure proper water shedding. Trim any shingles as needed to fit the edges and corners of the porch roof.
If you are using metal sheets as your porch roof covering, follow the manufacturer’s instructions for the correct installation process. Metal sheets typically require pre-drilling holes, followed by attaching them to the sheathing using screws or nails.
Once the porch roof covering is installed, inspect the roof for any exposed nails or loose edges. Seal any gaps or exposed areas using appropriate roof sealant or flashing materials to ensure a watertight finish.
Completing the installation of the porch roof covering not only provides protection against the elements but also adds beauty and style to your porch. Take time to ensure proper installation for a durable and appealing finish.
With the porch roof covering installed, you have reached a significant milestone in framing your porch roof. You’re almost done!
Next, we’ll move on to step 11, which involves adding finishing touches to your porch roof.
Step 11: Add finishing touches
As you near the completion of framing your porch roof, it’s time to add those final touches that will enhance the overall appearance and functionality of your outdoor space. These finishing touches will give your porch roof a polished and well-designed look.
Here are a few ideas for adding those final details:
- Fascia and Soffit: Install fascia boards along the edges of your porch roof to give it a clean and finished appearance. Soffit panels can be added to the underside of the roof overhangs for a seamless and attractive look.
- Gutters and Downspouts: Consider installing gutters and downspouts to efficiently channel water away from your porch and foundation. This will help protect your structure from water damage and erosion.
- Paint or Stain: Apply a coat of paint or stain to the porch roof framing and any exposed wood surfaces. This will not only provide protection against the elements but also enhance the visual appeal of your porch roof.
- Lighting: Install outdoor lighting fixtures around the porch roof area to create a warm and inviting ambiance. Consider options such as recessed lighting, pendant lights, or string lights to add both functionality and style to your porch roof.
- Ceiling Treatment: Consider adding a ceiling treatment beneath your porch roof, such as beadboard or tongue-and-groove paneling. This can provide an elegant and finished look to your outdoor space.
- Decorative Elements: Enhance the aesthetic appeal of your porch roof by adding decorative elements such as corbels, trim, or architectural accents. These small details can make a big impact in elevating the overall style of your porch roof.
Take the time to carefully plan and execute these finishing touches to ensure they complement the style and design of your porch roof. Pay attention to details and make adjustments as needed to achieve the desired outcome.
Once you have added these finishing touches, step back and admire your framed porch roof. You have successfully completed the construction process and transformed your outdoor space into a functional and beautiful area.
Remember to maintain and inspect your porch roof regularly to ensure its longevity and safety. Keep an eye out for any signs of damage or wear and address them promptly to avoid more extensive repairs in the future.
Congratulations on successfully framing your porch roof and adding those final touches. Enjoy your new and improved outdoor space!
This concludes our step-by-step guide to framing a porch roof. We hope this article has been informative and helpful in your porch roof construction project.
Thank you for reading!
Conclusion
Framing a porch roof is a rewarding project that can greatly enhance the functionality and visual appeal of your outdoor space. By following the step-by-step guide outlined in this article, you have learned how to successfully frame a porch roof, from gathering the necessary tools and materials to adding the finishing touches.
Throughout the process, it is essential to prioritize safety and accuracy. Always wear appropriate protective gear, such as safety glasses and gloves, and double-check your measurements and alignments to ensure a sound and stable porch roof.
By properly measuring, cutting, and securing the rafters, beams, and sheathing, you have created a solid framework for your porch roof. The installation of the porch roof covering adds the final layer of protection against the elements and enhances the overall aesthetics of your outdoor space.
Remember to consult local building codes and regulations in your area to ensure compliance with any specific requirements or permits needed for your porch roof construction. If you have any doubts or concerns about your abilities, consider seeking professional guidance or assistance to ensure the successful completion of your project.
Adding the finishing touches, such as fascia boards, lighting, and decorative elements, allows you to personalize your porch roof and create a welcoming and enjoyable outdoor area for yourself, family, and friends to gather and relax.
Regular maintenance and periodic inspections of your porch roof are essential to identify and address any issues promptly. Taking care of your porch roof will help prolong its lifespan and maintain its structural integrity for years to come.
We hope this article has provided you with comprehensive guidance, valuable insights, and practical tips to confidently frame your porch roof. Enjoy the process of creating your outdoor oasis, and may your porch roof bring you many years of comfort and enjoyment.
Thank you for reading, and best of luck with your porch roof framing project!
Now that you've got the hang of framing your porch roof, why stop there? Dive into enhancing your deck with vibrant decor and simple additions perfect for outdoor living. You'll find fresh ideas to transform your space into a cozy haven for relaxation and entertainment. For those who love getting hands-on, our guide on the perks of DIY projects will inspire you with practical, fun, and cost-effective ways to personalize your home. Ready to roll up your sleeves and create something uniquely yours?
Frequently Asked Questions about How To Frame Porch Roof
Was this page helpful?
At Storables.com, we guarantee accurate and reliable information. Our content, validated by Expert Board Contributors, is crafted following stringent Editorial Policies. We're committed to providing you with well-researched, expert-backed insights for all your informational needs.


0 thoughts on “How To Frame Porch Roof”