Home>diy>Architecture & Design>How To Design A Lean-To Roof To A House
Architecture & Design
How To Design A Lean-To Roof To A House
Modified: October 18, 2024
Learn how to design a functional and stylish lean-to roof for your house with expert tips from our architecture design guide. Enhance your home's aesthetic appeal and functionality with a well-designed lean-to roof.
(Many of the links in this article redirect to a specific reviewed product. Your purchase of these products through affiliate links helps to generate commission for Storables.com, at no extra cost. Learn more)
Introduction
Welcome to the world of architecture and design, where every element has its own story to tell. One such element is the lean-to roof, a beautiful and practical addition to any house. In this article, we will explore the ins and outs of designing a lean-to roof and how it can enhance the aesthetics and functionality of your home.
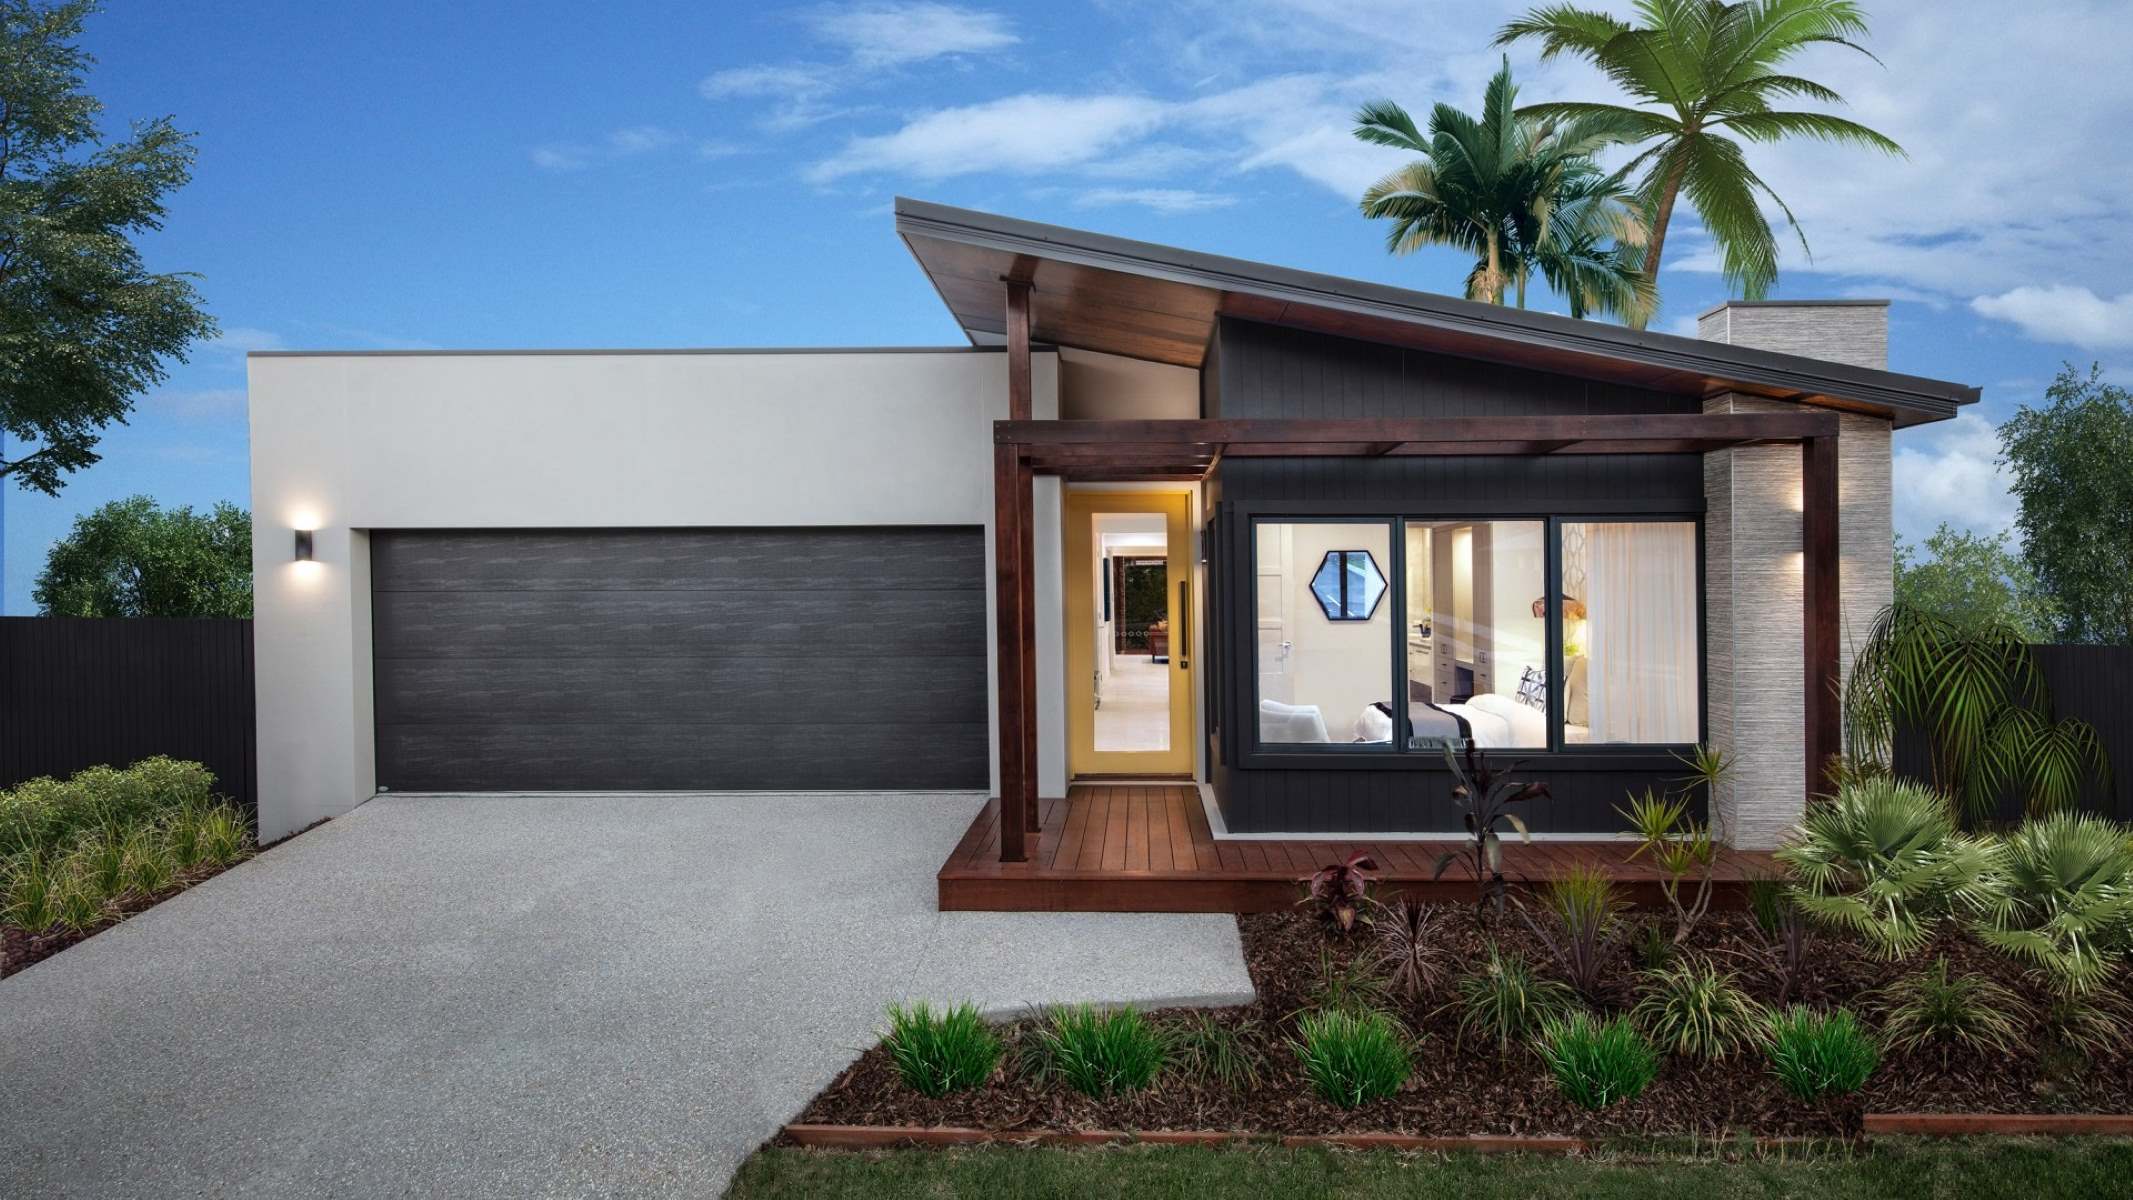
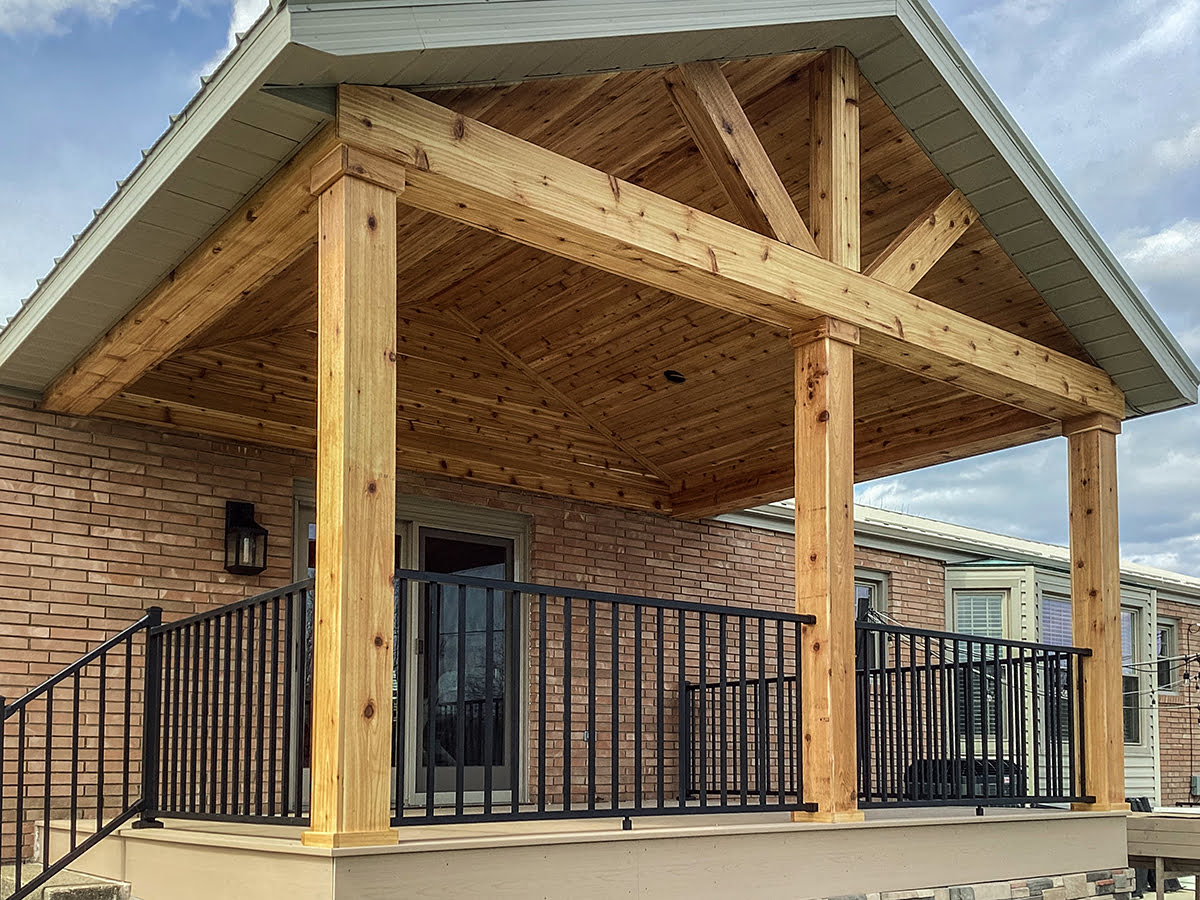
But first, let’s understand what exactly a lean-to roof is. A lean-to roof, also known as a shed roof or a mono-pitched roof, is a single-sloping roof attached to the main structure of a house. It is named “lean-to” because it essentially leans against and extends from an existing wall or structure.
So, why would you consider adding a lean-to roof to your house? Well, there are several benefits to this innovative design. First and foremost, a lean-to roof provides additional space, which can be utilized in various ways. Whether you want to create a cozy outdoor sitting area, construct a carport or garage extension, or simply have a sheltered space for storage, a lean-to roof offers endless possibilities.
Another advantage of a lean-to roof is its cost-effectiveness. Compared to complex and expensive roof designs, a lean-to roof is relatively simple and straightforward to build. It requires fewer materials and less labor, making it a cost-efficient option for homeowners.
Additionally, a lean-to roof seamlessly blends with the existing architecture of a house. Its minimalist and sleek design complements both modern and traditional styles, adding a touch of elegance to your home’s exterior.
However, before diving into the world of lean-to roof design, there are a few considerations to keep in mind. Firstly, it is crucial to assess the structural feasibility. You need to examine the existing house structure to ensure it can bear the additional weight of a lean-to roof. Consulting with a structural engineer is highly recommended to obtain expert advice and guidance for this process. It’s also essential to obtain the necessary permits and approvals from local building authorities to ensure compliance with regulations.
Now that we have a basic understanding of lean-to roofs and their benefits, let’s move on to the exciting part: designing the perfect lean-to roof for your house.
Key Takeaways:
- Designing a lean-to roof offers additional space, cost-effectiveness, and seamless integration with your home’s architecture. Careful consideration of size, placement, roofing materials, and structural feasibility is crucial for a successful project.
- Constructing and maintaining a lean-to roof involves meticulous preparation, installation, and ongoing care. Attention to detail in the construction phase, including insulation, ventilation, and finishing touches, ensures a durable and visually appealing addition to your home.
Read more: How To Build A Lean To Roof On A Shed
Understanding Lean-To Roofs
Before we dive into the design process, it’s important to have a clear understanding of what a lean-to roof is and the benefits it offers. Let’s start with the definition.
A lean-to roof, also known as a shed roof or a mono-pitched roof, is a single-sloping roof that is attached to an existing wall or structure of a house. The roof slopes in one direction, allowing rainwater to run off easily. This simplistic design not only provides a sleek and modern aesthetic but also offers a range of benefits for homeowners.
Benefits of a Lean-To Roof
There are several advantages to adding a lean-to roof to your house:
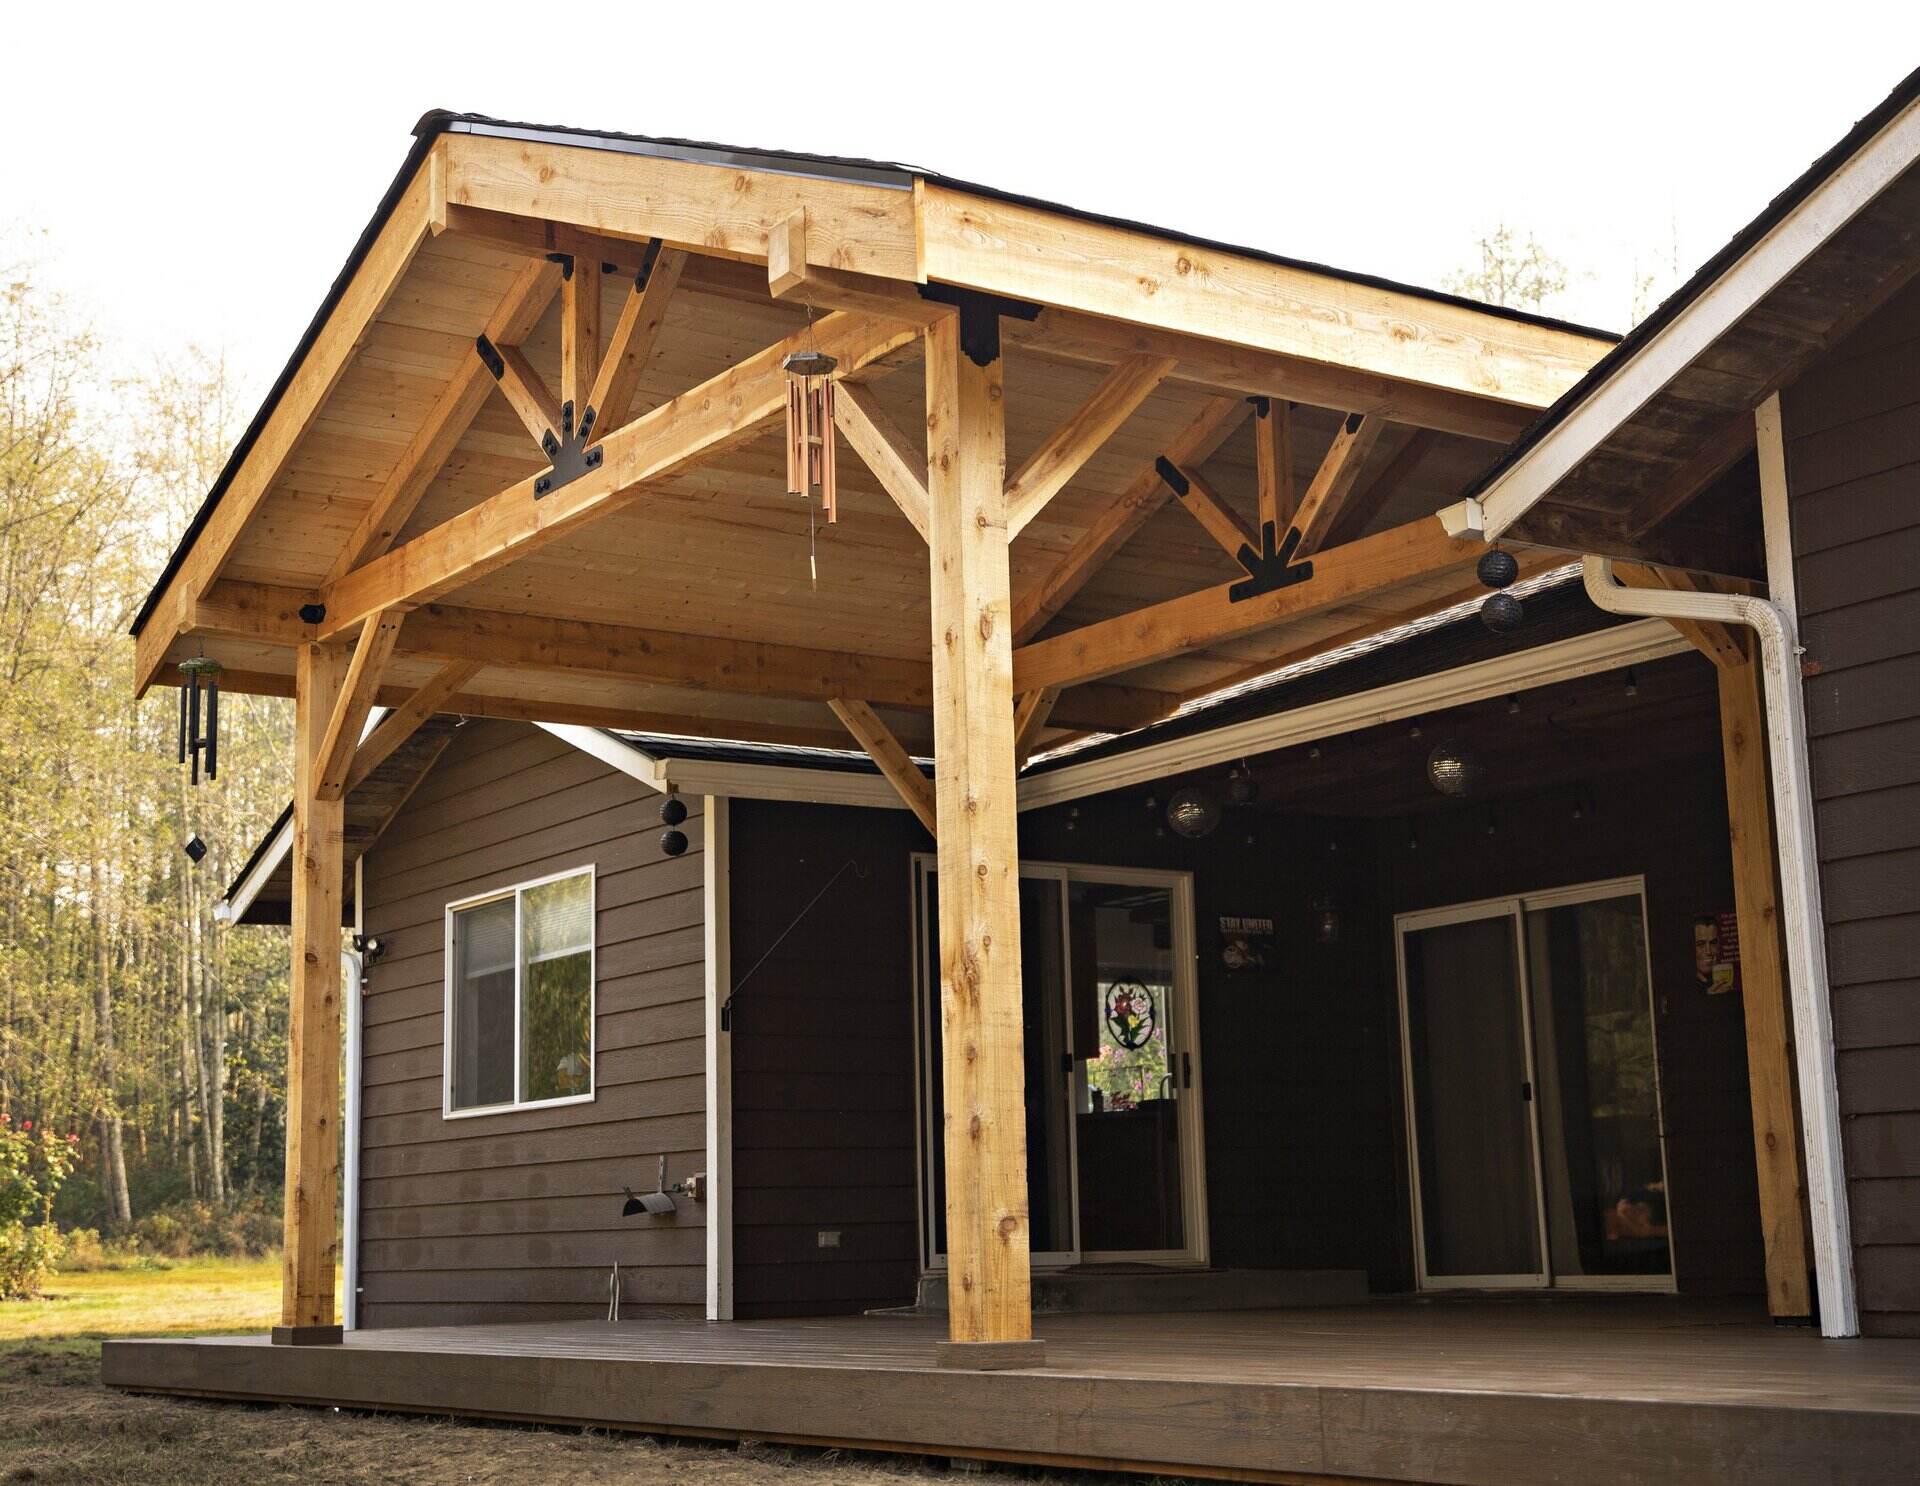
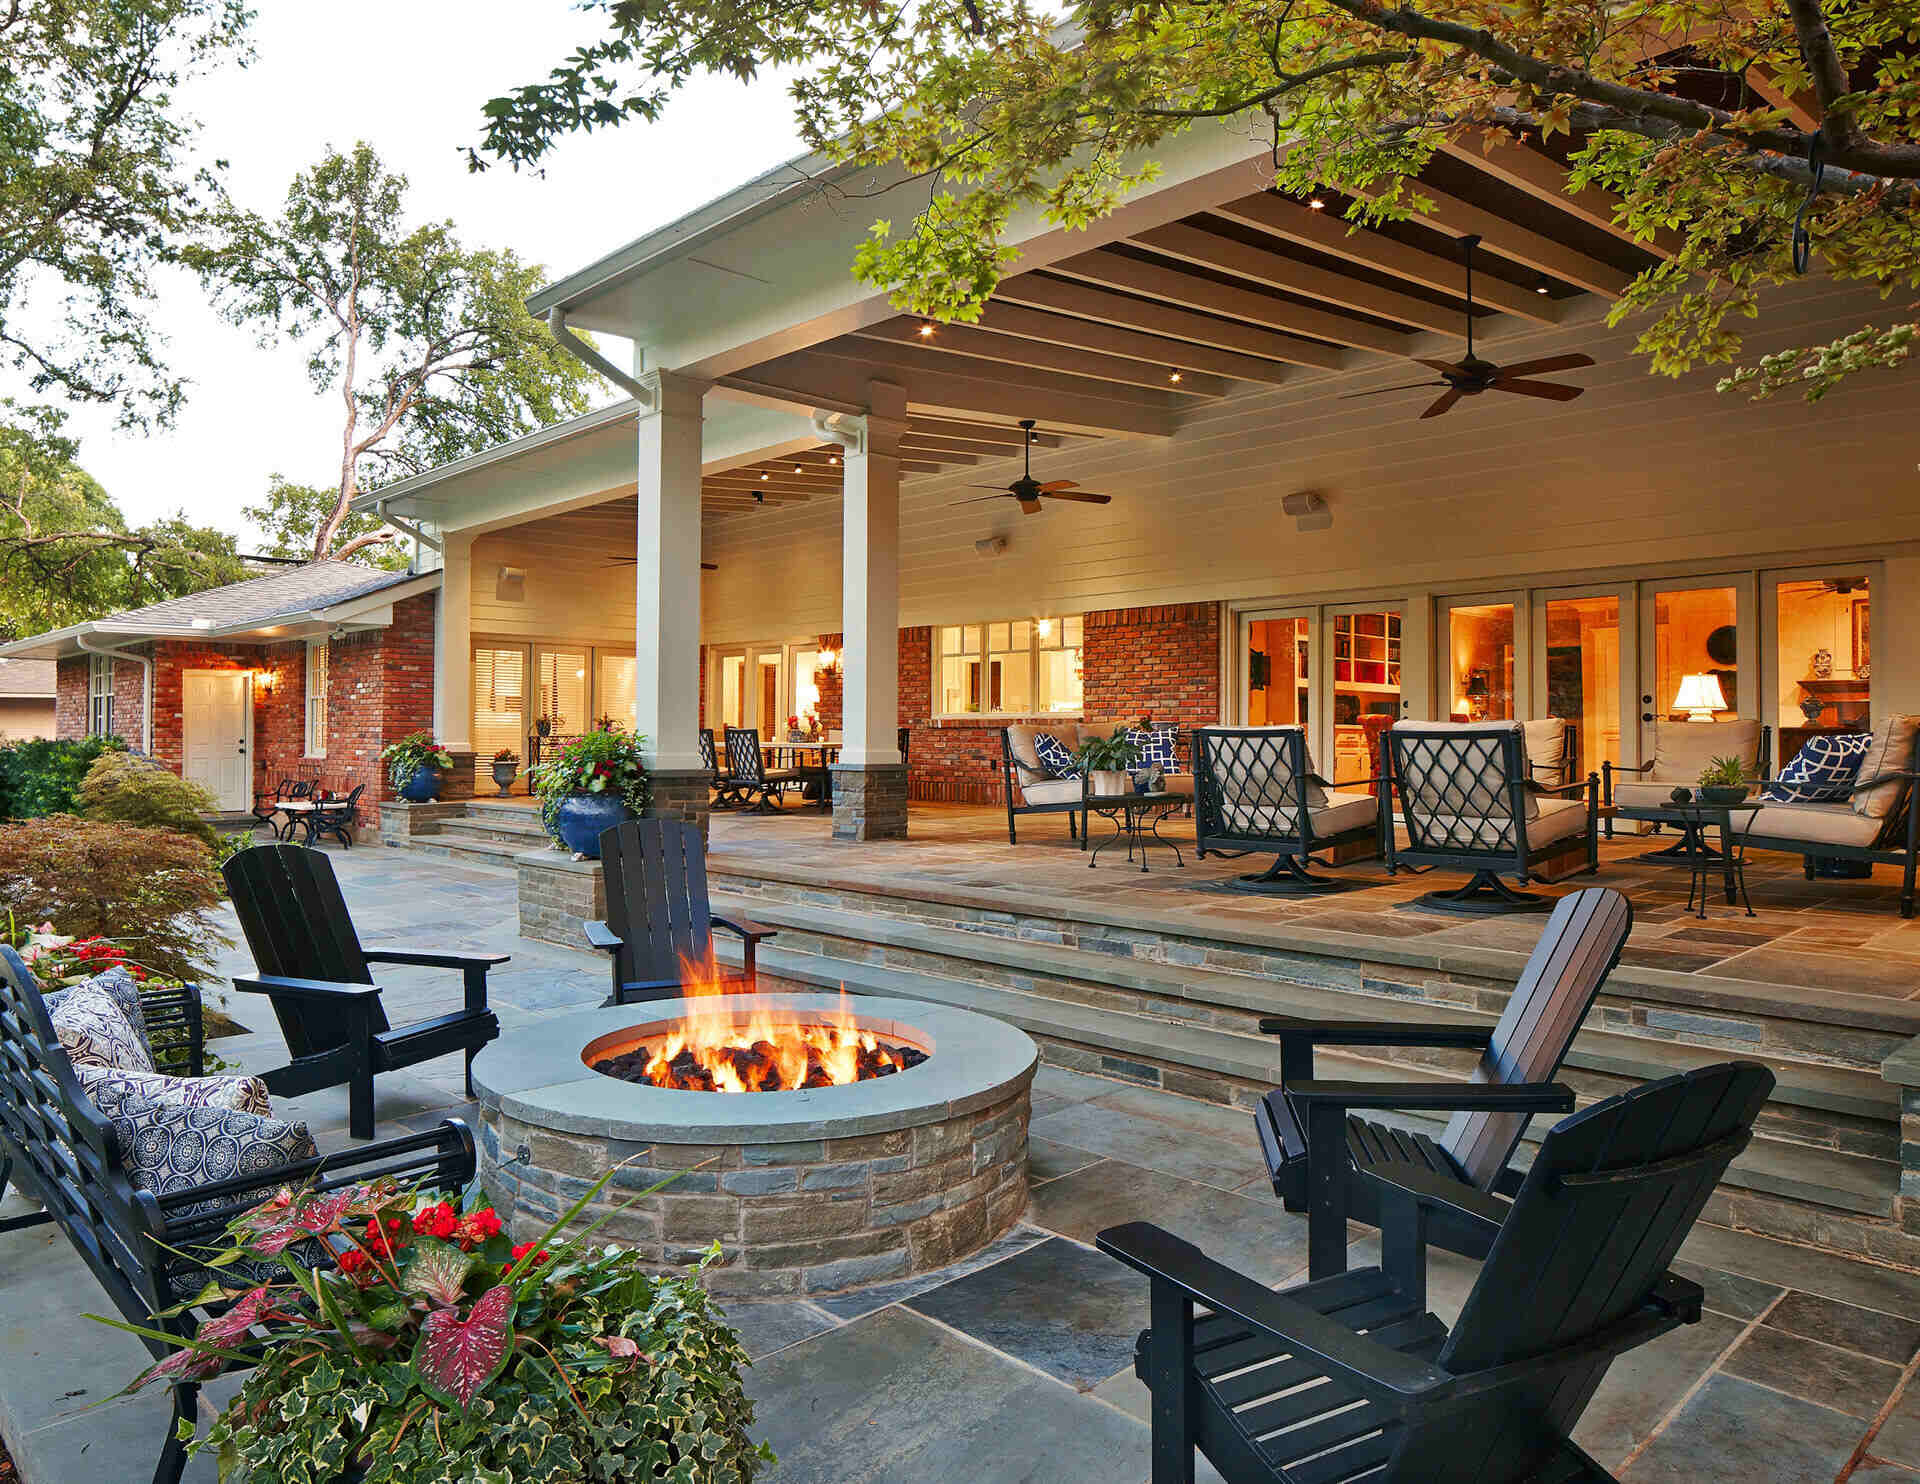
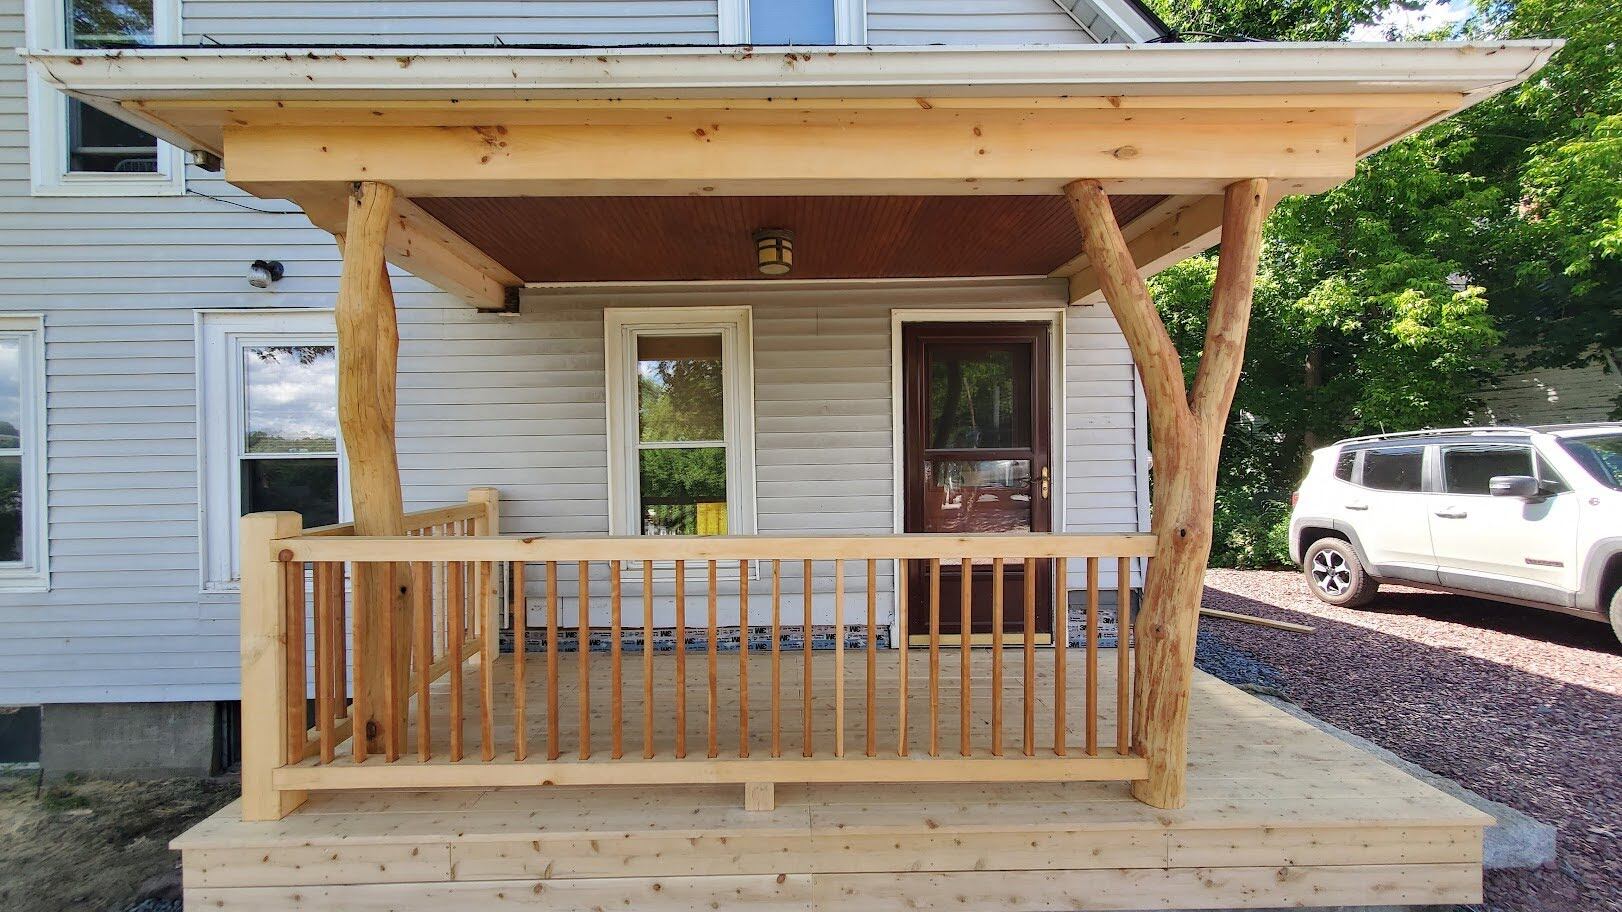
- Extra Space: One of the main benefits of a lean-to roof is the additional space it provides. You can create a covered outdoor area for relaxation and entertainment, such as a cozy patio or a spacious deck. It can also serve as a carport or garage extension, offering protection for your vehicles.
- Cost-Effective: Compared to more complex roof designs, a lean-to roof is cost-effective to build. It requires fewer materials and less labor, making it a budget-friendly option for homeowners.
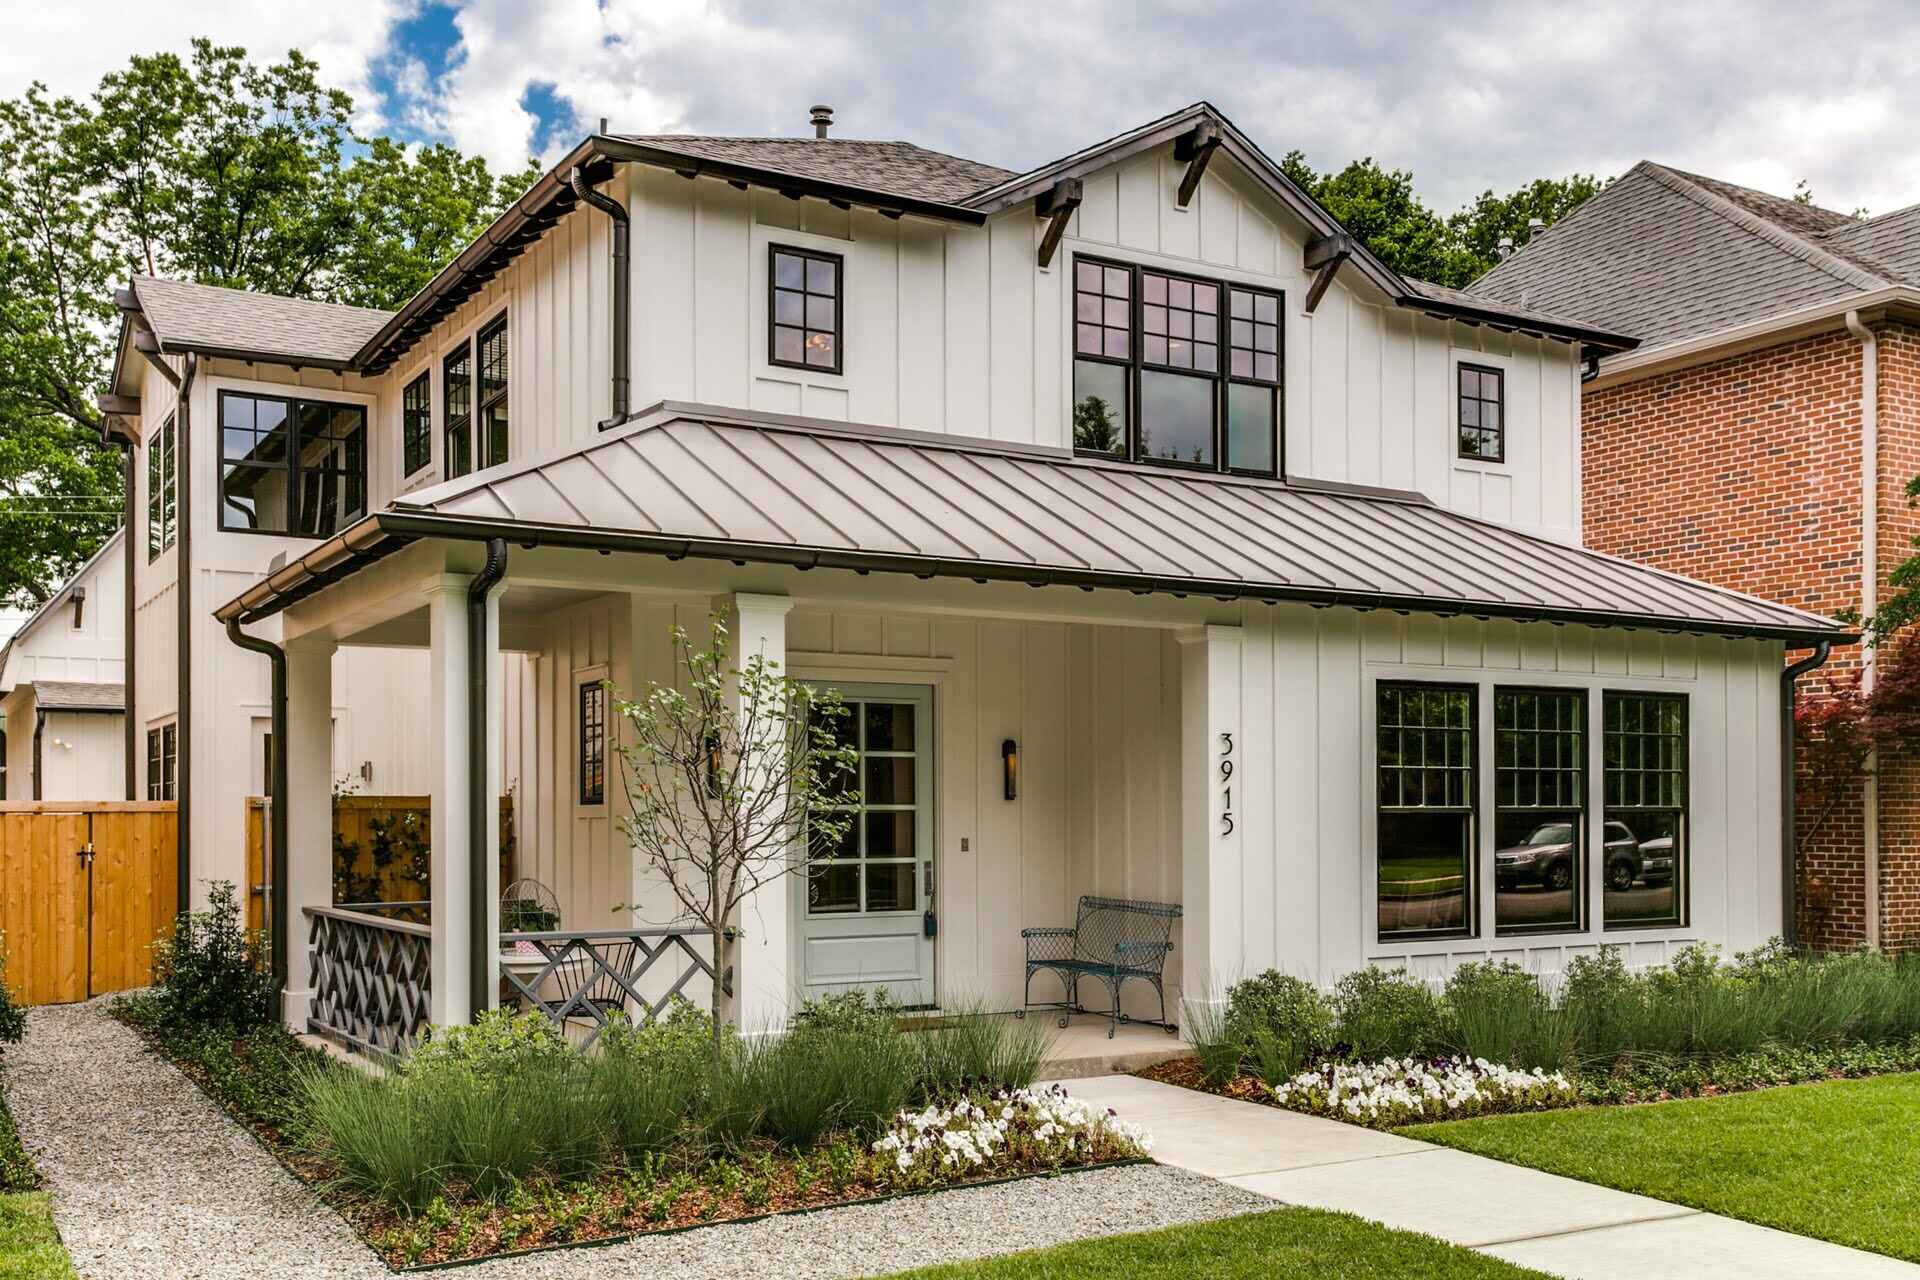
- Seamless Integration: A lean-to roof seamlessly blends with the existing architecture of your house, regardless of its style. Whether your home is modern, contemporary, or traditional, a lean-to roof can be designed to complement its aesthetics.
Considerations for Adding a Lean-To Roof to a House
While a lean-to roof offers numerous benefits, there are a few considerations you need to keep in mind before adding it to your house:
- Structural Feasibility: Before proceeding with the design and construction of a lean-to roof, it’s important to assess the structural feasibility. The existing house structure must be capable of supporting the additional weight of the roof. Consulting with a structural engineer is highly recommended to ensure the safety and stability of the structure.
- Permits and Approvals: Adding a lean-to roof to your house may require permits and approvals from local building authorities. It’s crucial to check the specific regulations and obtain the necessary permissions before starting the construction process. This ensures compliance with local building codes and regulations.
- Integration with Design: When designing a lean-to roof, it’s important to consider how it will integrate with the overall design of your house. You want the roof to enhance the aesthetics of your home and not appear as an afterthought. Incorporating materials, colors, and finishes that complement the existing architecture will result in a harmonious and visually appealing design.
Now that we have explored the definition of a lean-to roof, its benefits, and the considerations involved, we can move on to the next step: assessing the structural feasibility of adding a lean-to roof to your house.
Assessing the Structural Feasibility
Before embarking on the design and construction of a lean-to roof, it’s crucial to assess the structural feasibility. This step ensures the safety, stability, and longevity of the roof and the existing house structure. Let’s explore the key components of this process.
Read more: How To Attach Gable Porch Roof To House
Checking the Existing House Structure
The first step in assessing the structural feasibility is to thoroughly examine the existing house structure. This involves inspecting the foundation, walls, and roof to ensure they are in good condition and capable of supporting the additional weight of a lean-to roof.
Take note of any signs of structural damage or weaknesses, such as cracks, sagging, or rotting. It’s important to address these issues before proceeding further. Engage the services of a professional contractor or structural engineer to conduct a thorough assessment, as they have the expertise to identify potential problems and provide appropriate solutions.
Consulting with a Structural Engineer
Consulting with a structural engineer is highly recommended when considering the addition of a lean-to roof to your house. Their knowledge and expertise will help ensure that the roof design is structurally sound and complies with all safety regulations.
The structural engineer will evaluate the existing house structure and determine its load-bearing capacity. They will perform calculations to determine the size, shape, and materials that can be used for the lean-to roof. They will also assess the impact of the additional load on the existing foundation, walls, and roof, providing solutions to strengthen these elements if necessary.
By consulting with a structural engineer, you can have peace of mind knowing that the lean-to roof will be safely integrated into your house’s structure, minimizing the risk of any structural issues in the future.
Obtaining Required Permits and Approvals
Adding a lean-to roof to your house often requires obtaining permits and approvals from the local building authorities. These requirements may vary depending on your location and the specific regulations in place.
Before starting the construction process, it’s essential to contact your local building department and inquire about the necessary permits and approvals. Provide them with detailed plans of the proposed lean-to roof design, along with any other required documentation.
Obtaining the required permits and approvals ensures that your lean-to roof project complies with local building codes, safety standards, and zoning regulations. It also helps prevent any legal issues or complications that may arise during or after the construction process.
By checking the existing house structure, consulting with a structural engineer, and obtaining the required permits and approvals, you can proceed with confidence to the next exciting phase: designing the lean-to roof that perfectly complements your house.
Designing the Lean-To Roof
Once the structural feasibility has been assessed and the necessary permits and approvals obtained, it’s time to dive into the design phase of the lean-to roof. This is where you get to unleash your creativity and make decisions that will shape the final outcome. Let’s explore the important aspects of designing a lean-to roof.
Read more: How To Lean Ladder Against House
Determining the Size and Placement of the Lean-To Roof
The first step in designing a lean-to roof is to determine the size and placement. Consider how you plan to use the additional space created by the lean-to roof. Do you want it to serve as a patio, a carport, or for some other purpose? Based on your intended use, determine the desired dimensions for the roof.
Next, consider the placement of the lean-to roof. Ideally, it should be attached to an existing wall or structure of your house, allowing for easy access and a seamless integration with the rest of the property. Take into account factors such as sun exposure, privacy, and views when deciding on the placement.
Selecting the Roofing Materials
One of the key design decisions for a lean-to roof is choosing the right roofing materials. The materials should not only be aesthetically pleasing but also durable and weather-resistant to ensure the longevity of the roof.
Consider options such as asphalt shingles, metal roofing, or even natural materials like wood or slate, depending on the overall style of your house and your personal preferences. Take into account factors such as climate, maintenance requirements, and the architectural compatibility of the roofing materials with your existing house.
Choosing the Roof Pitch and Overhang
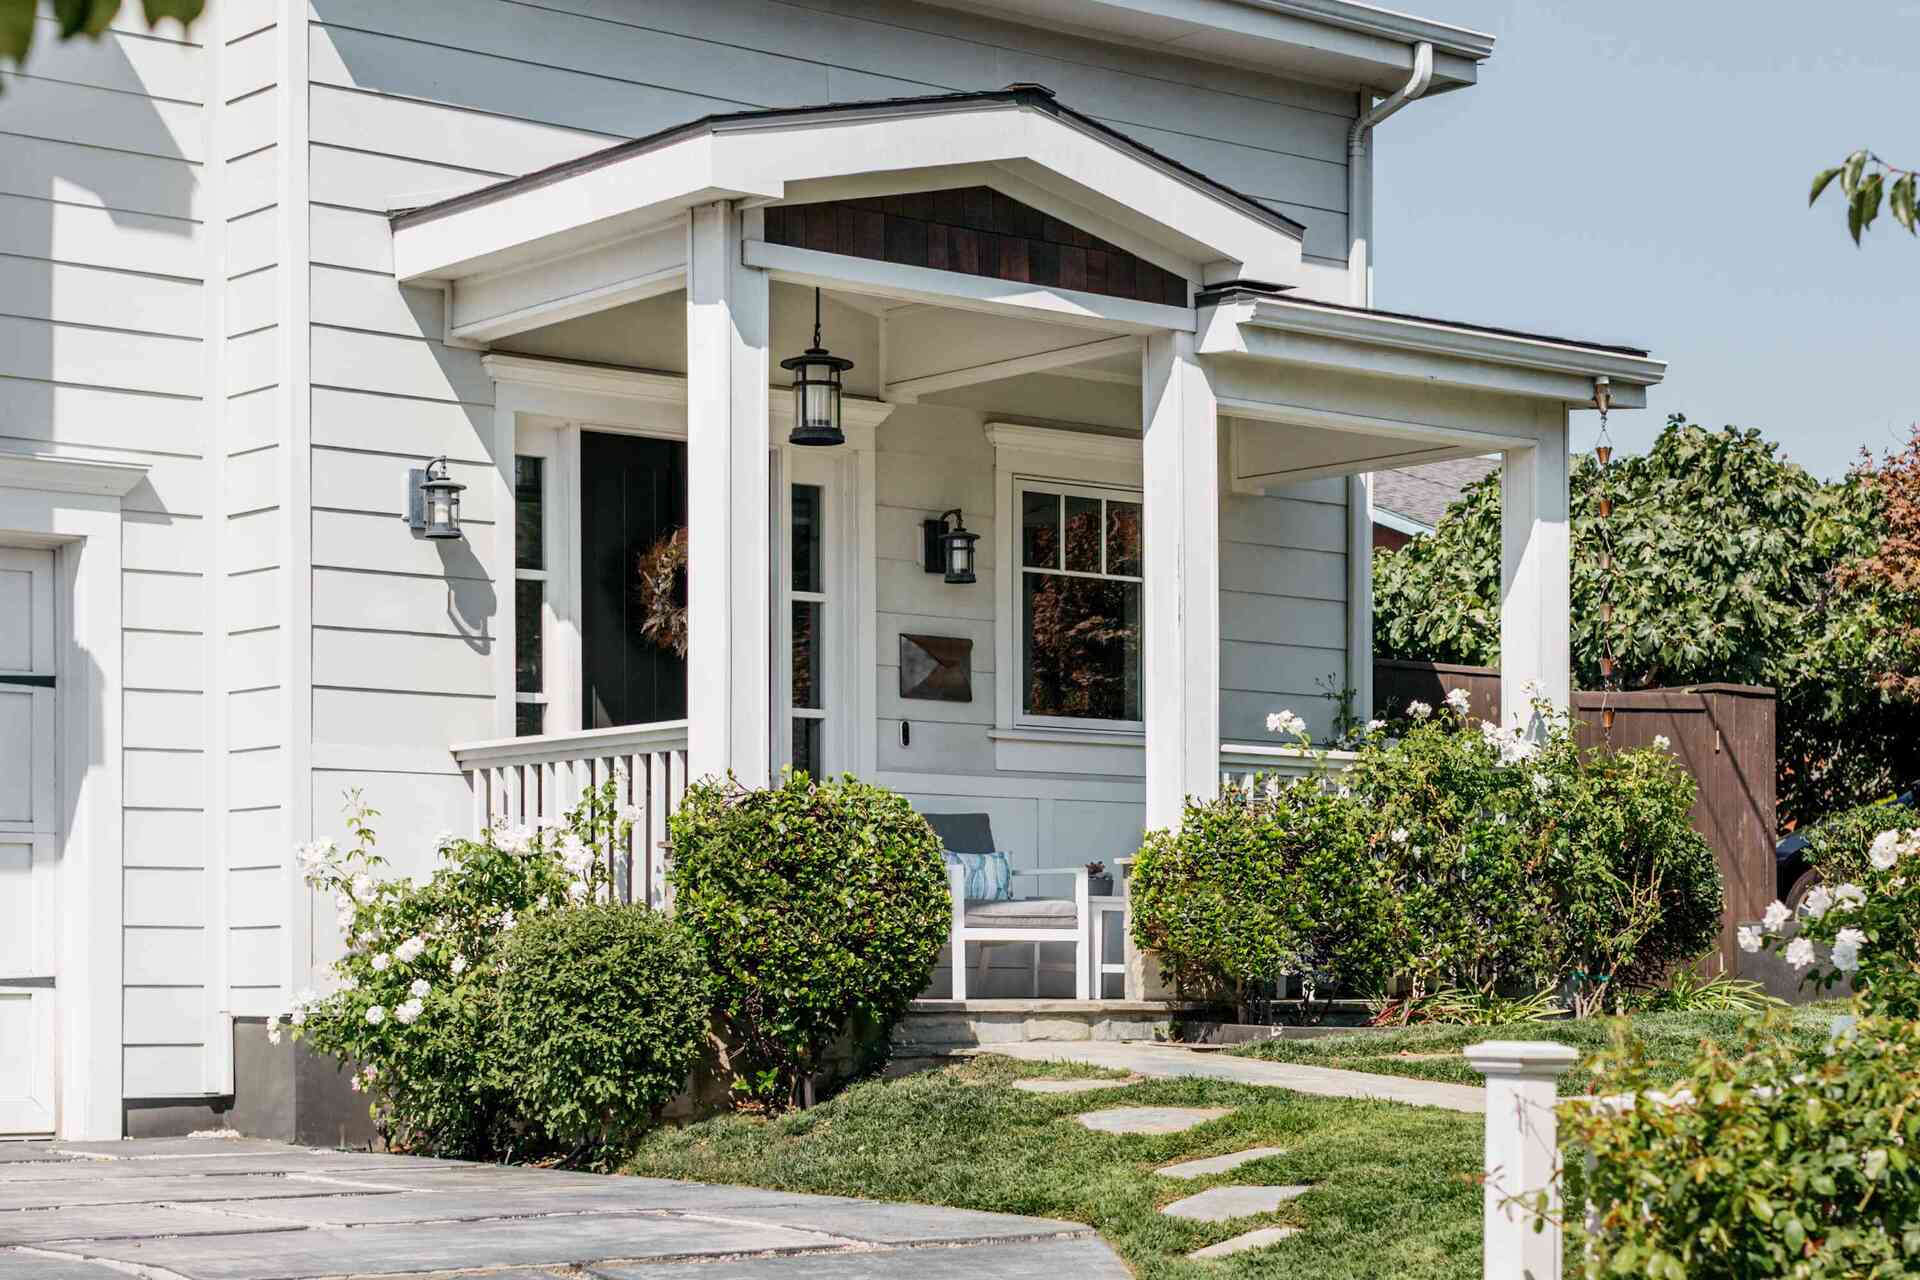
The roof pitch refers to the angle or slope of the roof. It plays a crucial role in the aesthetics and functionality of the lean-to roof. A lower pitch, such as 1:12, gives a more modern and minimalistic look, while a steeper pitch, like 4:12, adds a traditional and classic touch.
Consider the local weather conditions and the desired look when selecting the roof pitch. Ensure that the pitch allows for proper drainage to prevent water pooling and potential damage to the roof.
In addition to the pitch, you’ll also need to determine the overhang of the roof. The overhang provides protection from the elements and adds visual interest to the design. Consider how much overhang you want and how it will affect the overall appearance of the lean-to roof.
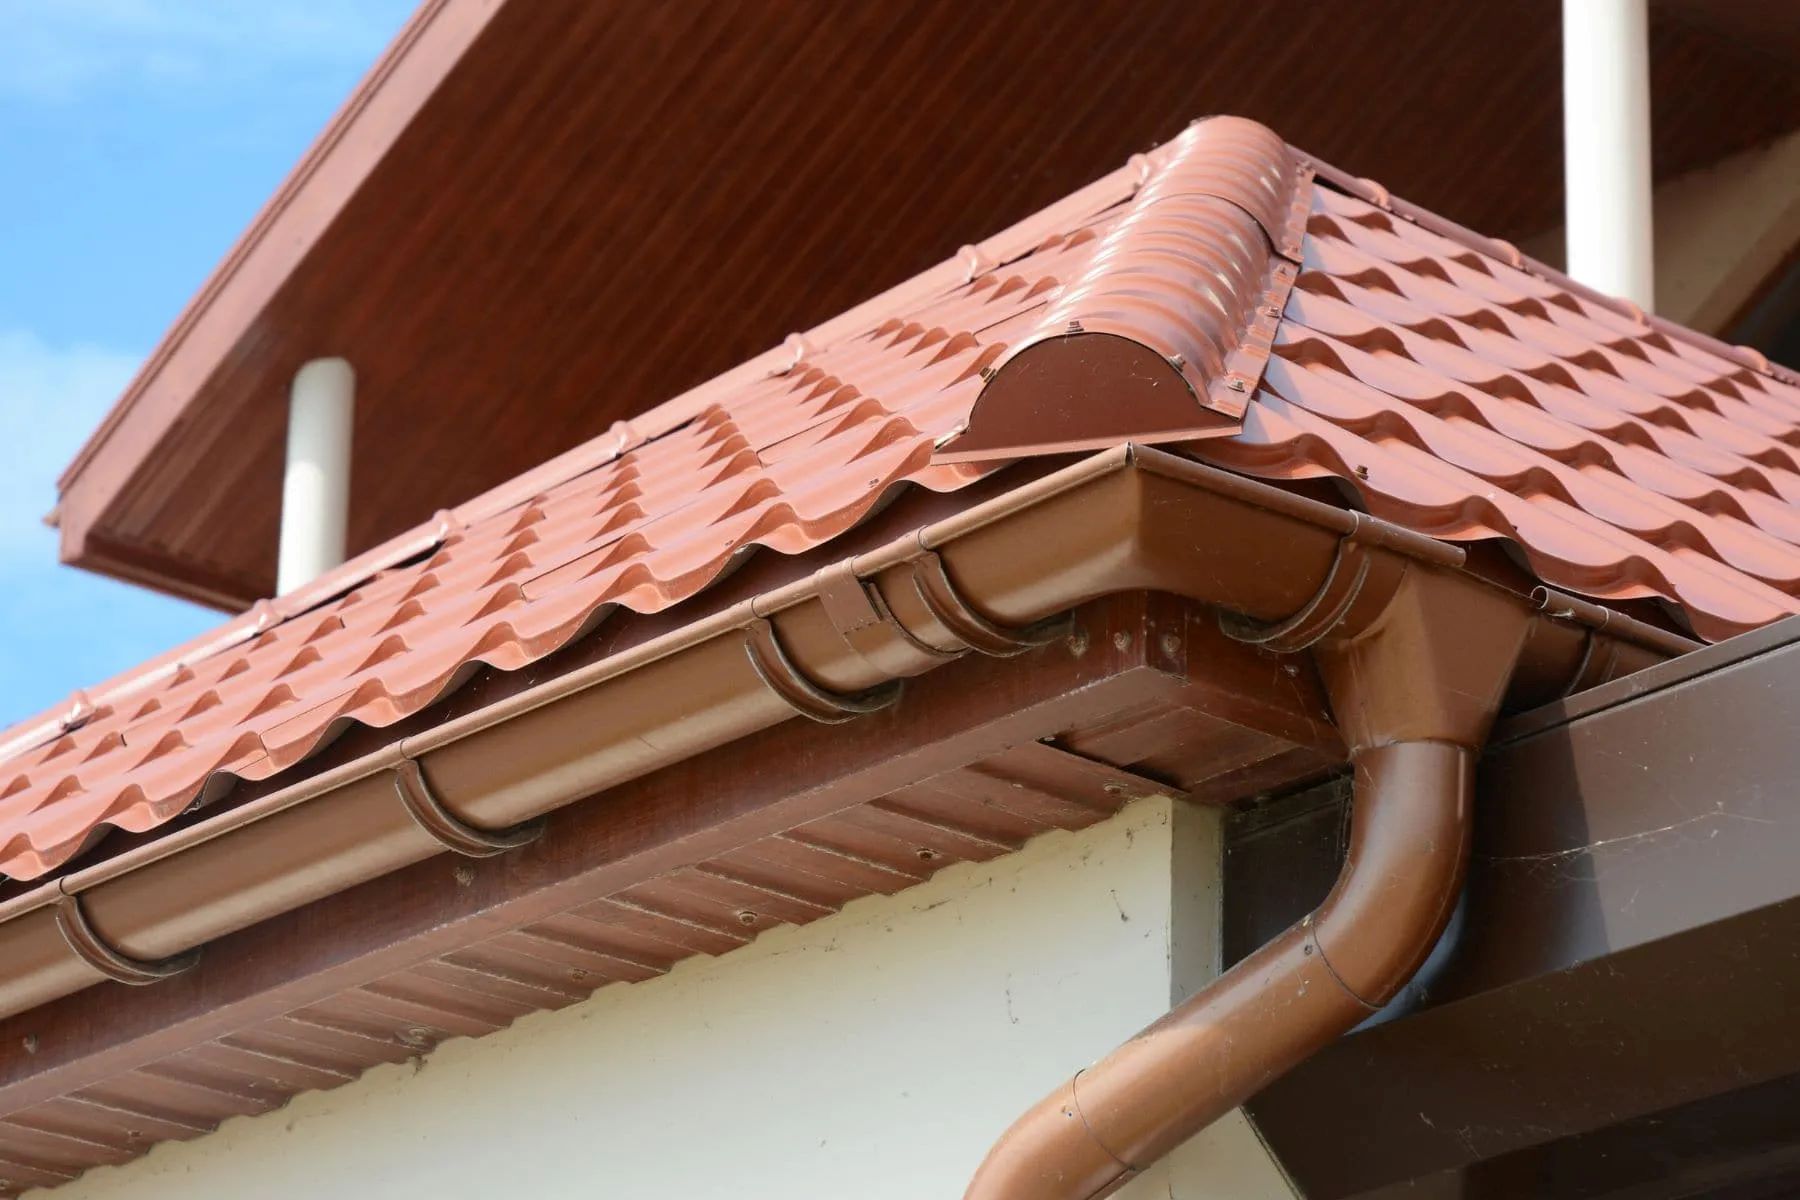
Incorporating Drainage and Gutters
Effective drainage is essential to prevent water from pooling on the roof and causing damage. Consider incorporating a slope in the design that allows rainwater to flow easily towards a designated drainage area.
A proper gutter system is also crucial to collect and divert water away from the foundation of the house. Choose gutters that complement the design and aesthetics of the lean-to roof while effectively channeling the water away.
Read more: How To Build A Lean To Carport
Adding Windows and Skylights
If you want to maximize natural light and enhance the ambiance of the lean-to roof, consider adding windows or skylights to the design. These features not only provide abundant natural light but also offer ventilation and a connection to the outdoors.
Windows and skylights should be strategically placed to capture views, provide adequate airflow, and maintain the privacy of the space. Consider the size and style of the windows or skylights to ensure they complement the overall design and aesthetics.
By carefully designing and considering the size, placement, roofing materials, roof pitch, overhang, drainage, and incorporating windows or skylights, you can create a lean-to roof that perfectly suits your needs and complements the architecture of your house.
Constructing the Lean-To Roof
Once the design of your lean-to roof is finalized, it’s time to move on to the construction phase. This is where the vision starts to become a reality. Let’s explore the key steps involved in constructing a lean-to roof.
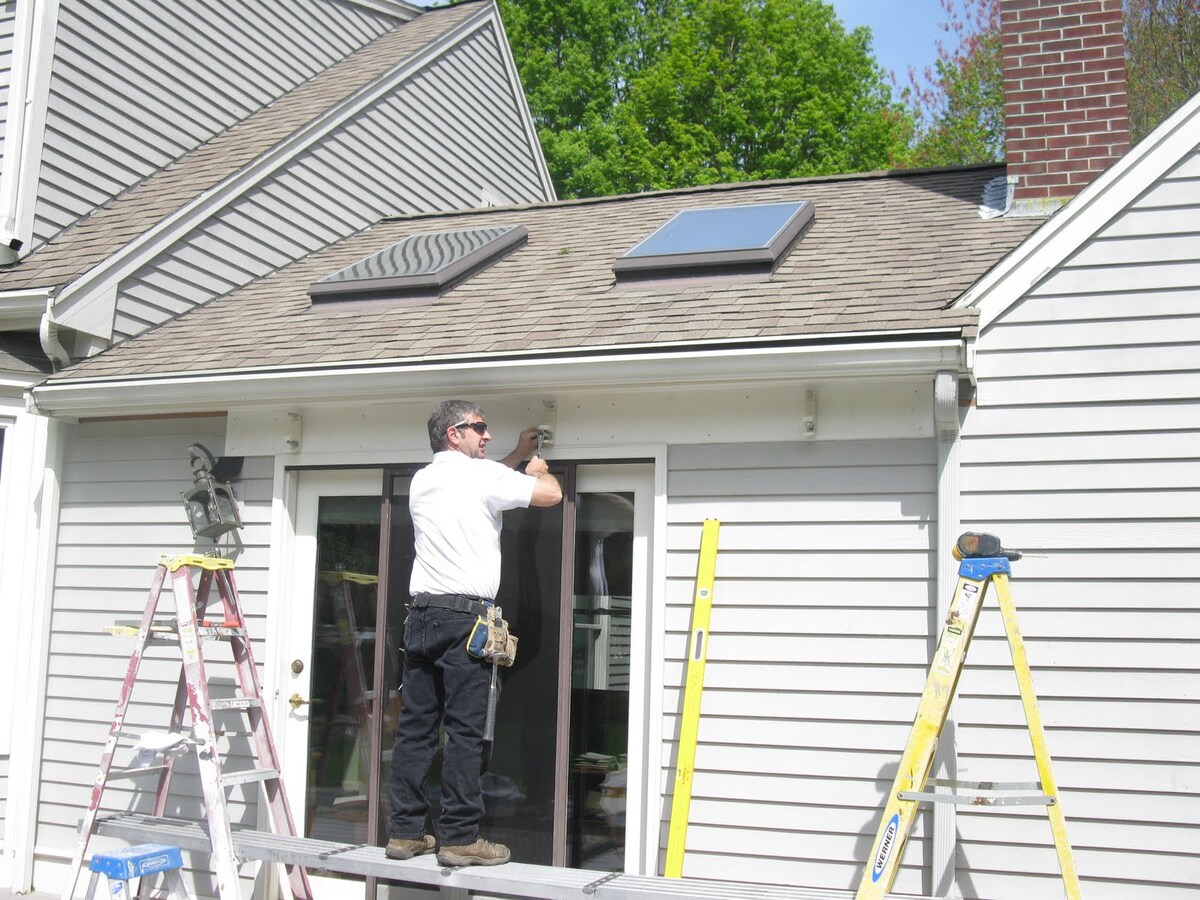
Preparing the Existing House Structure
Before you can begin constructing the lean-to roof, it’s important to prepare the existing house structure. This involves cleaning the area where the roof will be attached, removing any obstacles or debris, and ensuring that the surface is in good condition for the roof installation.
Inspect the existing wall or structure for any signs of damage or weakness. Make any necessary repairs or reinforcements to ensure the stability and integrity of the structure. This step is crucial to ensure that the lean-to roof is securely attached and will provide long-lasting support.
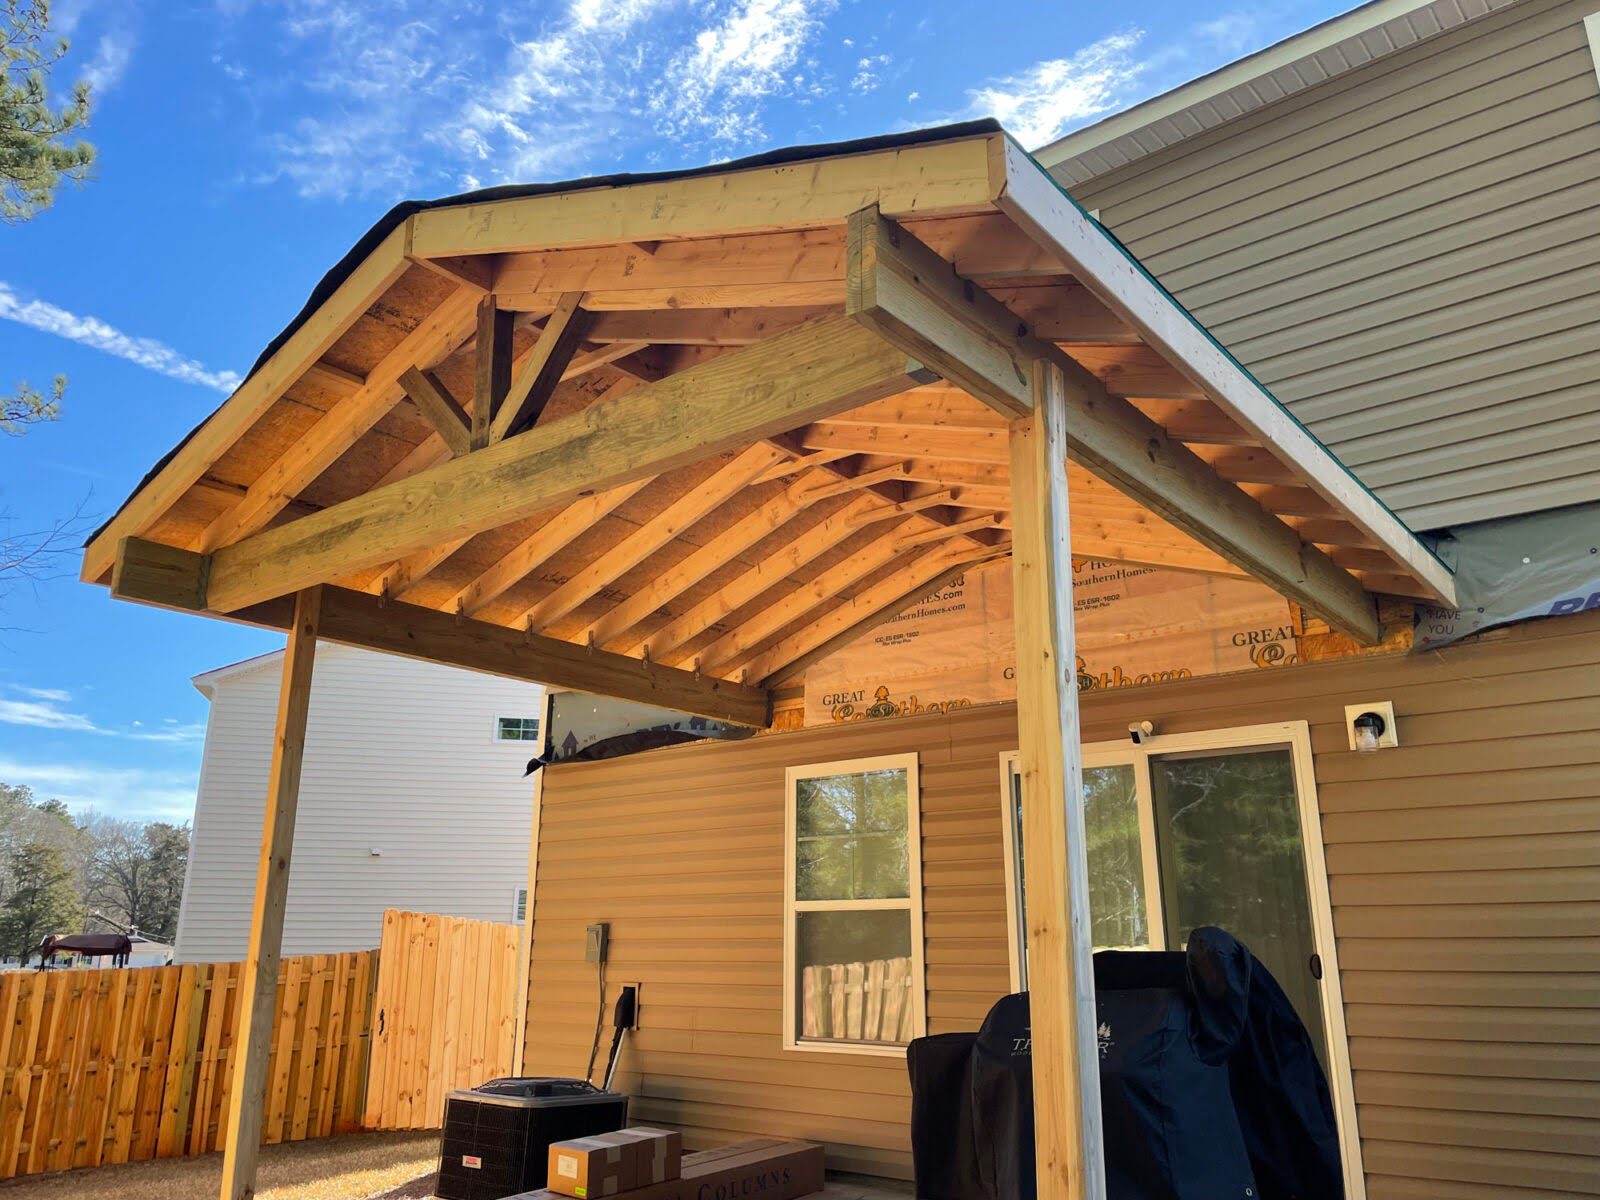
Installing the Roof Frame
The next step is to install the roof frame, which will provide the structure and support for the lean-to roof. The frame can be constructed using wood or metal beams, depending on your preference and the structural requirements determined during the planning phase.
Measure and cut the beams according to the dimensions and specifications of your design. Attach them securely to the existing house structure, ensuring they are properly aligned and level. The frame should be sturdy and capable of bearing the weight of the roofing material and any additional elements, such as windows or skylights.
Read more: How To Attach A Patio Roof To A House
Adding the Roofing Material
Once the roof frame is in place, it’s time to add the roofing material. This could be asphalt shingles, metal panels, or any other selected material that suits your design and preferences.
Follow the manufacturer’s instructions for installation, ensuring that the roofing material is properly aligned, laid, and secured. Pay attention to the details, such as overlapping the shingles or panels to ensure a watertight structure. It’s important to take extra care in areas where the lean-to roof intersects with the existing house structure to ensure a seamless transition.
Insulating and Ventilating the Lean-To Roof
To make your lean-to roof more energy-efficient and comfortable, it’s important to insulate and ventilate it properly. Insulation helps regulate temperature and prevents heat loss or gain, while ventilation allows for airflow and prevents moisture buildup.
Add insulation material to the roof frame, following the recommended insulation values for your region. This will help maintain a comfortable environment under the lean-to roof throughout the year.
Incorporate ventilation techniques such as vents or ridge vents to promote air circulation and prevent condensation. This will help maintain the structural integrity of the roof and prevent issues such as mold or rot.
By following these steps and ensuring proper preparation, installation of the roof frame, adding the roofing material, and insulating and ventilating the lean-to roof, you can create a durable and functional structure that enhances the overall aesthetics and functionality of your house.
Finishing Touches and Maintenance
With the construction of your lean-to roof complete, it’s time to focus on the finishing touches and ongoing maintenance. These final steps will ensure that your lean-to roof not only looks great but also remains in excellent condition for years to come.
Adding Siding and Trim
To enhance the appearance and protection of your lean-to roof, consider adding siding and trim. Siding can be chosen to complement the existing exterior of your house, creating a seamless look. Common siding options include vinyl, wood, or fiber cement. Trim adds a polished and finished touch, providing a clean transition between the lean-to roof and the existing house structure.
Select materials that are durable, weather-resistant, and require minimal maintenance. Proper installation of siding and trim is essential to ensure a watertight and aesthetically pleasing result. If you’re unsure about the installation process, it’s always advisable to consult with a professional to get the best outcome.
Read more: How Much To Replace A Roof On A House
Painting or Staining the Lean-To Roof
If the roofing material you chose for your lean-to roof allows for it, consider painting or staining to add a personal touch and preserve the material. This step also provides an opportunity to coordinate the roof color with the existing house or create a contrasting accent.
Before painting or staining, ensure that the roofing material is clean and free of debris. Follow the manufacturer’s recommendations for suitable paint or stain products and application techniques, ensuring a uniform and long-lasting finish.
Regular maintenance and cleaning of the painted or stained lean-to roof will help prolong its lifespan and maintain its appearance. Regular inspections should also be carried out to identify any signs of wear or damage that may require touch-ups or repairs.
Regular Maintenance and Repairs
Maintaining your lean-to roof is essential to ensure its longevity and functionality. Regular inspections should be conducted to identify and address any issues promptly. Here are a few key maintenance tasks:
- Clean gutters and drains: Regularly remove debris from the gutters and ensure the drains are clear to prevent water buildup and potential damage.
- Trim overhanging trees: If there are any trees near your lean-to roof, ensure that branches are trimmed to prevent them from touching or rubbing against the roof surface.
- Inspect for leaks and damage: Regularly check for signs of leaks or damage, such as cracked or missing shingles, loose fasteners, or water stains on the ceiling. Promptly address any issues to prevent further damage.
- Keep the roof clean: Regularly sweep or wash the lean-to roof to remove debris, leaves, and dirt. This helps prevent buildup and potential damage to the roofing material.
- Address repairs promptly: If any repairs are needed, such as replacing damaged shingles or addressing flashing issues, it’s important to address them promptly to prevent further damage and maintain the structural integrity of the lean-to roof.
By regularly maintaining and addressing any repairs or issues that arise, you can ensure that your lean-to roof remains in good condition and continues to provide the desired functionality for years to come.
Conclusion
Designing and constructing a lean-to roof can be an exciting and rewarding project that adds both beauty and functionality to your home. By understanding the concept of lean-to roofs and their benefits, assessing the structural feasibility, and carefully designing the roof, you can create a space that seamlessly integrates with your existing house and enhances your outdoor living experience.
During the design phase, consider factors such as size, placement, roofing materials, roof pitch, overhang, drainage, and the inclusion of windows or skylights. These choices will determine the overall aesthetics and functionality of the lean-to roof.
Once you have finalized the design, it is crucial to assess the structural feasibility by checking the existing house structure and consulting with a structural engineer. Obtaining the required permits and approvals ensures compliance with local regulations and provides peace of mind throughout the construction process.
As you move into the construction phase, attention to detail is key. Preparing the existing house structure, installing the roof frame, adding the roofing material, and properly insulating and ventilating the lean-to roof are essential steps for a sturdy and long-lasting structure.
After construction, give attention to the finishing touches such as adding siding and trim, and consider painting or staining the lean-to roof to provide both protection and a personalized touch. Regular maintenance, including the cleaning of gutters and drains, addressing repairs promptly, and keeping the roof clean, will help preserve the longevity and appearance of your lean-to roof.
In conclusion, a lean-to roof is a versatile and cost-effective addition to your house. It can create extra usable space, enhance the aesthetic appeal, and blend seamlessly with the existing architecture. By carefully planning, designing, and constructing your lean-to roof, and maintaining it regularly, you can enjoy the benefits of this beautiful and practical addition for years to come.
Frequently Asked Questions about How To Design A Lean-To Roof To A House
Was this page helpful?
At Storables.com, we guarantee accurate and reliable information. Our content, validated by Expert Board Contributors, is crafted following stringent Editorial Policies. We're committed to providing you with well-researched, expert-backed insights for all your informational needs.

0 thoughts on “How To Design A Lean-To Roof To A House”