Articles
How To Fix Floating Floor Gaps
Modified: December 7, 2023
Learn how to fix floating floor gaps with these helpful articles. Fixing your floor has never been easier!
(Many of the links in this article redirect to a specific reviewed product. Your purchase of these products through affiliate links helps to generate commission for Storables.com, at no extra cost. Learn more)
Introduction
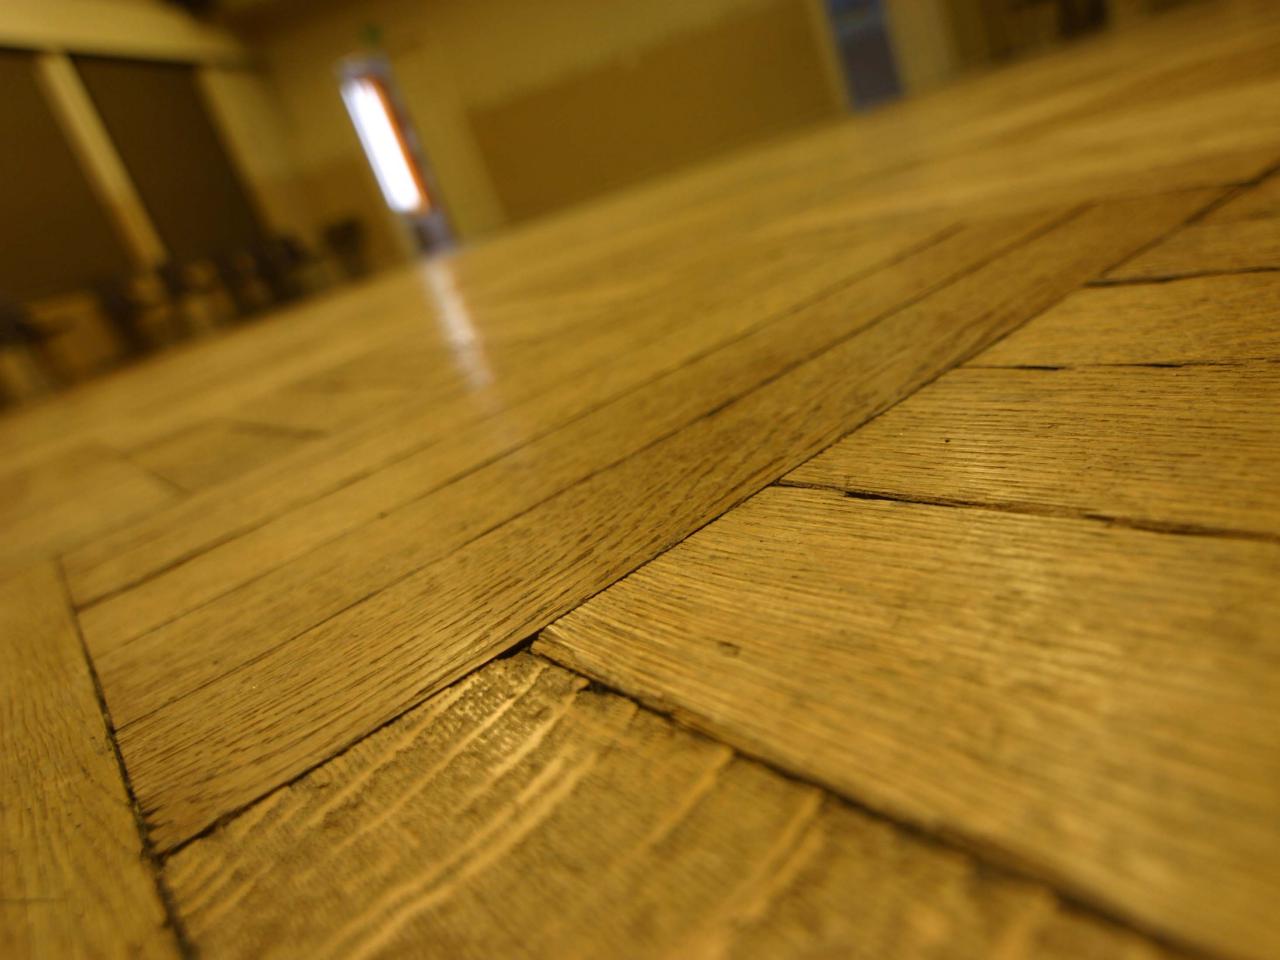
Floating floors are a popular choice for homeowners due to their easy installation and modern look. However, over time, you may notice gaps or spaces between the floorboards. These gaps can be unsightly and can also cause concerns about stability and durability. The good news is that fixing floating floor gaps is an achievable task that can be done without professional help.
In this article, we will provide you with a comprehensive guide on how to fix floating floor gaps. We will cover the tools and materials you’ll need, as well as the steps you should follow to ensure a successful repair. Additionally, we will discuss preventive measures to avoid future gaps and maintain the integrity of your floating floor.
Understanding the causes of floating floor gaps is essential before proceeding with the repair process. These gaps can occur due to a variety of factors, including improper installation, changes in humidity or moisture levels, or natural expansion and contraction of the flooring material. By addressing the root cause of the gaps, you can effectively fix and prevent them from recurring.
Before we dive into the repair process, let’s take a look at the tools and materials you’ll need.
Key Takeaways:
- Addressing the root causes of floating floor gaps, such as changes in humidity and improper installation, is essential for effective repair and long-term prevention. Understanding these factors will help you achieve a seamless and durable flooring solution.
- Using wood glue for small, uniform gaps and wood filler for larger or irregular gaps can effectively restore the appearance of your floating floor. Additionally, taking preventive measures like acclimating the flooring and maintaining consistent humidity levels can minimize future gap occurrences.
Read more: How To Fix Gap Between Door And Floor
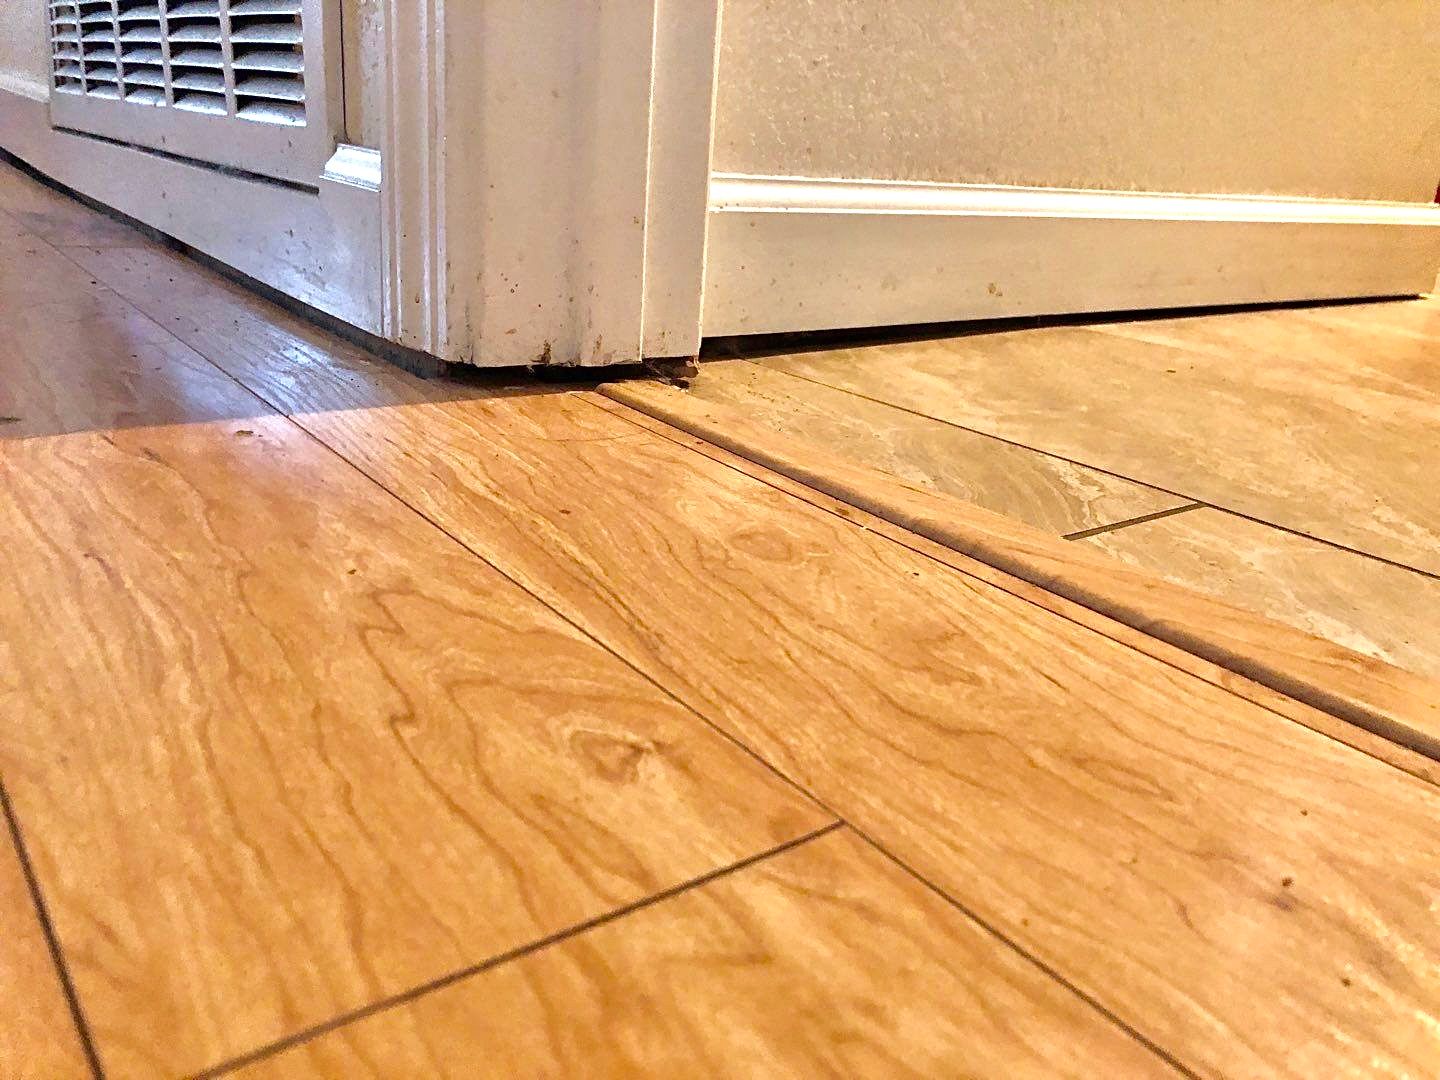
Understanding Floating Floor Gaps
Floating floors are designed to be installed without the need for nails or adhesive. They consist of individual planks or tiles that interlock with each other, forming a stable and secure surface. However, even with proper installation, gaps between the floorboards can still occur over time.
One common cause of floating floor gaps is changes in humidity and moisture levels. When the air becomes dry, the floorboards may shrink, creating small gaps between them. Conversely, high humidity can cause the floorboards to expand, leading to larger gaps.
Another factor that can contribute to floating floor gaps is the natural expansion and contraction of the flooring material. Wood has a tendency to expand when exposed to heat and moisture, and contract in dry and cool conditions. Over time, this repeated expansion and contraction can cause gaps to develop.
Additionally, improper installation can also lead to floating floor gaps. If the floorboards are not properly aligned or if there is insufficient space left for expansion between the boards and the walls, gaps may form.
Understanding the underlying causes of floating floor gaps is essential for effective repair and prevention. By addressing these causes, you can ensure a long-lasting and gap-free floating floor.
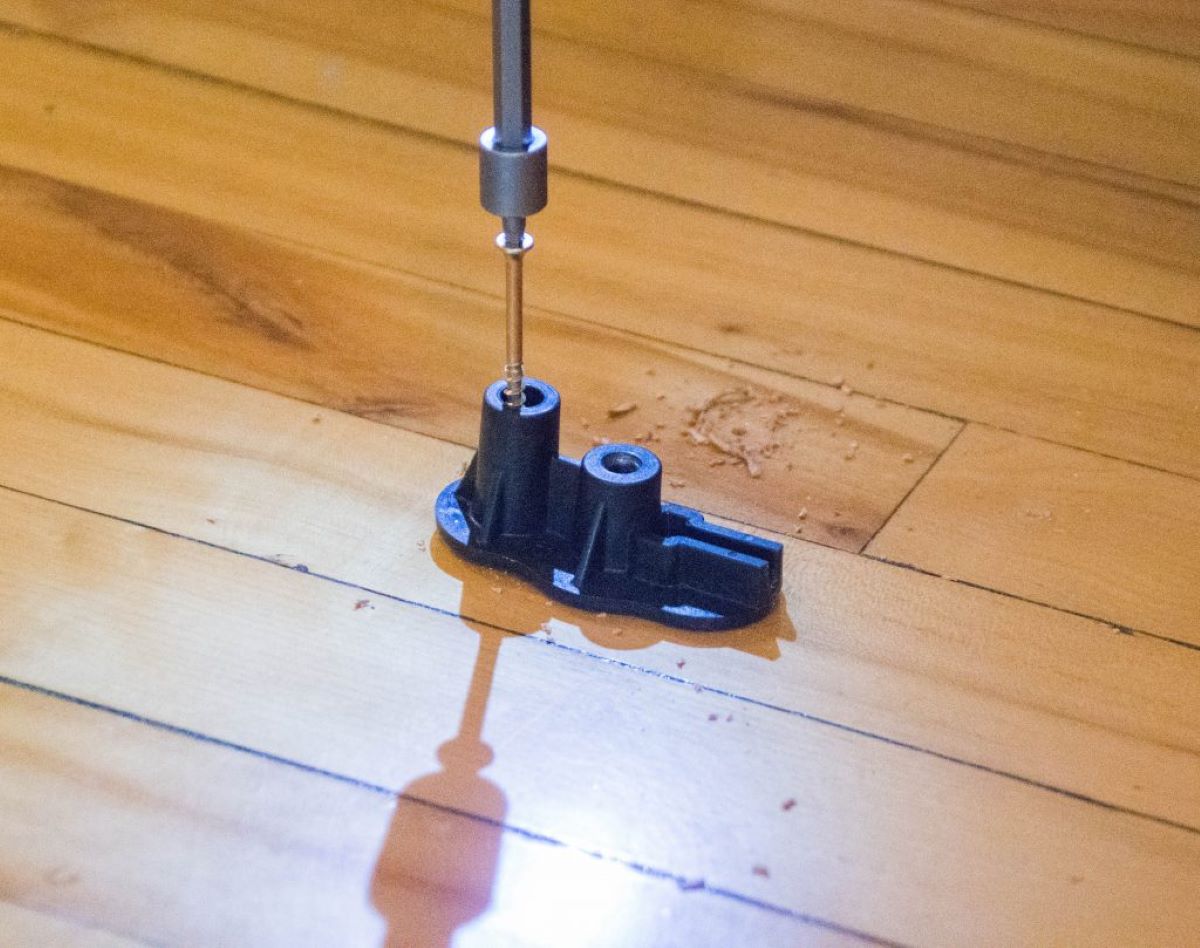
Tools and Materials Needed
Before you begin repairing your floating floor gaps, it’s important to gather the necessary tools and materials. Here’s a list of items you’ll need:
- Measuring tape
- Wood filler or putty
- Wood glue
- Utility knife
- Chisel
- Hammer
- Sanding block or sandpaper
- Vacuum cleaner or broom
- Damp cloth
- Heavy objects (such as weights or books) or clamps
Make sure you have all these tools and materials readily available before you start the repair process. This will help you work efficiently and effectively.
Preparing the Area
Before you begin fixing the floating floor gaps, you’ll need to prepare the area to ensure a smooth and seamless repair process. Here are the steps you should follow:
- Clear the floor: Remove any furniture or objects from the area where you’ll be working. This will give you ample space to maneuver and access the floorboards.
- Clean the floor: Use a vacuum cleaner or broom to remove any dust, dirt, or debris from the floor surface. Ensure that the area is clean and free from obstructions.
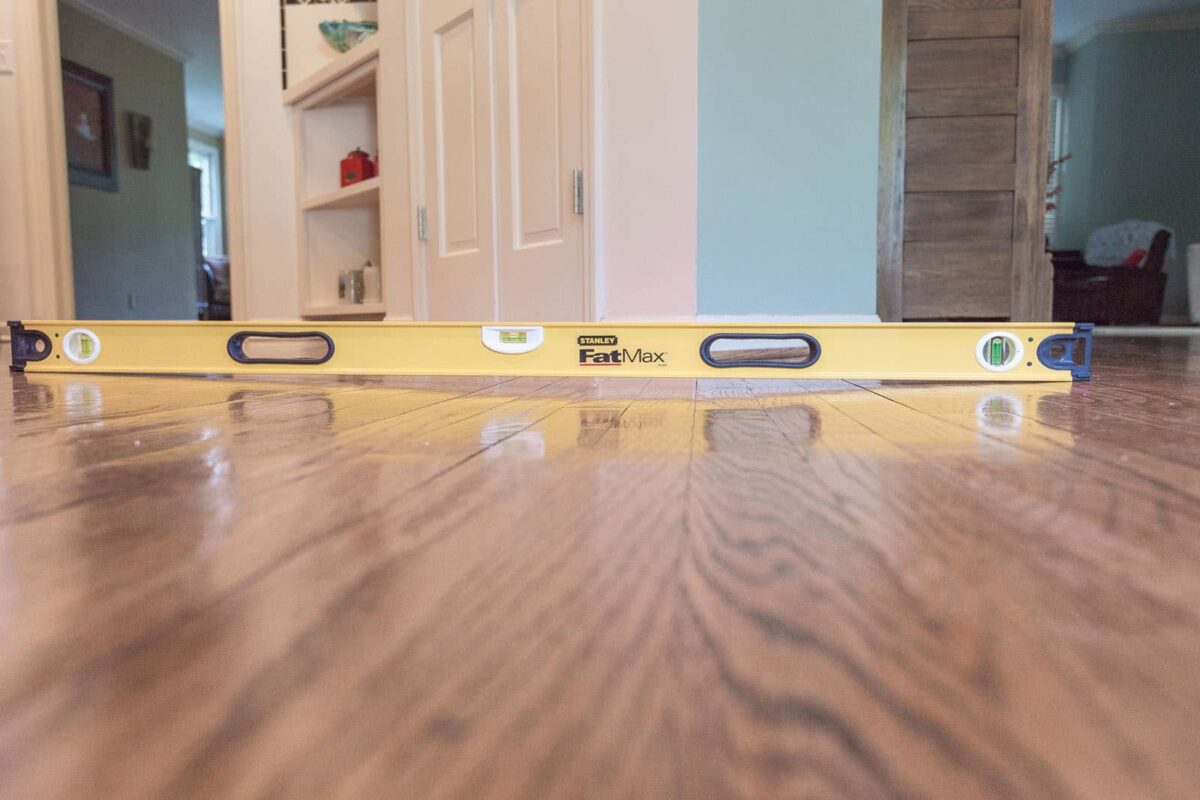
- Measure the gaps: Use a measuring tape to measure the width and length of the gaps between the floorboards. This will help you determine the appropriate method and materials to use for the repair.
- Inspect for underlying issues: Take a close look at the gaps and check for any underlying issues that may be causing the gaps. Look for signs of water damage, mold, or structural problems. Addressing these issues beforehand will prevent future gaps from forming.
By properly preparing the area, you’ll create an optimal workspace and ensure that your repair efforts yield the best results. Once you’ve prepared the area, you can proceed to the next steps of the repair process.
Acclimating the Flooring
Before you can effectively fix the floating floor gaps, it’s important to acclimate the flooring material to the environment in which it will be installed. Acclimation refers to the process of allowing the flooring to adjust to the temperature and humidity of the room.
Proper acclimation is crucial because it helps prevent future gaps and ensures the long-term stability of the flooring. Here’s how you can acclimate your flooring:
- Unbox the flooring: Remove the flooring material from its packaging and carefully unbox the planks or tiles.
- Leave it in the room: Place the flooring in the room where it will be installed. Leave it there for at least 48 hours, or as directed by the manufacturer. This allows the flooring to adjust to the temperature and humidity of the room.
- Keep it flat: Ensure that the flooring is stored in a flat position during the acclimation process. This helps prevent warping or bending of the boards.
- Maintain optimal conditions: During the acclimation period, maintain the room temperature and humidity within the recommended range. This will help the flooring adjust properly and minimize the risk of gaps forming in the future.
By acclimating your flooring before installation, you’ll create a more stable and resilient surface. This will reduce the chances of gaps forming and ensure the long-term performance of your floating floor.
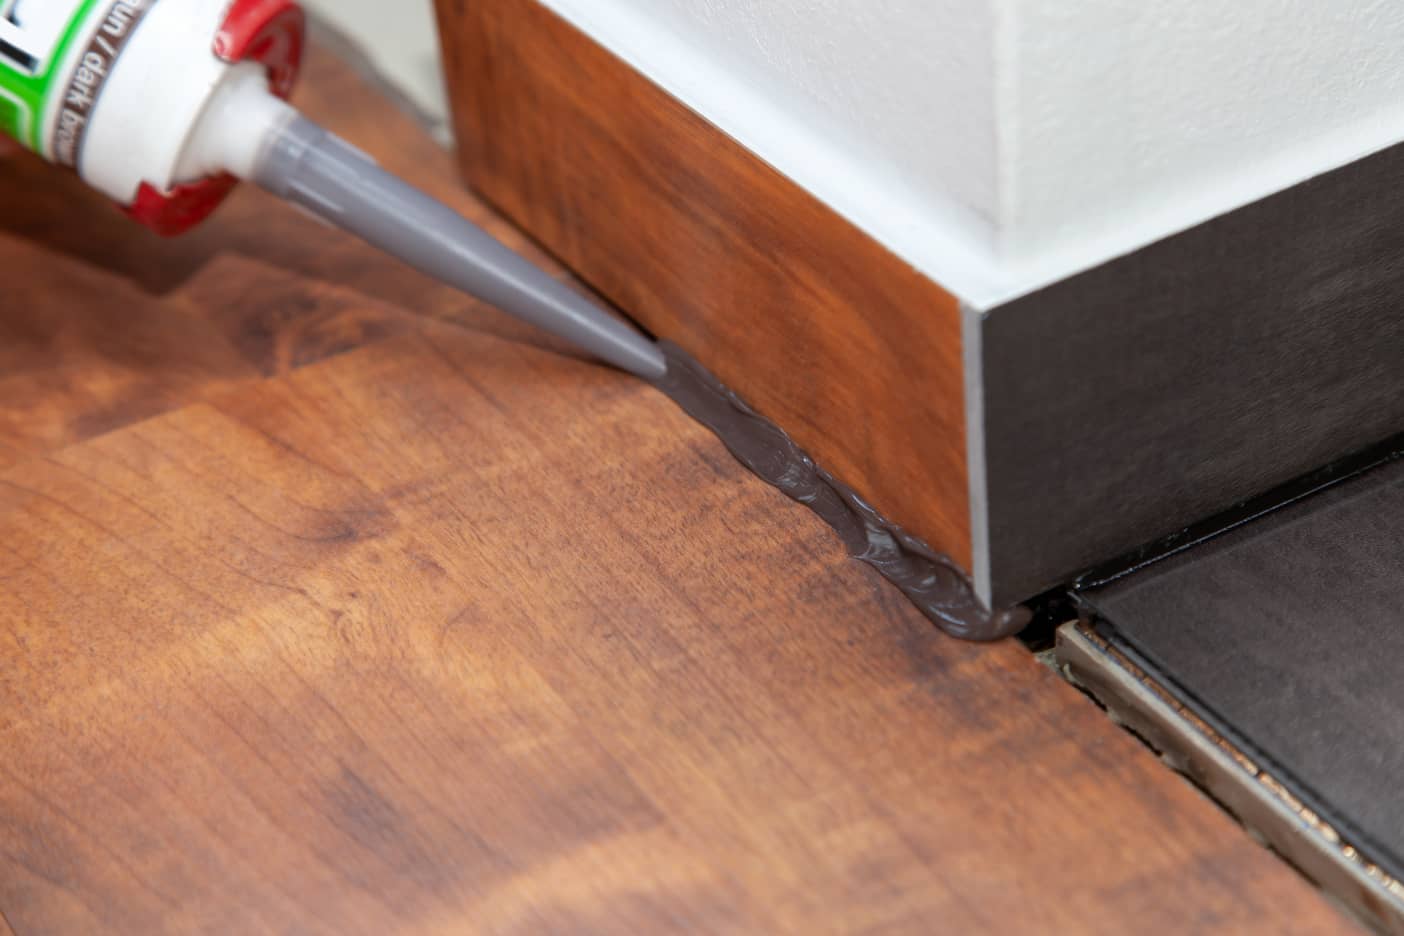
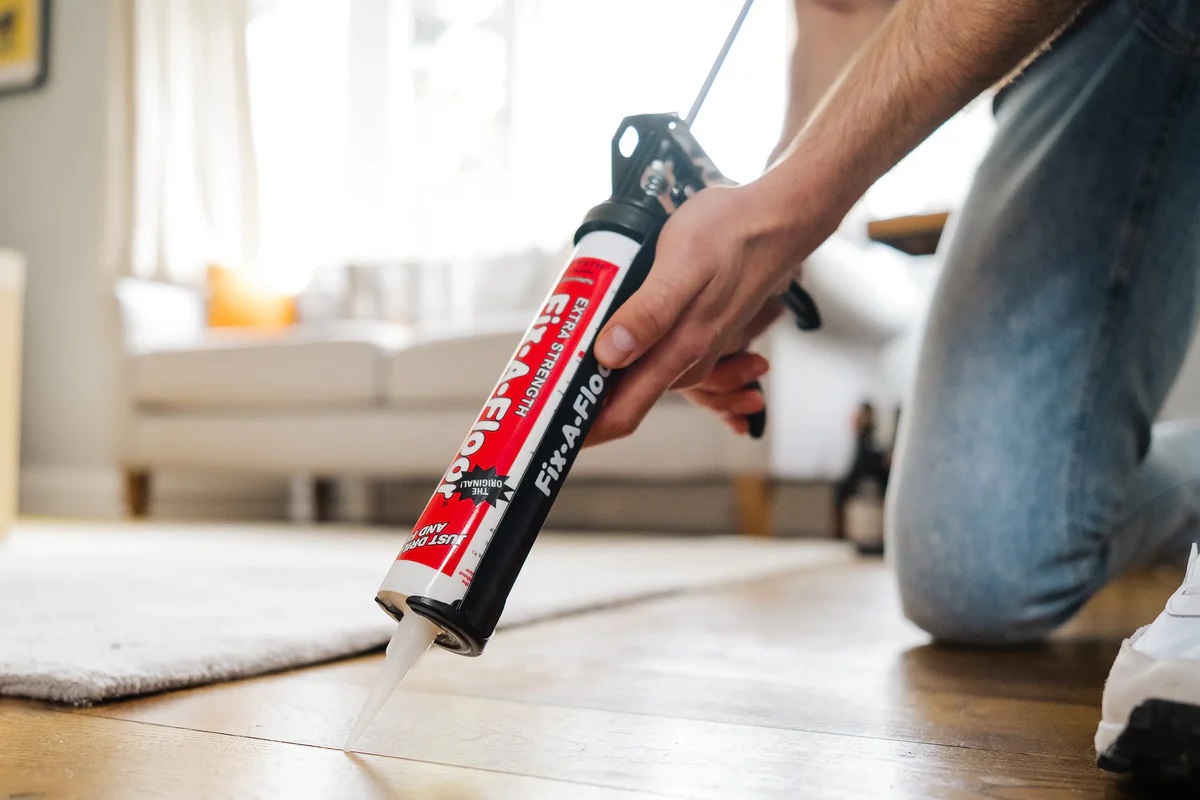
Use a wood filler or silicone caulk to fill in the gaps between the floating floor planks. Make sure to clean the area thoroughly before applying the filler for best results.
Read more: What Is A Floating Floor
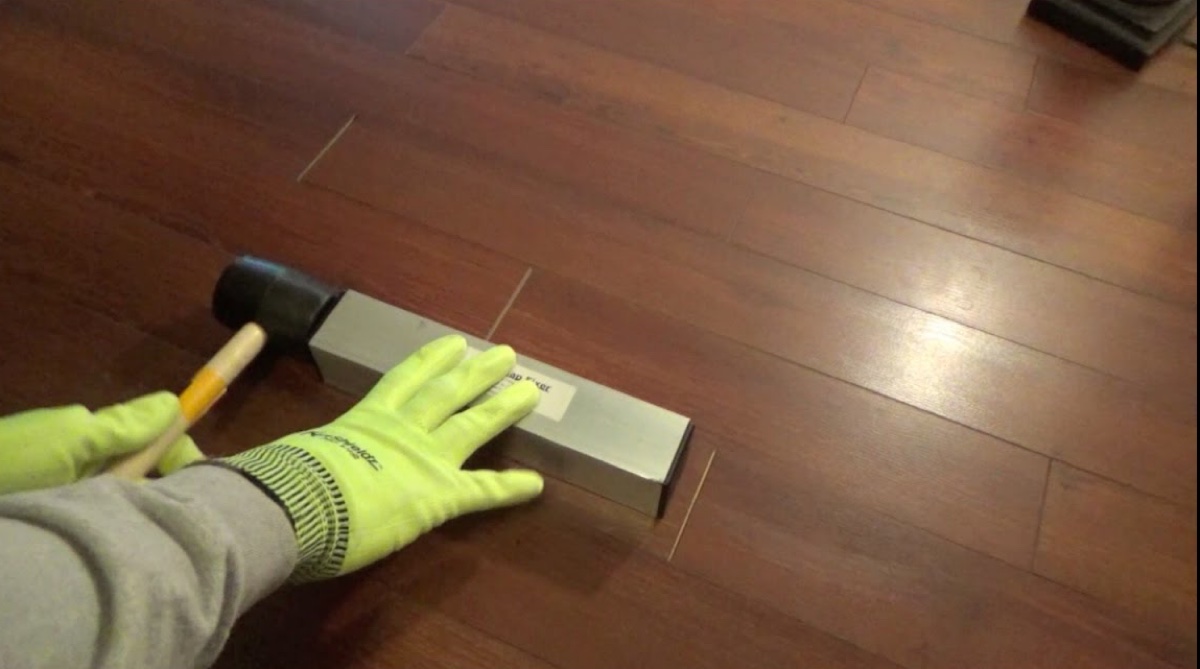
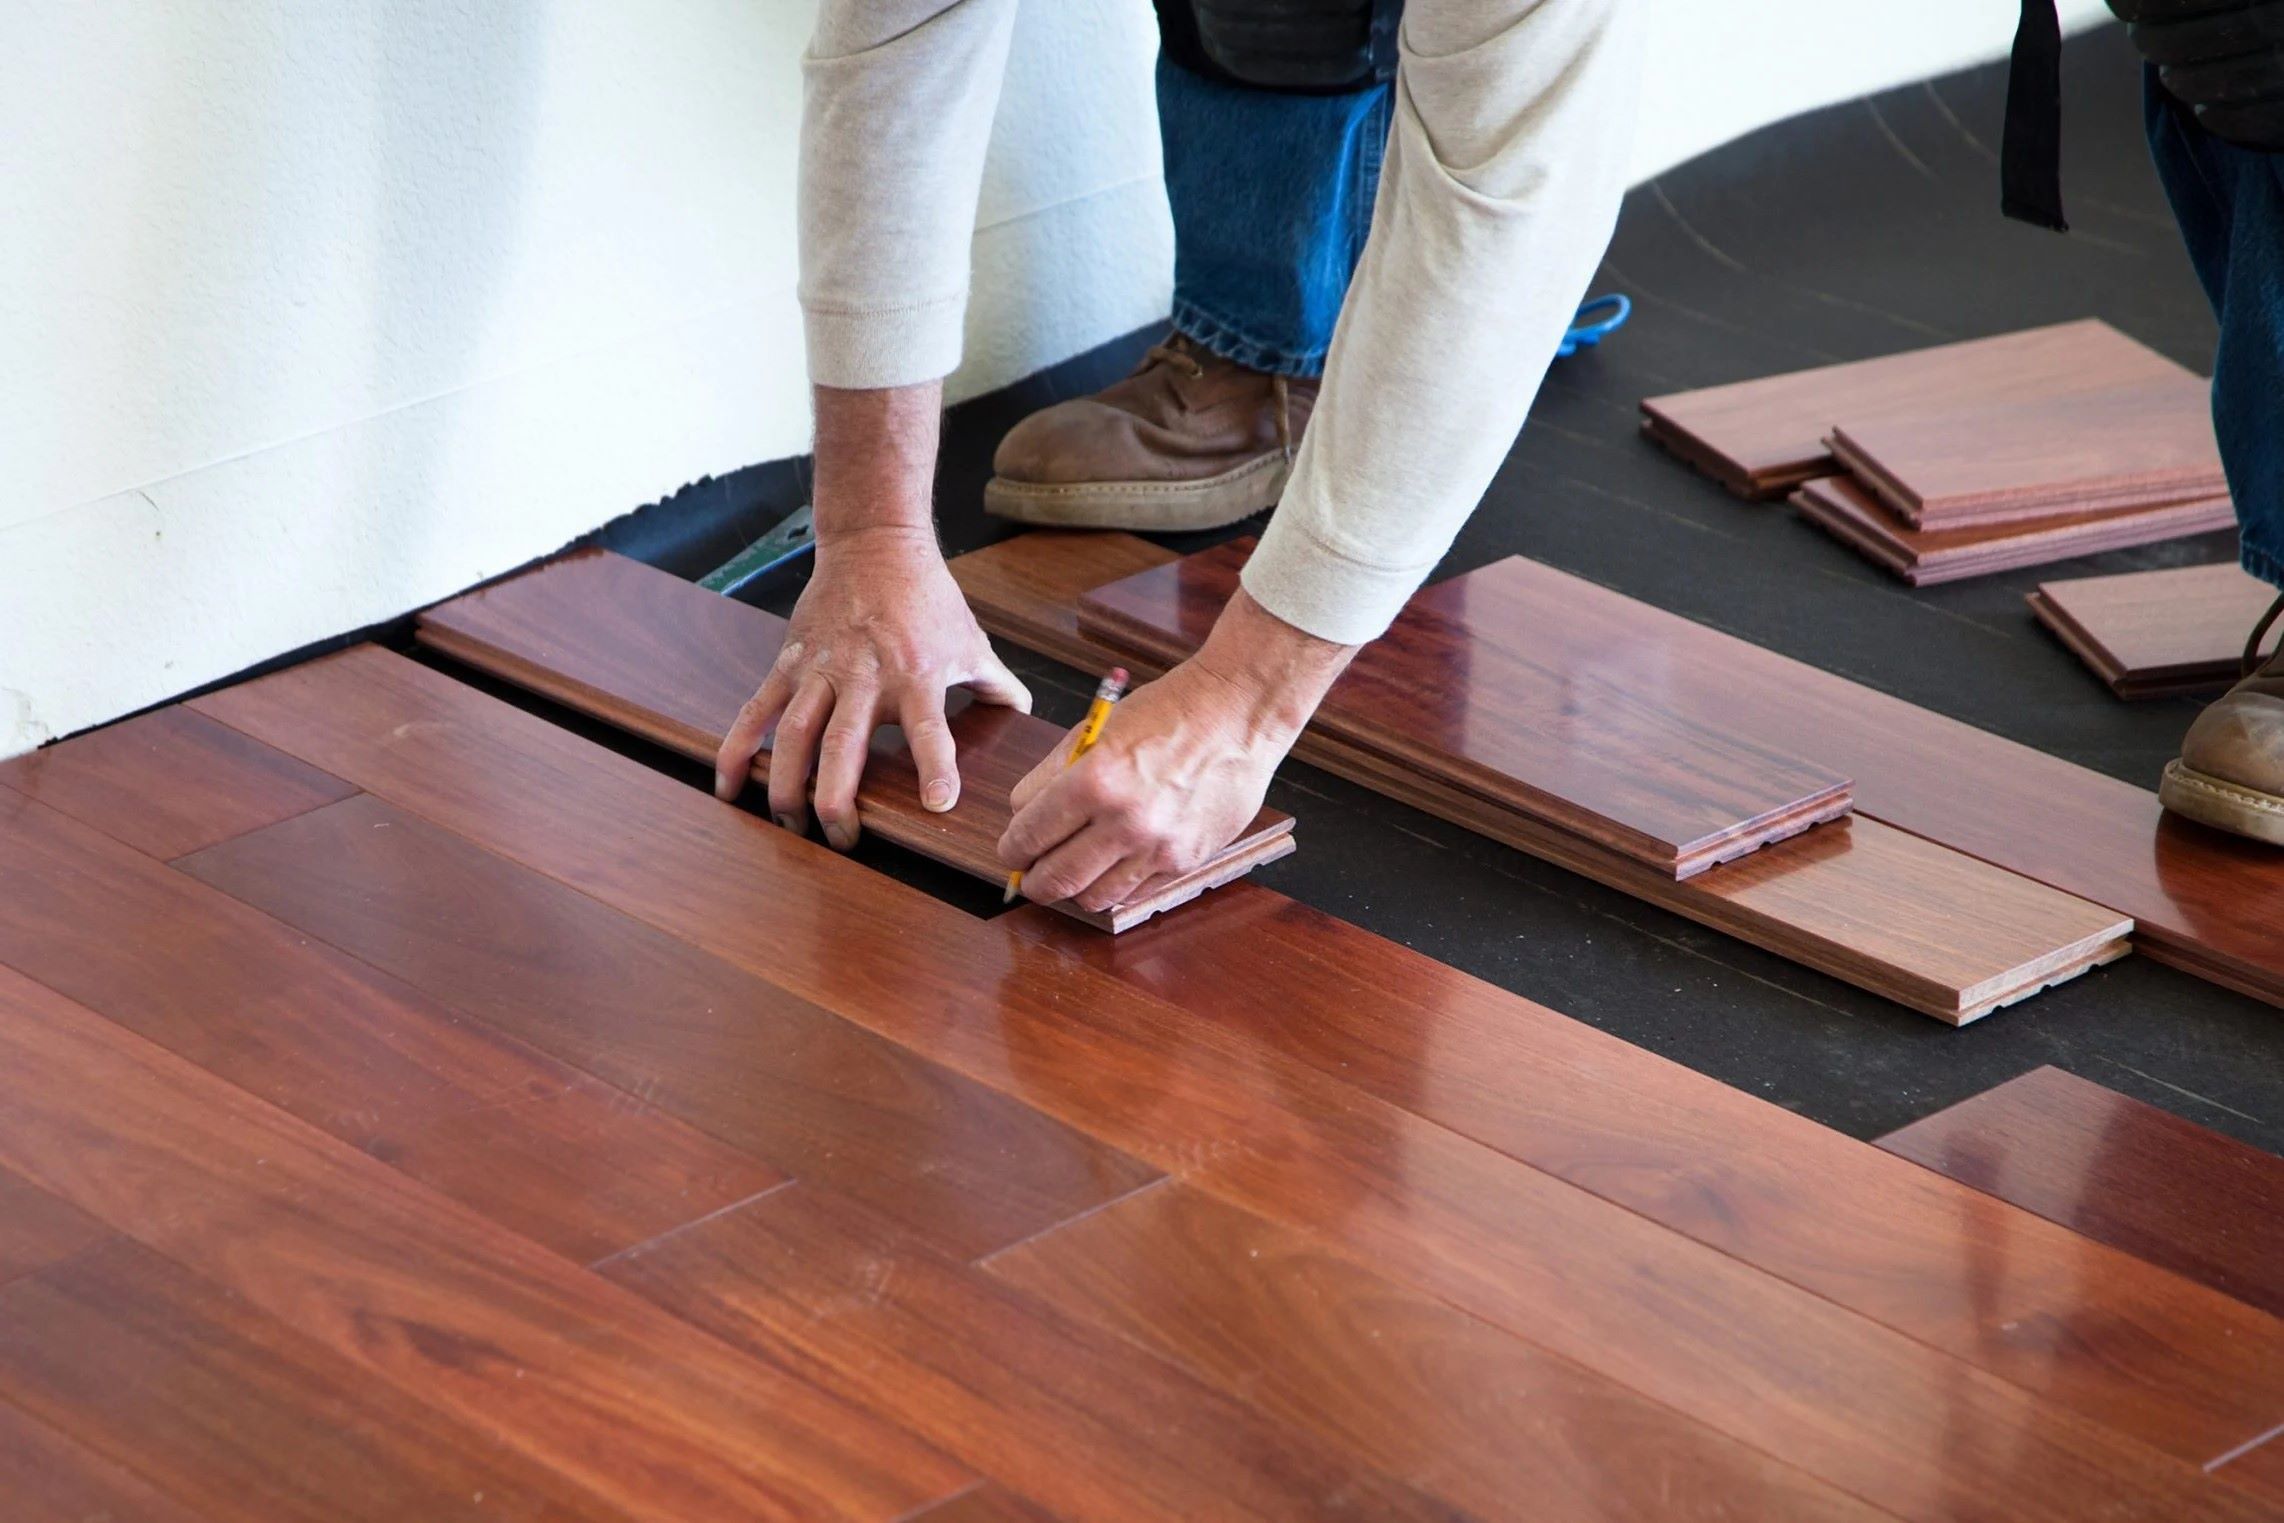
Fixing Small Gaps
If you’re dealing with small gaps between the floorboards of your floating floor, there are several methods you can use to fix them. Here’s a step-by-step guide:
- Inspect the gaps: Take a close look at the small gaps and determine their width and depth. This will help you determine the best approach for the repair.
- Use wood glue: If the gaps are small and uniform, you can use wood glue to fill them. Apply a small amount of wood glue into each gap using a small brush or a toothpick. Wipe off any excess glue with a damp cloth.
- Press the boards together: Once the glue is applied, gently press the floorboards together to close the gaps. You can use heavy objects or clamps to apply pressure evenly across the affected area. Leave the objects or clamps in place until the glue dries completely.
- Sand the repaired area: Once the glue is dry, use a sanding block or sandpaper to smooth out the surface. Sand in the direction of the grain to ensure a seamless look. Be careful not to sand too much, as you don’t want to damage the surrounding flooring.
- Clean the area: After sanding, clean the repaired area with a damp cloth to remove any dust or debris. This will give the floor a polished appearance.
By following these steps, you can effectively fix small gaps in your floating floor. However, it’s important to note that this method is suitable for small and uniform gaps. If you have larger or irregular gaps, the following section will provide you with alternative solutions.
Fixing Larger Gaps
If you’re dealing with larger or irregular gaps between the floorboards of your floating floor, using wood glue alone may not provide a sufficient fix. Here’s a step-by-step guide on how to address larger gaps:
- Inspect the gaps: Carefully examine the larger gaps and note their width and depth. This will help you determine the appropriate method to close the gaps.
- Fill the gaps with wood filler: Purchase a suitable wood filler that matches the color of your flooring. Use a putty knife to apply the wood filler into the gaps, ensuring that it is fully filled. Smooth out the surface of the filler with the putty knife and scrape off any excess.
- Allow the filler to dry: Follow the instructions on the wood filler product regarding drying time. It’s usually recommended to let it dry for at least 24 hours or as specified by the manufacturer.
- Sand the filled areas: Once the wood filler is completely dry, use a sanding block or sandpaper to smooth out the filled areas. Sand in the direction of the grain to achieve a seamless blend with the surrounding floorboards. Be mindful not to over-sand and damage the surrounding flooring.
- Remove any dust: After sanding, thoroughly sweep or vacuum the repaired areas to remove any leftover dust or debris.
It’s important to note that wood filler is a temporary solution for larger gaps and may require periodic maintenance as the flooring expands and contracts. For a more permanent fix, consider replacing the affected floorboards entirely.
If you’re unsure about your ability to fix larger gaps yourself, it’s best to consult a professional to ensure a proper and long-lasting repair.
Using Wood Filler
Wood filler is a versatile and effective solution for repairing gaps and imperfections in floating floors. It’s particularly useful for filling larger gaps or irregularly shaped spaces between the floorboards. Here’s a step-by-step guide on how to use wood filler to fix your floating floor:
- Select the right wood filler: Choose a high-quality wood filler that closely matches the color of your flooring. Look for a filler that is specifically designed for use on wooden surfaces.
- Clean the gaps: Before applying the wood filler, make sure the gaps are clean and free from debris. Use a vacuum cleaner or a damp cloth to remove any dust or dirt.
- Apply the wood filler: Using a putty knife or a small spatula, apply the wood filler into the gaps in a smooth and even manner. Press the filler firmly into the gaps to ensure proper adhesion.
- Smooth and level the filler: Use the putty knife to flatten and level the filler with the surrounding floor surface. Remove any excess filler and ensure the filled gaps are flush with the rest of the floor.
- Allow the filler to dry: Follow the manufacturer’s instructions regarding drying time for the wood filler. Typically, it takes 24 hours or more for the filler to fully dry and harden.
- Sand the filled areas: Once the filler is dry, use a sanding block or fine-grit sandpaper to smooth out the filled areas. Sand lightly in the direction of the grain to achieve a seamless finish.
- Clean the floor: After sanding, clean the floor to remove any dust or debris. Use a vacuum cleaner or a damp cloth to ensure the repaired areas are clean and ready for sealing or refinishing.
Using wood filler can be an effective way to fill gaps in your floating floor and restore its appearance. However, keep in mind that wood filler is not a permanent solution, and the filled gaps may require periodic maintenance as the floorboards expand and contract with changes in humidity. If the gaps persist or become more significant, it may be necessary to consult a professional or consider more extensive repairs.
Preventing Future Gaps
While fixing floating floor gaps is important, taking preventive measures can help minimize the occurrence of gaps in the future. Here are some tips to prevent future gaps in your floating floor:
- Acclimate the flooring: Before installation, allow the flooring material to acclimate to the room temperature and humidity. This helps minimize the chances of excessive expansion or contraction that can lead to gaps.
- Maintain consistent humidity levels: Fluctuations in humidity can cause the floorboards to expand and contract, leading to gaps. Use a humidifier or dehumidifier to maintain a consistent humidity level within the recommended range for your flooring material.
- Use expansion gaps: During installation, be sure to leave sufficient space around the perimeter of the room for expansion. Follow the manufacturer’s guidelines for the recommended expansion gap size.
- Use proper installation techniques: Ensure that the floorboards are installed correctly, with proper spacing and locking mechanisms engaged. Improper installation can cause gaps to form over time.
- Avoid excessive moisture: Clean up spills promptly and avoid excessive moisture on the floor. Excess water or prolonged exposure to liquids can cause the floorboards to warp and create gaps.
- Protect the flooring: Use rugs or mats in high-traffic areas and place protective pads under furniture legs to prevent scratching and minimize stress on the floorboards.
- Monitor temperature changes: Avoid significant temperature fluctuations in the room, as extreme heat or cold can cause the flooring material to expand or contract rapidly.
- Regular maintenance: Perform regular inspections of your floating floor to check for any signs of gaps or damage. Promptly address any issues to prevent them from worsening.
By following these preventive measures, you can help maintain the integrity and appearance of your floating floor. Taking proactive steps to prevent gaps can save you time, effort, and potentially costly repairs in the long run.
Read more: How To Fill Hardwood Floor Gaps
Conclusion
Fixing floating floor gaps is a common issue that many homeowners encounter. Luckily, with the right tools and techniques, you can successfully repair these gaps and restore the beauty and functionality of your flooring.
Understanding the causes of floating floor gaps is crucial in preventing their occurrence in the first place. Whether it’s changes in humidity, improper installation, or natural expansion and contraction, addressing the root cause is essential for a long-lasting solution.
When it comes to repairing small gaps, using wood glue can often suffice. Simply apply the glue and press the floorboards together, ensuring a tight fit. For larger or irregular gaps, wood filler can be an effective option. Fill the gaps, let the filler dry, and sand the area for a seamless finish.
Preventive measures such as acclimating the flooring, maintaining consistent humidity levels, and practicing proper installation techniques can help reduce the chances of gaps forming in the future. Regular maintenance and careful handling of your floating floor will also contribute to its longevity.
Remember, if you’re unsure about tackling the repairs yourself or if the gaps persist or worsen, it’s always a good idea to consult a professional for guidance.
By following the steps outlined in this article and taking preventive measures, you can ensure a beautiful and gap-free floating floor for years to come. Enjoy the comfort and aesthetic appeal that your flooring provides!
Frequently Asked Questions about How To Fix Floating Floor Gaps
Was this page helpful?
At Storables.com, we guarantee accurate and reliable information. Our content, validated by Expert Board Contributors, is crafted following stringent Editorial Policies. We're committed to providing you with well-researched, expert-backed insights for all your informational needs.


0 thoughts on “How To Fix Floating Floor Gaps”