
Articles
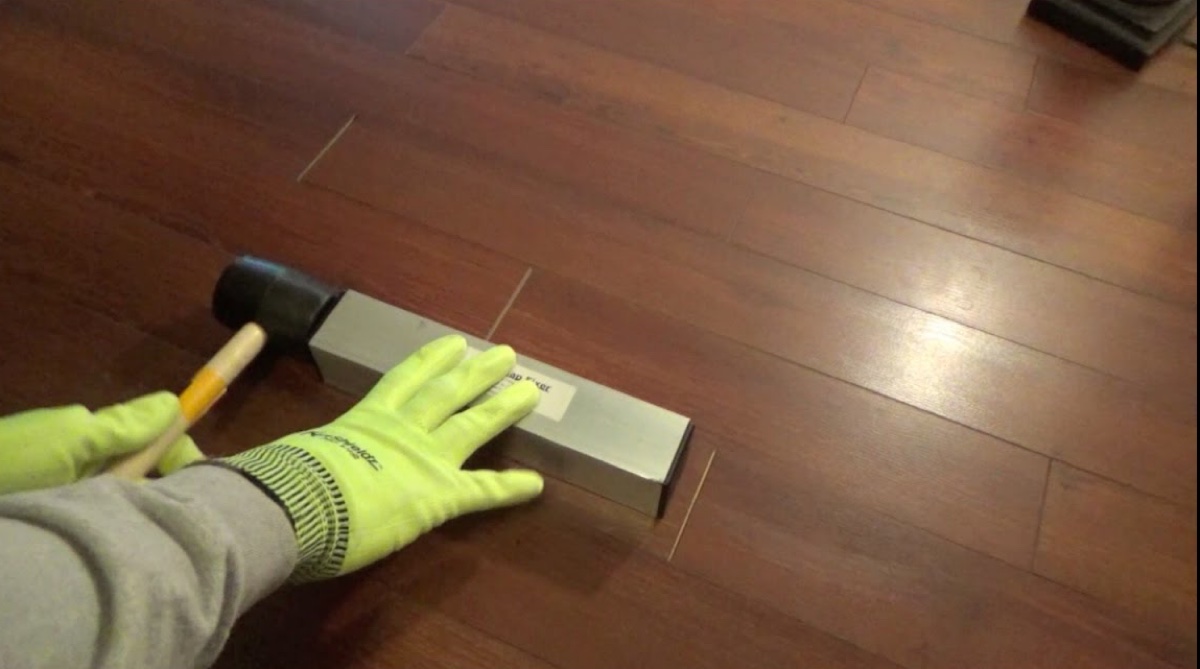
How To Fill Hardwood Floor Gaps
Modified: December 7, 2023
Learn how to fill hardwood floor gaps with these informative articles. Take steps to improve the look and longevity of your wood floors.
(Many of the links in this article redirect to a specific reviewed product. Your purchase of these products through affiliate links helps to generate commission for Storables.com, at no extra cost. Learn more)
Introduction
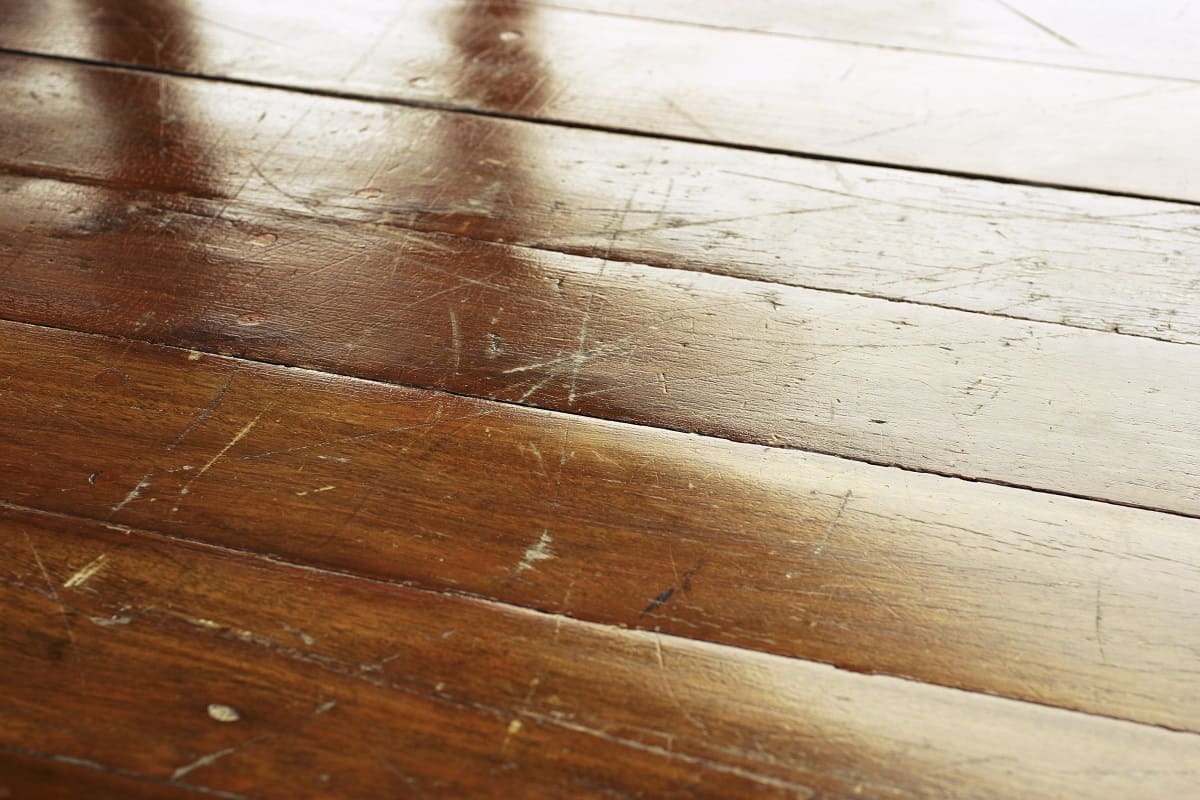
Hardwood floors are a beautiful and timeless addition to any home. They add warmth, character, and value to a space. However, over time, you may notice gaps appearing between the hardwood planks. These gaps can be unsightly and can also create potential problems, such as dirt and debris accumulation or even drafts.
Understanding the causes of hardwood floor gaps is the first step in addressing the issue. There are several factors that can contribute to the formation of gaps, including natural wood expansion and contraction due to temperature and humidity changes, improper installation, or normal wear and tear over time.
Fortunately, you can take steps to fill these gaps and restore the appearance and functionality of your hardwood floors. In this article, we will explore various methods for filling hardwood floor gaps, including using wood filler, rope or cord, sawdust and wood glue, and epoxy resin. We will also discuss when it may be appropriate to hire a professional for the job.
Before diving into the specific methods, it is important to gather the necessary tools and materials. Depending on the method you choose, you may need items such as wood filler, a putty knife, sandpaper, a vacuum cleaner, a hammer and chisel, rope or cord, sawdust, wood glue, epoxy resin, and a floor sander. Ensuring that you have all the required tools and materials will help make the gap-filling process smoother.
Preparation is key when it comes to filling hardwood floor gaps. Before starting any gap-filling method, it is important to thoroughly clean the gaps and the surrounding area, removing any dirt, debris, or old filler. This will ensure that the gap-filling material adheres properly and creates a seamless finish.
Now, let’s explore the different methods for filling hardwood floor gaps in detail, providing step-by-step instructions, tips, and considerations along the way.
Key Takeaways:
- Understanding the causes of hardwood floor gaps, such as natural wood movement and improper installation, is crucial for prevention. Implementing preventive measures and proper maintenance can help minimize the occurrence of gaps in the future.
- Various methods, including wood filler, rope or cord, sawdust and wood glue, and epoxy resin, offer effective solutions for filling hardwood floor gaps. Proper preparation, tool selection, and technique application are essential for achieving seamless and durable results.
Read more: How To Fill Gap Between Baseboard And Floor
Understanding the Causes of Hardwood Floor Gaps
Before diving into the methods for filling hardwood floor gaps, it’s important to understand why these gaps may occur in the first place. By understanding the causes, you can take preventive measures and address the underlying issues to minimize the occurrence of gaps in the future.
One of the primary causes of hardwood floor gaps is natural wood expansion and contraction. Wood is a hygroscopic material, meaning it absorbs and releases moisture in response to changes in the surrounding environment. When wood absorbs moisture, it expands, and when it loses moisture, it contracts. Fluctuations in temperature and humidity can cause this constant expansion and contraction, leading to gaps between the hardwood planks.
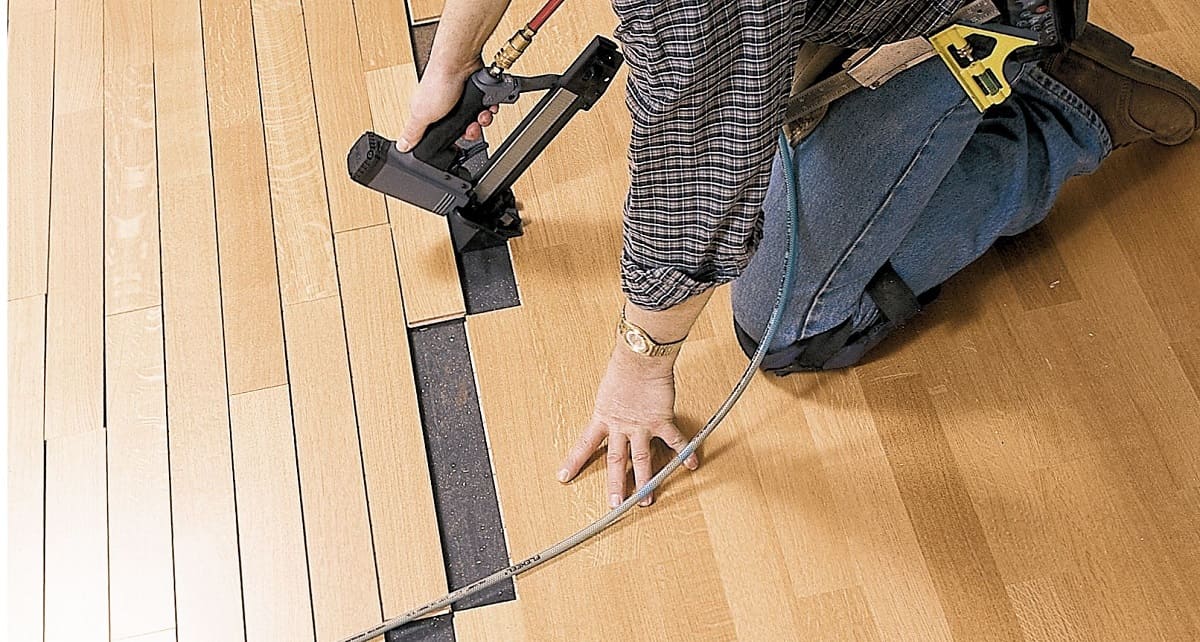
Improper installation is another common cause of hardwood floor gaps. If the flooring is not properly acclimated to the environment before installation, or if the planks are not installed with sufficient spacing to accommodate natural expansion and contraction, gaps may develop over time.
Normal wear and tear can also contribute to the formation of gaps. Over many years of foot traffic, the constant pressure and movement can cause the wood to slowly shift and separate, leading to gaps between the planks. This is especially true in high-traffic areas of the home.
In some cases, gaps may also be a result of subfloor issues. If the subfloor is uneven or has structural problems, it can cause the hardwood flooring to shift and separate, resulting in gaps between the planks.
To prevent or minimize the occurrence of hardwood floor gaps, it’s important to take preventive measures. One effective method is to ensure proper acclimation of the flooring before installation. This involves allowing the hardwood planks to adjust to the humidity and temperature of the room for a certain period before installation. Additionally, leaving an appropriate expansion gap around the perimeter of the room during installation allows the wood to expand and contract without causing gaps between the planks.
Controlling the indoor humidity levels can also help prevent excessive wood movement. Using a humidifier during dry winter months and a dehumidifier during humid summers can help maintain a stable humidity level in the home, reducing the extent of wood expansion and contraction.
Regular maintenance and care of the hardwood floors are crucial as well. This includes cleaning the floors regularly to prevent the accumulation of dirt and debris, promptly addressing any spills or leaks to prevent excessive moisture exposure, and using protective pads on furniture legs to prevent scratches and gouges that can contribute to gap formation.
By understanding the causes of hardwood floor gaps and implementing preventive measures, you can prolong the lifespan of your hardwood floors and minimize the need for frequent gap-filling. However, if gaps do occur, there are several methods available to effectively fill them, which we will explore in the following sections.
Tools and Materials Needed
Before filling the gaps in your hardwood floors, it’s essential to gather the necessary tools and materials. Having everything on hand will make the process smoother and more efficient. The specific tools and materials required may vary depending on the method you choose, but here are some common items you may need:
- Wood Filler: If you opt for the wood filler method, you’ll need a high-quality wood filler product that matches the color of your hardwood floors. Look for a filler that is specifically designed for use on hardwood floors to ensure durability and a seamless finish.
- Putty Knife: A putty knife will allow you to easily apply the wood filler into the gaps. Choose one with a flexible blade for better control and smoother application.
- Sandpaper: Sandpaper is essential for preparing the gaps before filling them and for achieving a smooth finish after the filler has dried. Choose different grits of sandpaper, starting with a coarse grit for initial sanding and finishing with a fine grit for a polished look.
- Vacuum Cleaner: Before filling the gaps, it’s important to thoroughly clean the gaps and the surrounding area. Use a vacuum cleaner to remove any dirt, debris, or old filler from the gaps. This will ensure that the filler adheres properly and that the final result looks seamless.
- Hammer and Chisel: In some cases, if the gaps are large or irregularly shaped, you may need a hammer and chisel to widen or reshape the gaps slightly, allowing for better filler application.
- Rope or Cord: If you choose the rope or cord method, you’ll need a suitable rope or cord material. Natural cotton or hemp ropes are commonly used for this purpose. Choose a thickness that matches the width of your gaps.
- Sawdust and Wood Glue: For the sawdust and wood glue method, you’ll need sawdust that matches the color of your hardwood floors and a high-quality wood glue. Ensure that the sawdust is finely ground for better blending with the glue.
- Epoxy Resin: If you decide to use epoxy resin for filling the gaps, you’ll need a two-part epoxy resin system. Make sure to select a color that closely matches the shade of your hardwood floors.
- Floor Sander: If you plan to fill larger gaps or refinish the entire floor, you may need a floor sander. This machine is used to sand the entire surface of the floor, ensuring a smooth and even finish.
These are some of the common tools and materials you may need for filling hardwood floor gaps. It’s always a good idea to read and follow the manufacturer’s instructions for any specific tool or material you choose to ensure proper usage and achieve the best results.
Now that you have the necessary tools and materials ready, let’s move on to the next section, where we will discuss the preparation steps before filling the hardwood floor gaps.
Preparation before Filling Hardwood Floor Gaps
Before you can effectively fill the gaps in your hardwood floors, proper preparation is key. Taking the time to prepare the gaps and the surrounding area will ensure a successful and seamless filling process. Here are the steps to follow for preparation:
- Clean the Gaps: Start by thoroughly cleaning the gaps and the surrounding area. Use a vacuum cleaner or a soft-bristle brush to remove any dirt, debris, or old filler. Cleaning the gaps will ensure that the filler adheres properly and creates a smooth finish.
- Widen the Gaps (if necessary): If the gaps are too narrow or irregularly shaped, you may need to widen or reshape them slightly to allow for better filler application. Use a hammer and chisel to carefully widen the gaps, making sure not to damage the surrounding flooring.
- Sand the Gaps: Next, sand the gaps to create a clean and smooth surface for the filler. Use sandpaper with a coarse grit to remove any rough edges or splinters. Sand along the direction of the wood grain for the best results.
- Remove Dust: After sanding, use a vacuum cleaner or a soft cloth to remove any dust or debris from the gaps. It’s crucial to have a clean surface to ensure proper adhesion of the filler.
Once you have completed these preparation steps, you are now ready to fill the hardwood floor gaps using the method of your choice. In the following sections, we will explore various methods for filling gaps, including using wood filler, rope or cord, sawdust and wood glue, and epoxy resin. Each method has its own process and considerations, so be sure to read the specific instructions carefully to achieve the best results.
Remember, taking the time to properly prepare the gaps before filling them will ensure a more seamless and durable finish. By following these preparation steps, you can ensure that the gap-filling process goes smoothly and that your hardwood floors regain their beautiful appearance.
Now that you are prepared, let’s delve into the various methods for filling hardwood floor gaps, starting with the use of wood filler.
Method 1: Using Wood Filler
Using wood filler is a popular and effective method for filling hardwood floor gaps. Wood filler is a material specifically designed to fill and seal gaps in wood surfaces. It can be easily applied and dries to create a smooth and seamless finish.
Here are the steps to follow when using wood filler to fill hardwood floor gaps:
- Choose the Right Wood Filler: Select a high-quality wood filler product that closely matches the color of your hardwood floors. Look for a filler that is specifically designed for use on hardwood floors, as these tend to be more durable and long-lasting.
- Clean the Gaps: Before applying the wood filler, make sure the gaps are clean and free of any dirt, debris, or old filler. Use a vacuum cleaner or a soft brush to remove any loose particles.
- Apply the Wood Filler: Using a putty knife, apply the wood filler directly into the gaps. Press the filler firmly into the gaps, ensuring it completely fills the space. Smooth out the surface of the filler with the putty knife, removing any excess filler.
- Allow the Filler to Dry: Follow the manufacturer’s instructions for the drying time of the wood filler. Typically, it takes a few hours for the filler to dry completely. Avoid walking on the filled areas until the filler is fully dried.
- Sand the Filled Areas: Once the filler is dry, use sandpaper with a fine grit to lightly sand the filled areas. This will help smooth out the surface and ensure a seamless finish. Sand along the direction of the wood grain to match the surrounding flooring.
- Clean and Finish: After sanding, use a vacuum cleaner or a soft cloth to remove any dust or debris from the filled areas. If necessary, apply a protective finish or stain to the filled areas to match the rest of the floor.
Using wood filler is a relatively simple and cost-effective method for filling hardwood floor gaps. It provides a durable and long-lasting solution when applied correctly. However, keep in mind that wood filler is not as flexible as natural wood, so it may not be suitable for larger gaps or areas with significant wood movement.
Now that you know how to fill hardwood floor gaps using wood filler, let’s explore another method: using rope or cord to fill the gaps.
Read more: How To Fill Gaps In A Driveway
Method 2: Using Rope or Cord
Another method for filling hardwood floor gaps is by using rope or cord. This technique gives a unique and rustic look to the floor while effectively filling the gaps. It is particularly suitable for wider gaps or for those who prefer a more natural and textured finish.
Here are the steps to follow when using rope or cord to fill hardwood floor gaps:
- Select the Right Rope or Cord: Choose a rope or cord material that suits your preference and matches the width of the gaps. Natural cotton or hemp ropes are commonly used for this method, as they are flexible and easy to work with.
- Clean the Gaps: Ensure that the gaps are clean and free of any debris or old filler. Use a vacuum cleaner or a soft brush to remove any loose particles.
- Measure and Cut the Rope: Measure the length of each gap and cut the rope or cord accordingly. Make sure to leave a little extra length to allow for adjustment during installation.
- Apply Wood Glue to the Gaps: Apply wood glue into each gap using a small brush or a putty knife. Ensure that the glue is spread evenly along the bottom and sides of the gaps.
- Insert the Rope: Press the cut pieces of rope or cord into the gaps, making sure that they fit snugly. Use a small tool or your fingers to adjust the position of the rope and ensure it is seated properly.
- Allow the Glue to Dry: Leave the glue to dry completely according to the manufacturer’s instructions. This will ensure a strong bond between the rope and the floor.
- Tidy Up and Trim Excess Rope: Once the glue is dry, clean any excess glue that might have squeezed out during the installation process. Use a sharp knife or scissors to trim any protruding ends of the rope to achieve a neat and flush finish.
- Finish the Floor: If desired, apply a protective finish or stain to the gaps with the rope to match the rest of the floor. This step will help blend the filled areas with the surrounding flooring.
Using rope or cord to fill hardwood floor gaps is a creative and visually appealing method. It provides an interesting texture and can add character to your floors. However, keep in mind that this method is more suitable for wider gaps and may not be suitable for smaller or narrow gaps.
Now that you know how to fill hardwood floor gaps using rope or cord, let’s explore another method: using sawdust and wood glue.
Use wood filler or a mixture of sawdust and wood glue to fill in gaps in hardwood floors. Apply the filler, let it dry, then sand it smooth for a seamless finish.
Method 3: Using Sawdust and Wood Glue
Another effective method for filling hardwood floor gaps is by using a mixture of sawdust and wood glue. This method allows you to create a custom filler that matches the color and texture of your hardwood floors, resulting in a seamless and natural finish.
Here are the steps to follow when using sawdust and wood glue to fill hardwood floor gaps:
- Collect Sawdust: Start by collecting sawdust from the same type of wood as your hardwood floors. If you don’t have access to matching sawdust, you can use sandpaper to create sawdust by rubbing it on a spare piece of wood of the same species.
- Mix Sawdust and Wood Glue: In a clean container, combine the collected sawdust with wood glue. The ratio of sawdust to wood glue should be approximately 1:1, but you can adjust it based on the consistency needed for proper application.
- Clean the Gaps: Ensure that the gaps are clean and free of any dirt or debris. Use a vacuum cleaner or a soft brush to remove any loose particles.
- Apply the Mixture: Using a putty knife or a small spatula, apply the sawdust and wood glue mixture directly into the gaps. Press the mixture firmly into the gaps, ensuring it completely fills the space. Smooth out the surface with the putty knife, removing any excess filler.
- Allow the Filler to Dry: Follow the drying time instructions provided by the wood glue manufacturer. It usually takes a few hours for the filler to dry completely. Avoid walking on the filled areas until the filler is fully dried.
- Sand the Filled Areas: Once the filler is dry, use sandpaper with a fine grit to lightly sand the filled areas. This will help smooth out the surface and ensure a seamless blend with the surrounding flooring. Sand along the direction of the wood grain for the best results.
- Clean and Finish: After sanding, use a vacuum cleaner or a soft cloth to remove any dust or debris from the filled areas. If necessary, apply a protective finish or stain to the filled areas to match the rest of the floor.
Using sawdust and wood glue to fill hardwood floor gaps allows you to create a custom filler that matches the color and texture of your floors. It provides a seamless and natural finish while effectively filling the gaps. However, keep in mind that this method requires proper mixing of the sawdust and wood glue to achieve the desired consistency.
Now that you know how to fill hardwood floor gaps using sawdust and wood glue, let’s explore another method: using epoxy resin.
Method 4: Using Epoxy Resin
Using epoxy resin is a durable and long-lasting method for filling hardwood floor gaps. Epoxy resin is a two-part system that, when fully cured, creates a strong and seamless bond. This method is especially effective for larger gaps or areas that experience significant wood movement.
Here are the steps to follow when using epoxy resin to fill hardwood floor gaps:
- Choose the Right Epoxy Resin: Select a high-quality epoxy resin system that is specifically designed for use on wood surfaces. Ensure that the resin color closely matches the shade of your hardwood floors.
- Clean the Gaps: Before applying the epoxy resin, make sure the gaps are clean and free of any dirt, debris, or old filler. Use a vacuum cleaner or a soft brush to remove any loose particles.
- Prepare the Epoxy Resin: Follow the manufacturer’s instructions to properly mix the two components of the epoxy resin system. Ensure that the mixing ratio is accurate to achieve optimal results.
- Apply the Epoxy Resin: Using a small brush or a putty knife, carefully apply the mixed epoxy resin into the gaps. Press the resin firmly into the gaps, ensuring it completely fills the space. Smooth out the surface of the resin with the putty knife, removing any excess resin.
- Allow the Epoxy Resin to Cure: Epoxy resin requires a certain amount of time to fully cure and harden. Follow the manufacturer’s instructions for the recommended curing time. It is crucial to avoid walking on the filled areas until the resin is fully cured.
- Sand the Filled Areas: Once the epoxy resin is fully cured, use sandpaper with a fine grit to lightly sand the filled areas. This will help achieve a smooth and even finish, blending the filled areas with the surrounding flooring.
- Clean and Finish: After sanding, use a vacuum cleaner or a soft cloth to remove any dust or debris from the filled areas. If desired, apply a protective finish or stain to the filled areas to match the rest of the floor.
Using epoxy resin to fill hardwood floor gaps provides a strong and durable solution. It creates a seamless and long-lasting bond, making it ideal for larger gaps or areas with significant wood movement. However, keep in mind that epoxy resin requires proper mixing and curing time, so it’s important to follow the manufacturer’s instructions closely.
Now that you know how to fill hardwood floor gaps using epoxy resin, let’s explore our final method: hiring a professional for the job.
Method 5: Hiring a Professional
If you prefer to leave the task of filling hardwood floor gaps to the experts, hiring a professional is a viable option. A professional floor contractor or wood flooring specialist has the knowledge, experience, and specialized tools to effectively fill gaps and restore the appearance of your hardwood floors.
Here are some reasons why you might consider hiring a professional for filling hardwood floor gaps:
- Expertise and Skill: Professionals have extensive experience working with hardwood floors and are familiar with various gap-filling techniques. They can assess the condition of your floors, identify the best method for filling the gaps, and execute the job with precision and attention to detail.
- Quality Materials and Tools: Professionals have access to high-quality materials and tools that may not be readily available to homeowners. They can utilize professional-grade fillers, adhesives, and finishing products for a superior and long-lasting result.
- Time and Efficiency: Hiring a professional saves you time and effort. They have the necessary equipment and manpower to complete the job efficiently, ensuring minimal disruption to your daily routine.
- Seamless Finish: Professionals have the skills to achieve a seamless finish, blending the filled areas with the rest of the flooring. They can also provide advice on matching the color and texture of the filler to your hardwood floors.
- Additional Floor Services: Professionals can offer additional services such as refinishing, sanding, or overall floor restoration. They can assess the overall condition of your floors and provide recommendations to enhance their appearance and longevity.
When hiring a professional, it’s important to do your research and choose a reputable and experienced flooring contractor or wood flooring specialist. Look for references, read reviews, and ask for examples of their previous work. It’s also recommended to obtain multiple quotes to compare prices and services offered.
While hiring a professional may involve an additional cost, it can provide peace of mind knowing that the job is being done by skilled experts who have the necessary tools and expertise.
Now that we have discussed the different methods for filling hardwood floor gaps, as well as the option of hiring a professional, it’s essential to follow some tips to prevent future gaps from occurring.
Read more: How To Fill Gaps In Brick Walls
Tips for Preventing Future Hardwood Floor Gaps
To minimize the occurrence of hardwood floor gaps in the future, it’s important to take preventive measures and practice proper maintenance. Here are some valuable tips to help you prevent future gaps:
- Acclimation: Before installing hardwood floors, ensure that the flooring planks have acclimated to the environment. This process allows the wood to adjust to the temperature and humidity of the room, minimizing the risk of excessive expansion or contraction.
- Proper Installation: Make sure hardwood floors are installed correctly, following the manufacturer’s guidelines and industry best practices. Leave an appropriate expansion gap around the perimeter of the room to allow for natural wood movement.
- Maintain Stable Humidity Levels: Fluctuations in humidity can cause wood to expand or shrink, leading to gaps. Use a humidifier during dry winter months to add moisture to the air and a dehumidifier during humid summers to remove excess moisture. Aim to maintain a stable humidity level between 35% and 55%.
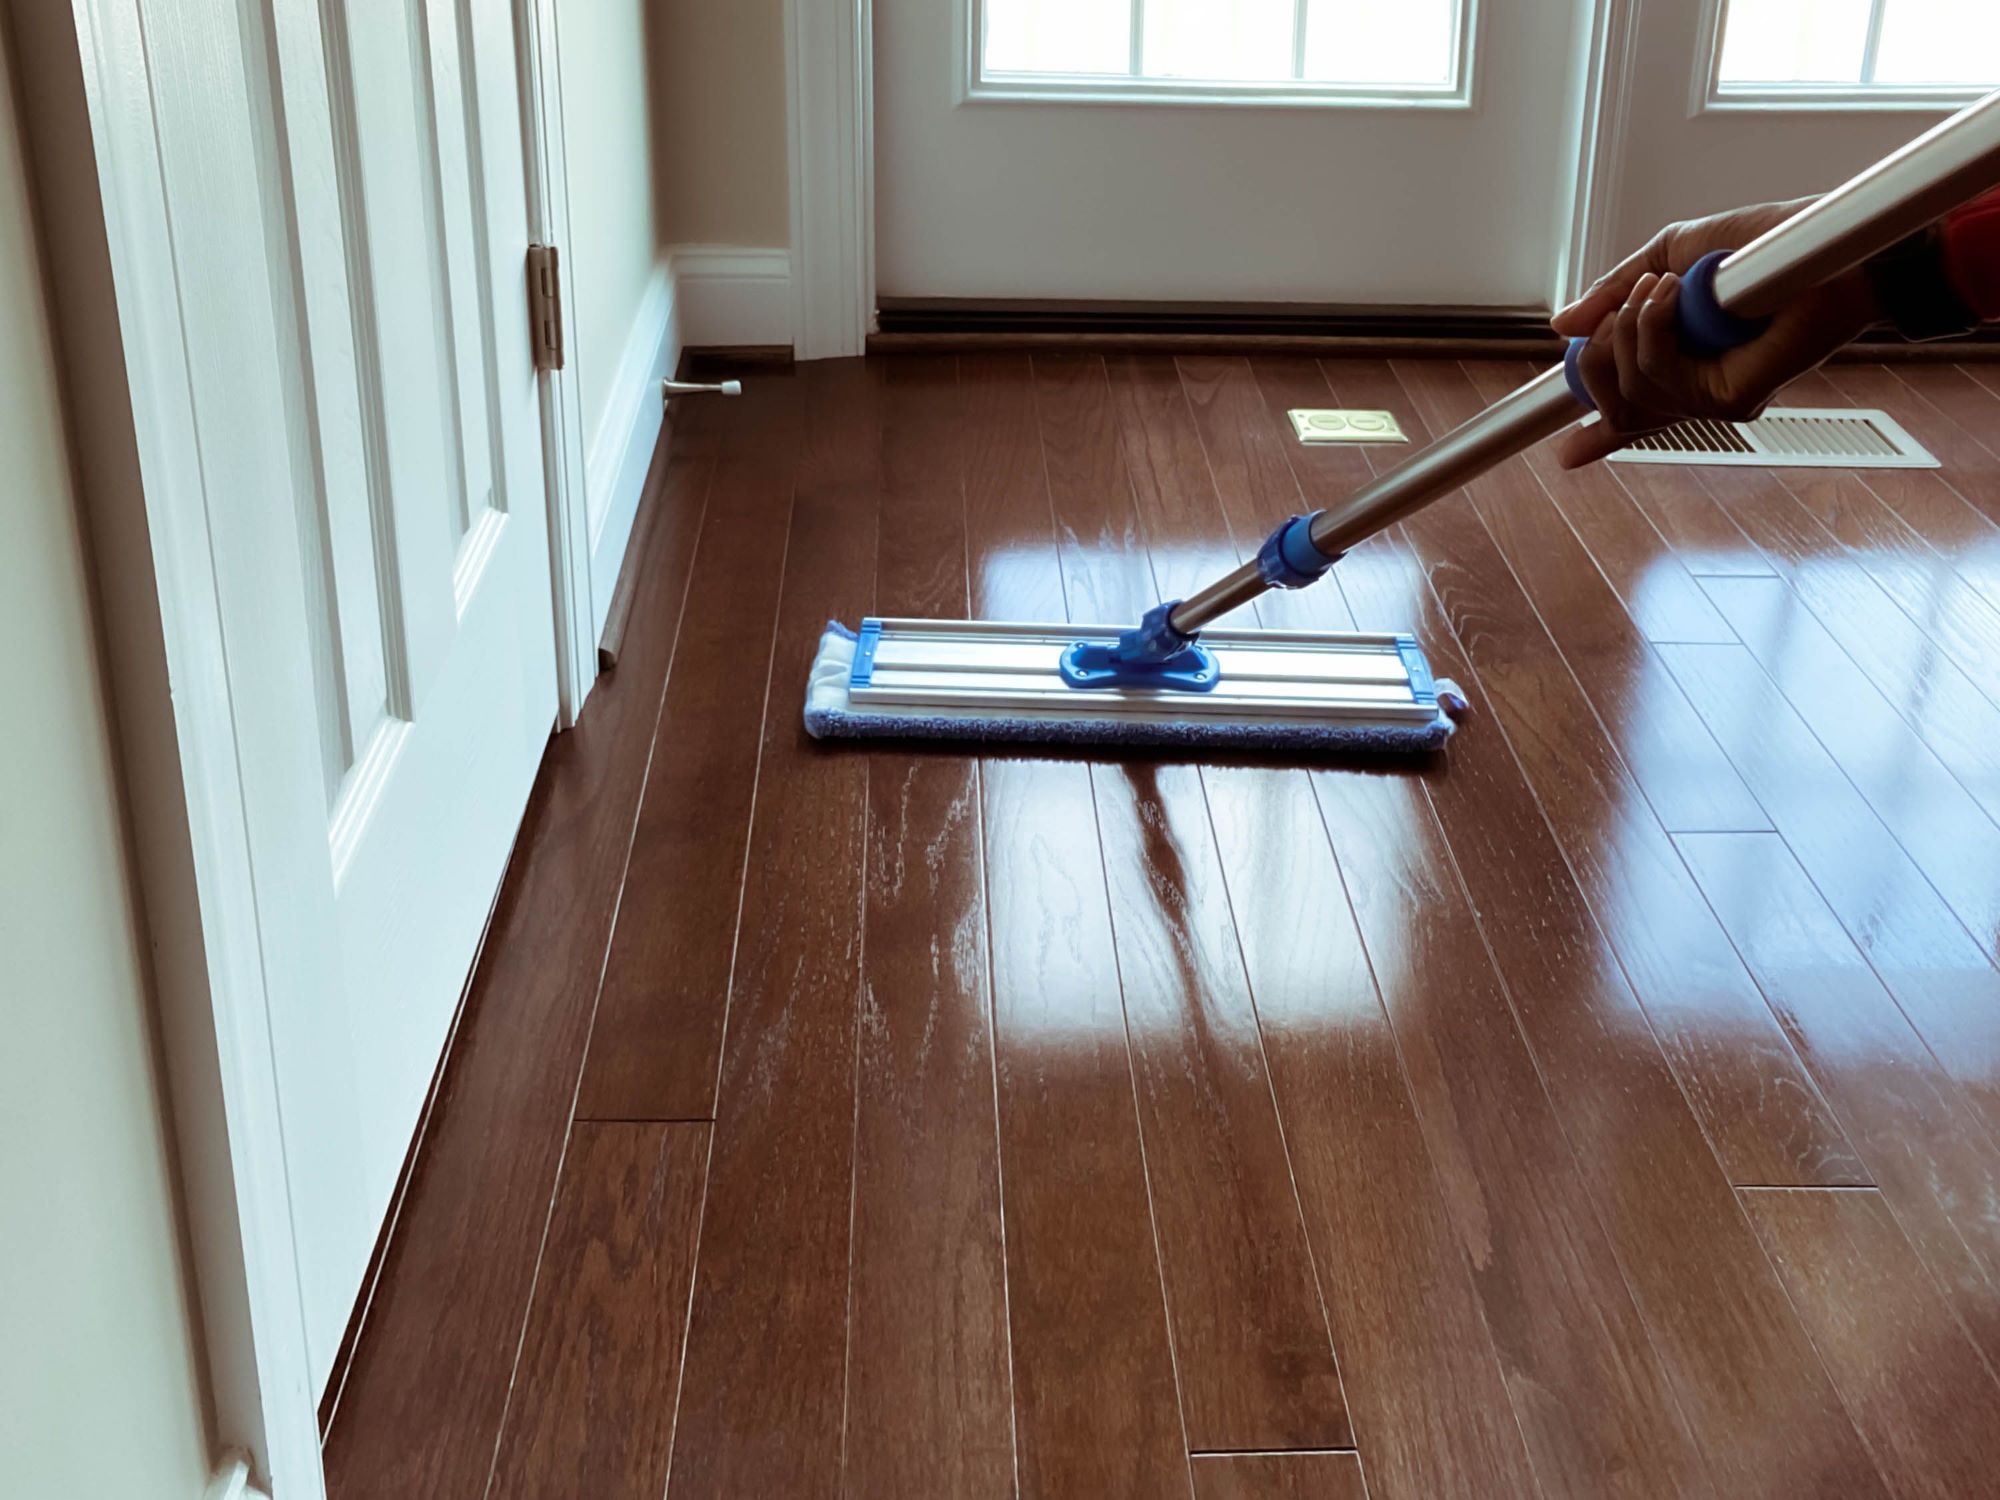
- Regular Cleaning: Keep your hardwood floors clean by regularly sweeping or vacuuming to remove dirt, dust, and debris. These particles can accumulate in the gaps and contribute to their widening. Use a microfiber mop or damp cloth for occasional wet cleaning, avoiding excessive moisture that may cause wood swelling.
- Immediate Spill Cleanup: Promptly clean up any spills or moisture on your hardwood floors to prevent water damage and wood expansion. Use a soft cloth or paper towel to absorb the liquid and ensure the area is thoroughly dried.
- Protective Pads: Attach felt or rubber protective pads to furniture legs to prevent scratches and gouges that can lead to gap formation. Regularly check and replace worn-out pads to maintain their effectiveness.
- Avoid High Heels and Sharp Objects: Discourage walking on hardwood floors with high-heeled shoes or allowing sharp objects to come in direct contact with the surface. These can cause indentations and damage to the wood, potentially leading to gap formation.
- Regular Maintenance Inspections: Conduct periodic inspections of your hardwood floors to identify any early signs of gaps or potential issues. Addressing any concerns promptly can help prevent further damage and costly repairs.
By following these tips and maintaining a proactive approach, you can minimize the chances of hardwood floor gaps appearing in the future. Remember that proper installation, regular cleaning, and maintenance are crucial for the longevity and beauty of your hardwood floors.
As a final note, it’s important to consult with a professional flooring contractor or wood flooring specialist if you have any significant concerns or if you prefer expert guidance in preventing and addressing hardwood floor gaps.
We hope these tips have provided valuable insights for preventing future gaps and maintaining the integrity of your hardwood floors.
Now you are equipped with the knowledge and methods to fill and prevent hardwood floor gaps effectively. Enjoy your beautiful and gap-free hardwood floors!
Conclusion
Hardwood floor gaps can be unsightly and can impact the functionality and appearance of your flooring. However, with the right methods and tools, you can effectively fill these gaps and restore the beauty of your hardwood floors.
In this article, we explored various methods for filling hardwood floor gaps, including using wood filler, rope or cord, sawdust and wood glue, and epoxy resin. Each method has its own advantages and considerations, allowing you to choose the one that best suits your needs and preferences.
We also discussed the importance of understanding the causes of hardwood floor gaps, such as natural wood movement, improper installation, and wear and tear, as well as providing tips for preventing future gaps from occurring.
Whether you decide to embrace a DIY approach or hire a professional, ensuring proper preparation, using the right materials, and following the recommended steps will contribute to achieving a seamless and durable finish.
Remember to acclimate your flooring before installation, maintain stable humidity levels, and clean your floors regularly to minimize the risk of gaps. Additionally, protect your floors from furniture damage and address any spills or water-related issues promptly.
By implementing these preventive measures and employing the appropriate gap-filling methods, you can enjoy beautiful and gap-free hardwood floors for years to come.
If you are uncertain or uncomfortable with the gap-filling process, it’s always a good idea to consult with a professional flooring contractor or wood flooring specialist. They have the expertise and tools to handle the task effectively and provide additional services, such as refinishing or overall floor restoration, if needed.
Now that you have a comprehensive understanding of how to fill hardwood floor gaps and prevent future gaps, you can confidently tackle this task and enjoy the timeless beauty and warmth that hardwood floors bring to your home.
Good luck with your gap-filling journey, and may your hardwood floors remain stunning and gap-free for years to come!
Frequently Asked Questions about How To Fill Hardwood Floor Gaps
Was this page helpful?
At Storables.com, we guarantee accurate and reliable information. Our content, validated by Expert Board Contributors, is crafted following stringent Editorial Policies. We're committed to providing you with well-researched, expert-backed insights for all your informational needs.


0 thoughts on “How To Fill Hardwood Floor Gaps”