Articles
How To Fix Soft Spots In Floor
Modified: May 6, 2024
Learn effective ways to fix soft spots in your floor with these helpful articles. Resolve the issue quickly and easily with expert tips and techniques.
(Many of the links in this article redirect to a specific reviewed product. Your purchase of these products through affiliate links helps to generate commission for Storables.com, at no extra cost. Learn more)
Introduction
Welcome to this comprehensive guide on how to fix soft spots in floors. Soft spots in flooring can be a real nuisance, not to mention a potential safety hazard. Whether you have carpeted floors, hardwood floors, or even tile floors, soft spots can occur due to various reasons such as water damage, aging subfloor, or improper installation.
Soft spots in floors not only feel uncomfortable underfoot, but they can also indicate underlying structural issues that need to be addressed. Ignoring soft spots can lead to further damage to your flooring and even compromise the stability of your entire floor system.
In this guide, we will take you through a step-by-step process to identify the cause of soft spots, prepare the area for repair, repair the subfloor, replace damaged flooring, and provide some important prevention tips to avoid future soft spots. It’s essential to tackle soft spots as soon as possible to maintain the integrity and safety of your flooring.
But before we dive into the practical steps, let’s first understand what causes soft spots in floors and the tools and materials you will need for the repair process.
Key Takeaways:
- Don’t ignore soft spots in floors! Address the root cause promptly to prevent further damage and ensure the stability and safety of your flooring.
- Proper preparation, thorough repair, and preventive measures are key to fixing soft spots in floors effectively and maintaining long-lasting results.
Read more: How To Fix Pee Spots In Grass
Understanding Soft Spots in Floors
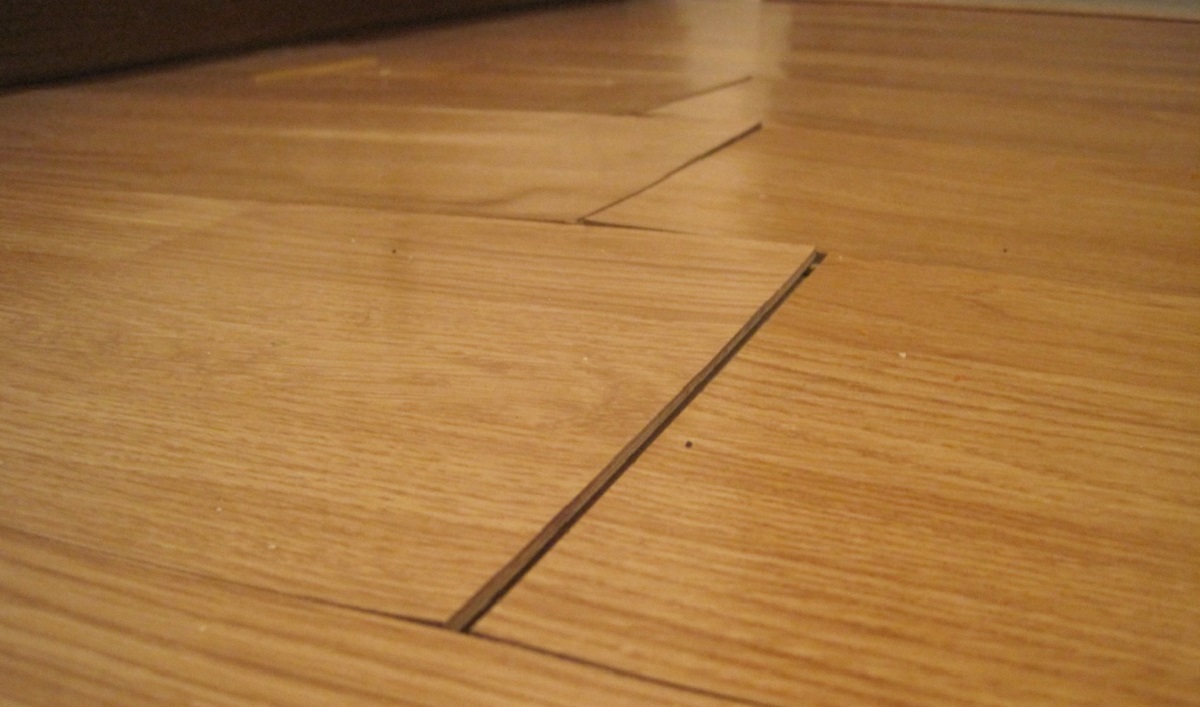
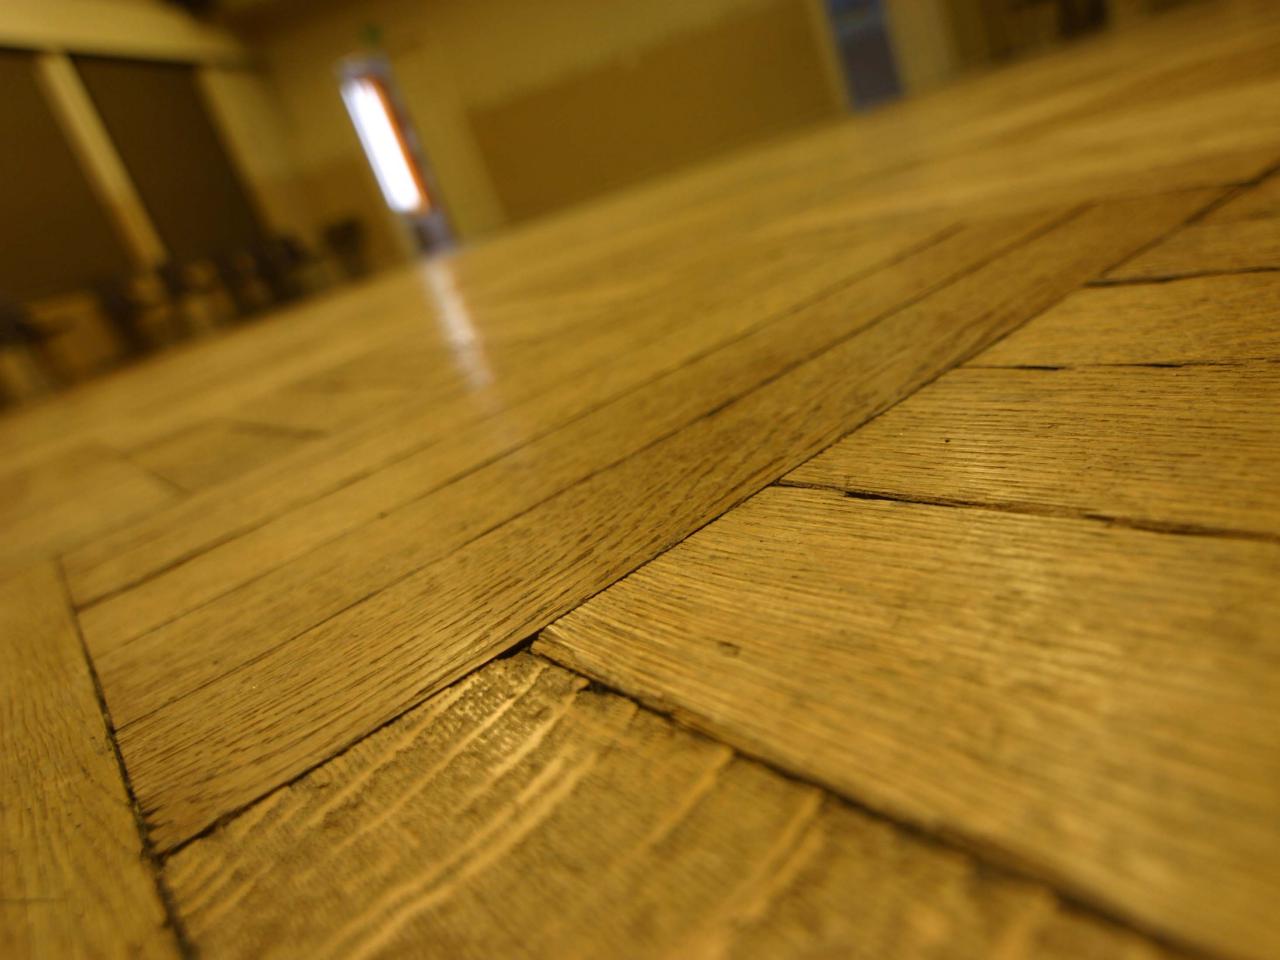
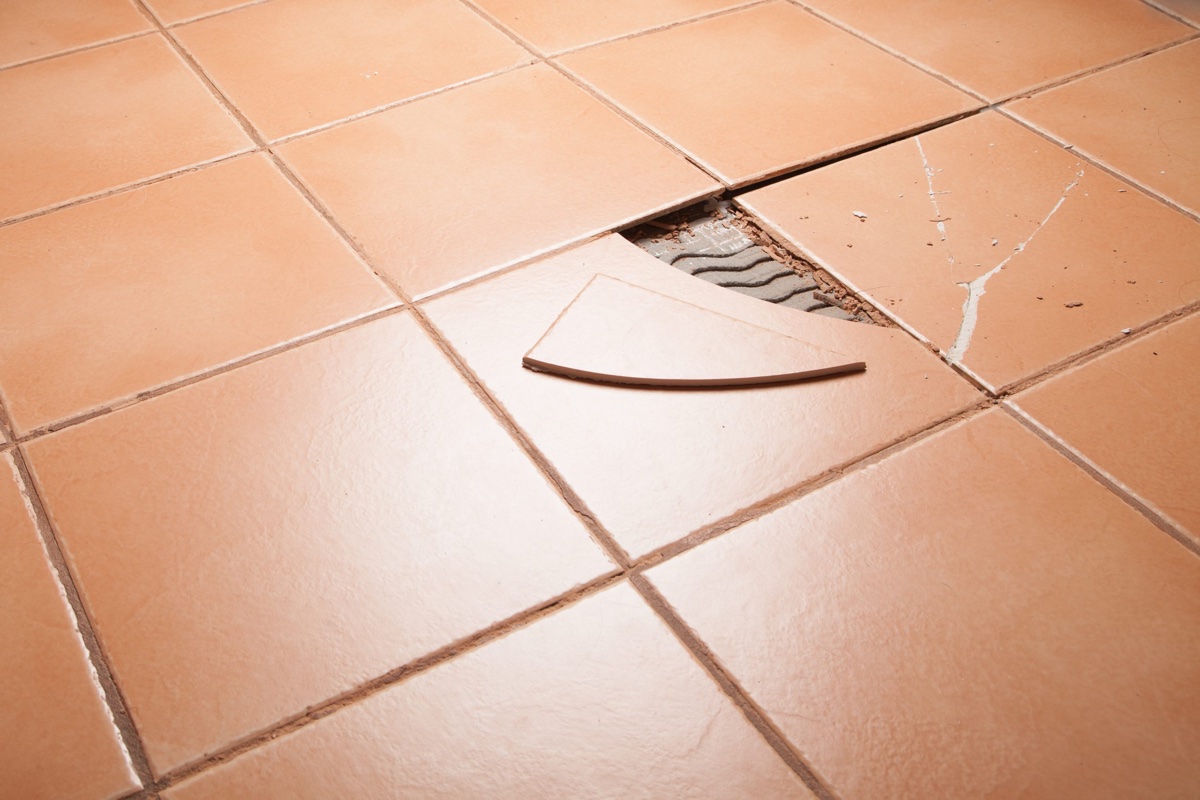
Soft spots in floors are areas that give a sinking or uneven feeling underfoot. These spots may feel weak or spongy compared to the surrounding floor. They can occur in various types of flooring, including carpet, hardwood, and tile.
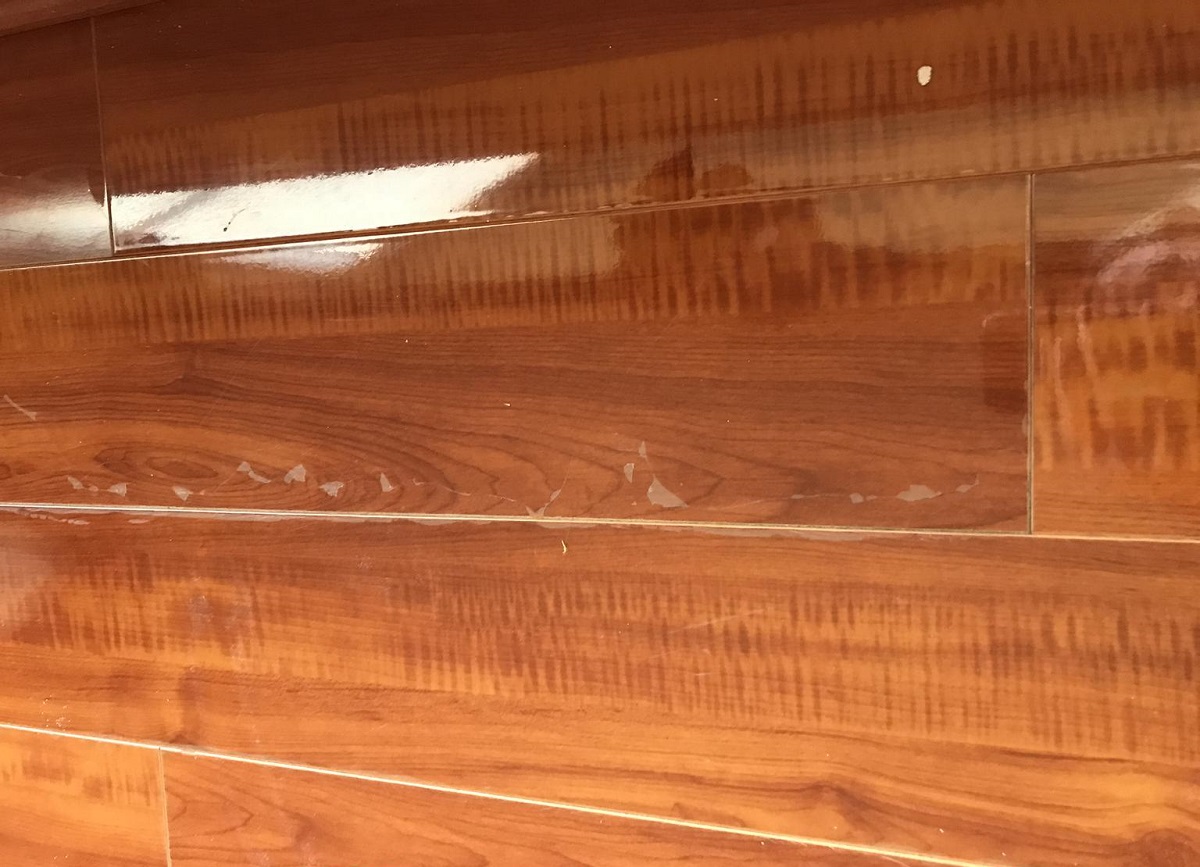
There are several common causes of soft spots in floors. One of the main culprits is water damage. If water is allowed to penetrate the subfloor, it can weaken the structural integrity and lead to soft spots. This can happen due to leaks, spills, or flooding, especially in areas prone to moisture such as bathrooms, kitchens, or basements.
Another cause of soft spots is an aging or deteriorating subfloor. Over time, the subfloor may weaken due to wear and tear, rot, or insect damage. This can result in areas of the floor feeling soft or unstable.
Improper installation of flooring can also lead to soft spots. If the subfloor was not properly prepared or if the flooring material was not installed correctly, it can result in weak areas that feel soft or uneven.
Identifying soft spots in floors is crucial to determine the appropriate course of action for repair. You can identify soft spots by walking across the floor and paying attention to areas that feel different, sink, or give a creaking sound. Visual inspection can also help pinpoint any visible signs of damage or deterioration.
Now that we have a better understanding of what causes soft spots, let’s move on to the tools and materials you will need for the repair process.
Tools and Materials Needed
Before you start repairing the soft spots in your floors, it’s essential to gather the necessary tools and materials. Having everything prepared in advance will make the repair process smoother and more efficient. Here is a list of the tools and materials you will need:
– Tape measure: A tape measure will be useful for taking measurements and ensuring accurate cuts.
– Circular saw or jigsaw: Depending on the type of flooring material, you may need a circular saw or jigsaw to cut through the damaged sections.
– Pry bar: A pry bar will help you remove any baseboards or trim necessary for accessing the affected area.
– Hammer: A hammer will be required for removing nails or securing loose floorboards and subfloor.
– Drill: A drill will be necessary for screwing down loose floorboards to the subfloor.
– Screwdriver: A screwdriver will be needed for removing screws and making adjustments to the subfloor.
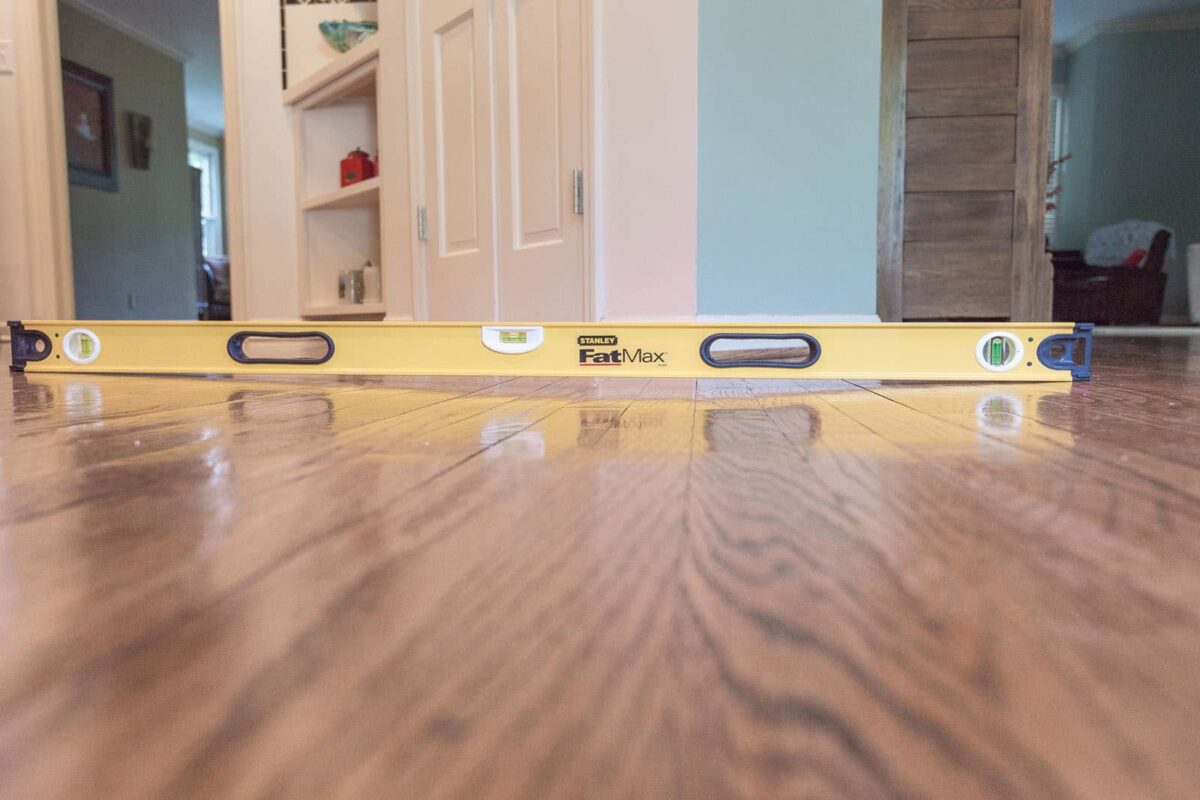
– Level: A level will help you determine if the floor is even after repairs have been made.
– Chisel: A chisel will be useful for removing any damaged or rotted subfloor sections.
– Putty knife: A putty knife will help you apply adhesive or filler to repair the subfloor.
– Adhesive or filler: Depending on the type of subfloor and repair required, you may need adhesive or filler to strengthen the subfloor.
– Replacement flooring: If the soft spots have damaged the flooring material, you may need replacement flooring to restore the floor’s appearance and integrity.
– Safety gear: Don’t forget to prioritize safety by wearing protective goggles, gloves, and a dust mask during the repair process.
It’s important to note that the specific tools and materials you need may vary depending on the extent of the damage and the type of flooring you have. Assess the situation carefully and ensure you have all the necessary items before starting the repair work.
Now that you are equipped with the right tools and materials, let’s move on to the step-by-step process of fixing the soft spots in your floors.
Step 1: Identifying the Cause of Soft Spots
Before diving into the repair process, it’s important to identify the cause of the soft spots in your floors. Understanding the root cause will not only help you address the existing problem but also prevent future occurrences.
Here are some key steps to follow when identifying the cause of soft spots:
- Observe the affected area: Take note of the location and extent of the soft spots. Are they isolated to a particular area, or do they span across the floor? This will give you an idea of the scale of the problem.
- Check for signs of water damage: Inspect the flooring and surrounding areas for signs of water damage, such as discoloration, mold, or mildew. Pay particular attention to areas near sinks, toilets, showers, or any pipes that could be leaking.
- Inspect the subfloor: If possible, access the subfloor beneath the soft spots. Look for any signs of rot, decay, or insect damage. These issues can weaken the subfloor and contribute to the formation of soft spots.
- Consider previous repairs or installations: If the soft spots are localized to a specific area, consider any past repairs or installations that might have been done there. Incorrect subfloor preparation or improper installation of flooring materials can lead to soft spots over time.
- Seek professional advice if needed: If you’re unsure about the cause of the soft spots or if the damage appears severe, it may be beneficial to consult a professional contractor or flooring specialist. They can provide expert insights and recommend the best course of action.
By thoroughly evaluating the cause of the soft spots, you’ll be able to determine the most appropriate repair methods. Whether it’s addressing water damage, reinforcing the subfloor, or replacing faulty flooring materials, understanding the cause will guide your repair process.
Once you’ve identified the cause, you can move on to the next step: preparing the area for repair.
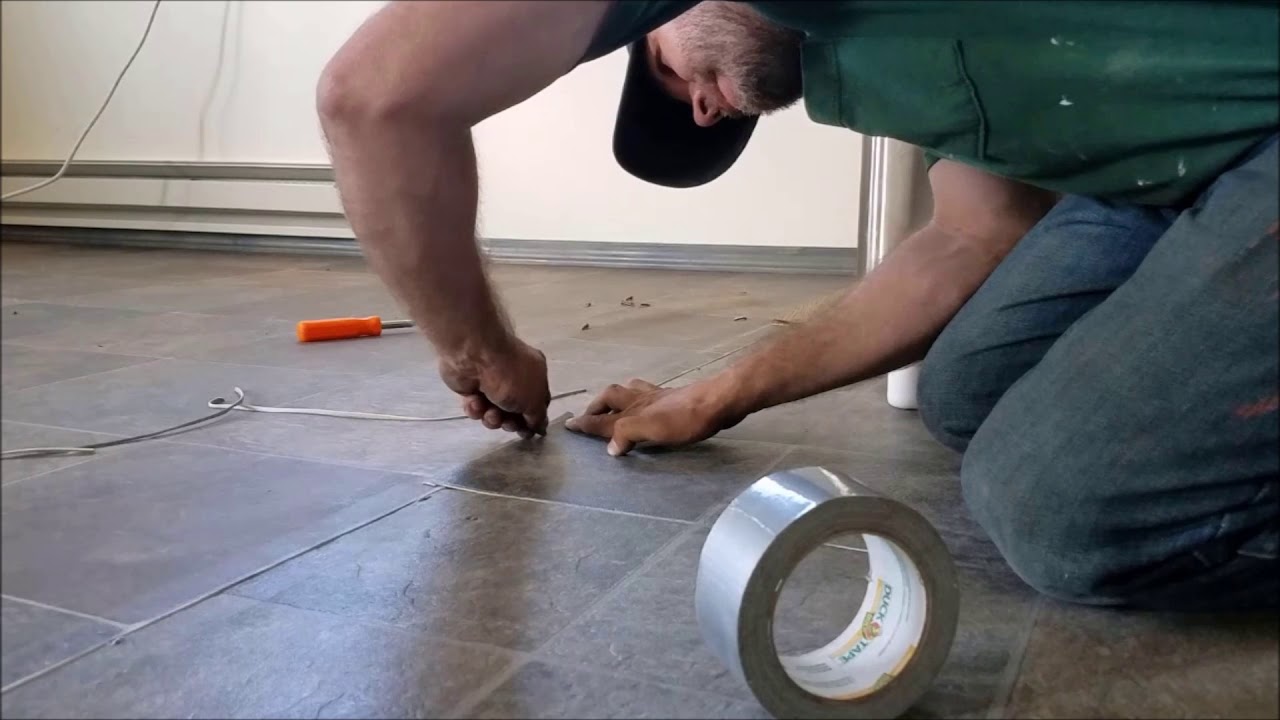
Step 2: Preparing the Area
Now that you have identified the cause of the soft spots in your floors, it’s time to prepare the affected area for repair. Proper preparation will ensure that the repair process goes smoothly and that the results are long-lasting.
Follow these steps to prepare the area:
- Clean the area: Start by clearing the affected area of any furniture, rugs, or debris. This will give you a clear workspace and make it easier to access the damaged sections of the floor.
- Remove baseboards and trim: If necessary, carefully remove the baseboards or trim surrounding the soft spots. This will allow you to access the subfloor and damaged areas more easily.
- Secure loose floorboards: Inspect the floorboards surrounding the soft spots. If you find any loose or squeaky boards, use a drill and screws to secure them to the subfloor. This will prevent further movement and potential damage.
- Remove damaged flooring: If the soft spots have caused damage to the flooring material, carefully remove the affected sections. This may involve cutting through the damaged areas using a circular saw or jigsaw.
- Inspect the subfloor: Once the damaged flooring is removed, examine the subfloor below for any signs of rot, decay, or damage. If you notice any compromised sections, consider removing and replacing them to ensure a solid foundation for the repair.
- Clean the subfloor: Thoroughly clean the subfloor of any debris, dust, or residue. A clean, smooth surface will allow for proper adhesion when repairing the subfloor or installing new flooring.
By carefully preparing the area, you ensure that the repair process will be more efficient and the results will be long-lasting. Taking the time to remove damaged flooring and inspect the subfloor will also help prevent further issues down the line.
Once the area is properly prepared, you can move on to the next step: repairing the subfloor.
Identify the cause of the soft spots, such as water damage or rotting subfloor. Repair or replace the damaged subfloor and ensure proper ventilation to prevent future issues.
Read more: How To Fix Black Spot On Projector
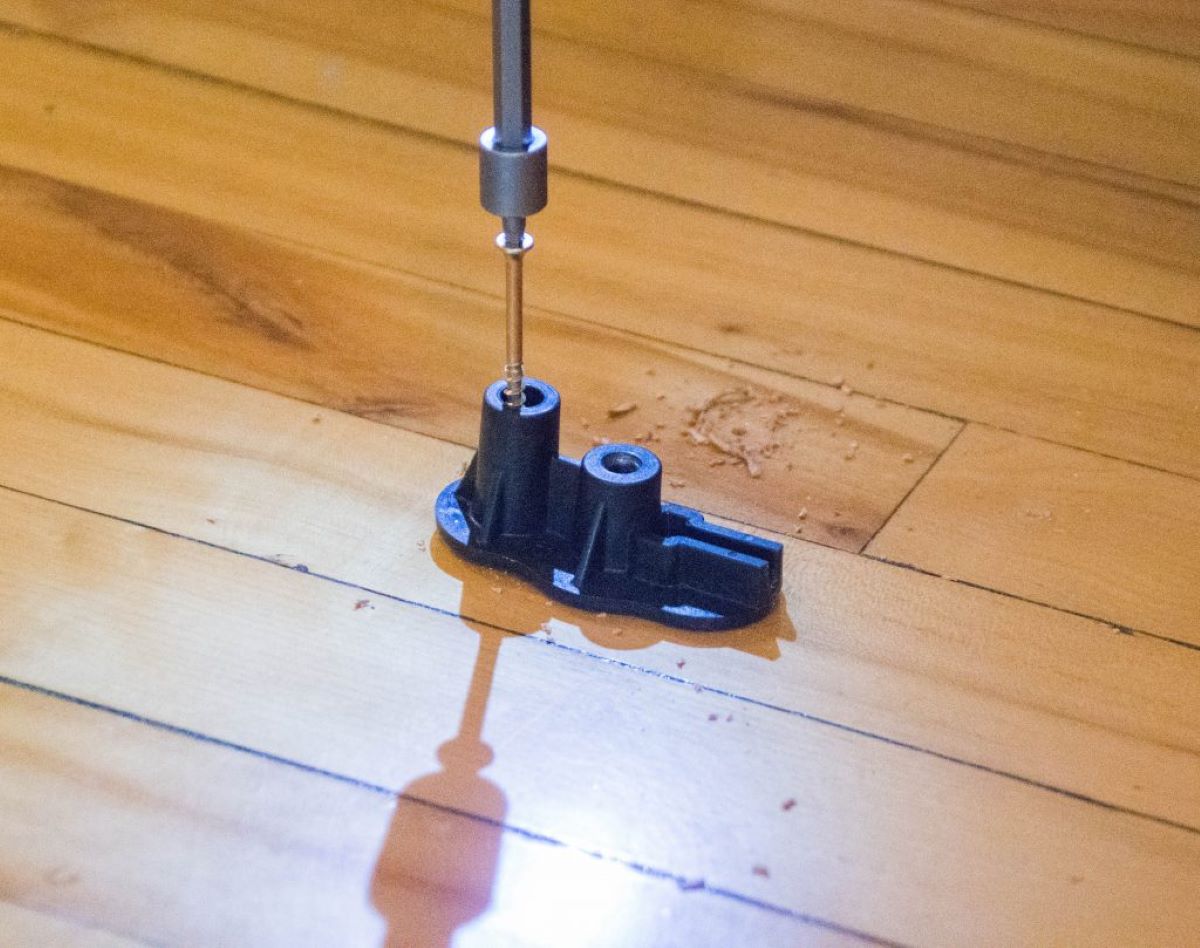
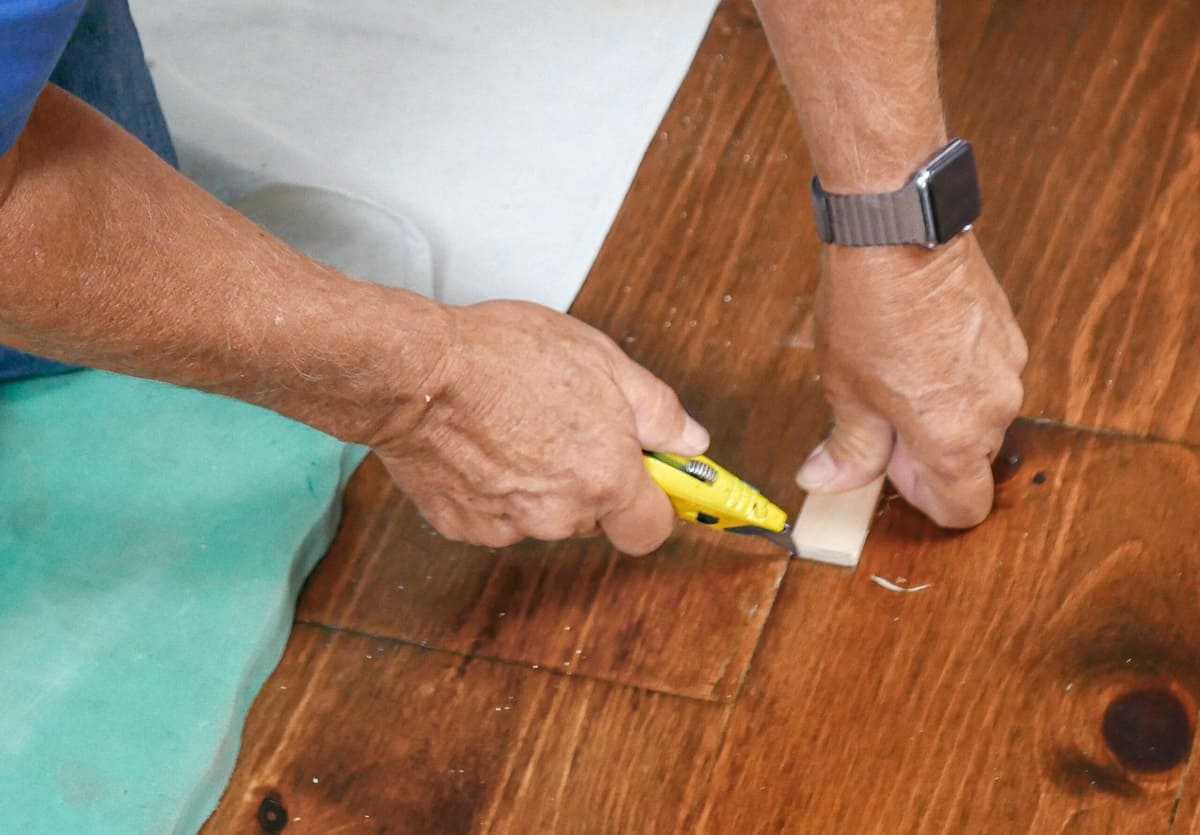
Step 3: Repairing the Subfloor
With the area properly prepared, it’s time to focus on repairing the subfloor. Strengthening the subfloor will provide a solid foundation for the flooring and help eliminate the soft spots. The exact method of repair will depend on the extent of damage and the type of subfloor you have. Here’s a general outline of the subfloor repair process:
- Replace damaged subfloor: If you identified any sections of the subfloor that are rotten or damaged, carefully remove them using a chisel or circular saw. Cut replacement subfloor pieces to fit and secure them in place using screws or nails.
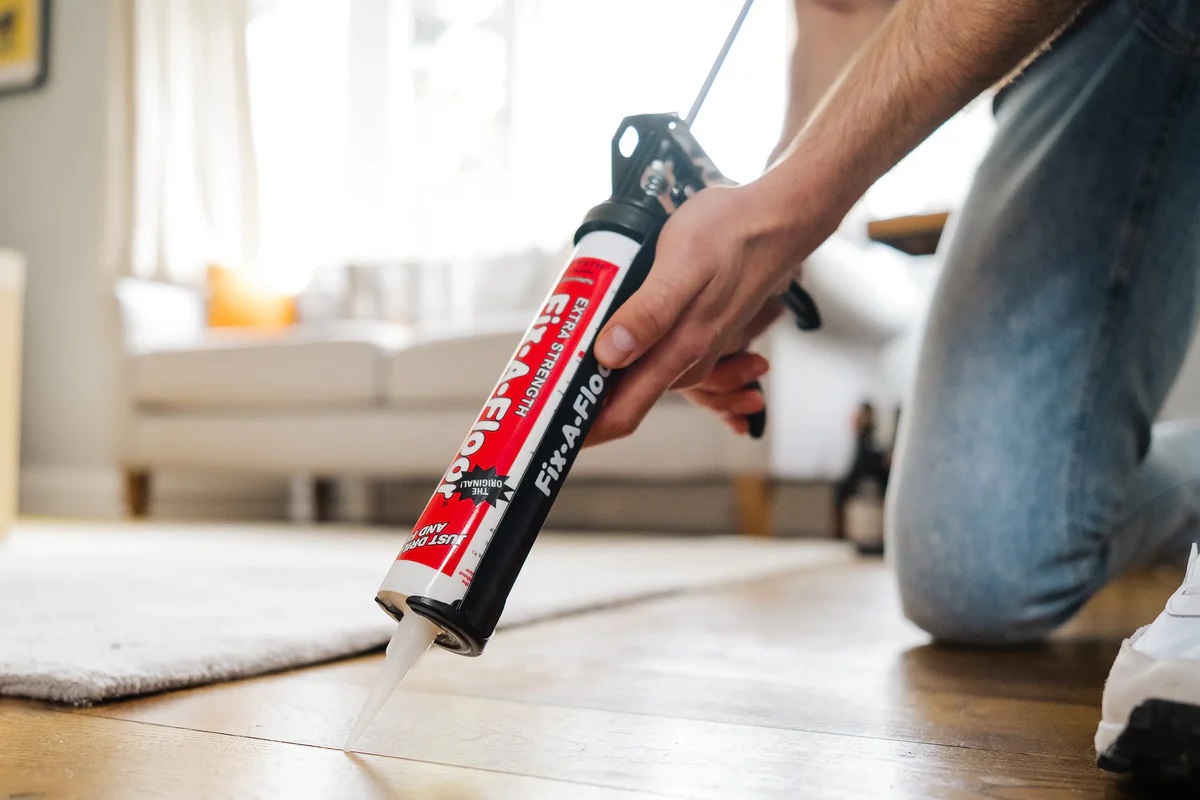
- Fill gaps and cracks: Inspect the remaining subfloor for any gaps or cracks. Fill these areas with an appropriate filler or adhesive, following the manufacturer’s instructions. This will help reinforce the subfloor and create a more stable surface.
- Secure subfloor: Use screws or nails to secure the subfloor to the floor joists. This will ensure that the subfloor is securely attached and minimize any potential movement that could lead to soft spots in the future.
- Apply adhesive: Depending on the type of subfloor and flooring material, applying adhesive can further strengthen the subfloor. Follow the recommendations for the specific adhesive product and apply it evenly across the subfloor.
- Allow time for the adhesive to dry: Once the adhesive is applied, allow sufficient time for it to dry and cure. This is important before moving on to the next step, which is replacing the damaged flooring.
By following these steps, you will reinforce the subfloor and eliminate any weak or soft areas. This will create a stable foundation for the new flooring and prevent future soft spots.
Now that the subfloor is repaired, it’s time to move on to the next step: replacing the damaged flooring.
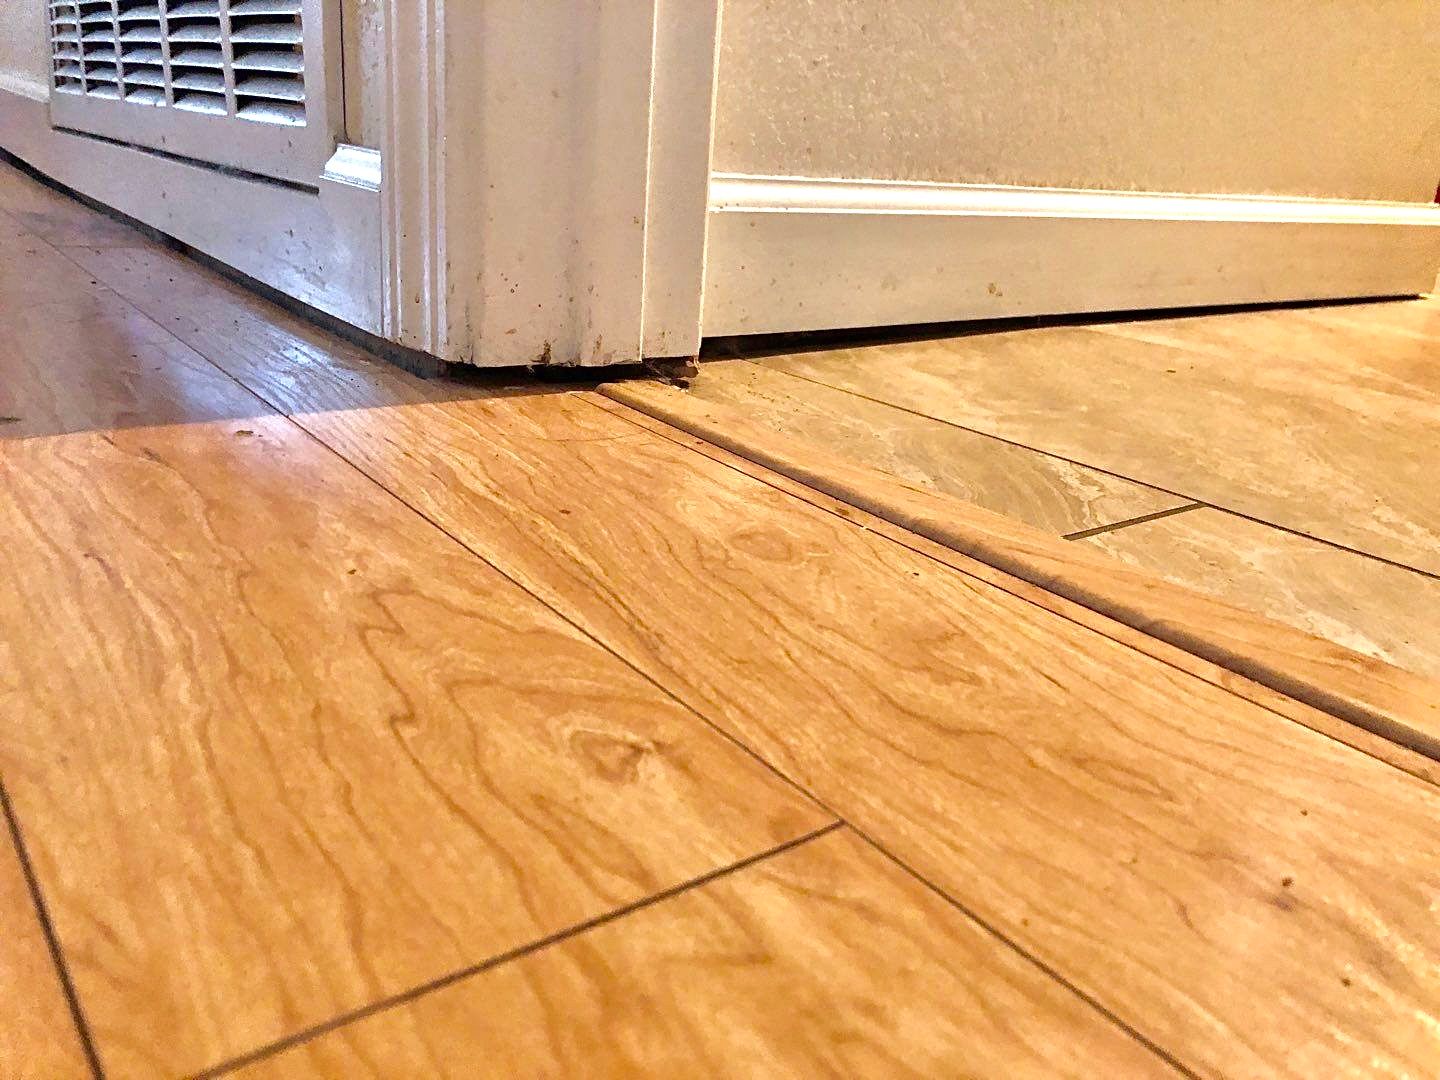
Step 4: Replacing Damaged Flooring
Now that the subfloor is sturdy and stable, it’s time to replace the damaged flooring. This step involves installing new flooring materials that will not only cover the repaired subfloor but also provide a smooth, even surface for walking. The specific process will depend on the type of flooring you have, so be sure to follow the manufacturer’s instructions. Here’s a general outline of the process:
- Select replacement flooring: Choose new flooring materials that match the existing floor or complement your desired aesthetic. Consider the type of flooring, such as hardwood, laminate, carpet, or tile, and ensure it is compatible with your subfloor.
- Prep the replacement flooring: If necessary, cut the replacement flooring to fit the dimensions of the area you are repairing. Use a measuring tape and a circular saw or other appropriate tools to achieve accurate cuts.
- Apply adhesive or install underlayment: Depending on the type of flooring, you may need to apply adhesive to the subfloor or install an underlayment before laying down the new flooring. Follow the manufacturer’s instructions for proper installation.
- Lay down the new flooring: Carefully place the new flooring materials onto the subfloor, following the recommended installation pattern. If necessary, use a mallet or rubber mallet to gently tap the flooring into place and ensure a snug fit.
- Secure the flooring: Depending on the type of flooring, you may need to secure it further by using nails, screws, or adhesive, as specified by the manufacturer.
- Allow the flooring to acclimate and settle: Leave the new flooring in place for a recommended period to acclimate to the room’s temperature and humidity. This will minimize the risk of the flooring expanding or contracting after installation.
Take your time during this step to ensure that the new flooring is properly installed and aligned with the existing flooring. It’s important to pay attention to detail to achieve a seamless look and prevent future issues.
Once the new flooring is in place, move on to the final step: finishing touches and prevention tips.
Step 5: Finishing Touches and Prevention Tips
As you near the end of the soft spot repair process, it’s important to add the finishing touches and implement preventive measures to ensure the longevity of your newly repaired floor. This step includes final adjustments, cleaning, and adopting practices that will minimize the chances of soft spots reoccurring in the future.
- Trim and baseboard installation: Replace the baseboards and trim that were removed during the preparation stage. Ensure the trim is securely attached to the walls and provides a clean and polished appearance to your repaired floor.
- Inspect the repaired area: Take a final walk on the repaired floor to ensure it feels solid and even. If you notice any areas that still feel soft or unstable, go back and re-evaluate the repair work. Additional attention might be required for a successful repair.
- Finishing touches: If necessary, apply touch-up paint or stain to the baseboards, trim, or any areas that require minor repairs or aesthetic improvements. This will help blend the repaired section seamlessly into the rest of the floor.
- Regular maintenance: Maintaining your floors properly is essential for their longevity and preventing future soft spots. Follow the manufacturer’s guidelines for cleaning and maintenance to ensure the floor remains in good condition.
- Avoid water damage: Be mindful of water and moisture sources near the repaired area. Promptly clean up spills, fix any leaks, and use waterproofing measures, such as mats or sealant, to protect the floor from potential water damage.
- Address ventilation and humidity: Ensure proper ventilation in areas prone to moisture, such as bathrooms and kitchens. Use dehumidifiers or fans to minimize humidity levels, as high humidity can lead to subfloor damage and soft spots.
- Address underlying issues: If the soft spots were caused by structural issues, such as inadequate subfloor support, it’s important to address these problems to prevent future issues. Consult with a professional if necessary.
By completing these finishing touches and implementing preventative measures, you will not only ensure the aesthetics and stability of your repaired floor but also minimize the chances of encountering soft spots again in the future.
Congratulations! You have successfully learned how to fix soft spots in floors. Remember to always take a proactive approach in maintaining your floors to avoid costly repairs and maintain the beauty and integrity of your flooring.
If you have any further questions or concerns, don’t hesitate to consult a professional for guidance and assistance.
Thank you for following this comprehensive guide, and best of luck with your floor repair journey!
Conclusion
Fixing soft spots in floors can seem like a daunting task, but with the right knowledge and approach, you can successfully restore the integrity and stability of your flooring. By following the step-by-step process outlined in this guide, you have learned how to effectively identify the cause of soft spots, prepare the area for repair, strengthen the subfloor, replace damaged flooring, and add finishing touches.
Soft spots in floors can be caused by various factors, such as water damage, aging subfloors, or improper installation. It’s essential to address these issues promptly to prevent further damage and potential safety hazards. By understanding the underlying causes and properly repairing and replacing the damaged areas, you can enjoy a sturdy and long-lasting floor.
Remember to prioritize regular maintenance and follow preventive measures to minimize the chances of soft spots reoccurring. This includes addressing water damage issues, maintaining proper ventilation, and being mindful of potential sources of moisture. By taking these precautions, you can significantly prolong the lifespan of your floors and avoid future headaches.
If you are unsure about the repair process or encounter any structural issues beyond your expertise, it is always wise to seek professional guidance. A flooring specialist or contractor can provide expert advice and ensure that your repair work is done effectively and safely.
Thank you for following this comprehensive guide on how to fix soft spots in floors. By applying the knowledge and techniques you have learned here, you can restore the beauty and functionality of your floors and enjoy a solid and stable surface for years to come.
Now that you've mastered fixing soft spots in your floor, why stop there? Dive into our guide on home repair to tackle all sorts of challenges around your house. Eager to get hands-on? Our DIY home improvement article offers easy-to-follow projects that'll transform your space. And if you're considering an upgrade, don't miss our list of home renovation must-haves, featuring the 10 best hardwood floors to really make a room pop.
Frequently Asked Questions about How To Fix Soft Spots In Floor
Was this page helpful?
At Storables.com, we guarantee accurate and reliable information. Our content, validated by Expert Board Contributors, is crafted following stringent Editorial Policies. We're committed to providing you with well-researched, expert-backed insights for all your informational needs.


0 thoughts on “How To Fix Soft Spots In Floor”