Articles
How To Fix Siding That Is Loose
Modified: October 28, 2024
Learn how to fix loose siding with these helpful articles. Find step-by-step guides and expert tips to repair and secure your siding.
(Many of the links in this article redirect to a specific reviewed product. Your purchase of these products through affiliate links helps to generate commission for Storables.com, at no extra cost. Learn more)
Introduction
Having loose siding on your home can not only be unsightly, but it can also cause further damage if not addressed promptly. Loose siding can be caused by a variety of factors, including age, weather conditions, improper installation, and even pests. However, the good news is that with a little bit of know-how and some basic tools, you can fix loose siding on your own.
In this article, we will walk you through the step-by-step process of fixing loose siding. We will cover common causes of loose siding, the tools and materials you will need, and provide a detailed guide on how to inspect, remove, replace, and secure the siding. By following these instructions, you can restore the integrity and appearance of your home’s exterior.
Before we dive into the fixing process, it is important to note that safety should always be your top priority. Make sure to use appropriate safety measures, such as wearing protective gear and using stable ladders, when working at heights or with power tools.
Now, let’s delve into the common causes of loose siding and understand how they can impact the overall condition of your home.
Key Takeaways:
- Identifying the common causes of loose siding, such as poor installation, age, extreme weather, pests, and foundation settling, is crucial for effective repair and prevention of further damage. Understanding the underlying issue is the first step to a successful fix.
- By following the step-by-step process of inspecting, removing, replacing, and securing loose siding, homeowners can restore the integrity and appearance of their home’s exterior. Prioritizing safety and using the right tools and materials are essential for a long-lasting solution.
Read more: How To Fix A Loose Faucet
Common Causes of Loose Siding
Loose siding can occur due to a variety of factors, many of which can be attributed to the passage of time and exposure to the elements. By understanding the common causes of loose siding, you can better assess the extent of the damage and take appropriate measures to fix it.
- Poor Installation: Improper installation of siding can lead to it coming loose over time. If the siding was not securely fastened or if the wrong nails were used, it can easily become dislodged.
- Age and Wear: As siding ages, it can become brittle, making it more prone to cracking and coming loose. The constant exposure to the sun, rain, wind, and other weather conditions can cause the siding to deteriorate, resulting in loose panels.
- Extreme Weather Conditions: Severe weather events, such as storms, high winds, and hail, can cause significant damage to siding. The forceful impact of wind or hail can loosen siding panels and even break them.
- Pest Infestation: Pests, such as termites or carpenter ants, can cause damage to the structure of your home, including the siding. These insects can weaken the siding material, leading to its loosening and potential displacement.
- Settling of the Foundation: Over time, the foundation of your home may settle, causing shifts in the structure. This movement can affect the siding, causing it to become loose or pull away from the house.
Identifying the cause of your loose siding is crucial for determining the appropriate course of action. By understanding the underlying issue, you can address it effectively and prevent further damage from occurring. Now that we have explored the common causes of loose siding, let’s move on to the essential tools and materials you will need to fix it.
Tools and Materials Needed
Before you begin fixing the loose siding, it’s important to gather the necessary tools and materials. Here is a list of items you will need:
- Protective Gear: Safety should always come first. Make sure to wear gloves, safety glasses, and appropriate clothing to protect yourself from any potential hazards.
- Ladder: Depending on the height of your siding, you may need a ladder to safely access the area. Ensure that the ladder is stable and positioned correctly.
- Hammer: A hammer will be your primary tool for removing nails and securing siding panels back in place.
- Flat Pry Bar: A flat pry bar, also known as a siding removal tool, will come in handy for removing damaged siding without causing further damage.
- Circular Saw or Snips: In some cases, you may need to make precise cuts on the siding. A circular saw or snips can be used to trim the siding to the required size.
- Replacement Siding: Depending on the extent of the damage, you may need replacement siding panels. It’s important to match the style, color, and material of the existing siding as closely as possible.
- New Nails: When securing the siding, you may need new nails to replace any that were removed or damaged during the repair process. Choose nails that are compatible with your siding material.
- Siding Adhesive: An adhesive can be used to reinforce the attachment of siding panels to the wall, ensuring a secure and long-lasting fix.
- Paint and Brush: After completing the repair, you may need to touch up the paint on the siding to blend the repaired area with the rest of the wall. Choose paint that matches the color of your siding.
By having these tools and materials readily available, you will be prepared to tackle the repair process with confidence. With all the necessary preparations in place, let’s now proceed to the step-by-step guide on fixing loose siding.
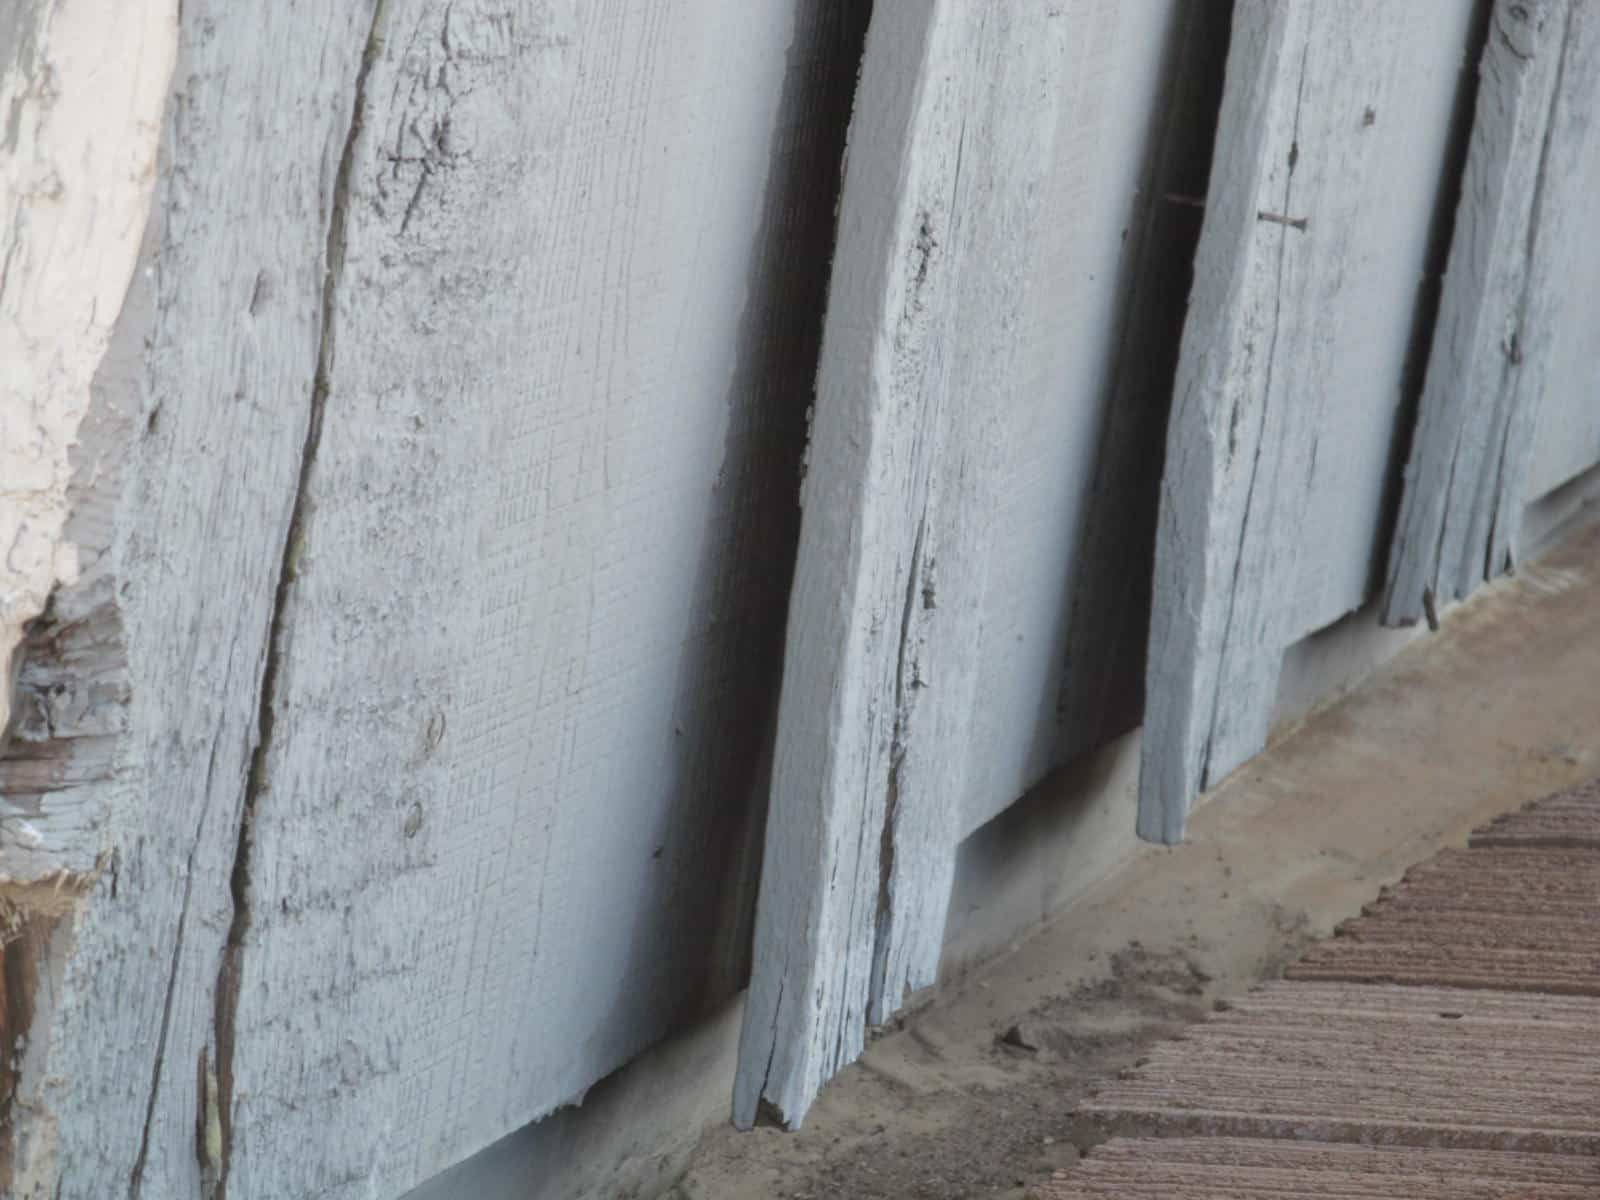
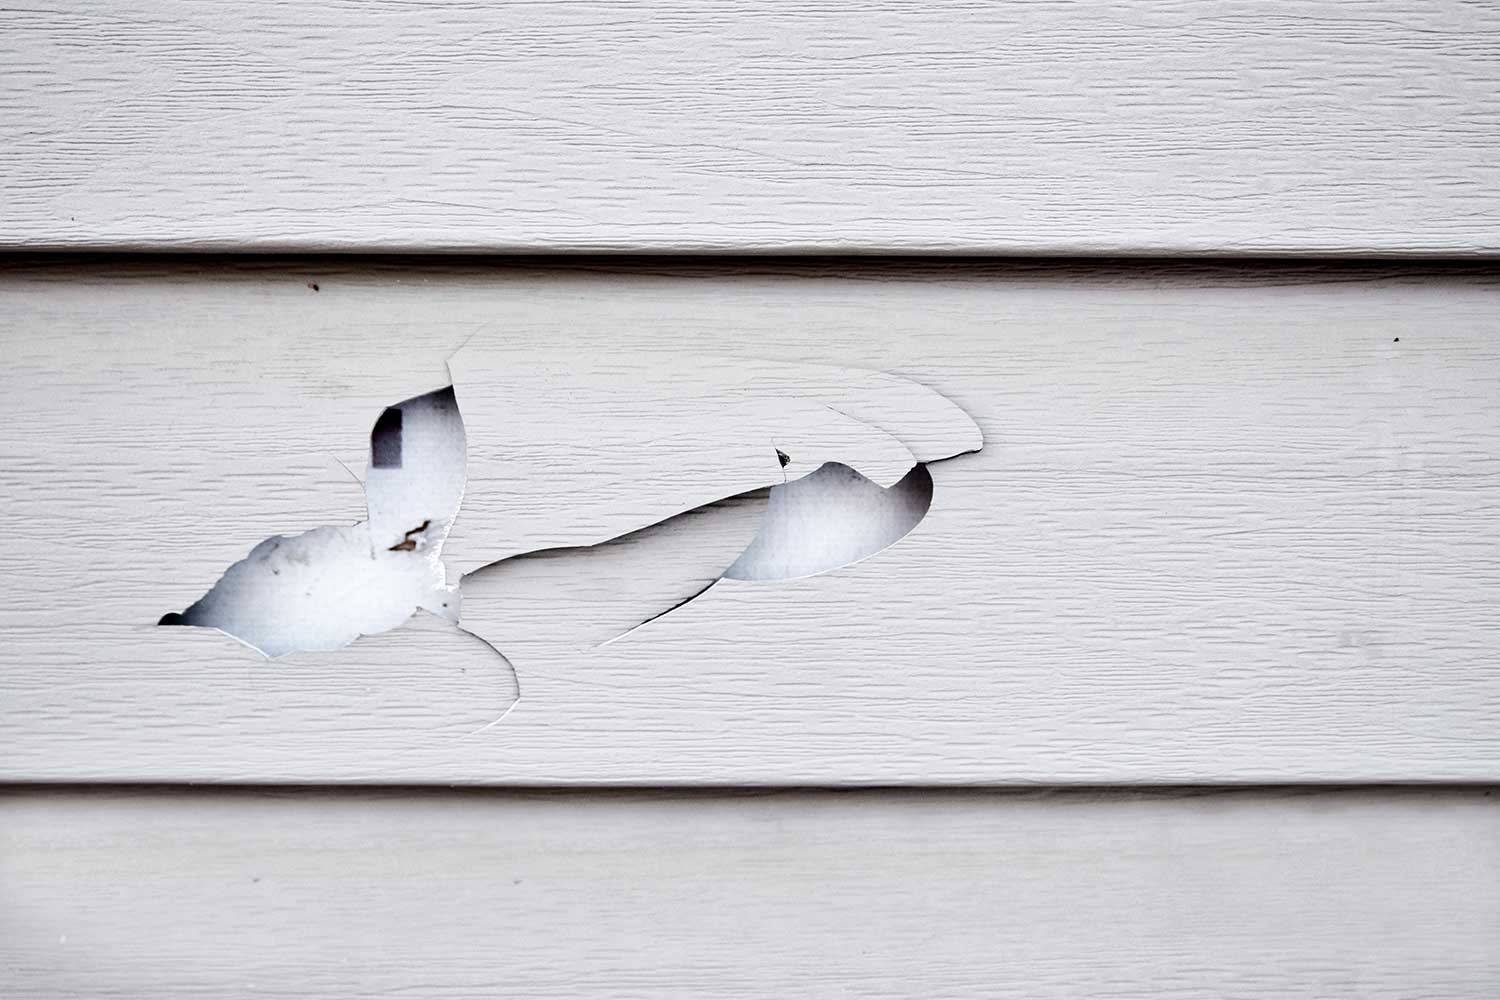
Step 1: Inspecting the Damage
Before you begin any repairs, it is essential to thoroughly inspect the extent of the damage to your siding. This step will help you determine the best course of action and ensure you have all the necessary materials and tools for the job.
Start by visually inspecting the siding. Look for any signs of cracks, gaps, or areas where the siding is pulling away from the house. Pay close attention to corners, edges, and areas where the siding meets windows or doors, as these tend to be more vulnerable to damage.
Next, lightly press on the siding to check for any flexibility or movement. Loose siding may feel unstable or shift when pressure is applied. Take note of which sections of the siding are loose or damaged.
Once you have identified the areas requiring repair, examine the surrounding area for any signs of additional damage. Look for water stains, rot, or insect infestations that may have been caused by the loose siding. It is crucial to address these issues before proceeding with the repair.
If you notice any severe damage, such as extensive cracks or large sections of missing siding, it may be necessary to call in a professional for assistance. They can provide expert advice and help you determine the best course of action for more complex repairs.
By thoroughly inspecting the damage, you will be able to assess the scope of the repair and gather the appropriate tools and materials. Once you have a clear understanding of the damage, you can proceed to the next step: removing loose nails.
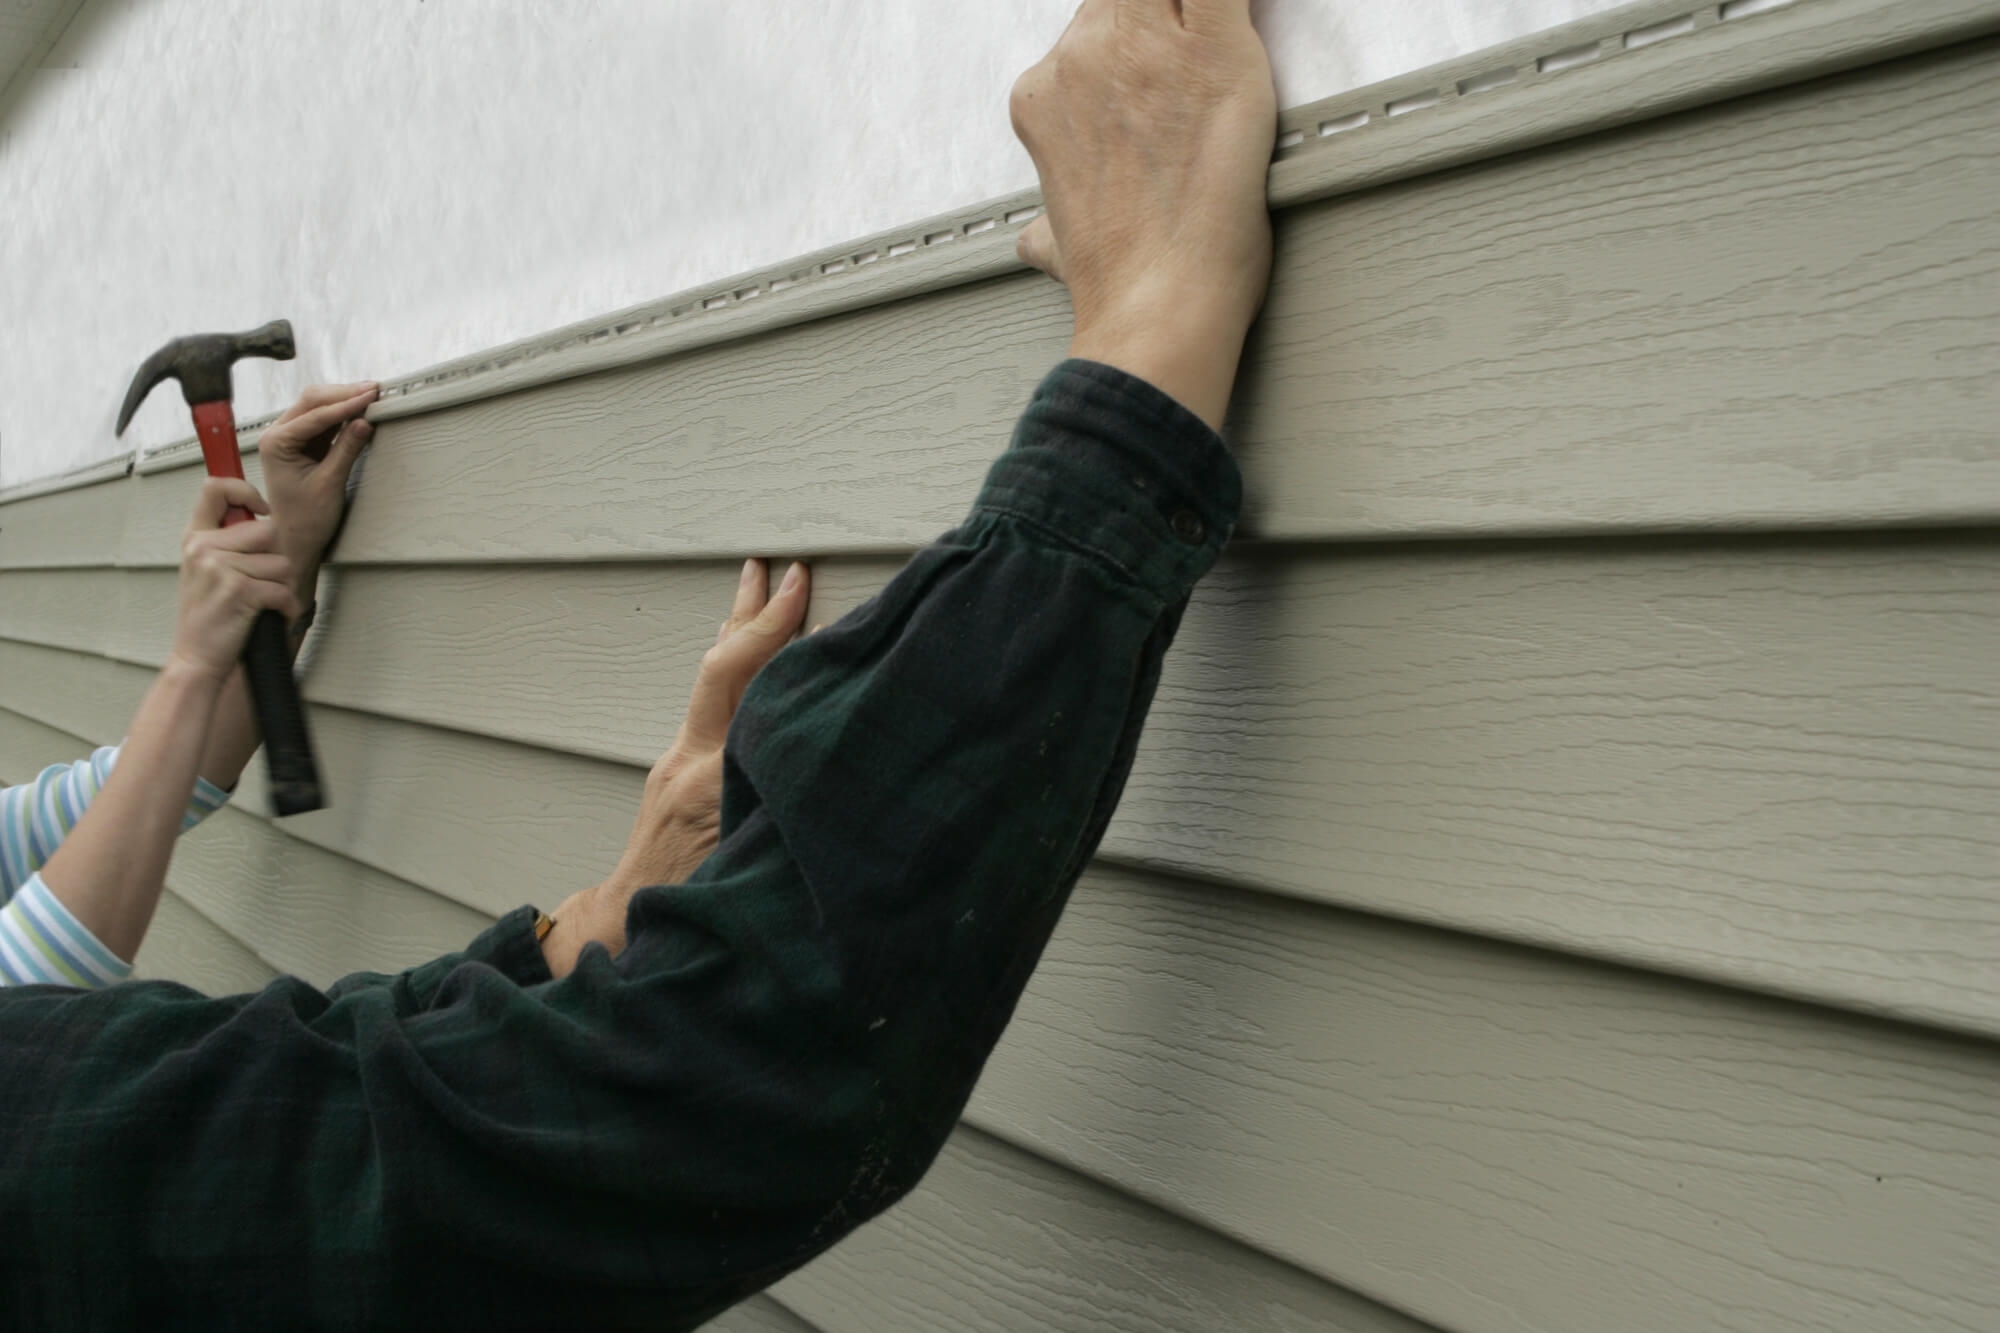
Step 2: Removing Loose Nails
Once you have inspected the damage and identified the areas where the siding is loose, it’s time to remove the loose nails that are causing the problem. Removing the nails will allow you to safely remove the damaged siding and replace it with new panels.
Here is how you can go about removing the loose nails:
- Start by positioning a ladder securely near the area of loose siding.
- Put on your gloves and safety glasses to protect yourself.
- Inspect the siding to locate the loose nails. These nails may be visible or concealed beneath the overlapping siding panels.
- Using a hammer, gently tap on the siding around the loose nail. This will help to expose the nail head.
- Place the flat pry bar behind the nail head and apply leverage to pry it out. Be careful not to damage the surrounding siding or the wall beneath.
- Continue this process for all the loose nails in the affected area. Take your time and be patient to avoid causing any further damage.
- Once you have removed the loose nails, set them aside for disposal later.
Removing the loose nails is a crucial step in the repair process as it allows you to remove the damaged siding without any obstructions. Once all the loose nails have been removed, you can proceed to the next step of removing and replacing the damaged siding.
Remember to take necessary precautions while removing the nails, and if you encounter any difficulty or are unsure about the process, it is always advisable to seek professional help.
Use a zip tool to reattach loose siding by hooking the tool onto the bottom edge of the panel and pulling it down to lock it into place. This will secure the siding and prevent it from coming loose again.
Read more: How To Fix A Loose Showerhead Pipe
Step 3: Removing and Replacing Damaged Siding
With the loose nails removed, you can now proceed to remove and replace the damaged siding. This step will involve carefully detaching the compromised panels and installing new ones in their place.
Follow these steps to remove and replace the damaged siding:
- Starting at the bottom of the damaged section, insert the flat pry bar between the overlapping siding panels.
- Gently pry the lower panel away from the wall, being cautious not to damage the adjacent panels.
- Continue prying along the entire length of the damaged section, loosening the nails that hold the siding in place.
- Once the damaged section is free, carefully remove it from the wall. Set it aside for disposal.
- Inspect the underlying wall for any signs of damage or rot. If you notice any issues, address them before proceeding with the replacement.
- Take the replacement siding panel and align it with the existing siding, making sure it fits securely into the surrounding panels.
- Slide the replacement panel up into the space left by the removed panel, interlocking it with the neighboring panels.
- Use your hammer to gently tap the replacement panel into place, ensuring it is snug against the wall.
- Insert new nails into the pre-drilled holes in the replacement panel, securing it firmly to the wall. Be sure to space the nails evenly and avoid overdriving them.
- Repeat this process for each damaged section of the siding, removing and replacing panels as needed.
It is important to note that different types of siding may require specific installation techniques, so it’s always a good idea to refer to the manufacturer’s instructions for guidance.
Once you have replaced all the damaged siding panels, you can move on to the next step of securing the siding to ensure its stability and longevity.
Step 4: Securing the Siding
After replacing the damaged siding panels, it’s essential to secure them properly to ensure their stability and prevent future issues. This step will involve reattaching the siding to the wall by securing it with new nails and using adhesive if necessary.
Follow these steps to secure the siding:
- Position yourself on a safe and stable ladder near the area of repaired siding.
- Inspect the replaced panels to ensure they are aligned properly and fit snugly.
- Starting at the bottom of the repaired section, insert new nails into the pre-drilled holes on the siding panels.
- Using a hammer, carefully drive the nails into the wall, securing the siding in place. Be sure to space the nails evenly and avoid overdriving them to prevent any damage.
- For added reinforcement, apply a small amount of siding adhesive to the back of the siding panels before installing them. This will help hold the panels securely in place.
- Continue securing the siding with nails and adhesive, working your way up the repaired section until all panels are properly fastened.
It is important to note that some types of siding, such as vinyl or fiber cement, may require specific nails or adhesive recommended by the manufacturer. Be sure to follow the manufacturer’s instructions to ensure proper installation and adherence.
By securely fastening the repaired siding, you are ensuring its stability and resistance to future loosening or damage. Once the siding is secure, you can move on to the final step of painting and adding finishing touches.
Step 5: Painting and Finishing Touches
After completing the repair and securing the siding, the final step is to paint and add finishing touches to blend the repaired section seamlessly with the rest of the wall. This step will enhance the appearance of your home’s exterior and protect the repaired siding from the elements.
Follow these steps to paint and add finishing touches:
- Start by cleaning the repaired section and removing any debris or dust. Use a mild detergent and water to wash the area, then allow it to dry completely.
- If there are any noticeable gaps or cracks around the repaired section, use an appropriate caulk or sealant to fill them. This will help prevent moisture and pests from infiltrating.
- Select a paint color that matches your existing siding. It is recommended to use exterior paint that is specifically formulated for the type of siding material you have.
- Apply a coat of primer to the repaired section of siding. This will help the paint adhere better and provide a more even finish.
- Once the primer is dry, apply the paint using a brush or roller, following the manufacturer’s instructions. Start from the top and work your way down to ensure an even application.
- Apply multiple coats of paint as needed, allowing each layer to dry completely before applying the next. This will provide better coverage and durability.
- After the paint has dried, inspect the painted area for any touch-ups or additional areas that may require attention. Use a small brush to carefully touch up any imperfections.
- Once you are satisfied with the appearance, step back and admire your newly repaired and painted siding.
It is worth mentioning that the paint and finishing touch process may vary depending on the siding material you have. Consult the manufacturer’s instructions or seek professional advice if you are unsure about the best practices for your specific siding.
With the painting and finishing touches complete, your repaired siding will not only look great but also be more resistant to further damage. Congratulations on successfully fixing your loose siding!
Conclusion
Fixing loose siding is a manageable task that can greatly improve the appearance and structural integrity of your home. By following the step-by-step process outlined in this article, you can confidently tackle the repair and ensure a long-lasting solution.
Remember to start by inspecting the damage, identifying the causes of the loose siding, and gathering the necessary tools and materials. Take your time to remove loose nails and damaged siding, replacing them with new panels and securing them properly. Finally, complete the repair by painting and adding finishing touches.
Throughout the repair process, prioritize safety by wearing protective gear and using stable ladders. If at any point you encounter challenges or are unsure about any aspect of the repair, don’t hesitate to seek professional assistance.
By addressing loose siding promptly, you can prevent further damage, such as water infiltration or pest infestation, and maintain the overall beauty and value of your home.
Keep in mind that regular maintenance and inspections are essential to identify and address any future issues with your siding. By taking proactive measures, you can ensure the longevity and durability of your siding for years to come.
Now that you have the knowledge and tools to fix your loose siding, don’t delay in applying these steps and restoring your home’s exterior. Enjoy the satisfaction of a job well done and the peace of mind that comes with a secure and visually appealing siding.
Frequently Asked Questions about How To Fix Siding That Is Loose
Was this page helpful?
At Storables.com, we guarantee accurate and reliable information. Our content, validated by Expert Board Contributors, is crafted following stringent Editorial Policies. We're committed to providing you with well-researched, expert-backed insights for all your informational needs.


0 thoughts on “How To Fix Siding That Is Loose”