Home>Furniture>Outdoor Furniture>How To Install Decking Lights
Outdoor Furniture
How To Install Decking Lights
Modified: October 19, 2024
Learn how to install outdoor furniture decking lights with our step-by-step guide. Enhance your outdoor space and create a warm, inviting atmosphere.
(Many of the links in this article redirect to a specific reviewed product. Your purchase of these products through affiliate links helps to generate commission for Storables.com, at no extra cost. Learn more)
Introduction
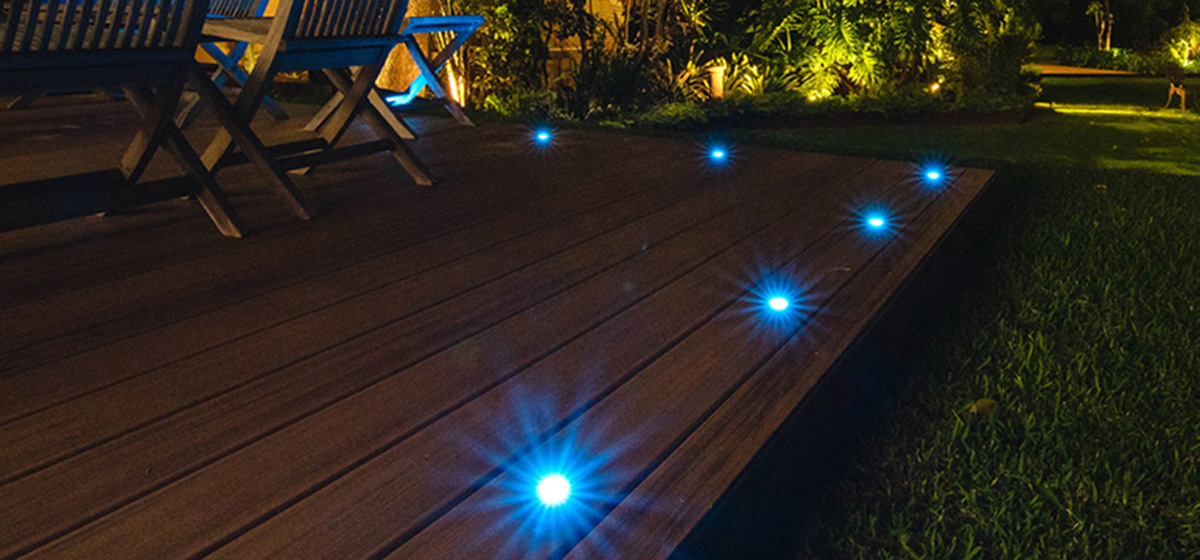
Are you looking to enhance the beauty and functionality of your outdoor living space? Installing decking lights is the perfect way to add a touch of ambiance and ensure that your deck can be enjoyed both day and night. Not only do decking lights provide illumination for safety and convenience, but they also create an inviting atmosphere for entertaining or simply relaxing outdoors.
In this comprehensive guide, we will walk you through the process of installing decking lights step by step, covering everything from choosing the right lights to testing and troubleshooting. Whether you are a DIY enthusiast or hiring a professional, this article will provide you with the knowledge and insights to successfully complete your decking light installation.
Before we dive into the installation process, let’s take a moment to explore the different types of decking lights available and considerations for choosing the right ones for your deck.
Key Takeaways:
- Enhance your outdoor space with decking lights for safety, ambiance, and entertainment. Choose the right lights, plan the layout, and follow the installation steps for a stunning and functional deck transformation.
- Prioritize safety, test the system, and troubleshoot any issues when installing decking lights. With the right tools and careful planning, you can create a beautifully illuminated outdoor space for enjoyment day and night.
Read more: How To Install Veranda Decking
Choosing the Right Decking Lights
When it comes to decking lights, there are a variety of options to choose from, each with its own unique features and benefits. Here are some factors to consider when selecting the right decking lights for your outdoor space:
1. Lighting Type: There are three main types of decking lights: recessed, surface-mounted, and post-cap lights. Recessed lights are installed flush with the surface of the deck, providing a sleek and seamless look. Surface-mounted lights are attached to the surface of the deck and are available in various designs and styles. Post-cap lights are mounted on top of deck posts, adding a decorative touch while providing illumination.
2. Lighting Effect: Consider the desired lighting effect you want to achieve. Do you want soft and diffused lighting or bright and focused illumination? You can choose from warm white, cool white, or color-changing LED lights to create the desired ambiance.
3. Material and Durability: Since decking lights will be exposed to outdoor elements, it’s important to choose lights that are made with durable materials such as stainless steel or weather-resistant plastics. Ensure that the lights have an IP rating indicating their level of protection against dust and moisture.
4. Energy Efficiency: Opt for energy-efficient LED lights that consume less power and have a longer lifespan compared to traditional incandescent bulbs. LED lights not only save energy but also reduce maintenance costs in the long run.
5. Compatibility and Control: Consider whether you want your decking lights to be compatible with home automation systems or controlled through a smartphone app. Some lighting systems offer dimming options and programmable timers for added convenience.
Once you have considered these factors, you can start exploring different lighting options and designs that align with your preferences and the overall style of your outdoor space. Now that you have an idea of what to look for in decking lights, let’s move on to the tools and materials you will need for the installation process.
Tools and Materials Needed
Before you begin the installation process, it’s essential to gather all the necessary tools and materials to ensure a smooth and efficient process. Here’s a list of items you will need:
1. Decking Lights: Choose the type and quantity of decking lights based on your design and lighting requirements. Be sure to purchase lights that are suitable for outdoor use.
2. Transformer: A transformer is necessary to convert the standard household voltage to a low-voltage suitable for the LED decking lights. Make sure the transformer has enough capacity to power all the lights you plan to install.
3. Cable: Purchase outdoor-rated and waterproof cable suitable for burying in the ground. You will need enough cable to connect all the lights from the transformer to each individual light point.
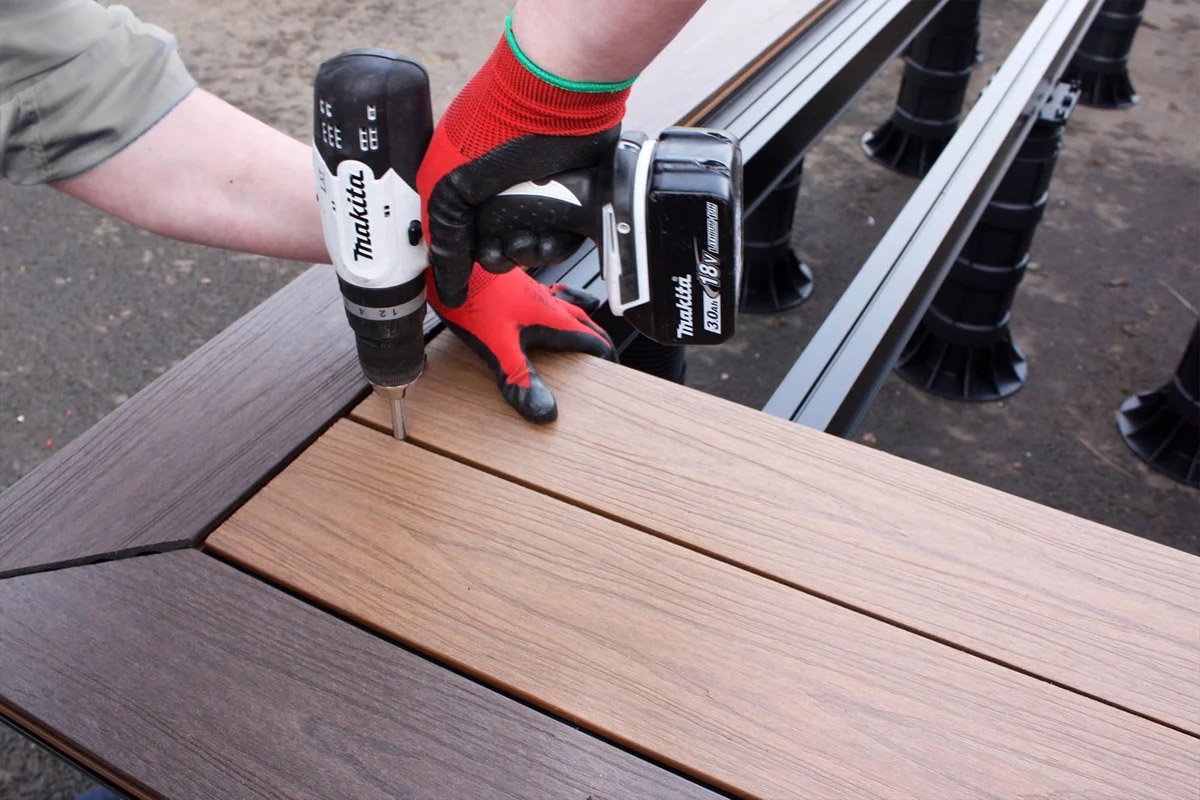
4. Drill: A cordless drill with drill bits is required for creating holes in the deck surface for recessed lights or surface-mounted lights. Make sure to use the appropriate drill bit size for your chosen lights.
5. Screwdriver: Depending on the type of lights you are installing, you may need a screwdriver for securing surface-mounted lights or attaching post-cap lights.
6. Wire Stripper: This tool is necessary for removing the insulation from the cable wires, allowing you to make connections between the lights and the power supply.
7. Tape Measure: Use a tape measure to ensure accurate spacing between lights and to measure the cable length needed.
8. Protective Gloves: Wear gloves to protect your hands when handling the lights and working with the tools.
9. Safety Glasses: It’s always recommended to wear safety glasses when drilling or working overhead to protect your eyes from any debris.
10. Cable Connectors: These connectors are used to make secure electrical connections between the cable and the lights and between the cable and the transformer.
11. Waterproof Gel: Use waterproof gel or silicone sealant to protect the electrical connections from moisture and ensure a long-lasting installation.
Make sure to check the instructions provided with your chosen lights and other equipment to ensure you have all the necessary tools and materials. Now that you have everything you need, it’s time to move on to planning and designing the lighting layout for your deck.
Step 1: Planning and Designing the Lighting Layout
Before you begin installing your decking lights, it’s important to plan and design the layout to ensure proper placement and create the desired lighting effect. Here are the steps to follow:
1. Assess Your Deck: Take a close look at your deck and identify the areas where you want to install the lights. Consider the functionality and aesthetics, such as illuminating stairs, pathways, or specific architectural features.
2. Create a Sketch: Use graph paper or a digital design tool to create a sketch of your deck, marking the desired light locations. This will help you visualize the placement and ensure an even distribution of light.
3. Consider Safety: Ensure that the lighting layout provides sufficient illumination for safety. Identify areas that may require extra lighting, such as steps or changes in elevation.
4. Balance and Symmetry: Aim for a balanced and symmetrical lighting design to create a visually pleasing effect. Consider spacing the lights evenly, maintaining consistent distance between each light.
5. Layered Lighting: Think about incorporating layers of lighting, such as installing lights on the deck surface as well as under railings or steps. This will add depth and create a more dynamic and inviting ambiance.
6. Trial and Adjustment: Once you have a rough idea of the placement, consider doing a trial run by temporarily placing lights to see how they look at night. Make any necessary adjustments to the layout before proceeding with the installation.
Remember to take into account any local electrical codes or regulations when planning the lighting layout. If you are unsure, consult with a professional electrician or contractor for guidance.
With the lighting design in place, you are now ready to prepare your deck for installation. In the next step, we will guide you through the process of preparing the deck for the decking light installation. Let’s get started!
Step 2: Preparing the Deck for Installation
Before you can start installing the decking lights, it’s important to properly prepare your deck. Taking the time to prepare the deck surface will ensure a secure and long-lasting installation. Follow these steps to prepare your deck:
1. Clean the Deck: Start by thoroughly cleaning the deck surface to remove any dirt, debris, or grime. Sweep the deck and use a mild detergent with water to wash away any stuck-on residue. Allow the deck to dry completely before moving on to the next step.
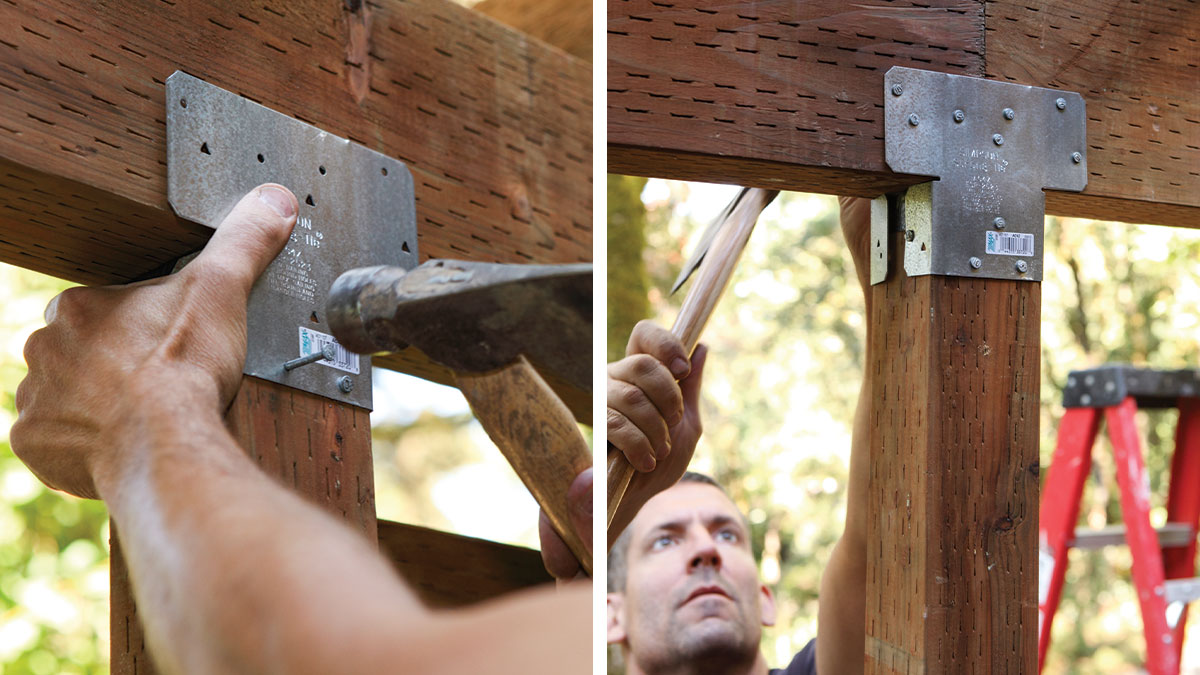
2. Inspect the Deck: Carefully inspect the deck boards for any signs of damage, such as rot, cracks, or loose boards. Replace any damaged boards and secure any loose ones to ensure a stable surface for the lights. This step is crucial for the long-term integrity of the installation.
3. Plan Cable Pathway: Plan the pathway for the cables that will connect the lights to the power supply. Consider the most discreet and safe route, such as running the cables along the edges of the deck or underneath the deck boards. Avoid placing the cables in high traffic areas or where they might be accidentally damaged.
4. Drill Cable Holes: Use a cordless drill with an appropriate-sized drill bit to create holes for the cables at the marked light locations. Ensure that the holes are large enough to accommodate the cable connectors.
5. Protect the Deck: To prevent any water damage or potential hazards, it’s advisable to install a waterproof deck membrane or conduit to encapsulate the cables. This will also make future cable replacements or additions easier.
6. Bury the Cable: Carefully bury the cable in the designated pathway, ensuring that it is properly secured and protected from damage. Avoid tightly twisting or bending the cable, as this can lead to connectivity issues or wire damage.
By properly preparing your deck, you create a solid foundation for the decking light installation. With the deck ready, you can now move on to step 3: installing the wiring and power supply. Stay tuned for the next part of our guide!
When installing decking lights, make sure to plan the layout beforehand and use waterproof lights suitable for outdoor use. It’s important to also consider the power source and use proper wiring techniques to ensure safety.
Read more: How To Install Composite Decking
Step 3: Installing the Wiring and Power Supply
Now that your deck is prepped, it’s time to install the wiring and power supply for your decking lights. This step involves connecting the lights to a transformer and running the cables to provide power. Follow these steps to install the wiring and power supply:
1. Choose a Transformer Location: Select a suitable location for the transformer, which will convert the standard household voltage to a low-voltage suitable for the LED lights. Ensure that the location is protected from the elements and easily accessible for maintenance.
2. Mount the Transformer: Securely mount the transformer to a wall or another secure surface using appropriate screws and mounting brackets. Ensure that there is enough clearance around the transformer for ventilation.
3. Connect the Cables: Strip the ends of the cable wires and connect them to the transformer according to the manufacturer’s instructions. Use waterproof cable connectors to make secure connections. Double-check that the connections are tight and properly insulated.
4. Run the Cables: Starting from the transformer, route the cables along the pre-planned pathway on the deck. Use cable clips or other suitable fasteners to secure the cables along the way, ensuring a neat and tidy installation.
5. Secure the Cables: For surface-mounted lights, use clips or cable ties to secure the cable directly under the lights, keeping it hidden from view. For recessed lights, ensure that the cable is properly positioned to access the light housing during the installation.
6. Connect the Lights: Strip the ends of the cable wires at the light locations and connect them to the lights’ wiring according to the manufacturer’s instructions. Use waterproof cable connectors and ensure proper insulation. Test the connections to ensure they are secure and functioning correctly.
7. Test the Wiring: Before proceeding with the installation of the lights, test the wiring to ensure everything is functioning properly. Plug in the transformer, turn on the power, and verify that all lights are receiving power and illuminating correctly.
By following these steps, you will have successfully installed the wiring and power supply for your decking lights. In the next step, we will guide you through the process of mounting the lights onto your deck. Stay tuned!
Step 4: Mounting the Lights
With the wiring and power supply in place, it’s time to move on to step 4: mounting the lights onto your deck. Properly mounting the lights will ensure their stability and provide the desired lighting effect. Follow these steps to mount your decking lights:
1. Position the Lights: Start by positioning the lights in the marked locations on your deck, ensuring they are aligned with the pre-drilled holes. For recessed lights, place them into the holes, making sure they are level with the deck surface. For surface-mounted lights, hold them in place to determine the desired angle and position.
2. Secure Recessed Lights: If you are installing recessed lights, use the provided retaining clips or mounting brackets to secure them in place. Ensure that the lights are firmly secured and level with the deck surface.
3. Attach Surface-Mounted Lights: For surface-mounted lights, use screws or the recommended mounting hardware to attach them securely to the deck surface. Check for any wobbling or instability and make any necessary adjustments to ensure a secure fit.
4. Check Light Alignment: Double-check the alignment and spacing of the lights to ensure a visually appealing layout. Make any adjustments before moving on to the next step.
5. Finishing Touches: If installing post-cap lights, carefully attach them to the top of the deck posts, following the manufacturer’s instructions. Ensure they are level and securely fitted.
Take your time during this step to ensure the lights are positioned correctly and securely mounted. Once all the lights are properly mounted, you can proceed to the next step: connecting the lights to the power supply. Let’s continue our installation process!
Step 5: Connecting the Lights to the Power Supply
Now that you have mounted the lights onto your deck, it’s time to connect them to the power supply. This step involves making the necessary electrical connections to ensure that your decking lights receive power and function properly. Follow these steps to connect the lights to the power supply:
1. Strip the Cable Ends: Strip the ends of the cable wires at the light locations, exposing the bare copper wires for making connections. Use a wire stripper tool to carefully remove the outer insulation while leaving the inner wires intact.
2. Connect the Wires: Connect the exposed cable wires to the corresponding wires of each light fixture according to the manufacturer’s instructions. Typically, this involves matching the positive wire (usually red or marked with “+”) to the positive terminal of the light and the negative wire (usually black or marked with “-“) to the negative terminal of the light.
3. Secure the Connections: Once the wires are connected, use waterproof cable connectors to secure and protect the electrical connections. Follow the instructions provided with the connectors to ensure proper installation.
4. Insulate the Connections: To ensure the longevity and safety of the connections, insulate them with electrical tape or heat shrink tubing. Cover the exposed wire and connector, creating a tight seal to protect against moisture and potential short circuits.
5. Carefully Tuck Away Excess Cable: If there is excess cable length between the lights, carefully tuck it away under the deck surface or use cable clips to secure it in a neat and organized manner. This will help prevent tripping hazards and keep the cable out of sight.
6. Recheck the Connections: Before proceeding to the final step, double-check all the connections to ensure they are secure and properly insulated. Verify that there are no exposed wires and that each light is connected correctly.
By carefully connecting the lights to the power supply, you are ensuring that they receive the necessary power to illuminate your deck. In the next step, we will guide you through testing and troubleshooting the lighting system. Stay tuned!
Step 6: Testing and Troubleshooting
After completing the installation and connecting the lights to the power supply, it’s crucial to test the system to ensure everything is working as intended. This step allows you to identify any issues or malfunctions and make necessary adjustments or repairs. Follow these steps to test and troubleshoot your decking light installation:
1. Turn on the Power: Ensure that the power supply is turned on and the transformer is providing power to the lights. Double-check that the circuit breaker or fuse for the lighting system is in the “on” position.
2. Check Light Operation: Go around your deck and inspect each light to ensure it is receiving power and illuminating as expected. Verify that all lights are functioning correctly and providing the desired lighting effect.
3. Inspect Connections: Examine all the connections you made during the installation process. Look for any loose or disconnected wires, damaged connectors, or signs of corrosion. Tighten any loose connections and replace any damaged components if necessary.
4. Address Dim or Non-Functional Lights: If you notice any dim or non-functional lights, check the corresponding connections and wiring for any issues. Ensure that the cables are properly connected and insulated. If the problem persists, consult the manufacturer’s troubleshooting guide or seek professional assistance.
5. Adjust Lighting Layout: During the testing phase, you may realize that certain areas of your deck require additional lighting or adjustments to the placement of the lights. Take note of these areas and make any necessary modifications to the lighting layout for optimal illumination.
6. Recheck Safety Measures: Confirm that all safety measures, such as covering exposed wires and securing excess cable, are in place. Ensure that there are no safety hazards, such as loose cables or exposed electrical components.
By conducting thorough testing and troubleshooting, you can address any issues and ensure that your decking lights are operating correctly. Once you are satisfied with the test results, you can enjoy your beautifully illuminated deck and the enhanced outdoor experience it provides.
Congratulations! You have successfully completed the installation, testing, and troubleshooting process for your decking lights. Now you can sit back, relax, and enjoy the ambiance and functionality they bring to your outdoor space.
Read more: How To Install Turf On Deck
Conclusion
Installing decking lights is a fantastic way to elevate the beauty and functionality of your outdoor living space. By following the step-by-step guide in this article, you have learned how to choose the right decking lights, gather the necessary tools and materials, plan the lighting layout, prepare the deck, install the wiring and power supply, mount the lights, and test and troubleshoot the system.
Remember, when choosing decking lights, consider factors such as lighting type, effect, durability, energy efficiency, compatibility, and control. Gathering the necessary tools and materials, such as lights, a transformer, cable, a drill, screwdriver, wire stripper, and more, ensures that you have everything needed for a successful installation.
Planning and designing the lighting layout helps achieve the desired ambiance and functionality. By assessing your deck, creating a sketch, considering safety, balancing symmetry, and layering lighting, you can create a visually appealing and well-lit outdoor space.
Preparing the deck by cleaning it, inspecting for any damage, planning the cable pathway, drilling necessary holes, and protecting the deck surface ensures a solid foundation for the installation.
Installing the wiring and power supply involves choosing a suitable transformer location, mounting the transformer, connecting the cables, running them along the planned pathway, and securing the connections. Testing the wiring and power supply ensures everything is working correctly before moving on to mounting the lights.
Mounting the lights onto your deck involves positioning them correctly, securely attaching them, and ensuring alignment and spacing. Connecting the lights to the power supply includes stripping cable ends, connecting the wires, securing the connections, and insulating them to protect against moisture.
Testing and troubleshooting the lighting system is crucial to identifying any issues or malfunctions. By turning on the power, checking light operation, inspecting connections, addressing dim or non-functional lights, adjusting the lighting layout, and rechecking safety measures, you can ensure a well-functioning and safe installation.
With the installation complete, your deck is now transformed into a stunning and inviting space that can be enjoyed day and night. Whether you’re hosting a gathering, enjoying a quiet evening, or simply appreciating the beauty of your deck, the addition of decking lights provides the perfect ambiance and functionality.
As you embark on this journey of installing decking lights, remember to prioritize safety, seek professional assistance if needed, and comply with local electrical codes and regulations.
Now it’s time to bask in the warm glow of your beautifully illuminated deck and create many unforgettable moments in your outdoor oasis!
Frequently Asked Questions about How To Install Decking Lights
Was this page helpful?
At Storables.com, we guarantee accurate and reliable information. Our content, validated by Expert Board Contributors, is crafted following stringent Editorial Policies. We're committed to providing you with well-researched, expert-backed insights for all your informational needs.


0 thoughts on “How To Install Decking Lights”