Home>Furniture>Outdoor Furniture>How To Install Timbertech Azek Decking
Outdoor Furniture
How To Install Timbertech Azek Decking
Modified: August 23, 2024
Learn how to install Timbertech Azek decking and enhance your outdoor space with durable and stylish outdoor furniture.
(Many of the links in this article redirect to a specific reviewed product. Your purchase of these products through affiliate links helps to generate commission for Storables.com, at no extra cost. Learn more)
Introduction
Welcome to the ultimate guide on how to install TimberTech Azek decking. Whether you are a seasoned DIY enthusiast or a first-time deck builder, this comprehensive article will walk you through the step-by-step process of installing TimberTech Azek decking. TimberTech Azek is a high-quality, low-maintenance composite decking material that offers the perfect combination of durability, aesthetics, and sustainability.
Installing TimberTech Azek decking not only enhances the beauty and functionality of your outdoor space but also increases the value of your home. With its innovative technology, TimberTech Azek decking is resistant to fading, staining, and moisture, making it an ideal choice for any climate.
Before we dive into the installation process, it’s important to note that proper planning and preparation are crucial for a successful deck installation. From gathering materials and tools to measuring and cutting the decking boards, each step contributes to the overall quality and longevity of your deck. So, let’s get started with the pre-installation steps.
Key Takeaways:
- Proper planning and preparation are crucial for a successful TimberTech Azek decking installation. From checking local building codes to gathering materials and tools, each step contributes to the overall quality and longevity of your deck.
- Regular cleaning and maintenance are essential to keep your TimberTech Azek decking looking its best and ensure its longevity. By following simple care tips, you can preserve the appearance and performance of your deck for years to come.
Read more: What Is Azek Decking
Pre-installation Steps
Before you begin installing TimberTech Azek decking, there are a few important pre-installation steps that you should follow to ensure a smooth and successful project:
- Check local building codes: Before starting any deck project, it’s essential to check your local building codes and obtain any necessary permits. Building codes may vary from one jurisdiction to another, and it’s important to comply with the regulations to ensure safety and compliance.
- Plan the layout: Take some time to plan the layout of your deck, considering the size, shape, and orientation. This will help determine the amount of materials needed and ensure proper spacing and positioning of the decking boards.
- Prepare the site: Clear the area where the deck will be installed, removing any obstacles such as plants, rocks, or debris. It’s important to have a clean and level surface for proper installation.
- Check for proper drainage: Ensure that the site has proper drainage to prevent water accumulation and potential damage to the deck. If necessary, make necessary adjustments to the grading or add drainage systems.
- Create a visual guide: Use string lines and stakes to create a visual guide for the layout of the deck. This will help ensure straight lines and accurate measurements during the installation process.
- Take into account safety considerations: Incorporate safety features into your deck design, such as handrails, balusters, and stairs. Follow the safety guidelines in your local building codes to ensure a secure and hazard-free deck.
By following these pre-installation steps, you will be well-prepared to move forward with the TimberTech Azek decking installation process. With a solid plan in place, you can proceed to gather the necessary materials and tools.
Gathering Materials and Tools
Before you can begin installing TimberTech Azek decking, it’s important to gather all the necessary materials and tools. Having everything on hand will ensure a smooth and efficient installation process. Here is a list of the materials and tools you will need:
Materials:
- TimberTech Azek decking boards
- Decking screws
- Joists or substructure material
- Post anchors
- Concrete mix (if using post anchors)
- Post caps and sleeves (if needed)
- Composite deck cleaner
- Composite deck stain or sealant (optional)
- Fasteners (depending on the chosen deck installation method)
Tools:
- Tape measure
- Chalk line
- Miter saw or circular saw
- Drill with screwdriver bits
- Level
- Pry bar
- Hammer
- Jigsaw (for cutting notches or curves in the decking boards)
- Safety equipment (gloves, safety glasses, ear protection)
Once you have gathered all the necessary materials and tools, you will be fully equipped to start the decking installation process. Remember to double-check that you have all the required items to avoid any delays or interruptions during the project.
Read more: What Is TimberTech Decking
Preparing the Deck Area
Before installing TimberTech Azek decking, it’s crucial to properly prepare the deck area to ensure a stable and long-lasting foundation. Follow these steps to prepare the deck area:
- Clear the site: Remove any existing structures or debris from the deck area. This includes old decking, railing, and any other obstructions. Ensure the area is clean and free of obstacles.
- Check for stability: Inspect the existing structure, such as an old deck or substructure, for stability. If any parts are damaged or compromised, make the necessary repairs or replacements before proceeding.
- Inspect the soil: Ensure the soil is compact and stable. Remove any organic material or vegetation from the area. If the soil is loose or unstable, consider adding a layer of gravel or compacted stone to create a solid base.
- Mark the layout: Use stakes and string lines to mark the dimensions and layout of the deck. This will serve as a visual guide for the installation process and ensure accurate placement of posts and joists.
- Adjust the slope: Check the slope of the area and make any necessary adjustments. The deck area should have a slight slope away from the house to facilitate proper water drainage. Use a level to ensure the slope is correct.
- Install the ledger board: If attaching the deck to an existing structure, such as the side of your house, install a ledger board using lag screws or bolts. Ensure it is level and securely attached.
By properly preparing the deck area, you are setting the stage for a successful installation of TimberTech Azek decking. Taking the time to clear the site, check for stability, and adjust the slope will ensure a solid foundation for your deck. Once the deck area is fully prepared, you can move on to installing the substructure.
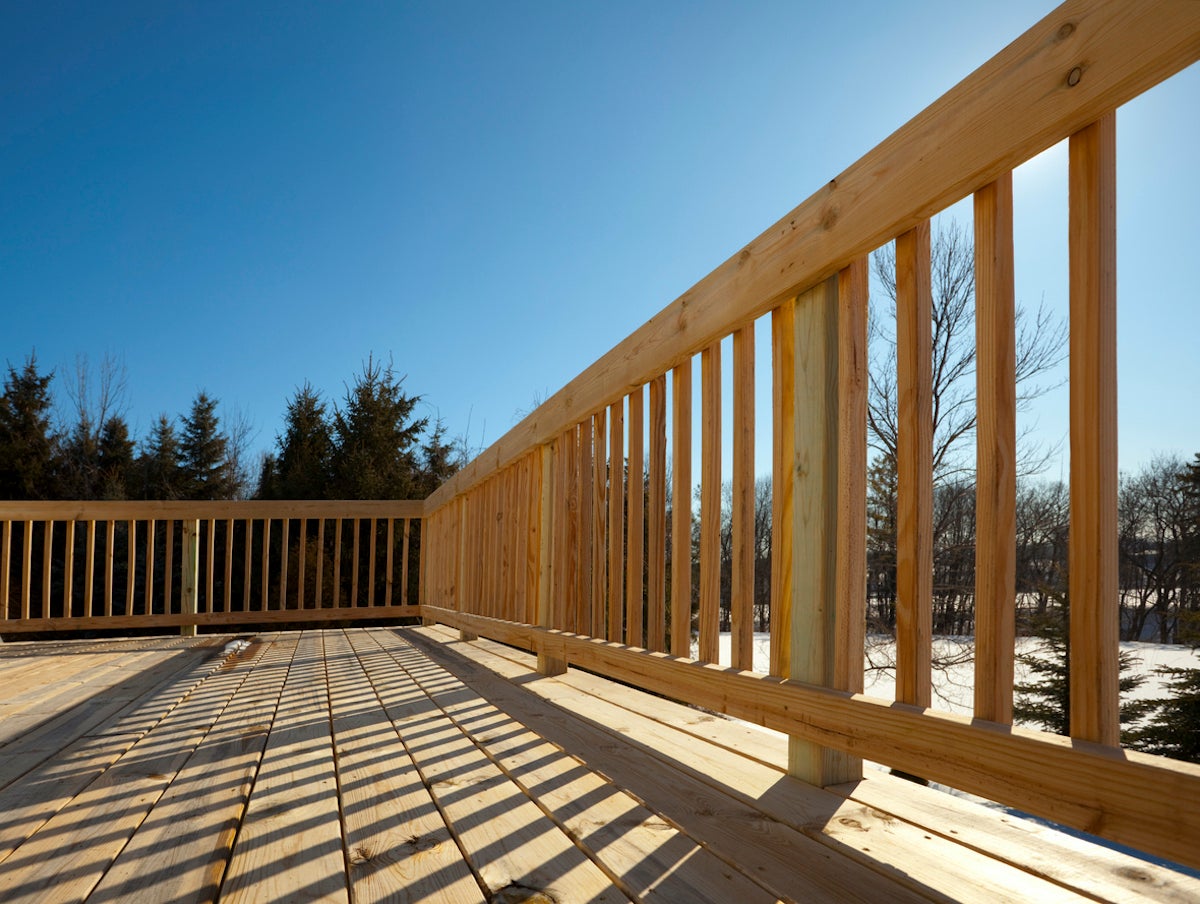
Installing the Substructure
The substructure of your deck is the framework that provides support and stability to your TimberTech Azek decking. It is essential to install a proper substructure to ensure the longevity and structural integrity of your deck. Follow these steps to install the substructure:
- Measure and mark: Measure and mark where the posts will be placed along the perimeter of the deck area according to your desired layout. Ensure the spacing between posts meets the local building code requirements.
- Dig post holes: Use a post hole digger to create holes at each marked location for the posts. The depth of the holes should be below the frost line in your region, typically around 12 inches or more.
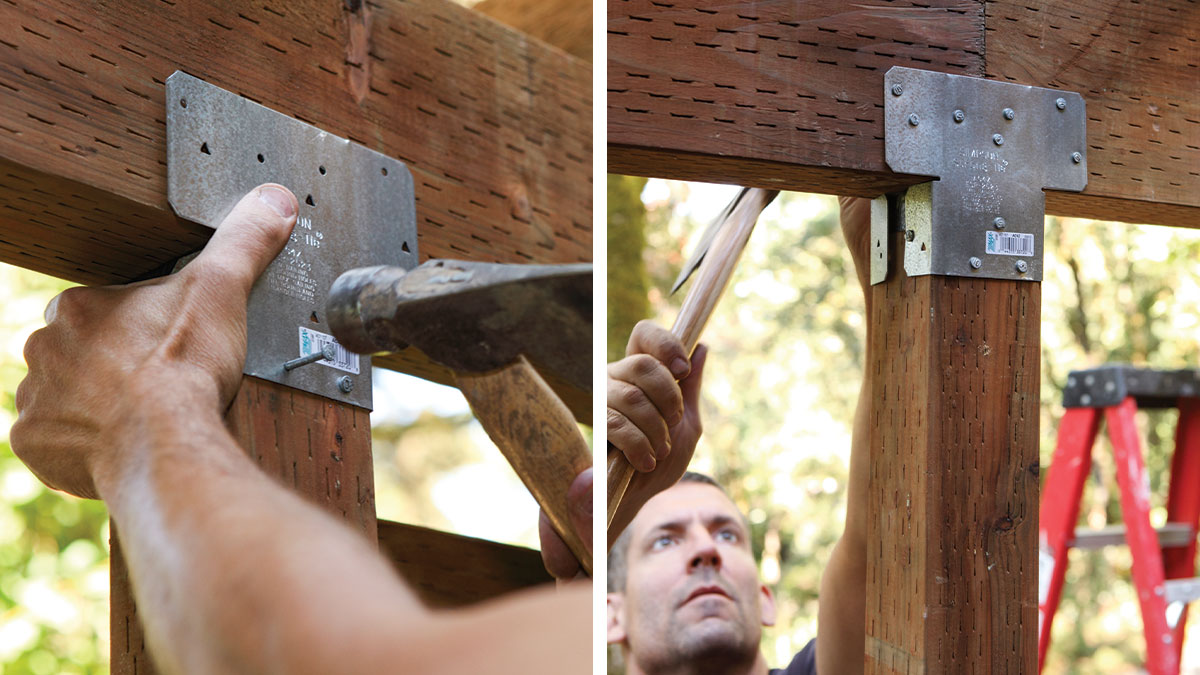
- Install posts: Place the posts into the holes, making sure they are plumb and level. Use a level and braces to ensure they stay in position. If necessary, pour concrete into the holes to secure the posts. Allow the concrete to cure as per the manufacturer’s instructions.
- Attach beams: Once the posts are set and secure, attach the beams to the posts, creating the perimeter frame of the deck. Use fasteners appropriate for the material and ensure they are properly aligned and level.
- Add joists: Install the joists perpendicular to the beams, ensuring an equal spacing between them. Use joist hangers or screws to secure the joists to the beams. Make sure the joists are level and in line with the desired deck height.
- Check for squareness: Use a measuring tape or framing square to confirm that the substructure is square and level. Making adjustments at this stage will ensure that the decking boards are installed correctly.
By following these steps, you will have successfully installed the substructure for your TimberTech Azek decking. The substructure serves as the foundation for your deck and is essential for ensuring stability and durability. With the substructure in place, you can now move on to measuring and cutting the decking boards.
Measuring and Cutting the Decking Boards
Measuring and cutting the decking boards accurately is crucial to achieve a professional and visually appealing deck installation. Follow these steps to measure and cut the TimberTech Azek decking boards:
- Measure the deck area: Measure the length and width of the deck area to determine the size of the decking boards needed. Be sure to account for any gaps or the desired spacing between the boards.
- Calculate the number of boards: Determine the number of decking boards needed based on the measurements. It’s a good idea to add a few extra boards to account for any cutting errors or potential replacements in the future.
- Plan the board orientation: Decide on the orientation of the decking boards, whether they will run parallel or perpendicular to the house or in a diagonal pattern. This will affect the cutting angles and layout of the boards.
- Mark and cut the first board: Start by marking and cutting the first decking board according to the desired length and orientation. Use a miter saw or circular saw to make precise cuts. Be sure to wear safety glasses and follow proper safety precautions.
- Continue cutting the remaining boards: Measure and mark the remaining decking boards based on the desired length and orientation. Cut them using the same method as the first board. Double-check the measurements before making the cuts to ensure accuracy.
- Create notches or curves (if necessary): If your design requires notches or curved edges, use a jigsaw to carefully cut those sections out. Take your time and make precise cuts to achieve clean and smooth edges.
Remember, accuracy is key when measuring and cutting the TimberTech Azek decking boards. Take your time to ensure the measurements are precise and double-check everything before making the cuts. With the decking boards properly cut, you are ready to move on to the installation process.
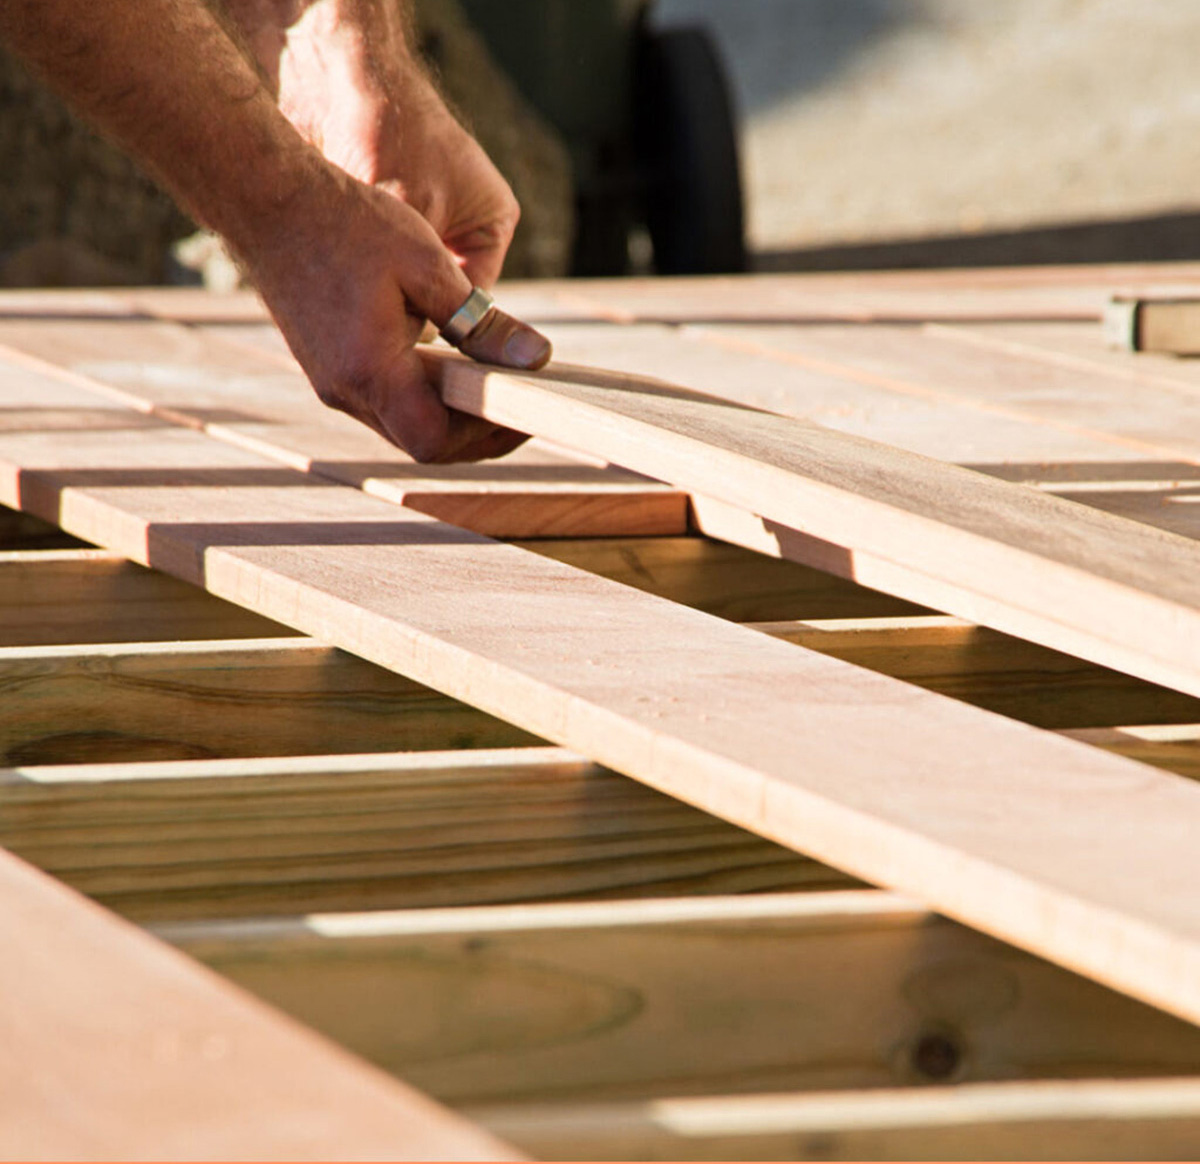
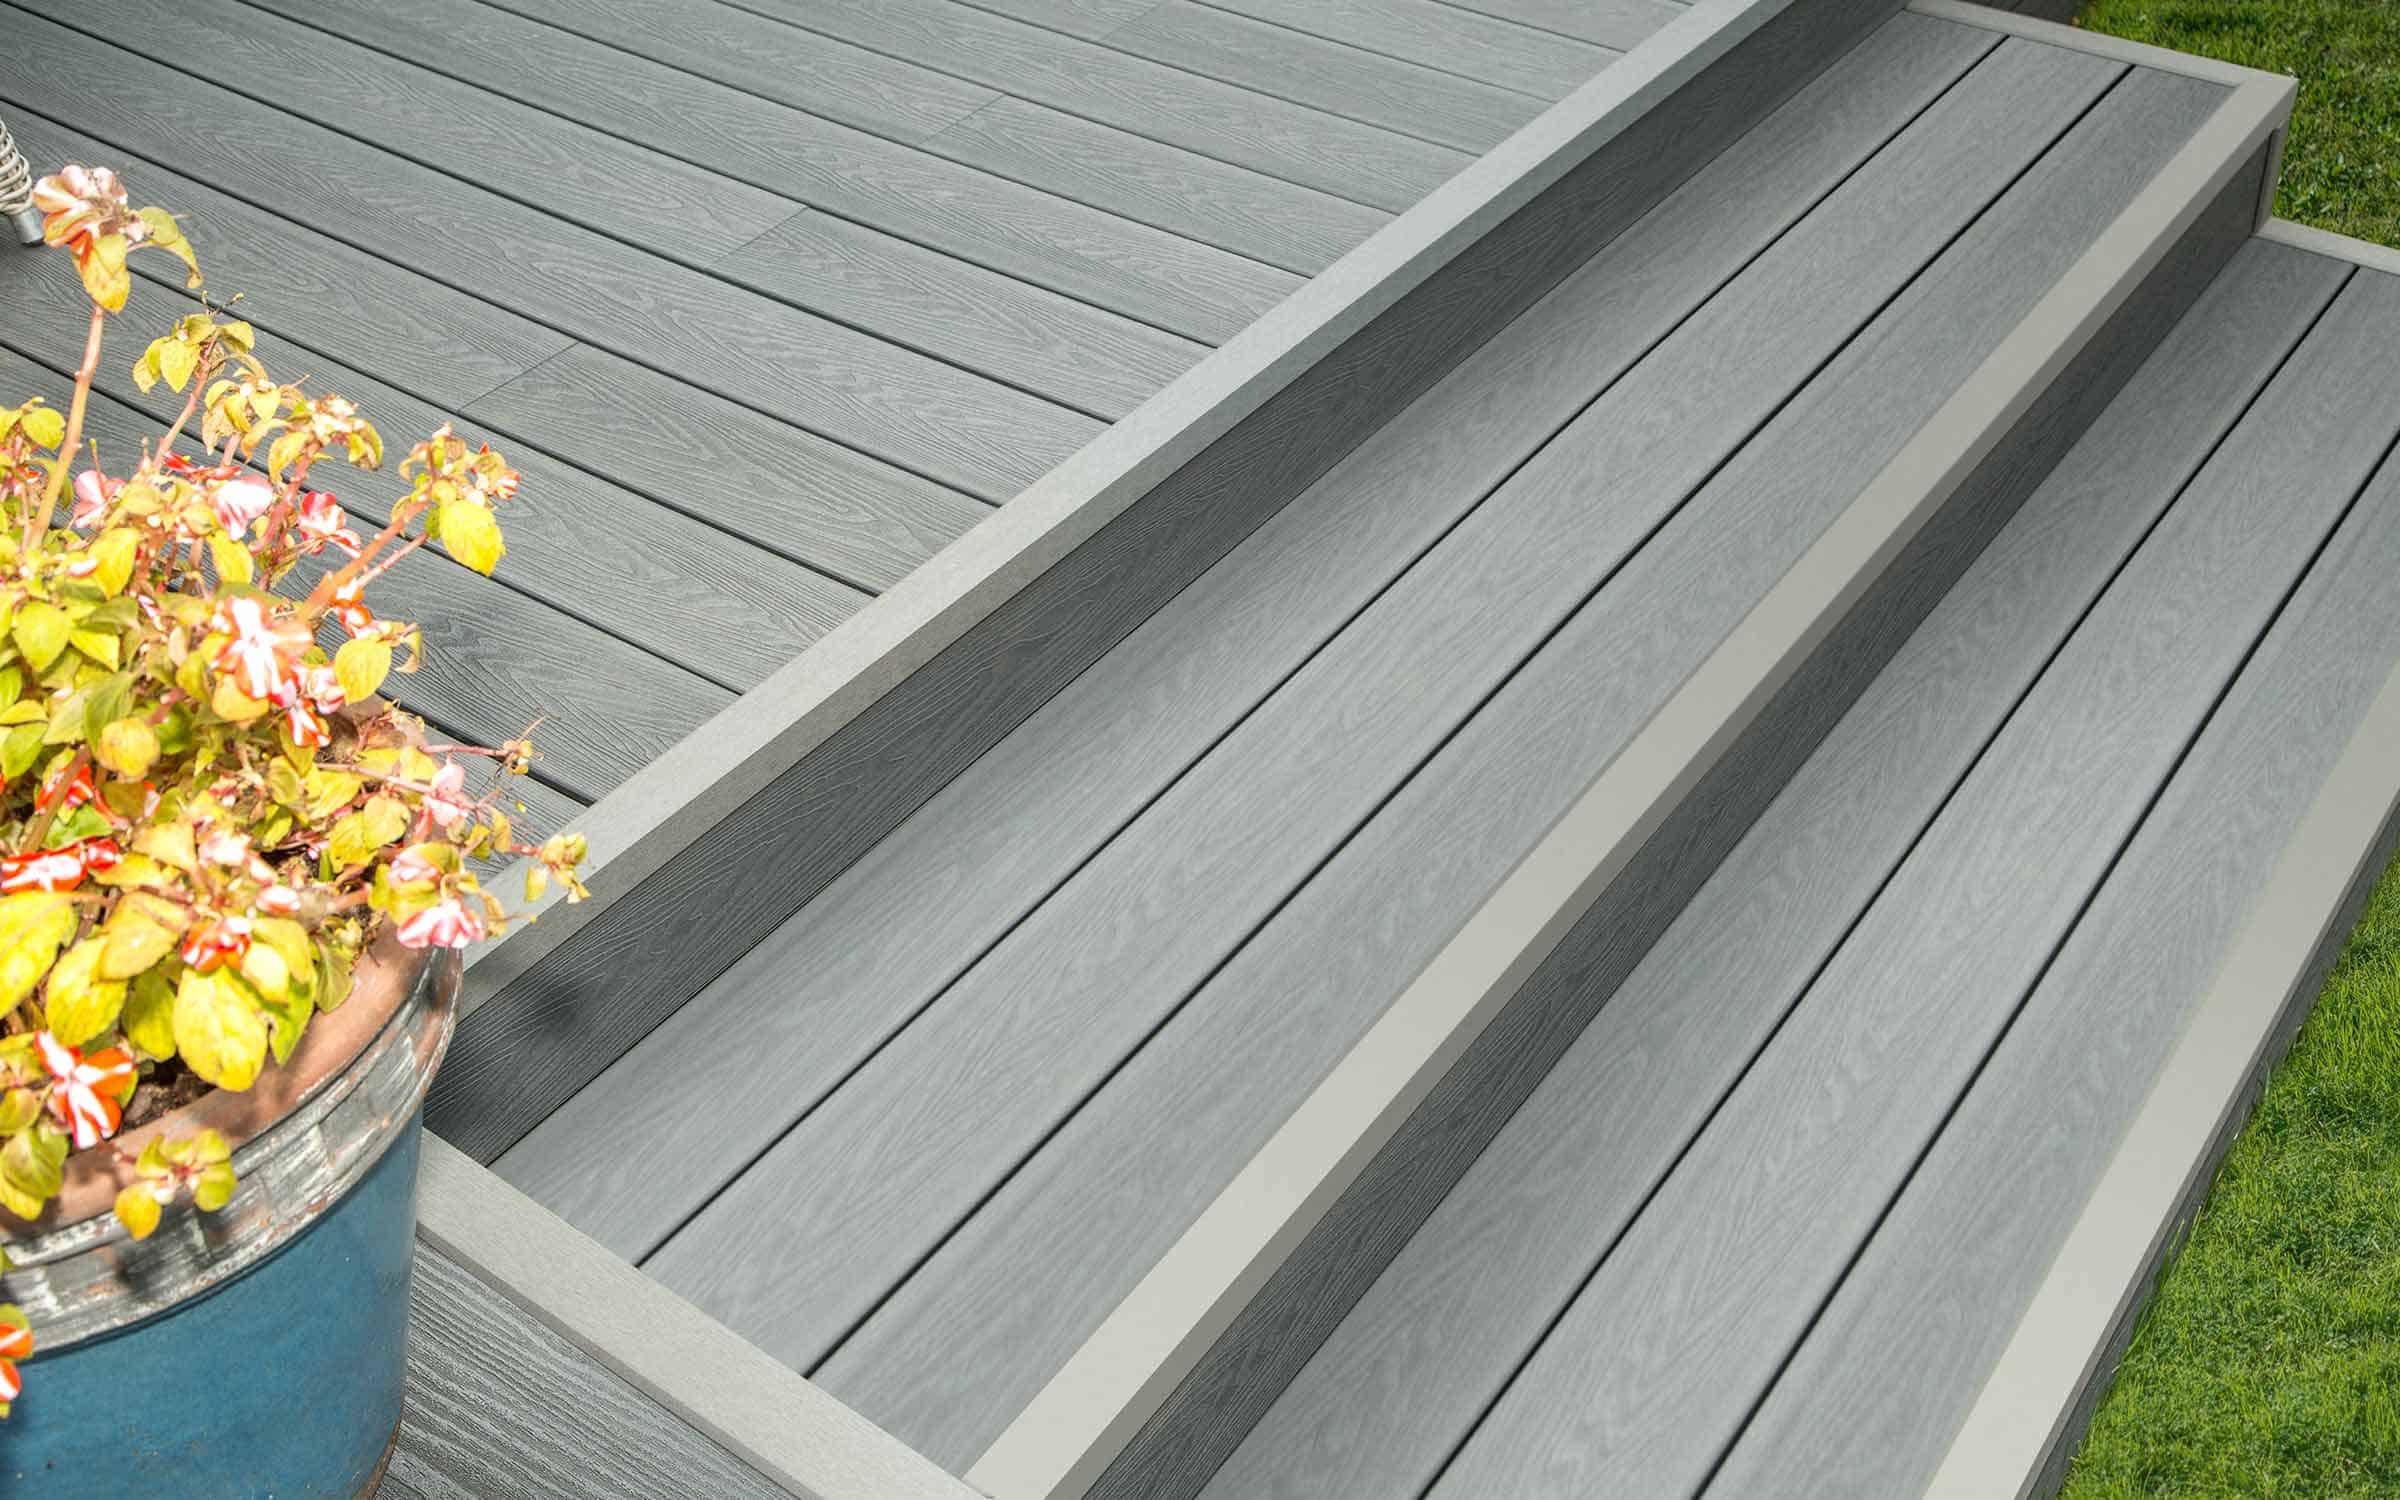
Installing the Decking Boards
Now that the substructure is in place and the decking boards are cut to the appropriate size, it’s time to start installing the TimberTech Azek decking. Follow these steps to ensure a seamless and professional deck installation:
- Start at the outer edge: Begin the installation by placing the first decking board along the outer edge of the deck, ensuring it aligns with the substructure. Leave a small gap between the board and any other structures (such as the house or a railing) to allow for expansion.
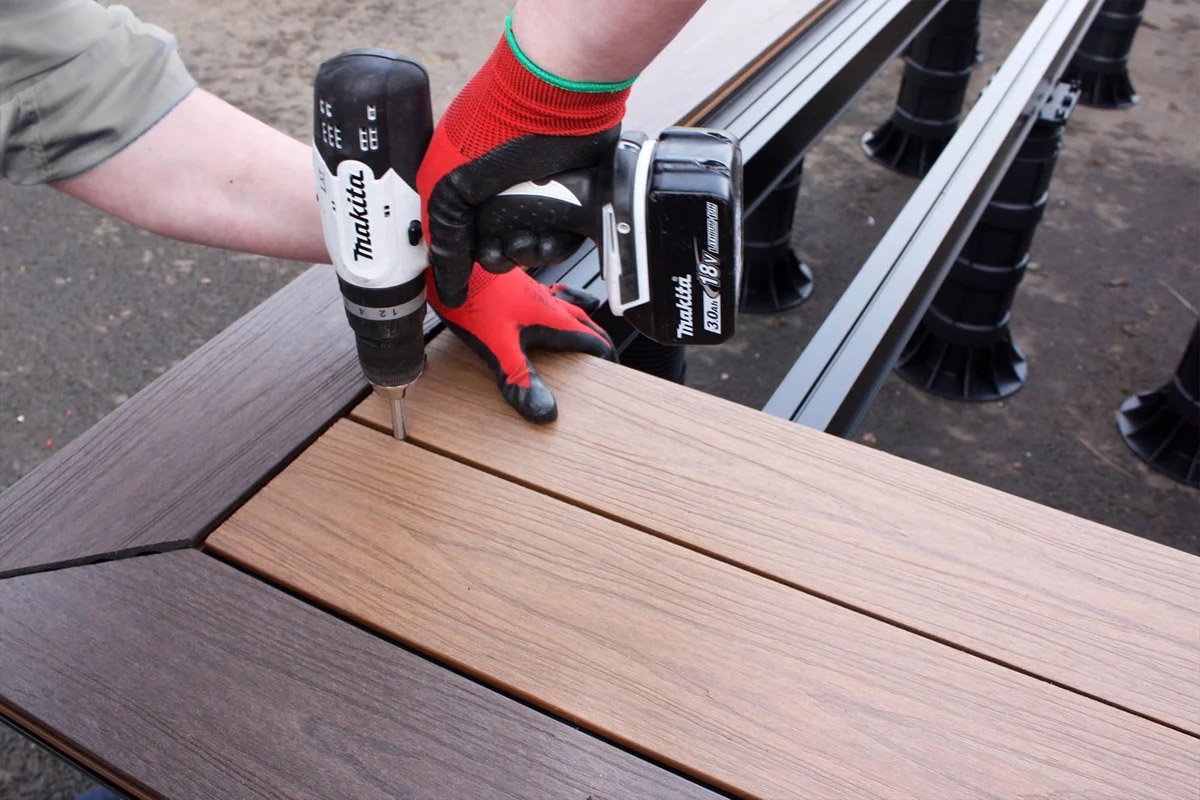
- Secure the boards: Use decking screws to secure the boards to the joists, starting from the outer edge. Place screws about 1 inch from the edge of the board, ensuring a secure connection. Continue securing the boards along the length of the deck.
- Ensure proper spacing: Maintain a consistent spacing between the decking boards to allow for expansion and contraction. Use spacers or another suitable tool to ensure even spacing between each board. Refer to the manufacturer’s guidelines for the recommended spacing.
- Stagger the joints: Stagger the joints of the decking boards for added strength and visual appeal. Avoid aligning the joints to create a more seamless and professional look. Randomly stagger the joints to distribute weight evenly.
- Trim the last board: Measure and trim the last board to fit the remaining space. Remember to leave a small gap for expansion and contraction. Use a circular saw or jigsaw to make the necessary cuts.
- Check for levelness: Use a level to ensure that the decking boards are level and flush with each other. Make any necessary adjustments by tightening or loosening the screws as needed.
By following these steps, you will successfully install the TimberTech Azek decking boards, creating a beautiful and functional deck. Take your time to ensure each board is properly secured and aligned, paying attention to details to achieve a professional finish.
Before installing Timbertech Azek decking, make sure to properly acclimate the boards to the environment for at least 48 hours. This will help prevent warping and ensure a more stable installation.
Read more: How Much Does Azek Decking Cost
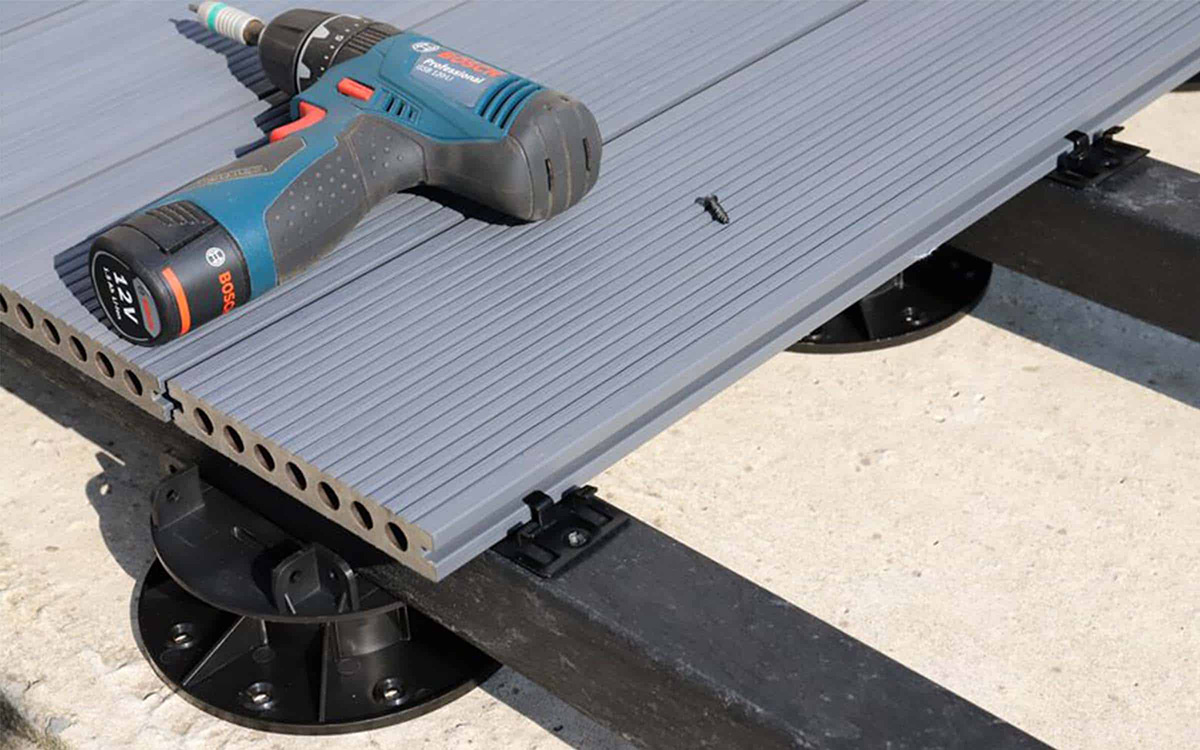
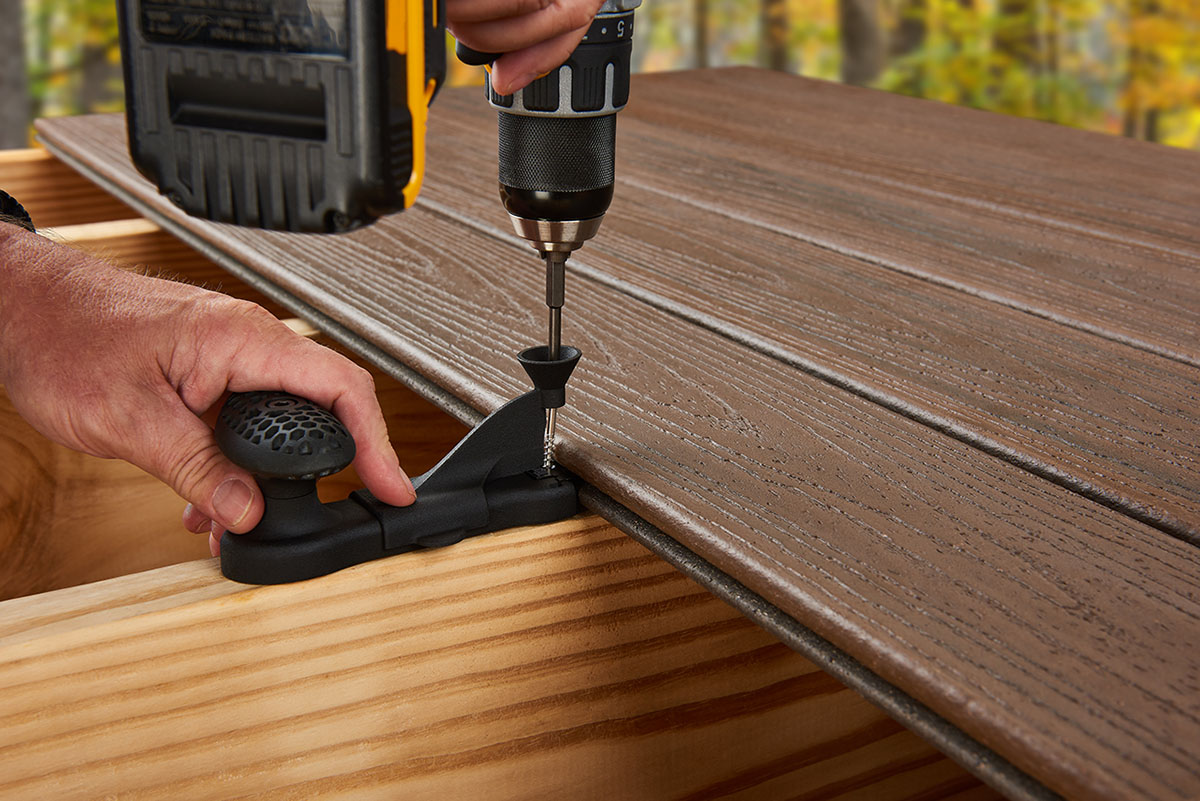
Securing the Decking Boards
To ensure the stability and longevity of your TimberTech Azek decking, it is crucial to properly secure the boards to the substructure. Follow these steps to securely fasten the decking boards:
- Choose the appropriate fasteners: Select the appropriate fasteners based on the type and thickness of the decking boards. TimberTech Azek decking is typically fastened using stainless steel or coated deck screws specifically designed for composite decking.
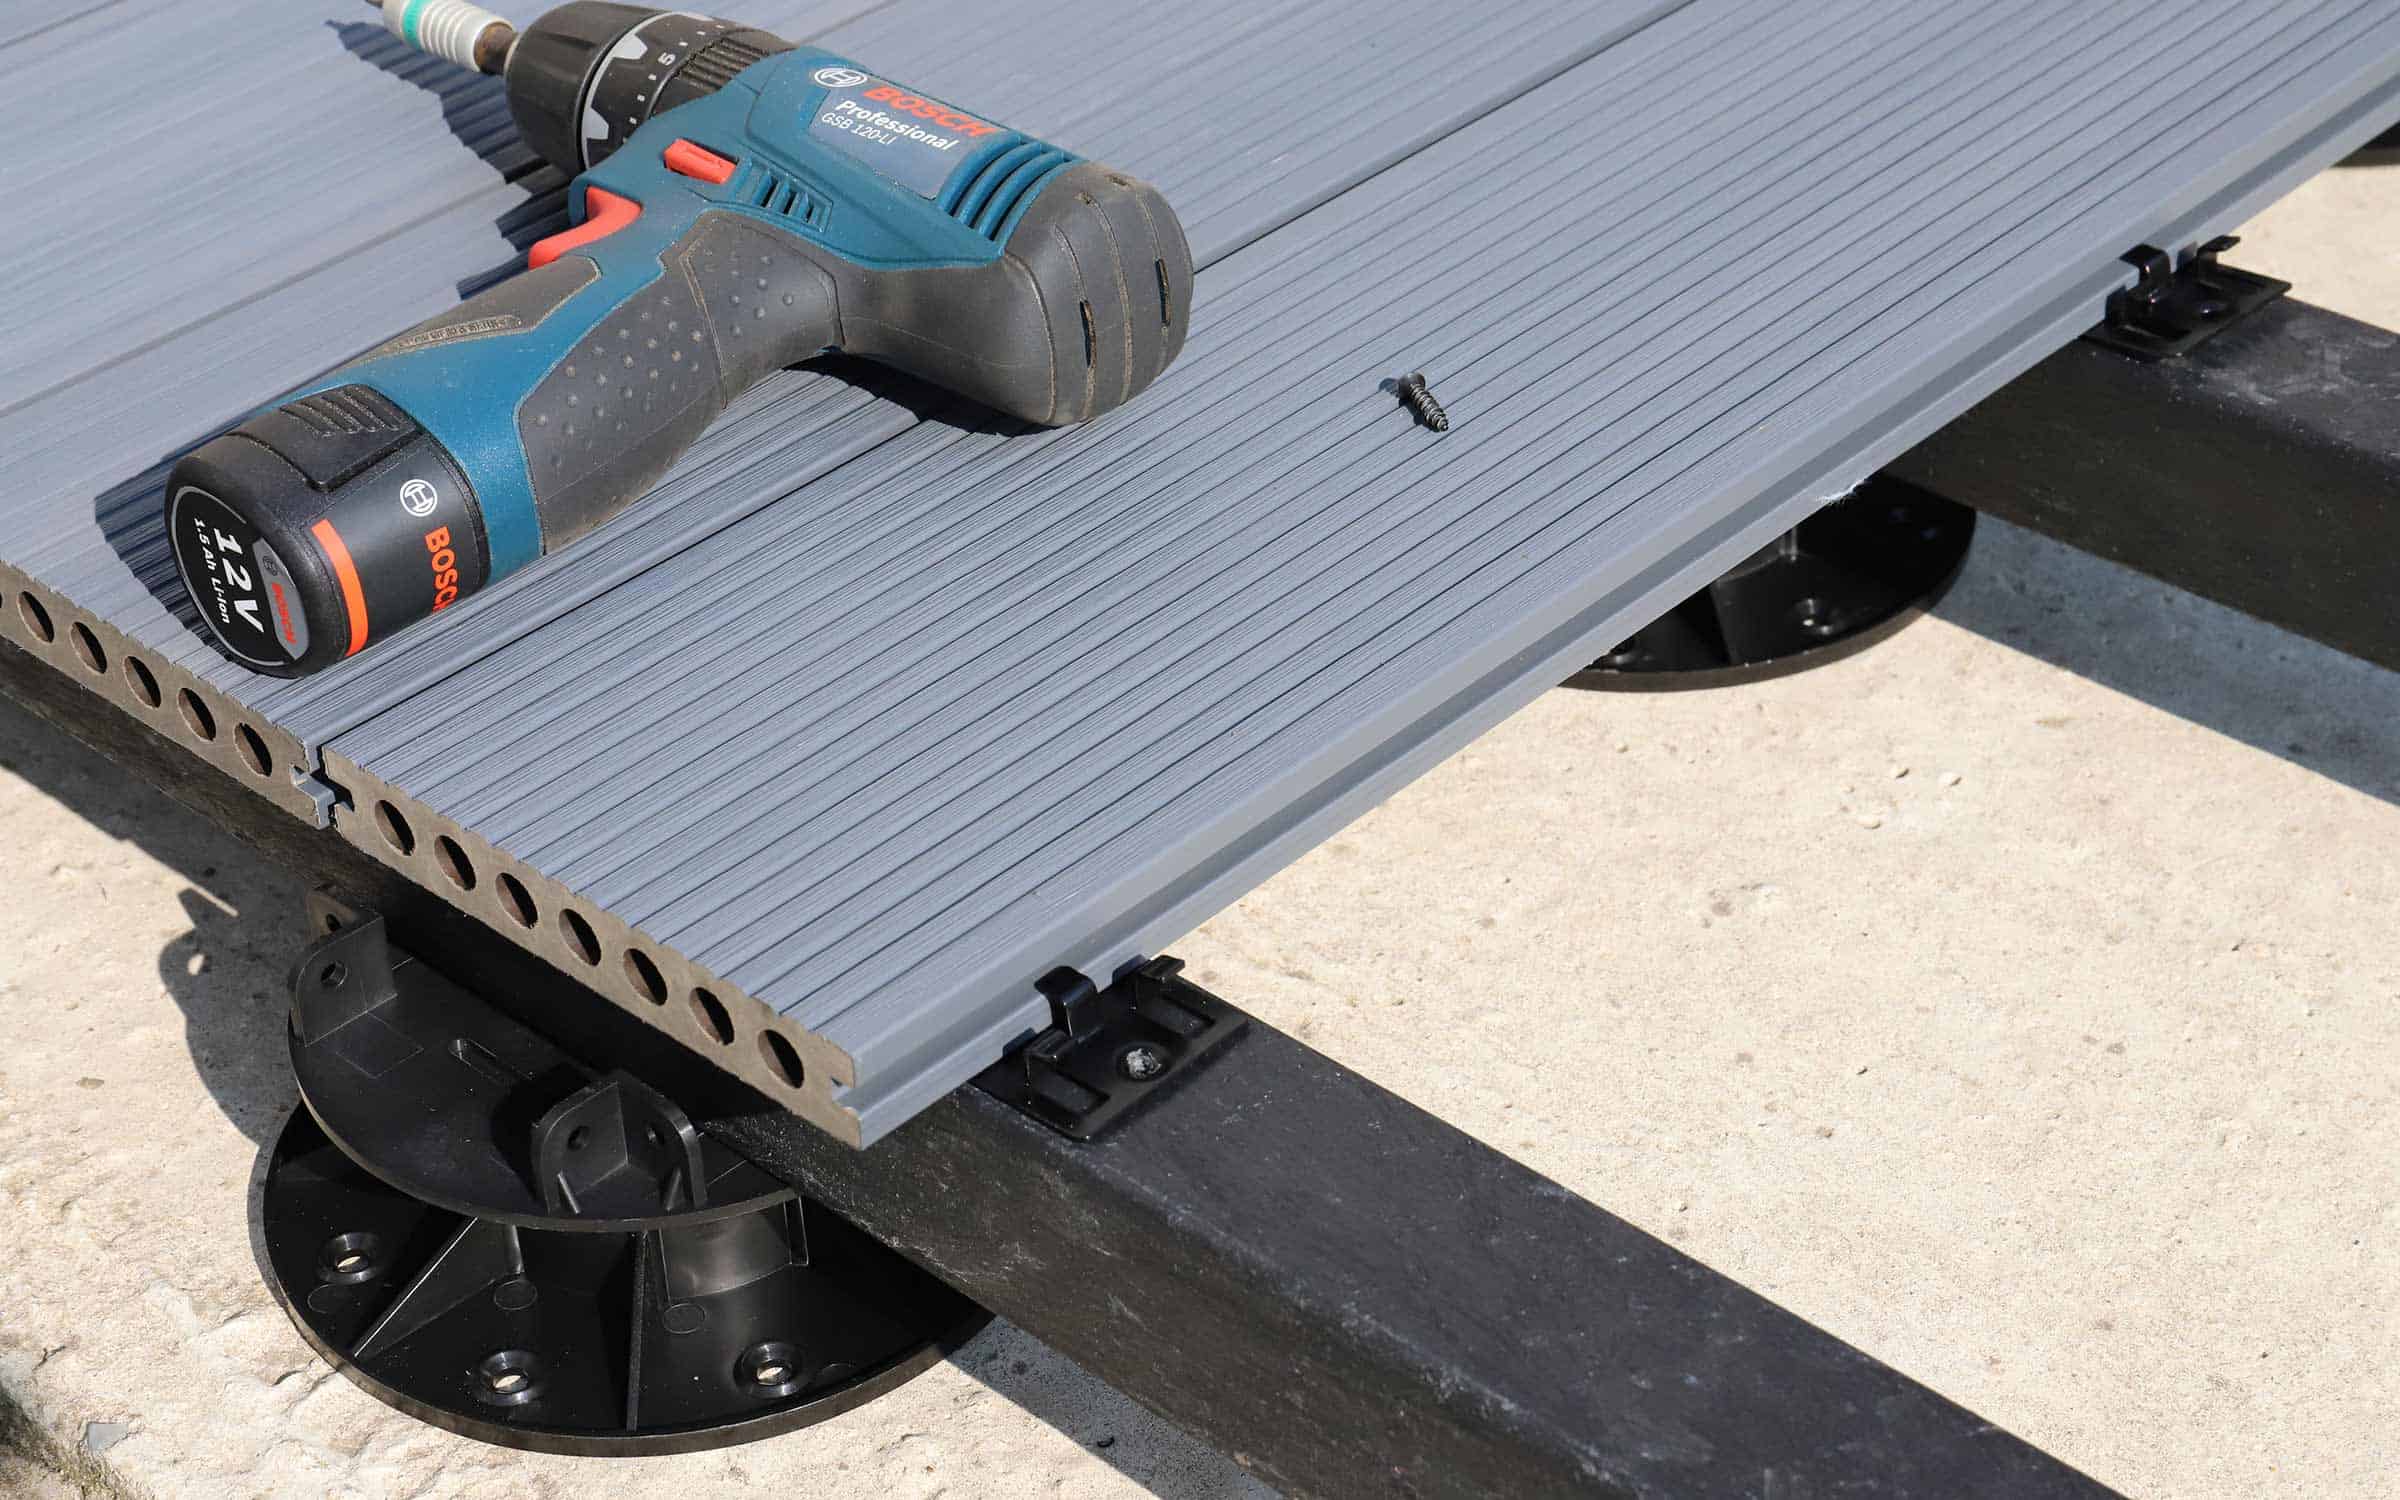
- Pre-drill the screw holes: To prevent splitting or damaging the decking boards, pre-drill pilot holes for the screws. The diameter of the pilot holes should be slightly smaller than the screw shank, allowing for a secure fit.
- Place the screws: Position the screws near the outer edges of the decking boards, about 1 inch from the edge. Drive the screws into the pre-drilled holes, ensuring they are flush with the surface of the boards. Avoid over-tightening, as it may cause damage to the decking material.
- Secure the boards along the joists: Place screws along the joists at regular intervals, typically every 12 to 16 inches. This will ensure that the decking boards are securely attached to the substructure, preventing any movement or warping over time.
- Check for any raised or loose boards: As you secure the decking boards, periodically check for any raised or loose boards. If any are found, use a pry bar or hammer to gently tap them back into place and secure them with additional screws.
- Conceal the fasteners (optional): If desired, you can choose to use hidden fastening systems to achieve a cleaner, fastener-free surface. These systems allow you to attach the decking boards from underneath, creating a seamless appearance.
By following these steps and ensuring that the decking boards are securely fastened to the substructure, you will create a reliable and long-lasting TimberTech Azek deck. Properly securing the boards is essential for the overall stability and structural integrity of your deck.
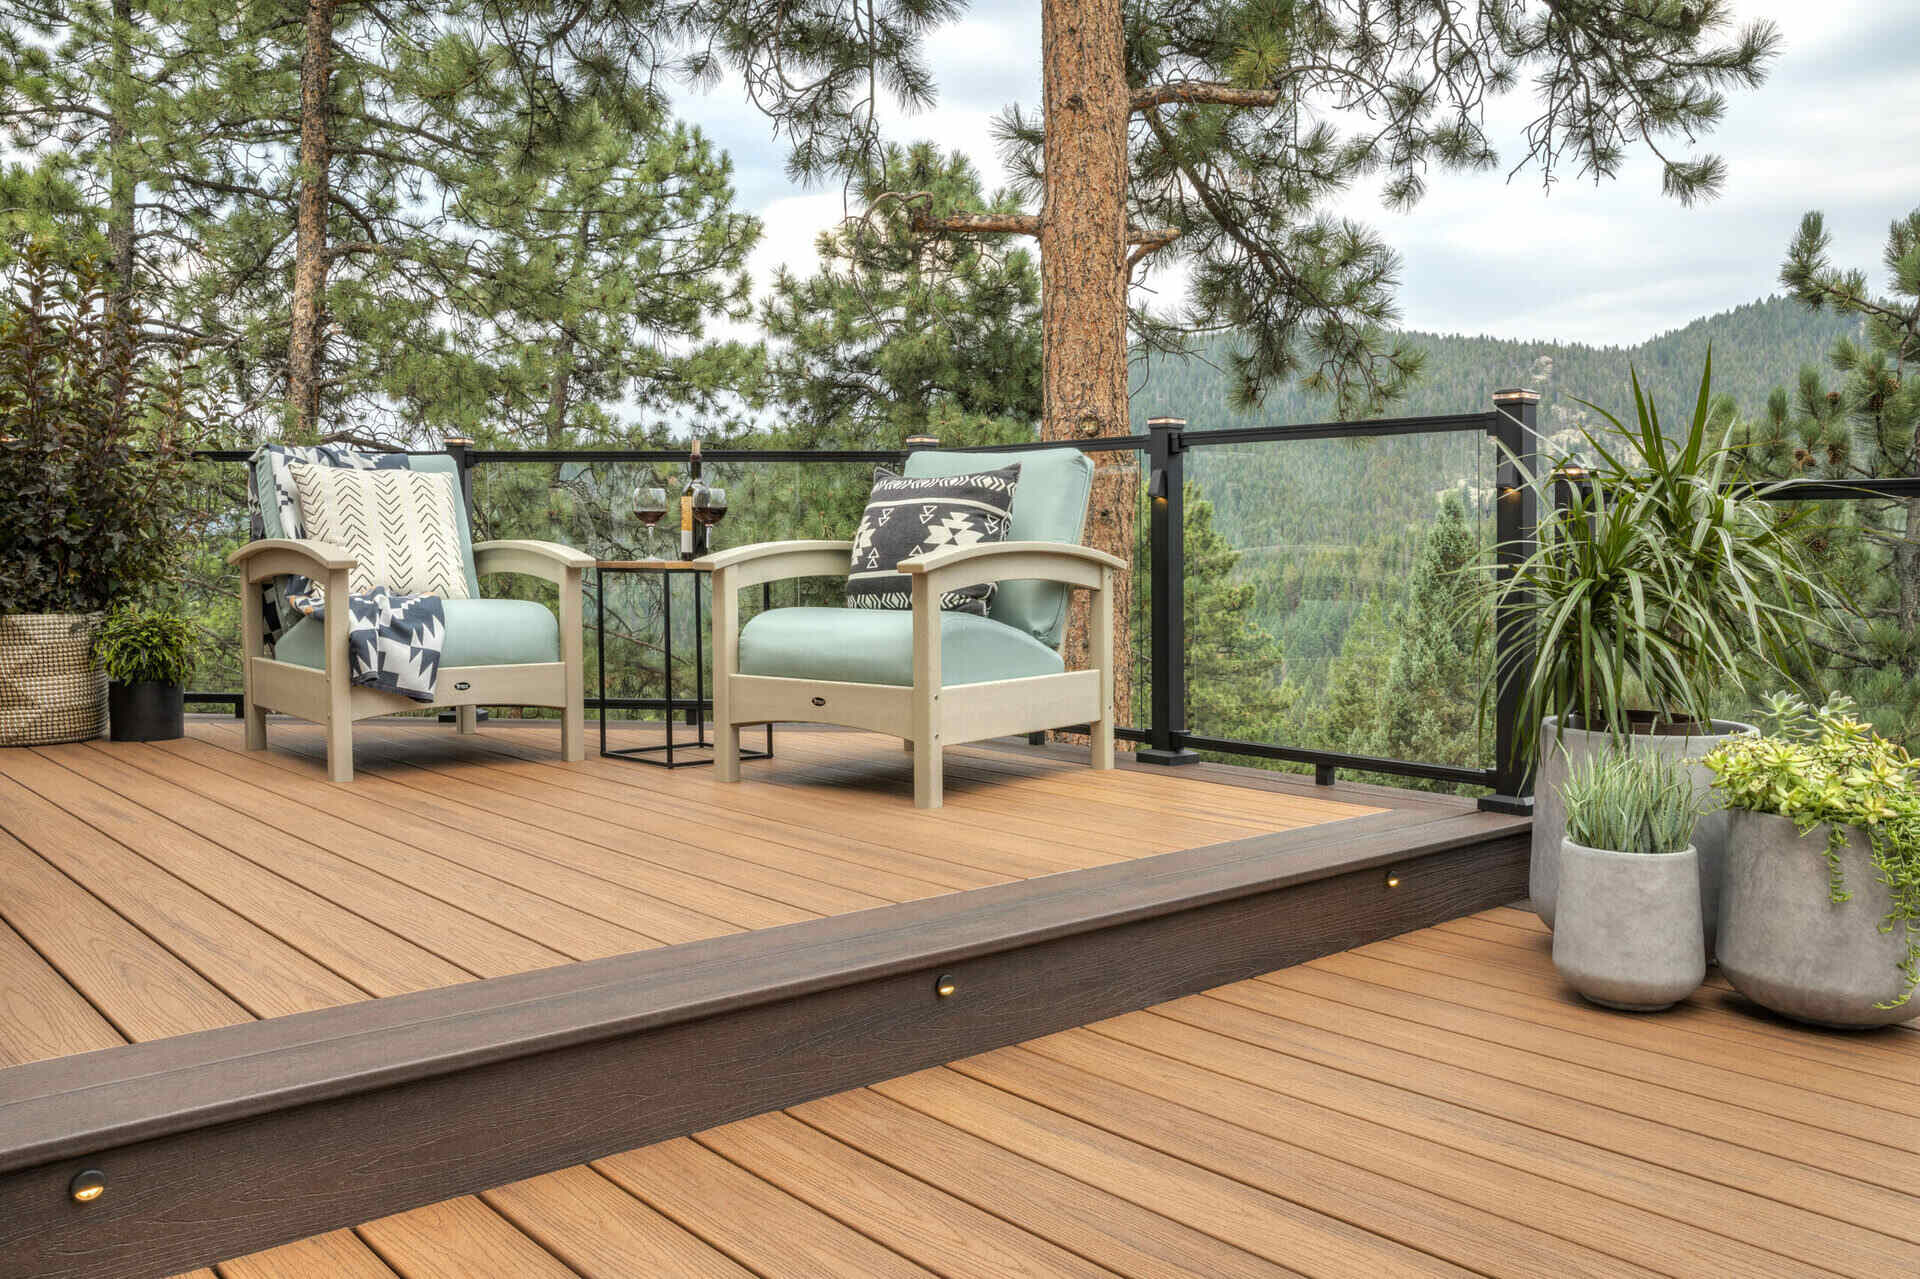
Applying Finishing Touches
As you near the completion of your TimberTech Azek decking installation, it’s time to apply the finishing touches that will enhance the aesthetics and functionality of your deck. Follow these steps to add the final details:
- Trimming the edges: If desired, you can trim the exposed edges of the decking boards to create a clean and polished look. Use a circular saw or a router with a trim bit to carefully trim the edges.
- Adding fascia boards: Install fascia boards along the perimeter of the deck to provide a finished appearance and to conceal any substructure. Use composite decking screws or fasteners to secure the fascia boards in place.
- Installing railing systems: Depending on your design and local building codes, you may need to install railing systems around your deck for safety. Follow the manufacturer’s instructions to properly install and secure the railing posts and balusters.
- Applying sealant or stain: While TimberTech Azek decking is highly resistant to stains and fading, you may choose to apply a composite deck sealant or stain for added protection and color enhancement. Follow the manufacturer’s guidelines for proper application.
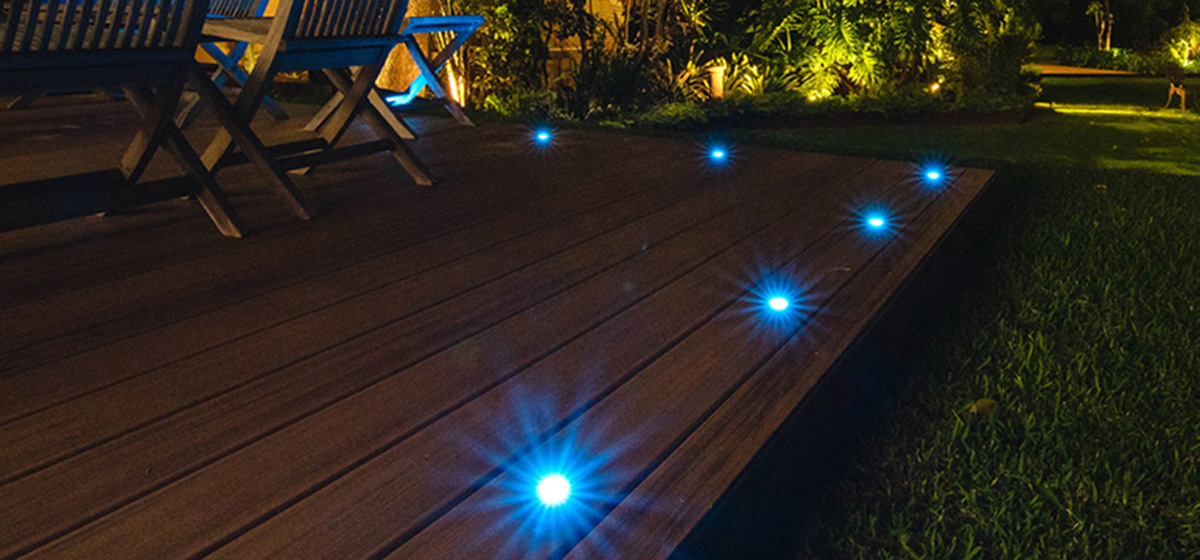
- Installing post caps and accessories: Consider adding post caps, lighting fixtures, or other deck accessories to enhance the overall look and functionality of your deck. Install them according to the manufacturer’s instructions for a secure and polished finish.
- Checking for any loose components: After completing the finishing touches, thoroughly inspect the entire deck for any loose components or fasteners. Tighten any screws or fasteners that may have become loose during the installation process.
By paying attention to these finishing touches, you will enhance the overall appearance and durability of your TimberTech Azek deck. Take the time to properly trim the edges, install fascia boards, add railing systems, and apply any necessary sealant or stain. These details will make a significant difference in the final look and feel of your deck.
Cleaning and Maintenance Tips
To keep your TimberTech Azek decking looking its best and ensure its longevity, regular cleaning and maintenance are essential. Follow these tips to properly care for your deck:
- Sweep regularly: Remove debris and dirt from your deck by sweeping it regularly using a broom or a leaf blower. This helps prevent the buildup of dirt and grime that can lead to staining or discoloration.
- Clean spills immediately: Accidents happen, so it’s important to clean up any spills or stains promptly. Use mild soap, water, and a soft brush to gently scrub the affected area. Rinse thoroughly and allow it to air dry.
- Avoid abrasive cleaners: When cleaning your deck, avoid using abrasive cleaners or harsh chemicals, as they can damage the surface of the decking boards. Stick to mild soaps or specialized composite deck cleaners recommended by the manufacturer.
- Prevent mold and mildew: Timbertech Azek decking is highly resistant to mold and mildew, but if you notice any signs of growth, clean it using a mixture of water and mild detergent. Scrub gently and rinse thoroughly.
- Protect from furniture scratches: Avoid dragging heavy furniture across the deck, as it can leave scratches on the surface. Use furniture pads or coasters to protect the decking boards when moving furniture.
- Remove snow and ice carefully: In cold climates, be cautious when removing snow or ice from your deck. Use a plastic shovel or a broom with soft bristles to avoid scratching or damaging the surface. Avoid using metal shovels or sharp objects.
- Inspect and tighten fasteners: Periodically inspect the deck for any loose fasteners and tighten them as needed. Loose screws or fasteners can compromise the integrity of your deck and should be addressed promptly.
- Consider annual cleaning and sealing: Depending on your deck’s exposure to the elements, you may consider an annual cleaning and sealing routine to further protect and enhance the appearance of your TimberTech Azek deck. Follow the manufacturer’s recommendations for sealants or stains.
- Follow manufacturer’s care guidelines: Always refer to the manufacturer’s care and maintenance guidelines for your specific TimberTech Azek decking. They may provide additional recommendations or precautions based on the product’s unique characteristics or regional considerations.
By following these cleaning and maintenance tips, you can ensure that your TimberTech Azek decking remains beautiful and functional for years to come. Regular cleaning and proper care will help preserve the appearance and performance of your deck, allowing you to enjoy it to the fullest.
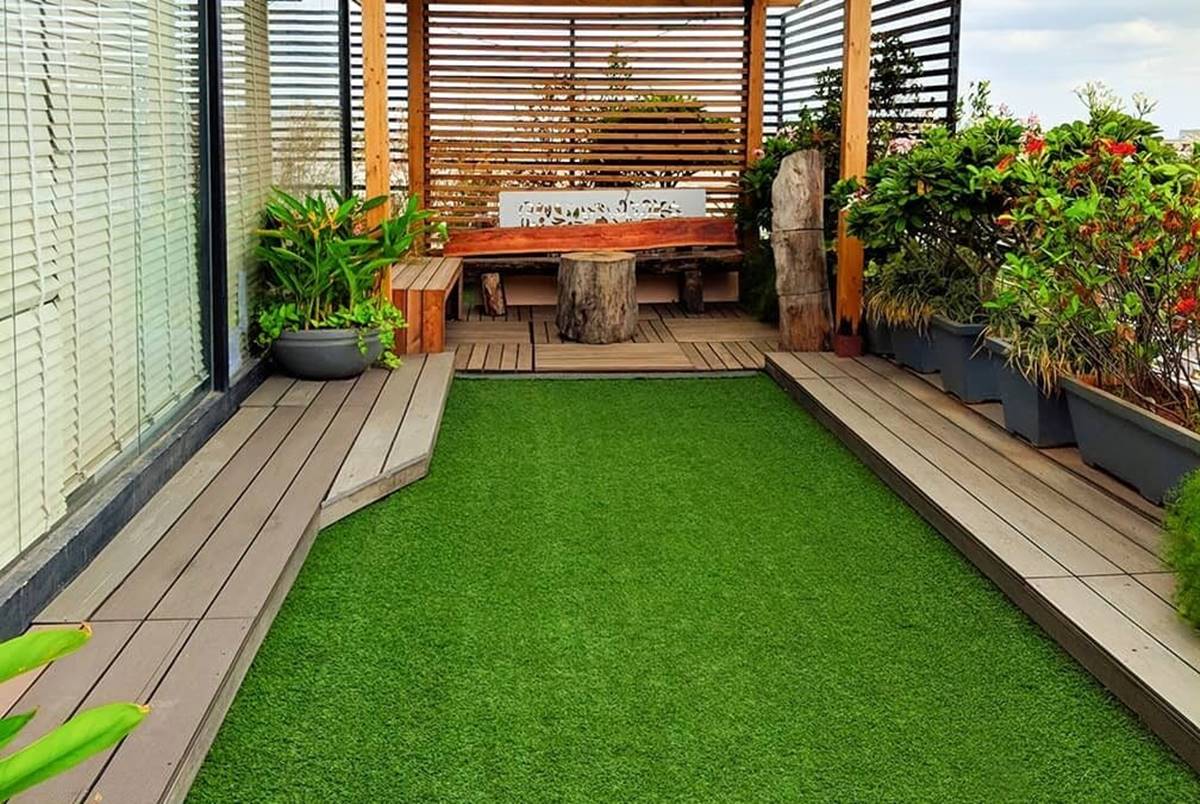
Conclusion
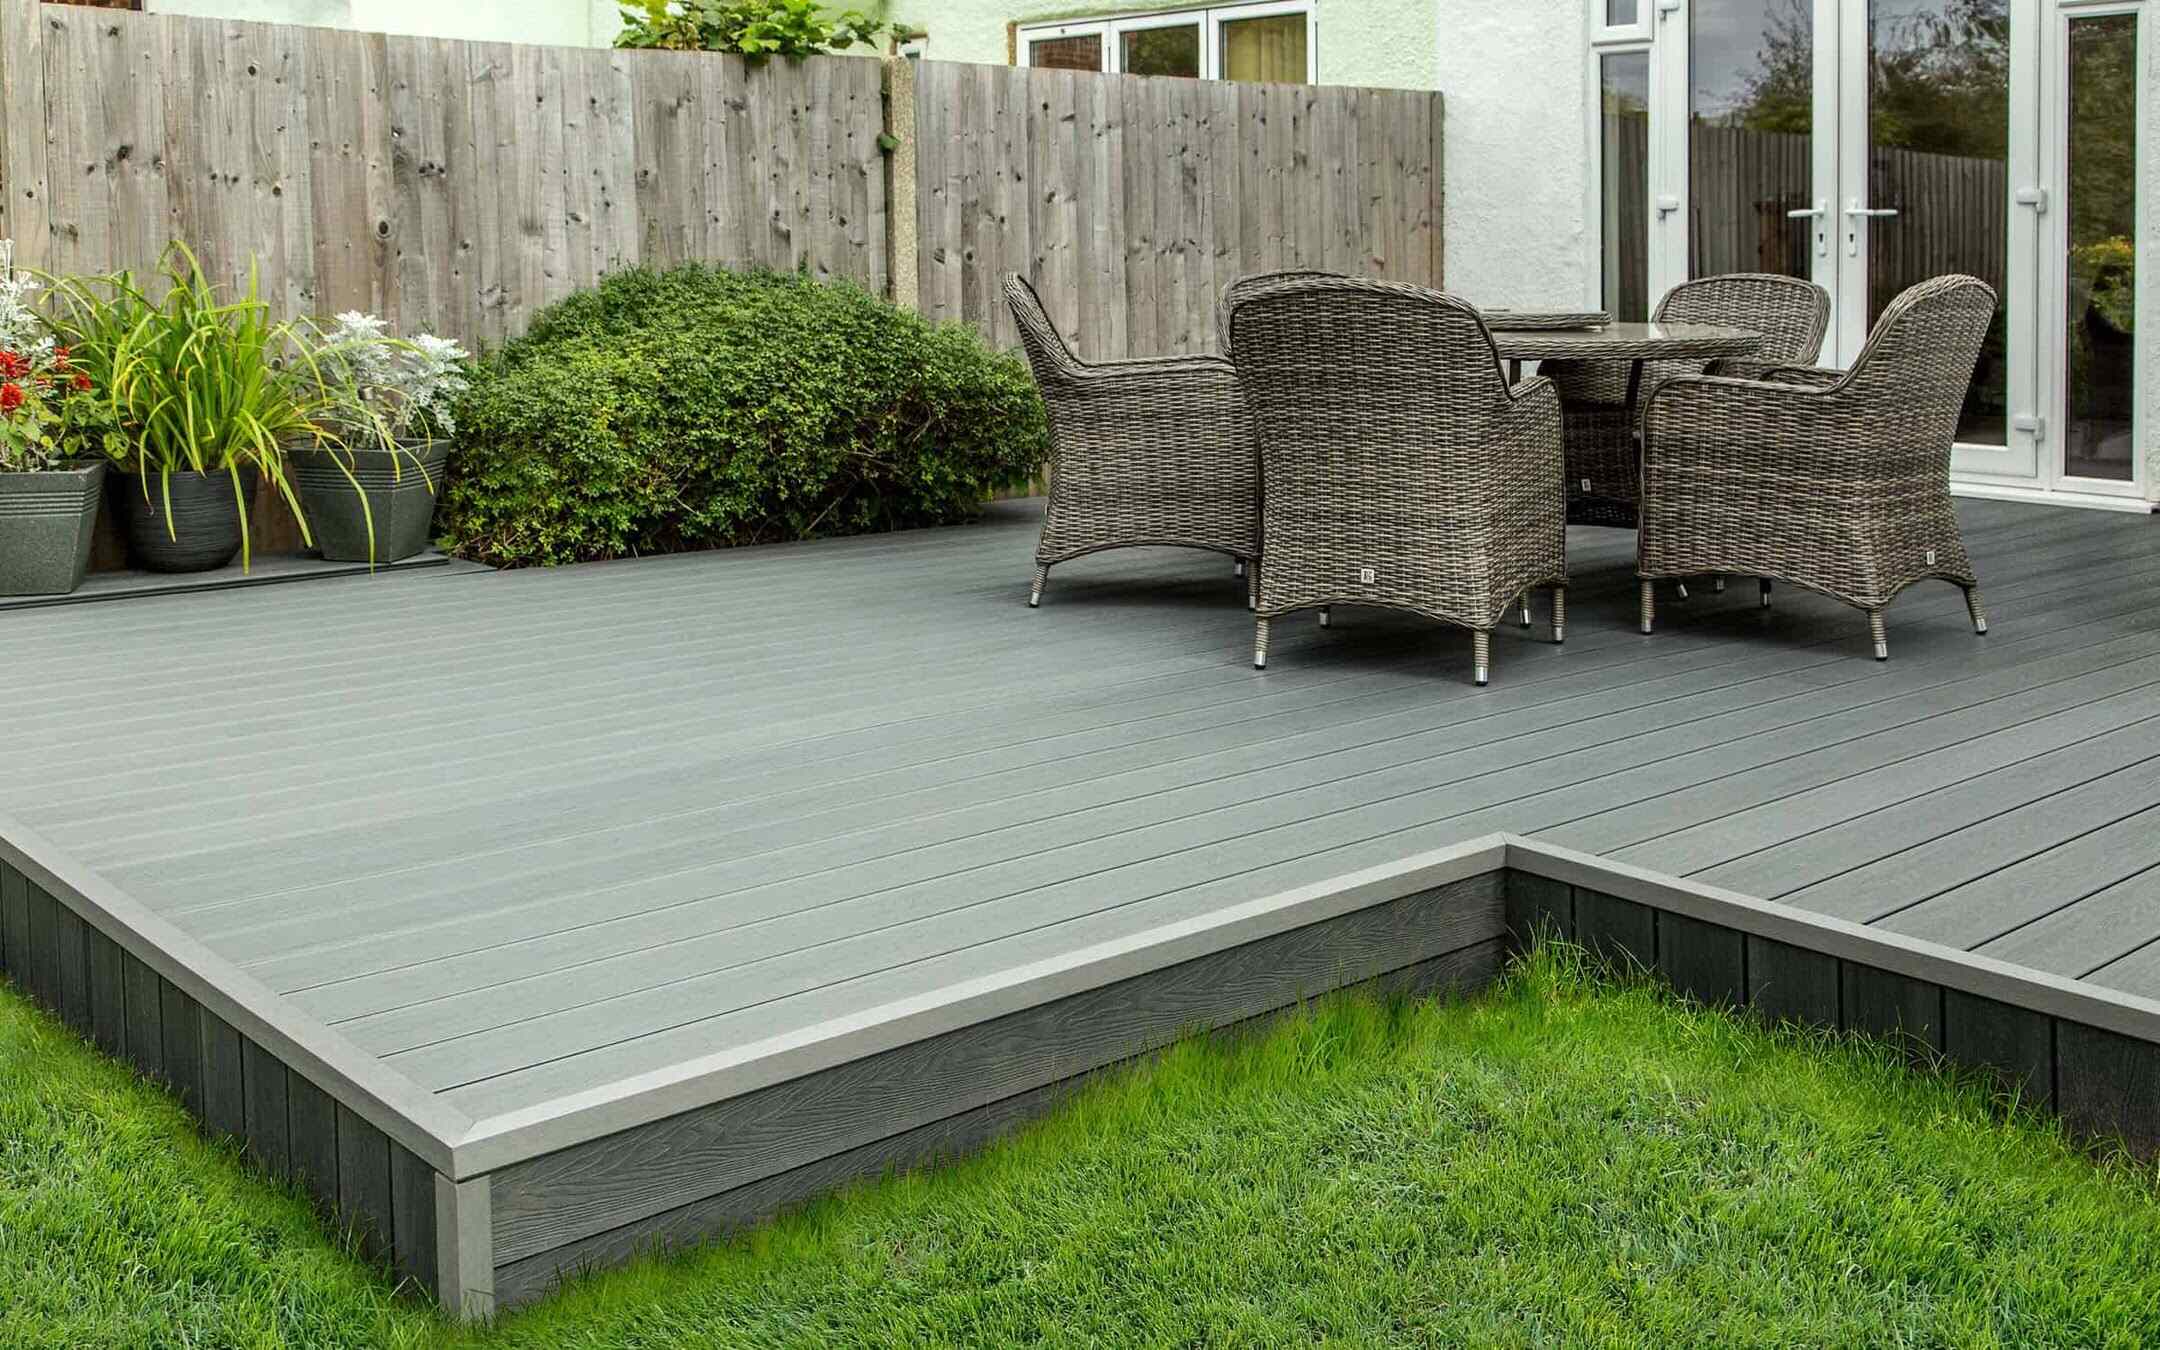
Congratulations on successfully completing the installation of your TimberTech Azek decking! By following the step-by-step guide provided in this article, you have created a beautiful and resilient outdoor space that will provide enjoyment for years to come.
TimberTech Azek decking offers a high-quality, low-maintenance solution for your outdoor living needs. Its innovative technology and durable composite materials make it resistant to fading, staining, and moisture, ensuring a deck that will withstand the test of time. With proper installation and regular maintenance, you can enjoy all the benefits of a stunning and functional deck without the hassle of constant upkeep.
Remember to plan and prepare your deck area properly, gather all the necessary materials and tools, and carefully measure and cut the decking boards. Secure the boards to the substructure, paying attention to proper spacing and alignment. Apply the finishing touches, such as trimming the edges and adding railing systems, to enhance the overall look and functionality of your deck.
Keeping your TimberTech Azek decking in pristine condition is as simple as following a regular cleaning and maintenance routine. Sweep regularly to remove debris, clean up spills promptly, and protect your deck from scratches. Inspect and tighten any loose fasteners, and consider performing an annual cleaning and sealing to keep your deck looking its best.
By taking these steps, you will not only maintain the aesthetic appeal of your deck but also prolong its lifespan, ensuring many years of enjoyment for you, your family, and friends. So sit back, relax, and bask in the beauty of your newly installed TimberTech Azek deck, knowing that you have created an outdoor oasis that will bring joy and memories for years to come.
Frequently Asked Questions about How To Install Timbertech Azek Decking
Was this page helpful?
At Storables.com, we guarantee accurate and reliable information. Our content, validated by Expert Board Contributors, is crafted following stringent Editorial Policies. We're committed to providing you with well-researched, expert-backed insights for all your informational needs.

0 thoughts on “How To Install Timbertech Azek Decking”