
Articles
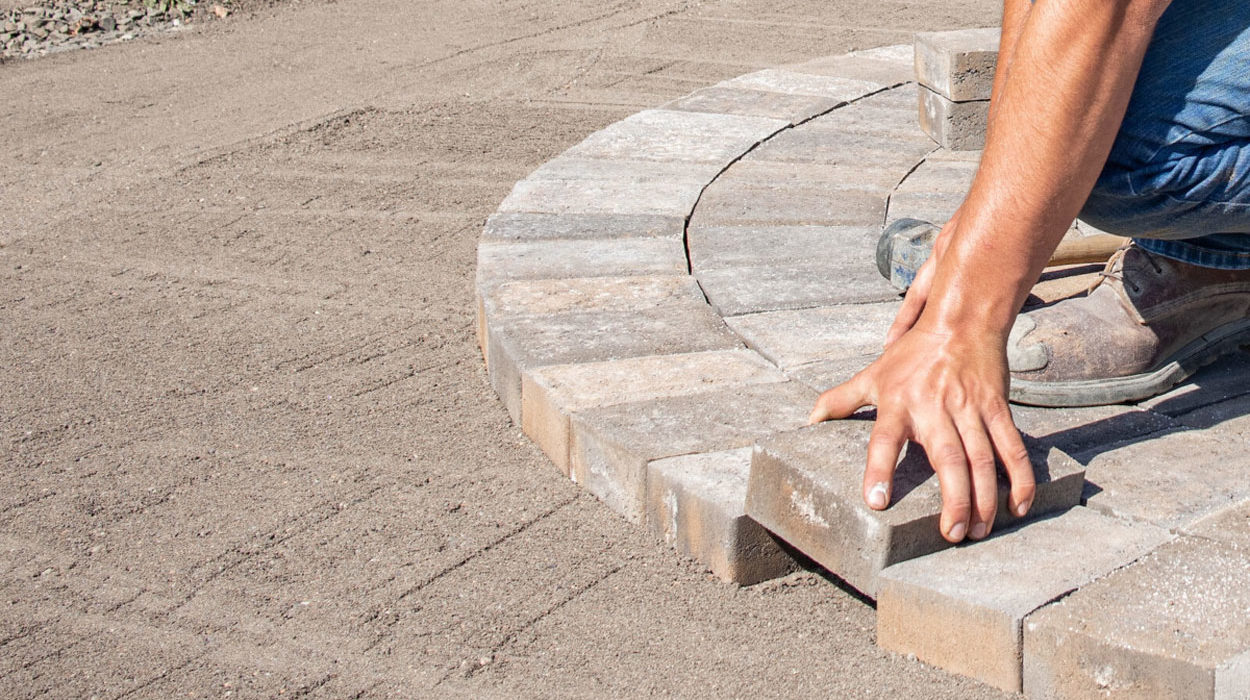
How To Install A Driveway Drainage System
Modified: October 18, 2024
Discover step-by-step articles on how to install driveway drainage to effectively manage water flow and prevent damage.
(Many of the links in this article redirect to a specific reviewed product. Your purchase of these products through affiliate links helps to generate commission for Storables.com, at no extra cost. Learn more)
Introduction
Installing driveway drainage is a crucial aspect of ensuring the longevity and functionality of your driveway. Poor drainage can lead to various problems, including standing water, erosion, and even structural damage. By installing a proper drainage system, you can effectively redirect water away from your driveway, preventing these issues and prolonging its lifespan.
In this article, we will provide you with a comprehensive guide on how to install driveway drainage. We will walk you through each step of the process, from assessing the drainage needs to the finishing touches. So, let’s get started!
Key Takeaways:
- Properly assessing the drainage needs, planning the route, and installing the drainage pipe with the correct slope are crucial for an effective driveway drainage system. Backfilling and thorough testing ensure long-term functionality.
- Regular maintenance, including inspecting for damage, clearing blockages, and monitoring the slope, is essential for preserving the effectiveness of the driveway drainage system. Investing in proper installation and maintenance pays off in the long run.
Read more: How To Run Drainage Pipe Under A Driveway
Step 1: Assessing the Drainage Needs
Before you begin installing driveway drainage, it’s important to properly assess the drainage needs of your driveway. This involves identifying areas where water tends to pool or flow towards, as well as understanding the slope and layout of your driveway.
First, take a walk around your driveway after a heavy rainstorm and observe where water accumulates. Look for areas where water collects or where erosion is evident. These are the problem areas that need to be addressed with a proper drainage system.
Next, determine the slope of your driveway. It’s ideal for your driveway to have a slight slope, usually around 1-2%, which allows water to naturally flow away from the surface. If your driveway is completely flat or has an uneven slope, you may need to make adjustments to ensure proper drainage.
Additionally, consider the layout and design of your driveway. Are there any obstacles or points where water tends to gather? This could be due to the shape of the driveway or the presence of landscaping features. You’ll need to take these factors into account when planning the drainage system.
By carefully assessing the drainage needs of your driveway, you’ll have a clear understanding of where the water is going and where it needs to be redirected. This will help you make informed decisions when it comes to the design and installation of your drainage system.
Step 2: Gathering the Necessary Tools and Materials
Once you have assessed the drainage needs of your driveway, it’s time to gather the necessary tools and materials to complete the installation. Here are the essential items you’ll need:
- Shovel or excavator: This will be used to dig the trench for the drainage system.
- Digging tools: Depending on the size and complexity of your project, you may also need a pickaxe or a trenching shovel to assist with excavation.
- Level: A level will help you ensure that the slope of the drainage pipe is correctly aligned for effective water flow.
- Measuring tape: Use this to measure the length of the trench and determine the appropriate slope.
- Pipe cutter: If you’re using plastic drainage pipes, a pipe cutter will enable you to accurately cut the pipes to the desired lengths.
- PVC glue or couplers: These are necessary for securely connecting the pieces of the drainage system.
- Perforated drain pipe: This is the main component of the drainage system that collects and redirects water away from the driveway.
- Gravel or crushed stone: This will be used as backfill material around the drainage pipe for stability and proper drainage.
- Landscape fabric: Placing landscape fabric around the drainage pipe will prevent soil and debris from clogging the system.
It’s important to gather all the required tools and materials before starting the installation process. This will help you work efficiently without interruptions. Additionally, ensure that you have the appropriate safety equipment, such as gloves and safety glasses, to protect yourself during the installation.
Step 3: Planning and Marking the Drainage Route
Now that you have the necessary tools and materials, it’s time to plan and mark the drainage route for your driveway. This step is crucial as it helps you visualize the path the drainage system will take and ensure proper water flow.
Start by identifying the starting point and endpoint of the drainage system. Typically, the starting point is where water tends to accumulate or where you can connect the system to an existing downspout or drain. The endpoint should be a suitable location where water can safely drain without causing any issues.
Using a measuring tape, measure the length of the drainage route. This will give you an idea of how much pipe you’ll need for the installation. It’s a good idea to add a little extra length to account for any curves or adjustments you might need to make along the way.
Once you have determined the route and measured the length, use a marker or spray paint to mark the path on the ground. Make sure your markings are clear and easy to follow during the excavation process.
Next, consider the slope of your driveway and the desired drainage flow. The drainage pipe should follow a downward slope to allow water to flow naturally. Use a level to ensure that the slope is consistent and sufficient for proper drainage.
Lastly, take into account any obstacles or obstructions, such as trees, landscaping features, or underground utilities. You may need to make adjustments to the path or work around these obstacles to ensure a smooth installation.
By carefully planning and marking the drainage route, you’ll have a clear roadmap for the installation process. This will help you dig the trench accurately and ensure that the drainage system functions effectively in redirecting water away from your driveway.
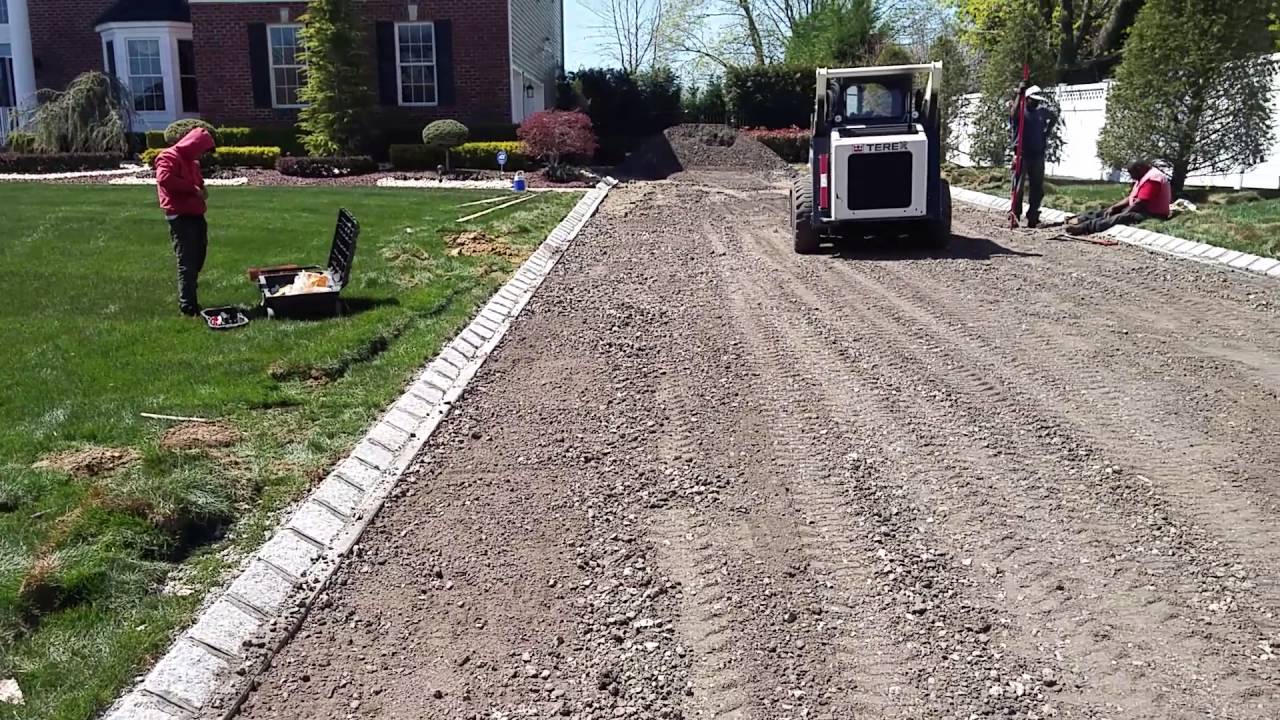
Step 4: Excavating the Trench
With the drainage route planned and marked, it’s time to start excavating the trench for the drainage pipe. This step involves digging a channel in the ground where the pipe will be laid.
Begin by using a shovel or an excavator to start digging the trench along the marked path. The width and depth of the trench will depend on the size of your drainage pipe and any additional requirements for backfill material.
As you dig, be mindful of the slope and ensure that it maintains a downward angle. The general rule is to have a drop of 1 inch for every 8 feet of pipe length. Use a level to periodically check the slope and make adjustments if necessary.
If your soil is particularly dense or compacted, you may encounter difficulties while digging. In such cases, consider using a pickaxe or a trenching shovel to aid in the excavation process and break up the soil.
As you dig, remove any rocks, roots, or debris that could obstruct or damage the drainage pipe. It’s crucial to create a clear and smooth path for the pipe to ensure proper water flow.
Once the trench is dug to the appropriate depth and width, take a moment to inspect its overall quality. Ensure that it is straight, level, and free of any loose dirt or debris.
Remember to exercise caution while digging, especially if there are underground utilities or cables in the area. It’s important to consult with local utility companies or obtain permission before excavating if you are unsure of what lies beneath the surface.
Excavating the trench is a critical step in installing driveway drainage. Take your time and ensure that the trench is properly prepared before moving on to the next step.
Step 5: Installing the Drainage Pipe
Now that the trench is properly excavated, it’s time to install the drainage pipe. The drainage pipe is the key component of the system that collects and redirects water away from your driveway.
Start by placing a layer of landscape fabric or geotextile in the bottom of the trench. This will act as a barrier, preventing sediment and debris from entering the drainage system.
If you’re using a perforated drain pipe, position it in the trench with the perforations facing downwards. The perforations allow water to enter the pipe while filtering out soil and debris.
Ensure that the pipe is aligned with the marked drainage route and follows the desired slope. Use a level to double-check the alignment and make any necessary adjustments.
Once the drain pipe is properly positioned, connect the sections together using PVC glue or couplers. Apply the glue or insert the couplers according to the manufacturer’s instructions to secure the connections and create a watertight seal.
Continue installing the drain pipe along the entire length of the trench, making sure that it fits snugly and remains securely connected. If needed, use a pipe cutter to trim the pipe to the correct length.
As you install the pipe, periodically check the slope to ensure that it maintains a downward angle for proper water flow. Make any adjustments as necessary to maintain the desired slope.
Finally, backfill the trench with gravel or crushed stone around the drainage pipe. This provides stability to the pipe and helps with water filtration. Fill the trench completely, ensuring that the pipe is fully covered but not compacted. Leave a few inches of space at the top to accommodate the final layer of backfill.
Installing the drainage pipe is a critical step in the process of driveway drainage installation. Take your time to ensure that the pipe is properly aligned, connected, and secured before moving on to the next step.
When installing driveway drainage, make sure to properly slope the drain pipe away from the driveway to ensure proper water flow and prevent pooling.
Step 6: Connecting the Drainage Pipe to the Downspout
Now that the drainage pipe is installed along the trench, it’s time to connect it to the downspout or other water sources. This step ensures that water from your roof or other areas is properly directed into the drainage system.
Start by locating the downspout that you want to connect to the drainage pipe. This is typically where water flows down from the gutters. If there isn’t a downspout nearby, you may need to install one to redirect the water.
Measure the distance between the downspout and the drainage pipe to determine the length of the connecting pipe you’ll need. Use a pipe cutter to trim the pipe to the correct length, ensuring a snug fit between the downspout and the drainage pipe.
Attach a downspout adapter or fitting to the downspout to create a connection point for the drainage pipe. Apply PVC glue or insert couplers as needed to secure the connection and create a watertight seal.
Next, position the other end of the connecting pipe into the drainage pipe. Again, use PVC glue or couplers to secure the connection. Check for any leaks or loose fittings and make adjustments as necessary.
Once the connection between the downspout and the drainage pipe is secure, test the system by running water from the downspout. Ensure that water flows smoothly through the connecting pipe and enters the drainage system without any obstructions or leaks.
If you have multiple downspouts or other water sources that need to be connected to the drainage pipe, repeat the same process for each connection. Use the necessary adapters or fittings to create secure connections and ensure proper water flow.
Connecting the drainage pipe to the downspout is a crucial step in the installation process. Take your time to ensure that all connections are properly fitted, secure, and free of leaks before proceeding.
Step 7: Backfilling the Trench
With the drainage pipe and connections in place, it’s time to backfill the trench. Backfilling involves filling the trench with soil or gravel to cover the drainage pipe and create a stable base for your driveway.
Start by adding a layer of gravel or crushed stone over the top of the drainage pipe. This layer helps with water filtration and provides additional stability.
Next, slowly backfill the trench with soil, starting from the bottom and working your way up. Use a shovel to carefully fill the trench, ensuring that the soil is evenly distributed and packed down lightly. Avoid compacting the soil too much, as this can hinder water flow.
As you backfill, periodically check the slope of the trench to ensure that it’s maintained. The slope should allow water to flow naturally towards the endpoint without any pooling or obstruction.
Continue backfilling until the trench is completely filled, making sure that the drainage pipe is fully covered. Leave a few inches of space at the top to accommodate the final layer of backfill.
Once the trench is backfilled, use a rake or shovel to level the soil surface. Ensure that the area is smooth and even to prepare for the final touches and the installation of your driveway surface.
It’s important to note that the backfilled trench may settle over time. Periodically check and add additional soil if needed to maintain the proper slope and ensure smooth water flow.
By properly backfilling the trench, you provide stability to the drainage pipe and create a strong foundation for your driveway. Take your time to ensure that the backfilling is done correctly and the soil is properly packed.
Step 8: Testing the System
After completing the installation of your driveway drainage system, it’s important to thoroughly test its functionality. Testing the system ensures that it effectively collects and redirects water away from your driveway, preventing any potential issues.
Start by running water through the system to simulate a heavy rainstorm. You can do this by using a hose or diverting water from a nearby source into the downspout connected to the drainage pipe.
Observe the flow of water along the drainage route. Check for any signs of pooling, blockages, or inadequate water flow. Pay close attention to areas that were problematic before the installation and ensure that the water is properly redirected away from your driveway.
Inspect the drainage pipe and connections for leaks or any signs of water escaping. Additionally, check for any areas where soil or debris may be entering the system and causing blockages.
If any issues are identified during testing, make the necessary adjustments or repairs. This may involve readjusting the slope, replacing damaged components, or clearing any obstructions that hinder water flow.
Repeat the testing process until you are confident that the system is functioning properly and effectively diverting water away from your driveway.
Regular maintenance is essential to ensure the ongoing functionality of your driveway drainage system. Keep an eye out for any signs of clogs, leaks, or erosion and address them promptly to prevent any potential damage to your driveway or property.
By thoroughly testing the system, you can have peace of mind knowing that your driveway is well-protected against water damage and that the drainage system is working effectively.
Read more: How To Install A Driveway Gate
Step 9: Finishing Touches and Maintenance
With the installation and testing of your driveway drainage system complete, it’s time to add the finishing touches and establish a maintenance routine to ensure its long-term functionality.
One important finishing touch is to cover the backfilled trench with topsoil or grass seed. This helps to restore the appearance of your lawn or landscaping and provides added stability to the area.
Consider adding a decorative element, such as river rocks or landscaping stones, around the drainage endpoint to enhance the overall aesthetics of your driveway.
To maintain the functionality of your system, regularly inspect the drainage pipe and connections for any signs of damage, blockages, or leaks. Clear away any debris that may accumulate over time to ensure unimpeded water flow.
Check the slope of the drainage route periodically to ensure that no settling or erosion has occurred that might compromise the effectiveness of the system. Make any necessary adjustments to maintain the desired slope.
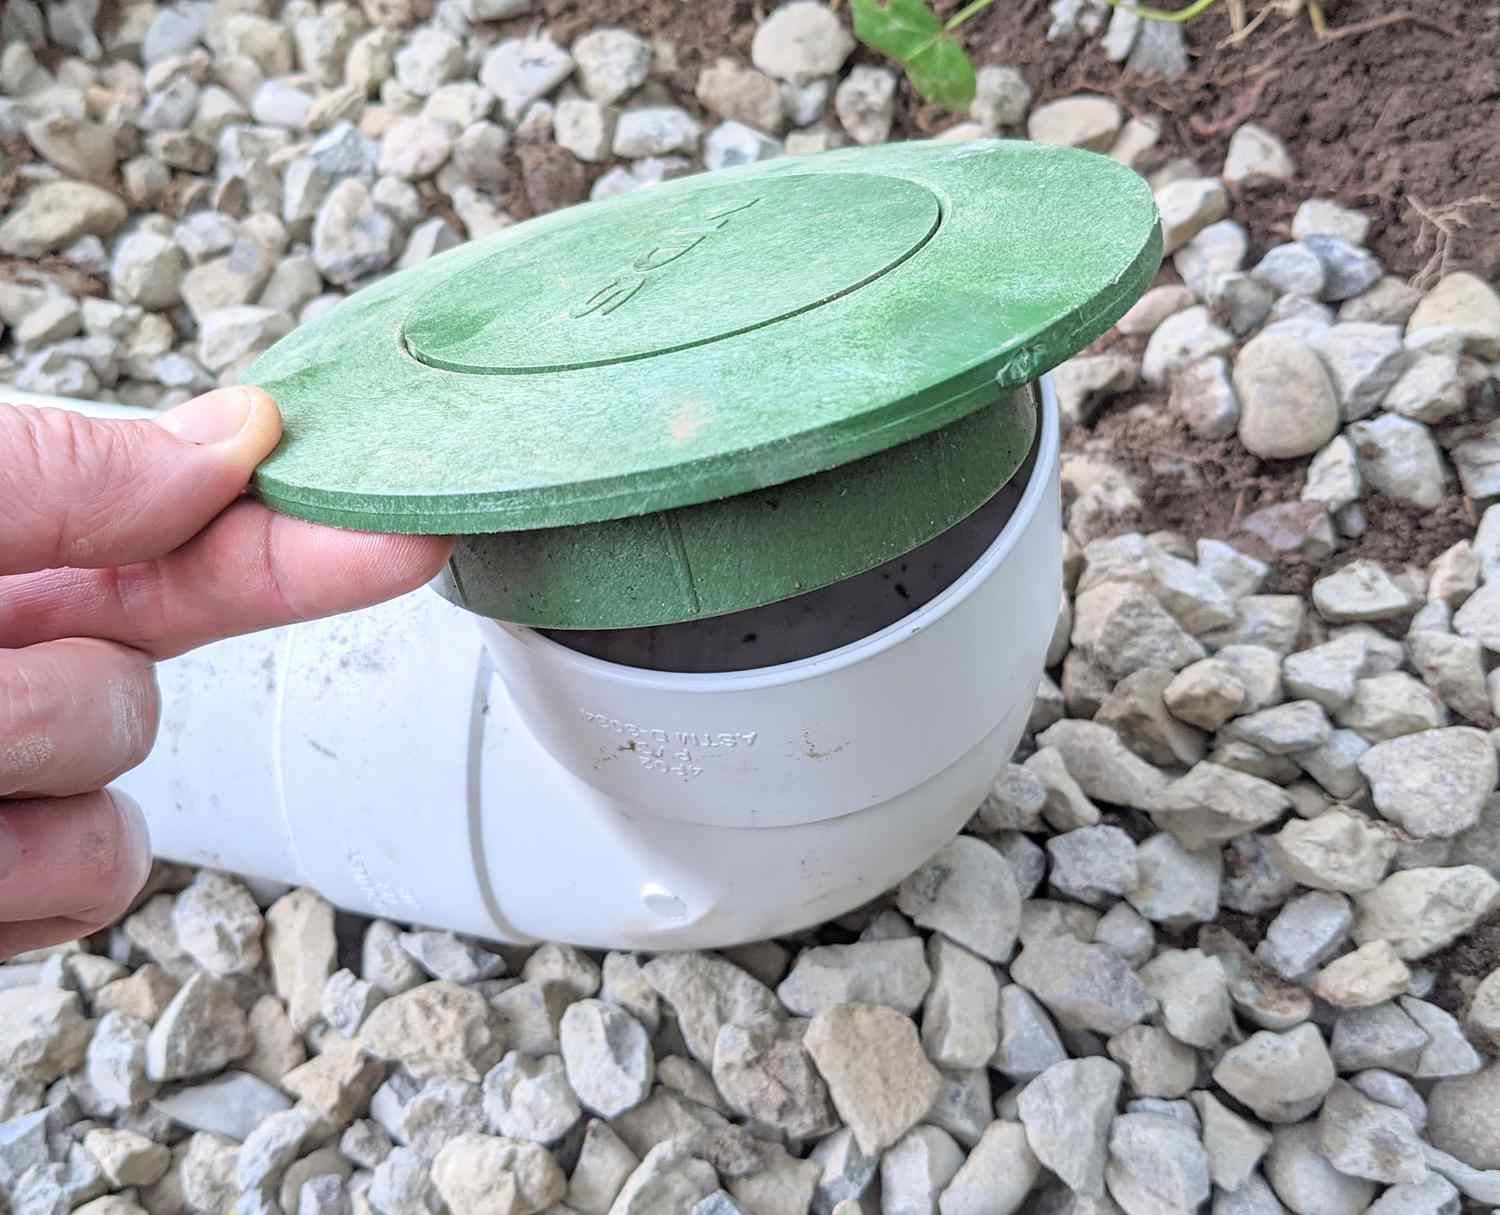
Consider installing a catch basin or grate cover over the drainage endpoint to prevent debris from clogging the system. Regularly clean and remove any accumulations to prevent blockages.
During the winter months, take steps to prevent freezing and ice buildup in the drainage system. Insulate any exposed pipes and ensure that water can flow freely without obstruction.
Lastly, periodically assess the overall performance of your driveway drainage system after heavy rainfall events or during the wet seasons. Make any necessary repairs or improvements to maintain its effectiveness.
By implementing a regular maintenance routine and staying vigilant, you can ensure that your driveway drainage system remains in excellent condition and protects your driveway for years to come.
Conclusion
Installing a driveway drainage system is vital for maintaining the longevity and functionality of your driveway. By properly redirecting water away from your driveway, you can prevent issues such as standing water, erosion, and structural damage. Following the steps outlined in this guide, you can successfully install a drainage system that keeps your driveway dry and in excellent condition.
Start by assessing the drainage needs of your driveway and gathering the necessary tools and materials for the installation. Plan and mark the drainage route, ensuring the proper slope for efficient water flow. Excavate the trench with caution, clearing any obstructions and maintaining the correct depth and width. Install the drainage pipe, connecting it to the downspout or other water sources. Backfill the trench, providing stability to the pipe and ensuring proper water filtration. Finally, test the system thoroughly to ensure its functionality.
Remember to add the finishing touches, maintaining the system through regular inspections and maintenance. Regularly check for any signs of damage, blockages, or leaks, making any necessary repairs promptly. With the right maintenance routine in place, your driveway drainage system will continue to protect your driveway for years to come.
Investing the time and effort in installing a proper driveway drainage system is a worthwhile endeavor. Not only will it enhance the durability and lifespan of your driveway, but it will also provide peace of mind, knowing that your property is protected from water-related issues. So, follow this guide, take the necessary steps, and enjoy a dry and functional driveway for many years ahead.
Frequently Asked Questions about How To Install A Driveway Drainage System
Was this page helpful?
At Storables.com, we guarantee accurate and reliable information. Our content, validated by Expert Board Contributors, is crafted following stringent Editorial Policies. We're committed to providing you with well-researched, expert-backed insights for all your informational needs.


0 thoughts on “How To Install A Driveway Drainage System”