Articles
How To Successfully Install An EMT Conduit
Modified: August 27, 2024
Discover everything you need to know about installing exposed EMT conduit with informative articles. Expert tips and guidelines for a successful installation.
(Many of the links in this article redirect to a specific reviewed product. Your purchase of these products through affiliate links helps to generate commission for Storables.com, at no extra cost. Learn more)
Introduction
Installing EMT (Electrical Metallic Tubing) conduit that will be exposed can be a challenging but rewarding project. Whether you’re adding electrical wiring to a new construction or renovating an existing space, properly installing and securing the conduit is crucial for a safe and efficient electrical system.
In this article, we will guide you through the steps involved in installing EMT conduit that will be exposed. We will cover important considerations such as choosing the right conduit, following safety precautions, using the necessary tools and materials, planning the conduit layout, mounting the conduit, bending and cutting the conduit, connecting the conduit, grounding it, adding conduit supports, securing cables within the conduit, and applying finishing touches.
By following these guidelines, you will be able to successfully install EMT conduit that will not only meet electrical safety standards, but also provide a clean and professional appearance to your electrical installation.
Key Takeaways:
- Prioritize safety by obtaining permits, following regulations, and using proper equipment when installing exposed EMT conduit. Choose the right material and size, plan the layout, and secure the conduit for a professional installation.
- Ensure a reliable and organized electrical system by properly connecting, grounding, and supporting the EMT conduit. Secure cables within the conduit, inspect the installation, and consider covering exposed conduit for a polished finish.
Read more: What Is An EMT Conduit
Choosing the Right EMT Conduit
When it comes to installing EMT conduit that will be exposed, the first step is to choose the right conduit material and size. This decision will depend on factors such as the environment, the type of wiring being used, and the specific requirements of your electrical system.
Material selection
EMT conduit is available in various materials, including steel, aluminum, and PVC (Polyvinyl Chloride). Each material has its own advantages and considerations.
- Steel: Steel EMT conduit is durable, resistant to physical damage, and offers reliable protection for electrical wiring. It is commonly used in commercial and industrial applications where strength and stability are important.
- Aluminum: Aluminum EMT conduit is lightweight, corrosion-resistant, and suitable for outdoor installations. It is often used in areas where moisture and exposure to harsh elements are a concern.
- PVC: PVC EMT conduit is lightweight, non-metallic, and easy to install. It is commonly used in residential applications where flexibility and cost-effectiveness are key factors.
Consider the specific requirements of your project and consult local electrical codes to determine the most appropriate material for your exposed conduit installation.
Size selection
The size of the EMT conduit you choose will depend on the number and size of the wires it will house. Generally, the diameter of EMT conduit ranges from 1/2 inch to 4 inches.
It is important to ensure that the conduit size matches the wiring capacity and meets the requirements set by the National Electrical Code (NEC). This ensures proper wire management and minimizes the risk of overheating or overloading the conduit.
Consult an electrical professional or refer to the NEC guidelines to determine the appropriate conduit size for your installation.
Choosing the right material and size for your EMT conduit is a crucial step in the installation process. Consider the environmental factors, wiring requirements, and applicable electrical codes to make an informed decision.
Safety Precautions
When installing EMT conduit that will be exposed, it is important to prioritize safety throughout the entire process. Taking necessary precautions will not only protect you and others involved in the installation, but it will also ensure compliance with local regulations and electrical codes.
Read more: How To Connect EMT Conduit
Obtain necessary permits
Before beginning any electrical installation project, it is essential to check with your local authorities and obtain the necessary permits. Permits help ensure that the installation meets safety standards and is in compliance with applicable regulations. Failure to obtain permits may result in fines or legal consequences.
Follow local regulations
Each region may have specific regulations and codes that govern electrical installations. It is important to familiarize yourself with these regulations and follow them diligently. This includes requirements for conduit installation, wiring methods, grounding, and other safety considerations. Staying informed and adhering to local regulations will help ensure a safe and code-compliant installation.
Utilize proper safety equipment
When working with EMT conduit and electrical wiring, it is crucial to use the appropriate safety equipment to protect yourself from potential hazards. This may include safety goggles, gloves, hearing protection, and protective clothing. Additionally, using insulated tools specifically designed for electrical work can help prevent electric shock and other injuries.
Furthermore, it is important to follow basic safety practices such as turning off power to the area where you will be working, identifying and avoiding live wires, and securing the work area to prevent accidents or tripping hazards.
Remember, safety should always be a top priority when working with electrical installations. By obtaining permits, following local regulations, and utilizing proper safety equipment, you can minimize risks and ensure a safe working environment.
Tools and Materials Required
Properly installing EMT conduit that will be exposed requires using the right tools and materials. Here is a list of essential tools and materials you will need for a successful installation:
Read also: 8 Best Emt Conduit for 2025
List of tools
- Tape measure
- Pencil or marker
- Hacksaw or pipe cutter
- Conduit bender
- Screwdriver
- Hammer
- Power drill
- Conduit reamer or deburring tool
- Level
- Wire stripper
- Lineman’s pliers
- Non-contact voltage tester
- Adjustable wrench
List of materials
- EMT conduit (steel, aluminum, or PVC)
- Conduit straps or hangers
- Conduit connectors (couplings, connectors, or fittings)
- Grounding bushings
- Grounding clamps
- Grounding wire
- Cable or wire for electrical connections
- Conduit couplings or connectors
- Conduit fittings (elbows, connectors, or tees)
- Conduit supports
- Screws or anchors for mounting conduit straps or hangers
- Wire nuts or connectors
- Electrical tape
- Conduit sealant or caulk (if required)
Having these tools and materials readily available will ensure a smooth and efficient installation process. Additionally, it is important to have the appropriate sizes and quantities of conduit and connectors based on the specific requirements of your project.
Keep in mind that this list may vary depending on the complexity and scope of your installation. It is always best to check the local codes and regulations, as well as consult with an electrical professional, to ensure you have all the necessary tools and materials for your specific project.
Planning the Conduit Layout
Before jumping into the installation of EMT conduit that will be exposed, it’s important to carefully plan the layout of the conduit. Proper planning will ensure a clean and efficient installation, minimizing the need for adjustments or modifications later on.
Consider the desired path
Start by considering the desired path for the conduit. Determine the most efficient and logical route for the conduit to run, taking into account the locations of electrical devices, outlets, and panels. Consider both practicality and aesthetics to achieve the best overall result.
Read more: How To Cut EMT Conduit Pipe
Evaluate obstacles and obstructions
Next, evaluate any obstacles or obstructions that may affect the conduit’s path. Look for existing plumbing, ductwork, structural elements, and other electrical wiring that may be in the way. Identify any potential conflicts or difficulties and come up with solutions to navigate around them.
Measure and mark the conduit placement
Once you have determined the desired path and accounted for any obstacles, it’s time to measure and mark the placement of the conduit. Use a measuring tape to accurately measure the distance along the planned route. Consider any bends or turns that may be required and mark those as well.
Use a pencil or marker to make clear and visible marks at the specified intervals along the wall or ceiling where the conduit will be installed. These marks will serve as a guide during the actual installation process.
Taking the time to carefully plan the conduit layout will help ensure a smooth installation and minimize the potential for issues or unexpected challenges. By considering the desired path, evaluating obstacles, and marking conduit placement, you can proceed with confidence and accuracy in the subsequent installation steps.
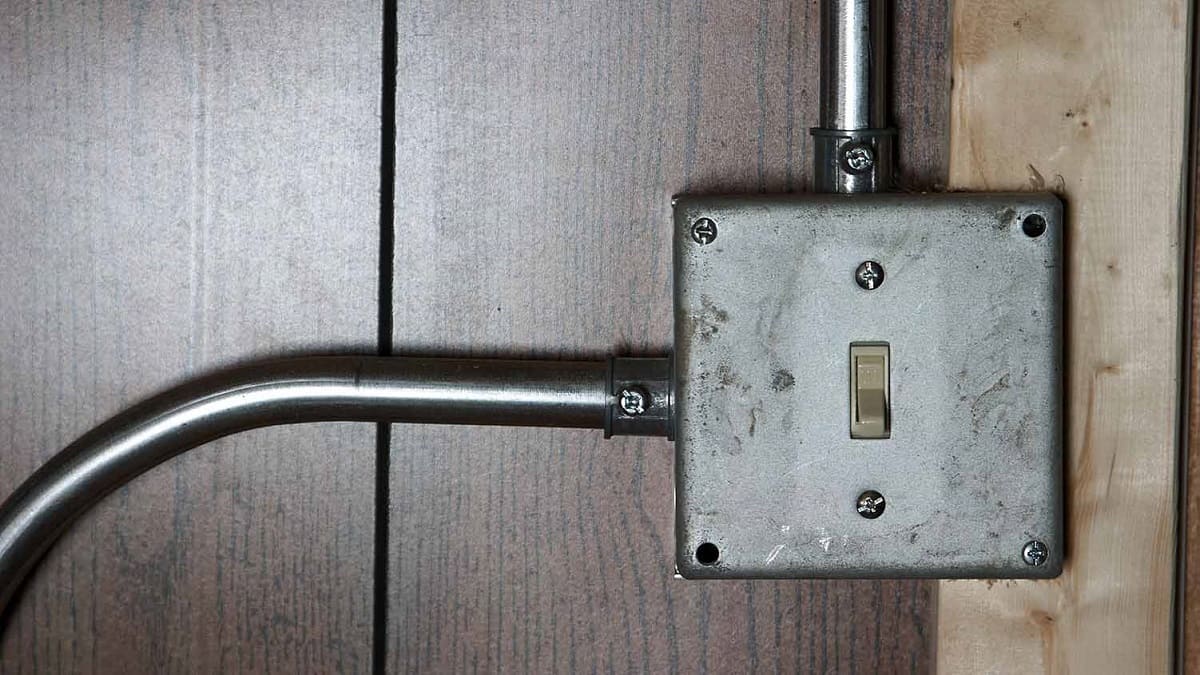
Mounting the Conduit
Once you have planned the layout of the EMT conduit, the next step is to mount the conduit securely to the surface. Proper mounting ensures stability and prevents the conduit from moving or sagging over time.
Attach conduit straps or hangers
Conduit straps or hangers are used to secure the conduit to the surface, such as a wall or ceiling. These straps provide support and keep the conduit in place. The number of straps required will depend on the length of the conduit, the weight of the wiring, and local code requirements.
Attach the straps or hangers to the surface at regular intervals along the planned conduit path. Use a power drill and appropriate screws or anchors to secure them firmly to the surface. Make sure the straps are positioned at a suitable distance from each other to provide sufficient support.
Read also: 14 Amazing Emt Conduit Cutter for 2025
Secure the conduit to the surface
With the straps or hangers in place, it’s time to secure the conduit to the surface. Insert the conduit into the straps, making sure it fits snugly. Use screws or clips to secure the conduit to the straps, keeping it firmly in place.
For longer runs of conduit, additional support may be needed to prevent sagging. This can be achieved by adding intermediate straps or hangers along the length of the conduit.
Throughout the mounting process, it’s important to check that the conduit is level and properly aligned. Use a spirit level to ensure that the conduit is straight and horizontal or vertical, depending on the installation orientation.
Properly mounting the conduit with straps or hangers and securing it to the surface is essential for a stable and professional installation. Taking the time to ensure a solid foundation will make the rest of the installation process smoother and more efficient.
Bending and Cutting EMT Conduit
Bending and cutting EMT (Electrical Metallic Tubing) conduit is an important step in the installation process. It allows you to navigate corners, curves, and obstacles while ensuring a smooth and efficient pathway for your electrical wiring.
Techniques for bending conduit
The most common method for bending EMT conduit is to use a conduit bender, which is specifically designed for this purpose. To bend the conduit accurately, follow these steps:
- Measure the distance from the starting point of the bend to the desired angle or curve.
- Position the conduit bender at the measured distance, ensuring that it aligns with the desired bend mark.
- Apply even pressure on the handle of the bender to slowly bend the conduit.
- Check the angle of the bend using a protractor or bending guide to ensure it matches the required specifications.
It’s important to note that bending conduit may require multiple steps if you need to create more complex bends or turns. Follow manufacturer instructions for your specific conduit bender to achieve accurate results.
Proper use of conduit benders
When using a conduit bender, it’s crucial to follow these guidelines for proper use:
- Make sure the conduit is fully inserted into the bender before applying pressure.
- Apply pressure gradually and evenly to avoid kinks or deformations in the conduit.
- Use a bender size that matches the diameter of the conduit to ensure a clean and accurate bend.
- Consider using a bending shoe or guide to create precise bends at specific angles.
Read more: How Much Weight Can EMT Conduit Hold
Cutting conduit to desired lengths
After bending the conduit, you may need to cut it to the desired lengths for your installation. To cut EMT conduit:
- Measure the conduit length, ensuring you have enough allowance for the required fittings on each end.
- Mark the measurement using a pencil or marker.
- Secure the conduit firmly in a vise or clamp to prevent it from moving during the cutting process.
- Use a hacksaw or a pipe cutter to cut the conduit along the marked line.
- Debur the cut ends of the conduit using a conduit reamer or deburring tool to remove any sharp edges.
Always wear appropriate safety equipment such as gloves and eye protection when cutting conduit to protect yourself from potential hazards.
Bending and cutting EMT conduit allows you to shape and customize the conduit to fit your installation needs. By mastering these techniques and using the proper tools, you can achieve precise bends and clean cuts, resulting in a professional and efficient electrical conduit installation.
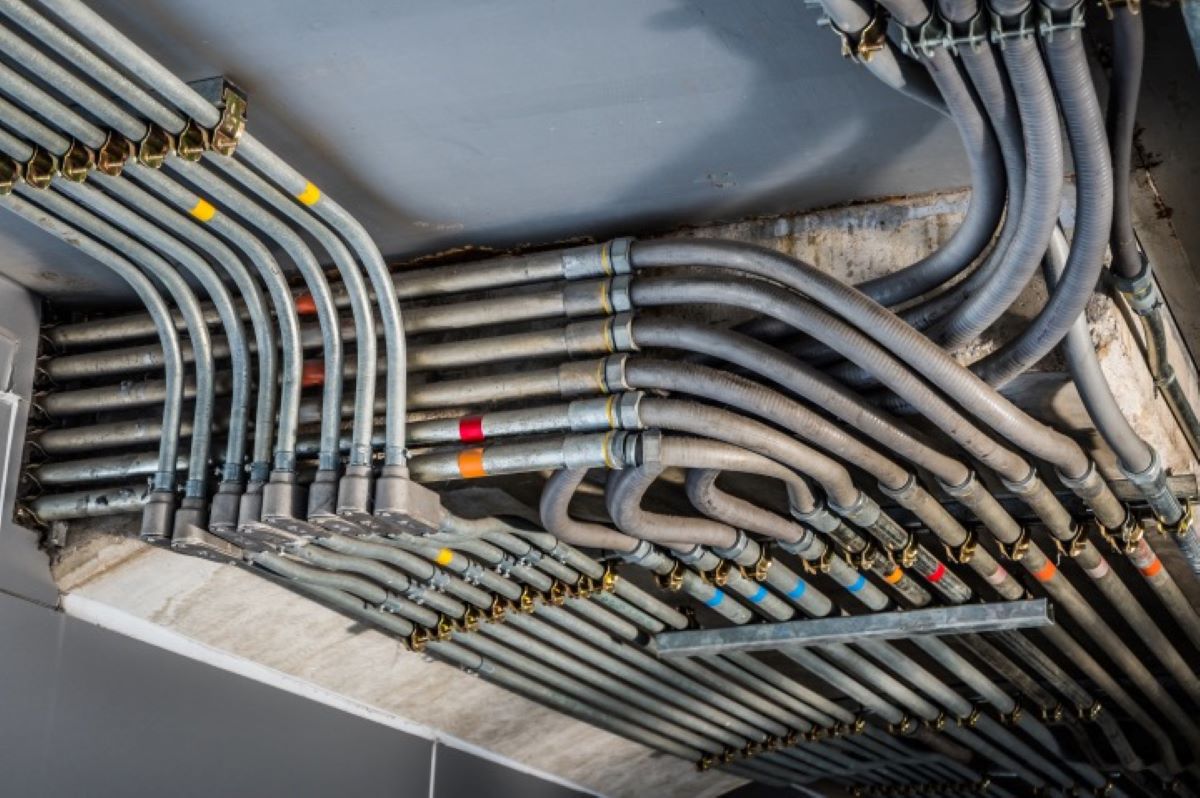
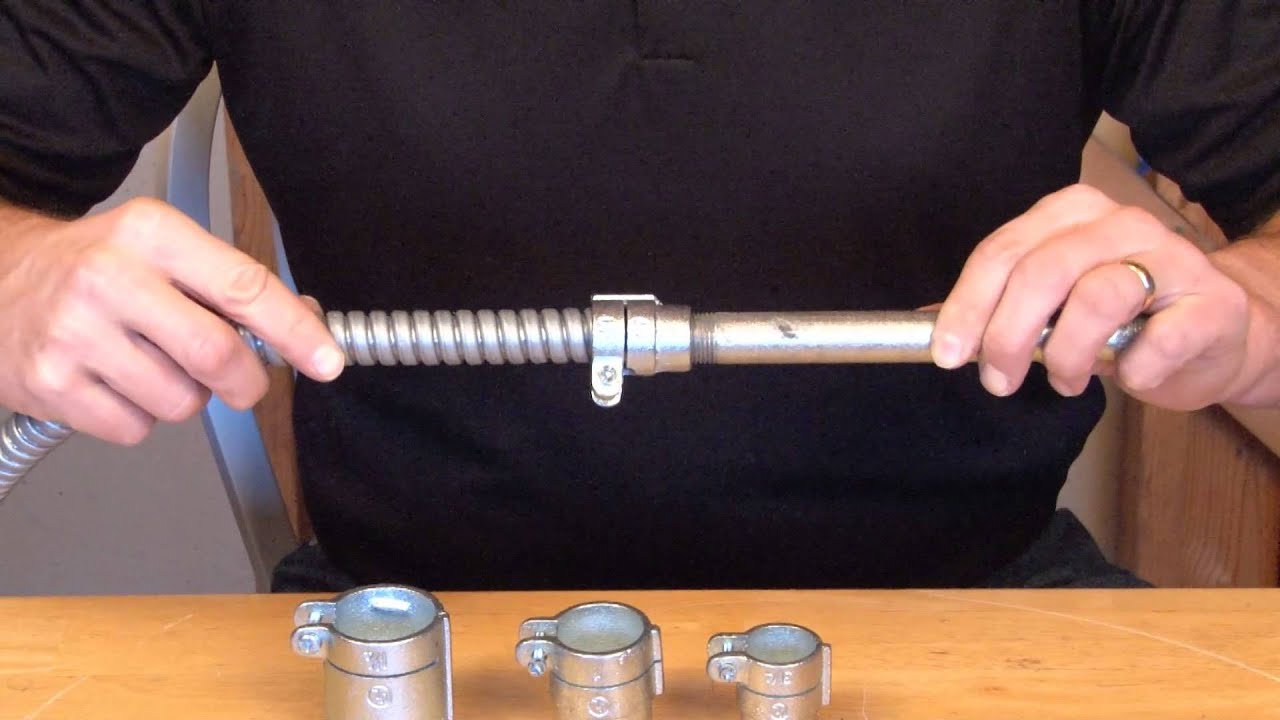
Connecting EMT Conduit
Connecting EMT (Electrical Metallic Tubing) conduit is a crucial step in the installation process, as it ensures a continuous and secure pathway for electrical wiring. There are various types of connectors available, each serving a specific purpose in joining sections of conduit together.
Types of connectors
Here are some common types of connectors used for connecting EMT conduit:
- Couplings: Couplings are used to join two sections of conduit together. They typically have a threaded interior that allows for a secure connection when twisted onto the ends of the conduit.
- Connectors: Connectors, also known as connectors or fittings, are used for making a 90-degree or 45-degree bend in the conduit. They have a threaded female end to attach to the conduit and a smooth, rounded end for the wire to pass through.
- Locknuts: Locknuts are used in conjunction with connectors to secure the connection at fittings or enclosures.
- Bushings: Bushings are used to protect wires and prevent damage when passing through the sharp edges of the conduit. They are typically installed at the entrance or exit points of the conduit.
Installation methods
When connecting EMT conduit, follow these installation methods:
- Measure and cut the conduit to the desired lengths using a hacksaw or pipe cutter, ensuring that you have enough allowance for the connectors and fittings.
- Slide the appropriate connector onto one end of the conduit, ensuring it is fully threaded and secure.
- Twist the connector onto the corresponding end of the adjacent conduit, aligning the threads and tightening it securely. Use an adjustable wrench if necessary, but avoid overtightening to prevent damage.
- If you need to make a bend, use a connector or fitting specifically designed for the desired angle. Attach it to the conduit and bend the conduit accordingly using a conduit bender. Ensure the connection is secure and aligned with the correct angle.
- Use locknuts to secure connectors, fittings, and enclosures. Thread the locknut onto the connector or fitting and tighten it securely using an adjustable wrench.
- Install bushings at the entrance or exit points of the conduit, ensuring the wires are protected and guided safely through the conduit.
It is important to note that when making connections, follow the manufacturer’s guidelines and local electrical codes to ensure proper installation and maintain compliance. Properly connecting EMT conduit ensures a seamless pathway for electrical wiring and facilitates ease of maintenance and future modifications to the electrical system.
Read also: 15 Amazing Emt Conduit Fittings for 2025
Grounding the Conduit
Grounding the conduit is an essential aspect of an electrical installation that involves EMT (Electrical Metallic Tubing) conduit. Grounding helps protect against electrical faults and ensures the safety of the electrical system and individuals. Proper grounding also helps to minimize the risks of damage to equipment and the potential for electrical shock.
Importance of grounding
Grounding the conduit provides a pathway for fault currents to safely flow to the ground, preventing excessive voltage buildup. It helps to redirect stray electrical currents, ensuring they are safely discharged, rather than posing a risk to people or equipment.
In addition, grounding helps protect against electrical hazards caused by lightning strikes or power surges. By providing an efficient path for electrical discharge, grounding helps to divert excessive current away from building systems and reduces the risk of damage to appliances, electronics, and other sensitive equipment.
Grounding techniques
Here are some common techniques for grounding EMT conduit:
- Grounding bushings: Installing grounding bushings at points where the conduit enters or exits an enclosure ensures a secure electrical connection. Grounding bushings have screws or lugs that allow for a grounding conductor to be attached.
- Grounding clamps: Grounding clamps are used to connect grounding conductors to the conduit. These clamps grip the exterior of the conduit securely and have a terminal for attaching the grounding wire.
- Grounding wire: A grounding wire, also known as a bonding conductor, is connected to the grounding bushings or clamps and provides a direct path for fault currents to flow to the ground. The wire is typically made of copper and is sized according to local electrical codes.
When grounding the conduit, it is important to comply with local electrical codes and standards. This may include requirements for the sizing of grounding conductors, the number of ground connections needed, and the proper methods for making electrical connections.
It is strongly recommended to consult with a qualified electrician or refer to the National Electrical Code (NEC) to ensure the proper grounding techniques are followed for your specific installation.
Grounding the conduit is a critical step in maintaining electrical safety and protecting both people and equipment. By following proper grounding techniques, you can ensure a reliable and secure electrical system.
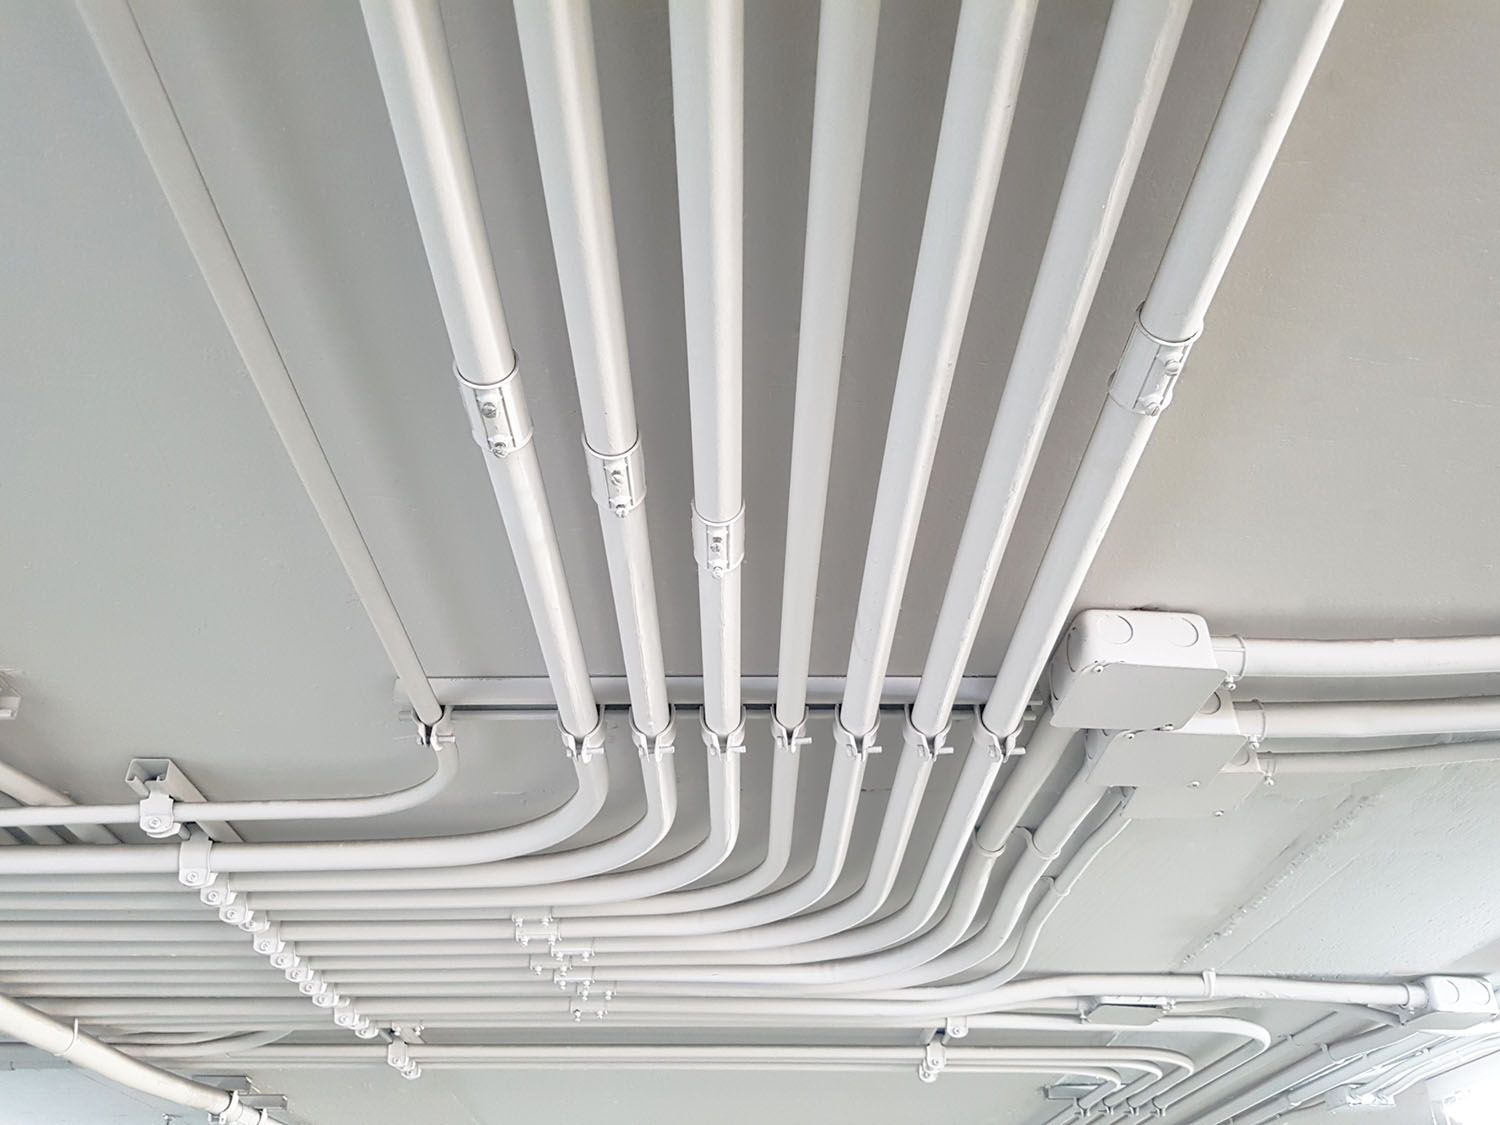
Adding Conduit Supports
When installing EMT (Electrical Metallic Tubing) conduit that will be exposed, it is important to provide adequate support to prevent sagging and ensure the stability of the conduit. While conduit straps or hangers are typically used for mounting the conduit to the surface, additional supports may be necessary depending on the length and weight of the conduit.
Additional supports as needed
While conduit straps or hangers offer sufficient support for short spans of conduit, longer runs or areas with heavy wiring may require additional supports. These additional supports help distribute the weight of the conduit and minimize sagging or bending over time.
Additional supports can be added at regular intervals, depending on the specific requirements of your installation. Consider the weight of the conduit, the type and number of wires inside, and any external factors, such as vibration or movement.
Some common methods for adding conduit supports include:
- Conduit clamps: Conduit clamps are similar to conduit straps but offer a more secure grip. They can be used to add extra support at strategic points along the conduit run.
- Conduit hangers: Conduit hangers, also known as J-hooks, provide strong support and can be attached to structural elements or suspended from a ceiling. They are especially useful when the conduit needs to be raised or is running along the ceiling.
- Conduit supports: Conduit supports, such as trapeze hangers or hanging brackets, are used for longer runs of conduit or in areas where additional strength and stability are required. They provide multiple attachment points and can be adjusted to fit different conduit sizes.
The specific placement and frequency of additional supports will depend on the unique factors of your installation. Consider consulting with a qualified electrician or referring to local codes and regulations to determine the appropriate spacing and requirements for conduit supports.
Adding conduit supports ensures the long-term durability and stability of your conduit installation. By properly supporting the conduit, you can prevent sagging, minimize stress on the wiring, and maintain a clean and professional appearance.
Securing Cable within Conduit
Securing the cable within the EMT (Electrical Metallic Tubing) conduit is an important step in the installation process. Properly securing and organizing the cables within the conduit ensures a neat and efficient electrical system. Here are some guidelines for securing the cable within the conduit:
Cable selection and preparation
Choosing the right cable for your installation is crucial for effective cable management within the conduit. Consider the following factors:
- Conductor size: Ensure that the cable is compatible with the amperage and voltage requirements of the electrical system. Consult local electrical codes for the appropriate conductor size.
- Jacket material: Select a cable with a suitable jacket material that meets the environmental conditions of the installation. Common jacket materials include PVC, nylon, or metal-clad.
- Cable type: Depending on the application, you may choose between different types of cables such as THHN/THWN, MC (Metal-Clad), or NM (Non-Metallic) cables.
Measure and cut the cable to the desired length, leaving some extra slack for ease of installation and future maintenance.
Proper installation within the conduit
When installing the cable within the conduit, follow these guidelines:
- Cable orientation: Ensure that the cables are aligned parallel to the conduit and do not twist or kink. This helps to maintain a smooth and efficient pathway for the cables.
- Bundle size: Avoid overcrowding the conduit with too many cables. Overfilling the conduit can lead to excessive heat buildup and potential damage to the cables. Follow local electrical codes for the maximum allowable fill capacity of the conduit.
- Secure and anchor: Secure the cable to the conduit at regular intervals using cable ties or straps. This helps to keep the cables organized and prevents them from shifting or becoming tangled.
- Avoid sharp bends: Minimize sharp bends and tight corners within the conduit. Excessive bending can put strain on the cable and increase the risk of damage or reduced performance.
It is important to follow local electrical codes and regulations when securing the cable within the conduit. These codes may specify the maximum number of cables allowed in a conduit, the acceptable methods for securing the cables, and other important guidelines for cable management.
By choosing the right cable and properly installing it within the conduit, you can ensure a reliable and organized electrical system. This promotes safety, easy maintenance, and efficient troubleshooting in the future.
Read more: How To Install Conduit In Wall
Finishing Touches
After the EMT (Electrical Metallic Tubing) conduit installation is complete, it’s important to perform a thorough inspection to ensure everything is in order. Additionally, depending on the desired aesthetic and protection, you may choose to cover exposed conduit. Here are the finishing touches to consider:
Inspecting the installation
Take the time to inspect the entire conduit installation to ensure it meets safety standards and is free from any issues. Perform the following checks:
- Conduit security: Confirm that the conduit is securely mounted and properly fastened to the surface using straps, hangers, or additional supports. Check for any loose connections that may require tightening.
- Proper conduit bending: Verify that any bends or curves in the conduit are uniform and meet the required angles according to local electrical codes.
- Correct fittings and connectors: Ensure that the correct fittings and connectors are used and securely attached at all junctions, connections, and corners. Double-check that locknuts, bushings, and other necessary components are in place.
- Correct cable installation: Inspect the cable within the conduit to ensure it is properly oriented, without any twists, kinks, or overcrowding. Verify that the cable is secured to the conduit at regular intervals using appropriate fastening methods.
- Grounding: Confirm that the conduit is appropriately grounded, with grounding bushings, clamps, and wires properly installed. Ensure the grounding wires are securely attached to grounding points or panels.
Covering exposed conduit if desired
Depending on the location and aesthetic preference, you may choose to cover the exposed conduit. This can provide a cleaner and more finished appearance to the installation and protect the conduit from environmental elements. Some options for covering exposed conduit include:
- Conduit covers: Use pre-made conduit covers or channel systems that snap or slide over the conduit. These covers help shield the conduit from dust, moisture, and physical damage. They come in various materials, such as plastic or metal.
- Pipe insulation: Wrap the exposed conduit with pipe insulation, which not only provides protection but also helps with soundproofing and insulation. Pipe insulation is available in different sizes and materials.
- Decorative elements: Incorporate decorative elements, such as weather-resistant casings, moldings, or even paint, to blend the conduit with the surrounding decor or architecture.
Consider the location, function, and aesthetic preferences when deciding whether to cover exposed conduit. Keep in mind that covering the conduit should not impede access for maintenance or violate any local codes or regulations.
By inspecting the installation and considering the options for covering exposed conduit, you can ensure a completed project that meets safety standards and aligns with your desired aesthetic. Take pride in your work and enjoy the benefits of a well-executed and visually appealing electrical conduit installation.
Conclusion
Installing EMT (Electrical Metallic Tubing) conduit that will be exposed is a challenging but rewarding project. By following the proper steps and guidelines, you can create a safe and efficient electrical system that meets both functional and aesthetic requirements.
Throughout the installation process, it is important to prioritize safety by obtaining necessary permits, following local regulations, and utilizing proper safety equipment. Choosing the right conduit material and size is crucial for the success of your installation, ensuring durability and compatibility with your electrical system.
Planning the conduit layout, mounting the conduit securely to the surface, and bending and cutting the conduit accurately contribute to a clean and professional installation. Properly connecting the conduit using the appropriate connectors and grounding the conduit provide stability and electrical safety.
Adding conduit supports as needed and securing the cable within the conduit ensure the longevity and reliability of the electrical system. Completing the project with a thorough inspection and covering exposed conduit, if desired, adds the finishing touches for a polished and cohesive look.
Remember to consult local electrical codes and standards throughout the entire process, and consult with a qualified electrician when needed. By following these guidelines, you can confidently tackle the installation of EMT conduit that will be exposed and create an electrical system that is both functional and visually appealing.
Enjoy the satisfaction of a job well done and the peace of mind that comes with a properly installed EMT conduit system. Whether it’s for a residential or commercial project, you can take pride in your work and the enhanced electrical infrastructure that you have contributed to.
Frequently Asked Questions about How To Successfully Install An EMT Conduit
Was this page helpful?
At Storables.com, we guarantee accurate and reliable information. Our content, validated by Expert Board Contributors, is crafted following stringent Editorial Policies. We're committed to providing you with well-researched, expert-backed insights for all your informational needs.


0 thoughts on “How To Successfully Install An EMT Conduit”