Home>Articles>How To Install A Sunbeam Deluxe Twin Showerhead
Articles
How To Install A Sunbeam Deluxe Twin Showerhead
Modified: August 27, 2024
Learn how to install a Sunbeam Deluxe Twin Showerhead with our step-by-step guide. Read our informative articles for expert tips and tricks on showerhead installation.
(Many of the links in this article redirect to a specific reviewed product. Your purchase of these products through affiliate links helps to generate commission for Storables.com, at no extra cost. Learn more)
Introduction
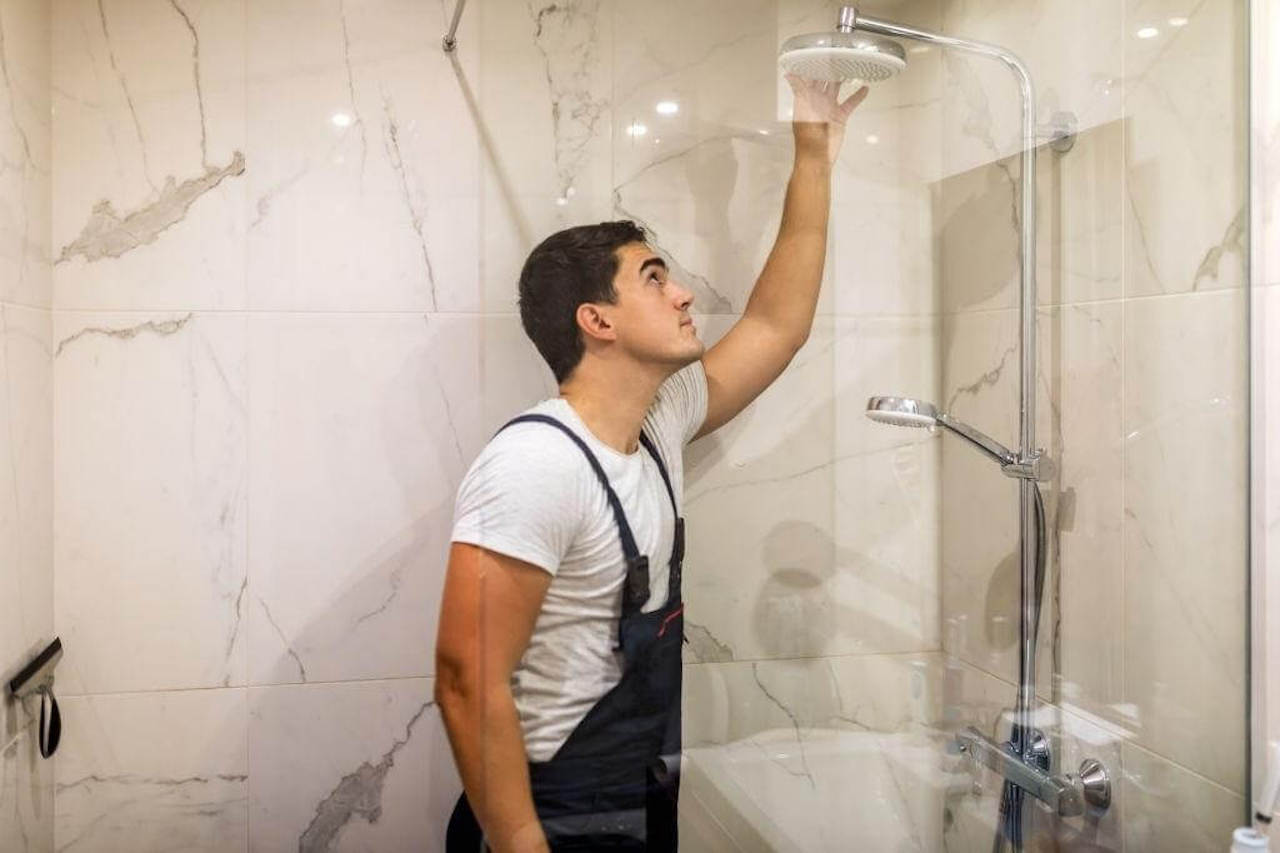
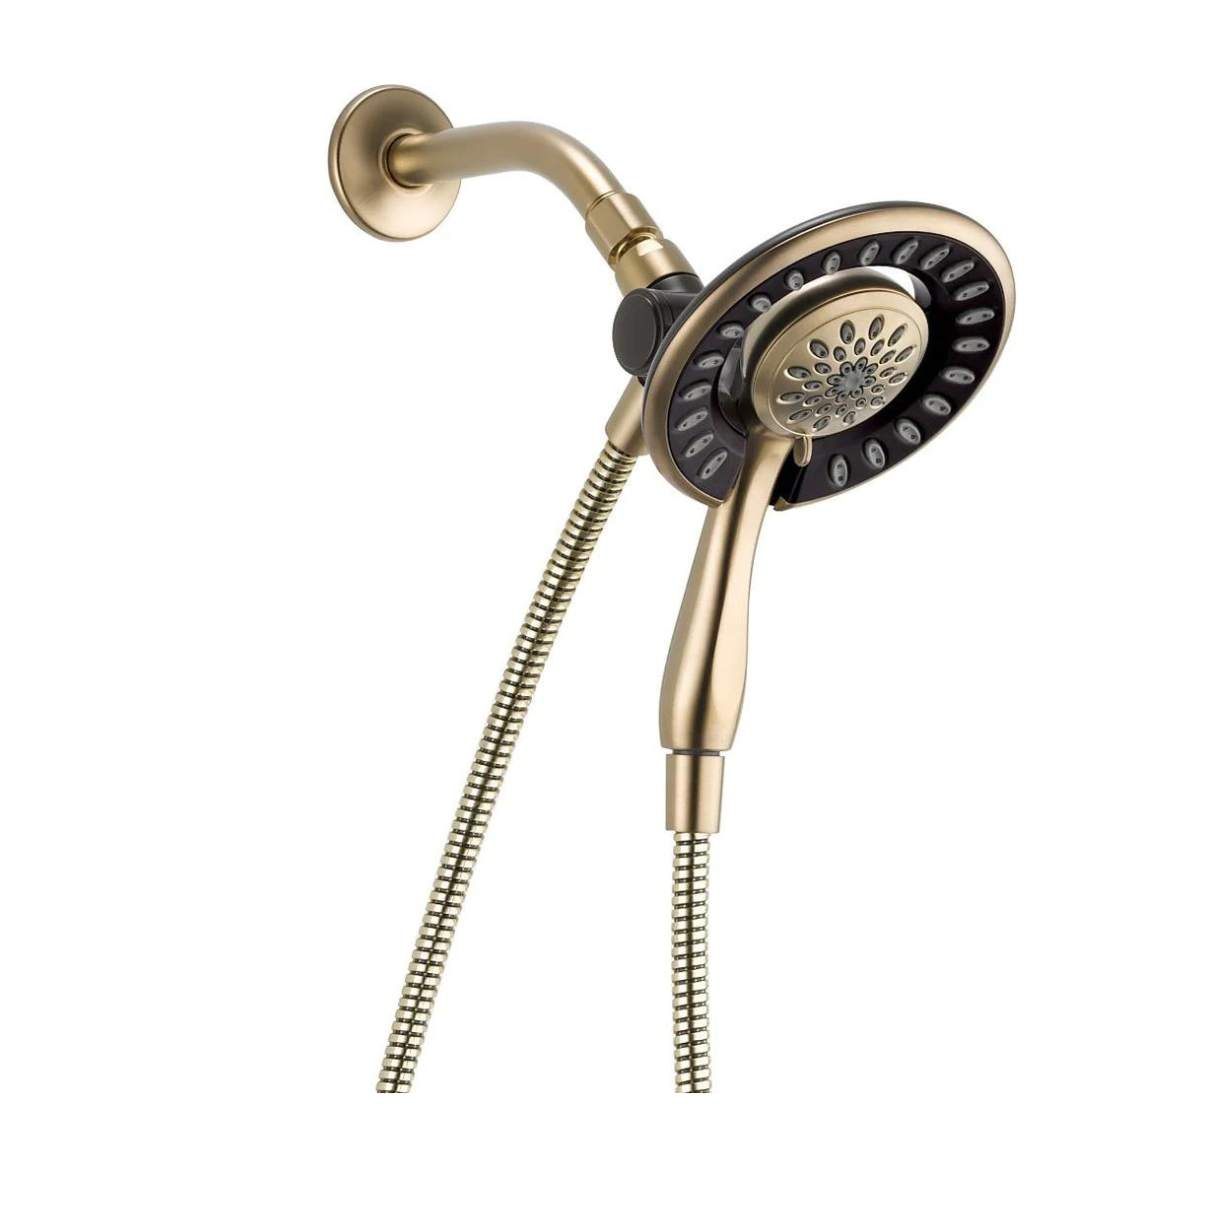
Welcome to the ultimate guide on how to install a Sunbeam Deluxe Twin Showerhead! If you’re looking to upgrade your showering experience with the convenience of a dual showerhead system, you’ve come to the right place. In this article, we will walk you through the step-by-step process of installing this luxurious showerhead set.
Having a dual showerhead system offers numerous benefits. Not only does it provide you with the option to choose between a regular showerhead and a handheld showerhead, but it also allows for a more indulgent and thorough showering experience. Whether you want a relaxing rainfall shower or a precision-focused handheld spray, a dual showerhead can cater to your specific preferences.
Before we jump into the installation process, let’s take a moment to gather all the materials you’ll need. This ensures that you have everything on hand and eliminates any potential delays during the installation.
Key Takeaways:
- Upgrade your showering experience with a Sunbeam Deluxe Twin Showerhead, offering the luxury of dual showerheads for a customizable and indulgent shower. Follow the step-by-step guide for a seamless installation process.
- Enjoy the convenience and luxury of a Sunbeam Deluxe Twin Showerhead, allowing you to customize your showering experience with rejuvenating rainfall showers or precision handheld sprays. Follow the comprehensive installation guide for a seamless setup.
Read more: How To Install A New Showerhead
Step 1: Gather the materials needed
Before you begin the installation process, it’s essential to gather all the necessary materials and tools. This ensures a smooth and hassle-free installation. Here’s a list of items you’ll need:
- Sunbeam Deluxe Twin Showerhead set (includes the main showerhead, handheld showerhead, and diverter valve)
- Adjustable wrench
- Plumbers tape
- Bucket or towel (to catch any water that may leak during the installation)
Make sure you have all these items readily available before proceeding with the installation. Having everything at hand will save you time and prevent any unnecessary interruptions.
Step 2: Remove the existing showerhead
Before you can install the Sunbeam Deluxe Twin Showerhead, you’ll need to remove your existing showerhead. Here’s how to do it:
- Start by turning off the water supply to the shower. Look for the shut-off valve located near the shower or the main water supply valve of your home.
- Once the water supply is turned off, grab the existing showerhead firmly with one hand.
- Using the other hand, twist the showerhead counterclockwise to loosen it. If the showerhead is stubborn and doesn’t want to budge, you can use an adjustable wrench for added leverage.
- Continue twisting until the showerhead is completely unscrewed from the shower arm.
- Remove the old showerhead from the shower arm and set it aside.
After removing the old showerhead, inspect the shower arm for any signs of damage or corrosion. If necessary, clean or replace the shower arm before proceeding with the installation of the new showerhead.
Once the shower arm is ready, you’re now ready to move on to the next step: preparing the shower arm for the installation of the Sunbeam Deluxe Twin Showerhead.
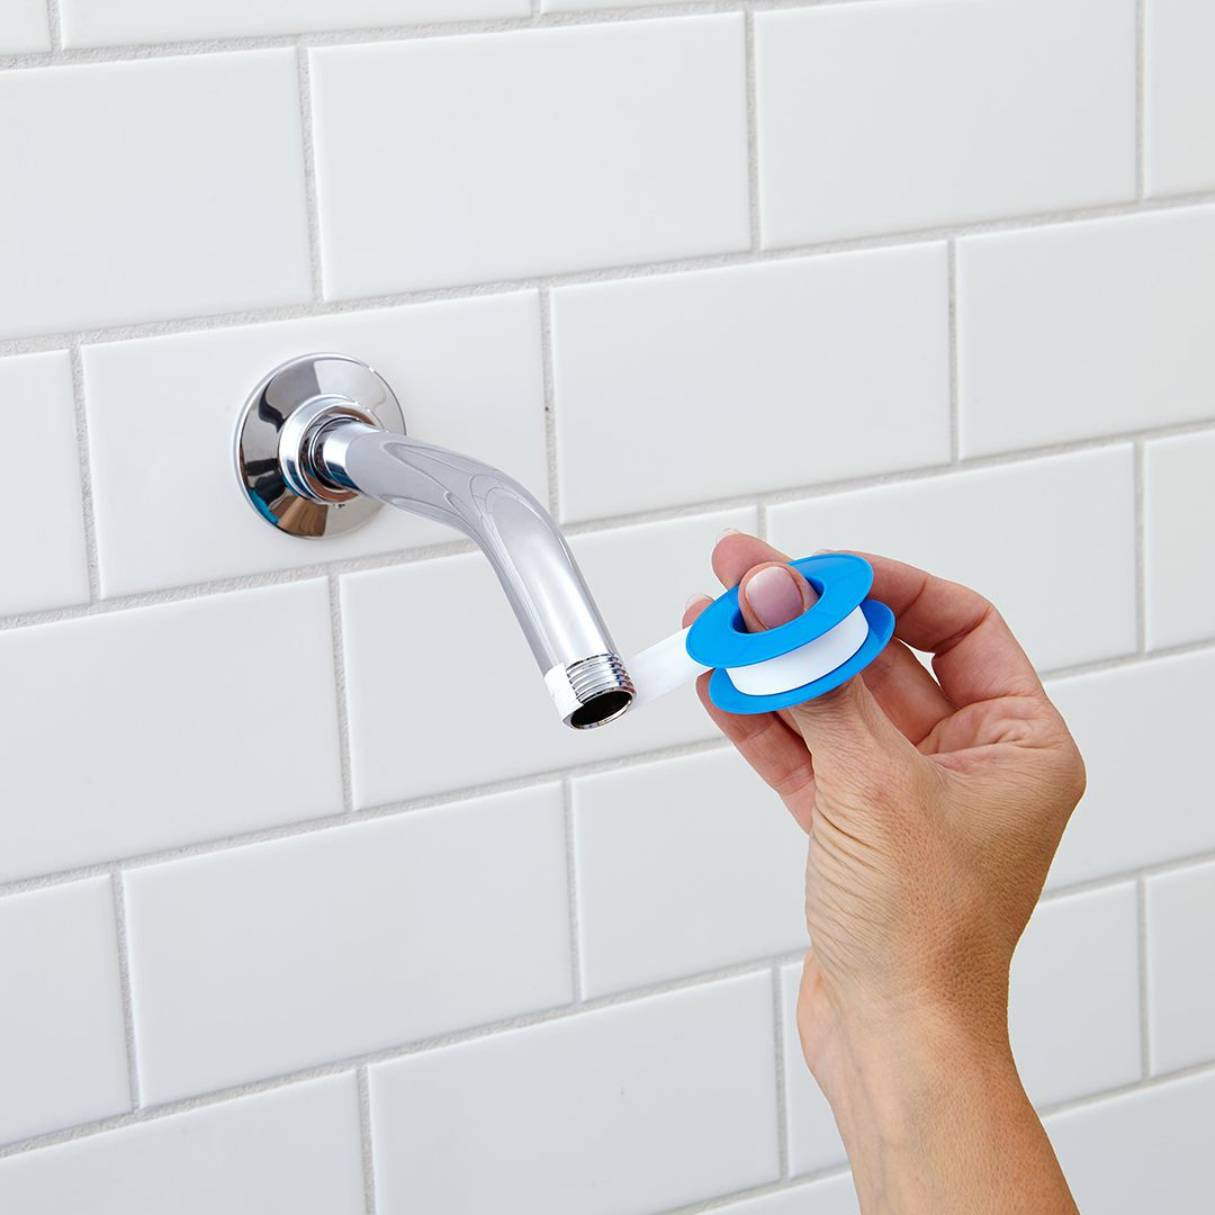
Step 3: Prepare the shower arm
Preparing the shower arm is an important step in the installation process. This ensures a secure and leak-free connection for your new Sunbeam Deluxe Twin Showerhead. Follow these steps to prepare the shower arm:
- Before you begin, make sure the water supply to the shower is still turned off.
- Inspect the threads on the shower arm to ensure they are clean and free from any debris or old plumber’s tape.
- If necessary, use a cloth or brush to clean the threads of the shower arm.
- Take a roll of plumber’s tape and wrap it around the threads of the shower arm in a clockwise direction. This will help create a watertight seal when the new showerhead is installed.
- Ensure that the plumber’s tape covers the entire threaded area of the shower arm.
- Use your fingers to press the plumber’s tape firmly onto the threads, making sure it adheres properly.
Once you’ve prepared the shower arm, you’re ready to move on to the next step: installing the diverter valve for the Sunbeam Deluxe Twin Showerhead.
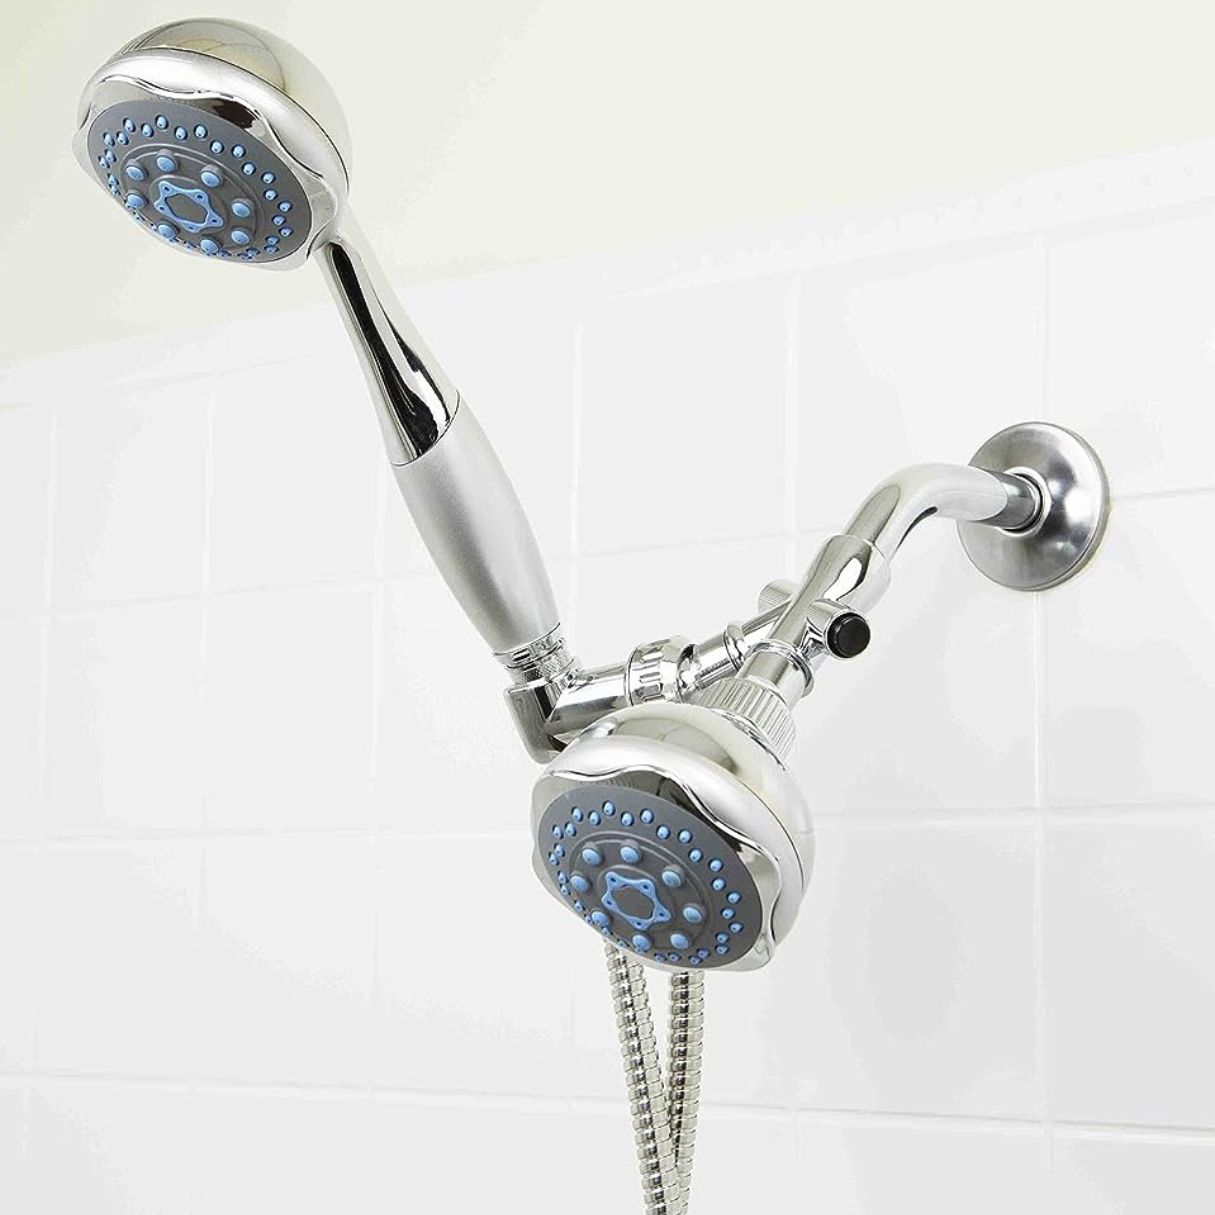
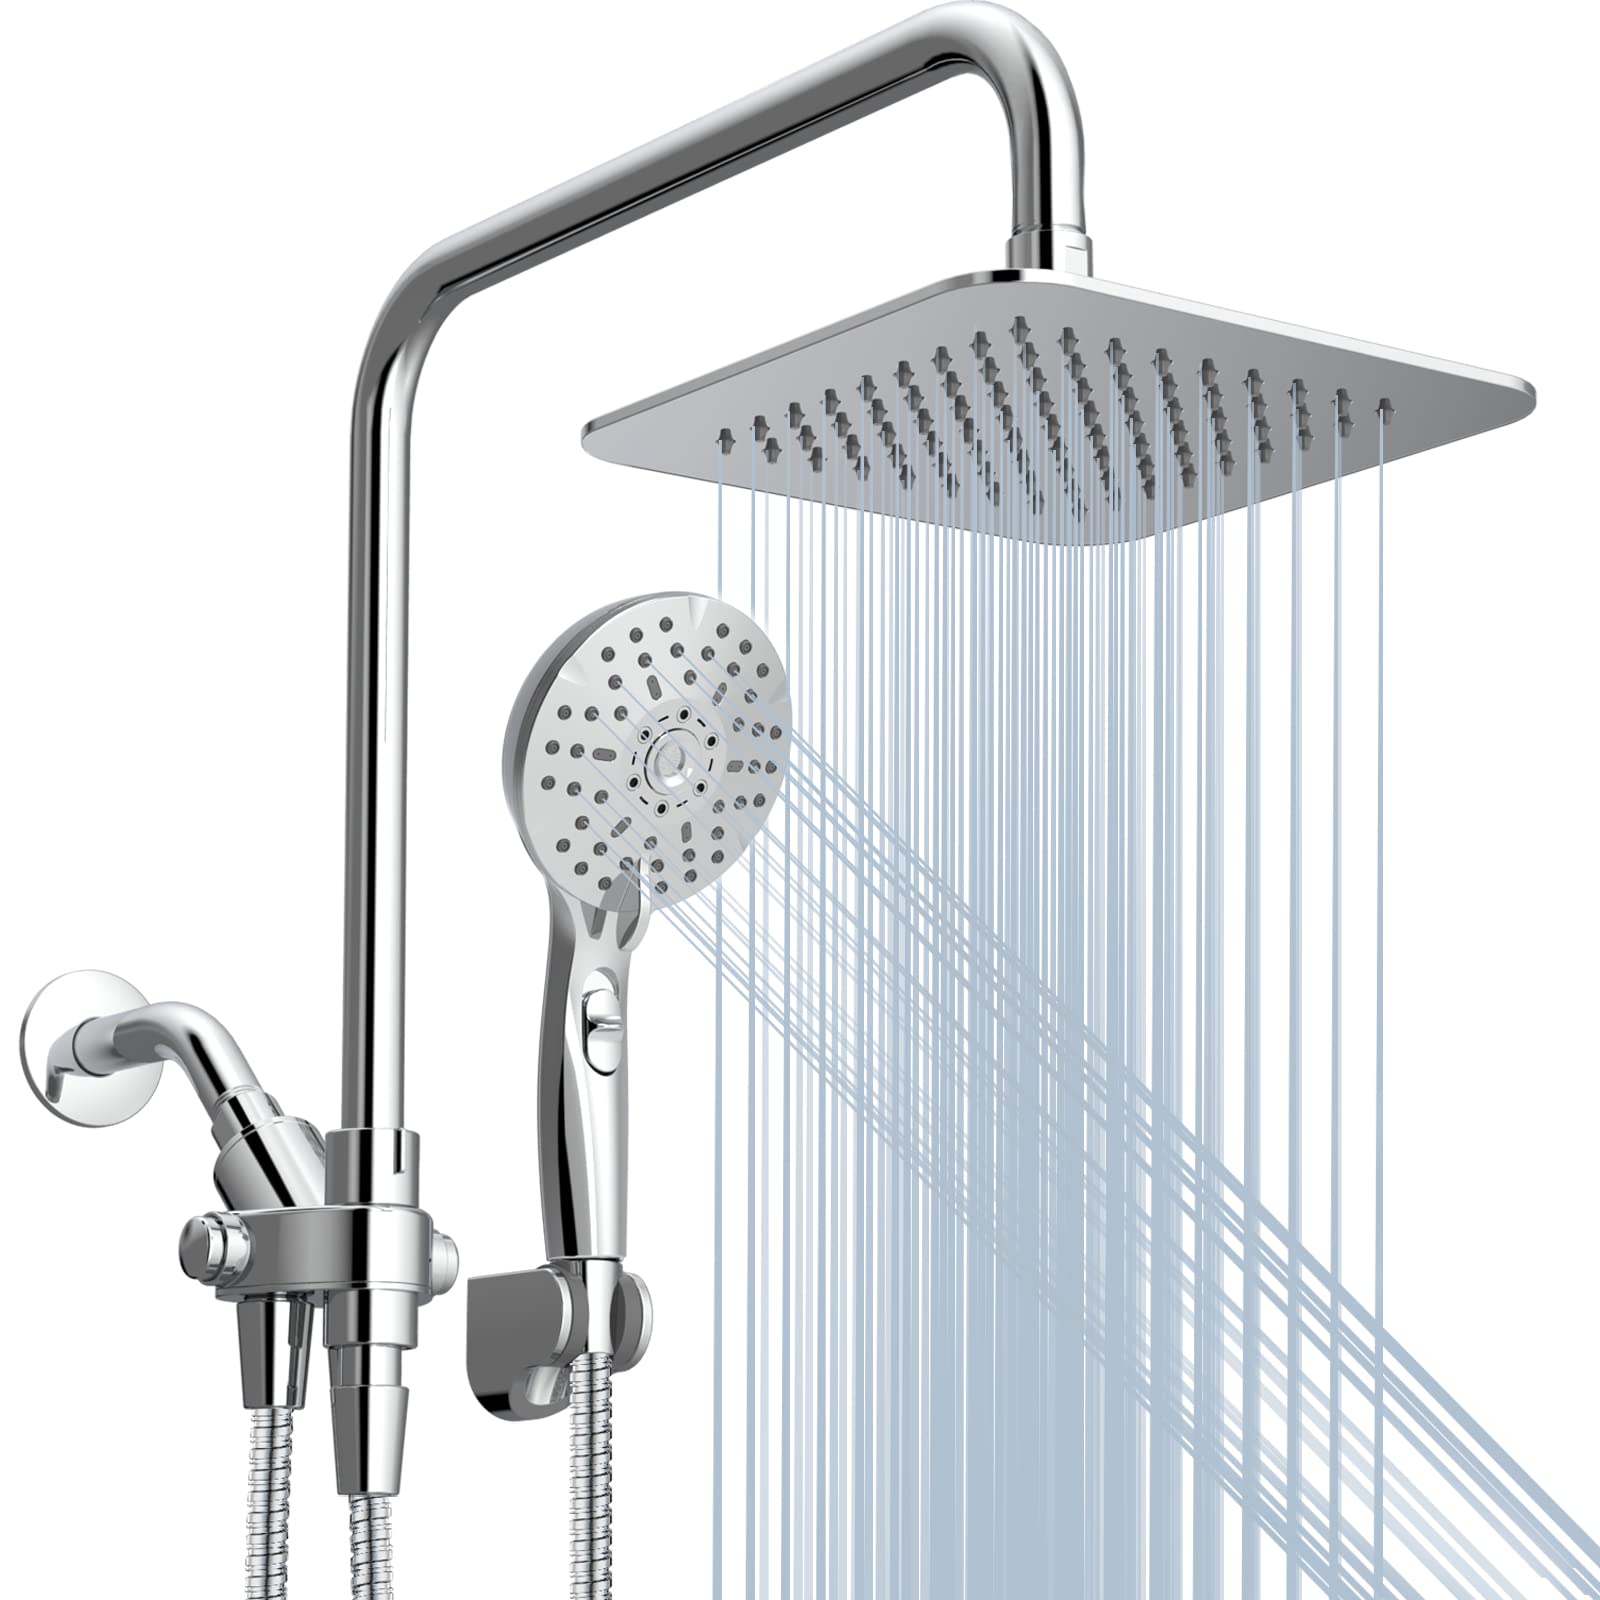
Step 4: Install the diverter valve
The diverter valve is a crucial component of the Sunbeam Deluxe Twin Showerhead system. It allows you to switch between the main showerhead and the handheld showerhead. Follow these steps to install the diverter valve:
- Start by applying plumber’s tape to the threads of the diverter valve. This will create a tight and secure connection.
- Screw the diverter valve onto the prepared shower arm by turning it clockwise. Use your hand to tighten it as much as possible.
- Once the diverter valve is securely in place, you may need to use an adjustable wrench to give it an extra quarter-turn. Be careful not to overtighten it, as this can damage the valve or the shower arm.
- Ensure that the diverter valve is facing the correct direction. The side labeled “Main” should be pointing towards the front, where the main showerhead will be installed, and the side labeled “Handheld” should be facing downward.
With the diverter valve installed, you’re ready to move on to the next step: attaching the main showerhead.
When installing a Sunbeam Deluxe Twin Showerhead, make sure to use plumber’s tape on the threads to prevent leaks and ensure a tight seal. This will help to maintain the water pressure and prevent any water from leaking out.
Read more: How To Install A Hascon Showerhead
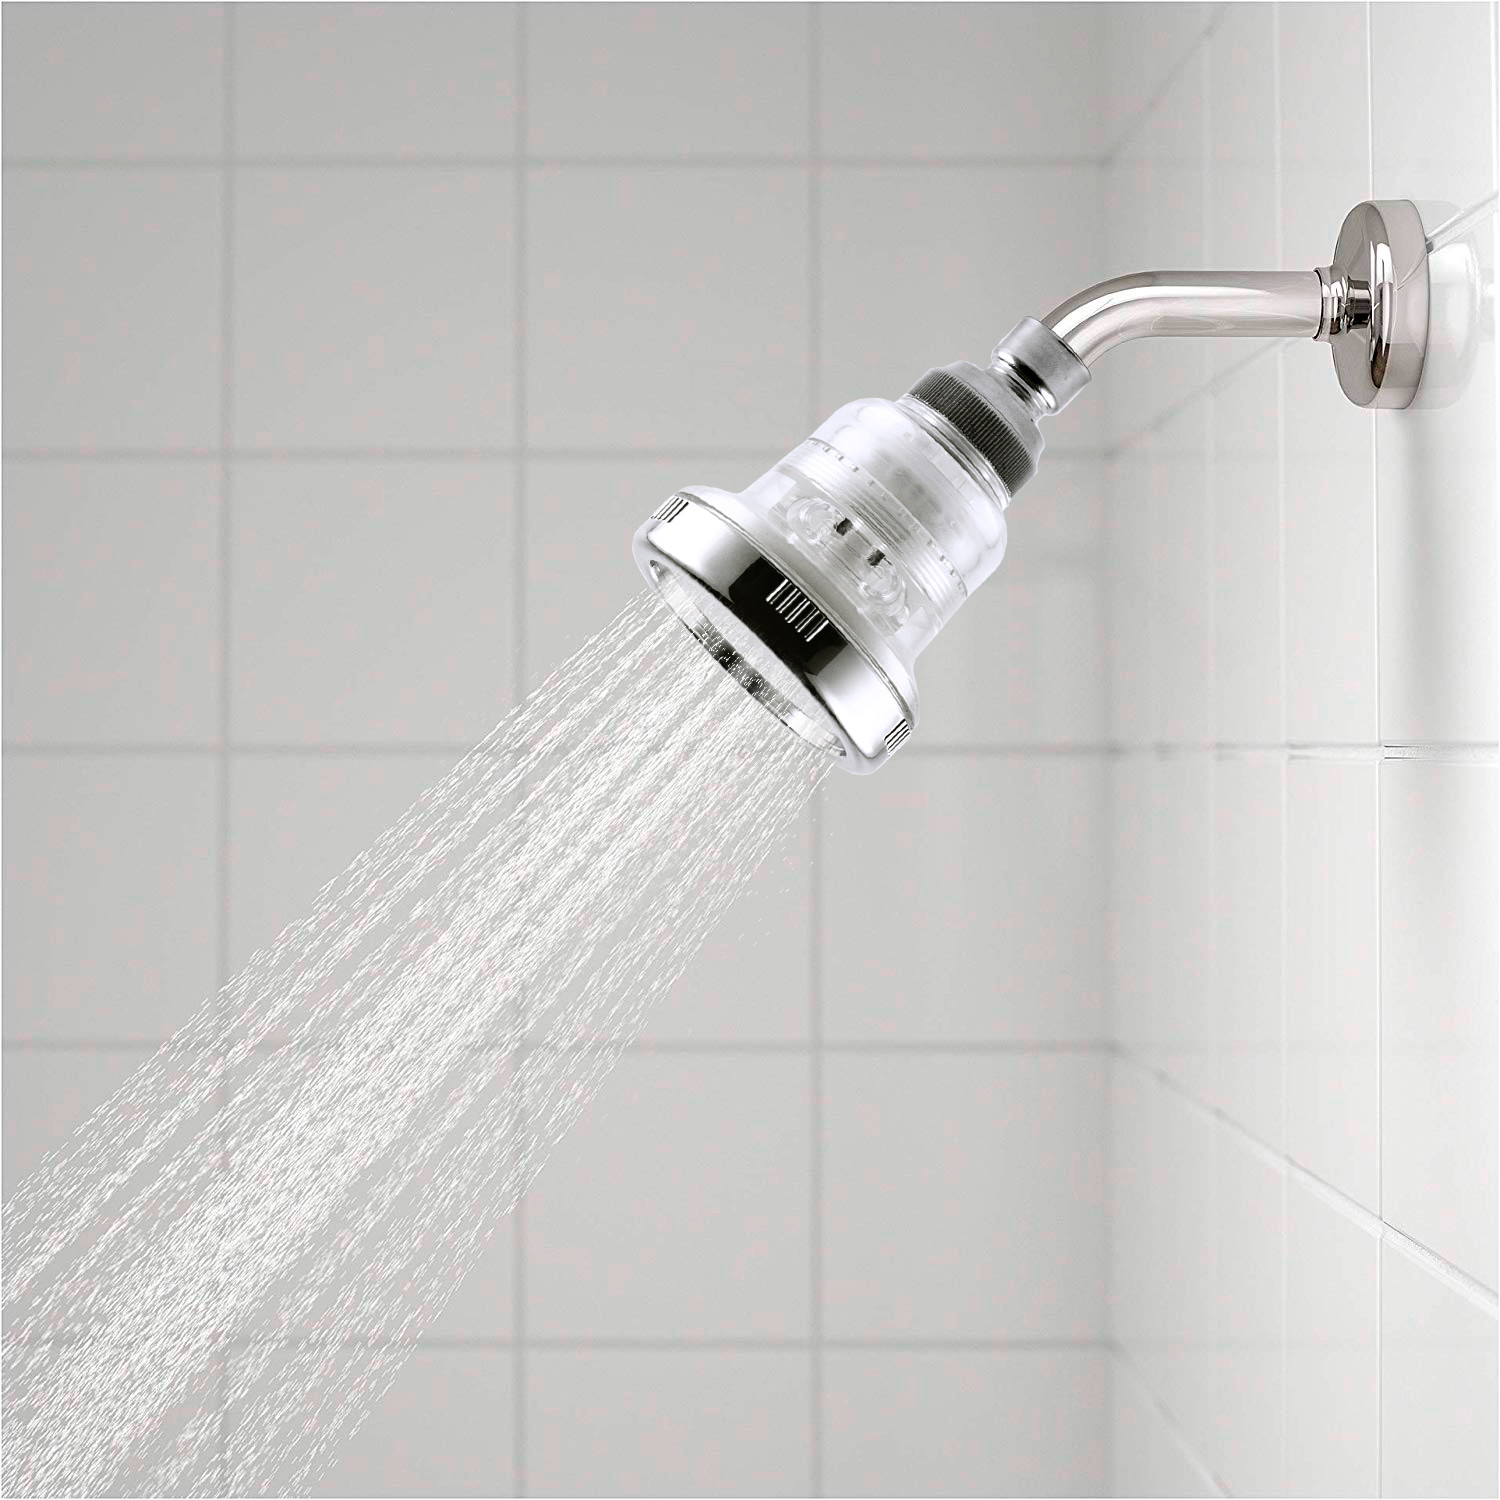
Step 5: Attach the main showerhead
Now that the diverter valve is in place, it’s time to attach the main showerhead of the Sunbeam Deluxe Twin Showerhead system. Follow these steps to complete this step:
- Apply plumber’s tape to the threads of the main showerhead. This will help create a secure and leak-free connection.
- Take the main showerhead and screw it onto the diverter valve by turning it clockwise. Use your hand to tighten it as much as possible.
- If necessary, use an adjustable wrench to give the main showerhead an additional quarter-turn to ensure it is securely attached.
- Double-check that the main showerhead is facing the correct direction and is aligned properly. The showerhead should be pointing downwards at an angle that suits your preference.
Once the main showerhead is securely attached, you’re now ready to move on to the next step: attaching the handheld showerhead.
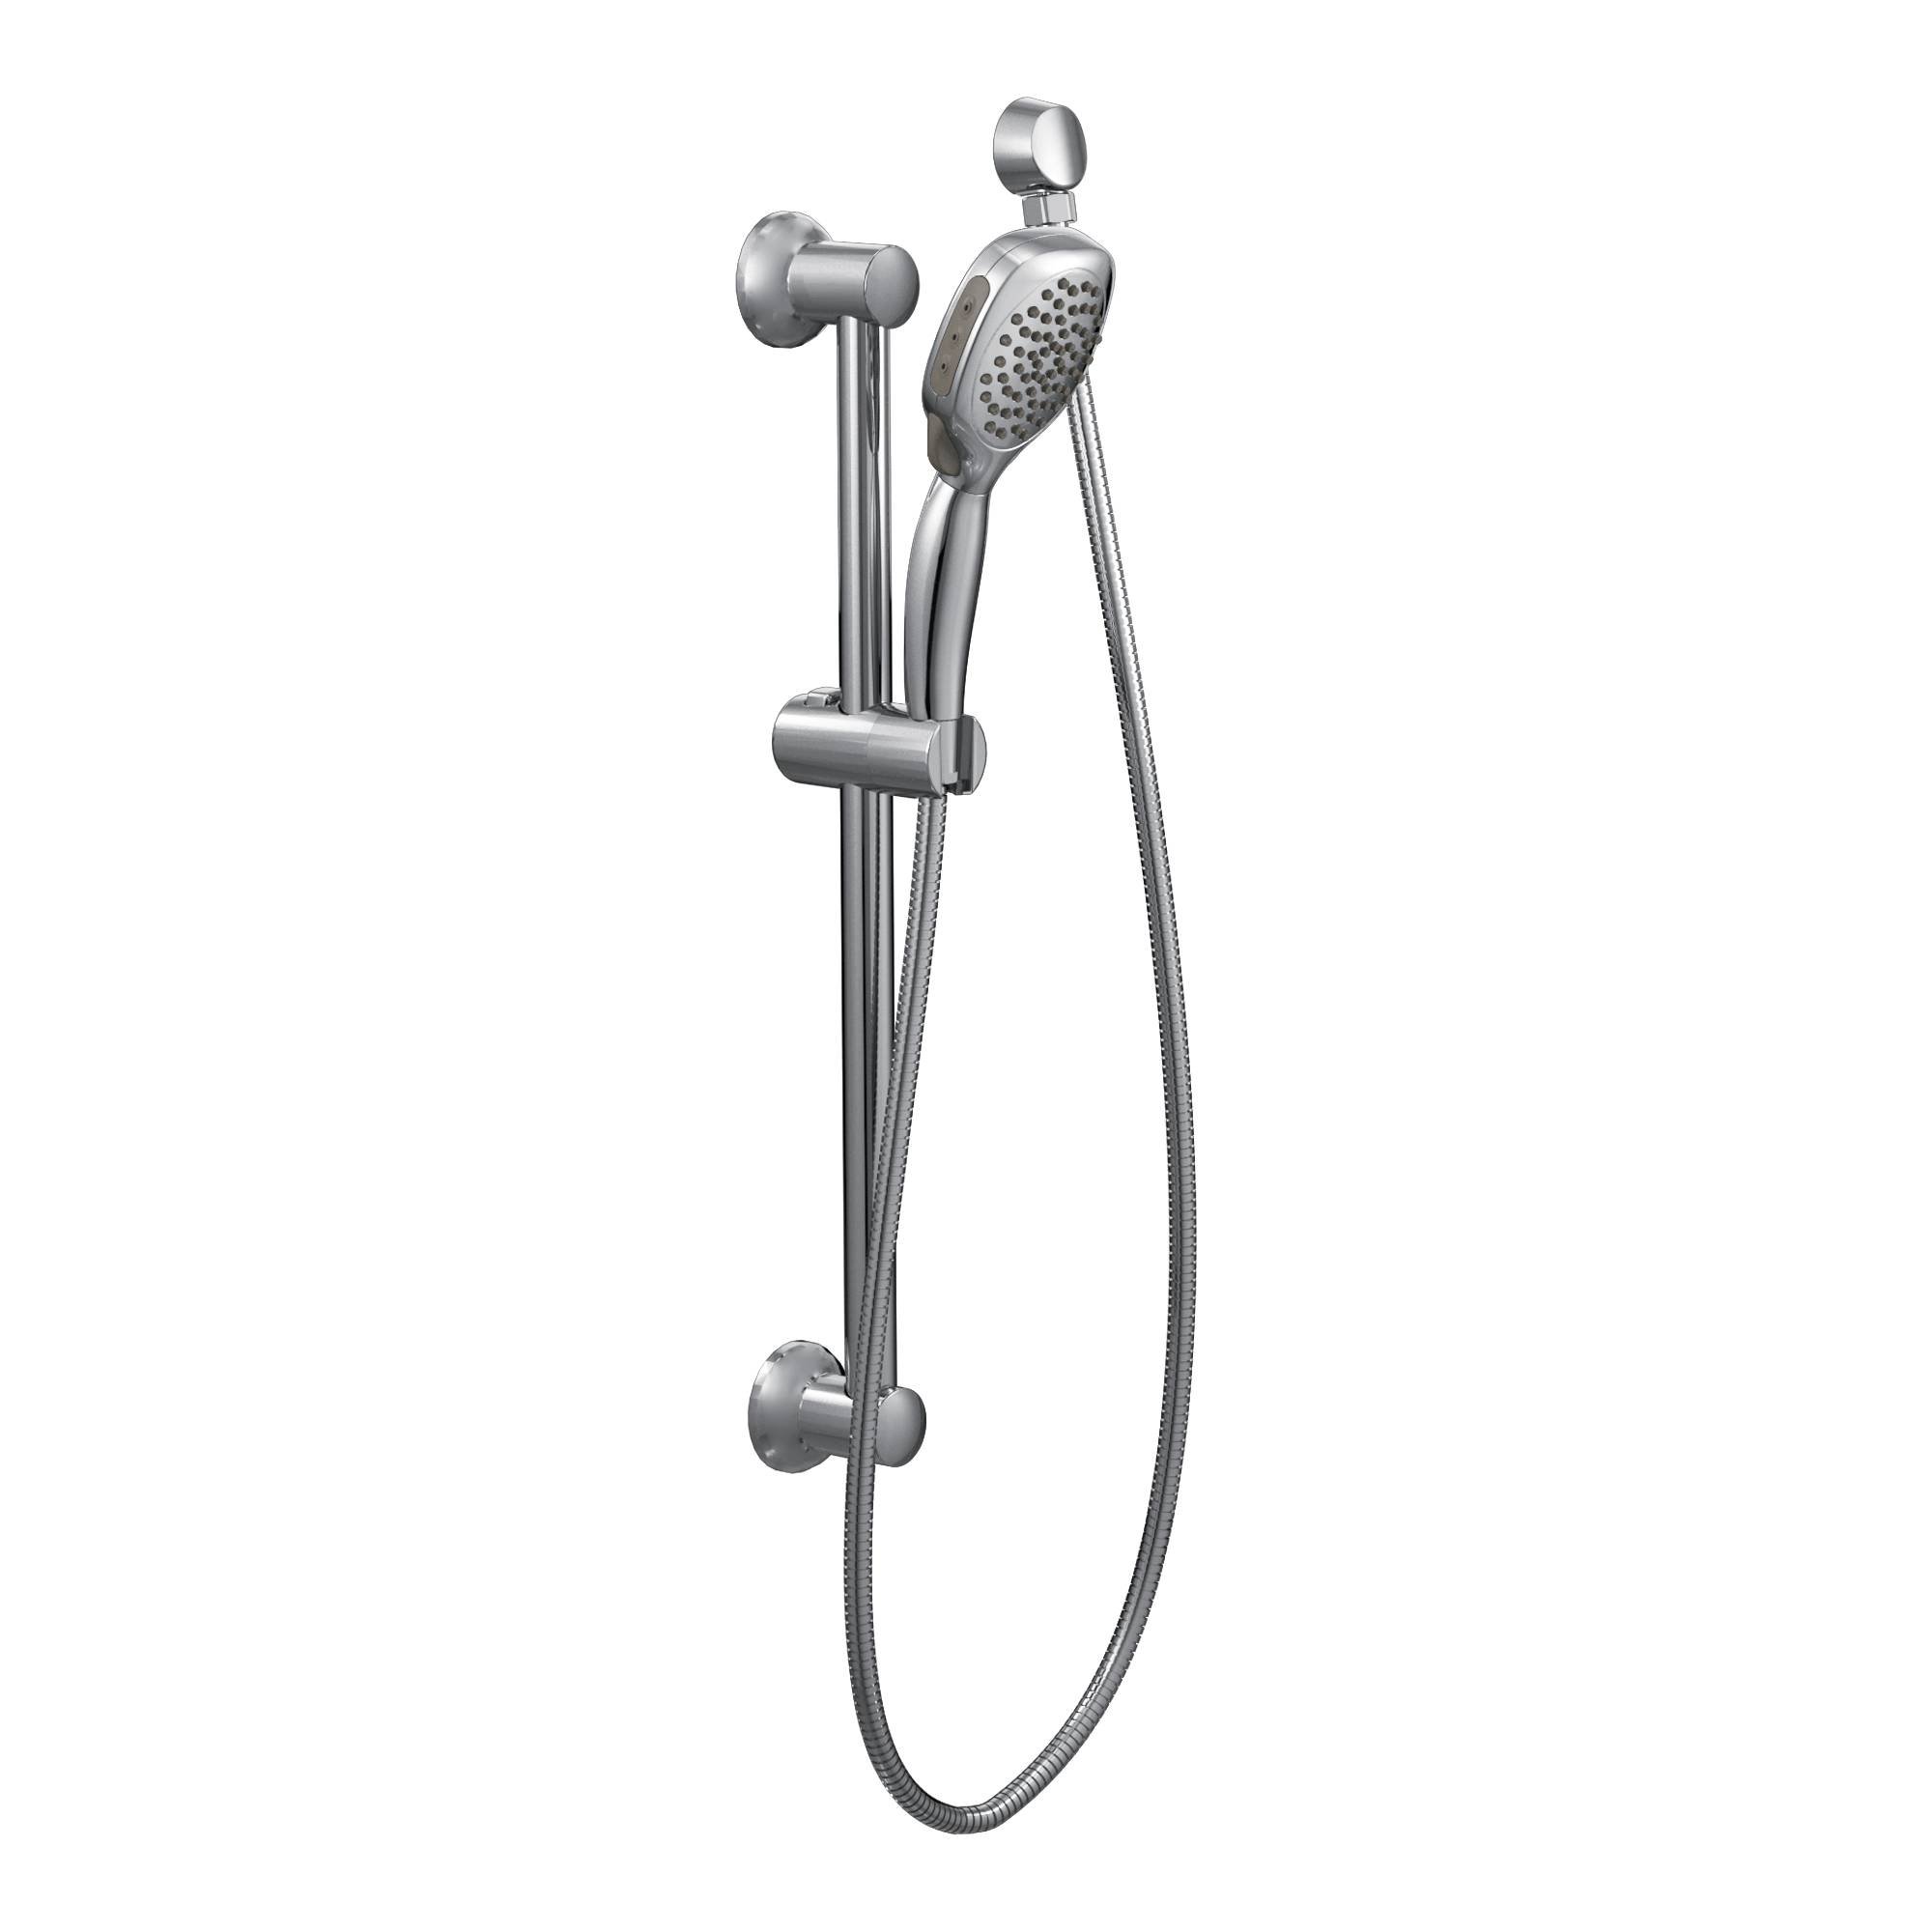
Step 6: Attach the handheld showerhead
In this step, we will be attaching the handheld showerhead to the Sunbeam Deluxe Twin Showerhead system. Follow these simple steps to complete the installation:
- Apply plumber’s tape to the threads of the handheld showerhead. This will ensure a tight and leak-free connection.
- Take the handheld showerhead and screw it onto the diverter valve by turning it clockwise. Use your hand to tighten it firmly.
- If necessary, use an adjustable wrench to give the handheld showerhead an extra quarter-turn to ensure it is securely attached.
- Ensure that the handheld showerhead is facing the correct direction and is adjusted to your desired angle.
- If your handheld showerhead comes with a bracket or holder, install it on the wall within easy reach.
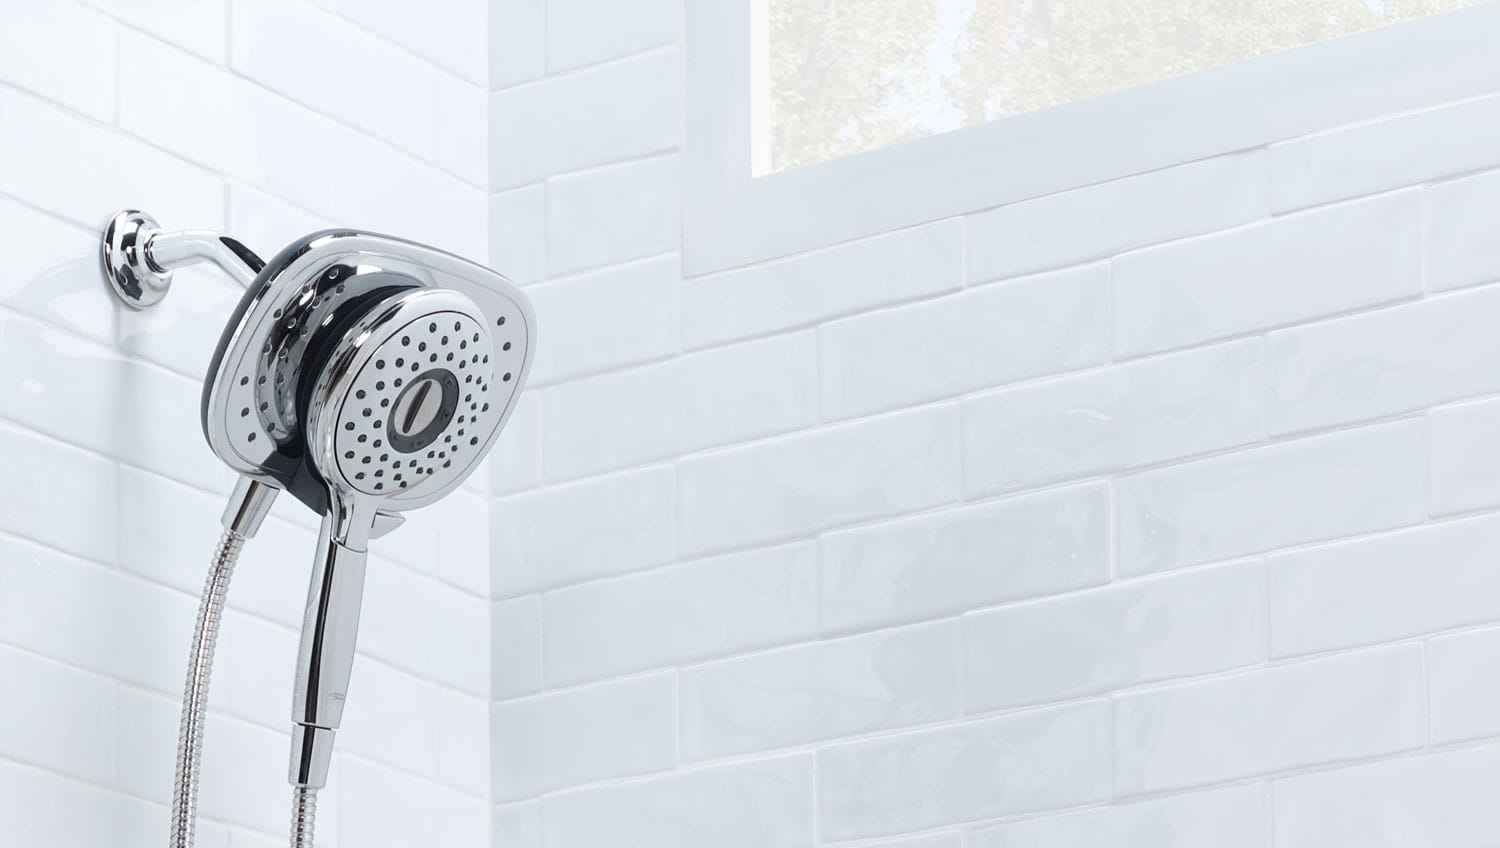
With the handheld showerhead securely attached, you have completed the installation process for the Sunbeam Deluxe Twin Showerhead system.
Before you start using your new showerhead, it is essential to test the installation to ensure everything is working correctly.
Step 7: Test the installation
After successfully installing the Sunbeam Deluxe Twin Showerhead, it’s crucial to test the installation to ensure proper functionality. Follow these steps to test the installation:
- Turn on the water supply to the shower. Slowly increase the water flow to a comfortable level.
- Test the main showerhead by switching the diverter valve to the “Main” position. Make sure there are no leaks and that the water flows smoothly from the main showerhead.
- Switch the diverter valve to the “Handheld” position and test the handheld showerhead. Check for any leaks and ensure that the water flow is steady and consistent.
- Try different spray patterns and adjust the angle of the showerheads to find the best position that suits your preferences.
- Pay attention to any potential leaks or issues. If you notice any leaks, tighten the connections with an adjustable wrench until the leak stops. If the issue persists, you may need to dismantle the showerhead and check for any damaged components or faulty installation.
By thoroughly testing the installation, you can address any potential problems early on and ensure that your Sunbeam Deluxe Twin Showerhead is functioning optimally.
Congratulations! You have successfully installed and tested your Sunbeam Deluxe Twin Showerhead. Enjoy a luxurious and rejuvenating shower experience with the convenience of dual showerheads.
Remember to regularly clean and maintain your showerhead to keep it in excellent working condition for years to come.
Conclusion
Installing a Sunbeam Deluxe Twin Showerhead can greatly enhance your showering experience with the luxury of dual showerheads. By following the step-by-step guide outlined in this article, you can successfully install this showerhead system and enjoy the benefits it has to offer.
Throughout the installation process, we covered the necessary steps, including gathering the materials, removing the existing showerhead, preparing the shower arm, installing the diverter valve, attaching the main showerhead, attaching the handheld showerhead, and testing the installation for proper functionality.
It’s important to remember to gather all the materials needed and to take appropriate precautions, such as turning off the water supply, before beginning the installation process. Additionally, ensure that you use plumber’s tape to create a secure and leak-free connection for each component.
Testing the installation is a crucial step to ensure that both the main showerhead and the handheld showerhead are functioning properly and without any leaks. By conducting a thorough test, you can address any issues promptly and enjoy a seamless shower experience.
Now that you have successfully installed your Sunbeam Deluxe Twin Showerhead, it’s time to sit back, relax, and enjoy the convenience and luxury it provides. Whether you prefer a rejuvenating rainfall shower or the precision of a handheld spray, this showerhead system allows you to customize your showering experience to your exact preferences.
Remember to regularly clean and maintain your showerhead to prevent any clogs or loss in water pressure. By doing so, you can ensure that your Sunbeam Deluxe Twin Showerhead continues to provide you with an indulgent and refreshing shower experience for years to come.
Thank you for following this comprehensive guide on how to install a Sunbeam Deluxe Twin Showerhead. Enjoy your new showerhead system and embrace the increased comfort and relaxation it brings to your daily showers!
Frequently Asked Questions about How To Install A Sunbeam Deluxe Twin Showerhead
Was this page helpful?
At Storables.com, we guarantee accurate and reliable information. Our content, validated by Expert Board Contributors, is crafted following stringent Editorial Policies. We're committed to providing you with well-researched, expert-backed insights for all your informational needs.


0 thoughts on “How To Install A Sunbeam Deluxe Twin Showerhead”