
Articles
How To Install An Electrical Subpanel
Modified: December 7, 2023
Learn how to install an electrical subpanel with our informative articles. Gain the knowledge you need to safely upgrade your electrical system.
(Many of the links in this article redirect to a specific reviewed product. Your purchase of these products through affiliate links helps to generate commission for Storables.com, at no extra cost. Learn more)
Introduction
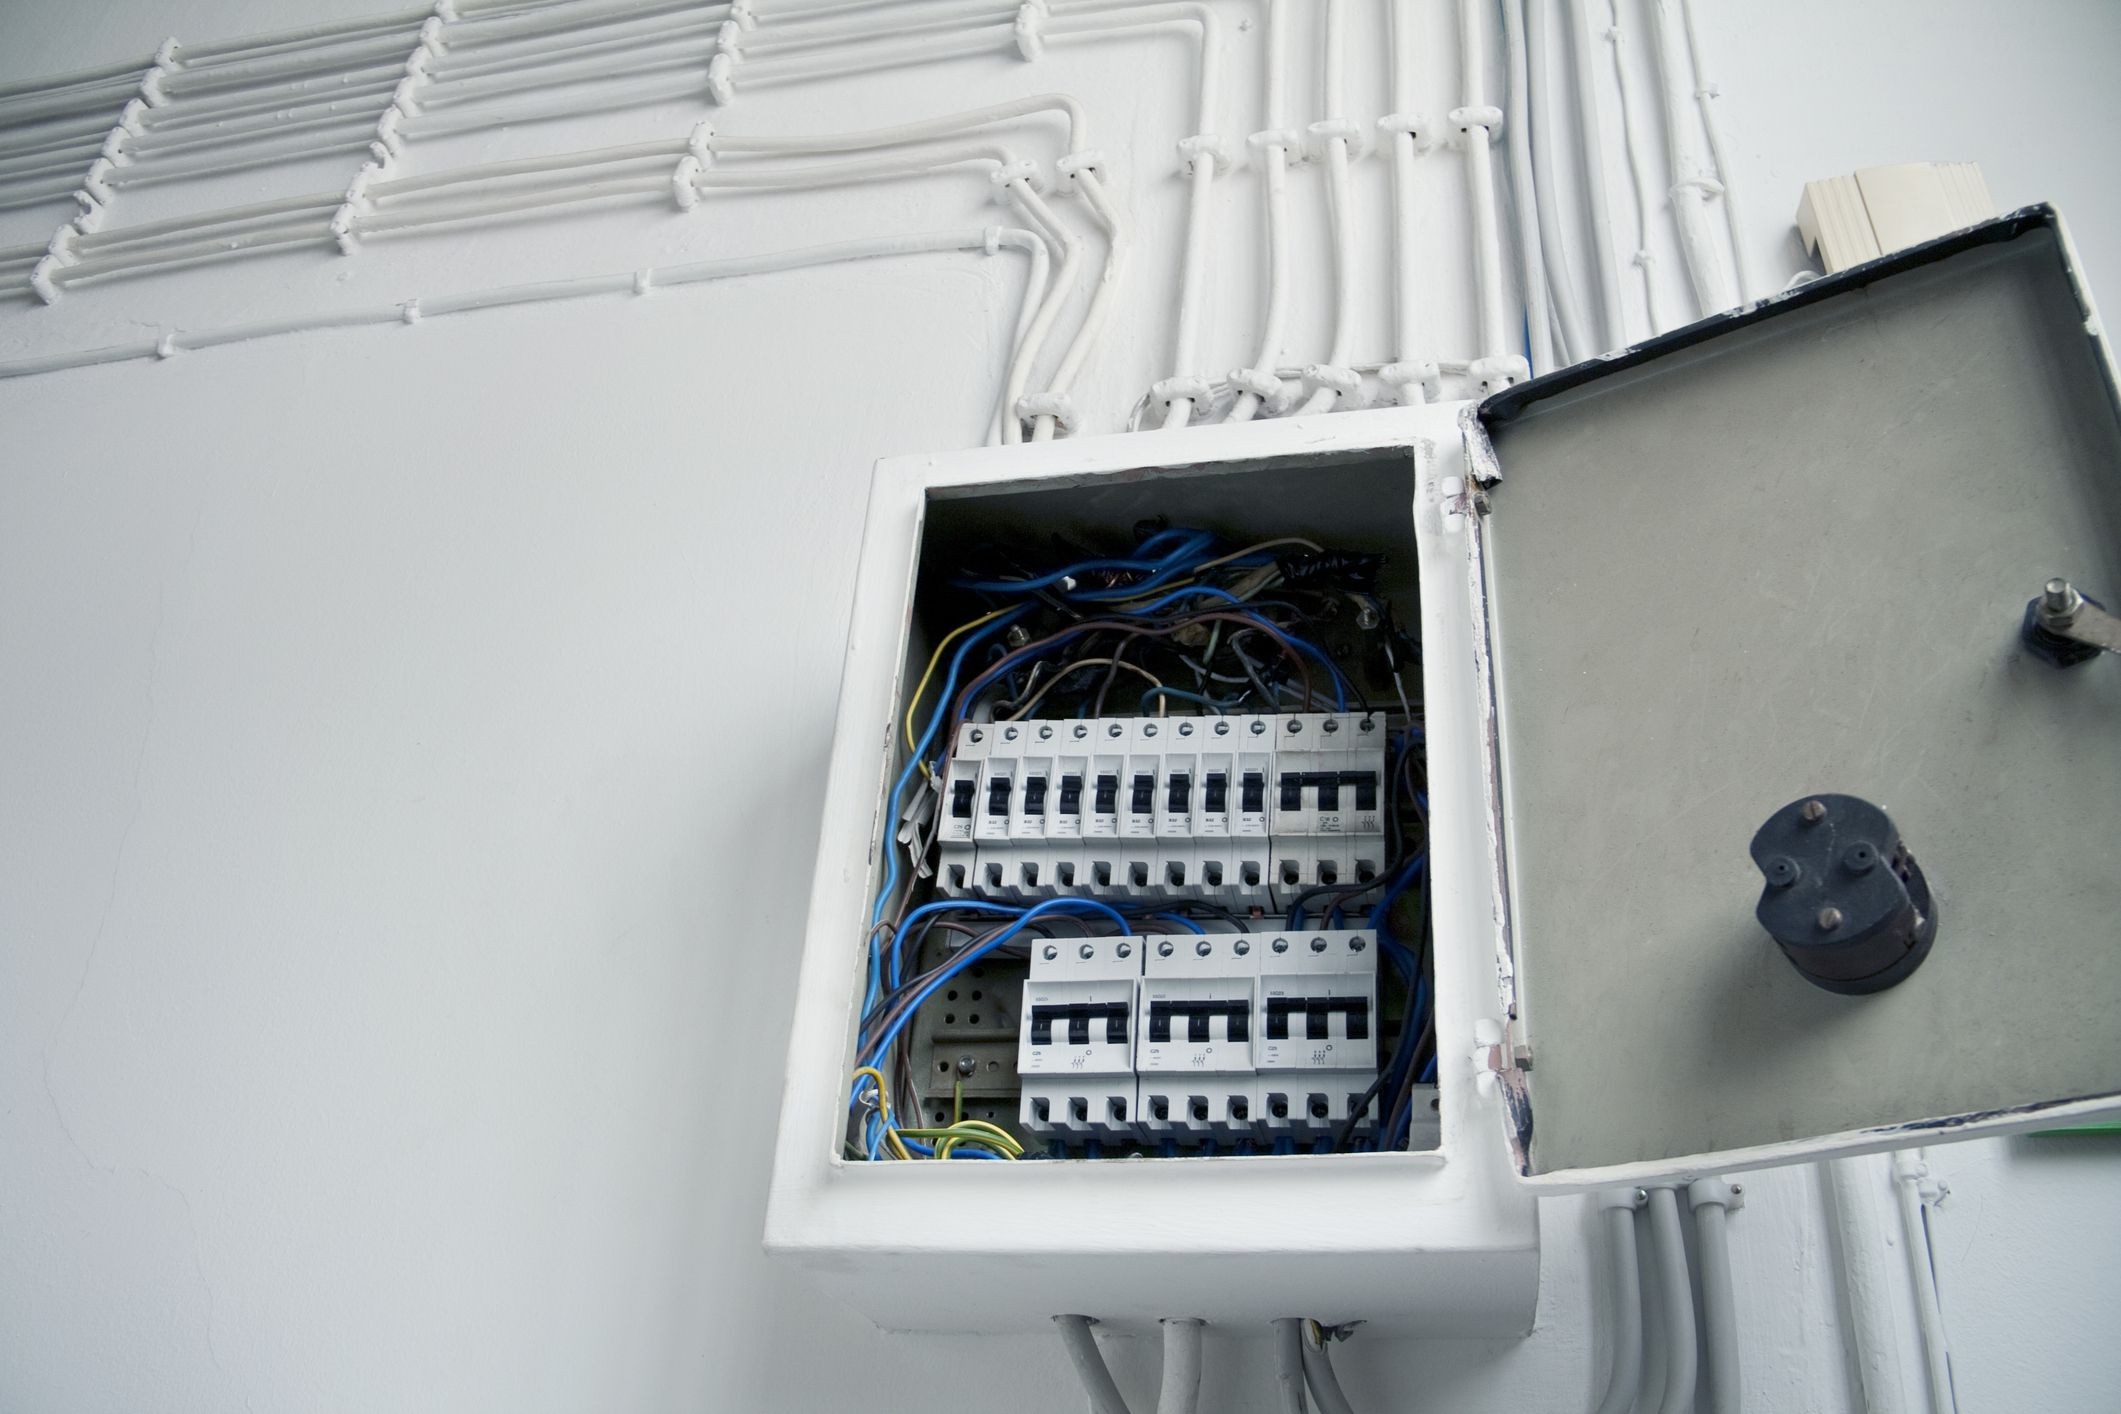
Welcome to this comprehensive guide on how to install an electrical subpanel. If you are looking to add more circuits to your home’s electrical system or expand the capacity of your current panel, installing a subpanel is the way to go. A subpanel, also known as a secondary or distribution panel, is a separate electrical panel that receives power from the main electrical panel and distributes it to various circuits within a specific area or room.
Installing an electrical subpanel may seem like a complex task, but with the right knowledge and guidance, it can be done safely and efficiently. In this article, we will walk you through the step-by-step process of installing an electrical subpanel, ensuring that you have the necessary tools and materials, follow local codes and regulations, and complete the installation successfully.
Before we dive into the installation process, it’s important to note that working with electricity can be dangerous, and if you are not comfortable or experienced with electrical work, it’s best to hire a licensed electrician to perform the installation. However, if you have a good understanding of electrical systems and feel confident in your abilities, this guide will provide you with the necessary information to tackle the project yourself.
By installing an electrical subpanel, you can add additional circuits to your home, which allows for greater flexibility in powering appliances, devices, and lighting fixtures. This is especially beneficial for homes with older electrical systems or ones that require more power due to additions or renovations. Having a separate subpanel also helps distribute the electrical load evenly, reducing the risk of tripped breakers and overloaded circuits.
Throughout this guide, we will cover the step-by-step process of installing an electrical subpanel, which includes gathering the necessary tools and materials, checking local electrical codes, selecting a suitable location, shutting off the main power supply, mounting the subpanel, installing the feeder wires, connecting circuit breakers and wires, and connecting the grounding system. We will also discuss the importance of restoring power and testing the subpanel, as well as obtaining the final inspection and approval.
Now that you have a general understanding of the benefits and purpose of an electrical subpanel, let’s dive into the detailed steps of installing one. Remember to always prioritize safety and consult any applicable local codes or regulations throughout the installation process.
Key Takeaways:
- Installing an electrical subpanel involves gathering the right tools, checking local codes, selecting a suitable location, and safely connecting wires and breakers. Prioritizing safety and obtaining final inspection are crucial for a successful installation.
- By following the step-by-step process outlined in the guide, homeowners can confidently install an electrical subpanel, enhancing their electrical system’s capacity and functionality. Regular maintenance and adherence to local codes ensure long-term safety and reliability.
Read more: How To Wire A Subpanel In A Shed
Step 1: Gather the necessary tools and materials
Before you begin the installation process, it is important to gather all the necessary tools and materials to ensure a smooth and efficient installation of your electrical subpanel. Having everything on hand will save you time and prevent delays. Here is a list of essential tools and materials you will need:
- Subpanel: Choose a subpanel that suits your electrical needs and is compatible with your main panel. Consider factors such as the number of circuits you plan to install and the available space for the subpanel.
- Wire: You will need appropriate gauge wire to connect the subpanel to the main panel. This includes hot wires (usually black), neutral wires (usually white), and grounding wires (usually green or bare copper).
- Circuit breakers: Select circuit breakers that match the amperage of your subpanel and the specific requirements of your circuits.
- Screws and mounting brackets: These will be used to secure the subpanel to the wall or mounting surface.
- Grounding system: Ensure you have the necessary grounding rods, clamps, and wires to establish a proper grounding system for the subpanel.
- Wire strippers: These will be used to remove the insulation from the wires to make connections.
- Wire cutters: You will need these to cut the wire to the appropriate lengths.
- Screwdrivers: Make sure you have both flathead and Phillips screwdrivers for the various screws and connections.
- Drill and bits: If you need to make holes for screws or mounting brackets, a drill with the appropriate bits will be necessary.
- Voltage tester: This tool will help you determine if a circuit is live or not, ensuring your safety during the installation process.
- Electrical tape: Use electrical tape to insulate and secure wire connections.
- Labeling materials: It is important to label all the circuits in your subpanel for future reference. You can use labels, markers, or any other suitable material for this purpose.
- Protective gear: Don’t forget to have safety glasses, gloves, and suitable footwear to protect yourself during the installation.
By ensuring you have all the necessary tools and materials, you will be well-prepared to tackle the installation of your electrical subpanel. Double-check the list and gather any additional tools or materials specific to your electrical system or local codes. Now that you are equipped, proceed to the next step – checking local electrical codes and obtaining necessary permits.
Step 2: Check local electrical codes and obtain necessary permits
Before you begin the installation of your electrical subpanel, it is crucial to check the local electrical codes and obtain any necessary permits. Electrical codes ensure the safety and compliance of electrical installations, and obtaining permits is a requirement in most jurisdictions to ensure that the installation meets all the necessary standards.
Here are the key steps to follow when checking local electrical codes and obtaining permits:
1. Research local electrical codes: Familiarize yourself with the electrical codes specific to your area. These codes outline the requirements and guidelines for electrical installations, including subpanels. You can find the relevant codes through your local municipal or building department, or consult the National Electrical Code (NEC) for a comprehensive set of rules and regulations.
2. Identify permit requirements: Contact your local building department to determine the specific permits needed for the installation of an electrical subpanel. The types of permits required may vary based on the location and scope of the project.
3. Complete permit applications: Once you have identified the necessary permits, fill out the appropriate application forms provided by your local building department. These forms typically require details about the project, including the type of subpanel, the location of installation, and the electrical loads.
4. Submit permit applications: Submit the completed permit applications along with any required fees to your local building department. Be sure to follow any specific submission guidelines provided by the department.
5. Wait for permit approval: After submitting the permit applications, the building department will review them to verify compliance with local electrical codes. Depending on the workload of the department, the approval process may take a few days to a couple of weeks. During this time, refrain from starting the installation until you receive the necessary permits.
6. Obtain permits: Once your permit application is approved, you will receive the permits for the installation of your electrical subpanel. These permits should be prominently displayed at the job site during the installation process.
7. Coordinate inspections: In addition to obtaining permits, you will likely need to schedule and coordinate inspections with the local building department. Inspections are typically required at various stages of the installation process to ensure compliance with electrical codes and regulations. Be sure to follow the inspection guidelines provided by the department and request inspections promptly to avoid delays.
By adhering to local electrical codes and obtaining the necessary permits, you can ensure that your electrical subpanel installation is safe, compliant, and meets all the required standards. Failure to comply with codes and obtain permits can result in fines, penalties, and potential hazards. Once you have received the necessary permits, you can proceed with confidence to the next step of selecting an appropriate location for your subpanel.
Step 3: Select an appropriate location for the subpanel
Choosing the right location for your electrical subpanel is crucial for the efficient and safe operation of your electrical system. The selected location should provide easy access, proper ventilation, and meet the requirements set by local electrical codes. Here are the key factors to consider when selecting the location for your subpanel:
1. Accessibility: The subpanel should be easily accessible for maintenance and troubleshooting purposes. It should be located in a space where you can easily reach it without obstacles, and there should be enough room for you to work comfortably.
2. Proximity to the main panel: If possible, select a location that is close to the main electrical panel. This will minimize the length of the feeder wires and reduce voltage drop. Ideally, the subpanel should be installed in the same building as the main panel.
3. Proper ventilation: The subpanel should be located in an area that allows for adequate airflow and ventilation. Avoid placing it in cramped or enclosed spaces. Good airflow helps dissipate heat generated by the subpanel and ensures its optimal functioning.
4. Dry and secure location: Choose a location that is dry and free from moisture. Avoid areas that are prone to water leaks or flooding. Additionally, ensure that the location is secure and protected from potential physical damage.
5. Proper clearances: Check local electrical codes for the required clearances around the subpanel. These codes specify the minimum distances that should be maintained between the subpanel and other objects, such as walls, ceilings, and appliances. Following these clearances helps prevent potential fire hazards and allows for safe operation.
6. Labeling and accessibility: Ensure that the subpanel is labeled clearly, indicating its purpose, such as “Subpanel” or “Distribution Panel”. Additionally, provide labels for each circuit breaker to identify the corresponding circuit. This will make it easier to identify and troubleshoot any issues that may arise.
7. Consider future expansion: If you anticipate the need for additional circuits in the future, choose a location that can accommodate potential expansion. Having extra space in the subpanel allows for easier installation of new breakers as your electrical needs grow.
When selecting a location for your subpanel, consult local electrical codes to ensure compliance with any specific requirements. Keep in mind that some jurisdictions may have additional regulations or restrictions for subpanel placement, particularly in commercial or high-rise buildings.
Once you have identified a suitable location for the subpanel, proceed to the next step, which involves shutting off the main power supply before starting the installation process.
Step 4: Shut off the main power supply
Prior to any electrical work, it is imperative to shut off the main power supply to ensure your safety. Cutting off the power prevents the risk of electric shock and allows you to work on the subpanel installation without any live wires. Follow these steps to shut off the main power supply:
1. Identify the main electrical panel: Locate the main electrical panel in your home or building. This panel is typically larger than subpanels and is usually installed near the entrance point of the electrical service.
2. Open the main panel cover: Use a screwdriver or the appropriate tool to remove the screws holding the main panel cover in place. Set the cover aside in a safe location.
3. Identify the main service disconnect: Look for a large circuit breaker or a main disconnect switch labeled as the main service disconnect. This switch or breaker controls the entire electrical supply to your home or building.
4. Turn off the main service disconnect: If it is a circuit breaker, flip it to the “OFF” position. If it is a disconnect switch, switch it to the “OFF” position. Ensure the switch or breaker is in the fully “OFF” position to cut off the power completely.
5. Test the power: As an additional safety precaution, use a voltage tester or a multimeter to verify that the power is indeed turned off. Test a few outlets or switches to ensure there is no voltage present.
6. Notify others: If you are working alongside others in your home or building, inform them that the power is shut off. This prevents anyone from accidentally turning on the power while you are performing the installation.
Remember, shutting off the main power supply is a critical step in ensuring your safety during the electrical subpanel installation process. Take the time to double-check and confirm that the power is indeed off before proceeding to the next steps.
With the main power supply successfully shut off, you can now move on to the next step of mounting the subpanel in the chosen location.
Read more: How To Install Electrical Box
Step 5: Mount the subpanel
Now that you have shut off the main power supply, it is time to mount the subpanel in the selected location. Properly mounting the subpanel ensures its stability and accessibility. Follow these steps to mount the subpanel:
1. Position the subpanel: Hold the subpanel against the wall or mounting surface in the chosen location. Ensure that it is level and positioned at the desired height. Use a pencil to mark the locations of the mounting holes on the wall.
2. Attach the mounting brackets: Depending on the subpanel’s design, it may come with pre-installed mounting brackets or require separate brackets to be attached. Align the brackets with the marked holes on the wall and secure them using the appropriate screws or bolts. Make sure the brackets are firmly attached to the wall.
3. Mount the subpanel: Align the mounting holes on the back of the subpanel with the mounting brackets. Carefully slide the subpanel onto the brackets, ensuring that it is securely attached. Double-check that the subpanel is level and properly aligned with the brackets before proceeding.
4. Secure the subpanel: Use the provided screws or bolts to fasten the subpanel to the mounting brackets. Tighten the screws or bolts securely, but be careful not to overtighten and damage the subpanel or brackets.
5. Check for stability: Once the subpanel is mounted, gently shake it to check for any wobbling or movement. It should be securely fixed in place without any looseness. If there is any instability, reinforce the mounting brackets or seek professional assistance.
6. Reinstall the subpanel cover: If the subpanel has a removable cover, reattach it accordingly. Ensure that the cover is securely in place to protect the interior components of the subpanel.
Properly mounting the subpanel is an important step in ensuring its functionality and accessibility. It is crucial to follow the manufacturer’s instructions and any specific requirements stated in local electrical codes. By securely mounting the subpanel, you can proceed to the next step of installing the main feeder wires.
When installing an electrical subpanel, make sure to carefully plan the location to ensure it is easily accessible and meets all local building codes and regulations.
Step 6: Install the main feeder wires
Now that the subpanel is securely mounted, it’s time to install the main feeder wires that will connect the subpanel to the main electrical panel. These wires will carry the electrical power from the main panel to the subpanel. Follow these steps to install the main feeder wires:
1. Measure and cut the wires: Measure the distance between the main panel and the subpanel, taking into account the necessary clearance and the route the wires will take. Use wire cutters to carefully cut the main feeder wires to the appropriate length. Be sure to leave a little extra length for easier installation.
2. Strip the insulation: Use wire strippers to carefully remove the insulation from the ends of the wires. Make sure to strip off enough insulation to expose the bare wire for proper connections. Be cautious not to nick or damage the wire strands during this process.
3. Route the wires: Determine the most suitable route for the main feeder wires from the main panel to the subpanel. Depending on the location and layout of your property, this may involve running the wires through walls, ceilings, or conduit. Ensure that the wires are securely fastened and protected along their route.
4. Connect the wires to the main panel: Locate the main service disconnect in the main panel. Depending on your electrical system, this may be a large circuit breaker or a disconnect switch. Loosen the appropriate terminals to create space for the connection of the main feeder wires. Connect the wires to the appropriate terminals, ensuring a tight and secure connection. Follow any specific instructions provided by the manufacturer or local electrical codes.
5. Connect the wires to the subpanel: Move to the subpanel and locate the main lugs or main breaker terminals. Loosen these terminals to create room for the main feeder wire connections. Connect the stripped ends of the main feeder wires to the appropriate terminals in the subpanel. Follow proper wiring techniques, such as connecting the black wire to the hot bus bar, the white wire to the neutral bus bar, and the green or bare copper wire to the grounding bar.
6. Tighten the terminals: Once the connections are made, use a screwdriver or the appropriate tool to tighten the terminals in both the main panel and subpanel. Ensure that the connections are secure and tight, but be careful not to overtighten and damage the wires or terminals.
7. Label the wires: In both the main panel and subpanel, label the main feeder wires to indicate their purpose and destination. This will make identification and troubleshooting easier in the future.
Installing the main feeder wires is a critical step in establishing the electrical connection between the main panel and the subpanel. It is important to follow proper wiring techniques and consult local electrical codes to ensure a safe and compliant installation. With the main feeder wires securely and properly connected, you can move on to the next step of connecting circuit breakers and wires.
Step 7: Connect circuit breakers and wires
Now that the main feeder wires are installed, it’s time to connect the circuit breakers and wires within the subpanel. This step involves creating the necessary circuits and ensuring proper connections for the distribution of power. Follow these steps to connect circuit breakers and wires:
1. Plan your circuit layout: Before proceeding, plan the layout of your circuits within the subpanel. Consider the electrical requirements of different areas or appliances that will be powered by the subpanel. Take into account the specific amperage ratings of the circuit breakers and ensure they match the electrical load. If needed, consult an electrician for guidance.
2. Install circuit breakers: Start by installing the circuit breakers into their respective slots in the subpanel. Ensure that the breakers are compatible with the subpanel and properly aligned with the bus bars. Refer to the manufacturer’s instructions for specific installation guidelines.
3. Connect the wires: Begin by connecting the wires from each circuit to their corresponding circuit breaker. Strip the insulation from the ends of the wires and insert them into the appropriate terminals on the circuit breakers. Follow the color-coding conventions, such as connecting hot or live wires (typically black) to the breaker’s hot terminal and neutral wires (typically white) to the neutral bar.
4. Secure the connections: Once the wires are properly inserted into the circuit breakers, tighten the terminal screws to ensure a secure connection. Be careful not to overtighten and damage the wires.
5. Connect neutral wires: Next, connect the neutral wires from each circuit to the neutral bar in the subpanel. Strip the insulation from the ends of the wires and insert them into the appropriate terminals. Ensure proper alignment and tightness of the connections.
6. Connect grounding wires: Finally, connect the grounding wires from each circuit to the grounding bar in the subpanel. Strip the insulation from the ends of the wires and insert them into the appropriate grounding terminals. Ensure that the connections are tight and secure.
7. Arrange and label wires: Arrange the wires neatly within the subpanel to ensure a clean and organized setup. Use zip ties or cable clips to secure and manage the wiring. Additionally, label each circuit and corresponding breaker to make future identification or troubleshooting easier.
It is vital to ensure that all connections are secure, properly tightened, and in accordance with local electrical codes. Follow proper wiring techniques and consult a licensed electrician or local regulations if you are unsure about any aspect of the connection process.
With the circuit breakers and wires connected, you are ready for the next step – connecting the grounding system for the subpanel.
Step 8: Connect the grounding system
Connecting the grounding system is a crucial step in ensuring the safety and proper functioning of your electrical subpanel. The grounding system helps protect against electrical faults and provides a safe path for electrical currents. Follow these steps to connect the grounding system:
1. Consult local electrical codes: Before proceeding with the grounding system installation, consult local electrical codes to ensure compliance with specific requirements and regulations.
2. Grounding electrode conductor: Locate the grounding electrode conductor (GEC) in the main electrical panel. This conductor is typically a thick copper wire that connects to the grounding system, which includes grounding rods and metal water pipes. Ensure that the GEC is securely attached to the grounding system in the main panel.
3. Grounding bar installation: In the subpanel, install a separate grounding bar if it is not already included. This bar provides a place to connect the grounding wires from the various circuits. Secure the grounding bar to the subpanel according to the manufacturer’s instructions.
4. Install grounding wires: Connect the grounding wires from each circuit to the grounding bar in the subpanel. Strip the insulation from the ends of the wires and insert them into the appropriate grounding terminals on the grounding bar. Ensure that the connections are tight and secure.
5. Grounding electrode system: If required by local codes, install a grounding electrode system for the subpanel. This typically involves driving grounding rods into the ground near the subpanel and connecting them to the grounding bar using copper grounding wire. Follow local codes for the number of grounding rods required and their proper installation.
6. Bonding the subpanel: Bond the subpanel to the main panel by connecting a bonding jumper wire between the neutral bar and the grounding bar in the subpanel. Ensure that the bonding jumper is properly sized and securely connected to both the neutral and grounding bars.
7. Test and verify: Once the grounding system is installed, conduct a grounding system test using a ground resistance tester or ohmmeter to ensure that the resistance is within acceptable limits. Verify that all connections are secure and that there are no loose or damaged wires.
Properly connecting the grounding system is crucial for electrical safety and code compliance. If you are uncertain about any aspect of the grounding process, consult a licensed electrician or local authorities for guidance.
With the grounding system properly connected, you are ready to proceed to the next step of restoring power and testing the subpanel.
Read more: How To Install Ceiling Electrical Box
Step 9: Restore power and test the subpanel
After completing the installation of the electrical subpanel and ensuring all connections are secure, it’s time to restore power and perform testing to ensure everything is functioning properly. Follow these steps to restore power and test the subpanel:
1. Double-check all connections: Before restoring power, double-check all connections within the subpanel to ensure that they are secure and properly tightened. Inspect all circuit breakers, wires, and grounding connections for any signs of damage or loose connections.
2. Reinstall the main panel cover: If you removed the main panel cover during the installation process, ensure it is reinstalled securely. This protects the internal components of the main panel.
3. Turn on the main service disconnect: Carefully switch the main service disconnect in the main panel to the “ON” position or flip the main circuit breaker to the “ON” position. This restores power to your home or building.
4. Inspect the subpanel: With power restored, visually inspect the subpanel for any signs of abnormal behavior, such as flickering lights or buzzing noises. Check for any loose connections or overheating components. If you notice any issues, turn off the power immediately and consult a licensed electrician.
5. Test the functionality of the subpanel: Go through each circuit in the subpanel and test its functionality. Flip the circuit breakers to the “ON” position and verify that the corresponding outlets, switches, or appliances are receiving power. Check for proper voltage and make sure everything is operating as expected.
6. Test the circuit breakers: To ensure the circuit breakers are functioning correctly, perform a test by intentionally overloading each circuit. Use caution and avoid exceeding the capacity of the breakers. Observe if the circuit breaker trips as intended when overloaded and cuts off power to the respective circuit. Reset the breaker once the overload is removed.
7. Conduct a comprehensive system test: Test all circuits individually and simultaneously to ensure that the subpanel can handle the electrical load without any issues. Monitor for any abnormal behavior, such as voltage fluctuations or tripped breakers.
8. Label the circuits: As you test each circuit, make note of its purpose or the area it corresponds to. Label each circuit breaker and its respective outlet, switch, or appliance. This improves future identification and troubleshooting if any issues arise.
9. Perform regular maintenance: After completing the initial testing, establish a schedule for routine maintenance of the subpanel. This includes regular inspections, tightening of connections, and addressing any potential issues or concerns.
By carefully restoring power and testing the subpanel, you can ensure the safe and efficient operation of your electrical system. If you encounter any problems or have concerns during the testing process, it is advisable to consult a licensed electrician for assistance.
With the subpanel successfully tested, we are now ready for the final step – obtaining the final inspection and approval.
Step 10: Obtain final inspection and approval
After completing the installation and testing of your electrical subpanel, it is essential to obtain a final inspection and approval from the appropriate authorities. This step ensures that your installation meets all the necessary safety and code requirements. Follow these steps to obtain the final inspection and approval:
1. Research inspection requirements: Familiarize yourself with the inspection requirements specific to your area. Contact your local building department or relevant authority to obtain information about the inspection process, required documentation, and any fees associated with the inspection.
2. Gather required documentation: Collect all the necessary documents related to your subpanel installation, such as permits, electrical diagrams, manufacturer’s specifications, and any other required paperwork. Ensure that these documents are readily accessible for the inspection.
3. Schedule the inspection: Contact your local building department or relevant authority to schedule the final inspection. Provide them with details regarding the subpanel installation and any relevant permit numbers, if applicable. Schedule the inspection for a time that is convenient for both you and the inspector.
4. Prepare for the inspection: Before the scheduled inspection, conduct a thorough inspection of your subpanel installation to identify any potential issues or areas that may not meet the code requirements. Rectify any problems found during this pre-inspection to ensure a smooth final inspection process.
5. Be present for the inspection: On the day of the inspection, be present and available to accompany the inspector during the evaluation. Provide access to the subpanel and any necessary documentation or information they may require. Answer any questions they may have regarding the installation.
6. Address any deficiencies: If the inspector identifies any deficiencies or areas that do not meet the code requirements, take note of these issues. Discuss with the inspector their recommendations and guidelines for rectifying the problems. Make the necessary adjustments or repairs as advised.
7. Obtain approval and documentation: Upon successful completion of the inspection, the inspector will provide you with their approval, either on-site or in the form of written documentation. Make sure to retain a copy of this documentation as proof of compliance with the electrical codes and regulations.
8. Make any necessary corrections: In the event that the inspector identifies any deficiencies during the inspection, promptly address and rectify them according to the inspector’s recommendations. Schedule a re-inspection, if required, to ensure compliance with the codes.
Obtaining the final inspection and approval is a crucial step in ensuring that your electrical subpanel installation meets all safety standards and legal requirements. It provides you with the assurance that your electrical system is safely and correctly installed. Once you have received the final approval, you can enjoy the benefits of the expanded electrical capacity and enhanced functionality provided by your subpanel.
With the completion of the final inspection and approval, it concludes the installation process of your electrical subpanel. Remember, if you are unsure about any aspect of the installation, it is always recommended to consult a licensed electrician to ensure the work is done safely and correctly.
Conclusion
Installing an electrical subpanel is a significant undertaking that can greatly enhance the functionality and capacity of your electrical system. With the right knowledge and guidance, you can successfully complete this project and enjoy the benefits of additional circuits and improved electrical distribution. Throughout this comprehensive guide, we have covered the step-by-step process of installing an electrical subpanel, ensuring your safety, compliance with local electrical codes, and a successful outcome.
From gathering the necessary tools and materials to checking local electrical codes and obtaining the required permits, each step is important in creating a safe and efficient electrical subpanel installation. Selecting an appropriate location for the subpanel ensures easy access and proper ventilation, while shutting off the main power supply is crucial for working safely. Mounting the subpanel securely and installing the main feeder wires establishes the connection between the main panel and the subpanel.
Connecting the circuit breakers and wires, as well as the grounding system, ensures reliable power distribution and protects against electrical faults. Restoring power and testing the subpanel verifies its functionality, while obtaining the final inspection and approval ensures compliance with codes and regulations. Each step is vital in creating a robust and reliable electrical subpanel installation.
Throughout this process, it is important to prioritize safety and consult local electrical codes and regulations. If you ever feel unsure or uncomfortable with any aspect of the installation, do not hesitate to consult a licensed electrician for assistance.
By following the step-by-step instructions in this guide and ensuring that all connections and installations are completed with precision, you can confidently install an electrical subpanel and enjoy the benefits it provides. Remember to conduct regular maintenance and inspections to keep your subpanel in optimal condition.
With your new electrical subpanel installed, you can now have the power and flexibility to meet your ever-growing electrical needs without overloading your existing circuits. Enjoy the convenience and peace of mind that comes with a well-designed and properly installed subpanel.
Frequently Asked Questions about How To Install An Electrical Subpanel
Was this page helpful?
At Storables.com, we guarantee accurate and reliable information. Our content, validated by Expert Board Contributors, is crafted following stringent Editorial Policies. We're committed to providing you with well-researched, expert-backed insights for all your informational needs.






0 thoughts on “How To Install An Electrical Subpanel”