Articles
How To Install Engineered Hardwood Floor
Modified: August 24, 2024
Learn how to install engineered hardwood floor with our step-by-step articles. From preparation to finishing touches, we've got you covered.
(Many of the links in this article redirect to a specific reviewed product. Your purchase of these products through affiliate links helps to generate commission for Storables.com, at no extra cost. Learn more)
Introduction
Installing engineered hardwood flooring can transform the look and feel of any space. It adds warmth, elegance, and value to your home or office. Whether you’re replacing old flooring or starting a renovation project from scratch, installing engineered hardwood can be a rewarding and fulfilling experience.
Engineered hardwood flooring is made up of multiple layers of wood pressed together, with a top layer of hardwood veneer. This construction creates a durable and stable material that is resistant to moisture and temperature fluctuations, making it suitable for installation in various areas of your home, including kitchens and basements.
In this article, we will guide you through the step-by-step process of installing engineered hardwood flooring. From preparing the subfloor to the final finishing touches, we will cover all the necessary steps and techniques to ensure a successful and long-lasting installation.
Before we dive into the installation process, let’s take a look at the tools and materials you will need to have on hand.
Key Takeaways:
- Transform your space with engineered hardwood flooring by following precise installation steps, acclimating the flooring, and considering key factors for a professional and long-lasting result.
- Achieve a stunning and durable engineered hardwood floor by meticulously preparing the subfloor, choosing the right installation method, and paying attention to detail throughout the process.
Read more: How To Install Hardwood Floors
Tools and Materials Needed
Before you begin installing engineered hardwood flooring, it’s important to gather all the necessary tools and materials. Here’s a list of what you’ll need:
- Engineered hardwood flooring
- Underlayment (if required)
- Moisture barrier (if required)
- Hammer or flooring nailer
- Flooring stapler
- Tape measure
- Pry bar
- Saw (circular or miter)
- Chalk line
- Pencil
- Safety goggles
- Knee pads
- Ear protection
- Square
- Utility knife
- Respirator mask
- Adhesive (if using glue-down method)
- Laminate flooring spacers
- Level
- Sanding equipment
- Finishing nails
- Wood putty
- Finishing nails
- Touch-up paint
- Stain or sealant (if desired)
Make sure you have all of these tools and materials ready before you begin the installation process. Having everything on hand will help you work efficiently and ensure a smooth installation.
Preparation Steps
Before you start installing engineered hardwood flooring, it’s essential to properly prepare the area to ensure a successful installation. Follow these preparation steps:
- Clean the space: Clear the installation area of any furniture, rugs, or debris. Sweep or vacuum the floor to remove dust and dirt.
- Check the subfloor: Inspect the subfloor for any damage or unevenness. Repair any cracks, holes, or uneven areas before proceeding.
- Measure the room: Measure the length and width of the room to calculate how much flooring you’ll need. It’s a good idea to purchase an extra 10% of flooring to account for any mistakes or future repairs.
- Acclimate the flooring: It’s essential to let the engineered hardwood flooring acclimate to the room temperature and humidity. Place the boxes of flooring in the room for at least 48 hours before installation.
- Test moisture levels: Use a moisture meter to test the moisture levels of both the subfloor and the engineered hardwood flooring. Ensure that the moisture content is within the recommended range specified by the manufacturer.
- Prepare the tools: Gather all the necessary tools and materials needed for the installation. Make sure they are in good working condition and easily accessible.
- Read the manufacturer’s instructions: Carefully read and familiarize yourself with the installation instructions provided by the manufacturer. Each flooring product may have specific requirements and guidelines.
By taking the time to prepare the space and gather the necessary tools and materials, you’ll set yourself up for a smoother and more efficient installation process. Proper preparation is key to achieving professional-looking results.
Acclimation of Flooring
One crucial step in the installation process of engineered hardwood flooring is allowing the flooring to acclimate to the environment where it will be installed. Acclimation refers to the process of letting the flooring adjust to the temperature and humidity conditions of its surroundings. This step is important for ensuring the long-term stability and performance of the flooring.
Here are the steps to properly acclimate your engineered hardwood flooring:
- Unpack the flooring: Remove the engineered hardwood flooring from its packaging and lay the planks flat in the room where they will be installed. Make sure to leave enough space between the planks for air circulation.
- Keep the room conditions stable: The room where the flooring is acclimating should have a consistent temperature and humidity level. Keep the room at normal living conditions by maintaining a temperature range of 60-80°F (15-27°C) and a humidity level of 40-60%.
- Allow sufficient acclimation time: The recommended acclimation period can vary depending on the flooring manufacturer and environmental conditions. Typically, the flooring should acclimate for a minimum of 48 hours, but it’s best to follow the manufacturer’s specific instructions.
- Monitor moisture levels: During the acclimation period, it’s important to monitor the moisture levels of both the flooring and the subfloor. Use a moisture meter to ensure that they are within the acceptable range specified by the manufacturer. If the moisture levels are outside the recommended range, adjustments may need to be made before proceeding with the installation.
- Keep the flooring dry: Avoid exposing the flooring to excessive moisture or extreme temperature variations during the acclimation process. This could negatively impact the stability and performance of the flooring.
Acclimating the flooring allows it to adjust to the moisture content and temperature of the installation environment, minimizing the chances of expansion, contraction, and other issues that may arise later on. Taking the time to properly acclimate the flooring will help ensure a successful and long-lasting installation.
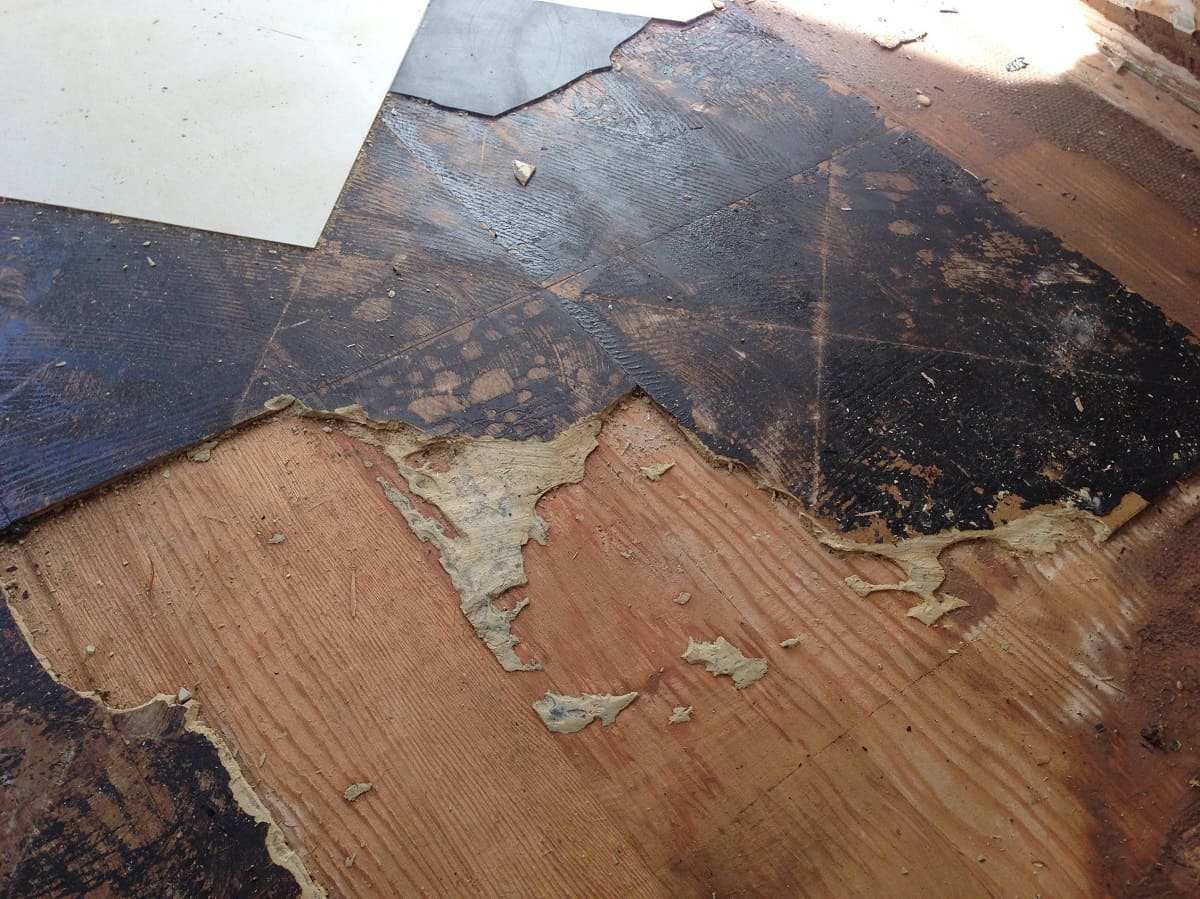
Subfloor Preparation
Proper preparation of the subfloor is crucial to achieving a smooth and durable installation of engineered hardwood flooring. The subfloor is the existing surface on which the new flooring will be installed. Follow these steps to ensure the subfloor is ready:
- Clean the subfloor: Remove any debris, dust, or adhesive residue from the subfloor. A clean surface will provide better adhesion and a more even installation.
- Check for flatness: Use a straightedge or level to check for any significant deviations or unevenness in the subfloor. If necessary, use a floor leveling compound to fill in low spots and smooth out any high spots.
- Repair any damage: Inspect the subfloor for any cracks, holes, or other damage. Repair these issues using suitable materials, such as patching compound or plywood, to ensure a stable and solid subfloor.
- Address moisture concerns: If moisture is a concern, particularly in areas like basements or bathrooms, it’s important to address this before installing the engineered hardwood flooring. Consider using a moisture barrier or underlayment with moisture protection properties to prevent moisture damage.
- Remove baseboards and trim: Remove any baseboards, trim, or molding along the edges of the room. This will allow for a cleaner and more professional installation.
- Ensure subfloor stability: The subfloor should be securely attached and free from any movement or squeaks. Fix loose subfloor panels with screws or nails to ensure stability.
- Check for squeaks: Walk over the subfloor to identify any squeaky areas. Apply screws or nails through the subfloor into the joists to secure and eliminate squeaks.
Taking the time to properly prepare the subfloor will create a solid foundation for the engineered hardwood flooring and help prevent issues such as unevenness, movement, or damage in the future. This step is essential for achieving a professional-looking and long-lasting installation.
Read more: DIY Guide To Installing Hardwood Floors
Underlayment Installation
Underlayment is a layer of material that is installed between the subfloor and the engineered hardwood flooring. It provides several benefits, including sound absorption, moisture protection, and a smoother surface for the flooring installation. While not always required, underlayment can enhance the performance and longevity of your engineered hardwood flooring. Here’s how to install underlayment:
- Select the appropriate underlayment: Choose an underlayment that is suitable for your specific flooring type and installation requirements. There are various types available, such as foam, cork, or combination underlayment.
- Clean and prepare the subfloor: Ensure that the subfloor is clean, dry, and free from debris before installing the underlayment. This will provide a smooth surface and proper adhesion.
- Roll out the underlayment: Start at one end of the room and roll out the underlayment across the entire installation area. Trim it to fit using a utility knife.
- Overlap and tape the seams: If the underlayment comes in sheets or rolls, overlap the edges by a few inches and secure them together using underlayment tape. This will prevent moisture and air pockets from forming.
- Install the next row: Continue rolling out and overlapping the underlayment in rows until the entire installation area is covered. Trim the final row to fit if necessary.
- Secure the underlayment: Use staples or adhesive recommended by the underlayment manufacturer to secure it to the subfloor. Follow the manufacturer’s instructions for proper installation techniques.
- Ensure a smooth and even surface: Walk over the underlayment to check for any bubbles or uneven areas. Smooth out any imperfections before proceeding with the flooring installation.
Installing underlayment is optional, but it can provide additional benefits and enhance the overall performance of your engineered hardwood flooring. Be sure to check the manufacturer’s recommendations for the specific underlayment material you choose to ensure compatibility with your flooring. Taking the time to properly install underlayment can contribute to a more comfortable, durable, and quiet floor.
Layout Planning
Before you begin installing the engineered hardwood flooring, it’s important to plan the layout of the planks for a visually pleasing and balanced result. Proper layout planning ensures that the flooring is installed correctly and minimizes waste. Follow these steps for effective layout planning:
- Inspect the space: Take note of any architectural features, such as doorways, closets, or columns, that may affect the layout. Consider the direction of natural light and any focal points in the room.
- Determine the starting point: It’s best to start the installation from a straight wall, preferably the longest wall in the room. This will create a more consistent and visually appealing look.
- Measure and mark the starting point: Measure the width of the room and divide it by the width of a full plank. If the remainder is smaller than half the width of a plank, cut the first row of planks accordingly to ensure a balanced and symmetrical layout.
- Create a reference line: Use a chalk line or other straight edge to create a reference line along the starting wall. This line will guide the installation and ensure a straight row of planks.
- Dry-fit the planks: Place the first row of planks along the reference line without securing them. This allows you to visualize how the layout will look and make any necessary adjustments before permanently installing the flooring.
- Consider orientation: Decide on the orientation of the planks – whether you want them laid parallel or perpendicular to the longest wall in the room. In general, laying the planks parallel to the longest wall creates a more spacious and visually appealing effect.
- Plan for doorways and transitions: Determine how you will handle doorways, transitions, and any areas where the flooring meets another type of floor covering. Proper planning ensures a seamless and cohesive transition between different flooring materials.
- Account for expansion gaps: Keep in mind that engineered hardwood flooring requires an expansion gap along the perimeter of the installation area. Plan for these gaps by using spacers or other suitable methods.
- Consider the layout pattern: If your flooring has a pattern, such as herringbone or chevron, plan the layout to showcase the pattern correctly and ensure a visually appealing result.
By investing time in layout planning, you can achieve a well-balanced and visually striking installation of engineered hardwood flooring. Taking the necessary steps to plan the layout will help ensure a smooth installation process and a beautiful end result.
First Row Installation
The first row of engineered hardwood flooring sets the foundation for the rest of the installation. It’s crucial to ensure that the first row is properly aligned and securely installed. Follow these steps for a successful first row installation:
- Prepare the first plank: Measure and cut the first plank to fit the starting wall, leaving a small gap for expansion. If needed, use a table saw or miter saw to make precise cuts.
- Apply adhesive (if using glue-down method): If you’re using the glue-down method, apply a recommended adhesive to the back of the first plank. Follow the adhesive manufacturer’s instructions for proper application.
- Place the first plank: Align the cut side of the first plank with the reference line created during layout planning. Press it firmly against the starting wall, ensuring that it is level and aligned.
- Secure the first plank: If you’re using the nail or staple method, use a flooring nailer or stapler to secure the first plank to the subfloor. Place the nails or staples near the edges of the plank, where they will be covered by the baseboards or trim.
- Continue with additional planks: Lay the next plank alongside the first, using the tongue-and-groove system to secure them together. Tap the planks gently with a mallet or rubber mallet to ensure a tight fit.
- Check for alignment: As you install the first row, regularly check for alignment by using a level or straight edge. This will help ensure that the planks are straight and properly aligned with the reference line.
- Trim the last plank: When you reach the end of the row, measure and cut the last plank to fit. Remember to leave a small gap for expansion.
- Secure the last plank: Secure the last plank to the subfloor using the appropriate method, whether it be nailing, stapling, or gluing, depending on the installation method you have chosen.
By following these steps, you will successfully install the first row of engineered hardwood flooring. Taking the time to ensure proper alignment and secure installation will set the stage for the remaining rows, resulting in a professional and polished finished product.
Before installing engineered hardwood flooring, make sure the subfloor is clean, level, and dry. Use an underlayment to reduce noise and protect the floor from moisture. Follow the manufacturer’s instructions for installation.
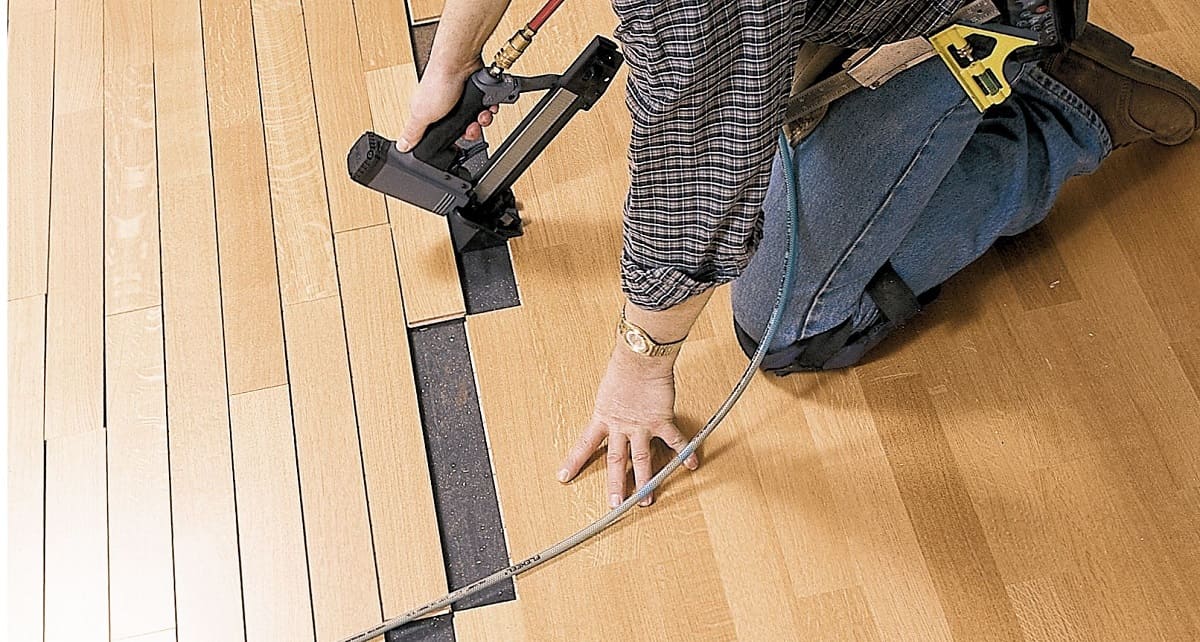
Nailing or Stapling the Flooring
Nailing or stapling is a common method used to secure engineered hardwood flooring to the subfloor. This method provides a strong and reliable connection between the flooring and the subfloor. Follow these steps for a successful nailing or stapling installation:
- Prepare the tools: Make sure you have a flooring nailer or stapler specifically designed for engineered hardwood flooring. Check that the nails or staples are the appropriate length for your flooring thickness.
- Position the nailer or stapler: Position the nailer or stapler at a 45-degree angle, about 1 inch from the edge of the plank, near the tongue side. Make sure the nail or staple will penetrate the tongue and attach the plank securely to the subfloor.
- Secure the flooring: Use the nailer or stapler to drive the nail or staple into the subfloor with a single strike. Ensure that the plank is firmly attached and flush with the subfloor.
- Continue with the next rows: Lay the next row of planks alongside the previous row, using the tongue-and-groove system to connect them. Repeat the nailing or stapling process for each plank, ensuring a tight and secure fit.
- Space the nails or staples: Space the nails or staples at regular intervals, following the manufacturer’s guidelines or recommendations. This will provide adequate support and prevent the planks from shifting.
- Trim the final row: When you reach the final row, measure and cut the planks to fit. Use a pry bar or pull bar to help guide and push the planks into place. Secure the last row with nails or staples as well.
- Inspect and adjust: After nailing or stapling the flooring, inspect the installation for any loose planks or gaps. If necessary, use a pry bar and rubber mallet to adjust and tighten the planks.
It’s important to note that you may need to adjust the air pressure on the nailer or stapler based on the hardness of the flooring material. Consult the manufacturer’s instructions and guidelines for the proper air pressure setting.
By following these steps, you can successfully nail or staple your engineered hardwood flooring, ensuring a secure and durable installation. Proper nailing or stapling provides a strong connection between the flooring and the subfloor, resulting in a long-lasting and sturdy floor.
Glue-Down Method
The glue-down method is an alternative installation technique for engineered hardwood flooring that provides a strong and permanent bond between the flooring and the subfloor. This method is especially suitable for concrete or plywood subfloors. Follow these steps for a successful glue-down installation:
- Prepare the adhesive: Purchase a high-quality adhesive that is specifically designed for engineered hardwood flooring. Follow the manufacturer’s instructions for preparing and applying the adhesive.
- Clean the subfloor: Ensure that the subfloor is clean, dry, and free from any debris or imperfections. Sweep or vacuum the surface to remove dust and dirt.
- Apply the adhesive: Using a trowel or recommended adhesive applicator, spread the adhesive evenly on the subfloor in small sections. Work in manageable areas to ensure that the adhesive does not dry before installing the planks.
- Place the first plank: Carefully align and press the first plank onto the adhesive, starting from the reference line or starting wall. Use a slight twisting motion to ensure proper adhesion and full coverage of the adhesive.
- Continue with additional planks: Install the next plank alongside the first, connecting them using the tongue-and-groove system. Slide the planks firmly together, ensuring a snug fit.
- Remove excess adhesive: Immediately wipe off any excess adhesive that squeezes out between the planks using a damp cloth or recommended adhesive cleaner. Do this before the adhesive dries to avoid leaving a residue on the flooring surface.
- Repeat the process: Continue applying adhesive and installing planks row by row until the entire installation area is covered. Trim the last row of planks as needed to fit the space.
- Allow for curing time: After completing the glue-down installation, allow the adhesive to cure according to the manufacturer’s instructions. This typically takes at least 24-48 hours before the floor can be lightly walked on.
It’s important to follow the manufacturer’s instructions and recommendations regarding the specific adhesive type, application techniques, and curing time. Additionally, be cautious with cleaning products to avoid damaging the flooring or compromising the adhesive bond.
The glue-down method provides a secure and long-lasting installation of engineered hardwood flooring. When properly executed, this method creates a seamless and stable floor that withstands daily use and maintains its integrity for years to come.
Floating Installation Method
The floating installation method is a popular technique for installing engineered hardwood flooring. Unlike the glue-down or nail-down methods, the floating method does not require the planks to be attached to the subfloor. Instead, the planks are secured to each other, creating a “floating” floor that rests on top of an underlayment. Follow these steps to successfully install engineered hardwood flooring using the floating method:
- Prepare the subfloor: Ensure that the subfloor is clean, dry, and level. Remove any debris or imperfections and address any necessary repairs.
- Install the underlayment: Lay the underlayment over the subfloor according to the manufacturer’s instructions. Typically, underlayment for floating installations comes in rolls and needs to be trimmed to fit the room’s dimensions.
- Begin the first row: Start by laying the first row of planks along the starting wall, leaving a small expansion gap between the planks and the wall. Use spacers to maintain a consistent gap.
- Connect the planks: Install the planks by connecting the tongue-and-groove joints, using a slight angle and a tapping block to secure them together. Continue with subsequent planks, fitting the short ends tightly against each other to create a seamless look.
- Stagger the planks: Stagger the end joints of the planks in each row to create an overall visually appealing pattern. This also adds stability to the floating floor. Follow the manufacturer’s recommendations for staggering, usually requiring a minimum distance between end joints.
- Trim the last row: Measure and cut the last row of planks to fit. Remember to leave the necessary expansion gap between the planks and the wall. A table saw or miter saw can be used to make precise cuts.
- Continue with additional rows: Install the subsequent rows of planks in the same manner, ensuring a snug fit and tight connections. Use a tapping block and rubber mallet to gently tap the planks together.
- Remove spacers: Once the entire floor is installed, remove the spacers. These were used to create the required expansion gaps during installation.
- Add baseboards and trim: Install baseboards or trim along the walls to cover the expansion gaps and provide a finished look to the floating floor installation.
The floating installation method offers several advantages, including ease of installation, reduced installation time, and the ability to install over various subfloor types. However, it’s important to note that proper acclimation, use of an appropriate underlayment, and following manufacturer guidelines are still essential for a successful floating floor installation.
By carefully following these steps, you can achieve a beautiful and durable floating floor with your engineered hardwood flooring.
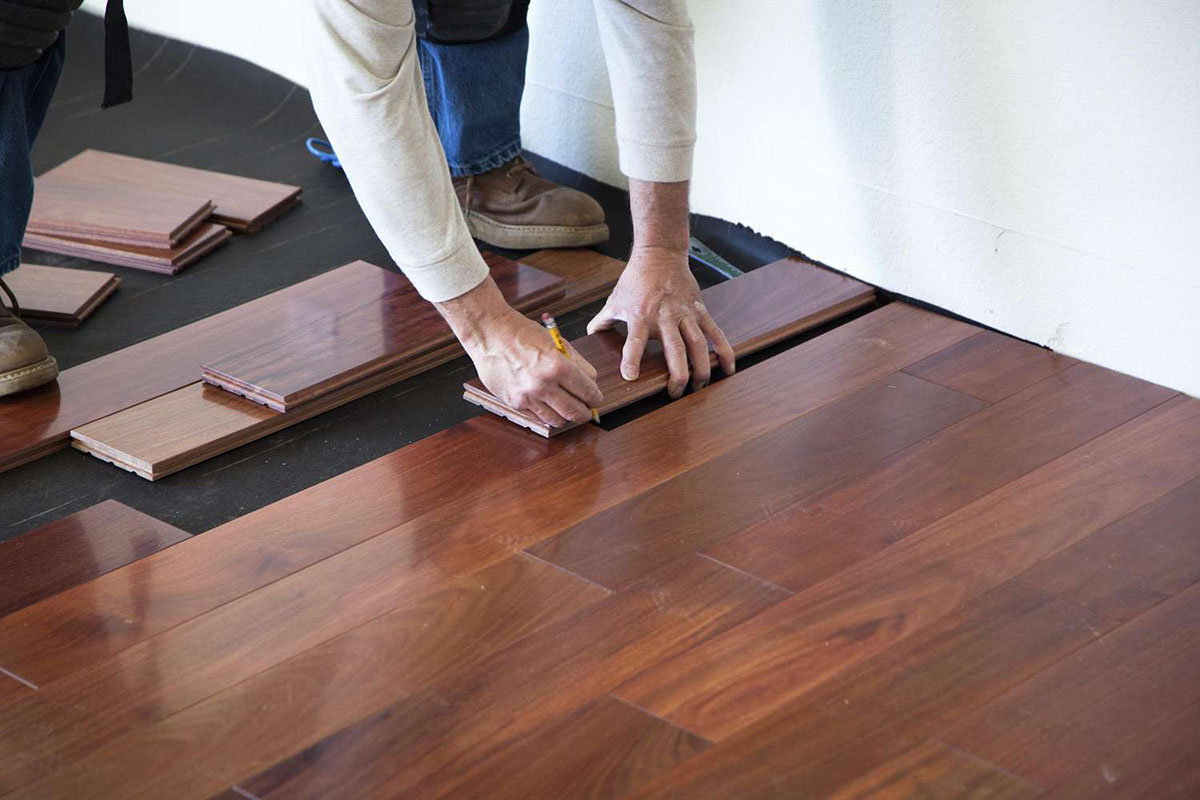
Installation of Final Rows
As you near the completion of your engineered hardwood flooring installation, it’s crucial to pay attention to the final rows. Properly installing these rows ensures a seamless and professional finish. Follow these steps to successfully install the final rows:
- Measure and trim: Measure the width of the space where the final row will be installed. Cut the planks to fit, leaving a small expansion gap between the planks and the wall.
- Insert the final row: Carefully insert the trimmed planks into place, aligning them with the previous row. Use a pull bar or tapping block, along with a rubber mallet, to gently tap the planks into position.
- Ensure a tight fit: Ensure that the final row fits snugly against the previous row. Use a pry bar or pull bar to help align and secure the planks if necessary. Avoid forcing the planks, as this can cause damage.
- Trim the last plank: Measure and cut the last plank in the final row to fit the remaining space. Use a pull bar or tapping block to position it correctly.
- Check for gaps and alignment: Once the final rows are installed, thoroughly inspect the entire flooring for any visible gaps or misalignment. Gaps can be filled with wood putty or other suitable fillers, while misaligned planks can be gently adjusted using a pry bar or tapping block.
- Clean up: Remove any excess adhesive, debris, or remaining spacers from the installation area. A vacuum cleaner or damp cloth can be used to ensure a clean and presentable result.
- Replace baseboards and trim: Reinstall or install new baseboards and trim along the walls to cover the expansion gaps and provide a finished look to the flooring installation.
- Allow for acclimation and settling: After completing the installation, allow the flooring to acclimate and settle for a few days before moving furniture or heavy objects onto the floor. This allows the planks to adapt and ensures a stable and durable installation.
It’s crucial to pay attention to the details during the installation of the final rows to maintain the overall quality and appearance of your engineered hardwood flooring. Taking the time to accurately measure, trim, and align the planks will result in a stunning and flawless finished look.
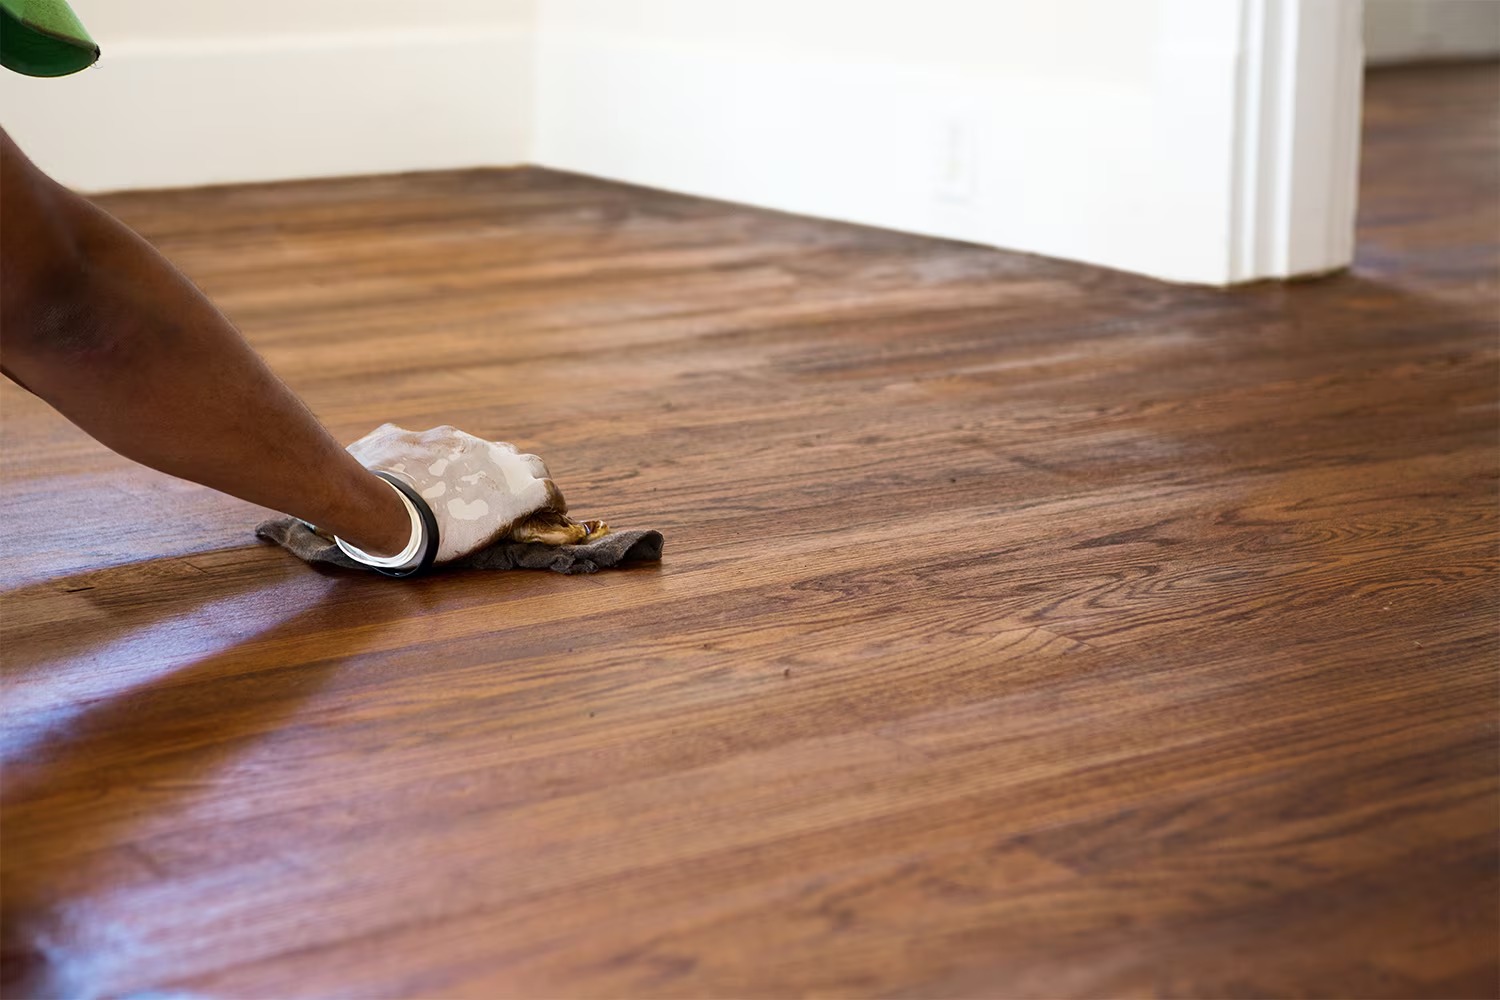
Trimming and Finishing
Trimming and finishing are the final steps in the installation process of engineered hardwood flooring. These steps help to create a polished and professional look, ensuring that your flooring enhances the overall aesthetic of the space. Follow these steps to effectively trim and finish your flooring:
- Trim excess length: Use a table saw or miter saw to trim any excess length from the planks along the walls. This will create a clean and refined edge.
- Add transition pieces: Install transition pieces, such as thresholds, T-moldings, or reducers, to provide a smooth transition between different flooring types or between rooms.
- Install baseboards and trim: Install or reinstall baseboards and trim along the walls to cover the expansion gaps and create a finished look. Use a nail gun or finishing nails to secure the trim in place.
- Fill nail or staple holes: If you used the nailing or stapling method, fill the nail or staple holes with wood putty that matches the color of the engineered hardwood flooring. Smooth the putty with a putty knife and allow it to dry before sanding.
- Sand and buff: Sand the entire floor surface lightly with a buffer or sanding machine to remove any imperfections or rough edges. Use a fine-grit sandpaper to achieve a smooth and even finish.
- Clean the floor: Thoroughly clean the floor to remove any dust or debris from the sanding process. Vacuum or sweep the entire area and use a damp cloth or mop to wipe away any remaining residue.
- Apply the finish: Choose the appropriate finish for your engineered hardwood flooring, whether it’s a polyurethane, oil-based, or water-based finish. Follow the manufacturer’s instructions for application, using a brush or lambswool applicator. Apply thin, even coats, allowing each coat to dry before applying the next.
- Final touches: Once the finish has dried, remove any protective coverings from the baseboards and trim. Replace any furniture or accessories that were temporarily moved during the installation process.
Trimming and finishing are essential steps in achieving a professional and visually appealing result with your engineered hardwood flooring. Taking the time to carefully trim, fill, sand, and apply the finish will enhance the durability and beauty of your flooring for years to come.
Tips and Considerations
Installing engineered hardwood flooring can be a rewarding and transformative project for your space. To ensure a successful installation and a beautiful end result, consider the following tips and important factors:
- Read and follow manufacturer instructions: Each flooring product may have specific installation requirements and recommendations. Read and follow the manufacturer’s instructions carefully to ensure a proper installation.
- Acclimate the flooring: Allow the flooring to acclimate to the installation environment by storing it in the room for at least 48 hours. This helps prevent issues related to expansion or contraction after installation.
- Moisture testing: Test the moisture levels of both the subfloor and the engineered hardwood flooring to ensure they are within the recommended range. Excessive moisture can lead to warping or other damage over time.
- Protective measures: Take precautions to protect the flooring during the installation process. Use furniture sliders or boards to avoid dragging heavy items on the flooring, and use felt pads on the feet of furniture to prevent scratches.
- Proper tools and techniques: Use the appropriate tools and techniques for the chosen installation method. Whether nailing, stapling, gluing, or floating, ensure you have the correct tools and follow the recommended techniques for a successful installation.
- Keep expansion and contraction in mind: Engineered hardwood flooring requires an expansion gap to accommodate normal fluctuations in temperature and humidity. Use spacers and follow guidelines to ensure adequate spacing around the perimeter of the floor.
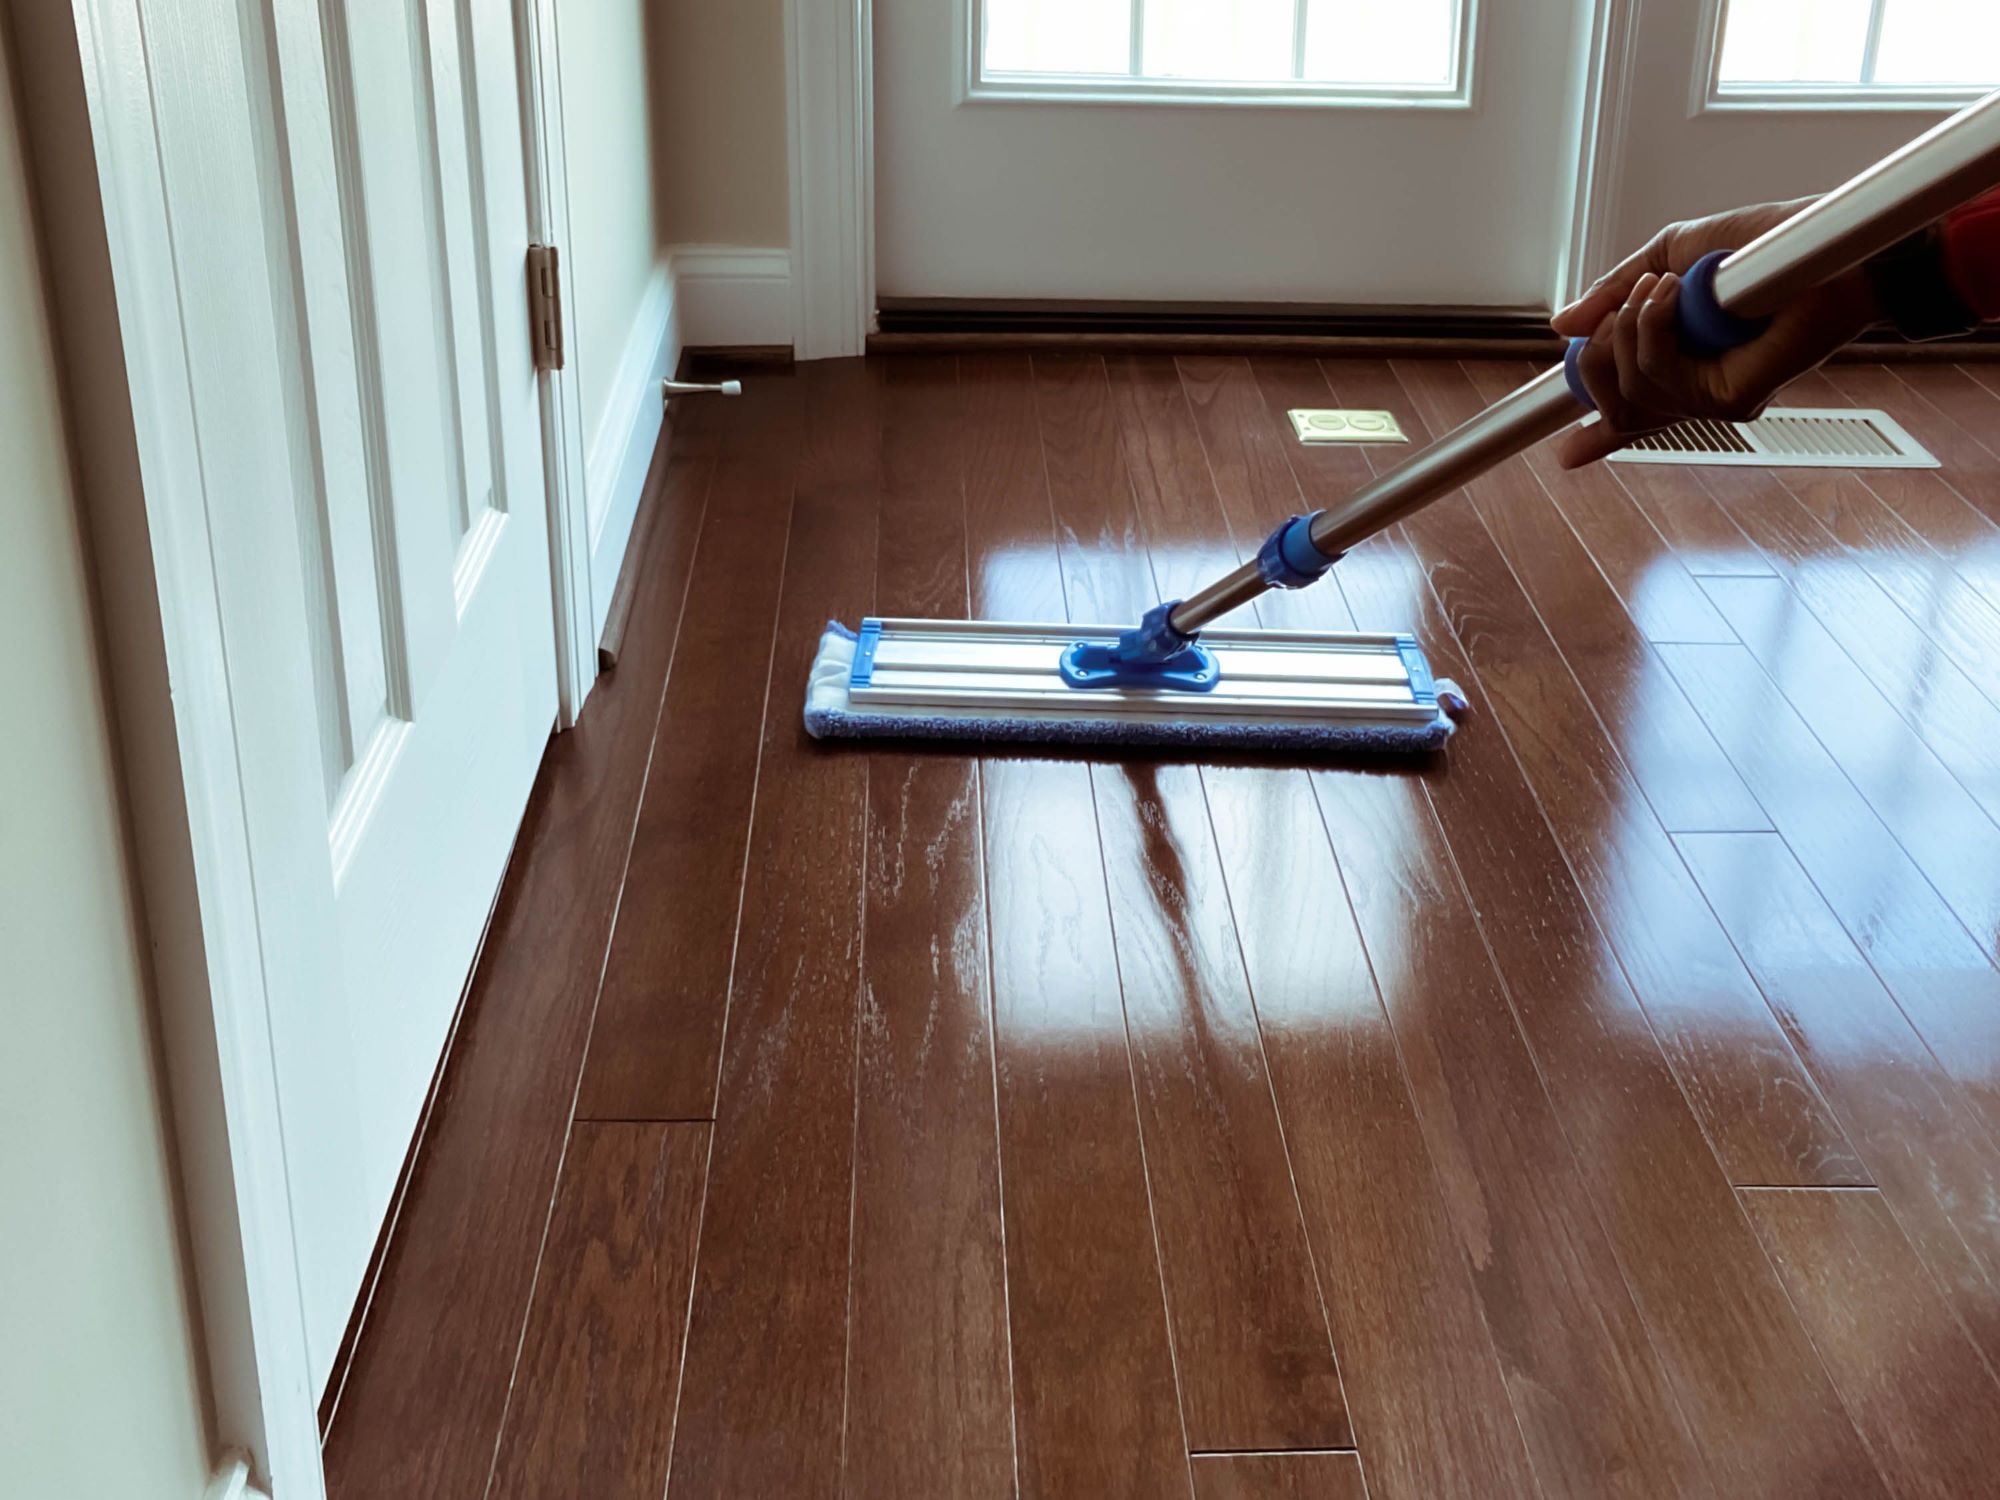
- Regular maintenance: Take care of your engineered hardwood flooring by implementing regular maintenance practices. This includes sweeping or vacuuming regularly to remove debris and using recommended cleaning products suitable for the flooring type.
- Protect from direct sunlight: Direct sunlight can cause fading and discoloration of the flooring over time. Consider using window coverings or applying protective films to windows to prevent excessive exposure.
- Consider professional installation: If you’re unsure about your DIY skills or have a large and complicated installation project, it may be worth hiring a professional installer. They have the expertise and tools to ensure a flawless and efficient installation.
By keeping these tips and considerations in mind, you’ll be well-prepared to install engineered hardwood flooring successfully. Remember to plan thoroughly, follow instructions carefully, and take the necessary precautions to achieve a stunning and long-lasting result.
Conclusion
Installing engineered hardwood flooring can be a transformative project that enhances the beauty and value of your space. By following the proper steps and considering key factors, you can achieve a professional and long-lasting installation. From preparation and layout planning to the final touches, attention to detail is essential in ensuring a successful outcome.
Start by gathering all the necessary tools and materials and preparing the subfloor. Take the time to acclimate the flooring to the installation environment, ensuring stability and preventing future issues. Choose the appropriate installation method, whether nailing, stapling, gluing, or floating, that suits your specific needs and preferences.
Throughout the installation process, maintain precision and accuracy. Properly align the planks, secure them securely, and pay attention to spacing and expansion gaps. Trim and finish the flooring carefully, creating refined edges and achieving a polished look.
Remember, reading and following the manufacturer’s instructions is crucial. Each flooring product may have specific requirements and recommendations that need to be followed for optimal installation.
Taking proper care of your engineered hardwood flooring after installation is equally important. Implement regular maintenance practices and protect the flooring from excessive sunlight and moisture to preserve its beauty and longevity.
If in doubt or for more complex projects, consider consulting or hiring a professional installer who has the expertise and tools to ensure a flawless installation.
In conclusion, installing engineered hardwood flooring is an opportunity to transform your space and create a beautiful, durable, and timeless floor. By following the steps outlined in this guide, considering key factors, and paying attention to details, you can achieve stunning results that will leave you enjoying your luxurious flooring for years to come.
Frequently Asked Questions about How To Install Engineered Hardwood Floor
Was this page helpful?
At Storables.com, we guarantee accurate and reliable information. Our content, validated by Expert Board Contributors, is crafted following stringent Editorial Policies. We're committed to providing you with well-researched, expert-backed insights for all your informational needs.


0 thoughts on “How To Install Engineered Hardwood Floor”