Articles
How To Remove Carpet And Install Hardwood
Modified: October 20, 2024
Learn the step-by-step process of removing carpet and installing hardwood floors with our comprehensive articles. Upgrade your space with ease and efficiency.
(Many of the links in this article redirect to a specific reviewed product. Your purchase of these products through affiliate links helps to generate commission for Storables.com, at no extra cost. Learn more)
Introduction
Removing carpet and installing hardwood flooring can be a game-changer for any home. Not only does it give your space a fresh and modern look, but it also adds a touch of elegance and sophistication. However, the process can seem daunting, especially if you’re not familiar with the steps involved.
In this article, we will guide you through the step-by-step process of removing carpet and installing hardwood flooring. Whether you’re a seasoned DIY enthusiast or a beginner, you’ll find this guide helpful in tackling this home improvement project.
Before we dive into the detailed steps, it’s important to note that preparation is key. Make sure you have all the necessary tools and materials on hand and set aside sufficient time to complete the project. Additionally, always follow safety precautions and consult professionals if needed.
So, let’s get started on transforming your space by removing that old carpet and installing beautiful hardwood flooring.
Key Takeaways:
- Transforming your space by removing old carpet and installing hardwood flooring is a rewarding project that requires careful preparation, precision, and attention to detail. Following the step-by-step guide will ensure a successful and elegant transformation.
- Prioritizing safety, using the right tools, and seeking professional guidance when needed are crucial elements in achieving a stunning and durable hardwood flooring installation. Enjoy the process and revel in the satisfaction of a job well done!
Step 1: Gather the Necessary Tools and Materials
Before you begin removing the carpet and installing hardwood flooring, it’s crucial to gather all the essential tools and materials. Having everything you need at hand will not only save you time but also ensure a smooth and efficient process. Here’s a list of the tools and materials you’ll need:
- Safety goggles and dust mask: These will protect your eyes and lungs from dust and debris.
- Knee pads: These will provide cushioning and support for your knees during the removal process.
- Utility knife or carpet cutter: You’ll use this tool to cut and remove the carpet.
- Pry bar: A pry bar will come in handy for removing the baseboards or any other trim.
- Hammer: You’ll need a hammer to remove any nails or staples.
- Pliers: Pliers will help you grip and remove any stubborn staples or nails.
- Carpet knife or scissors: Use these to cut and remove the carpet padding.
- Crowbar or flathead screwdriver: These tools will assist in removing the tack strips.
- Vacuum cleaner: It’s important to have a vacuum cleaner to thoroughly clean the subfloor before installing the hardwood flooring.
- Measuring tape: You’ll need a measuring tape to measure and cut the hardwood flooring accurately.
- Saw (circular saw or table saw): Depending on the type of flooring you choose, you may need a saw to cut the hardwood planks to size.
- Wood putty: Wood putty is used to fill in any gaps or holes in the floor.
- Sanding equipment: If required, you’ll need sanding equipment to smooth the floor surface before applying stain or finish (optional).
- Hardwood flooring: Choose the type and style of hardwood flooring that best suits your aesthetic preferences and budget.
Make sure to gather all the necessary tools and materials before you begin the project. This way, you’ll have everything on hand when you need it, and the process will be much more efficient. Once you’ve gathered everything, you’re ready to move on to the next step: preparing the room.
Step 2: Prepare the Room
Before you start removing the carpet, it’s important to prepare the room to ensure a smooth and hassle-free process. Here are the steps to follow when preparing the room:
- Clear the room: Remove all furniture, rugs, and any other obstacles from the room. This will give you a clear space to work and prevent any damage to your belongings.
- Open windows and doors: Proper ventilation is important during the removal process to minimize dust and allow for fresh air circulation. Open windows and doors to create a draft.
- Turn off the HVAC system: To prevent dust and debris from being circulated throughout your home, switch off the heating, ventilating, and air conditioning (HVAC) system before you begin.
- Disconnect electrical outlets: For safety reasons, turn off and disconnect any electrical outlets in the room. This will prevent accidents or damage to electrical components.
- Inspect the subfloor: Take a moment to inspect the subfloor for any damages or unevenness. If you notice any issues, address them before proceeding with the installation.
- Check for moisture: Check the moisture levels in the subfloor to ensure it’s dry enough for hardwood installation. High moisture levels can cause issues with the flooring in the long run.
- Acclimate the hardwood flooring: If required, allow the hardwood flooring to acclimate to the room’s temperature and humidity levels. Follow the manufacturer’s instructions for proper acclimation.
By taking the time to properly prepare the room, you’ll create a clean and safe environment for the installation process. This will also help ensure the longevity and durability of your hardwood flooring. Once the room is prepared, you’re ready to move on to the next step: removing the carpet.
Step 3: Remove the Carpet
Now that the room is prepared, it’s time to tackle the removal of the old carpet. Follow these steps to effectively remove the carpet:
- Start at the corner: Begin at one corner of the room and use a utility knife or carpet cutter to cut through the carpet. Pull up a corner of the carpet and grip it firmly.
- Roll and fold the carpet: Roll the carpet tightly as you move along the room, folding it on top of itself as you go. This will make it easier to handle and will prevent it from unraveling.
- Remove the carpet from the room: Once the carpet is completely rolled up, carefully carry it out of the room and dispose of it properly. Roll up any underlay or padding as well.
- Inspect the subfloor: Take a moment to inspect the subfloor for any remaining carpet staples or debris. Use pliers to remove any staples or nails that may be sticking out.
- Vacuum the subfloor: Use a vacuum cleaner to remove any loose dirt, dust, or debris from the subfloor. A clean subfloor will ensure a smooth installation of the hardwood flooring.
It’s important to take your time during the carpet removal process to avoid damaging the subfloor or injuring yourself. Be cautious of any tack strips that may be present along the perimeter of the room, as they can be sharp. Once the carpet has been successfully removed and the subfloor is clean and clear, you’re ready to move on to the next step: removing the carpet padding.
Step 4: Remove the Carpet Padding
After removing the carpet, it’s time to tackle the carpet padding. The carpet padding is the cushioning layer that sits between the carpet and the subfloor. Here’s how to remove the carpet padding:
- Start at a corner: Begin at one corner of the room and peel back the carpet padding. It is usually held in place with adhesive or staples.
- Peel and fold the padding: Grasp the edge of the padding and carefully peel it back, folding it on top of itself as you go. This will make it easier to handle and dispose of.
- Remove any remaining adhesive or staples: Use a carpet knife or scissors to cut away any adhesive residue left on the subfloor. Be cautious not to damage the subfloor while doing so.
- Discard the padding: Once you have removed all the carpet padding, dispose of it properly according to your local regulations.
- Vacuum the subfloor: After removing the carpet padding, vacuum the subfloor again to ensure that it is free of any loose debris or particles.
Removing the carpet padding will provide a clean and smooth surface for the installation of the hardwood flooring. Take your time during this step to ensure that you remove all the padding and adhesive residue, as this will help prevent any issues during the installation process. With the carpet padding successfully removed, you can move on to the next step: removing the tack strips.
Step 5: Remove the Tack Strips
With the carpet and padding out of the way, it’s time to remove the tack strips. Tack strips are thin, wooden strips with sharp nails that hold the carpet in place along the edges of the room. Follow these steps to remove the tack strips:
- Put on protective gloves and safety goggles: Tack strips can have sharp nails, so it’s important to protect your hands and eyes.
- Start at a corner: Locate a loose edge of the tack strip and use a crowbar or flathead screwdriver to pry it up.
- Work your way along the room: Continue prying up the tack strip along the entire perimeter of the room, placing your tool between the strip and the subfloor.
- Use pliers to remove stubborn nails: If some nails remain in the subfloor after removing the tack strip, use pliers to pull them out. Take care not to damage the subfloor in the process.
- Dispose of the tack strips and nails: Collect the removed tack strips and nails and dispose of them properly.
Removing the tack strips is an important step in the process, as it ensures a clean and clear surface for the installation of the hardwood flooring. Be cautious when prying up the tack strips to avoid any injury. Once the tack strips are successfully removed, you can move on to the next step: removing any remaining staples or nails.
Step 6: Remove any Staples or Nails
After removing the carpet, padding, and tack strips, there may still be some staples or nails left behind in the subfloor. It’s crucial to remove these to ensure a smooth and even surface for the hardwood flooring installation. Follow these steps to remove any remaining staples or nails:
- Put on protective gloves: Protect your hands from sharp objects by wearing gloves.
- Inspect the subfloor: Visually inspect the subfloor for any staples or nails that may still be sticking out.
- Use pliers or a pry bar: Depending on the size and type of the staples or nails, use pliers or a pry bar to grip and remove them. Take your time and be careful not to damage the subfloor.
- Check for any hidden staples or nails: In some cases, there may be staples or nails that are hidden under the surface of the subfloor. Run your hand lightly over the subfloor to feel for any protrusions and remove them if necessary.
- Dispose of the staples or nails: Collect the removed staples or nails and dispose of them properly.
Removing any remaining staples or nails is essential to ensure that the subfloor is free of obstacles and provide a smooth foundation for the hardwood flooring. Take your time during this step to ensure thorough removal. Once all staples and nails have been removed and the subfloor is clean, you’re ready to move on to the next step: cleaning the subfloor.
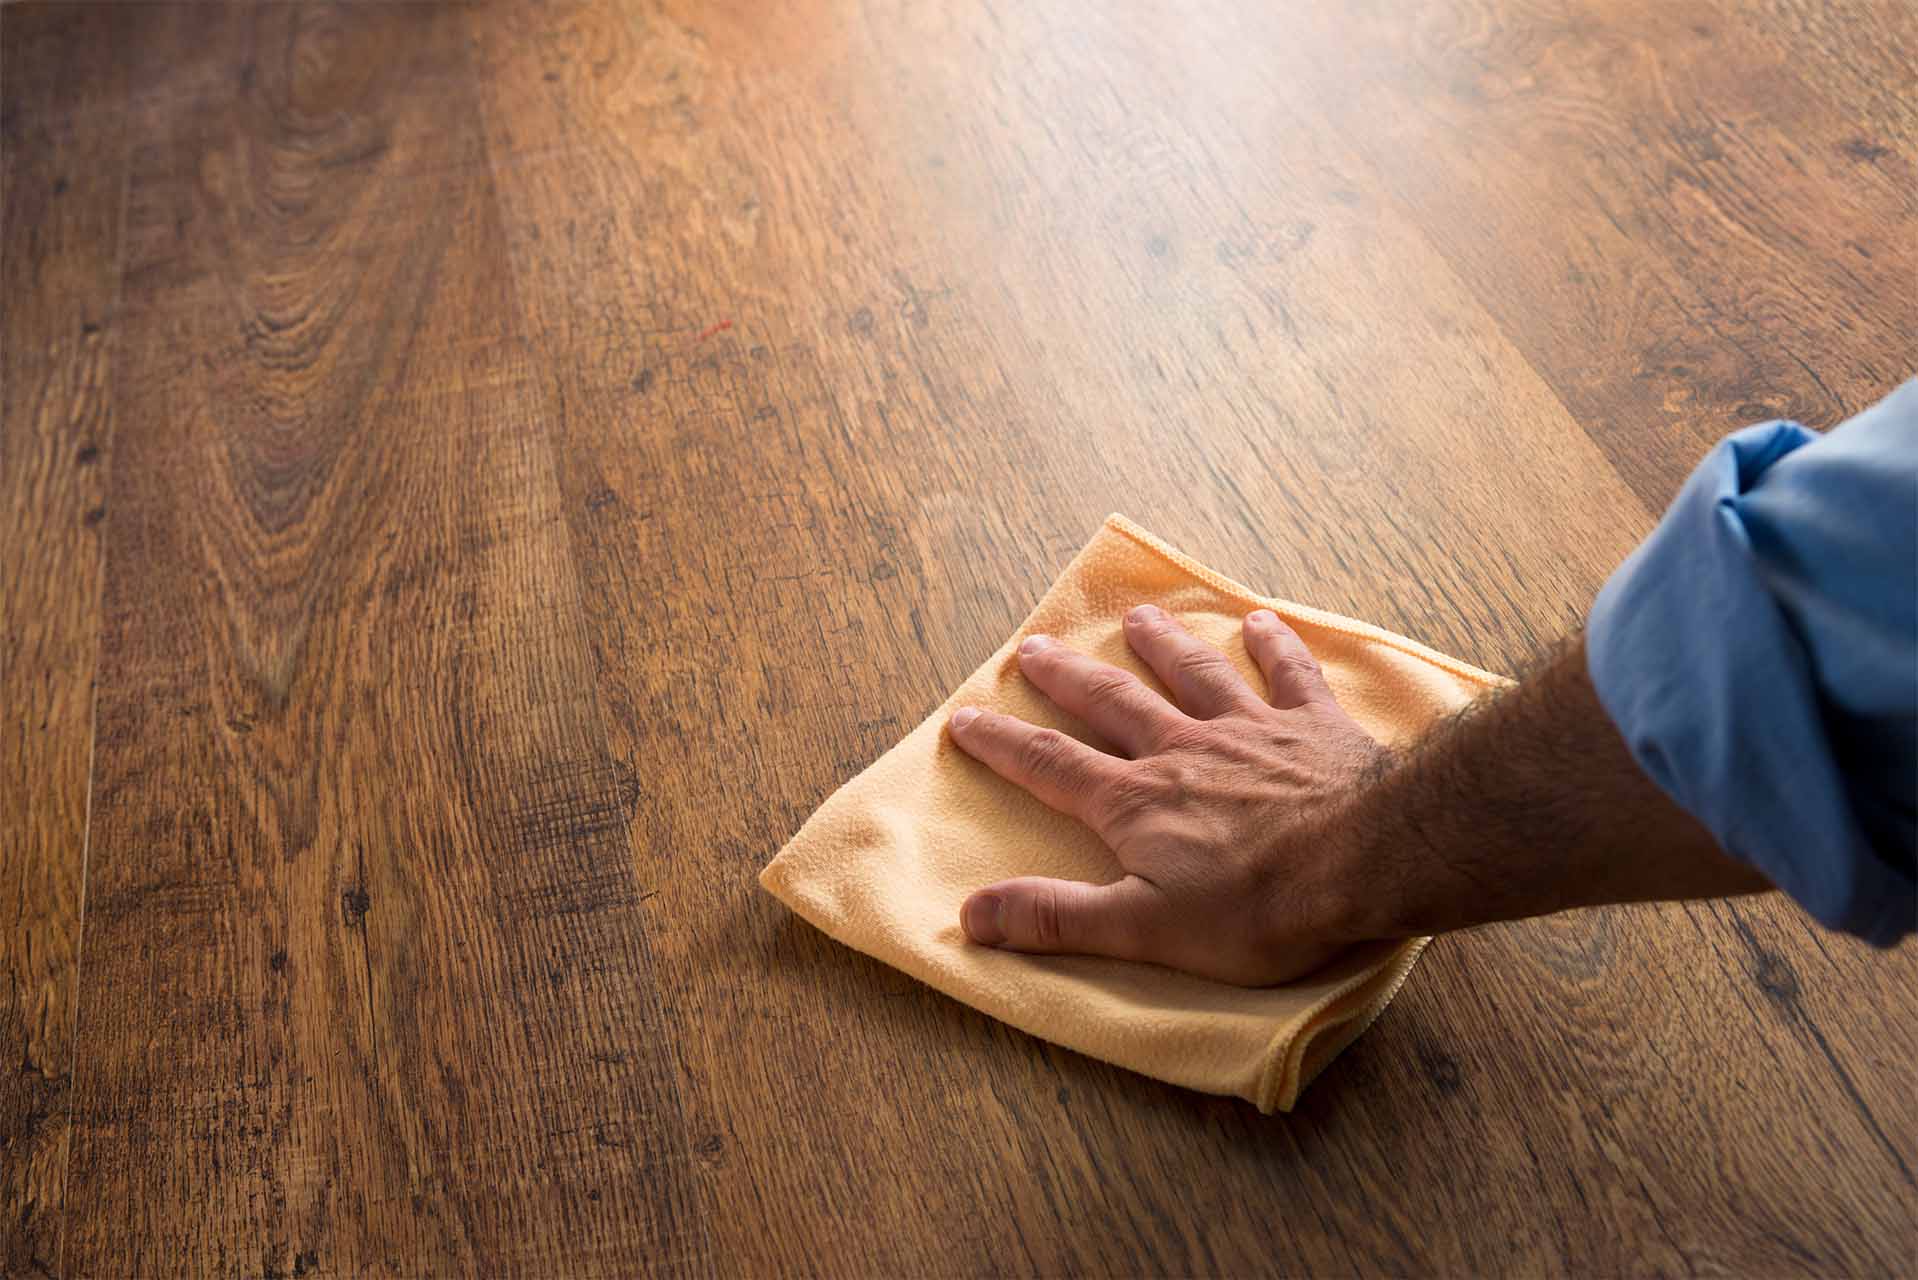
Step 7: Clean the Subfloor
Before installing the hardwood flooring, it’s important to clean the subfloor thoroughly. Removing any dust, debris, or residue will ensure proper adhesion and a smooth surface for the new flooring. Follow these steps to clean the subfloor:
- Vacuum the subfloor: Start by using a vacuum cleaner to remove any loose dirt, dust, or debris from the subfloor. Pay special attention to the corners and edges of the room.
- Scrub the subfloor: Depending on the condition of the subfloor, you may need to scrub it with a mild detergent and water solution. Use a scrub brush or sponge mop to scrub away any stains or stubborn dirt. Rinse the subfloor with clean water and allow it to dry thoroughly.
- Check for adhesive residue: If there is any adhesive residue left from the previous carpet or padding, use a floor adhesive remover to dissolve and remove it. Follow the manufacturer’s instructions and take the necessary safety precautions.
- Inspect for imperfections: Take a close look at the subfloor for any imperfections, such as cracks, uneven surfaces, or damaged areas. If needed, fill in any gaps or repair the subfloor before proceeding with the installation.
- Allow the subfloor to dry: After cleaning and making any necessary repairs, allow the subfloor to dry completely. Proper drying is crucial to prevent moisture-related issues with the hardwood flooring.
Cleaning the subfloor is an important step in the installation process. It ensures a clean and smooth surface, which promotes the longevity and durability of the hardwood flooring. Take your time during this step to ensure a thorough clean, and allow the subfloor to dry completely before moving on to the next step: measuring and cutting the hardwood flooring.
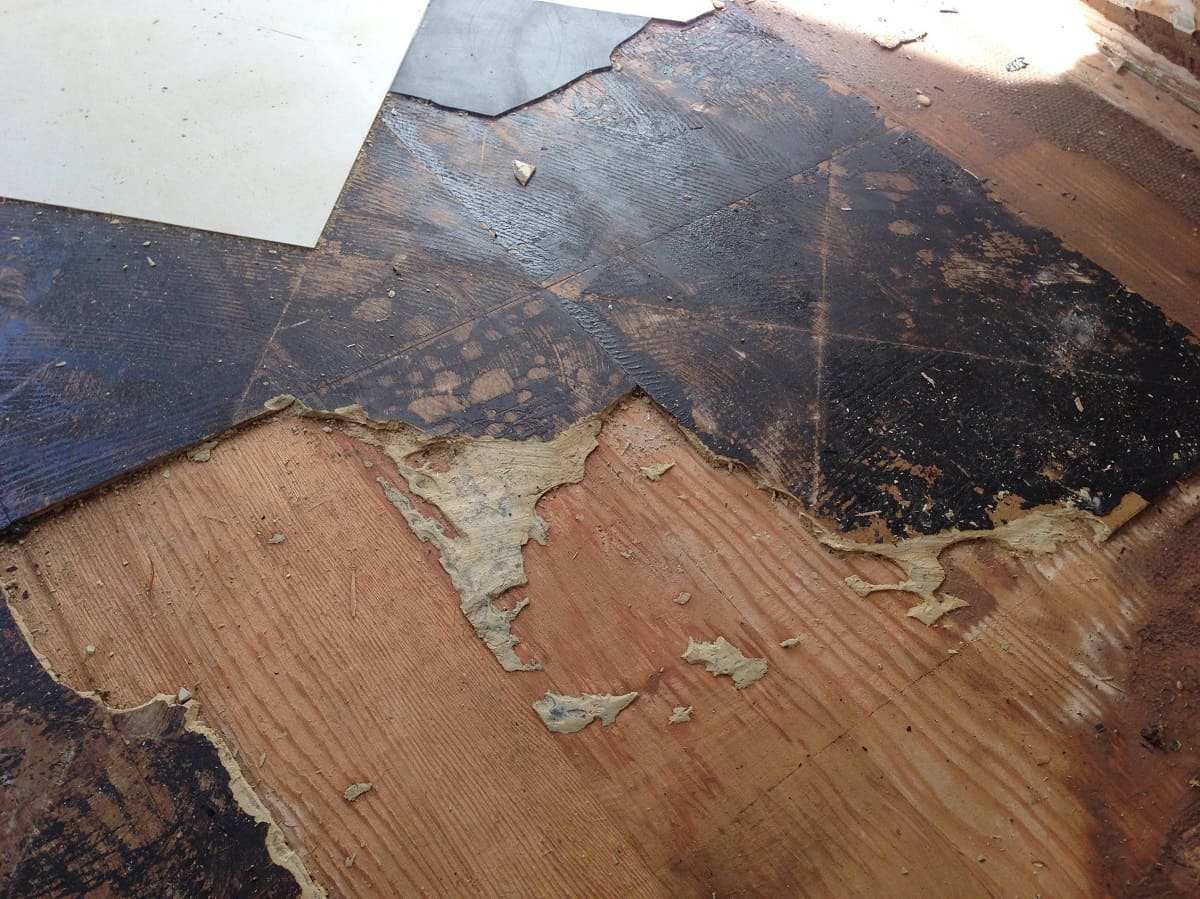
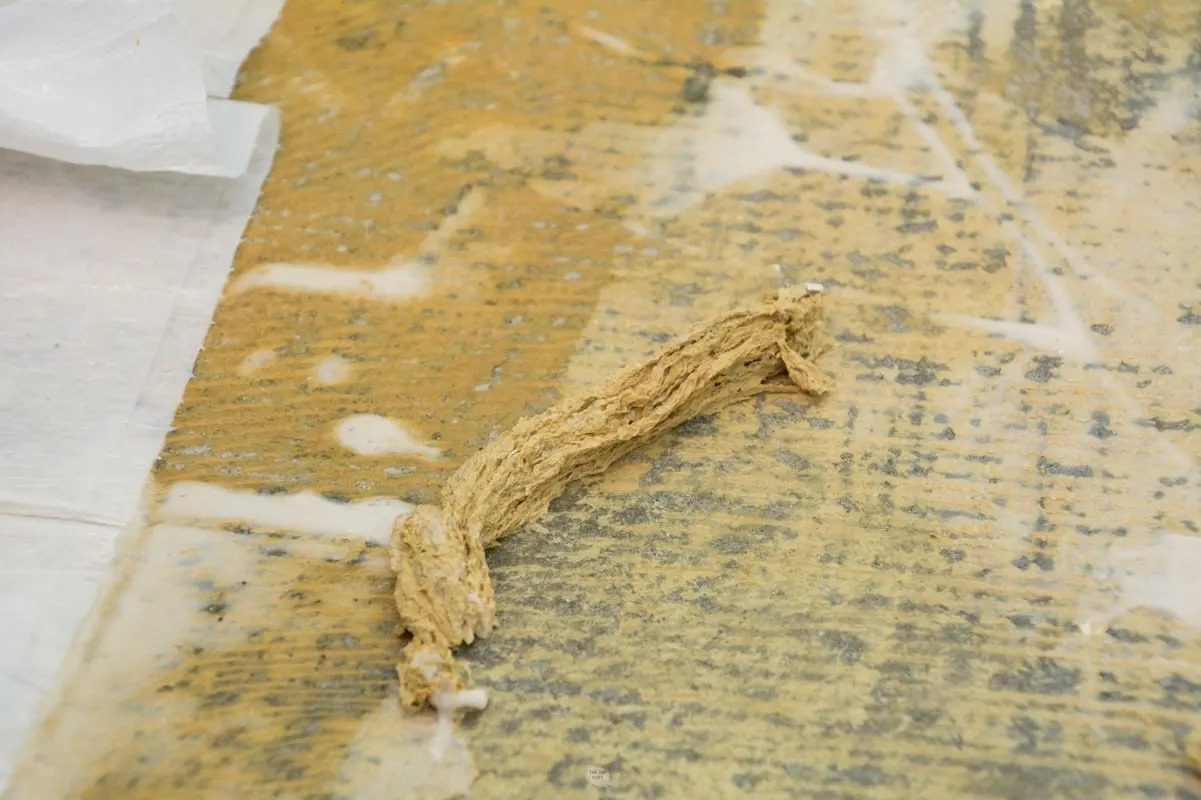
Before removing carpet, make sure to thoroughly clean the subfloor to remove any debris or adhesive. This will ensure a smooth surface for installing the hardwood.
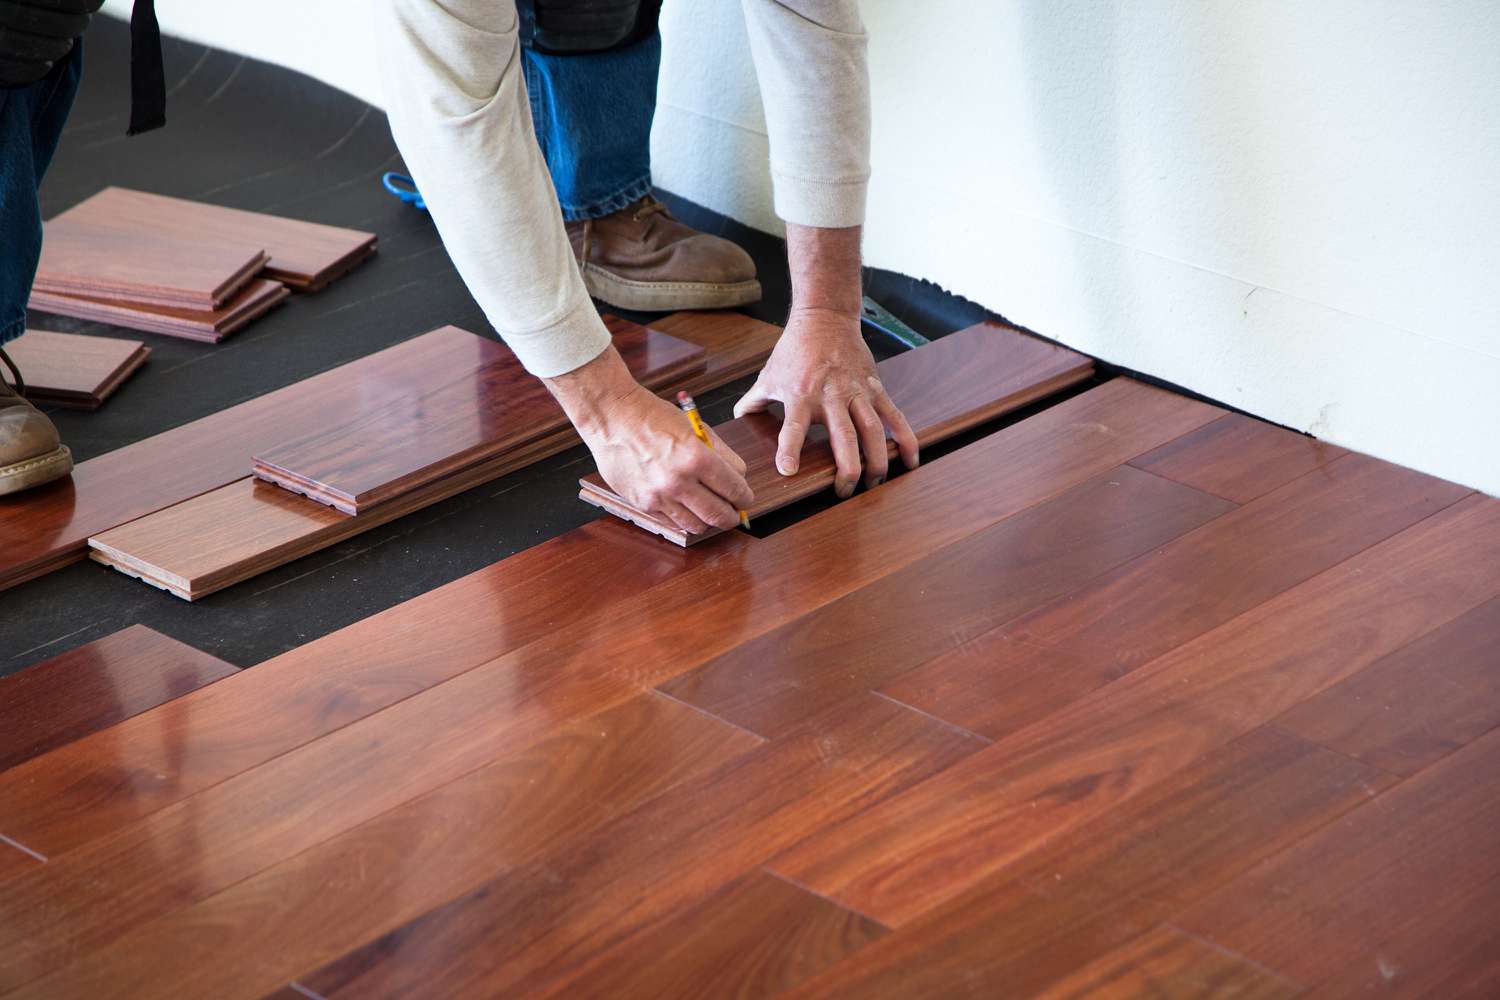
Step 8: Measure and Cut the Hardwood Flooring
Now that the subfloor is clean and ready, it’s time to measure and cut the hardwood flooring to fit your room. Precision and accuracy are crucial in this step to ensure a seamless installation. Here’s how to measure and cut the hardwood flooring:
- Measure the room: Start by measuring the length and width of the room to determine the total square footage needed for the hardwood flooring. Remember to account for any closets or irregularly shaped areas.
- Add extra length: It’s recommended to add a few extra inches to your measurements to account for any mistakes or uneven walls. This will ensure you have enough flooring to work with.
- Select the starting point: Choose a starting point for the installation that aligns with the room’s focal point or the longest, straightest wall. This will create a visually appealing layout.
- Mark the flooring: Use a measuring tape and pencil to measure and mark the hardwood planks according to the required lengths. Take into consideration any necessary cuts around doorways or corners.
- Cut the hardwood flooring: Depending on the type of flooring and your available tools, use a circular saw, table saw, or other appropriate cutting tools to cut the planks to the marked lengths. Ensure precise and clean cuts.
- Double-check measurements: After cutting the planks, double-check your measurements to ensure accuracy. It’s better to double-check than to have to re-cut the flooring due to incorrect measurements.
Properly measuring and cutting the hardwood flooring is essential to ensure a professional and seamless finish. Take your time and be attentive to detail during this step. Remember, it’s always better to measure and cut accurately the first time to save time and materials. Once you have the hardwood flooring cut to the correct lengths, you’re ready to move on to the next step: installing the first row of hardwood flooring.
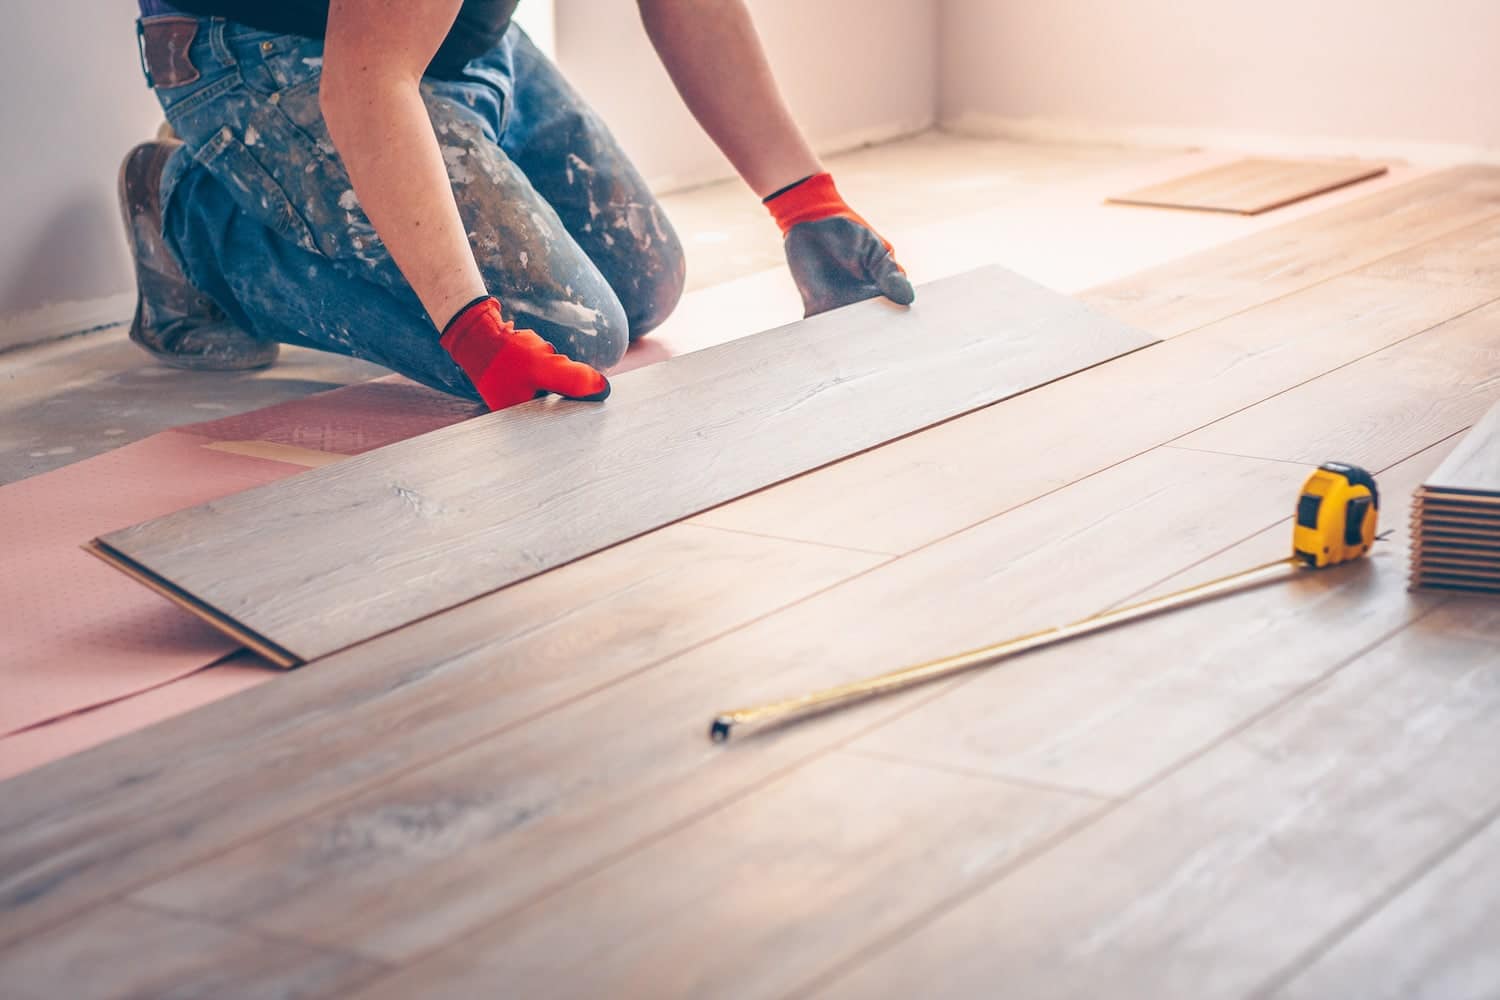
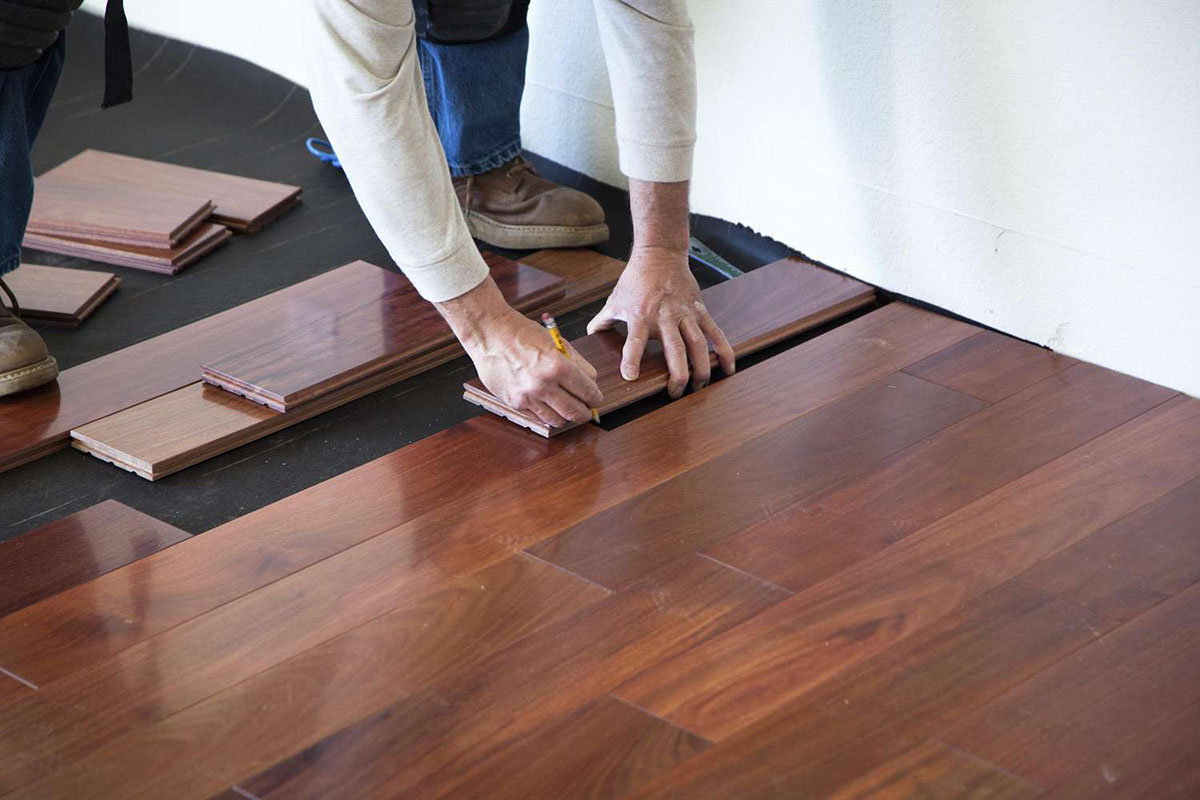
Step 9: Install the First Row of Hardwood Flooring
With the hardwood flooring cut to size, it’s time to start the installation process. Beginning with the first row is crucial for ensuring a straight and level foundation for the rest of the flooring. Follow these steps to install the first row of hardwood flooring:
- Prepare the floorboards: Inspect each floorboard for any defects or damage. Remove any debris or dust from the boards to ensure a clean installation.
- Apply adhesive or underlayment: Depending on the type of hardwood flooring you have, you may need to apply an adhesive or underlayment to the subfloor. Follow the manufacturer’s instructions for proper application.
- Start with a straight edge: Choose a straight and long floorboard as the starting point for the first row. This will help establish a straight and level foundation for the rest of the flooring.
- Leave an expansion gap: Place spacers or shims along the walls to leave a small expansion gap between the flooring and the walls. This gap allows the hardwood to expand and contract with changes in humidity.
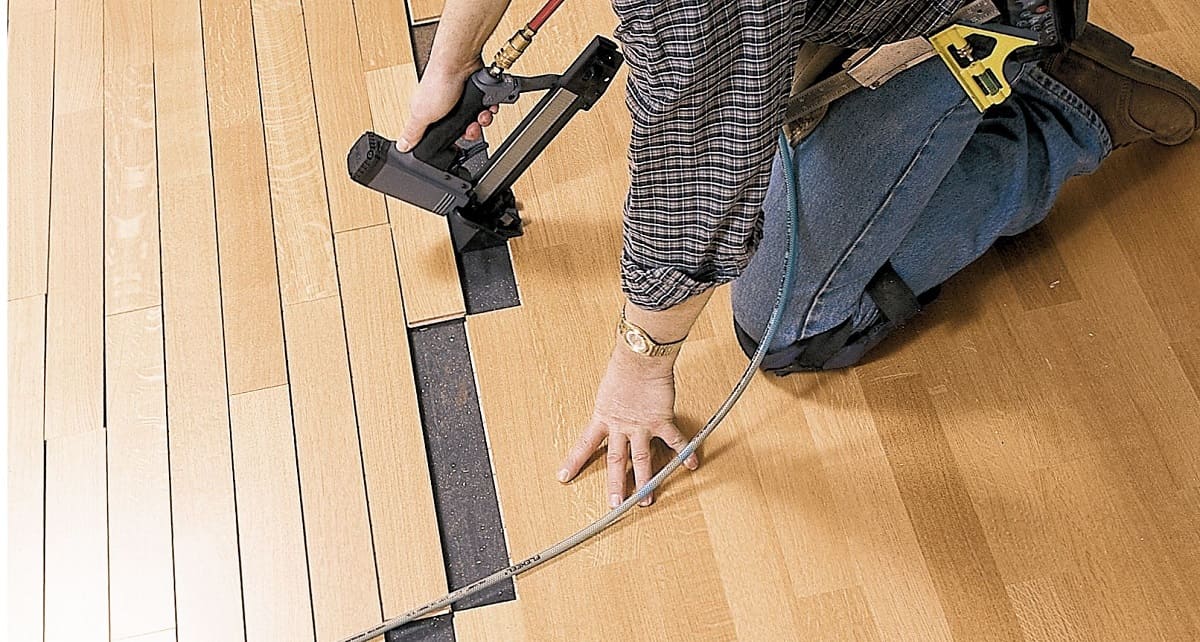
- Secure the first row: Apply adhesive or use a pneumatic flooring nailer to secure the first row of flooring. Make sure each board fits tightly against the spacers and each subsequent board fits snugly into the tongue and groove of the previous board.
- Use a rubber mallet and tapping block: As you install each floorboard, use a rubber mallet and tapping block to ensure a tight and flush fit. This will help eliminate any gaps between the boards.
- Check for levelness: Use a level to ensure that the first row is level and even. Adjust as necessary, adding shims or sanding down high spots.
Installing the first row of hardwood flooring correctly sets the stage for the rest of the installation. Take your time to ensure that each board is securely fastened and properly aligned. Once the first row is installed, you’re ready to move on to the next step: installing the remaining rows of hardwood flooring.
Step 10: Install the Remaining Rows of Hardwood Flooring
With the first row of hardwood flooring in place, it’s time to continue the installation by adding the remaining rows. The key to a professional-looking installation is ensuring a tight fit between the boards and maintaining a consistent and level layout. Follow these steps to install the remaining rows of hardwood flooring:
- Apply adhesive or use a pneumatic flooring nailer: Depending on the manufacturer’s recommendations, apply adhesive or use a pneumatic flooring nailer to secure the remaining rows of hardwood flooring. Follow the specific instructions to ensure a secure and stable installation.
- Stagger the seams: To create a visually appealing and structurally sound installation, stagger the seams of your floorboards. Avoid aligning the end joints of adjacent boards, aiming for a random pattern.
- Use a tapping block and mallet: As you install each board, use a tapping block and rubber mallet to snugly fit the tongue and groove joints together. This will help eliminate any gaps between the boards.
- Check for levelness and straightness: Regularly check for levelness and straightness as you continue installing the rows of hardwood flooring. Make any necessary adjustments to ensure a consistent and even installation.
- Trim boards as needed: Measure and cut boards to fit around doorways, corners, or any other obstructions. Use a saw or appropriate cutting tool for precise and clean cuts.
- Ensure proper spacing: Use spacers or shims to maintain the correct expansion gap along the walls and between the boards. This gap allows the hardwood to expand and contract with changes in humidity.
- Clean as you go: Regularly clean the surface of the hardwood flooring as you progress with the installation. Remove any adhesive or excess dust to maintain a clean and tidy work area.
By following these steps, you’ll successfully install the remaining rows of hardwood flooring. Take your time and pay attention to detail for a flawless and high-quality installation. Once all the rows are laid and secured, you can move on to the next step: cutting and installing the last row of hardwood flooring.
Step 11: Cut and Install the Last Row of Hardwood Flooring
As you near the end of the installation process, you’ll likely need to cut and install the last row of hardwood flooring to fit against the wall. This step requires attention to detail to ensure a seamless and professional finish. Follow these steps to cut and install the last row of hardwood flooring:
- Measure the gap: Measure the width of the remaining gap between the previous row of flooring and the wall. Remember to account for the expansion gap.
- Mark and cut the floorboards: Transfer the measurement onto a floorboard, accounting for the expansion gap. Use a saw or appropriate cutting tool to make precise and accurate cuts.
- Test the fit: Place the cut board into the gap, ensuring it fits snugly. Use a tapping block and rubber mallet to gently tap the board into place.
- Secure the last row: Apply adhesive or use a pneumatic flooring nailer to secure the last row of flooring. Follow the manufacturer’s recommendations for the specific type of flooring you are using.
- Check for levelness and alignment: Ensure that the last row is level and aligned with the rest of the flooring. Make any necessary adjustments to maintain a visually pleasing and consistent installation.
By following these steps, you’ll successfully cut and install the last row of hardwood flooring. Taking the time to make accurate measurements and ensuring a tight fit will result in a professional and polished look. Once the last row is securely in place, you’re ready to move on to the next step: apply wood putty and sand the floor.
Step 12: Apply Wood Putty and Sand the Floor
After the hardwood flooring is installed, it’s time to refine the surface and achieve a smooth and uniform appearance. Applying wood putty and sanding the floor will help eliminate any imperfections, such as gaps or nail holes, and create a seamless finish. Follow these steps to apply wood putty and sand the floor:
- Prepare the wood putty: Select a wood putty color that matches the color of your hardwood flooring. Follow the manufacturer’s instructions to prepare the putty for application.
- Fill in gaps and holes: Use a putty knife or a small spatula to carefully and evenly apply the wood putty into any gaps, cracks, or nail holes in the floor. Ensure the putty is level with the surface of the floor, and remove any excess putty.
- Allow the putty to dry: Follow the recommended drying time specified by the wood putty manufacturer. This usually takes a few hours. Avoid walking on the floor or applying excessive pressure during this time.
- Sand the floor: Once the wood putty is dry, use a floor sander or a handheld sanding device with a fine-grit sandpaper to sand the entire floor. Work in the direction of the wood grain, applying even pressure. Sanding will smooth out any inconsistencies and create a uniform surface.
- Remove dust and debris: After sanding, thoroughly clean the floor to remove any dust and debris. Use a vacuum cleaner or a damp cloth to ensure the surface is clean and ready for the finishing touches.
Applying wood putty and sanding the floor not only improves the visual appeal of your hardwood flooring but also helps to create a seamless and polished finish. By following these steps carefully, you’ll be able to achieve excellent results. Once the floor is sanded and cleaned, you’re ready to move on to the next step: applying stain or finish, if desired.
Step 13: Apply Stain or Finish (Optional)
Applying stain or finish to your hardwood flooring is an optional step but can greatly enhance its appearance and protect it from wear and tear. Stain adds color and depth to the wood, while finish seals and protects the surface. Follow these steps to apply stain or finish to your hardwood flooring:
- Choose your stain or finish: Select a stain color or finish that complements your desired aesthetic and matches the type of wood you have. Consider testing a small area or sample board first to ensure you achieve the desired look.
- Prepare the floor: Ensure the floor is clean, dry, and free from any dust or debris. Use a vacuum cleaner or a damp cloth to remove any remaining particles.
- Apply stain (if desired): If you’ve chosen to apply stain, use a brush, sponge, or cloth to apply the stain to the floor. Follow the manufacturer’s instructions for application and drying time. Work in small sections and wipe away any excess stain with a clean cloth.
- Apply finish: If you’ve chosen to apply finish, use a brush, roller, or applicator pad to evenly apply the finish to the floor. Follow the manufacturer’s instructions for the recommended number of coats and drying time in between each coat.
- Avoid walking on the floor: Allow the stain or finish to dry completely before walking on the floor or moving furniture back into the room. This typically takes several hours to a few days, depending on the specific product.
- Maintain the finish: Follow the maintenance instructions provided by the stain or finish manufacturer to ensure the longevity and beauty of your hardwood flooring. Regularly clean the floor using recommended products and techniques.
Applying stain or finish to your hardwood flooring can bring out the natural beauty of the wood and provide an added layer of protection. Make sure to follow safety precautions and proper ventilation when using these products, and always consult the manufacturer’s instructions for best results. Once the stain or finish has dried and cured, you’re ready for the final step: installing baseboards or trim.
Step 14: Install Baseboards or Trim
The final step in completing your hardwood flooring installation is to install baseboards or trim. Baseboards not only provide a finishing touch to the room but also cover the expansion gap between the flooring and the walls. Follow these steps to install baseboards or trim:
- Measure and cut the baseboards/trim: Measure the length required for each section of the baseboards/trim, taking into account any corners or angles. Use a miter saw or appropriate cutting tool to make precise cuts.
- Prepare the baseboards/trim: Sand any rough edges or imperfections on the baseboards/trim using sandpaper. Wipe them clean to remove any dust or debris.
- Apply adhesive or use nails: Depending on the type of baseboards/trim and the manufacturer’s recommendations, apply adhesive or use finishing nails to secure them to the wall. Use a level to ensure they are straight and aligned.
- Fill nail holes and gaps: Use wood putty or a filler that matches the color of the baseboards/trim to fill any nail holes or gaps. Smooth out the putty with a putty knife and remove any excess.
- Paint or stain (if desired): If you prefer a different color for your baseboards/trim, you can paint or stain them to match your interior style. Apply multiple coats for a smooth and even finish.
- Clean the floor and inspect: After installing the baseboards/trim, thoroughly clean the floor to remove any dust or debris. Inspect the entire installation for any missed spots, touch-ups, or adjustments needed.
Installing baseboards or trim is the final step in completing your hardwood flooring installation. It provides an elegant transition between the floor and walls, enhancing the overall aesthetic appeal of the room. Take your time and ensure the baseboards/trim are accurately measured, cut, and properly aligned. Once the installation is complete, step back and admire your beautifully transformed space!
Conclusion
Removing carpet and installing hardwood flooring is a rewarding home improvement project that can completely transform the look and feel of your space. By following the step-by-step guide outlined in this article, you can successfully navigate through each stage of the process, from gathering the necessary tools to installing baseboards or trim.
Throughout the journey, we emphasized the importance of preparation, precision, and attention to detail. Ensuring your tools and materials are readily available, properly measuring and cutting the hardwood flooring, and taking the time to clean, sand, and finish the floor all contribute to a successful installation.
Remember to prioritize safety by using protective gear and following manufacturer instructions for any adhesives or finishes. Additionally, consult professionals or seek guidance when faced with challenging situations or if you’re unsure of any steps in the process.
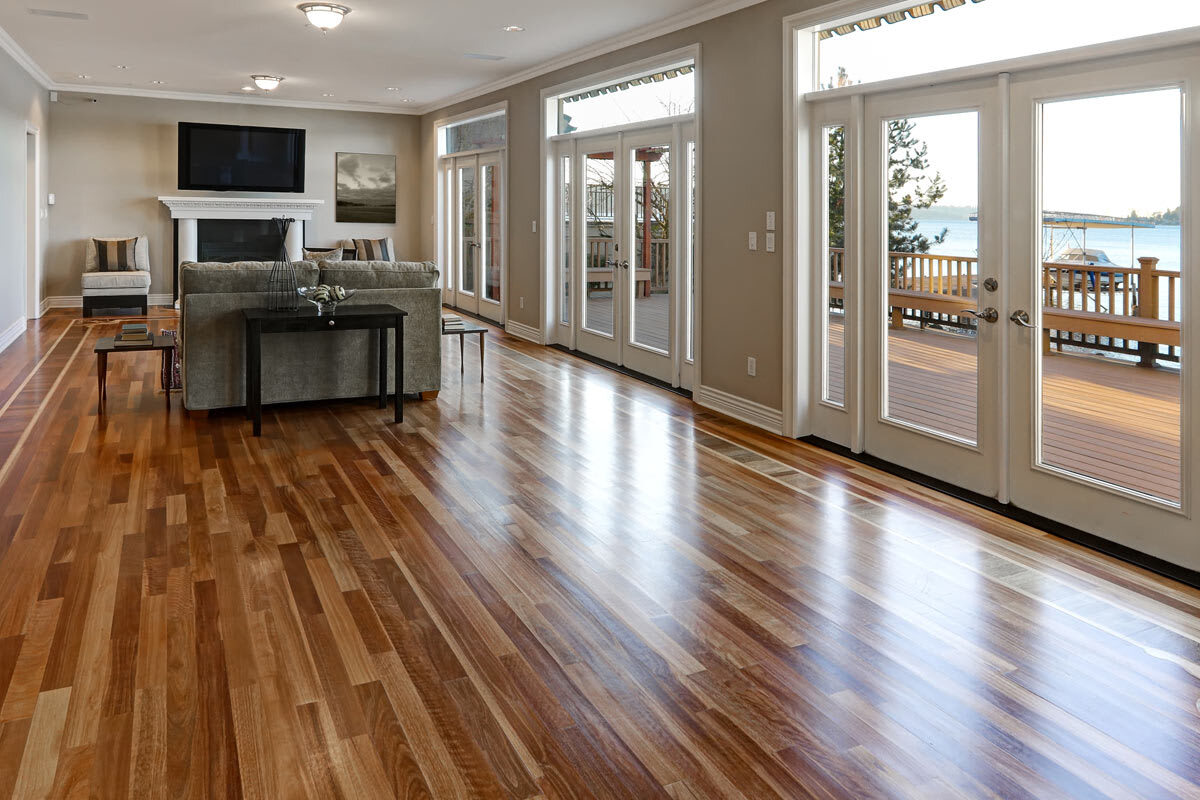
Once your hardwood flooring is installed and the finishing touches are complete, take a moment to appreciate the beauty and elegance it brings to your home. The timeless appeal of hardwood flooring not only enhances the aesthetic value but also adds durability and functionality to your living space.
Now that you have the knowledge and guidance to remove carpet and install hardwood flooring, you can confidently embark on this exciting project. Enjoy the process, and revel in the satisfaction of a job well done as you create a stunning, inviting, and long-lasting floor that will be enjoyed for years to come.
Frequently Asked Questions about How To Remove Carpet And Install Hardwood
Was this page helpful?
At Storables.com, we guarantee accurate and reliable information. Our content, validated by Expert Board Contributors, is crafted following stringent Editorial Policies. We're committed to providing you with well-researched, expert-backed insights for all your informational needs.