
Articles
How To Install Hardwood On Stairs
Modified: February 23, 2024
Learn the step-by-step process of installing hardwood on your stairs with our comprehensive articles. Transform your staircase with elegance and durability.
(Many of the links in this article redirect to a specific reviewed product. Your purchase of these products through affiliate links helps to generate commission for Storables.com, at no extra cost. Learn more)
Introduction
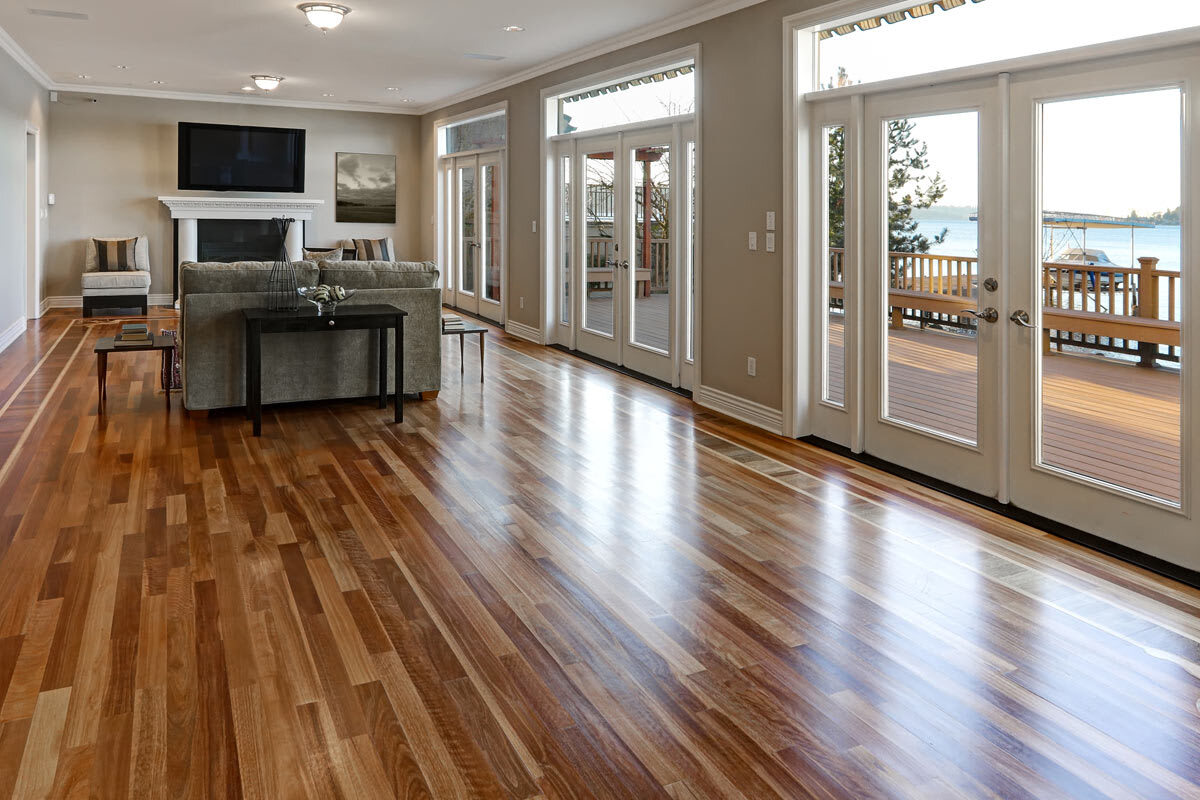
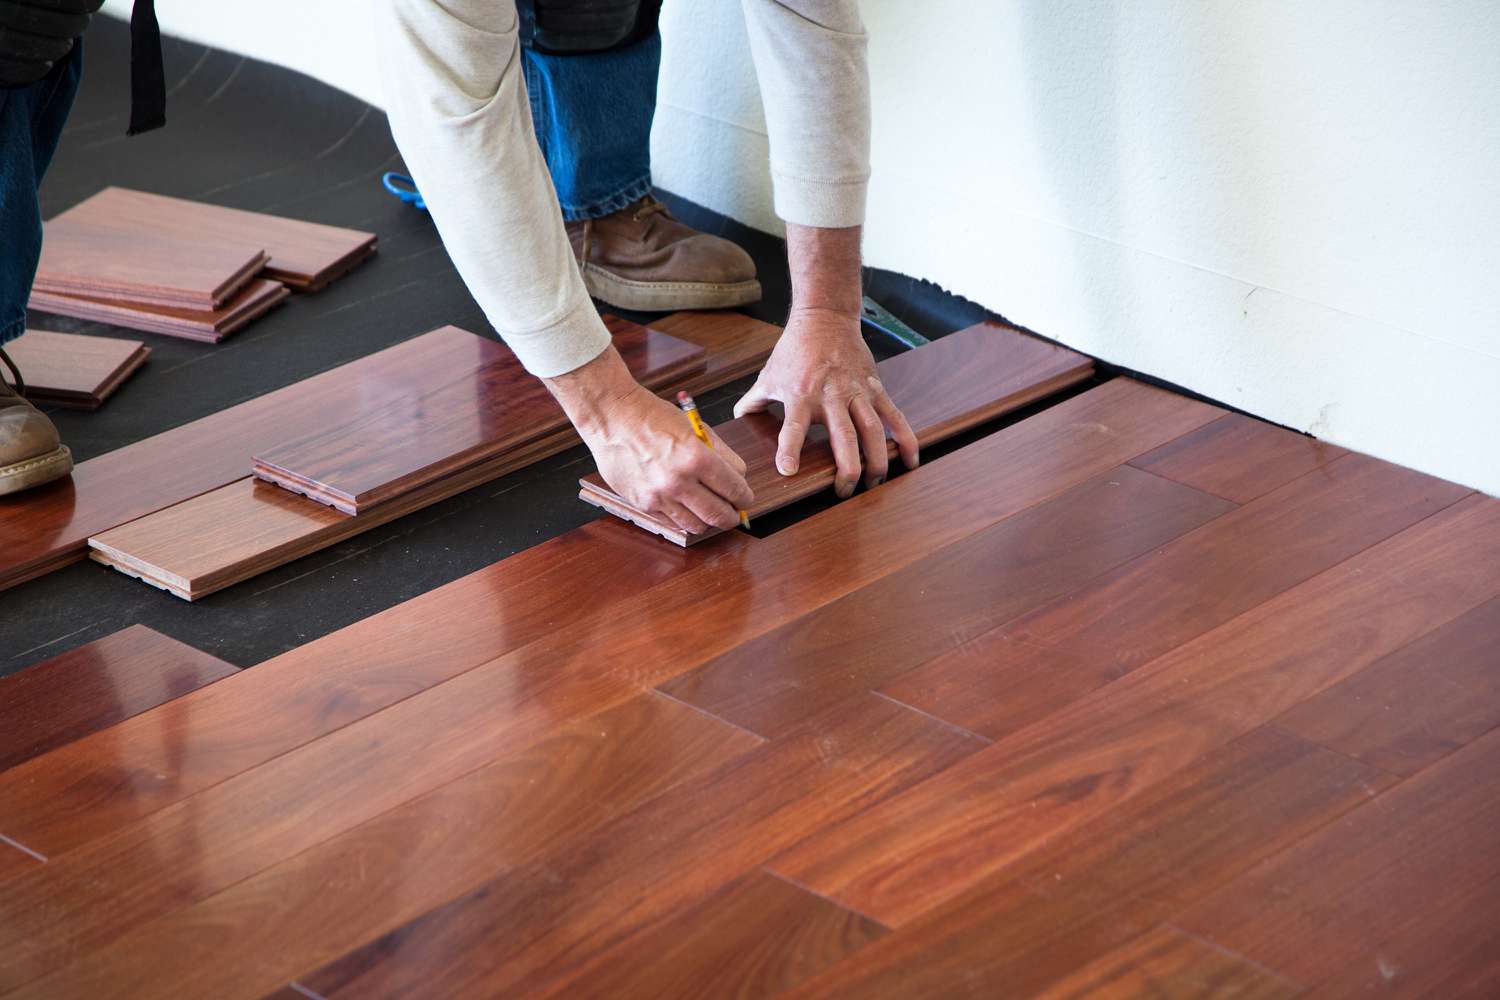
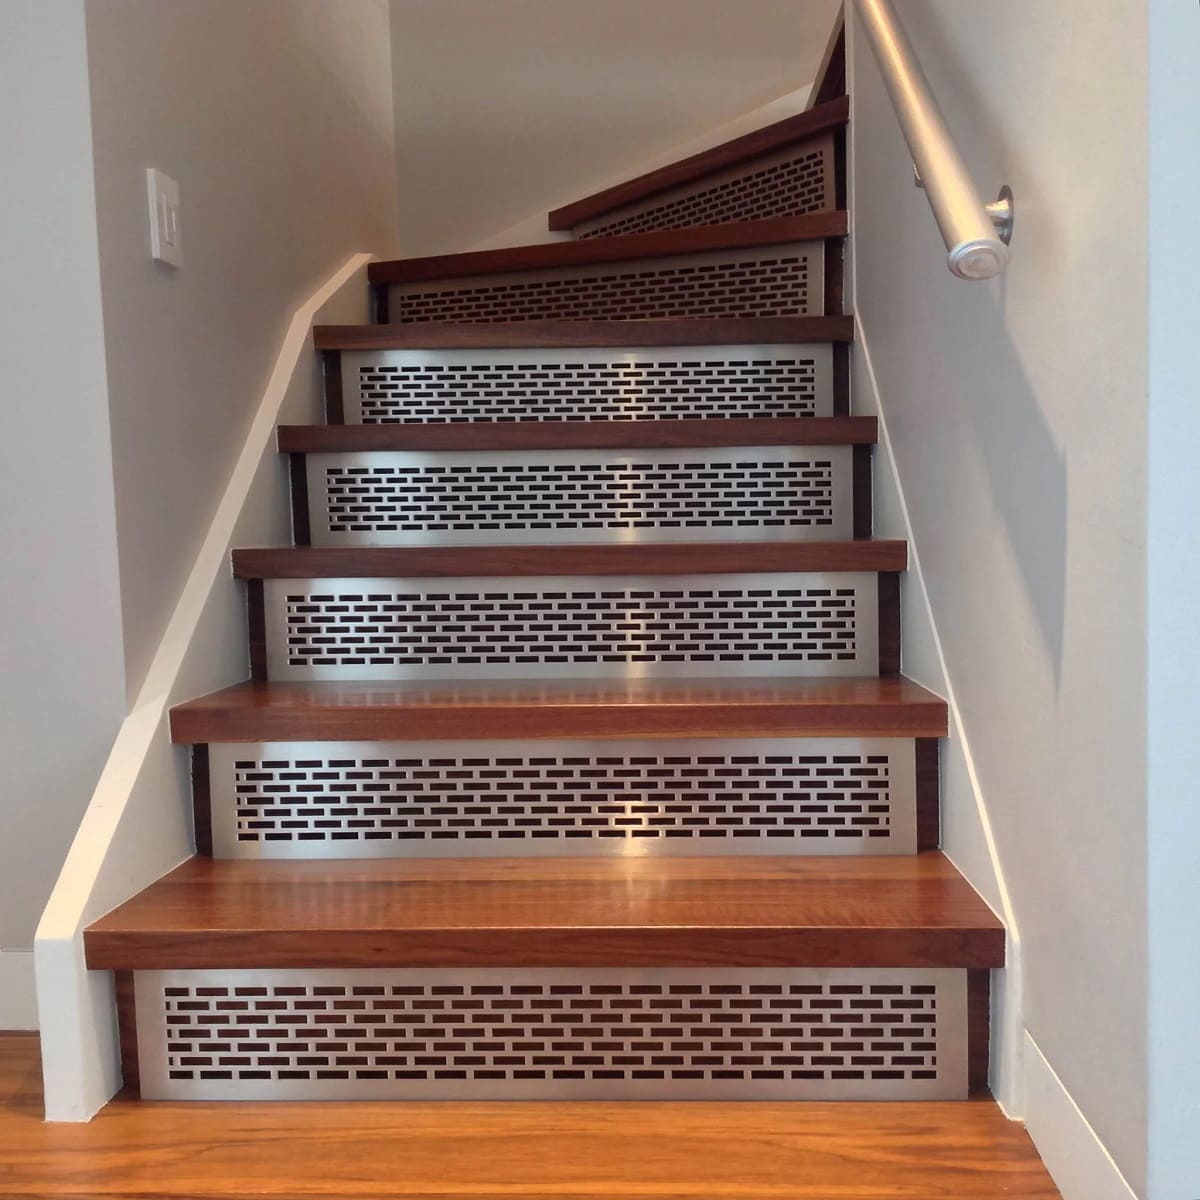
When it comes to upgrading the look of your home, installing hardwood on stairs can make a significant impact. Hardwood stairs not only add elegance and sophistication to your space, but they also enhance the overall value of your property. Whether you’re renovating your existing staircase or building a new one from scratch, this comprehensive guide will walk you through each step of the installation process.
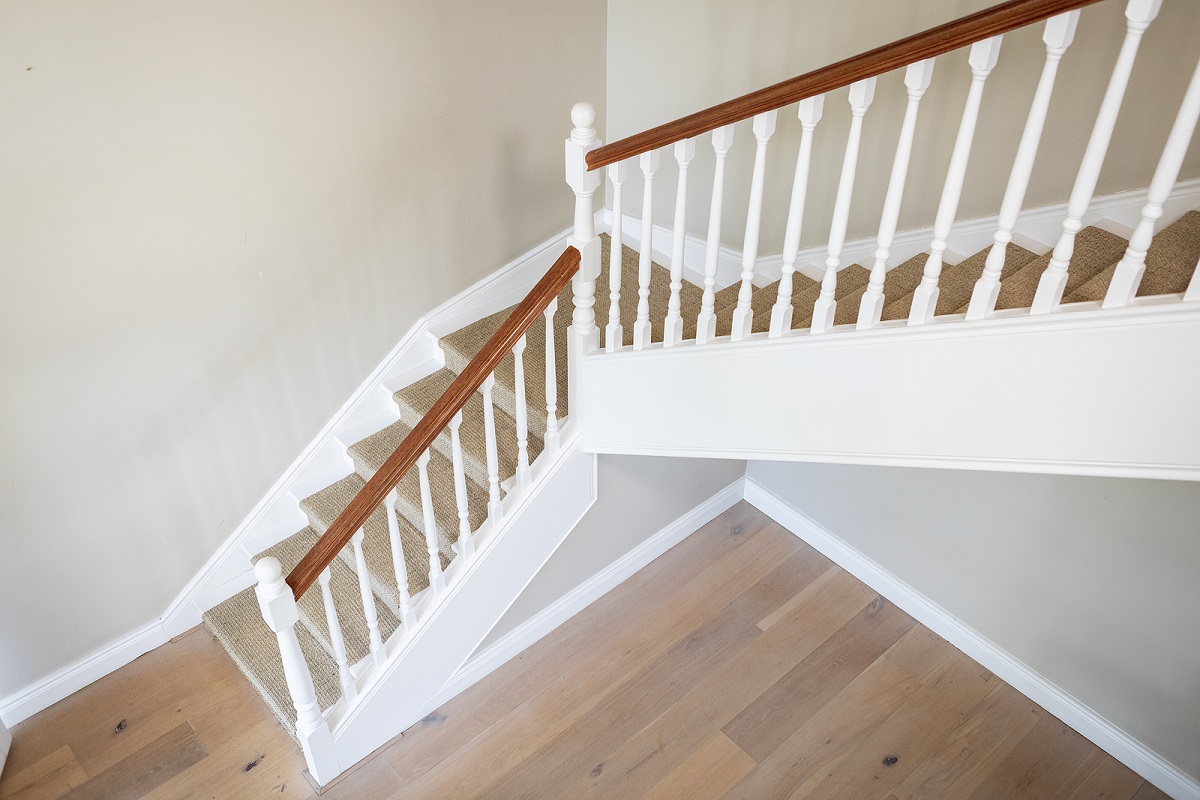
Before diving into the details, it’s important to have a clear understanding of what hardwood stairs entail. Unlike carpeted or laminate stairs, hardwood stairs exude a timeless beauty and durability that withstands the test of time. They offer a seamless transition from one level of your home to another while providing a warm and inviting atmosphere.
While the installation process may seem daunting, it can be accomplished with the right tools, materials, and techniques. In this article, we’ll cover everything from measuring and planning to sanding and finishing. By following these steps, you’ll be well on your way to transforming your staircase into a stunning focal point of your home.
Before we begin, it’s important to note that installing hardwood on stairs requires intermediate-to-advanced DIY skills. If you’re not confident in your abilities, it’s always best to consult a professional to ensure a safe and successful installation.
Now, let’s dive into the details of installing hardwood on stairs and turn your staircase into a work of art!
Key Takeaways:
- Transform your staircase into a stunning focal point by following the comprehensive guide to installing hardwood on stairs. From preparation to finishing, create a durable and timeless staircase with confidence.
- Elevate the look and value of your home with hardwood stairs. Proper planning, precise measurements, and attention to detail are essential for a successful installation. If unsure, consult a professional for guidance.
Preparation
Before you can start installing hardwood on your stairs, it’s crucial to gather the necessary tools and materials. Here’s a list of what you’ll need:
- Hardwood flooring: Choose a high-quality hardwood that matches the style and color scheme of your home.
- Measuring tape: Accurate measurements are essential for a proper fit.
- Safety goggles and gloves: Protect your eyes and hands during the installation process.
- Circular saw: This tool will be used to cut the hardwood planks to size.
- Drill: A drill will be needed to secure the treads and risers in place.
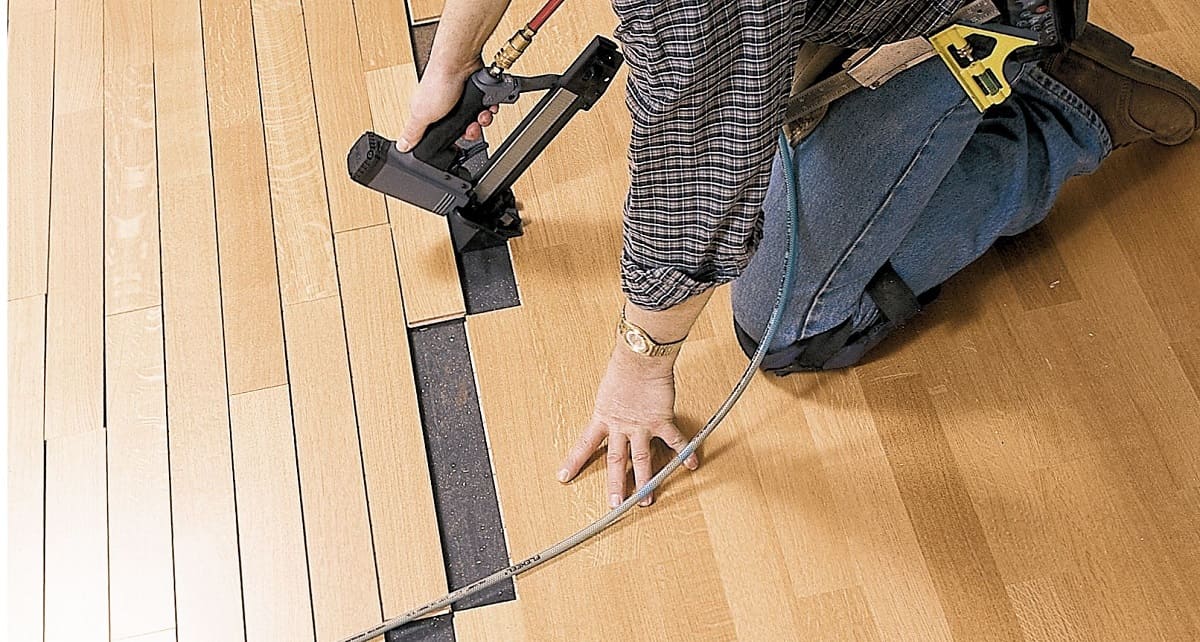
- Nail gun or hammer and nails: Depending on your preference, you can use a nail gun or traditional hammer and nails to fasten the hardwood to the stairs.
- Level: Ensure that the stairs are properly aligned using a level.
- Sanding tools: Sanding the hardwood after installation will create a smooth and even surface.
- Stain and finish: Choose a stain color and finish that complements your hardwood and desired aesthetic.
Once you have gathered all the necessary tools and materials, it’s important to prepare the area before installation. Follow these steps:
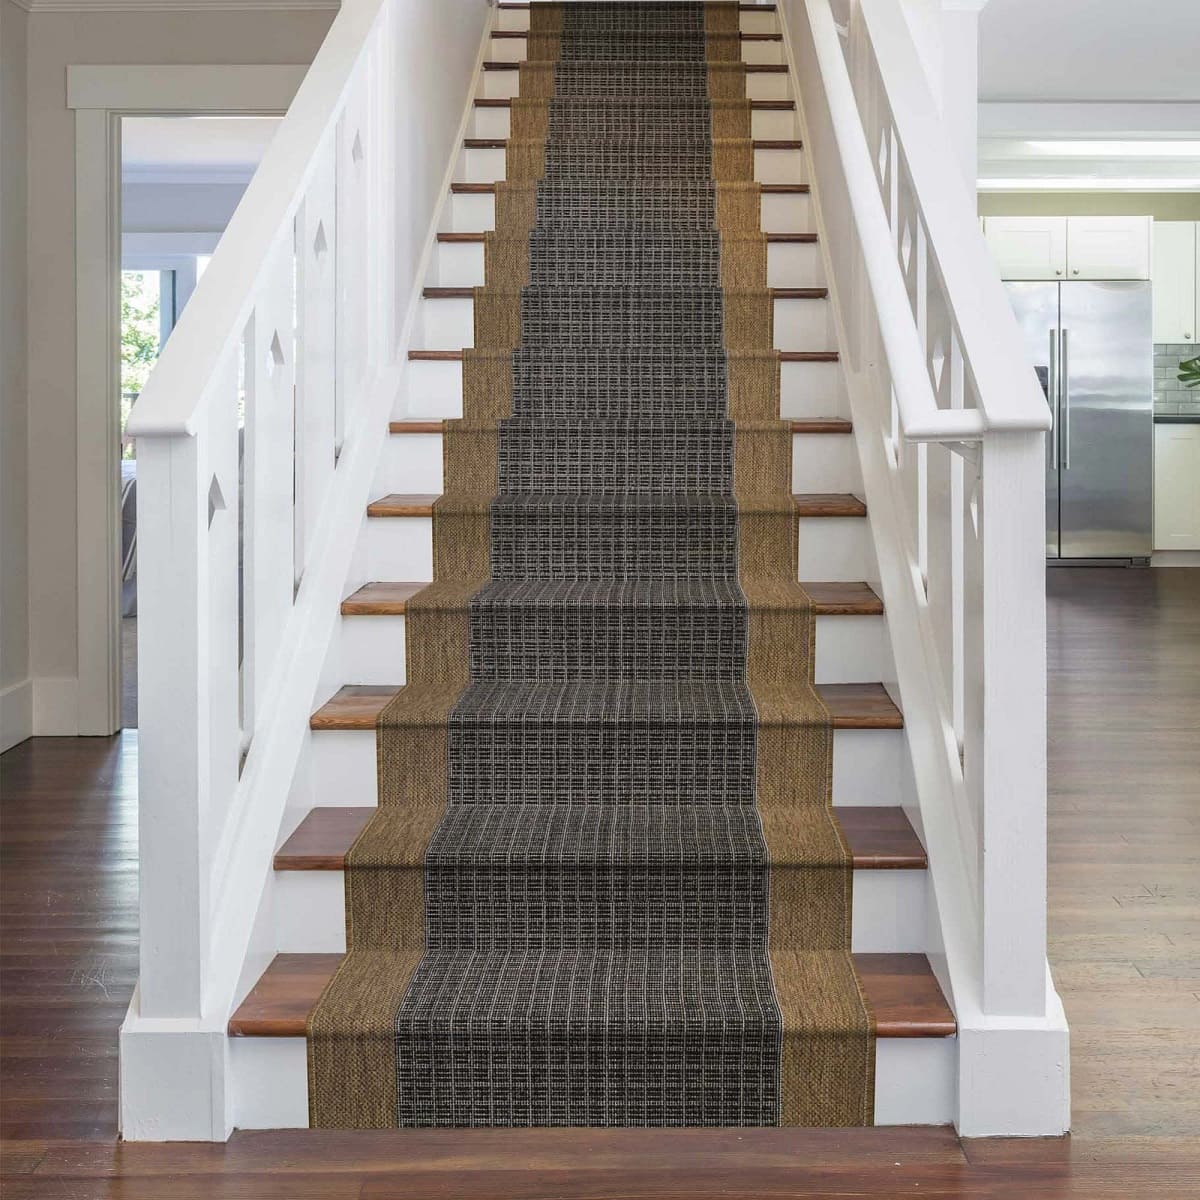
- Clear the stairs: Remove any carpet, padding, or existing flooring from the stairs. Ensure that the surface is clean and free of debris.
- Inspect the stairs: Take a close look at the existing stairs for any structural issues or damage. Repair or reinforce any weak or damaged areas before proceeding with the installation.
- Measure the dimensions: Accurately measure the width, depth, and height of each stair. These measurements will help you determine the amount of hardwood flooring needed.
- Order the materials: Based on your measurements, calculate the square footage of hardwood flooring required and place an order accordingly. It’s always a good idea to order a little extra to account for potential mistakes or future repairs.
- Acclimate the hardwood: Hardwood flooring needs time to acclimate to the temperature and humidity of your home to prevent warping or shrinking. Follow the manufacturer’s instructions for acclimating the flooring before installation.
By properly preparing the area and gathering all the necessary tools and materials, you’ll be ready to tackle the installation process with confidence. Next, we’ll dive into the first step of installing hardwood on stairs: measuring and planning.
Step 1: Measure and Plan
Before you can start installing hardwood on your stairs, it’s crucial to take accurate measurements and create a detailed plan. Follow these steps to ensure a precise fit:
- Start with the risers: Measure the height and width of each riser. It’s essential to measure from the top of one tread to the bottom of the next to ensure consistency.
- Measure the treads: Determine the depth and length of each tread. Measure from the back of one tread to the front of the next, ensuring accuracy.
- Calculate the number of risers and treads: Count the total number of risers and treads. This will help you determine the amount of hardwood flooring needed.
- Consider the overhang: Decide if you want the hardwood to overhang the edge of the steps or be flush with the risers. This is a personal preference and will impact the measurements.
- Create a diagram: Sketch out a detailed diagram of your staircase, labeling each riser and tread with their corresponding measurements. This diagram will serve as a guide throughout the installation process.
- Plan the installation sequence: Determine the best order for installing the hardwood on the stairs. Start from the top or bottom and work your way up or down, depending on the design and accessibility.
During the measuring and planning stage, it’s important to double-check your measurements and consult the manufacturer’s guidelines for any specific requirements. Precise measurements and a thoughtful plan will ensure a seamless and professional-looking installation.
Once you have completed the measuring and planning process, you’re ready to move on to the next step: removing the existing stair treads. This step is crucial for a clean and sturdy installation. Stay tuned for step 2!
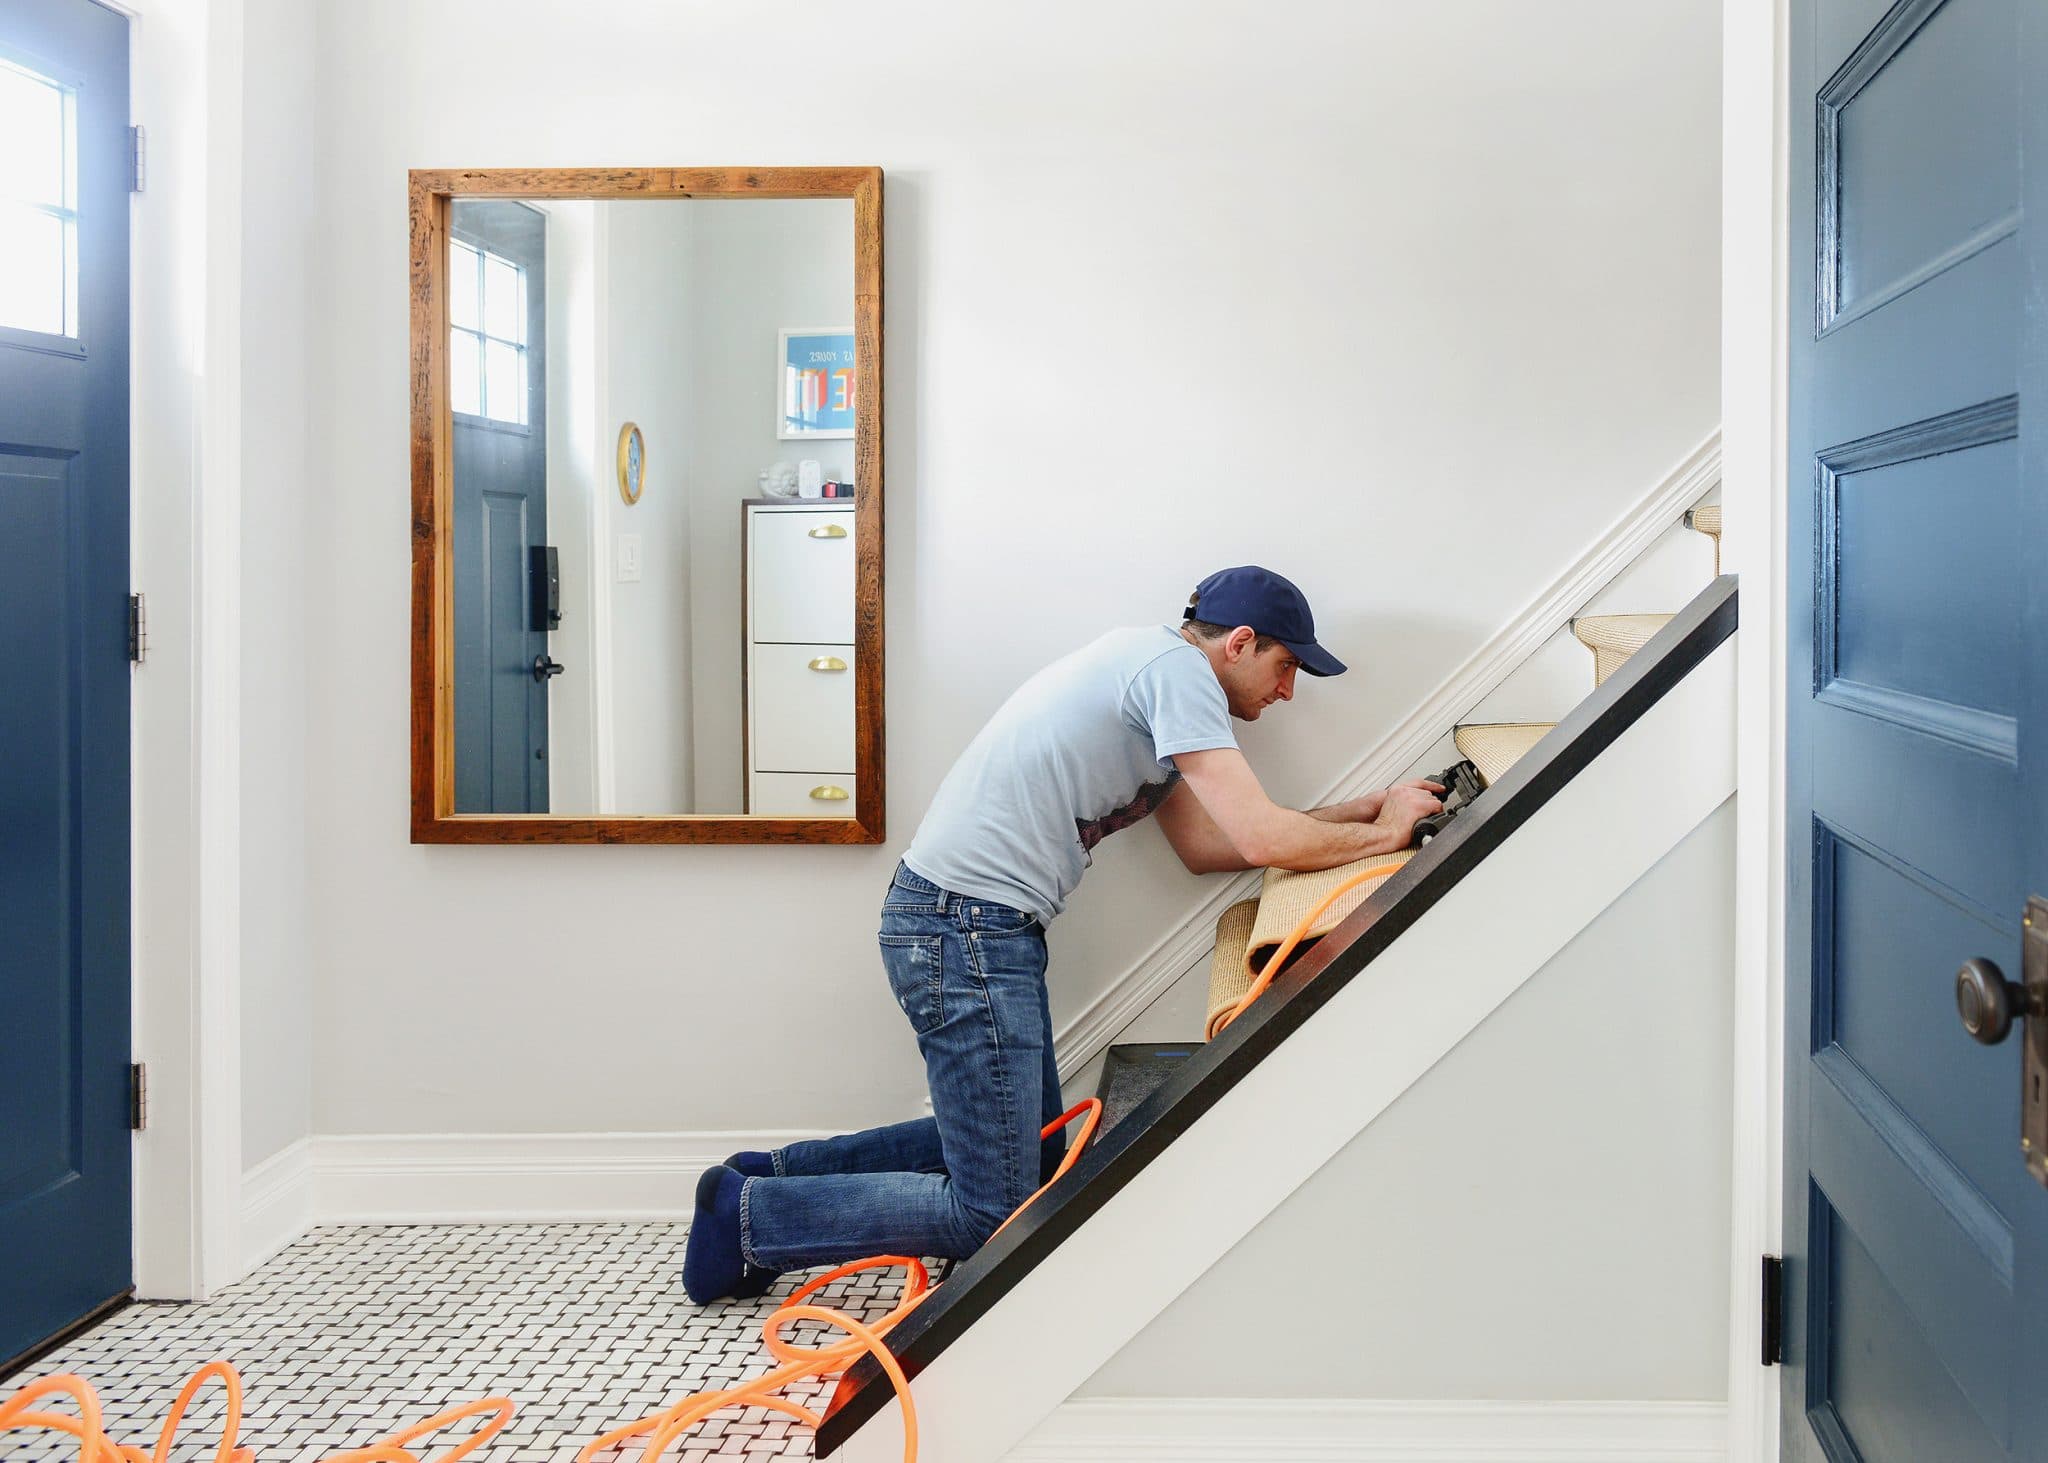
Step 2: Remove Existing Stair Treads
Before you can install new hardwood treads, you’ll need to remove the existing stair treads. Follow these steps to safely remove them:
- Start with safety precautions: Put on safety goggles and gloves to protect yourself during the removal process.
- Inspect the treads: Examine the existing treads for any nails, screws, or adhesive that may be holding them in place. Use a pry bar or a hammer and chisel to carefully remove any nails or screws.
- Loosen the treads: Gently tap the pry bar or hammer and chisel under the edge of the treads to loosen them from the stairs. Start at one end and work your way to the other, being careful not to damage the surrounding structure.
- Remove the treads: Once the treads are loosened, use the pry bar to lift them up and remove them from the stairs. Set them aside for disposal or repurposing, depending on their condition.
- Clean the stairs: After removing the treads, clean the stairs to remove any debris, dust, or adhesive residue. A broom and a vacuum cleaner can be used to ensure a clean surface for the installation of the new hardwood treads.
It’s important to take your time during this step to avoid any damage to the surrounding structure. If you encounter any stubborn treads that are difficult to remove, try using additional tools or seek professional assistance.
Once you have successfully removed the existing stair treads, you are ready to move on to the next step: preparing the staircase for the installation of the new risers and treads. Stay tuned for step 3!
Step 3: Prepare the Staircase
After removing the old stair treads, it’s important to properly prepare the staircase for the installation of the new hardwood risers and treads. Follow these steps to ensure a smooth and secure installation:
- Clean the stairs: Use a broom and a vacuum cleaner to remove any dust, debris, or adhesive residue from the bare stairs. A clean surface will ensure better adhesion and a professional finish.
- Inspect for damage or uneven surfaces: Thoroughly examine the staircase for any structural issues, such as loose or squeaky steps, cracks, or uneven surfaces. Address these issues before proceeding with the installation to ensure a safe and secure staircase.
- Repair or reinforce if necessary: If you come across any damaged or weak areas while inspecting the staircase, take the time to repair or reinforce them. This may involve replacing damaged subflooring or reinforcing weak steps with additional support.
- Fill in gaps: If there are any gaps between the stairs and the wall or between individual steps, use a suitable filler material to fill them in. This will ensure a clean and seamless appearance once the new risers and treads are installed.
- Sand rough surfaces: If there are any rough or uneven areas on the stairs, use sandpaper or a sander to smooth them out. This will create a better surface for the installation and make the final result more visually appealing.
By taking the time to properly prepare the staircase, you ensure a solid foundation for the installation of the new hardwood risers and treads. This step is crucial for a professional-looking and long-lasting result. Once the staircase is properly prepared, you’re ready to move on to step 4: installing the risers. Stay tuned!
Read more: How To Install Hardwood Floors
Step 4: Install Risers
With the staircase properly prepared, it’s time to move on to installing the risers. Risers are the vertical boards that go between each stair tread, creating a finished look and providing support. Follow these steps to install the risers:
- Start at the bottom: Begin the installation at the bottom of the staircase and work your way up.
- Measure and cut the risers: Measure the height and width of each riser and transfer those measurements onto your selected hardwood material. Use a circular saw to cut the risers to the appropriate size.
- Apply construction adhesive: Apply a generous amount of construction adhesive to the back of each riser, ensuring even coverage.
- Position the riser: Carefully position the riser against the step, ensuring it is snug and centered. Press firmly to ensure a secure bond with the adhesive.
- Secure the riser: Use a drill or hammer and nails to secure the riser in place. Place nails or screws at regular intervals along the edges and center of the riser.
- Repeat the process: Repeat steps 2-5 for each riser, working your way up the staircase. Double-check the alignment and levelness of each riser as you go.
It’s important to take your time during this step to ensure that each riser is securely and evenly installed. Use a level to ensure that each riser is straight and aligned with the staircase. Any adjustments should be made before the adhesive dries.
Once all the risers are installed, allow the adhesive to cure fully according to the manufacturer’s instructions. This usually takes several hours or overnight. With the risers in place, you’re now ready to move on to step 5: installing the treads. Stay tuned!
When installing hardwood on stairs, make sure to measure and cut each tread and riser accurately to ensure a snug and secure fit. Use a high-quality adhesive to bond the hardwood to the stairs for a long-lasting finish.
Step 5: Install Treads
With the risers securely in place, it’s time to move on to the installation of the treads. Treads are the horizontal boards that you step on when ascending or descending the staircase. Follow these steps to install the treads:
- Measure and cut the treads: Measure the depth and length of each tread and transfer those measurements onto your selected hardwood material. Use a circular saw to cut the treads to the appropriate size.
- Apply construction adhesive: Apply a generous amount of construction adhesive to the top of each riser, ensuring even coverage.
- Position the tread: Carefully position the tread over the riser and press it down firmly onto the adhesive. Ensure that it is centered and aligned with the staircase. Apply pressure to ensure a secure bond with the adhesive.
- Secure the tread: Use a nail gun or a hammer and nails to secure the tread in place. Place nails or screws at regular intervals along the edges and center of the tread. Be sure to countersink the nails or screws slightly below the surface of the tread.
- Repeat the process: Repeat steps 1-4 for each tread, working your way up the staircase. Double-check the alignment and levelness of each tread as you go.
During the installation process, it’s important to pay attention to the alignment and levelness of each tread. Use a level to ensure that each tread is straight and even. Any adjustments should be made before the adhesive dries.
Once all the treads are installed, allow the adhesive to cure fully according to the manufacturer’s instructions. This typically takes several hours or overnight. With the treads in place, you’re one step closer to completing your hardwood stair installation. Next, we’ll move on to step 6: securing the treads and risers. Stay tuned!
Step 6: Secure Treads and Risers
Now that the treads and risers are in place, it’s time to ensure they are securely fastened to the staircase. This step will provide stability and longevity to your hardwood stair installation. Follow these steps to secure the treads and risers:
- Inspect the treads and risers: Before securing them, double-check the alignment and overall appearance of the treads and risers. Make any necessary adjustments for a seamless and uniform look.
- Use a drill or nail gun: Depending on your preference and the thickness of the material, use a drill with appropriate screws or a nail gun to secure the treads and risers.
- Secure treads: Starting from one end, drive screws or nails through the tread and into the underlying stair structure. Space the screws or nails evenly along the length of each tread.
- Secure risers: Similarly, drive screws or nails through the risers and into the underlying stair structure to ensure they are securely fastened.
- Countersink and fill holes: If using screws, countersink them slightly below the surface of the treads and risers. Fill the holes with wood putty to create a smooth finish.
- Inspect and test the staircase: Once all treads and risers are secured, thoroughly inspect the staircase to ensure stability. Test each step by applying pressure and verifying there is no movement or squeaking.
By following these steps, you can ensure that the treads and risers are firmly attached to the staircase, providing a safe and durable hardwood stair installation.
With the treads and risers securely fastened, you’re nearing the completion of your project. In the next step, we’ll cover how to cut and install nosing, adding the finishing touches to your hardwood stairs. Stay tuned for step 7!
Step 7: Cut and Install Nosing
In this step, you will add the finishing touch to your hardwood stairs by cutting and installing nosing. Nosing is the piece of trim that covers the edge of the treads, providing a polished and professional look. Follow these steps to cut and install nosing:
- Measure the length of each tread: Use a measuring tape to determine the length of each tread, from edge to edge.
- Cut nosing material: Using a circular saw or a miter saw, cut the nosing material to the measured length of each tread. Be sure to cut the nosing at a 45-degree angle on each end to create a mitered joint for a seamless look.
- Apply adhesive: Apply construction adhesive to the back of each nosing piece, ensuring even coverage.
- Position the nosing: Carefully position the nosing on the front edge of each tread, making sure it aligns with the tread and extends slightly over the edge. Press the nosing firmly onto the adhesive.
- Secure the nosing: Use a nail gun or hammer and nails to secure the nosing in place. Drive nails at regular intervals along the length of the nosing, ensuring they are countersunk slightly below the surface.
- Fill holes and sand: Fill any nail holes or gaps with wood putty and sand the nosing to create a smooth, flush surface with the treads.
By following these steps, you’ll achieve a professional and polished look with the installation of nosing on your hardwood stairs. The nosing not only enhances the aesthetic appeal but also adds functionality by providing a smooth and safe transition between each step.
With the nosing installed, your hardwood stair installation is almost complete. In the next step, we’ll cover how to sand and finish the stairs to achieve a beautiful and durable final result. Stay tuned for step 8!
Read more: How To Remove Carpet And Install Hardwood
Step 8: Sand and Finish
Once the nosing is installed, the final step in your hardwood stair installation is sanding and finishing. This step will give your stairs a smooth and polished appearance while protecting the wood from wear and tear. Follow these steps to sand and finish your hardwood stairs:
- Prepare the area: Clear the staircase of any debris and cover adjacent surfaces with drop cloths or plastic sheets to protect them from dust and finish.
- Sand the treads and risers: Use a handheld or orbital sander with medium-grit sandpaper to sand the surfaces of the treads and risers. Sand in the direction of the wood grain to ensure a consistent finish. Gradually switch to finer-grit sandpaper for a smoother surface.
- Sand the nosing: Sand the nosing edges using a hand sanding block or sandpaper to achieve a seamless transition between the nosing and the treads.
- Clean the stairs: Use a vacuum cleaner or a soft brush to remove all the sanding dust from the stairs. Ensure that the surface is clean and free of any debris before proceeding to the finishing step.
- Apply finish: Choose a suitable finish for your hardwood stairs, such as polyurethane, varnish, or oil-based finish. Apply the finish according to the manufacturer’s instructions, using a brush or a roller for an even coating. Allow the first coat to dry thoroughly before applying additional coats.
- Lightly sand between coats: After each coat has dried, lightly sand the surface with fine-grit sandpaper to create a smooth and even finish. Remove the sanding dust before applying subsequent coats.
- Apply final coats: Repeat the process of applying the finish, allowing it to dry between coats. The number of coats will depend on the desired level of protection and sheen.
- Allow the finish to cure: Once the final coat of finish is applied, allow sufficient time for it to cure according to the manufacturer’s instructions. This will ensure maximum durability and longevity.
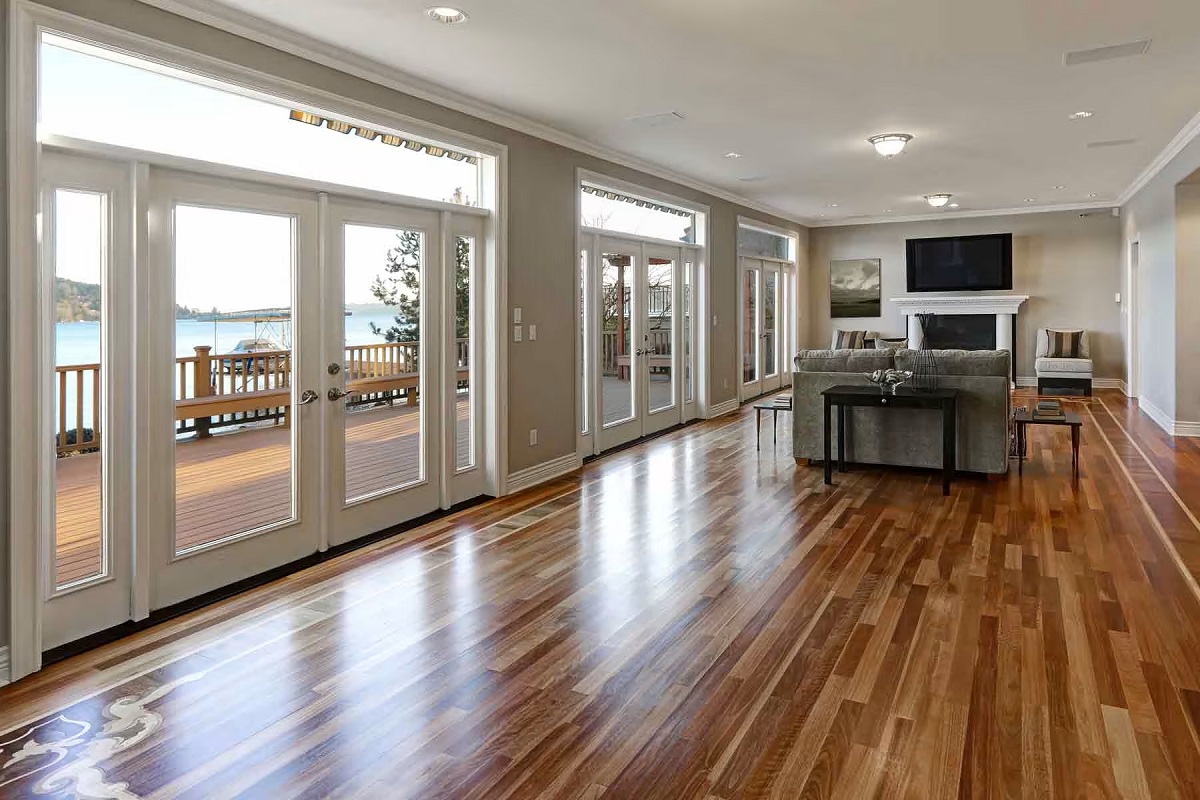
By following these steps, you’ll achieve a beautifully finished hardwood staircase that not only adds elegance to your home but also withstands daily use and enhances the overall value of your property.
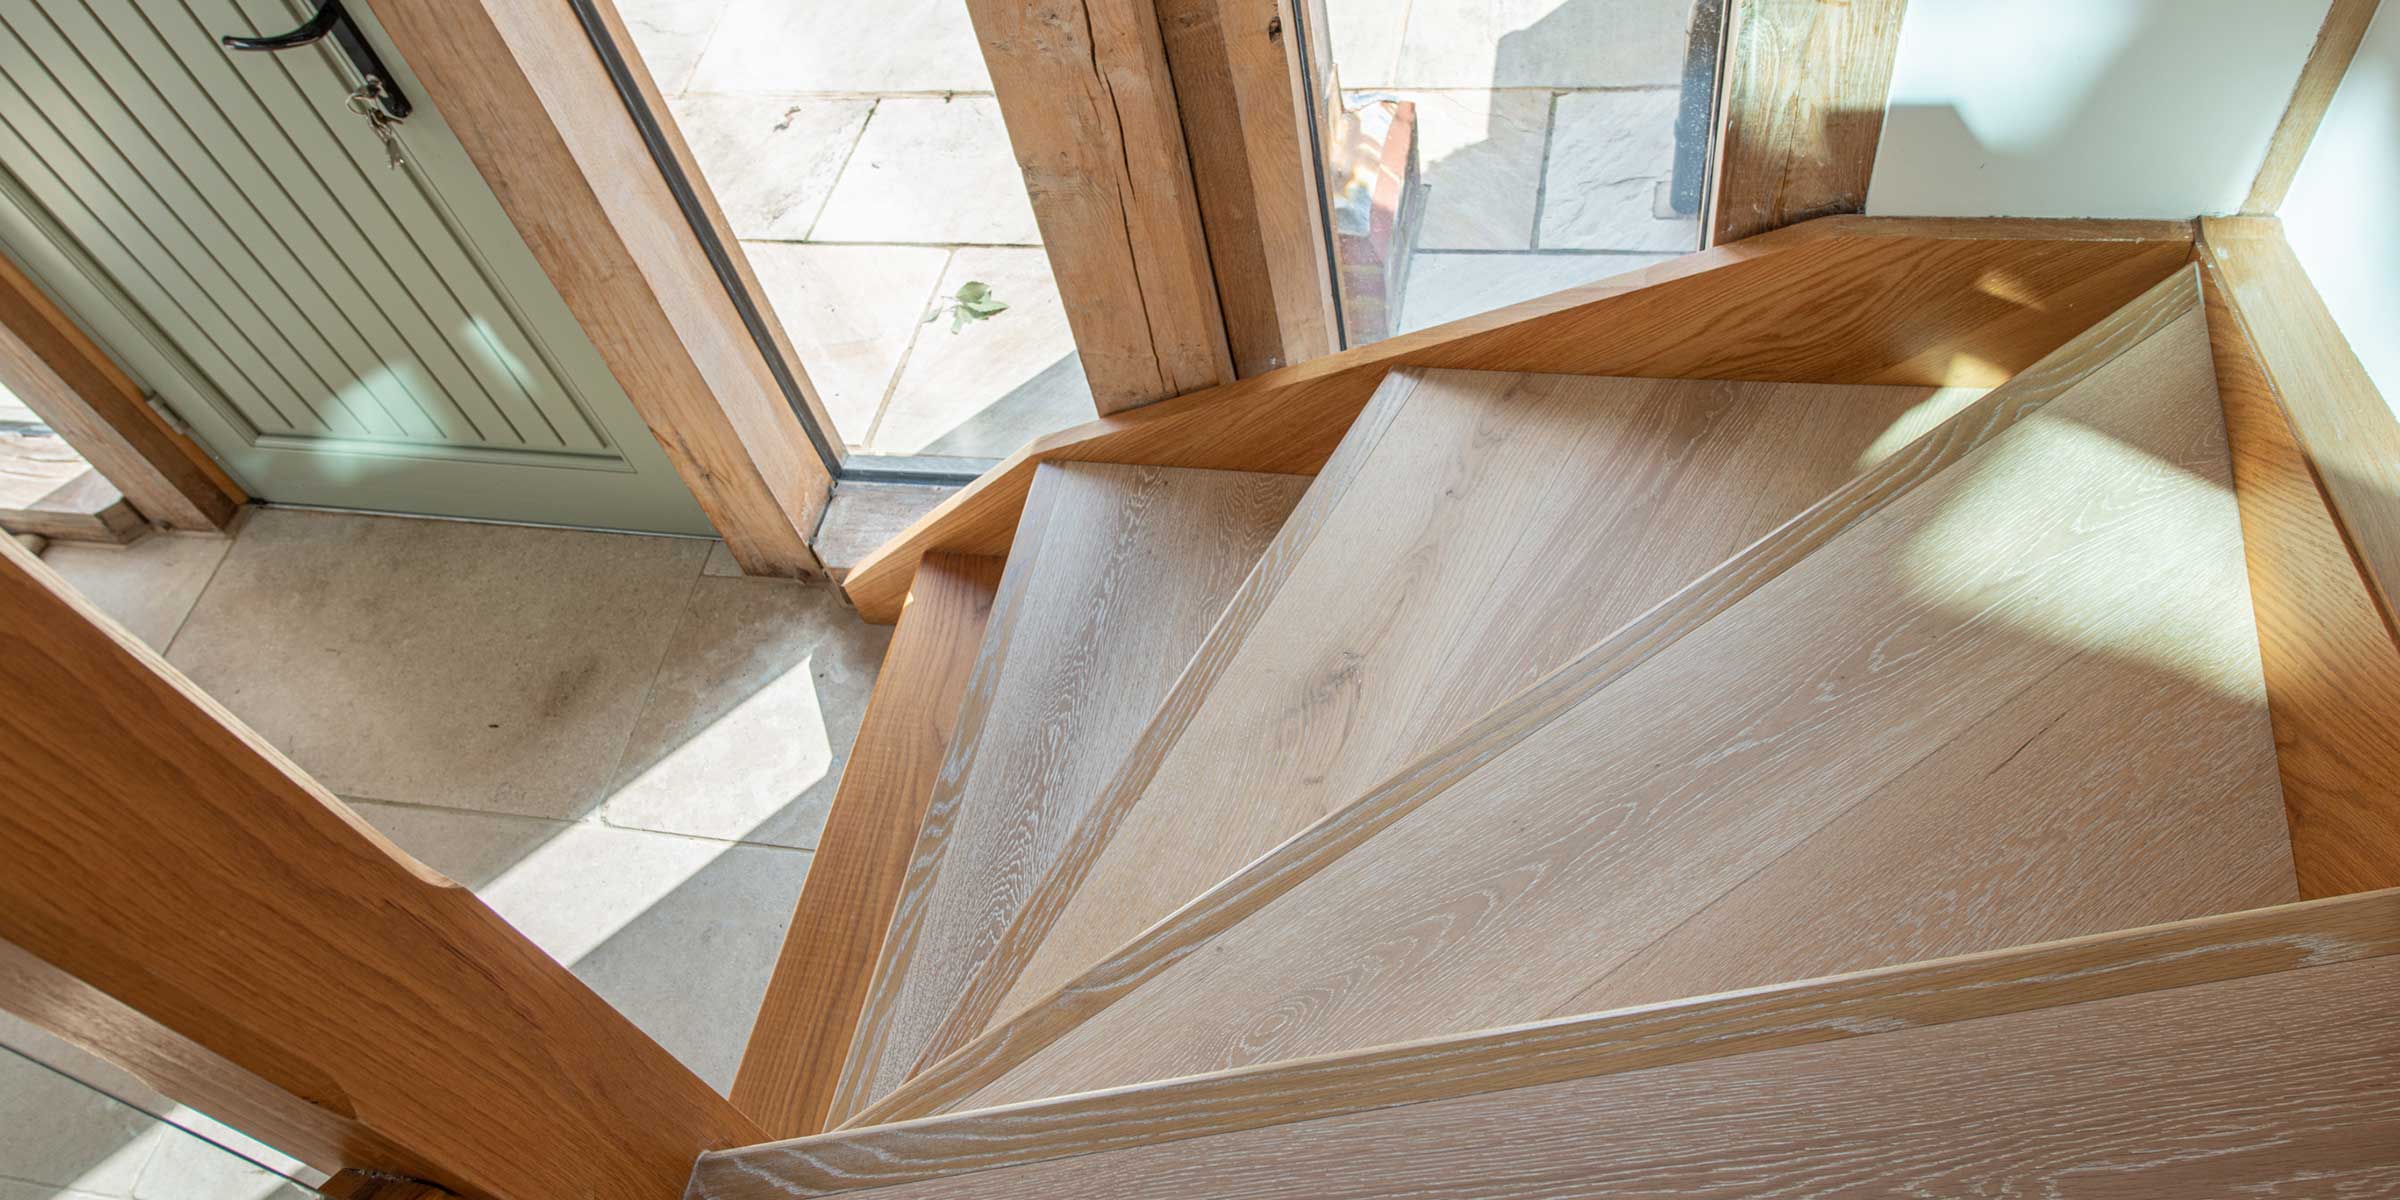
Congratulations! You have successfully completed all the steps to install and finish hardwood on your stairs. Take a step back and admire your handiwork—the transformation of your staircase is sure to impress! Remember to follow proper maintenance and care instructions to preserve the beauty of your hardwood stairs for years to come.
Conclusion
Installing hardwood on stairs is a rewarding and worthwhile project that can completely transform the look and feel of your home. By following the steps outlined in this comprehensive guide, you can confidently tackle the installation process and create a stunning, durable, and timeless staircase.
Throughout the process, proper planning, measurement, and preparation are key. Taking the time to gather the necessary tools and materials, measuring accurately, and preparing the staircase will ensure a successful installation. From removing the old stair treads to securing the new risers and treads, each step plays a vital role in creating a stable and visually appealing staircase.
With the treads and risers in place, don’t forget the finishing touches. Installing nosing provides a refined look and adds a layer of safety, while sanding and finishing completes the project by creating a smooth surface and protecting the wood from daily wear and tear.
Remember, if you’re not confident in your DIY skills, it’s always advisable to consult a professional to ensure a safe and successful installation. Their expertise and knowledge will help you achieve the best results.
Now, take a moment to admire your beautifully transformed hardwood staircase. The elegance, warmth, and durability of hardwood will undoubtedly leave a lasting impression on your guests and enhance the overall value of your home. Enjoy your new, stunning staircase for years to come!
Frequently Asked Questions about How To Install Hardwood On Stairs
Was this page helpful?
At Storables.com, we guarantee accurate and reliable information. Our content, validated by Expert Board Contributors, is crafted following stringent Editorial Policies. We're committed to providing you with well-researched, expert-backed insights for all your informational needs.


0 thoughts on “How To Install Hardwood On Stairs”