
Articles
How To Install Undermount Kitchen Sink
Modified: August 26, 2024
Learn how to properly install an undermount kitchen sink with our informative articles. From preparation to final installation, we've got you covered.
(Many of the links in this article redirect to a specific reviewed product. Your purchase of these products through affiliate links helps to generate commission for Storables.com, at no extra cost. Learn more)
Introduction
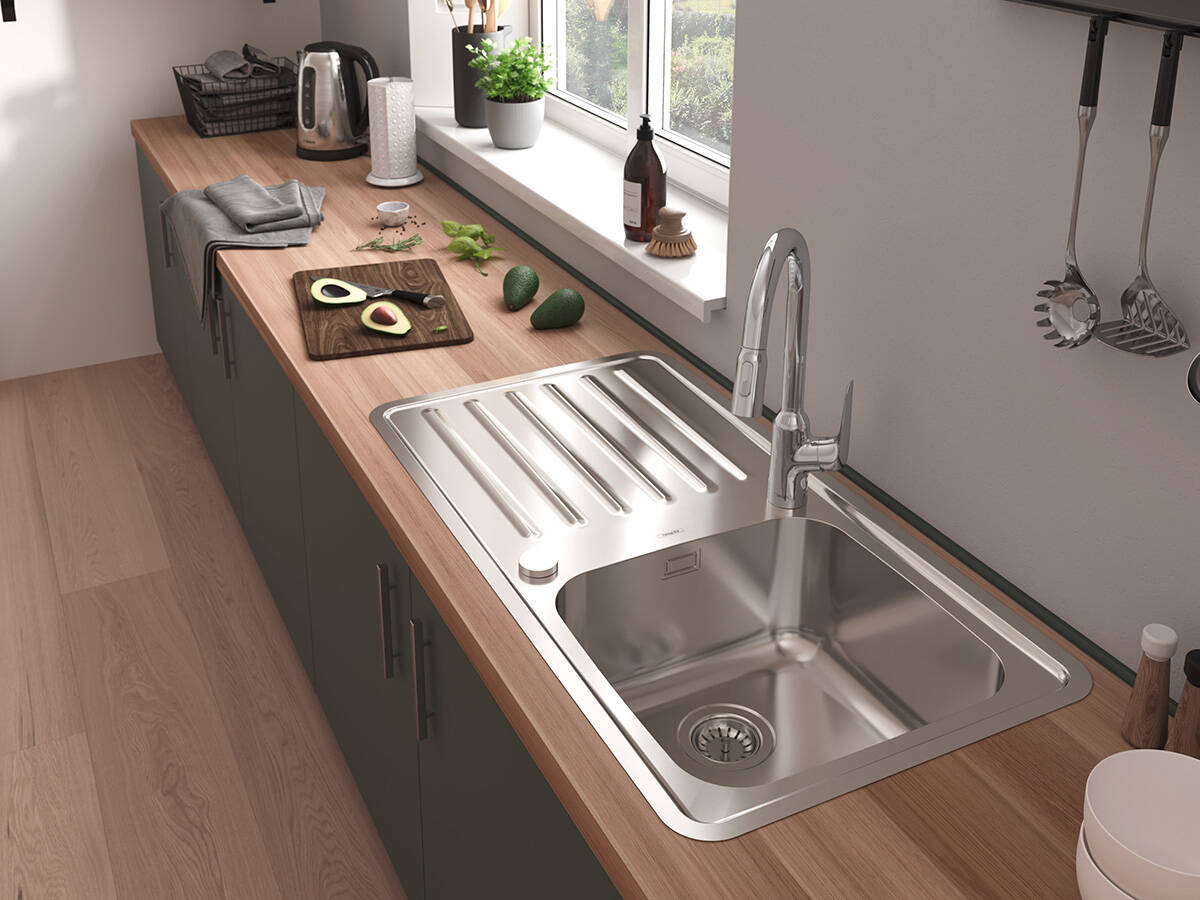
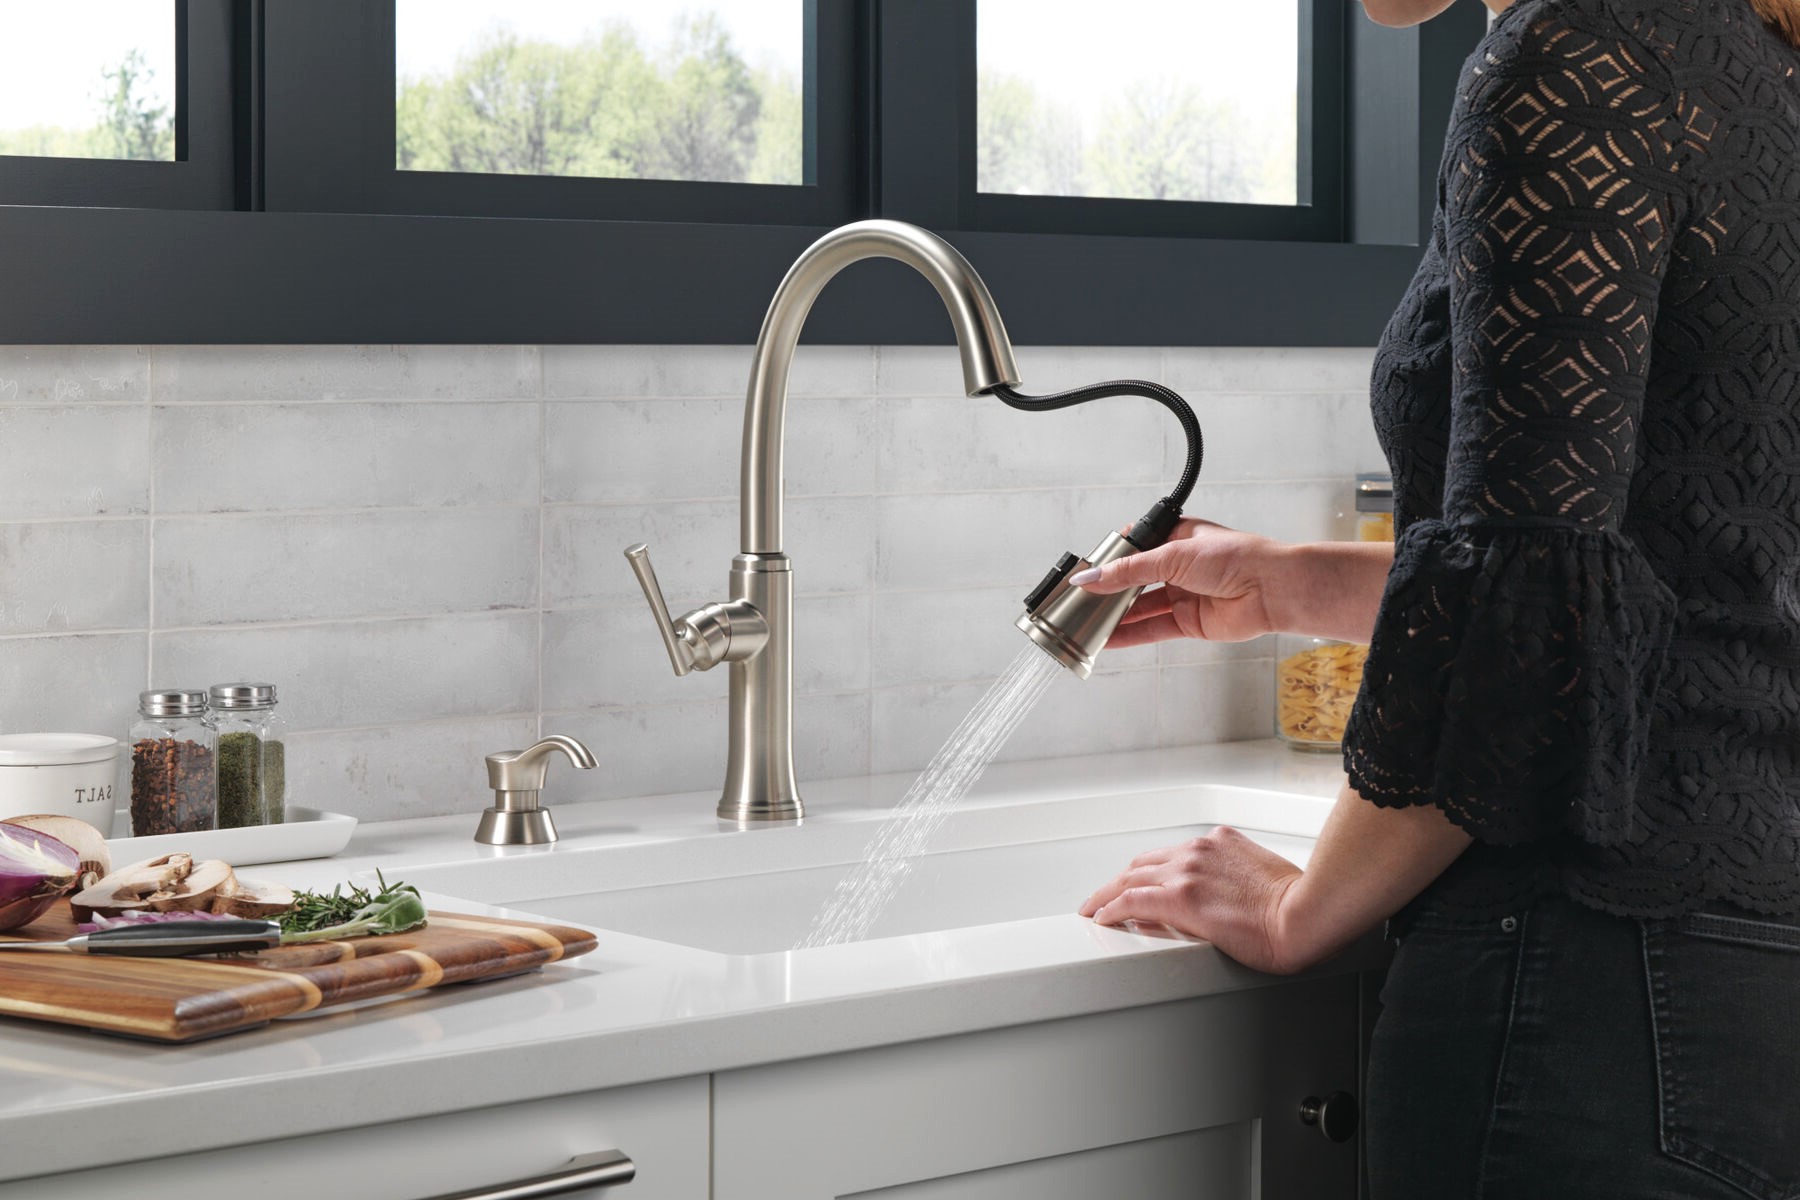
Welcome to our comprehensive guide on how to install an undermount kitchen sink. If you’re looking to upgrade your kitchen and create a sleek and modern look, an undermount sink is a perfect choice. Unlike top-mount sinks, undermount sinks are installed beneath the countertop, providing a seamless and streamlined appearance.
Installing an undermount sink may seem like a daunting task, but with the right tools and a step-by-step approach, you can easily accomplish this project. In this article, we will walk you through the entire installation process, from preparing the sink area to connecting the plumbing.
Before we dive into the step-by-step instructions, let’s take a look at the tools and materials you will need for the installation:
Key Takeaways:
- Upgrade your kitchen with a sleek and modern look by installing an undermount sink. Follow the step-by-step guide for a seamless and stable installation process.
- Ensure a durable and functional undermount sink by properly preparing the area, creating support brackets, and testing for leaks. Enjoy a beautiful and reliable kitchen upgrade.
Read more: What Is Undermount Sink
Tools and Materials Needed
- Undermount sink
- Silicone adhesive
- Support brackets
- Drill
- Screwdriver
- Tape measure
- Pencil or marker
- Adjustable wrench
- Plumber’s putty
- Plumbing supplies (pipes, connectors, etc.)
Now that you have gathered all the necessary tools and materials, let’s get started with the installation process.
Key Takeaways:
- Upgrade your kitchen with a sleek and modern look by installing an undermount sink. Follow the step-by-step guide for a seamless and stable installation process.
- Ensure a durable and functional undermount sink by properly preparing the area, creating support brackets, and testing for leaks. Enjoy a beautiful and reliable kitchen upgrade.
Read more: What Is Undermount Sink
Tools and Materials Needed
Before you begin installing your undermount kitchen sink, it’s important to gather all the necessary tools and materials. Having everything at hand will make the installation process smoother and more efficient. Here’s a comprehensive list of what you’ll need:
- Undermount sink: Choose a sink that fits the dimensions of your countertop opening and complements your kitchen decor. Undermount sinks are available in various materials, such as stainless steel, granite composite, and porcelain.
- Silicone adhesive: This adhesive is used to secure the sink to the underside of the countertop. Make sure to choose a high-quality adhesive that is specifically designed for undermount sink installation.
- Support brackets: These brackets provide additional support and stability to the sink. They are typically made of metal and are installed on the sides of the sink cabinet.
- Drill: A power drill will be needed to create holes for the support brackets and plumbing connections.
- Screwdriver: You’ll need a screwdriver to attach and tighten the screws for the support brackets.
- Tape measure: Accurate measurements are vital for a successful installation. Use a tape measure to measure the dimensions of your sink and countertop opening.
- Pencil or marker: Marking the sink and countertop ensures proper alignment during the installation process.
- Adjustable wrench: This tool is used to tighten and loosen plumbing connections.
- Plumber’s putty: Plumber’s putty is a sealant used to create a watertight seal between the sink drain and the countertop.
- Plumbing supplies: Depending on your specific plumbing setup, you may need additional supplies such as pipes, connectors, and plumber’s tape.
Having these tools and materials ready beforehand will save you time and ensure a smooth installation process. Now that you’re well-equipped, let’s move on to the step-by-step instructions for installing your undermount kitchen sink.
Step 1: Preparing the Sink Area
Before you can install your undermount kitchen sink, it’s important to properly prepare the sink area. This involves removing the old sink (if applicable), cleaning the countertop surface, and ensuring that the area is level and free from any debris or obstruction.
Here’s a breakdown of the steps to prepare the sink area:
- Remove the old sink: If you’re replacing an existing sink, start by disconnecting the plumbing connections and removing the sink from the countertop. Follow the manufacturer’s instructions or consult a professional if you’re unsure how to remove your specific type of sink.
- Clean the countertop surface: Thoroughly clean the countertop surface where the sink will be installed. Remove any dirt, grease, or old sealant using a mild cleaner or degreaser. Ensure that the surface is completely dry before proceeding.
- Check for levelness: Use a level to ensure that the countertop surface is level. If it’s not, you may need to add shims or adjust the cabinet to achieve a level surface. A level countertop is crucial for proper installation and functionality of the undermount sink.
- Clear the sink opening: Remove any obstructions from the sink opening, such as clips or brackets from the previous sink installation. Ensure that the opening is clean and free from any debris or protrusions that could interfere with the installation process.
By properly preparing the sink area, you’ll create a clean and level surface for installing your undermount kitchen sink. Once the sink area is ready, you can proceed to the next step: measuring and marking the countertop for the sink installation.
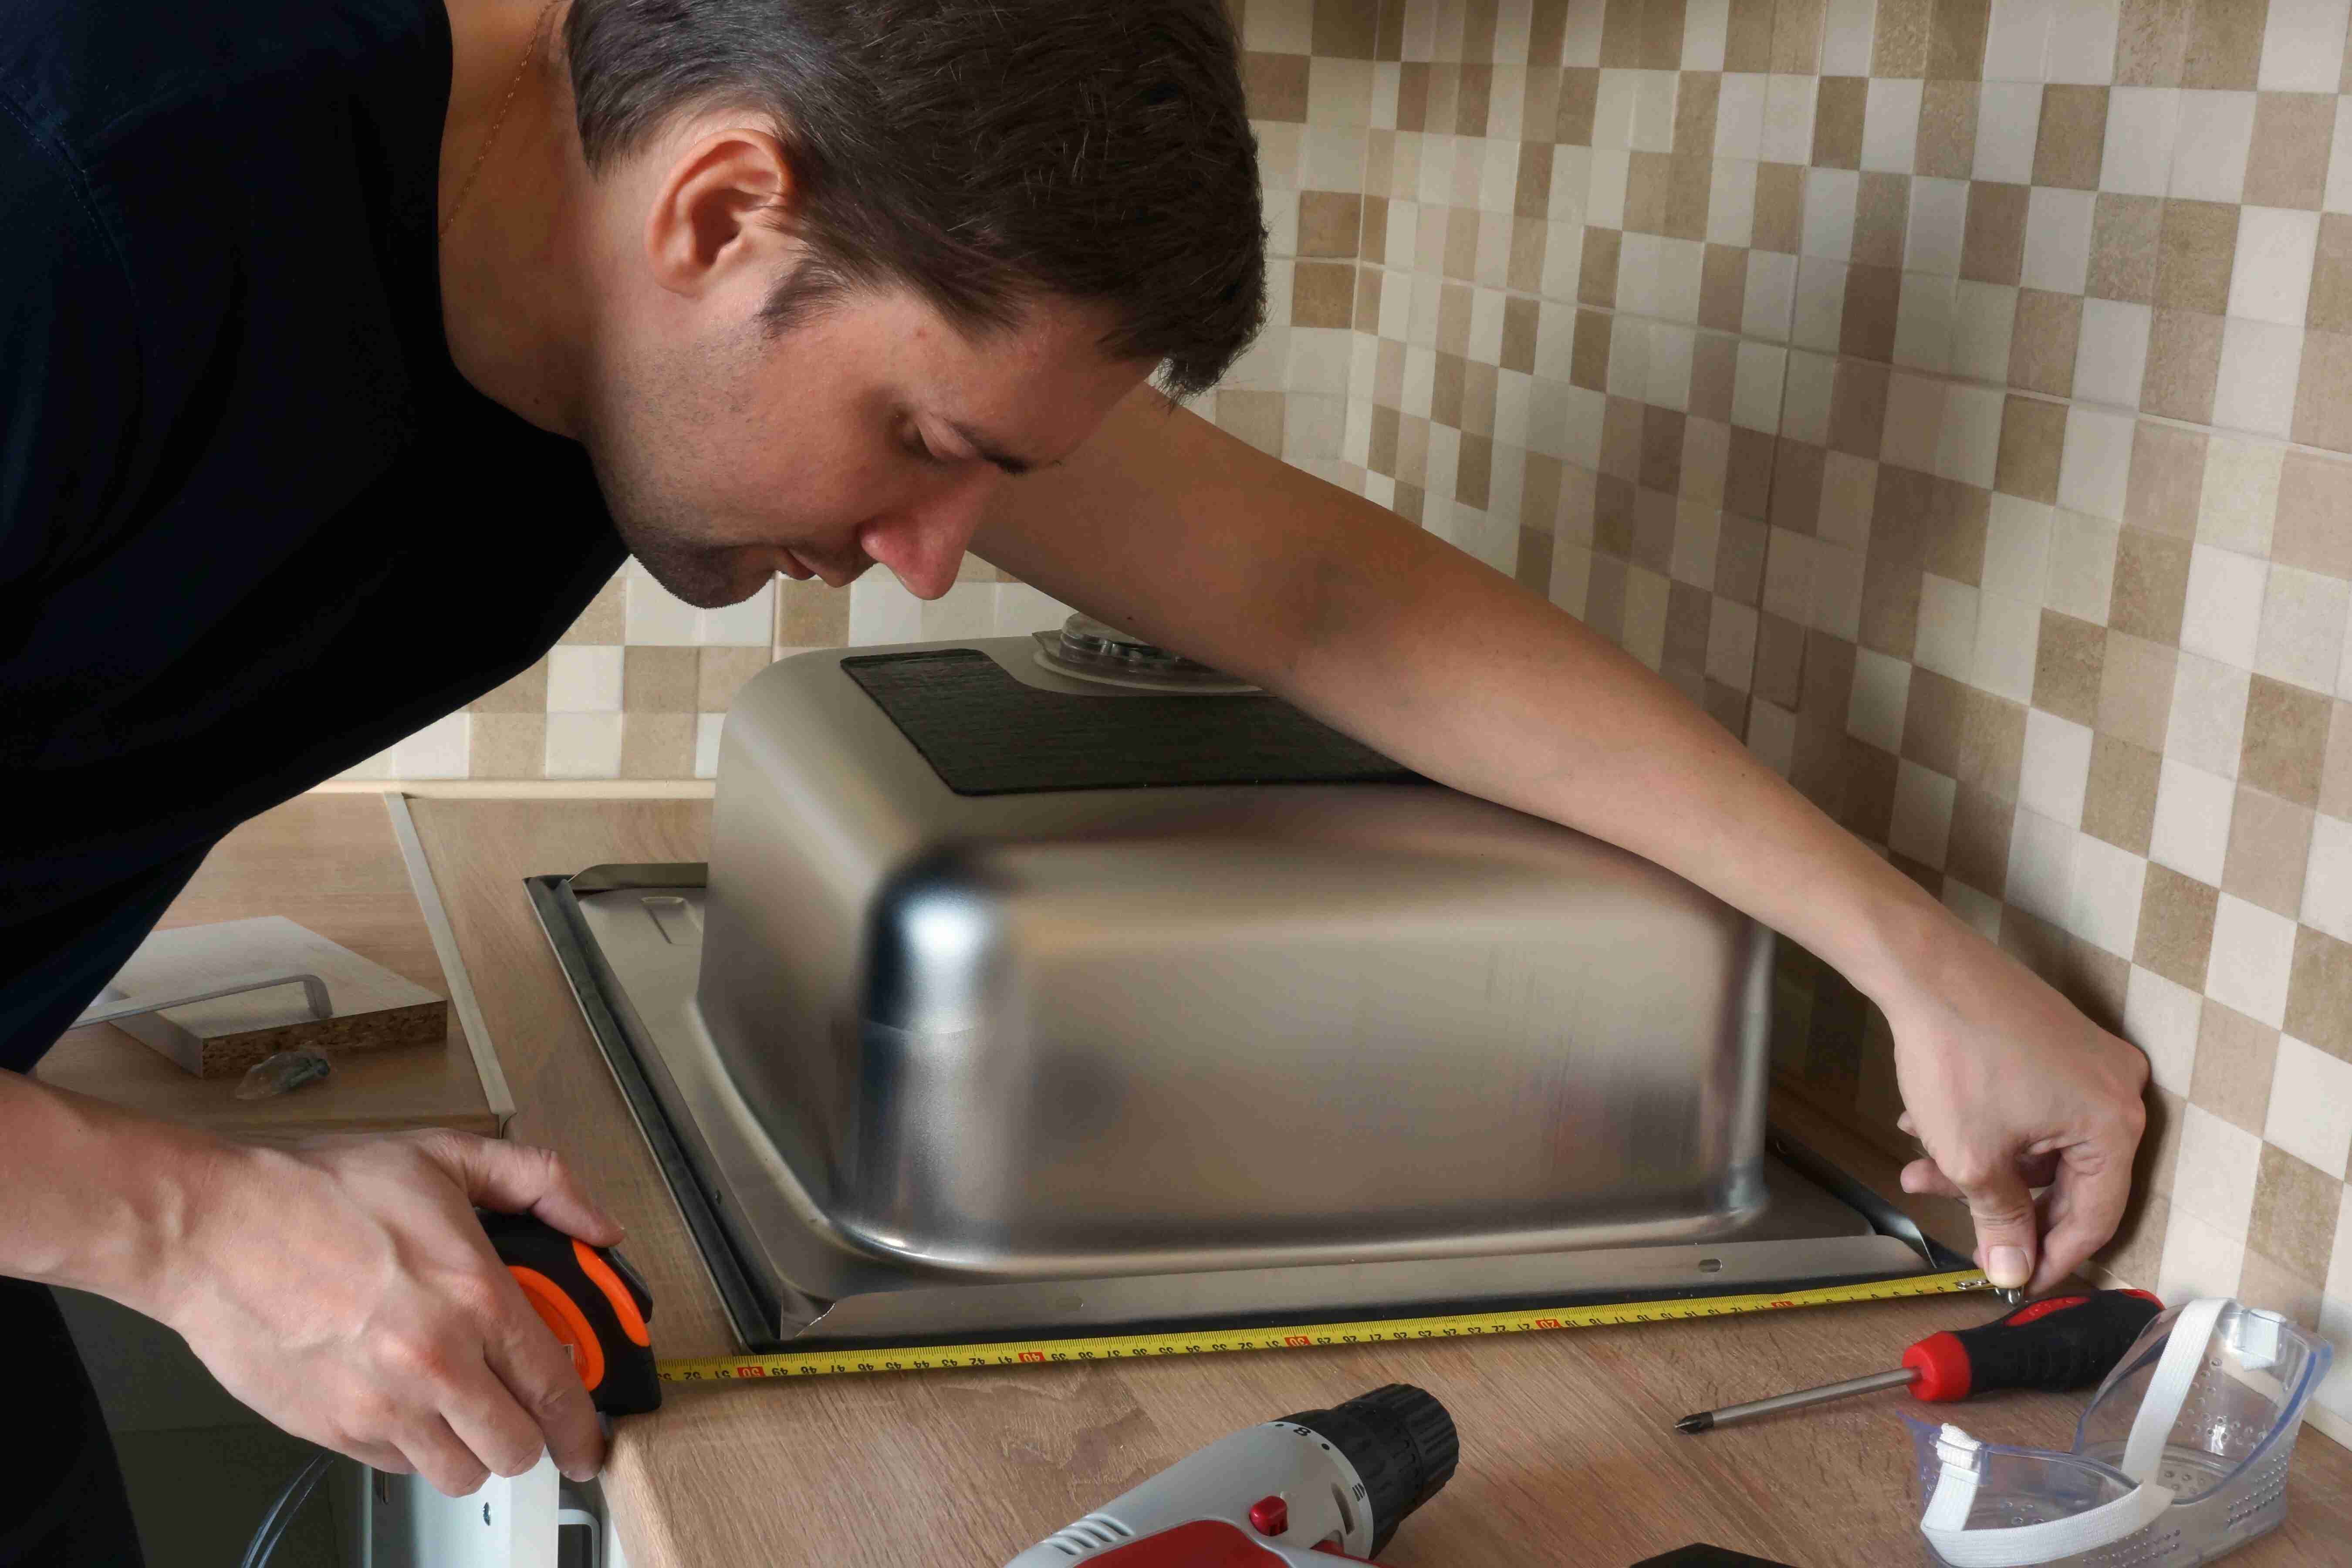
Step 2: Measuring and Marking
Once you’ve prepared the sink area, the next step in installing an undermount kitchen sink is to measure and mark the countertop. Accurate measurements are crucial for ensuring a proper fit and alignment of the sink.
Here’s a step-by-step guide for measuring and marking the countertop:
- Measure the sink opening: Use a tape measure to measure the dimensions of the sink opening in the countertop. Take accurate measurements of the width, depth, and height of the opening. It’s important to note that the opening should be slightly larger than the size of the sink to allow for proper installation.
- Transfer measurements to the countertop: Once you have the measurements, transfer them to the underside of the countertop. Use a pencil or marker to mark the outline of the sink opening. Make sure to align the markings with the center of the cabinet and ensure that the sink will be positioned where you want it.
- Mark the faucet and accessory holes: If your sink has pre-drilled faucet and accessory holes, mark their locations on the countertop as well. Measure the distances between the holes and ensure they are aligned with your faucet and accessories.
- Double-check the markings: Before proceeding to the next step, double-check your measurements and markings. Ensure that they are accurate and properly align with your sink and plumbing fixtures.
By taking precise measurements and marking the countertop, you’ll ensure that the undermount sink fits perfectly into the opening and aligns properly with the rest of your kitchen fixtures. With the countertop marked, you’re now ready to move on to the next step of creating support brackets for the sink installation.
Read more: How To Measure Undermount Sink
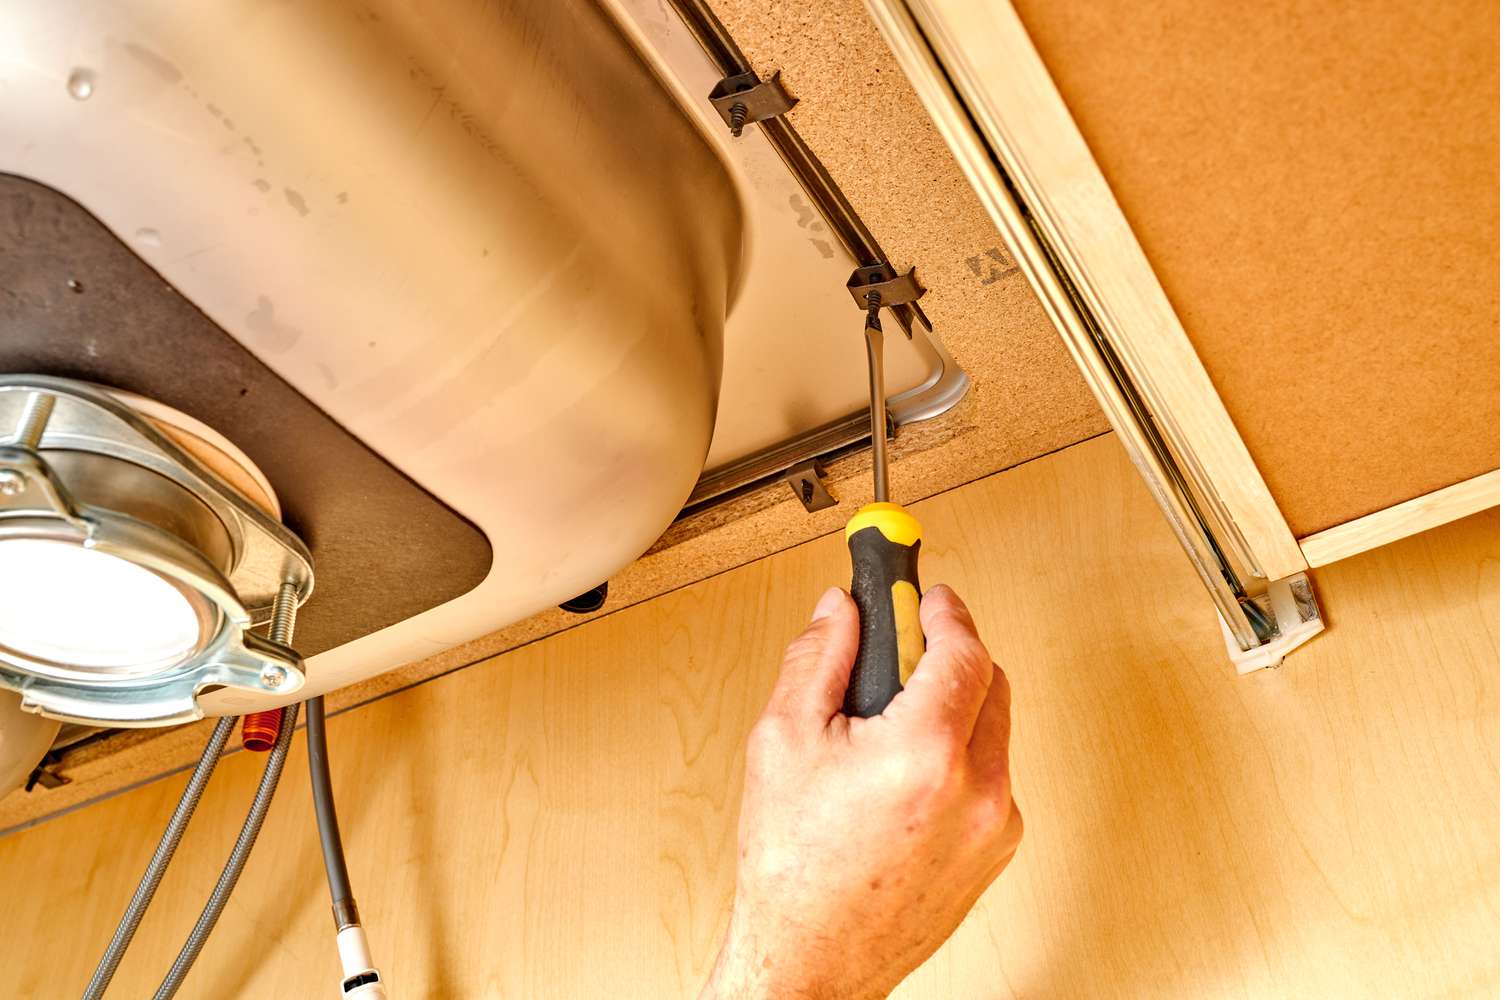
Step 3: Creating Support Brackets
In order to provide stability and support to your undermount kitchen sink, it’s important to create and install support brackets. These brackets will help secure the sink to the underside of the countertop and prevent any sagging or movement over time.
Here’s a step-by-step guide on creating support brackets for your undermount sink:
- Measure and cut the support brackets: Using a tape measure, measure the length of the sides of your sink cabinet. Cut metal support brackets to the appropriate length, ensuring they are slightly shorter than the cabinet width to allow for adjustments.
- Position the brackets: Place the support brackets on the sides of the sink cabinet, lining them up with the marked outline of the sink opening. Ensure that they are evenly spaced and centered to provide optimal support.
- Mark the hole locations: Use a pencil or marker to mark the hole locations for the brackets on the cabinet sidewalls. These holes will be used for attaching the brackets later on.
- Drill pilot holes: Using a drill, create pilot holes at the marked locations on the cabinet sidewalls. Make sure the pilot holes are slightly smaller than the screws you’ll be using to attach the brackets.
- Attach the support brackets: Position the brackets back onto the cabinet sidewalls, aligning them with the pilot holes. Secure the brackets in place by driving screws through the holes and into the cabinet sidewalls.
- Check the stability: Once the brackets are attached, give them a gentle tug to ensure they are securely in place. The brackets should feel stable and provide support for the sink.
By creating and installing support brackets, you’ll ensure that your undermount sink is properly supported and secured to the countertop. These brackets will help distribute the weight of the sink and prevent any sagging or movement over time. With the brackets in place, you’re now ready to move on to the next step of attaching the sink to the countertop.
Before installing an undermount kitchen sink, ensure that the countertop is properly supported and the sink is the correct size for the opening. Use a high-quality adhesive to secure the sink in place and follow the manufacturer’s instructions carefully.
Step 4: Attaching the Sink to the Countertop
With the sink area prepared and support brackets installed, it’s time to attach the undermount sink to the countertop. This step is crucial for ensuring a secure and stable installation.
Follow these steps to properly attach the sink to the countertop:
- Apply silicone adhesive: Apply a generous amount of silicone adhesive around the entire perimeter of the sink cutout on the underside of the countertop. This adhesive will help create a watertight seal and secure the sink in place.
- Position the sink: Carefully lower the sink into the countertop opening, making sure it aligns with the marked outline. Take your time to position the sink properly as adjustments may be difficult once the adhesive sets.
- Press down firmly: Once the sink is in position, apply even pressure to the entire surface of the sink. This helps ensure that the sink adheres well to the silicone adhesive and creates a strong bond.
- Remove excess adhesive: Wipe away any excess silicone adhesive that squeezes out from the sink and countertop joint. Use a clean cloth or sponge to remove the excess and achieve a clean and professional finish.
It’s important to note that some sinks may come with clips or mounting hardware for additional support. If your sink includes these accessories, follow the manufacturer’s instructions to properly attach them to the sink and secure it to the countertop.
Once the sink is securely attached to the countertop, allow the silicone adhesive to dry and cure as per the manufacturer’s instructions. This usually takes several hours or overnight. In the meantime, you can proceed to the next steps of connecting the plumbing.
Congratulations! The undermount sink is now successfully attached to the countertop. With the sink securely in place, you’re ready to move on to the next steps of connecting the plumbing and testing for any potential leaks.
Step 5: Securing the Sink with Adhesive
After attaching the undermount sink to the countertop, the next step is to secure it using adhesive. This step is crucial for ensuring a strong and durable bond between the sink and the countertop.
Follow these steps to properly secure the sink with adhesive:
- Choose a high-quality adhesive: Select a silicone adhesive that is specifically designed for undermount sink installations. It should be waterproof and provide a strong bond.
- Apply the adhesive: Apply a generous amount of adhesive around the entire perimeter of the sink where it comes in contact with the countertop. Use a caulking gun or a squeeze tube to apply an even layer of adhesive.
- Ensure complete coverage: Make sure the adhesive is applied consistently and covers the entire contact area between the sink and the countertop. This will ensure a secure bond and prevent any water leakage.
- Secure any mounting brackets or clips: If your sink comes with mounting brackets or clips, secure them in place using the adhesive. This will provide additional stability and support to the sink.
- Give the adhesive time to cure: Allow the adhesive to dry and cure as per the manufacturer’s instructions. This may take several hours or overnight. Avoid placing any weight or stress on the sink during this time to ensure a strong bond.
It’s important to note that the adhesive will create a watertight seal between the sink and the countertop, preventing any water from seeping into the cabinet below. A proper bond is essential for the long-term durability and functionality of the undermount sink.
Once the adhesive has fully cured, you can move on to the next steps of connecting the plumbing and testing for leaks. Congratulations! Your undermount sink is now securely attached to the countertop, and you’re one step closer to completing the installation process.
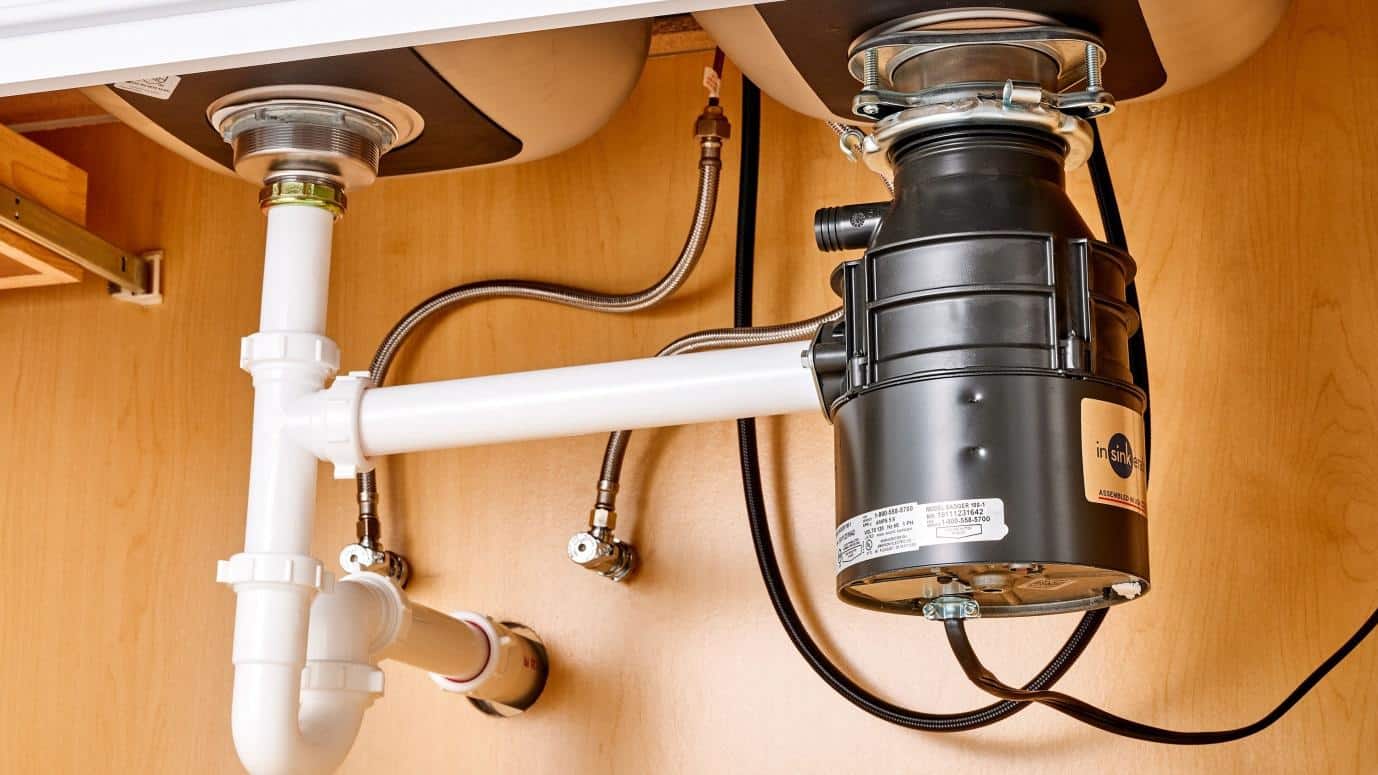
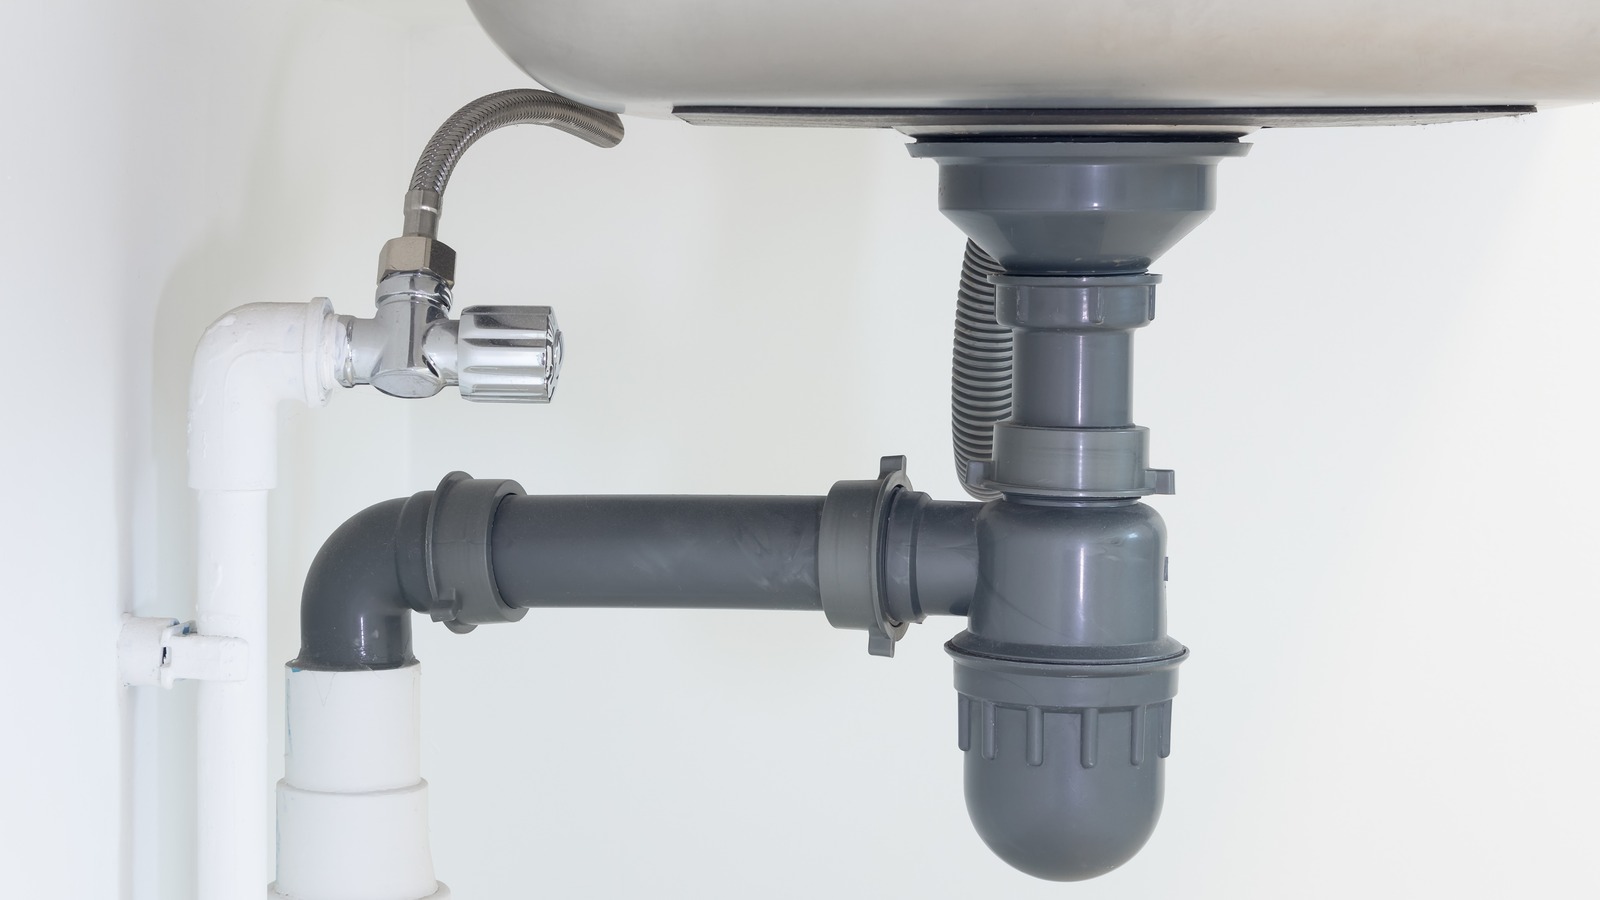
Step 6: Connecting Plumbing
Once the undermount sink is securely attached to the countertop, the next step is to connect the plumbing. This involves connecting the drain lines, water supply lines, and any additional plumbing fixtures.
Follow these steps to properly connect the plumbing for your undermount sink:
- Install the sink drain: Begin by installing the sink drain assembly. Apply plumber’s putty around the drain hole in the sink, then insert the drain assembly and tighten it from underneath using an adjustable wrench. Ensure a proper seal to prevent any water leakage.
- Connect the P-trap: Install the P-trap under the sink drain by connecting the curved section of the P-trap to the sink drain and the straight section to the wall or floor drain pipe. Use an adjustable wrench to tighten the connections, ensuring they’re snug but not overly tightened.
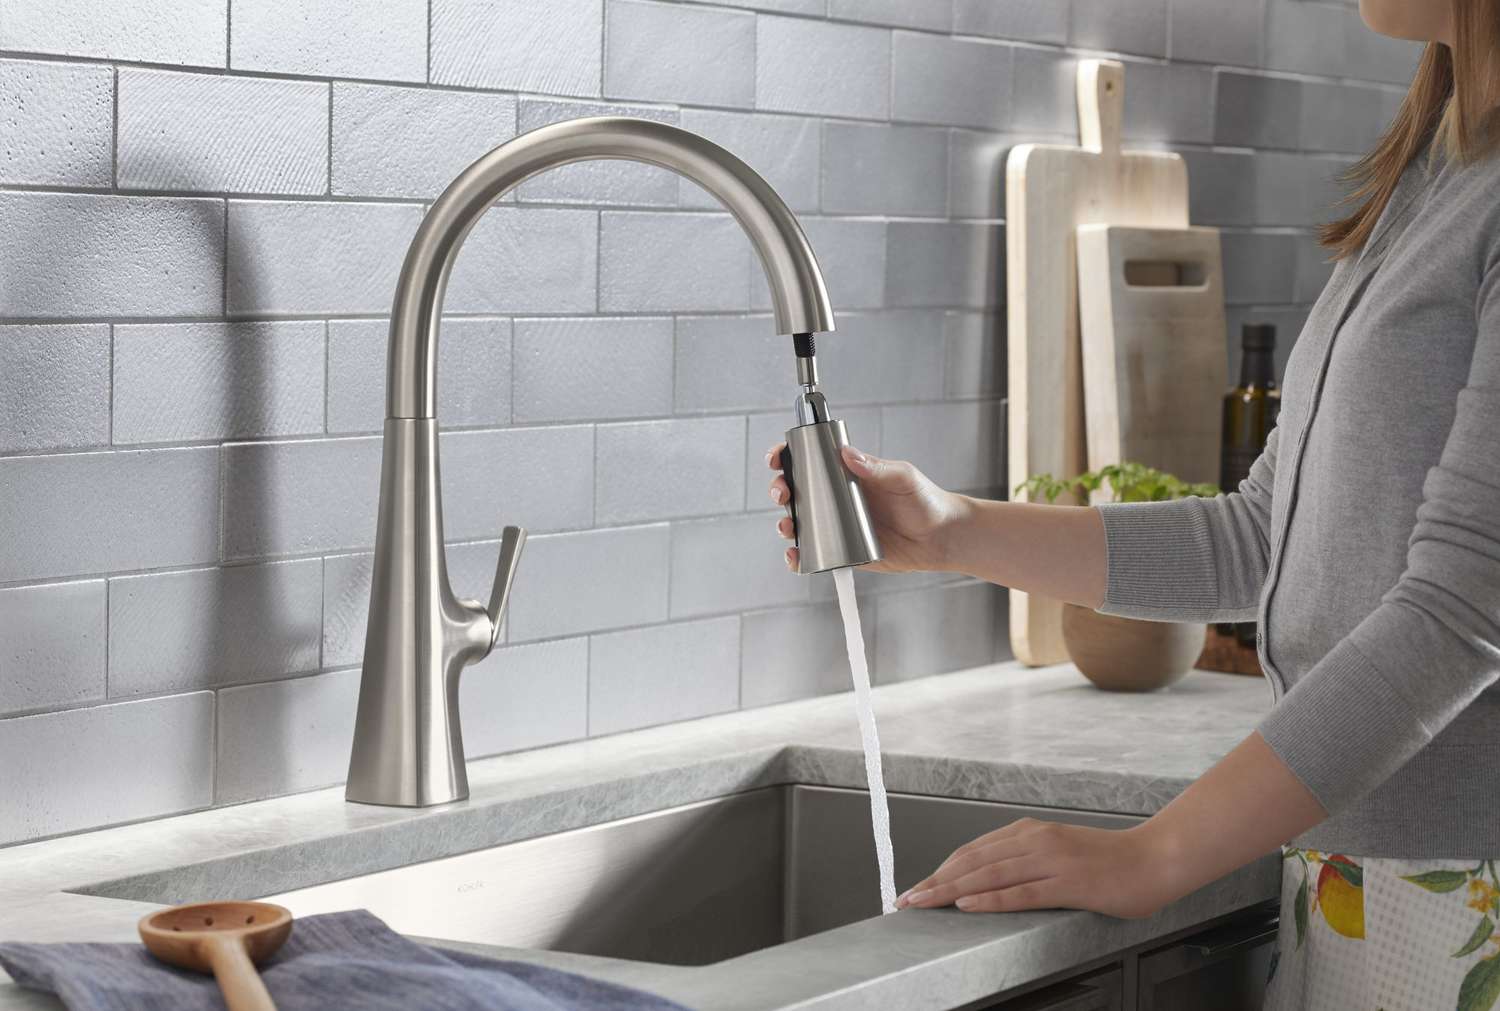
- Connect the water supply lines: Depending on your plumbing setup, connect the water supply lines to the faucet using the appropriate fittings. Use plumber’s tape to ensure a secure and leak-free connection. Tighten the connections with an adjustable wrench, being careful not to overtighten.
- Test for leaks: Once you’ve connected the plumbing, turn on the water supply to test for any leaks. Check the connections, faucet, and drain for any signs of water leakage. If you notice any leaks, tighten the connections or apply plumber’s tape to fix the issue.
It’s essential to ensure that all plumbing connections are secure and leak-free to prevent any water damage to your cabinets or kitchen. It’s recommended to carefully inspect the connections and test for leaks multiple times before considering the installation complete.
Once you’ve successfully connected the plumbing and tested for leaks, you can move on to the final step of the installation process: testing the sink for proper functionality.
Congratulations! Your undermount sink is now fully connected and ready for use. By completing this step, you’re one step closer to enjoying your new and improved kitchen sink.
Read more: How To Attach An Undermount Sink To Granite
Step 7: Testing for Leaks
After completing the installation of your undermount kitchen sink and connecting the plumbing, it’s crucial to thoroughly test for any potential leaks. This step ensures that your sink is functioning properly and that there are no hidden issues that could lead to water damage or other problems.
Follow these steps to properly test your undermount sink for leaks:
- Fill the sink with water: Start by plugging the drain and filling the sink with water. Let the water sit for a few minutes to allow any potential leaks to become visible.
- Inspect the drain: Carefully examine the sink drain and the connections for any signs of leakage. Check for drips or pooling water around the drain assembly, P-trap, and any other plumbing connections.
- Check the faucet: Turn on the faucet and observe both the hot and cold water supply lines. Look for any signs of dripping or leaking around the faucet connections and handles.
- Inspect the underside: Carefully check the underside of the sink, along with the cabinet and surrounding areas, for any signs of water damage or moisture. This is especially important if you had any leaks during the testing process.
- Monitor for an extended period: Keep an eye on the sink and plumbing connections for an extended period, running water and using the sink as you normally would. This will help ensure that no hidden leaks occur over time.
- Make necessary adjustments: If you notice any leaks during the testing process, carefully tighten the affected connections or apply plumber’s tape to fix the issue. Repeat the testing process until there are no more leaks.
By carefully testing for leaks, you can identify and address any potential issues early on, preventing water damage and ensuring the long-term functionality of your undermount sink.
Once you have completed the testing process and have confirmed that there are no leaks, congratulations! You have successfully installed and tested your undermount kitchen sink. Enjoy the sleek and modern look it brings to your kitchen, and feel confident in its reliable and secure performance.
Conclusion
Congratulations on successfully installing your undermount kitchen sink! By following the step-by-step guide in this article, you have accomplished a significant upgrade to your kitchen and created a sleek and modern look.
We started by preparing the sink area, removing the old sink (if applicable), and cleaning the countertop surface. Next, we measured and marked the countertop to ensure an accurate fit for the undermount sink. Then, we created and installed support brackets to provide stability and support.
After that, we attached the sink to the countertop using silicone adhesive, ensuring a secure bond. We then moved on to connecting the plumbing, including the sink drain, P-trap, and water supply lines. Testing for leaks was a critical final step to ensure the proper functionality of the sink and prevent any water damage.
By completing these steps with care and attention to detail, you can enjoy a beautiful, functional, and long-lasting undermount kitchen sink. The sleek design and seamless integration of the sink into the countertop will enhance the overall aesthetic of your kitchen.
Remember, the key to a successful installation is proper preparation, accurate measurements, thorough testing, and attention to detail. If you encounter any challenges or are unsure about any step, it’s always a good idea to seek professional assistance to ensure the best results.
Thank you for choosing this comprehensive guide on how to install an undermount kitchen sink. We hope it has provided valuable insights and guidance throughout the installation process. Enjoy your new sink and the many benefits it brings to your kitchen!
Now that you've mastered installing an undermount kitchen sink, why not expand your DIY skills further? If you're curious about connecting the water source seamlessly, our guide on "sink installation" provides step-by-step details. Wondering about different types of sinks? Our article on "undermount sinks" offers insights into their benefits and installation nuances. For those aiming to optimize kitchen space, don't miss our expert's "kitchen design" tips for maximizing storage efficiently. Each guide is crafted to help you enhance your home improvement skills effectively.
Frequently Asked Questions about How To Install Undermount Kitchen Sink
Was this page helpful?
At Storables.com, we guarantee accurate and reliable information. Our content, validated by Expert Board Contributors, is crafted following stringent Editorial Policies. We're committed to providing you with well-researched, expert-backed insights for all your informational needs.


0 thoughts on “How To Install Undermount Kitchen Sink”