
Articles
How To Install New Kitchen Sink
Modified: March 1, 2024
Step-by-step guide on installing a new kitchen sink. Learn from our expert articles and make your kitchen renovation a breeze!
(Many of the links in this article redirect to a specific reviewed product. Your purchase of these products through affiliate links helps to generate commission for Storables.com, at no extra cost. Learn more)
Introduction
Welcome to our guide on how to install a new kitchen sink. Updating your kitchen sink can not only enhance the overall look of your kitchen but also improve its functionality. While it may seem like a daunting task, with proper preparation and some basic tools, you can successfully install a new sink on your own.
Before beginning the installation process, it’s important to gather all the necessary tools and materials. This will ensure that you have everything you need at hand, saving you time and frustration. Once you have everything ready, you can proceed to remove the old sink and prepare the area for the new installation.
Installing a new sink involves connecting the plumbing, securing the sink in place, and performing a thorough test for leaks. Completing these steps correctly will ensure that your new kitchen sink is not only functional but also free from any potential issues.
In this comprehensive guide, we will take you through each step of the installation process, providing you with detailed instructions and helpful tips along the way. By following these steps, you’ll be able to successfully install your new kitchen sink and enjoy a fresh and upgraded space.
So, let’s dive in and learn how to install a new kitchen sink!
Key Takeaways:
- Installing a new kitchen sink is a manageable DIY project with the right tools and preparation. From removing the old sink to testing for leaks, following each step carefully ensures a successful and professional-looking result.
- Proper measurement, securing plumbing connections, and attention to detail are crucial for a functional and leak-free installation. Seeking professional assistance for any difficulties and prioritizing safety throughout the process is essential.
Read more: How To Install New Sink Plumbing
Step 1: Gather the necessary tools and materials
Before you begin the installation process, it’s essential to gather all the necessary tools and materials. Having everything ready in advance will ensure a smooth and efficient installation. Here’s a list of the items you’ll need:
- A new kitchen sink
- A wrench or pliers
- A screwdriver
- A putty knife
- A silicone adhesive
- A caulk gun
- A tape measure
- A bucket
- A rag or towel
- Plumber’s tape
- Plumbing pipes and connectors
- Safety goggles and gloves
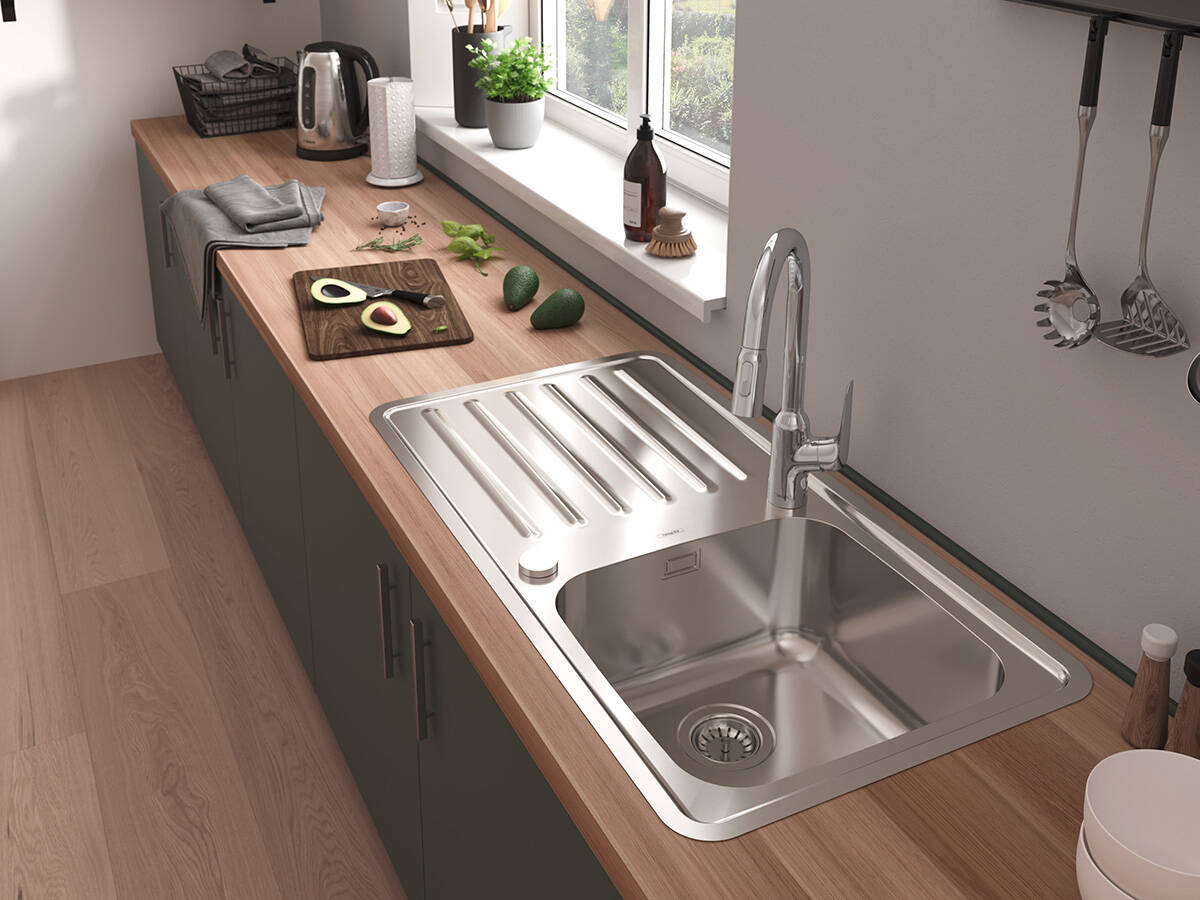
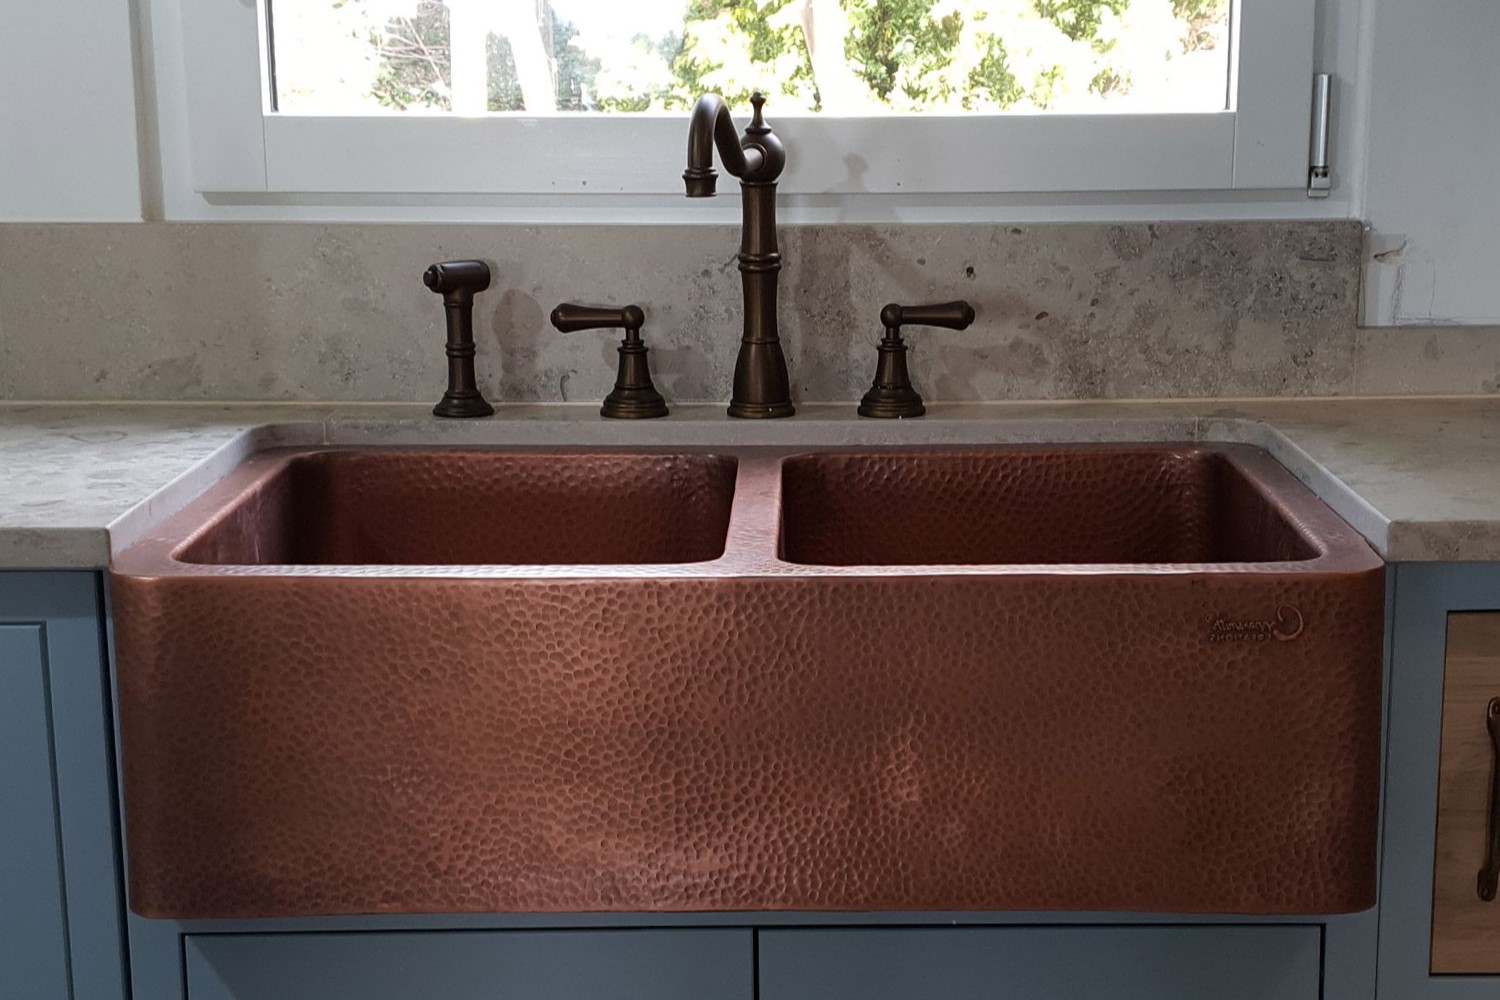
When selecting a new kitchen sink, consider the size and style that will best suit your needs and blend with your kitchen decor. Measure the dimensions of the sink opening to ensure a proper fit.
Having a wrench or pliers on hand will help with loosening and tightening nuts and connectors during the installation process. A screwdriver is necessary for removing any screws or fasteners.
A putty knife will come in handy for scraping off any old caulk or adhesive from the previous sink installation. High-quality silicone adhesive is essential for sealing the sink to the countertop, ensuring a watertight connection. A caulk gun will make it easier to apply the adhesive.
Proper measurement is crucial when installing a new sink. A tape measure will help you accurately measure the dimensions of the sink opening and ensure a precise fit.
A bucket will be useful for catching any water that might spill during the installation. Keep a rag or towel nearby to wipe away any spills or excess water, keeping your workspace clean and dry.
Plumber’s tape is necessary for creating a secure seal between plumbing pipe connectors. Safety goggles and gloves should be worn to protect your eyes and hands when handling tools and materials.
Now that you have all the necessary tools and materials ready, you’re one step closer to installing your new kitchen sink. Let’s move on to the next step: removing the old sink.
Step 2: Remove the old kitchen sink
Before you can install your new kitchen sink, you’ll need to remove the old one. Follow these steps to safely and efficiently remove your old kitchen sink:
- Start by turning off the water supply to the sink. Locate the shut-off valves underneath the sink and turn them clockwise until they are completely closed. This will prevent any water from flowing while you work.
- Next, disconnect the plumbing connections. Using a wrench or pliers, loosen the nuts that connect the supply lines to the faucet. Place a bucket underneath to catch any water that may spill out.
- Once the supply lines are disconnected, remove the drain lines. Loosen the compression nuts that connect the drain assembly to the sink using a wrench or pliers. Again, place a bucket under the connections to catch any residual water.
- Disconnect any additional components such as garbage disposals or dishwasher drains if present.
- With the plumbing connections detached, it’s time to remove the sink from the countertop. Begin by loosening any clips or brackets that secure the sink to the countertop. Use a screwdriver or wrench to remove any screws or fasteners.
- Once the sink is free from any attachments, carefully lift it up and away from the countertop. Enlist the help of a friend if the sink is too heavy or cumbersome to handle on your own.
- Inspect the area where the sink was located for any signs of damage or leaks. Clean the countertop surface thoroughly with a mild cleanser and a sponge or cloth.
Now that the old kitchen sink has been successfully removed, you are ready to move on to the next step: preparing the area for the new sink installation. Ensure that the countertop is clean and free from any debris before proceeding.
Step 3: Prepare the area for the new sink installation
Now that the old kitchen sink has been removed, it’s time to prepare the area for installing the new sink. Follow these steps to ensure a smooth and successful installation:
- Clean the countertop thoroughly to remove any debris, dirt, or old adhesive from the previous sink installation. Use a mild cleanser and a sponge or cloth to wipe down the surface.
- Inspect the countertop for any signs of damage, such as cracks or water stains. If you notice any issues, it’s best to repair or replace the countertop before proceeding with the sink installation.
- Once the countertop is clean and in good condition, measure the dimensions of the sink opening. Use a tape measure to ensure accurate measurements.
- Refer to the manufacturer’s instructions for your new sink to determine the proper placement. Mark the outline of the sink on the countertop using a pencil or marker.
- Using a putty knife, scrape off any old caulk or adhesive from the sink cutout. This will ensure a clean and smooth surface for attaching the new sink.
- Apply a thin bead of silicone adhesive along the rim of the sink cutout. This will create a watertight seal between the sink and countertop. Be sure to follow the manufacturer’s instructions for proper adhesive application.
- Carefully set the new sink into the cutout, aligning it with the marked outline. Press down firmly to ensure a secure fit.
- Adjust the sink as needed to ensure it is level and properly aligned. Use a level to check for any unevenness.
- Place any clips or brackets provided with the sink onto the underside of the countertop. These will help secure the sink in place.
- Tighten the clips or brackets using a screwdriver or wrench. Make sure they are snug but not overly tight, as this could damage the sink or countertop.
Once you have prepared the area and securely placed the new sink into the cutout, you are ready to move on to the next step: installing the new sink. Take a moment to ensure that the sink is level and properly aligned before proceeding.
Step 4: Install the new sink
With the area prepared and the new sink securely placed into the cutout, it’s time to proceed with the installation process. Follow these steps to install your new kitchen sink:
- Begin by connecting the supply lines to the faucet. Use a wrench or pliers to tighten the nuts onto the corresponding connections. Be careful not to overtighten, as this could cause damage.
- Next, attach the drain assembly to the sink. Apply plumber’s tape to the threads of the drain opening to create a secure seal. Insert the drain into the opening and tighten the compression nut using a wrench or pliers.
- If your sink has a garbage disposal or dishwasher drain, connect them at this stage. Follow the manufacturer’s instructions for proper installation and ensure that all connections are secure.
- Check the alignment of the sink with the countertop. Make any necessary adjustments to ensure it is level and properly positioned.
- Apply a thin bead of silicone adhesive along the edge of the sink where it meets the countertop. This will create a seal to prevent water from seeping between the sink and the countertop.
- Smooth out the silicone adhesive using your finger or a caulking tool. Wipe away any excess adhesive with a damp cloth.
- Allow the silicone adhesive to dry and cure according to the manufacturer’s instructions. This will ensure a strong and watertight bond between the sink and the countertop.
Once you have completed these steps, your new kitchen sink is now installed and ready to be connected to the plumbing. Take a moment to admire your work and ensure that everything is secure and properly aligned.
In the next step, we will discuss how to connect the plumbing to your new sink and ensure a leak-free installation.
When installing a new kitchen sink, be sure to shut off the water supply before disconnecting the old sink. This will prevent any potential flooding or water damage during the installation process.
Read more: How To Install Sink In Basement
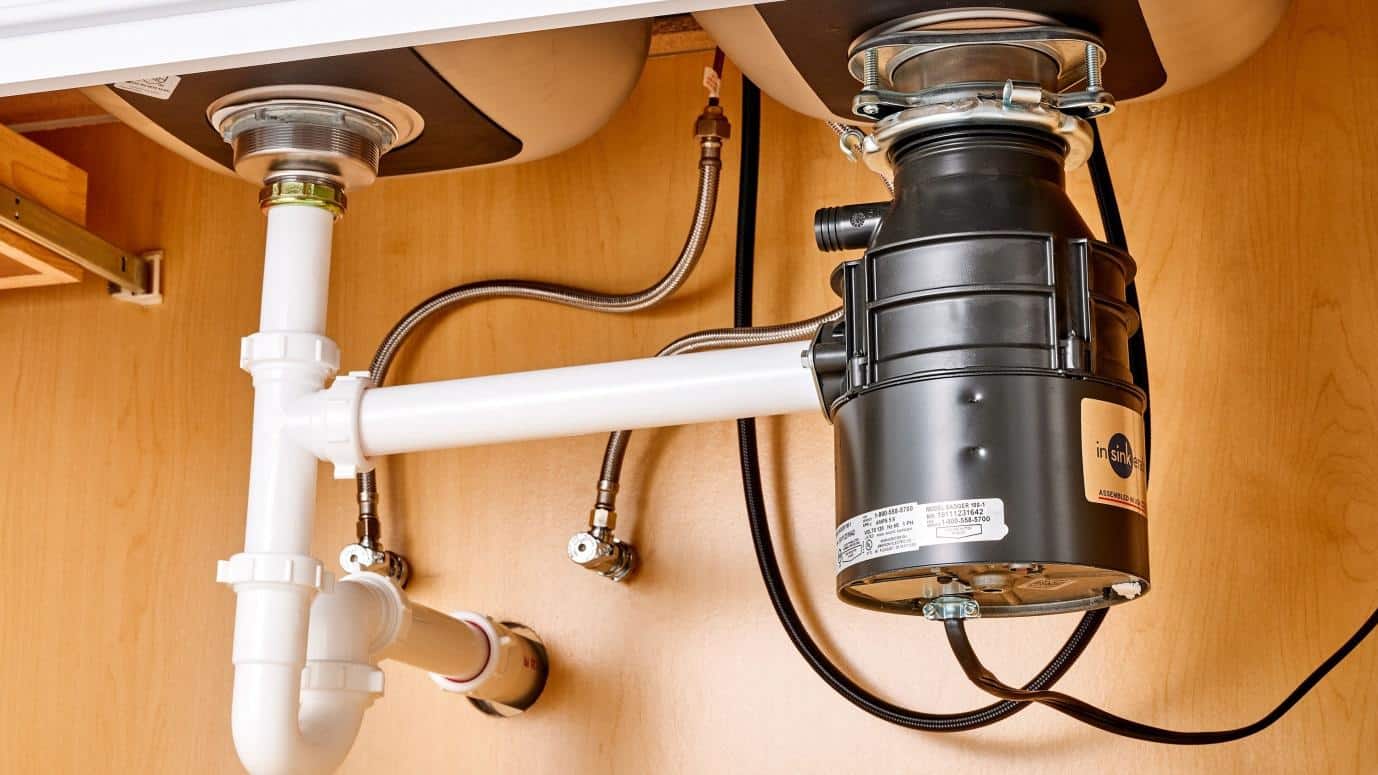
Step 5: Connect the plumbing
Connecting the plumbing is an essential part of the sink installation process. Properly connecting the supply lines and drain pipes will ensure a functional and leak-free operation. Follow these steps to connect the plumbing to your new kitchen sink:
- Start by attaching the supply lines to the faucet. Connect the hot and cold water supply lines to the corresponding valves on the faucet. Use a wrench or pliers to tighten the nuts onto the connections, ensuring a secure fit.
- If your sink has a separate sprayer or soap dispenser, now is the time to connect these components. Follow the manufacturer’s instructions for proper installation and connection.
- Next, connect the drain assembly to the plumbing pipes. Apply plumber’s tape to the threaded ends of the drain pipes and the drain outlet on the sink. This will create a tight seal and prevent any leaks.
- Insert the drain pipe into the drain outlet on the sink and tighten the compression nut using a wrench or pliers. Be sure not to overtighten, as this could damage the pipes or sink.
- Connect the other end of the drain pipe to the main plumbing drain line. Use a wrench or pliers to tighten the compression nut onto the pipe connection.
- If you have a garbage disposal, connect the discharge tube to the side of the disposal unit. Ensure a secure fit by tightening the appropriate connections.
- Double-check all connections to ensure they are tight and secure. If necessary, use a wrench or pliers to make any adjustments or tighten any loose connections.
Once you have completed these steps and all the plumbing connections are secure, you are ready to move on to the next step: testing for leaks.
Testing for leaks is a crucial step to ensure that your new kitchen sink installation is watertight and problem-free. In the next step, we will guide you through the process of checking for leaks and making any necessary adjustments.
Step 6: Test for leaks
Testing for leaks is a crucial step in the installation process to ensure that your new kitchen sink and plumbing connections are watertight. Follow these steps to test for leaks and make any necessary adjustments:
- First, ensure that all the plumbing connections are securely tightened. Use a wrench or pliers to make any necessary adjustments.
- Turn on the water supply by slowly opening the shut-off valves underneath the sink. Check for any visible leaks around the supply connections and the drain assembly.
- Inspect the area under the sink for any signs of water accumulation or dripping. Use a flashlight if necessary to thoroughly examine the pipes, connections, and drain lines.
- If you notice any leaks, tighten the affected connections slightly to see if it stops the leakage. If the leak persists, disconnect the connection and inspect the washer or gasket for any damage. Replace the washer or gasket if necessary.
- Once you have addressed any leaks and ensured that all connections are secure, fill the sink with water. Let it run for a few minutes and then drain the water. Check for any additional leaks during this process.
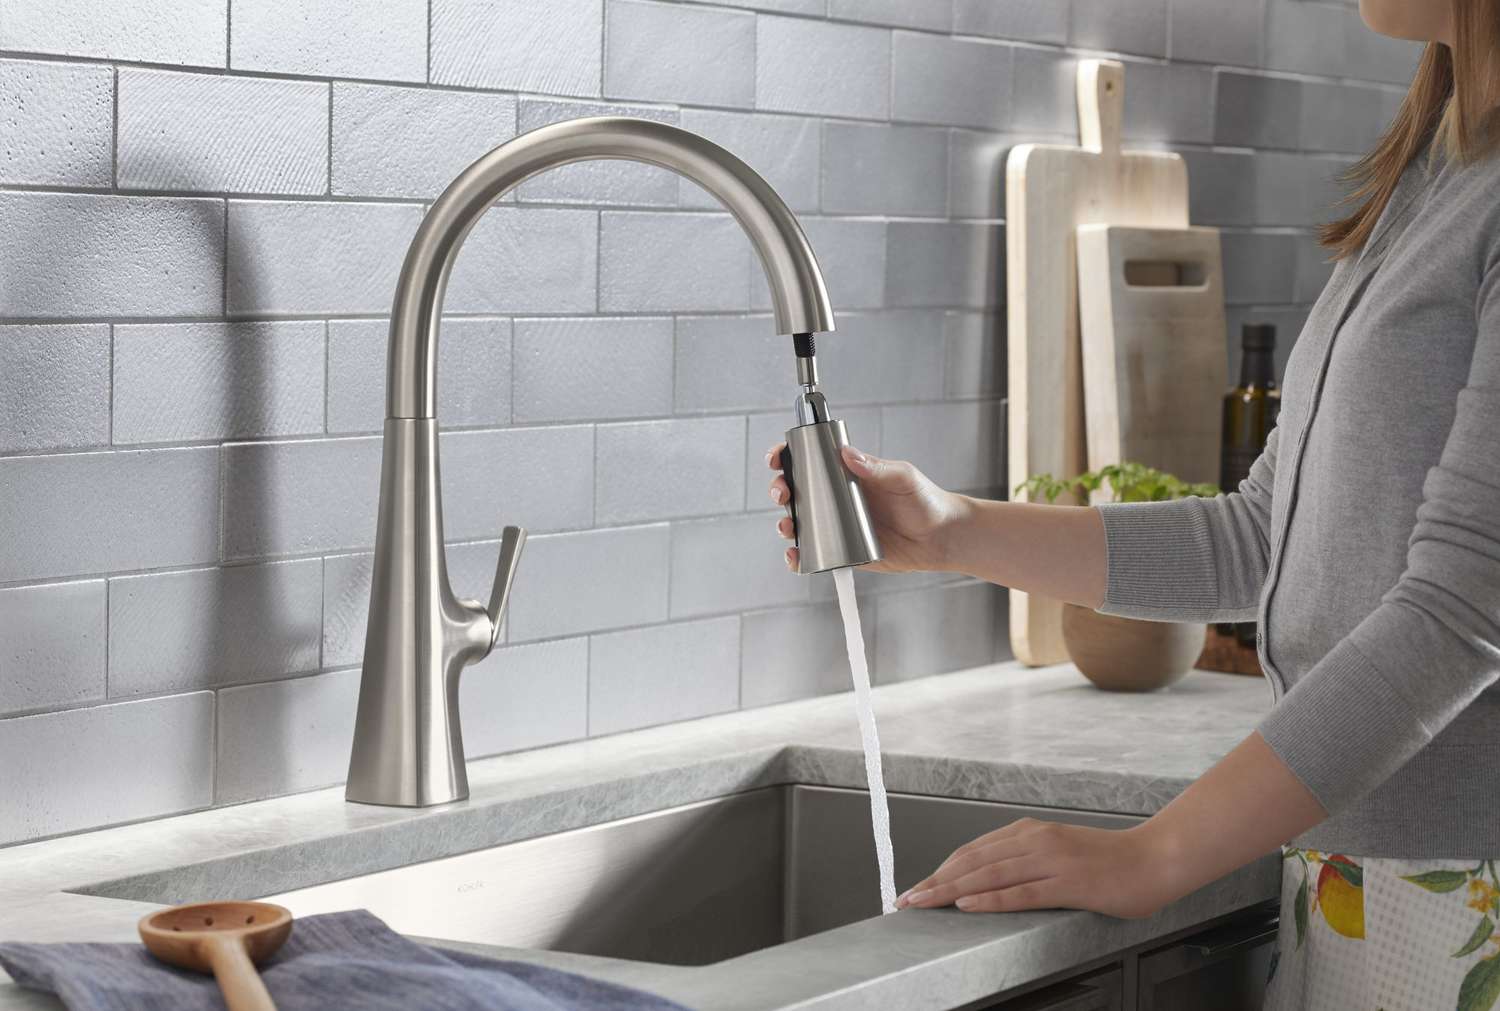
- Test the functionality of the faucets, sprayer, and soap dispenser, if applicable. Make sure they are operating correctly and that there are no leaks or drips when using them.
- Continue to monitor the area under the sink for a day or two after installation and use. This will ensure that there are no hidden leaks or issues that may arise over time.
If you encounter persistent leaks or have any concerns about the plumbing connections, it may be necessary to seek professional assistance from a plumber.
Once you have tested for leaks and made any necessary adjustments, you can proceed to secure the sink in place in the next step.
Step 7: Secure the sink in place
Securing the sink in place is an important step to ensure its stability and prevent any movement or shifting. Follow these steps to securely fasten your new kitchen sink:
- Inspect the underside of the sink and locate the mounting brackets or clips that came with your sink. These brackets are designed to secure the sink to the countertop.
- Position the brackets onto the edge of the sink, aligning them with the mounting holes or slots provided. Make sure the brackets are evenly spaced around the perimeter of the sink.
- Use a screwdriver or wrench to tighten the screws or bolts that secure the brackets to the sink. Ensure that they are securely attached and provide ample support.
- Place the sink back into the cutout in the countertop, aligning it with the marked outline. Press down firmly to ensure a snug fit.
- Beneath the sink, locate the mounting clips or brackets that correspond to the ones attached to the sink. These will be secured to the underside of the countertop.
- Position the mounting clips or brackets onto the edge of the countertop, aligning them with the sink brackets. Make sure they are evenly spaced.
- Using a screwdriver or wrench, tighten the screws or bolts on the mounting clips or brackets. This will secure the sink to the countertop.
- Double-check that the sink is level and properly aligned. Make any necessary adjustments to ensure a perfect fit.
By following these steps, you can ensure that your new kitchen sink is securely fastened and will remain stable during use.
In the next step, we will cover some final touches and cleanup to complete the installation process.
Step 8: Final touches and cleanup
Once your new kitchen sink is securely installed, there are a few final touches and cleanup steps to complete the installation process. These steps will help ensure a polished and finished look for your new sink:
- Inspect the area around the sink for any excess silicone adhesive or caulk. Use a damp cloth or sponge to clean up any stray adhesive.
- Wipe down the entire sink, including the edges and the surface, to remove any dust or debris that may have accumulated during the installation process.
- Restore the water supply by fully opening the shut-off valves underneath the sink. Check for any leaks around the supply lines and drain connections one final time.
- If necessary, apply a thin bead of caulk along the seam where the sink meets the countertop. This will provide an extra layer of protection against water leakage and enhance the overall appearance.
- Clean and polish the faucets, sprayer, and soap dispenser, if applicable, to give them a shiny and new look. Use a non-abrasive cleanser and a soft cloth for this task.
- Dispose of any old sink materials or packaging from the new sink properly.
- Finally, step back and admire the newly installed kitchen sink. Enjoy the refreshed look and improved functionality it brings to your kitchen.
With these final touches and cleanup steps, your kitchen sink installation is complete. Now, you can move forward and make the most of your updated kitchen space.
Remember, if you encounter any issues or have concerns about the installation process, it’s always wise to seek assistance from a professional plumber to ensure a proper and successful installation.
Congratulations! You have successfully installed your new kitchen sink, and now you can enjoy the benefits of a beautiful and functional upgrade in your kitchen.
Read more: How To Install Sink Clips
Conclusion
Installing a new kitchen sink may initially seem like a daunting task, but with the right tools, preparation, and guidance, it can be a rewarding and achievable project. By following the comprehensive steps outlined in this guide, you can confidently install your own kitchen sink while ensuring a secure and functional installation.
Throughout the installation process, we covered essential steps, from gathering the necessary tools and materials to removing the old sink, preparing the area, installing the new sink, connecting the plumbing, testing for leaks, securing the sink in place, and adding final touches and cleanup. Each step plays a crucial role in creating a successful and professional-looking result.
Remember to pay attention to detail and take your time during each stage of the installation. Proper measurement, aligning the sink correctly, and securing the plumbing connections are key to a functional and leak-free installation.
If you encounter any difficulties or feel unsure about any step, it’s always wise to consult a professional plumber who can provide expert advice and assistance. Safety is also important during the installation process, so take necessary precautions and wear protective gear, such as goggles and gloves, when handling tools or materials.
Once your new kitchen sink is installed, take pride in your accomplishment and enjoy the benefits it brings to your kitchen. A new sink can greatly enhance the overall look and functionality of your kitchen space, making it more enjoyable and efficient for everyday tasks and meal preparations.
We hope this guide has provided you with valuable information and guidance on installing a new kitchen sink. Now, it’s time to put your newfound knowledge into practice and create a beautiful and functional kitchen space that you can enjoy for years to come.
Frequently Asked Questions about How To Install New Kitchen Sink
Was this page helpful?
At Storables.com, we guarantee accurate and reliable information. Our content, validated by Expert Board Contributors, is crafted following stringent Editorial Policies. We're committed to providing you with well-researched, expert-backed insights for all your informational needs.


0 thoughts on “How To Install New Kitchen Sink”