Articles
How To Install Welded Wire Fence With T-Posts
Modified: October 20, 2024
Learn how to install a welded wire fence using T-posts with our comprehensive articles. Find step-by-step instructions and tips for a successful installation.
(Many of the links in this article redirect to a specific reviewed product. Your purchase of these products through affiliate links helps to generate commission for Storables.com, at no extra cost. Learn more)
Introduction
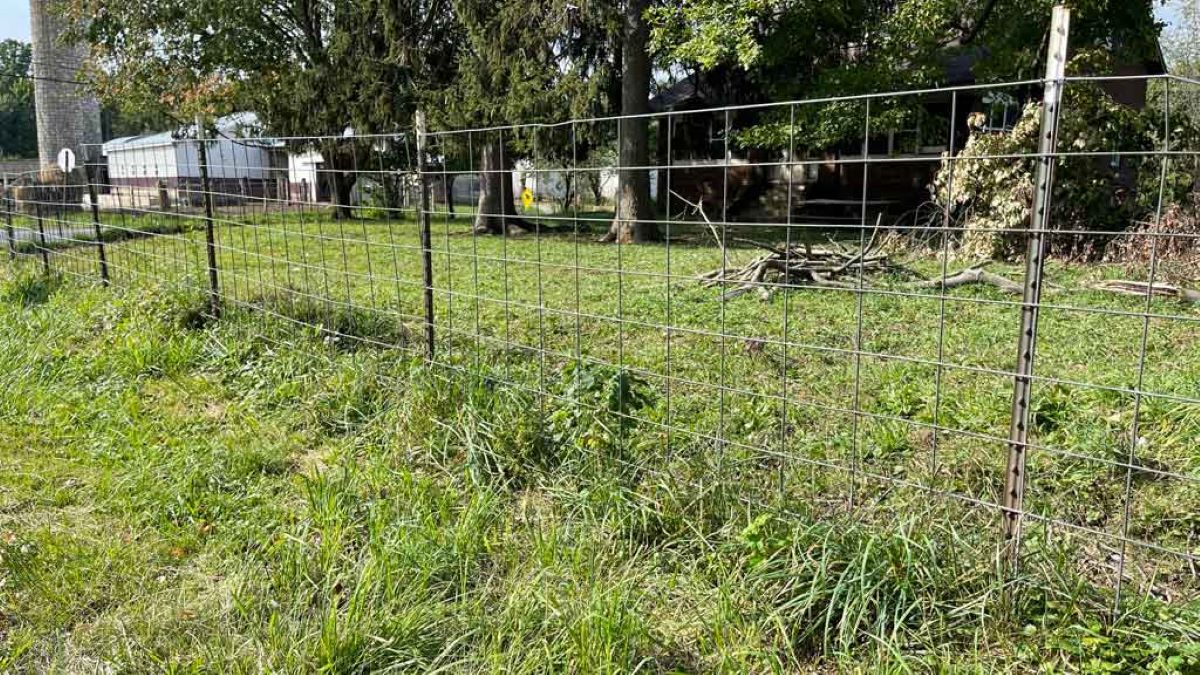
Installing a welded wire fence with T-posts is a popular and effective way to secure and delineate your garden, yard, or property. Whether you’re looking to keep pets in or critters out, a properly installed fence can provide the necessary boundary and security you need.
When it comes to installing a welded wire fence, T-posts play a crucial role. T-posts, also known as steel fence posts, are durable, affordable, and easy to install. They provide strong support for the wire fence and help maintain its stability over time.
In this comprehensive guide, we will walk you through the step-by-step process of installing a welded wire fence with T-posts. We will cover everything from planning and marking the fence line to setting corner and end posts. By following these instructions, you’ll be able to tackle this project with confidence and achieve professional-looking results.
Before we dive into the installation process, let’s take a closer look at T-posts and the tools and materials you’ll need for the job.
Key Takeaways:
- Proper planning, marking, and alignment are crucial for a successful welded wire fence installation with T-posts. Careful consideration of property boundaries, post spacing, and gate locations ensures a sturdy and visually appealing end result.
- Attaching and securing the wire fence to T-posts, setting corner and end posts, and adding gates are essential steps for a durable and functional welded wire fence. Attention to detail and proper installation techniques contribute to a secure and aesthetically pleasing property enclosure.
Read more: How To Build A Wire Fence With T-Posts
T-Posts: An Overview
T-posts are vertical metal posts that are widely used in agriculture and fencing applications. They are made of high-strength steel and come in various lengths, typically ranging from 4 to 8 feet. T-posts have a unique T-shaped design, which gives them their name.
One of the main advantages of using T-posts for fencing is their durability. They are resistant to rot, decay, and weather damage, making them a long-lasting option for securing your property. Additionally, T-posts are relatively affordable compared to other types of fence posts, making them a popular choice for many homeowners.
T-posts also offer versatility in terms of fence attachment options. They have pre-punched holes along the length of the post, allowing you to easily adjust the height of the fence or add additional wires if needed. These holes also make it convenient to attach accessories like wire clips and gate hinges.
When selecting T-posts for your fence project, it’s important to choose the right size and gauge. The size refers to the length of the post, while the gauge indicates the thickness of the steel. The size and gauge you choose will depend on factors such as the terrain, fence height, and intended use of the fence.
In addition to T-posts, you will also need a few essential tools and materials to complete the installation process. Let’s take a look at what you’ll need.
Tools and Materials Needed
Before you begin installing a welded wire fence with T-posts, gather the following tools and materials:
Tools:
- Post hole digger or auger
- Shovel
- Tape measure
- Level
- String or twine
- Wire cutters
- Fence stretcher (optional, but recommended for larger fences)
- Hammer
- Gloves
- Safety glasses
Materials:
- T-posts (appropriate length and gauge for your fence)
- Welded wire fence roll
- Wire clips or hog rings
- Fence staples
- Gate(s) and hardware (if adding gates)
- Concrete mix (optional, for added post stability)
Having the right tools and materials on hand will make the installation process smoother and more efficient. It’s always a good idea to double-check that you have everything you need before starting the project.
Now that you have your tools and materials ready, let’s move on to the step-by-step installation process.
Read more: How To Put Up Welded Wire Fence
Step 1: Planning and Marking
Before you start installing the welded wire fence with T-posts, it’s essential to carefully plan and mark the fence line. Taking the time to plan will ensure that your fence is installed in the desired location and aligns with any property boundaries or regulations.
Here are the steps to follow for planning and marking your fence:
1. Determine the Purpose and Design:
Decide why you are installing the fence and what design you want to achieve. Consider factors like privacy, security, and aesthetic appeal. It’s also important to check any local regulations or HOA guidelines that may restrict fence height or style.
2. Locate Property Boundaries:
Use property survey documents or consult with a professional to identify the exact location of your property boundaries. This will help ensure that your fence is installed within your property lines.
3. Measure and Stake Out the Fence Line:
Start by measuring the length of the fence line using a tape measure. Mark the endpoints and use stakes or flags to indicate its trajectory. For a straight fence line, use a taut string or twine to create a guide.
Read more: How To Install Metal Fence Post
4. Check for Utility Lines:
Before digging any post holes, call the local utility companies to locate any underground utility lines near the fence line. This will help you avoid damaging any pipes or cables during the installation process.
5. Confirm Post Spacing:
Determine the spacing between T-posts based on the height and intended use of your fence. As a general rule, posts are typically spaced 6 to 8 feet apart. Smaller spacing may be required for added stability, especially in areas with high winds or for taller fences.
6. Flag Gate Locations:
If you plan to install gates, mark their locations along the fence line. Ensure there is enough space for the gate opening and the swing arc.
By carefully planning and marking your fence line, you will have a clear idea of where to install the T-posts and ensure a proper alignment for your welded wire fence. In the next step, we will discuss digging the post holes.
Step 2: Digging Post Holes
Once you have planned and marked the fence line, the next step in installing a welded wire fence with T-posts is to dig the post holes. Properly spaced and aligned post holes are crucial for the stability and longevity of your fence.
Follow these steps to dig the post holes:
Read more: How To Attach Wire Fence To Wood Post
1. Start with Corner and End Posts:
Begin by digging the post holes for the corner and end posts first. These posts provide the structure and framework for your fence. Use a post hole digger or an auger to create holes that are deep enough to accommodate approximately one-third of the length of the T-post, plus an additional 6 inches for added stability.
2. Dig Intermediate Post Holes:
After placing the corner and end posts, continue digging the post holes for the intermediate T-posts along the designated fence line. Make sure the spacing between the holes matches your planned distance. The depth of these holes should be the same as the corner and end post holes.
3. Check Hole Alignment and Levelness:
As you dig each post hole, check that they are aligned properly with the marked fence line. Use a level to ensure that the holes are both plumb (vertical) and level (horizontally aligned). Adjust the hole position or depth if necessary.
4. Consider Using Concrete (Optional):
In areas with heavy wind or soil that is prone to shifting, you may want to consider using concrete to secure the T-posts. Mix the concrete according to the manufacturer’s instructions and pour it into the bottom of each post hole before inserting the T-post. This added support can help prevent the posts from shifting over time.
Remember to take appropriate safety precautions while digging the post holes, such as wearing gloves and safety glasses. Additionally, be mindful of any underground utility lines and dig with caution to avoid any potential damage.
With the post holes dug and properly aligned, you’re ready to move on to the next step: installing the T-posts.
Read more: How To Weld Pipe Fence
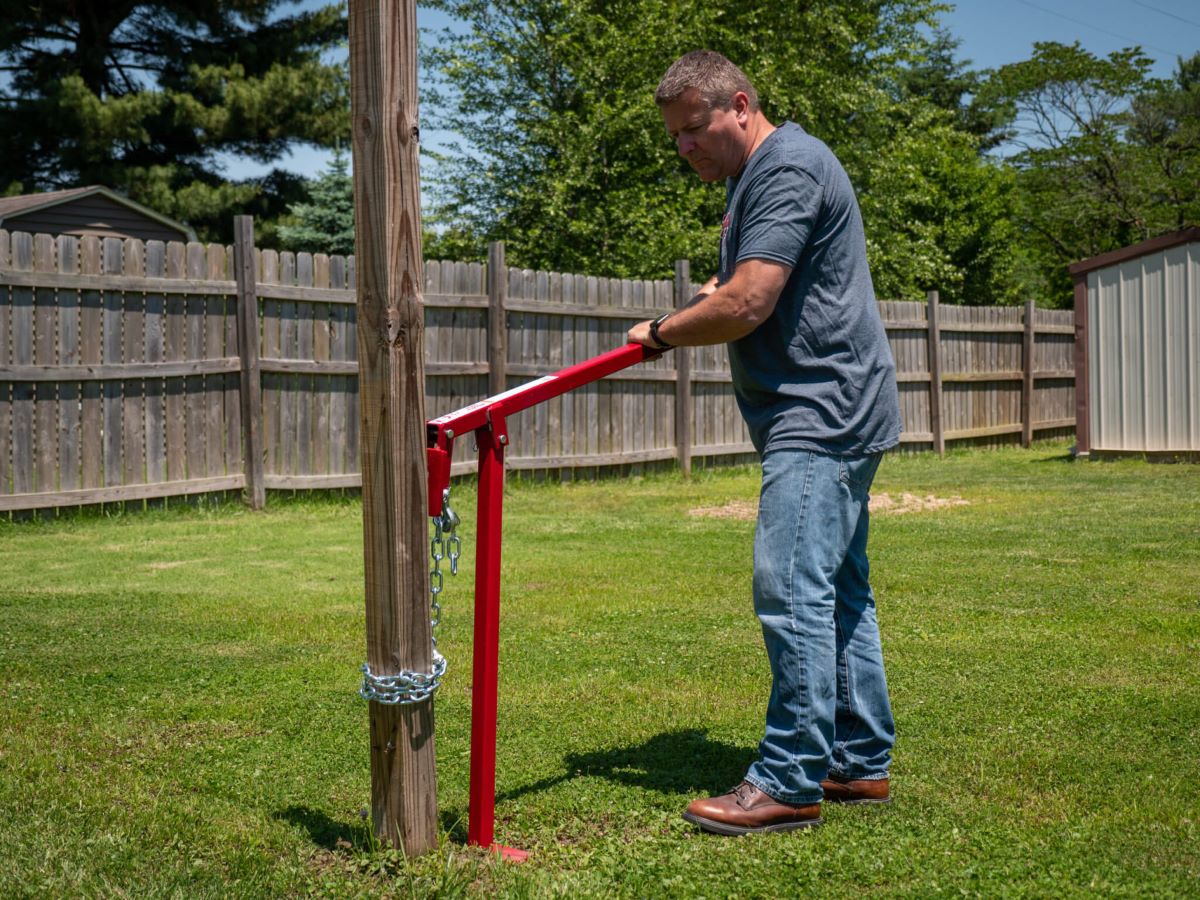
Step 3: Installing T-Posts
Now that you have the post holes dug and prepared, it’s time to install the T-posts. Proper installation of the T-posts is essential for the stability and strength of your welded wire fence.
Follow these steps to install the T-posts:
1. Insert the T-Posts into the Holes:
Start by picking up a T-post and carefully lower it into one of the post holes. Push it down until the bottom of the post is resting firmly on the ground or the concrete base (if you opted to use concrete).
2. Check Post Alignment:
As you insert each T-post, check its alignment by ensuring it is straight and parallel to the fence line. Use a level to double-check that the post is perfectly vertical. Adjust and reposition the post if needed.
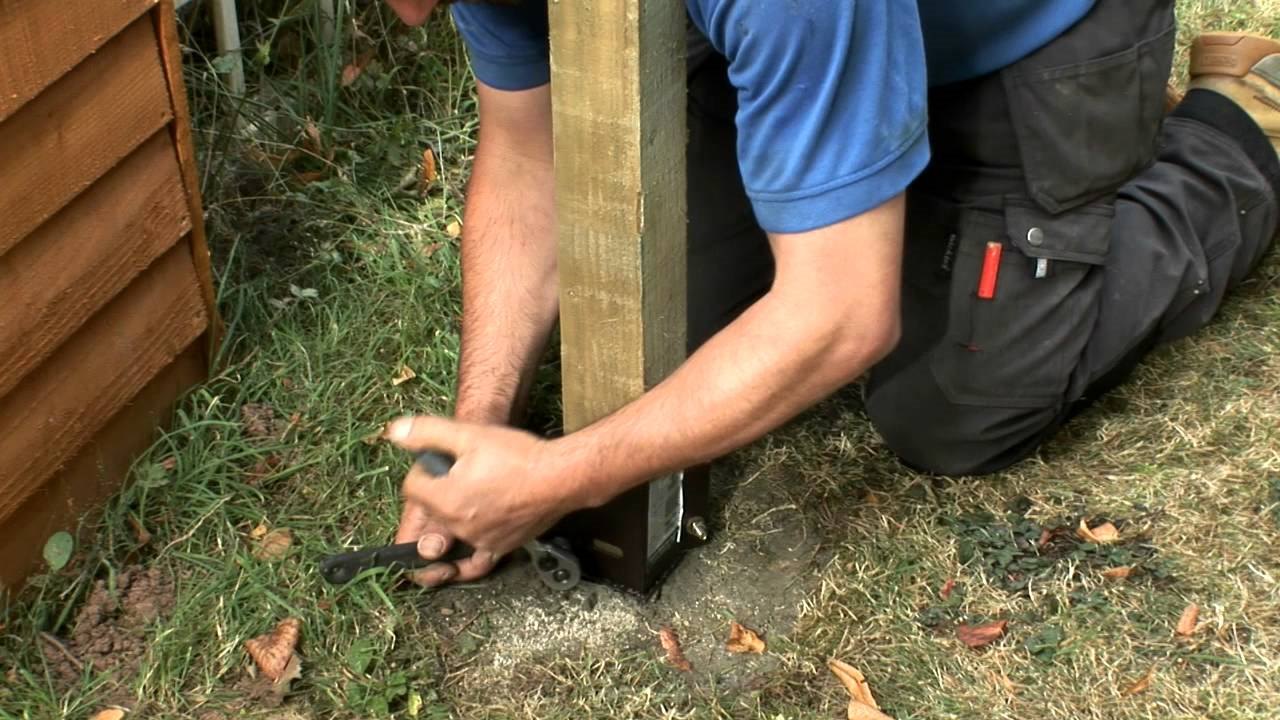
3. Compact the Soil:
With the T-post in place, use a shovel or your foot to carefully backfill the hole with the excavated soil. Tamp down the soil around the post to compact it and provide stability. Repeat this process for each T-post along the fence line.
Read more: How To Install Metal Posts For Wood Fence
4. Consider Using a Fence Stretcher (Optional):
If you’re working with a larger fence or are installing the wire under tension, consider using a fence stretcher. A fence stretcher will help you apply the necessary tension to the wire, ensuring a taut and secure fence. Follow the manufacturer’s instructions for using the stretcher.
Remember to maintain consistent spacing between the T-posts as you install them. This will help ensure the overall stability and integrity of your fence. Take your time during this step to ensure that each T-post is properly installed.
With the T-posts securely in place, it’s time to move on to the next step: attaching the wire fence to the posts.
Step 4: Attaching the Wire Fence
Now that the T-posts are installed, it’s time to attach the wire fence to them. Attaching the wire fence properly is crucial to ensure the fence’s strength and stability.
Follow these steps to attach the wire fence to the T-posts:
1. Unroll the Wire Fence:
Start by unrolling the welded wire fence along the length of the fence line. Make sure the bottom edge of the fence is touching the ground to prevent animals from slipping underneath. If needed, cut the fence roll to the desired length using wire cutters.
2. Secure the Fence to the End Posts:
Begin at one of the end posts and use wire clips or hog rings to securely attach the fence to the post. Place a clip or ring around a horizontal wire of the fence and a vertical face of the T-post. Use pliers or fence pliers to tighten the clip or ring, ensuring a secure connection. Repeat this process for all the horizontal wires of the fence at the end post.
Read more: How To Install Fence Post Without Concrete
3. Attach the Fence to the Intermediate T-Posts:
Continue along the fence line and attach the welded wire fence to the intermediate T-posts using the same method as with the end posts. Space the clips or rings evenly along the height of the T-post, ensuring the fence is taut and securely fastened.
4. Trim Excess Wire (If Necessary):
If there are any sections of the fence where the length exceeds the distance between the posts, use wire cutters to trim the excess wire. This will help maintain a neat and tidy appearance.
5. Double-Check Fence Alignment:
As you attach the wire fence, periodically step back and check that the fence is aligned properly and follows the intended fence line. Adjust the tension and positioning of the fence as needed to ensure its straightness and evenness.
When attaching the wire fence, it’s important to work carefully and ensure a secure connection between the fence and the T-posts. This will result in a durable and stable fence that serves its purpose effectively.
Now that the wire fence is attached to the T-posts, we’ll move on to the next step: securing the wire fence to the T-posts.
Step 5: Securing the Wire Fence to T-Posts
After attaching the wire fence to the T-posts, the next step is to secure the fence to the T-posts to ensure it remains in place and maintains its structural integrity. Properly securing the wire fence will prevent sagging or shifting over time.
Follow these steps to secure the wire fence to the T-posts:
1. Check Vertical Alignment of the Fence:
First, ensure that the wire fence is vertically aligned and evenly spaced along the height of the T-posts. Make any necessary adjustments to ensure a consistent appearance.
2. Secure the Fence with Fence Staples:
Starting at one end of the fence, use fence staples to attach the wire fence to the T-posts. Place the staple over a horizontal wire of the fence and hammer it into the wooden post, ensuring a secure connection. Continue this process along the entire fence line, spacing the fence staples out evenly.
3. Use Additional Staples for Stability (Optional):
If you’re working with a taller or longer fence or if you’re experiencing high winds, you may want to consider using additional staples for added stability. Place additional staples at strategic points along the fence line, such as at the top and middle, to further secure the fence to the T-posts.
4. Double-Check the Fence Tension:
As you secure the wire fence to the T-posts, periodically check the tension of the fence. Ensure it is taut and evenly stretched along the entire fence line. Make any necessary adjustments to maintain a consistent tension throughout.
Read more: How To Install A Barb Wire Fence
5. Trim Excess Wire (If Necessary):
If there are any sections of the wire fence where the length exceeds the distance between the T-posts, use wire cutters to trim the excess wire. This will help maintain a clean and professional appearance.
By securely attaching and securing the wire fence to the T-posts, you can ensure that your fence remains stable and provides the intended functionality for years to come.
Next, we’ll move on to Step 6: setting corner and end posts to provide additional support and stability for your welded wire fence.
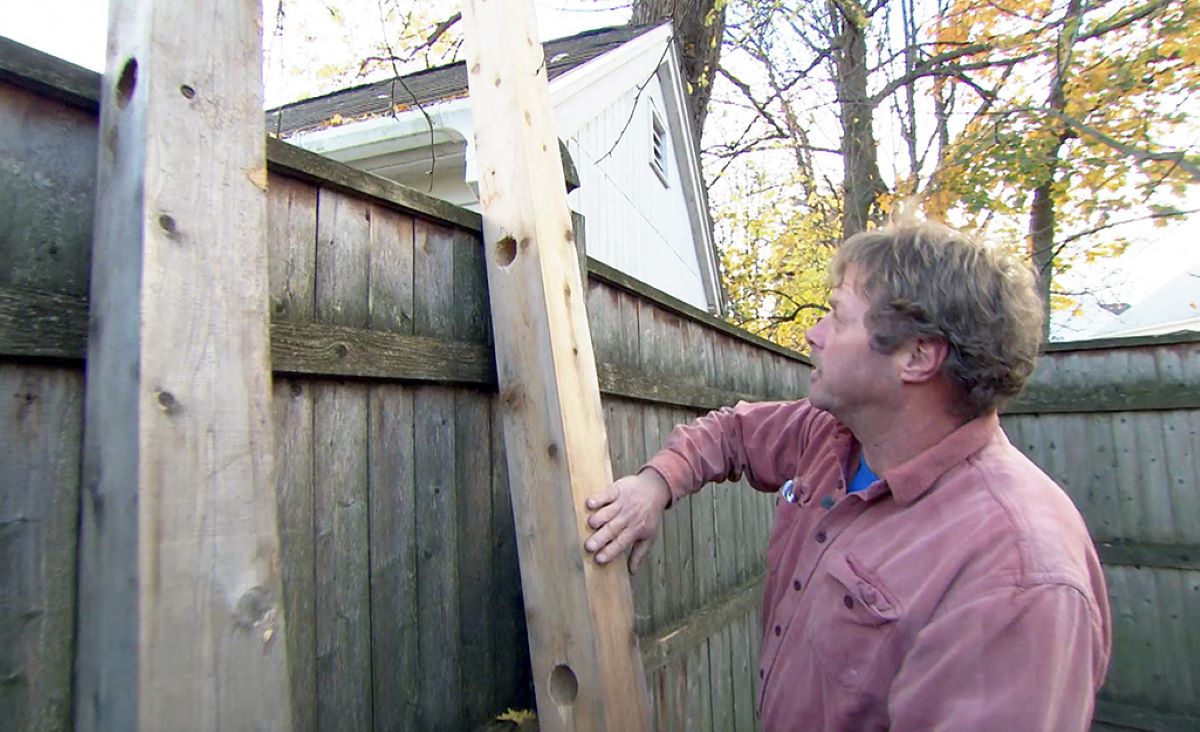
Step 6: Setting Corner and End Posts
In addition to the T-posts, corner and end posts are essential for providing additional support and stability to your welded wire fence. These posts serve as anchors, helping to maintain the structural integrity of the fence.
Follow these steps to set the corner and end posts:
1. Dig the Corner and End Post Holes:
Using a post hole digger or auger, dig holes for the corner and end posts. These holes should be deeper and wider than the T-post holes to accommodate the larger size of the corner and end posts. The depth of the holes should be at least one-third of the length of the posts, plus an additional 6 inches for stability.
2. Insert the Posts:
Place the corner post in its designated hole, ensuring it is aligned with the fence line and level. Fill the hole around the post with soil or use concrete mix for added stability. Tamp down the soil or allow the concrete to set according to the manufacturer’s instructions. Repeat this process for the end posts.
3. Secure the Posts:
Use braces or temporary supports to hold the corner posts in place until the soil or concrete sets. This will prevent them from shifting during the installation process.
4. Check Alignment and Levelness:
With the corner and end posts inserted, double-check their alignment and levelness. Ensure they are vertically straight and perfectly aligned with the fence line. Make any necessary adjustments to ensure they are properly positioned.
5. Attach the Wire Fence:
Once the corner and end posts are set and secure, attach the wire fence to them using the same methods described in previous steps. Use wire clips or fence staples to connect the fence to these posts, ensuring the fence is taut and properly aligned with the corner and end posts.
Setting the corner and end posts will provide additional strength and stability to your welded wire fence, especially in areas where the fence changes direction or terminates. By following these steps, you can ensure that your fence remains secure and resilient for years to come.
Next, we’ll move on to Step 7: adding gates if desired to provide convenient access to your enclosed area.
Step 7: Adding Gates
Adding gates to your welded wire fence provides convenient access to your enclosed area. Whether you want to enter or exit your property or allow vehicles, pets, or equipment to pass through, installing gates is an important final step in completing your fence installation.
Follow these steps to add gates to your welded wire fence:
Read more: How To Secure Fence Post
1. Determine Gate Locations:
Decide where you want to install gates along your fence line. Consider the size and type of gate you need based on the intended use, such as a pedestrian gate or a larger vehicle gate.
2. Measure Gate Opening:
Measure the width of the gate opening to determine the appropriate size for your gate. Take into account any additional space needed for hinges and latches.
3. Prepare Gate Posts:
Install gate posts on each side of the gate opening. These posts should be similar in size and material to the corner and end posts of your fence. Dig holes for the gate posts, ensuring they are deep and wide enough to provide stability. Insert the posts and secure them with braces or temporary supports.
4. Attach Gate Hardware:
Install hinges on one gate post and latch hardware on the other. Ensure the hinges and latch are aligned and level. Use screws or bolts to secure them to the gate posts. Test the gate to ensure it swings smoothly and securely closes with the latch.
Read more: How To Extend Fence Posts
5. Hang the Gate:
With the gate hardware in place, hang the gate on the hinges. Adjust the positioning of the gate if necessary to ensure it is level and aligned with the fence line. Tighten the hinge screws or bolts to secure the gate in place.
6. Install Gate Support:
If you have a larger gate or want to provide additional support, consider installing a gate support or wheel at the bottom of the gate. This will help distribute the weight and prevent sagging over time.
7. Secure the Gate to the Fence:
Attach the wire fence to the gate using wire clips or fence staples. Make sure the fence is taut and properly aligned with the gate. Use additional clips or staples to secure the fence to the gate posts if needed.
By incorporating gates into your welded wire fence, you’ll have convenient access to your enclosed area while maintaining the security and functionality of the fence.
Congratulations! You have successfully completed the installation of your welded wire fence with T-posts, attaching the wire fence, securing it to the T-posts, and adding gates if desired. Your fence is now ready to provide the desired boundary, security, and protection for your property.
Remember to periodically inspect and maintain your fence to ensure its longevity and proper function. Performing routine checks, addressing any repairs promptly, and keeping the fence clean and free from debris will help maximize its lifespan.
Enjoy the benefits of your newly installed welded wire fence and the peace of mind it brings knowing your property is secure and defined.
Conclusion
Installing a welded wire fence with T-posts is a rewarding project that provides numerous benefits for your property. It offers security, defines boundaries, and can enhance the overall appearance of your yard or garden. By following the step-by-step guide outlined in this article, you can confidently install a welded wire fence that is sturdy, durable, and aesthetically pleasing.
Throughout the installation process, careful planning and preparation are essential. From marking the fence line to digging post holes, each step contributes to the overall success of the project. Choosing the right tools and materials, such as T-posts, wire fence, and gate hardware, ensures the durability and stability of your fence over time.
Properly attaching and securing the wire fence to the T-posts, as well as adding gates for access, is crucial to maintaining the structural integrity of the fence. Taking the time to align and level the fence, as well as adjusting the tension appropriately, will contribute to a professional and visually appealing end result.
It’s important to remember that maintaining your welded wire fence is key to its longevity. Regular inspections, addressing any repairs promptly, and keeping the fence clean and free from debris will help ensure its continued functionality and aesthetic appeal.
Now that you have completed the installation of your welded wire fence, you can enjoy the benefits it provides. Whether it’s keeping your pets safe, deterring wildlife, or enhancing your property’s privacy, your fence will serve as a valuable asset for years to come.
Thank you for following this comprehensive guide on how to install a welded wire fence with T-posts. We hope this article has provided you with the knowledge and confidence to undertake this project successfully. Happy fencing!
Now that you've mastered installing a welded wire fence, why not tackle more outdoor enhancements? Our guide on outdoor projects offers inspiring ideas that are perfect for any DIY enthusiast looking to transform their backyard into a haven of creativity and charm. From simple setups to more intricate designs, there's something to spark everyone's interest and keep those hands busy!
Frequently Asked Questions about How To Install Welded Wire Fence With T-Posts
Was this page helpful?
At Storables.com, we guarantee accurate and reliable information. Our content, validated by Expert Board Contributors, is crafted following stringent Editorial Policies. We're committed to providing you with well-researched, expert-backed insights for all your informational needs.

0 thoughts on “How To Install Welded Wire Fence With T-Posts”