Articles
How To Light A Honeywell Water Heater
Modified: May 6, 2024
Learn how to properly light your Honeywell water heater with our informative articles. Get step-by-step instructions and troubleshooting tips to ensure your water heater is functioning efficiently.
(Many of the links in this article redirect to a specific reviewed product. Your purchase of these products through affiliate links helps to generate commission for Storables.com, at no extra cost. Learn more)
Introduction
Properly lighting a Honeywell water heater is essential for maintaining a reliable and efficient hot water supply in your home. Whether you’re starting up your water heater for the first time or relighting it after a temporary shutdown, following the correct procedure is crucial for safety and optimal performance.
In this guide, we will walk you through the step-by-step process of lighting a Honeywell water heater. We will cover the tools and materials required, safety precautions you should take, and the necessary steps to ensure a successful ignition. By following these instructions, you’ll be able to confidently light your Honeywell water heater and enjoy hot water whenever you need it.
Note: This guide is specific to Honeywell water heaters. If you have a different brand or model, consult the manufacturer’s instructions for the proper lighting procedure.
Before beginning the process, it’s important to gather the necessary tools and materials. This will ensure you have everything you need within reach, minimizing the risk of accidents or delays during the lighting process.
Here’s a list of the tools and materials you will need:
- Safety goggles
- Non-flammable gloves
- Screwdriver
- Long lighter or matchstick
- Flashlight
Make sure you have these items readily available before proceeding with the lighting process.
Key Takeaways:
- Ensure safety by following manufacturer’s instructions, proper ventilation, and wearing safety gear when lighting a Honeywell water heater. Prioritize safety to prevent accidents and ensure optimal performance.
- Properly prepare the area, locate the pilot light assembly, and follow the step-by-step process to safely light and verify the functioning of your Honeywell water heater. Enjoy reliable hot water with confidence.
Read more: How To Light Rv Water Heater Pilot
Required Tools and Materials
Before you begin lighting your Honeywell water heater, it’s important to gather all the necessary tools and materials. Having these items on hand will ensure a smooth and safe lighting process. Here are the tools and materials you will need:
- Safety goggles: Protect your eyes from any potential sparks or debris that may occur during the lighting process.
- Non-flammable gloves: These gloves will shield your hands from heat and protect against accidental burns.
- Screwdriver: You’ll need a screwdriver to access the pilot light assembly and adjust any necessary settings.
- Long lighter or matchstick: Use a long lighter or matchstick with an extended handle to reach the pilot light assembly safely.
- Flashlight: A flashlight will help illuminate the area around the water heater, making it easier to locate the pilot light assembly and perform any necessary adjustments.
Make sure you gather these tools and materials before you begin the lighting process to prevent any delays or interruptions.
In addition to these tools and materials, it’s a good idea to have a fire extinguisher nearby in case of any emergencies. Safety should always be your top priority when working with gas-powered appliances.
Once you have gathered all the necessary tools and materials, you’re ready to move on to the next step: taking safety precautions. Ensuring your safety and the safety of those around you is crucial when working with a water heater, so let’s go over the precautions you should take.
Safety Precautions
When working with a Honeywell water heater, it’s important to prioritize safety. The following precautions will help minimize the risk of accidents or injuries during the lighting process:
- Read the manufacturer’s instructions: Before attempting to light your Honeywell water heater, thoroughly read and understand the manufacturer’s instructions. Familiarize yourself with the specific model and any unique features or considerations.
- Ensure proper ventilation: Make sure the area around the water heater is well-ventilated. This will prevent the buildup of potentially dangerous gases, such as carbon monoxide.
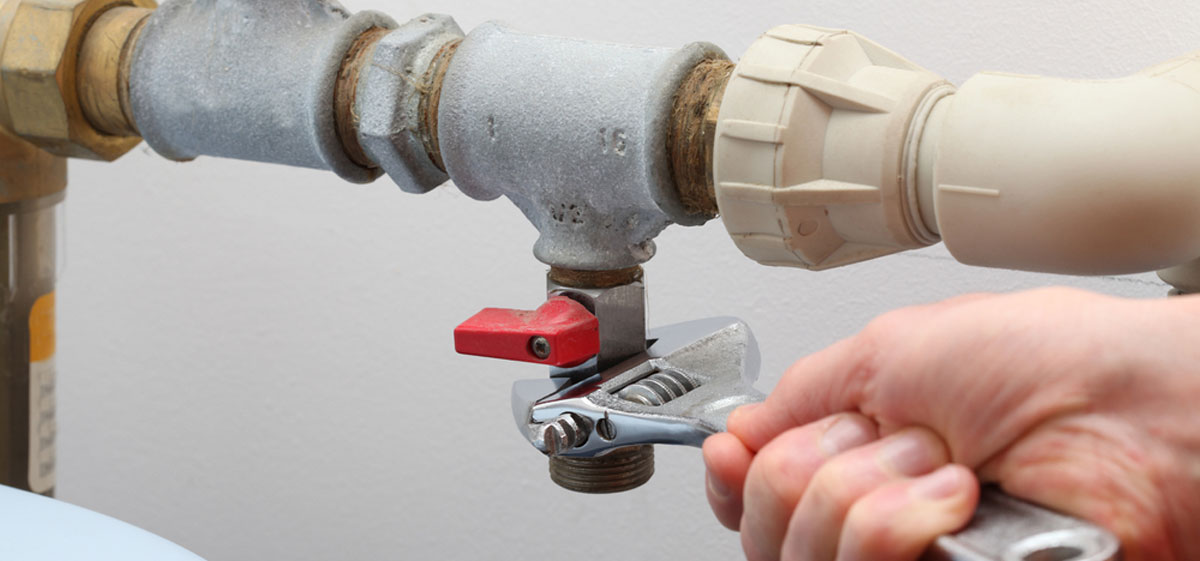
- Turn off the gas supply valve: Before starting the lighting process, locate the gas supply valve and ensure it is in the “off” position. This will cut off the supply of gas to the water heater, preventing any leaks or accidents.
- Wear safety goggles and gloves: Protect your eyes from sparks and debris by wearing safety goggles. Additionally, wear non-flammable gloves to shield your hands from burns and heat.
- Keep flammable materials away: Ensure there are no flammable materials or substances near the water heater. This includes items like papers, cloth, gasoline, and cleaning products.
- Be cautious of hot surfaces: Take care when touching or working near the water heater, as certain components may be hot. Use caution and wait for any hot surfaces to cool down before proceeding.
- Have a fire extinguisher nearby: Keep a fire extinguisher within reach in case of emergency. Familiarize yourself with its operation and make sure it is in good working condition.
- Follow manufacturer’s instructions: Always adhere to the specific instructions provided by the manufacturer for your Honeywell water heater. Each model may have unique requirements, so it’s important to follow the guidelines provided.
By taking these safety precautions, you can ensure a safe and incident-free lighting process for your Honeywell water heater. Once you have taken all the necessary precautions, you can proceed to the next step: shutting off the power supply.
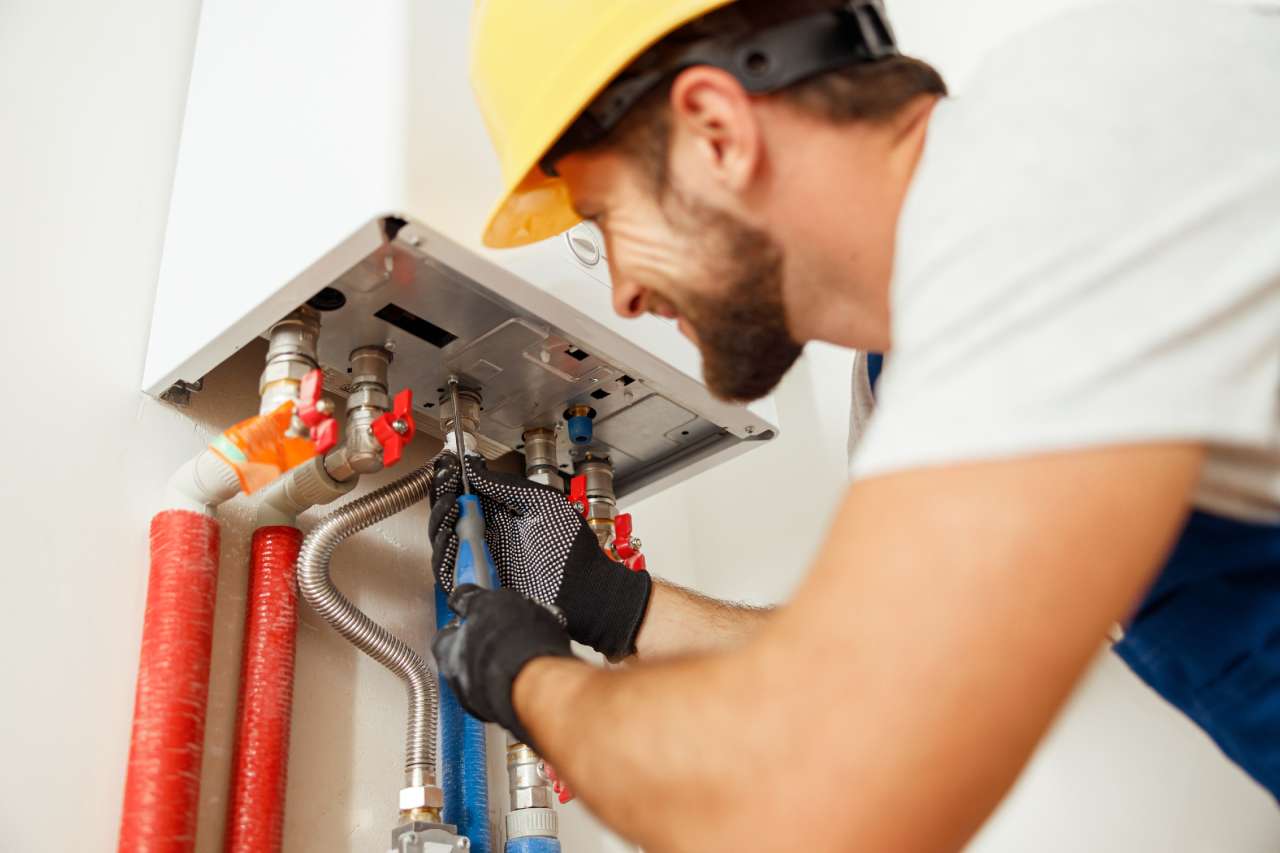
Step 1: Shutting Off the Power Supply
Before you begin the process of lighting your Honeywell water heater, it’s important to shut off the power supply. This will prevent any accidental ignition or electrical mishaps while you’re working on the heater. Follow these steps to safely shut off the power supply:
- Locate the circuit breaker or fuse box for your home. This is usually found in the basement, garage, or utility room.
- Identify the circuit breaker or fuse that controls the water heater and switch it to the “off” position. If you’re unsure which one it is, consult the circuit breaker box diagram or refer to the manufacturer’s instructions.
- Confirm that the power to the water heater is cut off by testing the heater’s controls. You should not be able to adjust the temperature or turn on the hot water faucet while the power is off.
- Once you have confirmed that the power supply is shut off, you can proceed to the next step of locating the pilot light assembly.
Shutting off the power supply is an essential step in ensuring your safety while working on your Honeywell water heater. It eliminates the risk of electrical shock or accidental ignition. Remember to keep the power supply turned off until the entire lighting process is complete.
With the power supply successfully shut off, you can now move on to locating the pilot light assembly, which is necessary for igniting the pilot light. This step will be covered in detail in the following section.
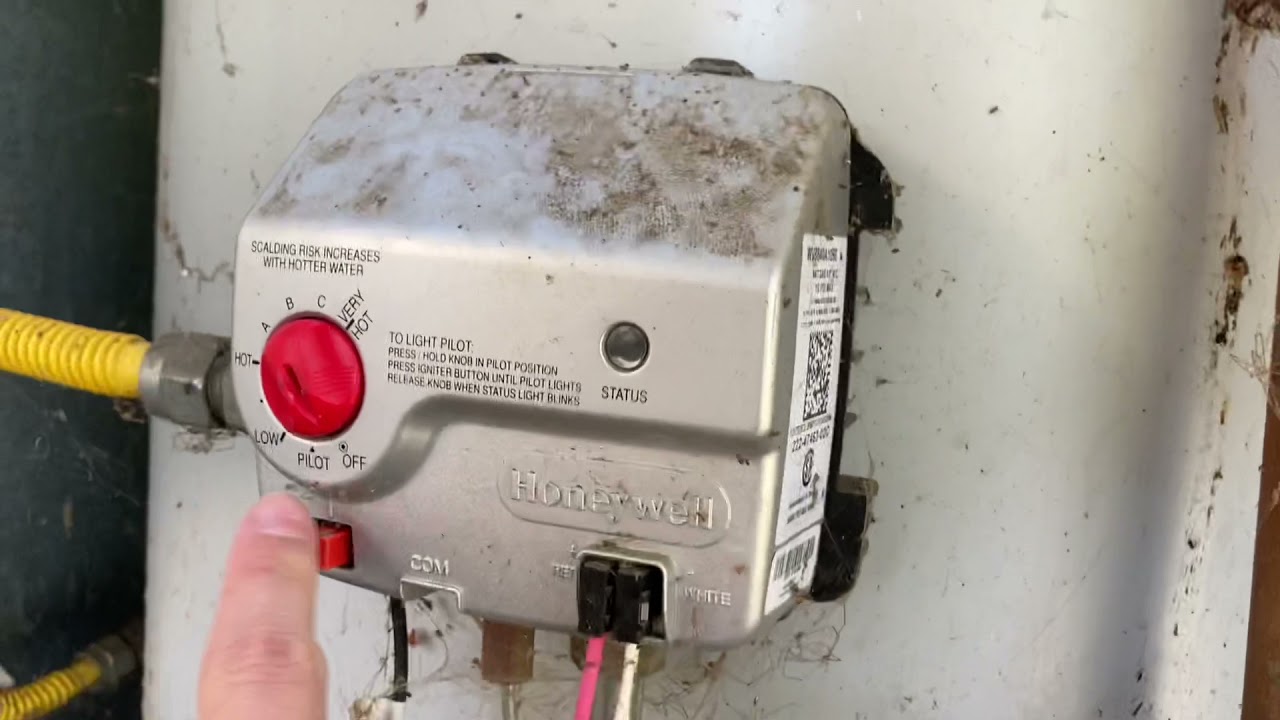
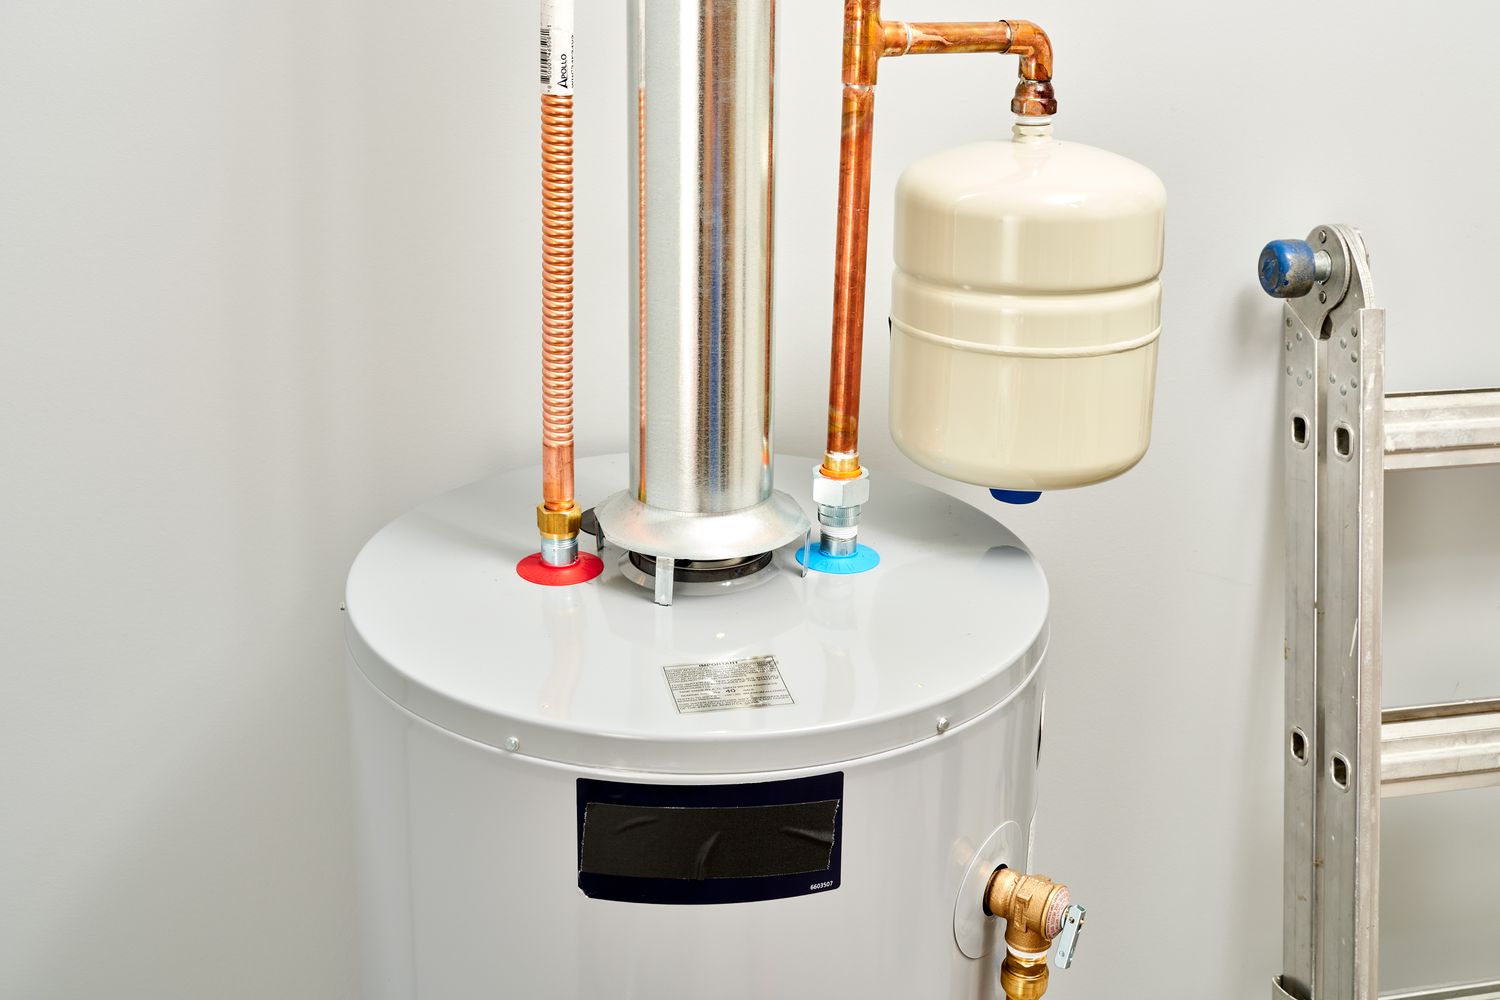
Step 2: Locating the Pilot Light Assembly
In order to light your Honeywell water heater, you need to locate the pilot light assembly. The pilot light is a small flame that ignites the main burner, which in turn heats the water. Follow these steps to find the pilot light assembly:
- Locate the access panel on the front of your water heater. This panel is typically located near the bottom of the unit.
- Use a screwdriver to remove the screws or fasteners securing the access panel in place.
- Set the access panel aside in a safe place, and use a flashlight to illuminate the interior of the water heater.
- Look for a small metal tube or pipe protruding from the gas control valve. This tube is the pilot tube, which leads to the pilot light assembly.
- Near the pilot tube, you should see a small bracket or holder that houses the pilot light assembly. This may be a metal rod or a small box-like structure.
- If necessary, consult your Honeywell water heater’s manual for a detailed diagram showing the exact location of the pilot light assembly.
Once you have located the pilot light assembly, you are ready to proceed with the lighting process. It’s important to prepare the area before lighting the pilot light to ensure a safe and efficient ignition. This will be covered in the next step.
By following these steps, you can easily locate the pilot light assembly on your Honeywell water heater. Take your time to ensure that you have identified the correct area before moving on to the next step. With the pilot light assembly located, you’re one step closer to successfully lighting your water heater.
Read more: How To Refill A Water Heater
Step 3: Preparing the Area
Before you proceed with lighting the pilot light on your Honeywell water heater, it’s essential to prepare the area for a safe and successful ignition. By following these steps, you can ensure that the area is clear of any potential hazards and that you have everything you need within reach:
- Clear the area around the water heater. Remove any flammable materials, such as papers, rags, or cleaning products, that could pose a fire hazard. Make sure there are no obstructions that could impede your access to the pilot light assembly.
- Ensure proper ventilation. Adequate airflow is crucial when working with gas appliances. Open windows or doors to provide ventilation in the area. This will help prevent the accumulation of potentially dangerous gases, such as carbon monoxide.
- Gather your tools and materials. Double-check that you have all the necessary tools and materials within reach. These include safety goggles, non-flammable gloves, a screwdriver, a long lighter or matchstick, and a flashlight.
- Put on your safety goggles and non-flammable gloves. Protecting your eyes and hands is important to minimize the risk of injury during the lighting process.
- Position yourself comfortably in front of the water heater. Make sure you have a clear view of the pilot light assembly and easy access to the necessary controls and tools.
By taking the time to prepare the area, you ensure that you can safely and efficiently light your Honeywell water heater. Clearing any potential hazards and having your tools and materials ready will greatly contribute to a smooth and successful lighting process.
With the area properly prepared, you’re now ready to move on to the next step: lighting the pilot light. This is an important step in the overall process, as it initiates the heating of the water. We will cover the specific steps to light the pilot light in the following section.
Make sure to follow the manufacturer’s instructions for lighting your Honeywell water heater. Always turn off the gas and wait for any lingering gas to dissipate before attempting to relight the pilot.
Step 4: Lighting the Pilot Light
Now that you have prepared the area and gathered the necessary tools and materials, it’s time to light the pilot light on your Honeywell water heater. Follow these steps carefully to ensure a successful ignition:
- Locate the pilot light assembly, which should be near the pilot tube connected to the gas control valve.
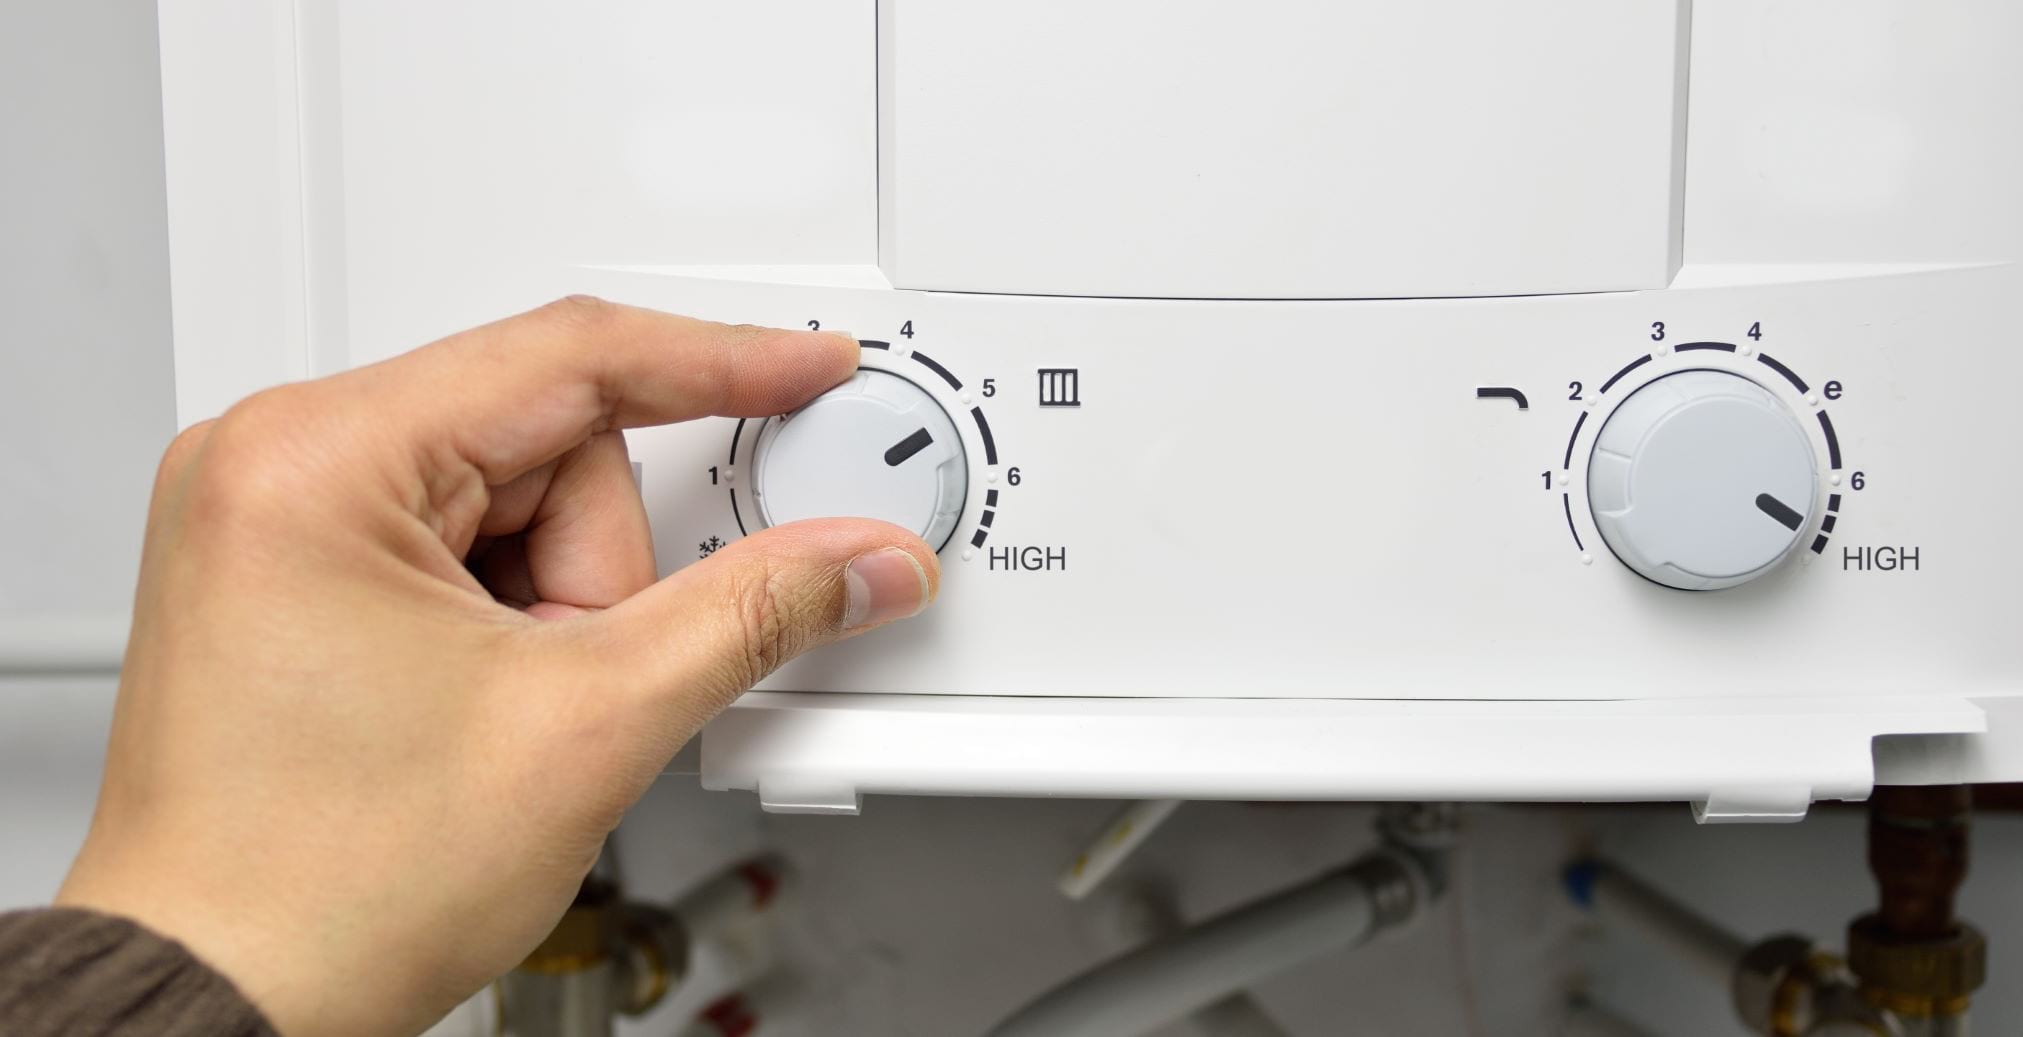
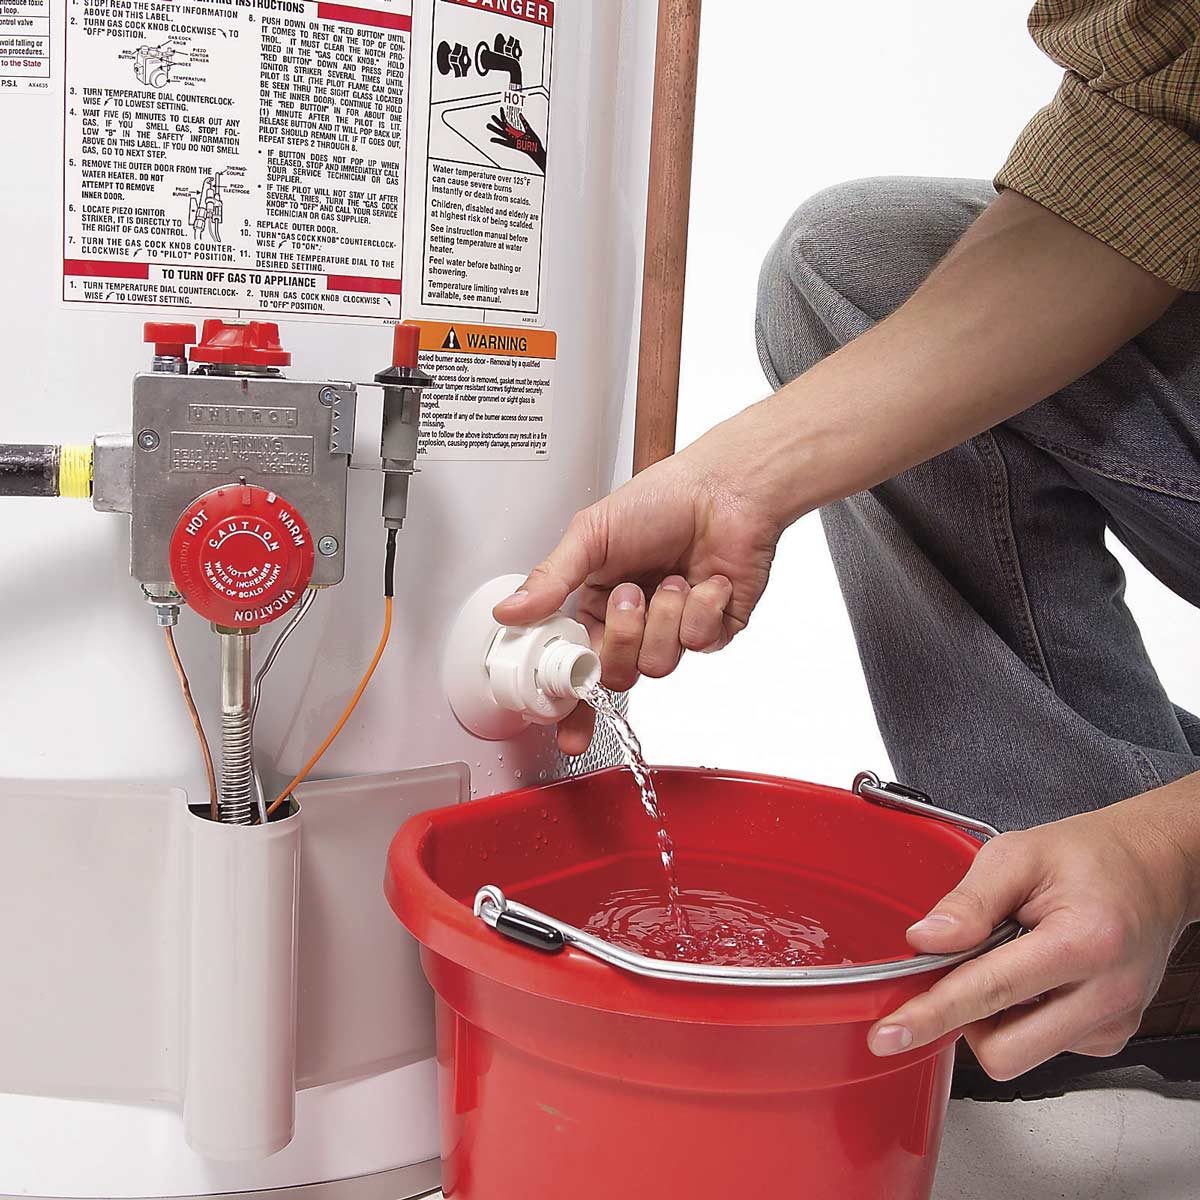
- Turn the gas control knob to the “off” position. This will allow any gas that may have built up to dissipate before igniting the pilot light.
- Wait for at least five minutes to allow the gas to dissipate fully.
- While waiting, locate the pilot light button or lever near the pilot light assembly. This is the mechanism that you will press or slide to ignite the pilot light.
- Using your long lighter or matchstick, bring the flame close to the pilot light assembly.
- Press and hold the pilot light button or slide the lever to the “pilot” position. While doing this, continue to hold the flame to the pilot light assembly.
- You should see the pilot light ignite. Once it is lit, continue holding the pilot light button or lever for about one minute to ensure that the thermocouple or flame sensor heats up properly.
- After one minute, release the pilot light button or slide the lever back to the “on” position.
It’s important to note that if the pilot light fails to ignite, you should turn the gas control knob to the “off” position and wait for at least five minutes before attempting to relight it. This allows any accumulated gas to dissipate safely.
By following these steps, you can successfully light the pilot light on your Honeywell water heater. Once the pilot light is lit, you can move on to the next step of checking for proper ignition and functionality, which we will cover in the following section.
Step 5: Checking for Proper Ignition
After successfully lighting the pilot light on your Honeywell water heater, it’s important to verify that it has ignited properly. Proper ignition ensures that the main burner will function correctly and provide hot water as needed. Follow these steps to check for proper ignition:
- Observe the pilot light flame. It should appear as a steady blue flame with a small yellow tip.
- If the flame is flickering or has a yellow or orange color, it may indicate an issue with the gas supply or a dirty pilot light. In this case, you may need to clean the pilot light or check the gas supply line for any obstructions.
- Listen for the sound of the main burner igniting. After the pilot light is lit, you should hear a distinct “whoosh” sound as the main burner ignites. This indicates that the water heater is functioning properly.
- If you don’t hear the burner ignite, it may indicate a problem with the gas supply or the ignition system. In this case, it is recommended to consult a professional or refer to the manufacturer’s instructions for troubleshooting steps.
- Observe the pilot light flame for a few minutes to ensure it remains stable. If the flame starts to flicker or goes out, it may indicate a problem with the thermocouple or flame sensor. Again, consulting a professional is recommended in this situation.
Checking for proper ignition is essential to ensure the safe and efficient operation of your Honeywell water heater. A steady blue flame and the sound of the main burner igniting are good indications that everything is functioning as it should. If you notice any irregularities or problems during this step, it’s best to seek professional assistance.
With the pilot light successfully ignited and properly functioning, you can proceed to the next step of relighting the main burner, which will be covered in the following section.
Step 6: Relighting the Main Burner
Now that the pilot light is lit and functioning properly, you can proceed to relight the main burner on your Honeywell water heater. The main burner is responsible for heating the water in the tank. Follow these steps to relight the main burner:
- Find the control knob on the gas control valve near the pilot light assembly.
- Turn the control knob to the “on” position. This will open the gas valve and allow the gas to flow to the main burner.
- Listen for the sound of the main burner igniting. You should hear a distinct “whoosh” sound as the main burner lights up. This indicates that the water heater is now fully operational.
- Observe the main burner flame. It should be a steady blue flame, indicating proper combustion. If you notice any irregularities, such as a flickering flame or an orange/yellow color, there may be an issue with the gas supply or the burner itself. Consult a professional for further assistance.
- Allow the main burner to run for a few minutes to ensure it remains lit and provides a consistent flame. This will indicate that the water heater is functioning properly.
Relighting the main burner is an important step in the process of restoring your Honeywell water heater to full functionality. A steady blue flame and the “whoosh” sound of ignition indicate that the main burner is working as it should. If you encounter any issues during this step, it’s best to seek professional help to diagnose and resolve the problem.
By following these steps, you can successfully relight the main burner on your Honeywell water heater. Once you have verified that the main burner is lit and functioning correctly, you can move on to the next step of verifying the proper functioning of the water heater, which will be covered in the following section.
Read more: How To Disconnect Water Heater
Step 7: Verifying Proper Functioning
After relighting the main burner on your Honeywell water heater, it’s important to verify that the water heater is functioning properly and providing hot water as expected. Follow these steps to ensure proper functioning:
- Turn on a hot water faucet in your home and let it run for a few minutes.
- Check the temperature of the water coming out of the faucet. It should be hot, indicating that the water heater is heating the water effectively.
- Observe the water heater as it continues to operate. Look for any signs of leaks, unusual noises, or malfunctions. If you notice any abnormal behavior, it may indicate a problem that requires further inspection or professional assistance.
- Monitor the performance of the water heater over the next few days. Ensure that it consistently provides hot water when needed and maintains a steady temperature.
- If you experience any issues or concerns with the functioning of your water heater, consult a professional technician who can diagnose and address any problems.
Verifying proper functioning is crucial to ensure that your Honeywell water heater is providing reliable hot water for your household needs. By following these steps and monitoring its performance, you can identify and address any issues in a timely manner, ensuring the continued efficiency and safety of your water heater.
With the water heater functioning properly and providing hot water as expected, you can now proceed to the final step of restoring the power supply, which will be covered in the following section.
Step 8: Restoring the Power Supply
After verifying the proper functioning of your Honeywell water heater, it’s time to restore the power supply. Restoring the power supply allows the water heater to continue operating efficiently. Follow these steps to restore the power supply:
- Locate the circuit breaker or fuse box for your home.
- Identify the circuit breaker or fuse that controls the water heater.
- Switch the circuit breaker or replace the fuse, turning the power supply back on.
- Confirm that the power supply has been restored by testing the controls and hot water faucets. You should be able to adjust the temperature and use hot water without any issues.
- If you encounter any problems after restoring the power supply, such as a lack of hot water or malfunctioning controls, it may indicate an underlying issue. In this case, it’s best to consult a professional for further inspection and repair.
Restoring the power supply is the final step in the process of lighting your Honeywell water heater. By following these steps, you have successfully reestablished the power and ensured the continued operation of the water heater.
It’s important to note that if you ever need to shut off the power supply again, follow the same procedure in Step 1 to do so safely.
Congratulations! You have successfully lit and restored your Honeywell water heater. By following these steps and performing regular maintenance on your water heater, you can continue to enjoy reliable hot water in your home for years to come.
If you have any further questions or concerns about your Honeywell water heater, always refer to the manufacturer’s instructions or consult a professional for assistance.
Conclusion
In conclusion, properly lighting and maintaining your Honeywell water heater is essential for ensuring a reliable supply of hot water in your home. By following the step-by-step process outlined in this guide, you can confidently and safely light your Honeywell water heater. Let’s recap the key points:
First, gather all the required tools and materials, including safety goggles, non-flammable gloves, a screwdriver, a long lighter or matchstick, and a flashlight. These items will help protect you and assist in the lighting process.
Next, prioritize safety by taking necessary precautions, such as turning off the power supply, ensuring proper ventilation, wearing safety goggles and gloves, and keeping flammable materials away from the area.
Locate the pilot light assembly by removing the access panel and using a flashlight to find the pilot tube and the holder for the assembly.
Prepare the area by clearing any potential hazards, ensuring proper ventilation, and having your tools and materials within reach.
Light the pilot light by following the proper sequence, holding a flame to the assembly, pressing the pilot light button or sliding the lever, and ensuring the pilot light ignites and stays lit.
Check for proper ignition by observing the flame and listening for the sound of the main burner igniting. A steady blue flame and a distinct “whoosh” sound indicate successful ignition.
Relight the main burner by turning the control knob to the “on” position and confirming the proper functioning of the burner.
Verify the water heater’s proper functioning by checking the temperature of the hot water, observing for leaks or malfunctions, and monitoring its performance over time.
Finally, restore the power supply by turning on the circuit breaker or replacing the fuse, ensuring that the controls and hot water faucets are functioning correctly.
By following these steps and taking proper care of your Honeywell water heater, you can enjoy a steady supply of hot water for your daily needs. Remember to always prioritize safety and consult a professional if you encounter any issues or concerns with your water heater.
Thank you for reading this guide on how to light a Honeywell water heater. We hope it has been informative and helpful in ensuring the optimal performance of your water heater.
Now that you've mastered lighting your Honeywell water heater, why stop there? Our next guide covers top options for water heaters to consider for the upcoming year, ensuring you're equipped with reliable and efficient choices. From eco-friendly models to powerful units designed for large homes, we've got insights that will help you make an informed decision. Don't miss out on optimizing your home's hot water system with our latest recommendations.
Frequently Asked Questions about How To Light A Honeywell Water Heater
Was this page helpful?
At Storables.com, we guarantee accurate and reliable information. Our content, validated by Expert Board Contributors, is crafted following stringent Editorial Policies. We're committed to providing you with well-researched, expert-backed insights for all your informational needs.


0 thoughts on “How To Light A Honeywell Water Heater”