Articles
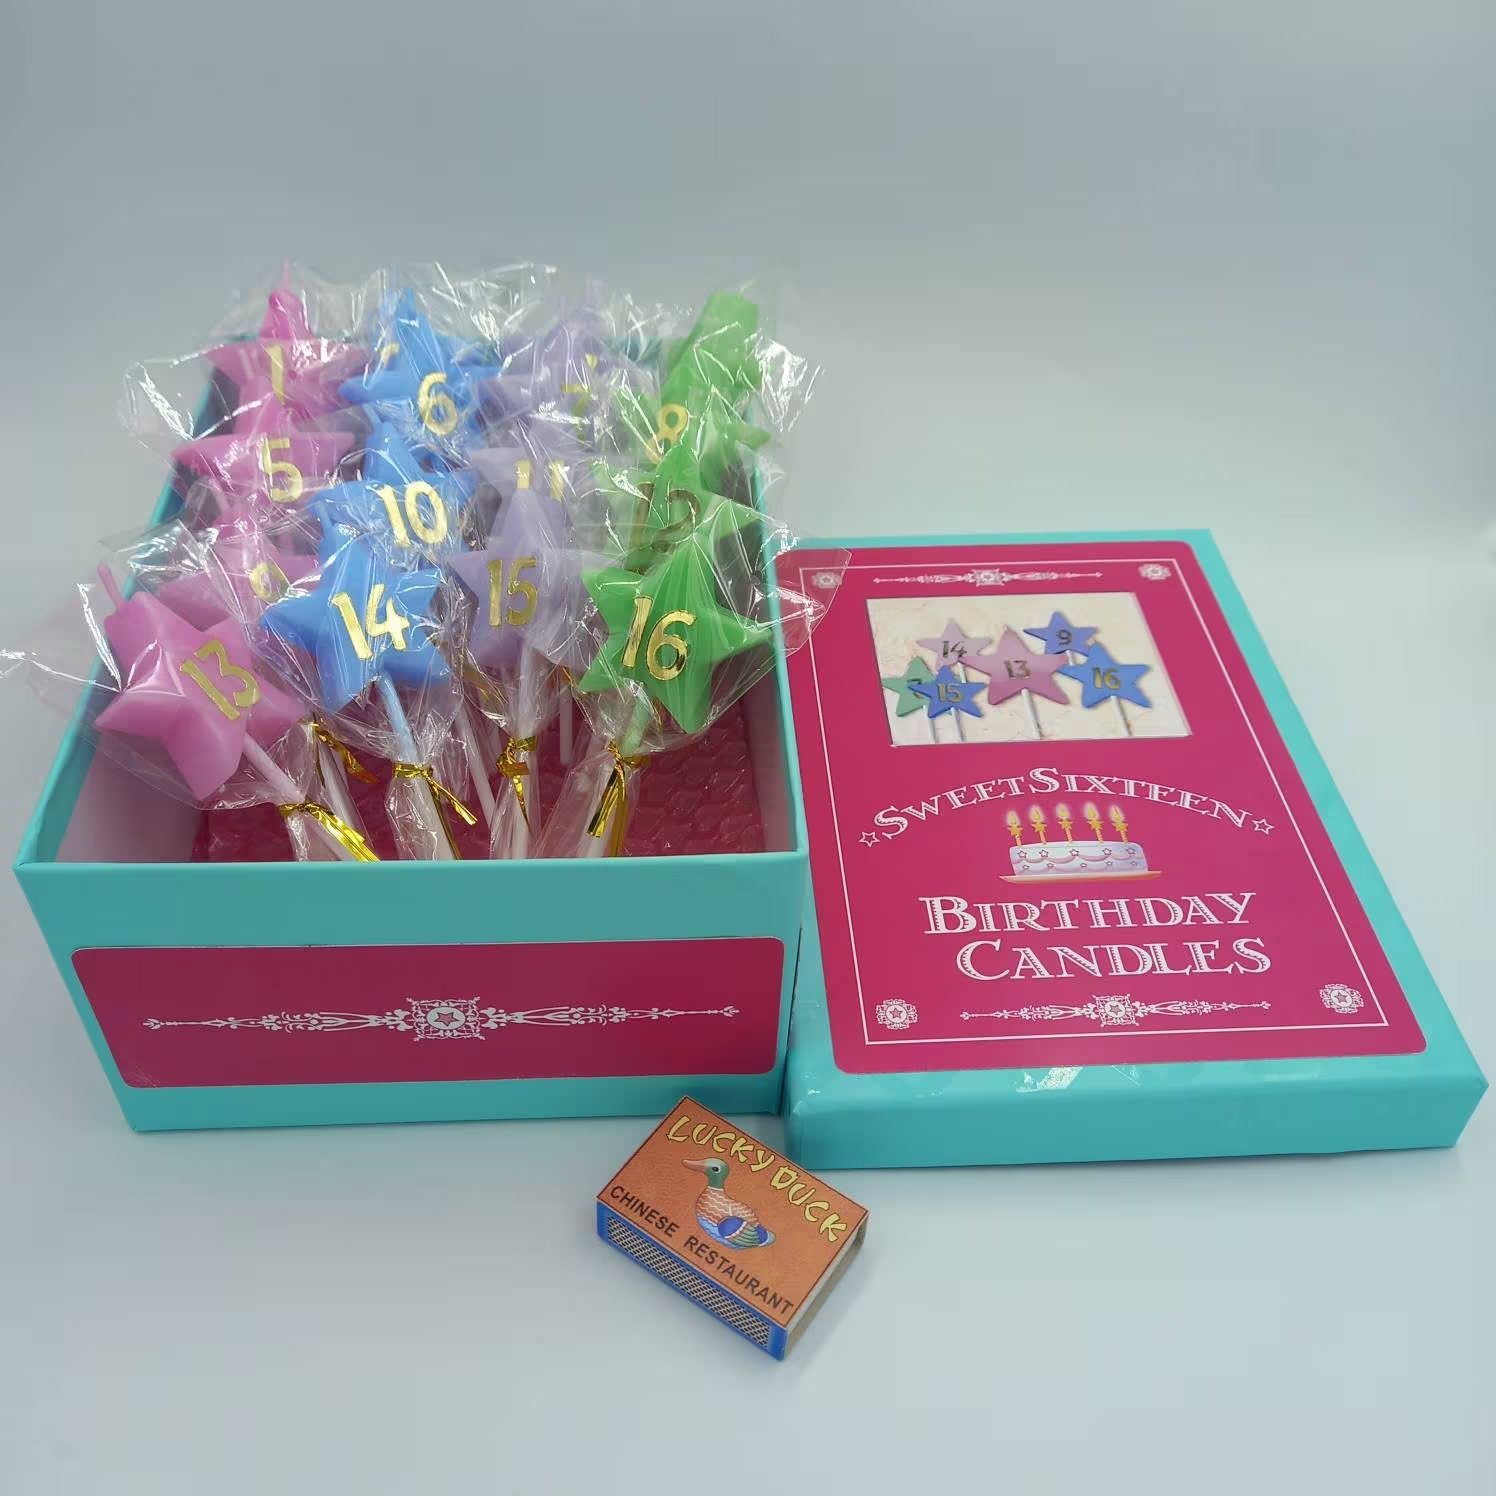
How To Make 16 Wishes Candles
Modified: September 1, 2024
Learn how to create beautiful 16 wishes candles with our informative articles. Gather inspiration and step-by-step instructions to make your own unique candles.
(Many of the links in this article redirect to a specific reviewed product. Your purchase of these products through affiliate links helps to generate commission for Storables.com, at no extra cost. Learn more)
Introduction
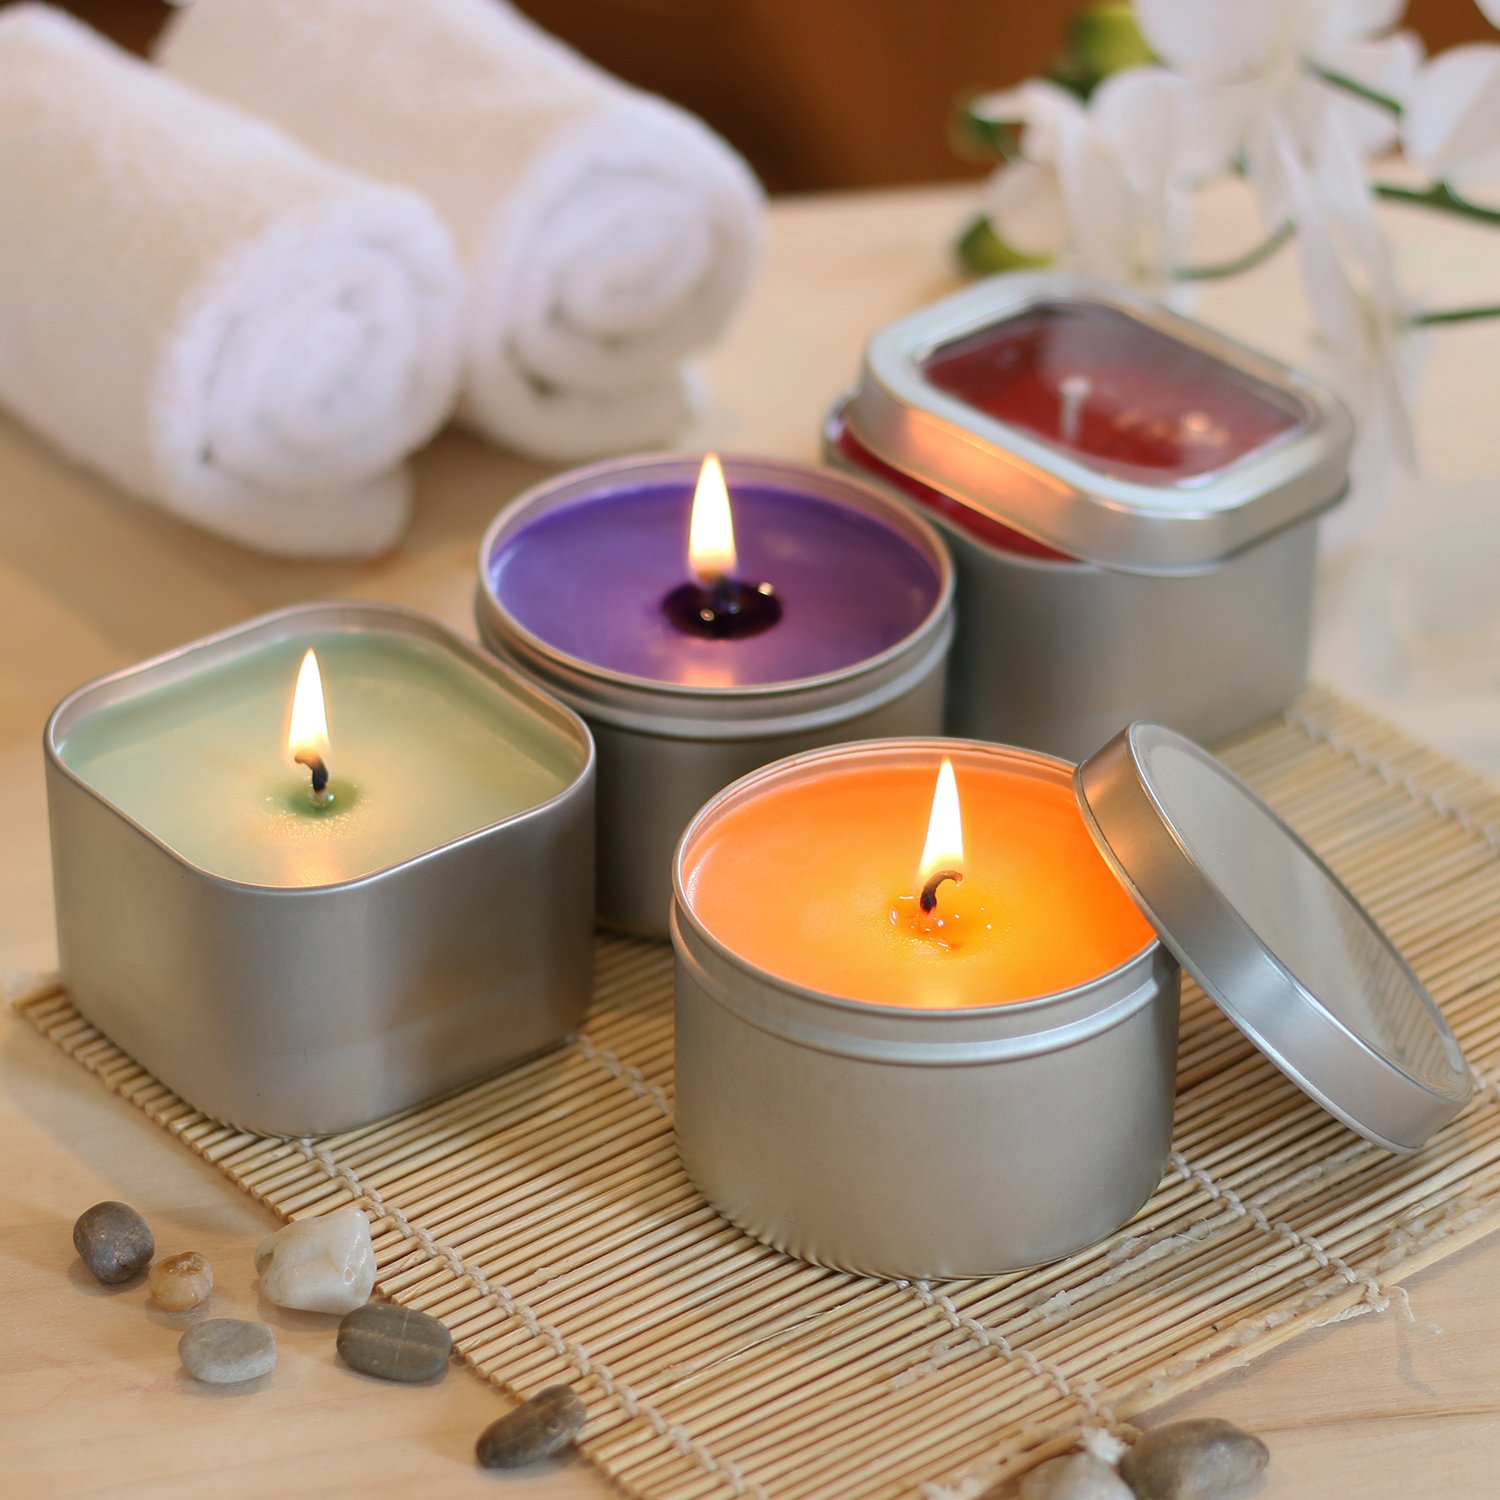
Candles have been used for centuries as a source of light and a symbol of relaxation and tranquility. They can create a warm and inviting atmosphere in any space, and have the power to evoke a sense of calm and serenity. If you’re looking to add a touch of magic to your candles, why not try making your own 16 Wishes candles?
16 Wishes candles are a unique and personalized way to bring your hopes and dreams to life. Whether you want to manifest love, success, or happiness, these candles can help you focus your intentions and set the stage for positive energy and manifestation. Plus, making your own candles allows you to customize the fragrance, color, and design, adding a personal touch to your creations.
In this article, we’ll guide you through the step-by-step process of making your own 16 Wishes candles. From gathering the necessary supplies to testing and enjoying the final product, we’ll cover everything you need to know to create beautifully scented and meaningful candles.
So, let’s embark on this magical journey of candle making and bring your 16 Wishes to life!
Key Takeaways:
- Create personalized 16 Wishes candles to infuse your intentions and desires into tangible objects, evoking positive energy and manifestation. Enjoy the magical journey of candle making and let your wishes come true!
- From gathering supplies to testing and enjoying, making 16 Wishes candles is a fun and meaningful process. Infuse your personal touch, set intentions, and bask in the enchanting ambiance they create.
Read more: How To Make A Heater With Candles
Supplies Needed
Before you begin making your 16 Wishes candles, it’s important to gather all the necessary supplies. Here’s a list of items you’ll need to get started:
- Candle wax: You can choose between paraffin wax, soy wax, or beeswax, depending on your preference.
- Candle fragrance oil: Select a fragrance oil that resonates with your wishes, such as lavender for relaxation or citrus for energy.
- Candle coloring: Opt for candle dye chips or liquid candle dye in colors that symbolize your intentions.
- Candle wicks: Pick wicks suitable for your candle size, preferably with a metal base for stability.
- Candle molds: Choose molds that complement the size and shape of your desired candles. Silicone molds are a popular choice for their flexibility and ease of use.
- Candle thermometer: A thermometer is essential for monitoring the temperature of the melted wax.
- Double boiler or a heat-resistant container: This will be used to melt the wax and ensure even heating.
- Stirring utensil: A heat-resistant spoon or spatula will be needed to mix the wax, fragrance, and color.
- Measuring tools: Use a kitchen scale or measuring cup to accurately measure the wax, fragrance oil, and candle dye.
- Heat-resistant surface: To place your candle molds on during the pouring and cooling process.
- Protective gear: Wear gloves and an apron to protect yourself from hot wax and spills.
Once you have gathered all the necessary supplies, you’re ready to begin the candle making process. Remember to create a clean and organized workspace to ensure an enjoyable and safe experience.
Step 1: Gathering the Candle Making Materials
Before you dive into the exciting process of making your 16 Wishes candles, it’s important to gather all the necessary materials. This will ensure a smooth and seamless candle-making experience. Here’s a step-by-step guide on how to gather the candle making materials:
- 1. Determine the Type of Wax: Choose the type of wax you want to work with. Options include paraffin wax, soy wax, and beeswax. Each type has its own unique qualities and benefits, so consider what factors are important to you, such as sustainability or scent throw.
- 2. Select Fragrance Oils: Choose fragrance oils that align with your intentions and desires. Whether you want a relaxing lavender scent or an invigorating citrus aroma, select oils that evoke the emotions and energy you wish to manifest.
- 3. Decide on Candle Colors: Determine the colors you want to use for your 16 Wishes candles. Consider the symbolism of different colors and how they relate to your intentions. For example, red represents passion and love, while green symbolizes growth and abundance.
- 4. Gather Candle Molds: Choose molds that suit the shape and size of your desired candles. Silicone molds are popular for their flexibility and ease of use. Ensure that the molds are clean and free from any debris or previous candle remnants.
- 5. Acquire Candle Wicks: Select wicks that are suitable for the size and type of candles you plan to make. It’s a good idea to choose wicks with a metal base for added stability. Ensure that the wicks are long enough to comfortably reach the bottom of your candle molds.
- 6. Prepare a Double Boiler or Heat-Resistant Container: If you’re using a double boiler, make sure you have one available. Alternatively, you can use a heat-resistant container to melt your wax. This will prevent direct heat exposure and ensure the wax melts evenly.
- 7. Have Thermometer and Stirring Utensils Ready: A thermometer is crucial for monitoring the temperature of the melted wax. Ensure you have one on hand. Additionally, have heat-resistant stirring utensils, such as spoons or spatulas, ready to mix the wax, fragrance oils, and colors.
- 8. Set Up Your Workspace: Create a clean and organized workspace. Lay down a heat-resistant surface to place your candle molds on during the pouring and cooling process. Keep your materials and tools within easy reach.
- 9. Wear Protective Gear: To ensure your safety, wear gloves and an apron to protect your hands and clothing from hot wax and potential spills.
By following these steps and gathering all the necessary candle making materials, you’re now ready to move on to the exciting process of creating your 16 Wishes candles.
Step 2: Preparing the Wax
Once you have gathered all the necessary materials for making your 16 Wishes candles, it’s time to move on to the next step: preparing the wax. Properly preparing the wax is essential for achieving a smooth and even burn in your finished candles. Follow these steps to prepare your wax:
- Weigh the Wax: Start by weighing the wax using a kitchen scale or a measuring cup. Measure the amount according to the size of your candle molds and the number of candles you wish to make.
- Melt the Wax: Place the wax in a double boiler or a heat-resistant container. If using a double boiler, fill the bottom pot with water and place it on the stove over medium heat. Place the wax-filled top pot or container on top of the bottom pot. If using a heat-resistant container, microwave the wax in short intervals, stirring in between, until completely melted.
- Monitor the Temperature: Use a candle thermometer to monitor the temperature of the melted wax. Different types of wax have different melting points – refer to the instructions for your specific wax type. Generally, the wax should be heated to around 180-185°F (82-85°C).
- Stir the Wax: Once the wax has reached the desired temperature, gently stir it with a heat-resistant stirring utensil. This will help to distribute the heat evenly, ensuring a smooth and consistent texture.
- Allow the Wax to Cool: Let the melted wax cool slightly before adding fragrance oils or colors. The optimal temperature for adding these additional components is typically around 160-175°F (71-79°C).
Preparing the wax correctly is crucial for the overall quality of your 16 Wishes candles. Take your time during this step and ensure that the wax is heated and stirred properly to achieve the desired consistency for successful candle making.
Step 3: Adding the Fragrance and Color
Now that you have prepared the wax for your 16 Wishes candles, it’s time to infuse them with delightful fragrances and vibrant colors. This step will add a personalized touch to your candles and enhance the overall sensory experience. Follow these steps to add fragrance and color to your candles:
- Select Your Fragrance: Choose a fragrance oil that aligns with your intentions. Consider scents that evoke the emotions and energy you wish to manifest. Measure the desired amount of fragrance oil, following the manufacturer’s instructions for recommended usage rates or scent throw.
- Add the Fragrance Oil: Gently pour the measured amount of fragrance oil into the melted wax. Stir the mixture thoroughly to ensure the fragrance is evenly distributed. Take your time during this step to fully incorporate the fragrance into the wax.
- Determine Your Color: Decide on the color or colors you want to use for your candles. Consider the symbolism of different colors and how they relate to your intentions. Whether you want a single color or a combination of hues, select candle dye chips or liquid candle dye in the desired shades.
- Add the Candle Dye: Carefully add the candle dye to the melted wax, following the manufacturer’s instructions for the recommended amount. Start with a small amount and gradually add more to achieve the desired color intensity. Stir the mixture thoroughly to fully incorporate the dye into the wax.
- Check the Color: After stirring, assess the color of the wax. If it doesn’t meet your expectations, you can adjust the shade by adding more dye or mixing in a different color. Remember to stir well after each adjustment to maintain a consistent color throughout the candle.
Adding fragrance and color to your 16 Wishes candles allows you to create a personalized and sensory experience. Take your time during this step to ensure that the fragrance oil and color are thoroughly mixed into the wax, producing beautiful and aromatic candles that align with your intentions.
Read more: How To Make Candles With Herbs
Step 4: Preparing the Candle Molds
With the fragrance and color added to the wax, it’s time to move on to the next step: preparing the candle molds. Properly preparing the molds ensures that your candles will have a smooth and professional-looking finish. Follow these steps to prepare your candle molds:
- Clean the Molds: Before using the molds, make sure they are clean and free from any debris or residue from previous candle-making sessions. Wash the molds with warm soapy water and dry them thoroughly.
- Apply Mold Release: To ensure easy removal of the finished candles, apply a thin layer of mold release spray or a non-stick cooking spray to the inside of the molds. This will help the candles release from the molds smoothly.
- Secure the Molds: Place the prepared candle molds on a flat, heat-resistant surface. You can use a baking sheet or a plastic tray lined with parchment paper to catch any potential spills or drips.
- Arrange the Wicks: If your molds require multiple wicks, position them evenly within each mold. Make sure the wicks are centered and straight, allowing them to stand upright in the wax.
By carefully preparing the candle molds, you’ll ensure that your 16 Wishes candles have a professional and polished appearance. Taking the time to clean the molds, apply mold release, and position the wicks properly will contribute to the overall quality of your finished candles. Now that your molds are ready, you can move on to the exciting process of pouring the wax.
Step 5: Pouring the Wax into the Molds
Now that you have prepared the candle molds, it’s time to pour the wax and bring your 16 Wishes candles to life. This step is where your creativity truly shines as you pour the colored and fragrant wax into the molds. Follow these steps to pour the wax into the molds:
- Prepare the Workstation: Ensure your work area is clean and free from any potential obstacles. Place the prepared molds on a flat, heat-resistant surface with the wicks centered and standing upright.
- Slowly Pour the Wax: Using a heat-resistant pouring pitcher or ladle, slowly pour the wax into each mold. Start from the outer edges and gradually fill the mold to the desired level, leaving a small space at the top to prevent overflow during the cooling process.
- Avoid Air Bubbles: As you pour the wax, be mindful of any air bubbles that may form within the molds. To remove air bubbles, gently tap the mold or use a toothpick to pop them before the wax begins to set.
- Maintain Consistent Temperature: It’s important to maintain a consistent temperature while pouring the wax. This ensures that the wax sets evenly and prevents any potential cracking or uneven surfaces on the finished candles.
- Allow the Wax to Set: Once you have poured the wax into the molds, resist the urge to move or disturb them. Let the candles sit undisturbed on the heat-resistant surface until the wax has completely cooled and solidified.
Take your time during this step to pour the wax slowly and smoothly into the molds. It’s important to avoid rushing the process to ensure that your 16 Wishes candles turn out beautifully. Once the wax has set, you can move on to the next step of adding the wicks.
When making 16 wishes candles, be sure to use high-quality wax and fragrance oils for a longer-lasting and more fragrant candle. Additionally, consider adding dried herbs or flowers for a decorative touch.
Step 6: Adding the Wicks
Now that the wax has set in the molds, it’s time to add the wicks to your 16 Wishes candles. Properly positioning and securing the wicks is essential for a successful burn and even melting of the wax. Follow these steps to add the wicks:
- Prepare the Wicks: Trim the wicks to the appropriate length, leaving about 1/4 inch (0.6 cm) above the surface of the hardened wax. This will allow for easy lighting and a steady flame.
- Apply Adhesive: Place a small dot of hot glue or a wick sticker at the bottom of the wick’s metal base. This will help anchor the wick to the bottom of the candle mold.
- Position the Wicks: Carefully place the metal base of each wick into the center of the hardened wax in each mold. Press down gently to ensure the wick is securely held in place.
- Avoid Sagging: To prevent the wicks from sagging or moving during the pouring and burning process, you can use a wick holder or a pencil. Simply place the wick holder or pencil across the top of the mold and allow the wick to rest against it.
Adding the wicks to your candles is an important step to ensure proper burning and enjoyment of your 16 Wishes candles. Take care in positioning and securing the wicks to achieve a centered and stable flame. With the wicks in place, you are now ready to let the candles fully set and cool.
Step 7: Allowing the Candles to Set
After adding the wicks to your 16 Wishes candles, it’s crucial to allow them to fully set and cool. This step is essential for ensuring that your candles solidify properly and maintain their shape. Follow these steps to allow the candles to set:
- Find a Stable and Undisturbed Area: Choose a location where the candles can remain undisturbed while they set. Make sure the area is stable and away from drafts or direct sunlight.
- Leave the Candles to Cool: Let the candles sit for several hours until the wax has completely solidified. The exact time needed for the candles to set will depend on the type of wax used and the size of the candles.
- Patience is Key: Remember not to move or touch the candles during this time, as this may disrupt the cooling process and affect the final appearance of the candles.
- Check for Solidification: To ensure that the candles have fully set, gently touch the surface of the wax. If it feels firm and no longer tacky or soft, it indicates that the candles have solidified properly.
Allowing the candles to set undisturbed is crucial for achieving high-quality and well-formed 16 Wishes candles. Be patient during this step and resist the temptation to prematurely handle the candles. Once you are confident that the candles have fully solidified, it’s time to move on to the next step of removing them from the molds.
Read more: How To Make Dipped Candles
Step 8: Removing the Candles from the Molds
After the 16 Wishes candles have completely set and cooled, it’s time to remove them from the molds. Proper removal ensures that your candles maintain their shape and come out easily without any damage. Follow these steps to safely and efficiently remove the candles from the molds:
- Prepare the Workspace: Clear a clean and flat surface where you can comfortably work with the molds. Place a soft cloth or paper towel on the surface to protect the candles while removing them from the molds.
- Apply Gentle Pressure: Hold each mold firmly and apply gentle pressure to the bottom of the mold to loosen the candle. Avoid using excessive force, as this may cause the candle to break or distort.
- Tap or Flex the Mold: If the candles are not easily releasing from the molds, gently tap the mold on the surface to help loosen them. Alternatively, try flexing the sides of the mold slightly to create space between the wax and the mold.
- Slowly and Carefully Remove the Candles: Once you feel the candles are loosened, slowly and carefully lift them out of the molds. If you encounter any resistance, stop and repeat the tapping or flexing process until the candles release easily.
It’s important to note that different molds may require slightly different techniques for removing the candles. Some molds may easily release the candles, while others may require a bit more effort. Patience and gentleness are key to successfully removing the candles without any damage.
Once the candles are out of the molds, place them on a clean and flat surface to prepare for the next step of trimming the wicks.
Step 9: Trimming the Wicks
After removing the 16 Wishes candles from the molds, it’s time to trim the wicks to an appropriate length. Trimming the wicks helps promote a clean and efficient burn, ensuring that your candles last longer and produce a steady flame. Follow these steps to trim the wicks:
- Evaluate the Wick Length: Take a close look at the length of each wick and determine if it needs to be trimmed. The ideal wick length is typically around 1/4 inch (0.6 cm) above the surface of the wax.
- Prepare Scissors or Wick Trimmers: Use a pair of sharp scissors or dedicated wick trimmers to cut the wicks. Ensure that the cutting tool is clean and free of any debris.
- Trim the Wicks: Hold each candle upright and carefully trim the wick, leaving about 1/4 inch (0.6 cm) above the surface of the wax. Make a clean and straight cut to avoid any jagged edges.
- Remove the Trimmed Wicks: After trimming, gently remove the trimmed wick fragments from the surface of the candle, ensuring they don’t fall back into the wax.
Trimming the wicks is an important step for maintaining the quality and longevity of your 16 Wishes candles. Keep in mind that the proper wick length may vary depending on the candle size and the type of wax used, so adjust accordingly. With the wicks trimmed, your candles are now ready for the final step of testing and enjoying their magical glow.
Step 10: Testing and Enjoying Your 16 Wishes Candles
Congratulations! You’ve reached the final step in the process of making your 16 Wishes candles. Now it’s time to test them and bask in the enchanting ambiance they create. Follow these steps to test and enjoy your candles:
- Find a Suitable Location: Choose a safe and suitable location to burn your candles. Place them on a heat-resistant surface away from any flammable materials and out of reach of children or pets.
- Light the Candles: Use a lighter or match to carefully light the wicks of your 16 Wishes candles. Enjoy the anticipation as the flame dances to life, igniting the intentions behind each candle.
- Observe the Burn: Pay attention to how the candles burn. Ensure that the flame is steady and centered, and that the wax melts evenly across the surface of the candle. If you notice any irregularities or issues, extinguish the flame and reevaluate the wick length and candle placement.
- Experience the Fragrance: Allow the fragrance to fill the air as the candles burn. Take in the delightful scents and let them evoke the emotions and energies associated with your 16 Wishes. Enjoy the sensory experience and the ambiance it creates.
- Monitor Safety: Always prioritize safety when burning candles. Never leave them unattended, and extinguish the flames before leaving the room or going to sleep. Keep candles away from drafts, and make sure they are fully extinguished before discarding.
- Reflect on Your Intentions: As your 16 Wishes candles burn, take a moment to reflect on the intentions and desires behind each one. Use this time to visualize your goals, express gratitude, or simply enjoy the serene atmosphere you’ve created.
Testing and enjoying your 16 Wishes candles is a delightful and fulfilling experience. Take the time to savor the ambiance, fragrance, and symbolism they bring into your space. Allow the warm glow and gentle flicker of the flame to inspire and uplift you.
Remember, each time you light your 16 Wishes candles, you are setting the stage for manifestation and positive energy. Let them serve as a reminder and a tangible representation of your hopes and dreams. Enjoy the journey and may your wishes come true!
Conclusion
Creating your own 16 Wishes candles is not only a fun and creative activity but also a meaningful way to infuse your intentions and desires into a tangible object. By following the step-by-step process outlined in this article, you’ve learned how to make personalized and enchanting candles that evoke positive energy and manifestation.
From gathering the necessary supplies and preparing the wax to adding fragrances and colors, each step in the candle-making journey allows you to infuse your personal touch and intentions into the final product. Taking the time and care to pour the wax into your chosen molds, add the wicks, and allow the candles to set ensures that you achieve professional-looking and beautifully scented results.
Trimming the wicks and testing your 16 Wishes candles marks the final steps in the process. As the flames dance and the fragrances fill the air, you’re reminded of the symbolism and intentions behind each candle. Whether you’re seeking love, success, happiness, or any other wish, these candles serve as a constant reminder of your desires and goals.
As you embark on your candle-making journey, remember to stay safe and enjoy the process. Be mindful of the quality of your materials, respect the nature of open flames, and take joy in the transformative power of creating something with your own hands. Whether you choose to keep these candles for yourself or gift them to loved ones, their presence will continue to inspire and uplift.
So, gather your supplies, unleash your creativity, and embark on this magical journey of candle making. Let your 16 Wishes candles illuminate your path with their gentle glow and bring your dreams to life.
Frequently Asked Questions about How To Make 16 Wishes Candles
Was this page helpful?
At Storables.com, we guarantee accurate and reliable information. Our content, validated by Expert Board Contributors, is crafted following stringent Editorial Policies. We're committed to providing you with well-researched, expert-backed insights for all your informational needs.