Articles
How To Make A Chicken Water Dispenser
Modified: January 19, 2024
Discover expert articles on how to make a chicken water dispenser. Get the best tips and step-by-step instructions for creating a reliable water source for your feathered friends.
(Many of the links in this article redirect to a specific reviewed product. Your purchase of these products through affiliate links helps to generate commission for Storables.com, at no extra cost. Learn more)
Introduction
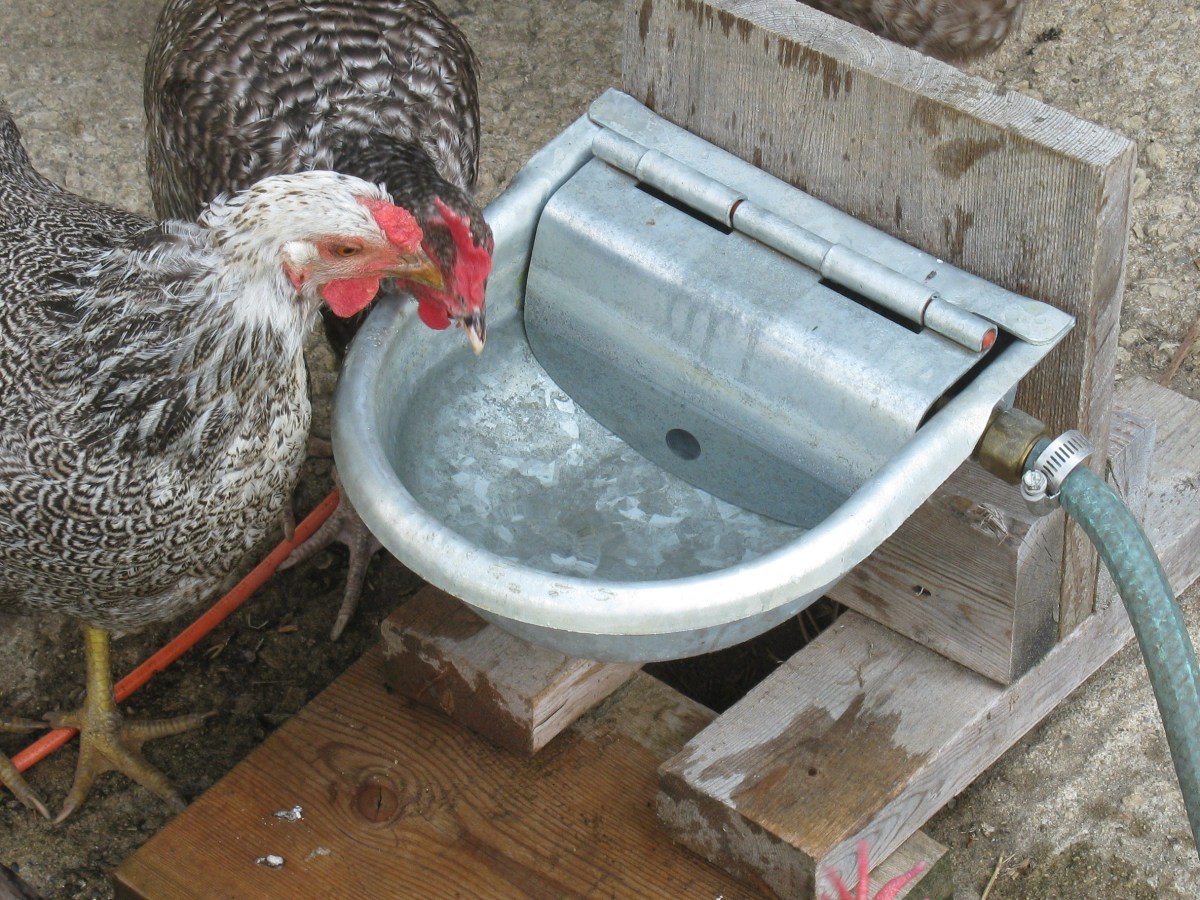
Welcome to our guide on how to make a chicken water dispenser! Keeping your chickens hydrated is essential for their health and well-being. A water dispenser ensures that your feathered friends have a constant supply of clean and fresh water, reducing the risk of dehydration and other health problems.
While you can easily purchase a pre-made chicken waterer from a store, making your own can be a rewarding and cost-effective option. Plus, you can customize it to suit the needs of your flock.
In this article, we will walk you through the step-by-step process of creating a simple and efficient chicken water dispenser. But before we dive into the instructions, let’s take a look at the materials you’ll need to get started.
Key Takeaways:
- Creating a DIY chicken water dispenser is a rewarding and customizable way to ensure your flock has constant access to clean water, promoting their health and well-being.
- Regular maintenance, testing, and adjustments are crucial for ensuring a reliable water supply for your chickens. By following the installation and maintenance steps, you can contribute to the overall health and happiness of your feathered friends.
Read more: What Is A Water Dispenser
Materials Needed
Before you begin making your chicken water dispenser, make sure you have the following materials and tools:
- Plastic container with a lid: Choose a container that is large enough to hold a sufficient amount of water for your chickens. Look for one with a tight-fitting lid to prevent dirt and debris from entering the water.
- Plastic or PVC pipe: You will need a length of pipe to create the dispenser tube. The diameter of the pipe will depend on the size of your flock and the water flow you desire.
- Drill: A drill with a hole saw attachment or a spade bit will be used to create holes in the container and pipe.
- Water nipples: These are specialized valves that allow the chickens to access water when they peck at them. Make sure you get enough water nipples to accommodate all your chickens.
- Sealant: Use a waterproof sealant, such as silicone, to prevent leaks around the drilled holes.
- Cutting tool: You will need a saw or pipe cutter to cut the pipe to the desired length.
- Marker or pencil: This will be used to mark the drill holes on the container and pipe.
- Cleaning supplies: Have soap, water, and a brush on hand to clean the container and pipe before assembly.
Once you have gathered all the necessary materials, you can proceed to the next step: preparing the water container.
Step 1: Gathering Supplies
The first step in making a chicken water dispenser is to gather all the necessary supplies. This ensures that you have everything you need on hand and saves you from running back and forth during the assembly process.
Start by gathering the materials listed in the previous section. Check each item to make sure it is in good condition and suitable for use. If you need to purchase any missing items, take the time to do so before moving forward.
Once you have all the materials, find a clean and well-lit workspace for your project. This could be a table or a workbench in your garage or backyard. Make sure the area is free from any clutter or obstacles that could hinder your progress.
It’s also a good idea to have a set of safety equipment on hand. This may include safety goggles to protect your eyes from flying debris when using the drill, gloves to safeguard your hands, and a dust mask if you will be working in a dusty environment.
With your supplies gathered and your workspace ready, you are now ready to move on to the next step: preparing the water container.
Step 2: Preparing the Water Container
Now that you have all your supplies ready, it’s time to prepare the water container for your chicken water dispenser.
Start by thoroughly cleaning the container with soap and water. This will help remove any dirt, residue, or potential contaminants from the container. Rinse it well and let it dry completely before proceeding.
Next, determine where you want to place the water nipples on the container. These nipples should be positioned at a height that is easily accessible for your chickens, but not too low as to get easily contaminated with dirt or bedding.
Use a marker or pencil to mark the spots where the nipples will be inserted. Make sure to evenly space them around the container for equal water distribution.
Now, it’s time to drill holes at the marked spots. Attach the appropriate-sized hole saw or spade bit to your drill and carefully make a hole at each marked point. Take your time and apply steady pressure to ensure clean and precise holes.
After drilling the holes, test the fit of each water nipple. The nipples should fit into the holes snugly but not too tightly. If necessary, use a small amount of sandpaper or a file to slightly enlarge the holes for a better fit.
Once the water nipples fit properly, remove them from the holes and apply a small amount of waterproof sealant around each hole. This will help prevent any leaks when the nipples are inserted and provide a secure seal.
Allow the sealant to dry completely before proceeding to the next step. This may take a few hours, depending on the type of sealant you are using.
With the water container prepared and the water nipple holes sealed, you are now ready to move on to the next step: creating the dispenser tube.
Step 3: Creating the Dispenser Tube
In this step, we will focus on creating the dispenser tube for your chicken water dispenser. This tube will allow the water to flow from the container to the water nipples.
Start by measuring and cutting a length of plastic or PVC pipe. The length will depend on the size of your chicken coop and the desired placement of the dispenser tube. Make sure to leave enough extra length on each end for proper attachment to the container and the chicken coop.
Once you have the correct length of pipe, use a saw or pipe cutter to make a clean and even cut. Ensure that both ends are straight and without any jagged edges that could potentially harm your chickens.
Next, mark the desired height on the pipe where the water nipples will be mounted. It’s recommended to place the nipples slightly above the base of the coop to prevent the bedding material from clogging the nipples.
Now, it’s time to create holes for the water nipples on the pipe. Measure the diameter of the water nipples and mark the corresponding spots on the pipe. These spots should align with the marks you made in Step 2 on the water container.
Using the appropriate-sized drill bit, carefully drill holes at each marked spot on the pipe. Take your time and apply moderate pressure to ensure clean and accurate holes. Remove any burrs or rough edges from the holes, if present, with sandpaper or a file.
After drilling the holes, insert the water nipples into each hole. They should fit securely without any play or loose movement. If the nipples are too loose, you may need to apply a small amount of sealant around each hole to provide a better fit.
Once all the water nipples are securely in place, double-check their alignment and make any necessary adjustments. The nipples should be oriented downward to allow gravity to help with water flow.
With the dispenser tube created and the water nipples installed, you’re now ready to move on to the next step: assembling the chicken water dispenser.
To prevent algae growth in your chicken water dispenser, add a few drops of apple cider vinegar to the water. This will help keep the water clean and safe for your chickens to drink.
Read more: How Hot Is Water From Water Dispenser
Step 4: Assembling the Chicken Water Dispenser
Now that you have prepared the water container and created the dispenser tube, it’s time to assemble the chicken water dispenser.
Start by attaching the dispenser tube to the water container. Align one end of the tube with the holes on the container where the water nipples are inserted. Ensure a secure and tight fit between the tube and the container.
If necessary, you can use a small amount of sealant to further secure the connection and prevent any potential leaks. Apply the sealant around the base of the dispenser tube where it meets the container and let it dry according to the manufacturer’s instructions.
Once the tube is securely attached to the container, it’s time to test the assembly. Fill the container with water and observe the flow of water through the dispenser tube. Ensure that water is reaching all the water nipples and that there are no leaks or obstructions.
If you notice any issues, such as a slow or uneven flow, make the necessary adjustments. This may involve adjusting the angle of the dispenser tube or repositioning the water nipples for optimal water distribution.
After testing and adjusting the water flow, empty and clean the container and tube thoroughly. Rinse with clean water to remove any soap or debris and ensure a clean and hygienic water supply for your chickens.
Once the equipment is cleaned and dried, reassemble the chicken water dispenser by securely attaching the dispenser tube back to the water container. Ensure that all the connections are tight and properly sealed.
With the chicken water dispenser successfully assembled, it’s now time to move on to the next step: testing and adjusting the water flow.
Step 5: Testing and Adjusting the Water Flow
After assembling the chicken water dispenser, it is important to test and adjust the water flow to ensure that your chickens have a steady and accessible water supply.
To start, fill the water container with fresh and clean water. Make sure the lid is securely in place to prevent any contamination or evaporation.
Observe the water flow through the dispenser tube and the water nipples. Check if the water is flowing evenly to all the nipples and if there are any leaks or blockages.
If you notice any issues, such as a slow or erratic flow, here are some troubleshooting steps you can take:
- Check for any blockages: Inspect the dispenser tube and the water nipples for any obstructions or debris that might be hindering the water flow. Remove any clogs and ensure that the water can freely pass through.
- Adjust the height of the water container: If the water flow is too slow, you can try increasing the height of the water container. This will create more water pressure and improve the flow to the water nipples.
- Inspect the water nipples: Make sure that the water nipples are functioning properly. Check for any damage or wear and tear that might be affecting their performance. Replace any faulty water nipples to ensure consistent water flow.
- Modify the dispenser tube: If the water flow is too fast or excessive, you can tweak the dispenser tube to regulate the flow. Consider adding a small restrictor or adjust the angle of the tube to reduce the water pressure.
Test and adjust the water flow as needed until you achieve a steady and controlled flow that meets the needs of your chickens.
Remember to regularly monitor the water level in the container and refill it as necessary to ensure a continuous water supply for your flock.
With the water flow tested and adjusted, you have successfully completed Step 5. You’re now ready to move on to the final step in the process: installing and maintaining the chicken water dispenser.
Step 6: Installing and Maintaining the Dispenser
Now that you have successfully tested and adjusted the water flow, it’s time to install the chicken water dispenser in your coop and establish a maintenance routine to ensure a continuous supply of clean water for your chickens.
Start by choosing a suitable location for the water dispenser inside the chicken coop or run. Opt for a spot that is easily accessible for your chickens but also protected from dirt, droppings, and other potential contaminants.
Securely mount the water dispenser at an appropriate height for your chickens. Make sure it’s stable and won’t be knocked over or dislodged easily. Attach it to a wall, fence, or a sturdy post using suitable hardware such as screws or zip ties.
Once the dispenser is installed, provide a clear and visible pathway to the water nipples for your chickens. Remove any obstacles or bedding material that could obstruct their access to the water.
Regularly monitor the water level in the container and refill it as needed. It’s important to keep the water supply clean and fresh. Dirty or stagnant water can lead to health issues for your chickens.
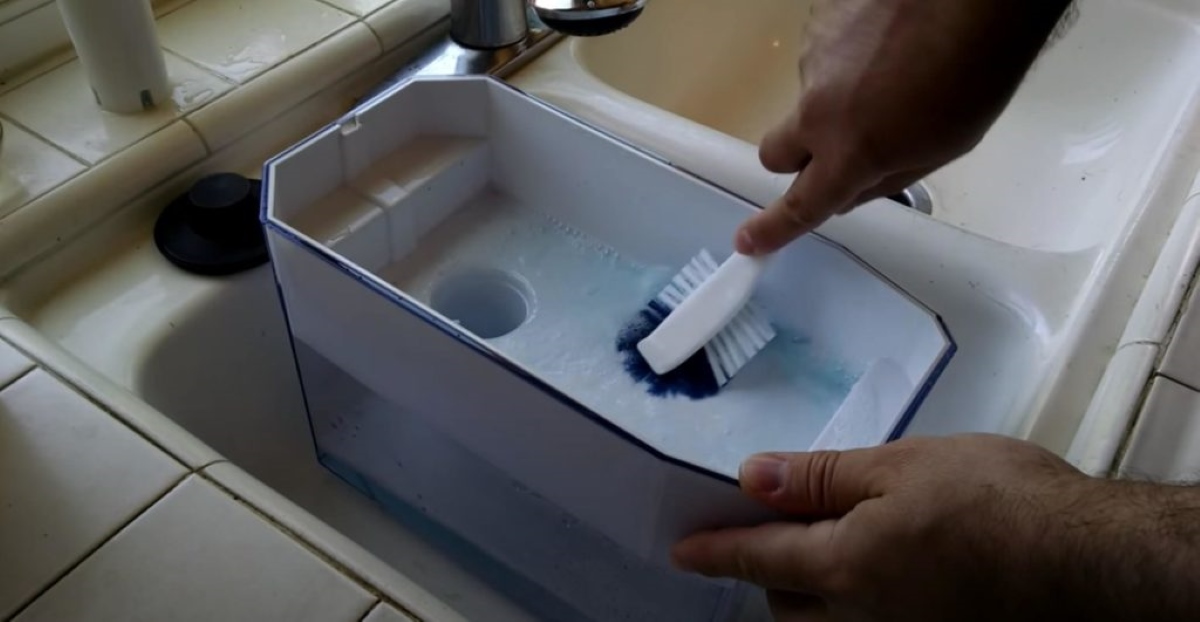
Check the dispenser and water nipples regularly for any signs of damage, leaks, or blockages. Clean the water nipples with a small brush or toothbrush to remove any buildup or debris. This will help maintain a consistent flow of water and prevent any potential contaminants from coming into contact with your chickens.
During extreme weather conditions, such as freezing temperatures, consider insulating or protecting the water container to prevent the water from freezing or becoming too hot.
Lastly, make a habit of regularly cleaning and sanitizing the water container and dispenser tube. This will prevent the buildup of bacteria, algae, or other contaminants that can affect the water quality and the health of your chickens.
By following these installation and maintenance steps, you can ensure a reliable and clean water supply for your chickens and contribute to their overall health and well-being.
Congratulations! You have now completed all the steps to make and install a chicken water dispenser. Your chickens will surely appreciate having a constant and easily accessible source of fresh water.
Remember to regularly monitor the dispenser, keep it clean and functioning properly, and be attentive to any signs of issues or required adjustments. With proper care and maintenance, your DIY chicken water dispenser will serve you and your flock well for years to come.
Happy chicken keeping!
Conclusion
Creating a chicken water dispenser is a practical and cost-effective way to ensure that your feathered friends have access to clean and fresh water. By following the steps outlined in this guide, you can easily make your DIY chicken water dispenser and provide your flock with a reliable water supply.
Throughout the process, we discussed the materials needed, from the container and pipe to the water nipples and sealant. We also covered the step-by-step instructions on preparing the water container, creating the dispenser tube, assembling the chicken water dispenser, testing and adjusting the water flow, and finally installing and maintaining the dispenser.
Remember, it’s crucial to regularly monitor the water level, clean and sanitize the dispenser, and check for any signs of damage or blockages. Keeping the water source clean and free from contaminants is essential for the health and well-being of your chickens.
By making your own chicken water dispenser, you have the flexibility to customize it to meet the specific needs of your flock. You can adjust the water flow, choose the size and design that fits your coop, and ensure that your chickens have easy access to water at all times.
Now that you have completed the process, it’s time to reap the benefits. Enjoy watching your chickens hydrate and thrive with the help of their new water dispenser.
Remember, a happy and healthy flock starts with a reliable water supply. Cheers to your successful DIY chicken water dispenser!
Frequently Asked Questions about How To Make A Chicken Water Dispenser
Was this page helpful?
At Storables.com, we guarantee accurate and reliable information. Our content, validated by Expert Board Contributors, is crafted following stringent Editorial Policies. We're committed to providing you with well-researched, expert-backed insights for all your informational needs.


0 thoughts on “How To Make A Chicken Water Dispenser”