
Articles
How To Make A Quilt With Fat Quarters
Modified: January 19, 2024
Discover expert techniques and step-by-step tutorials in our articles on how to make a quilt with fat quarters. Create beautiful quilts with ease and precision.
(Many of the links in this article redirect to a specific reviewed product. Your purchase of these products through affiliate links helps to generate commission for Storables.com, at no extra cost. Learn more)
Introduction
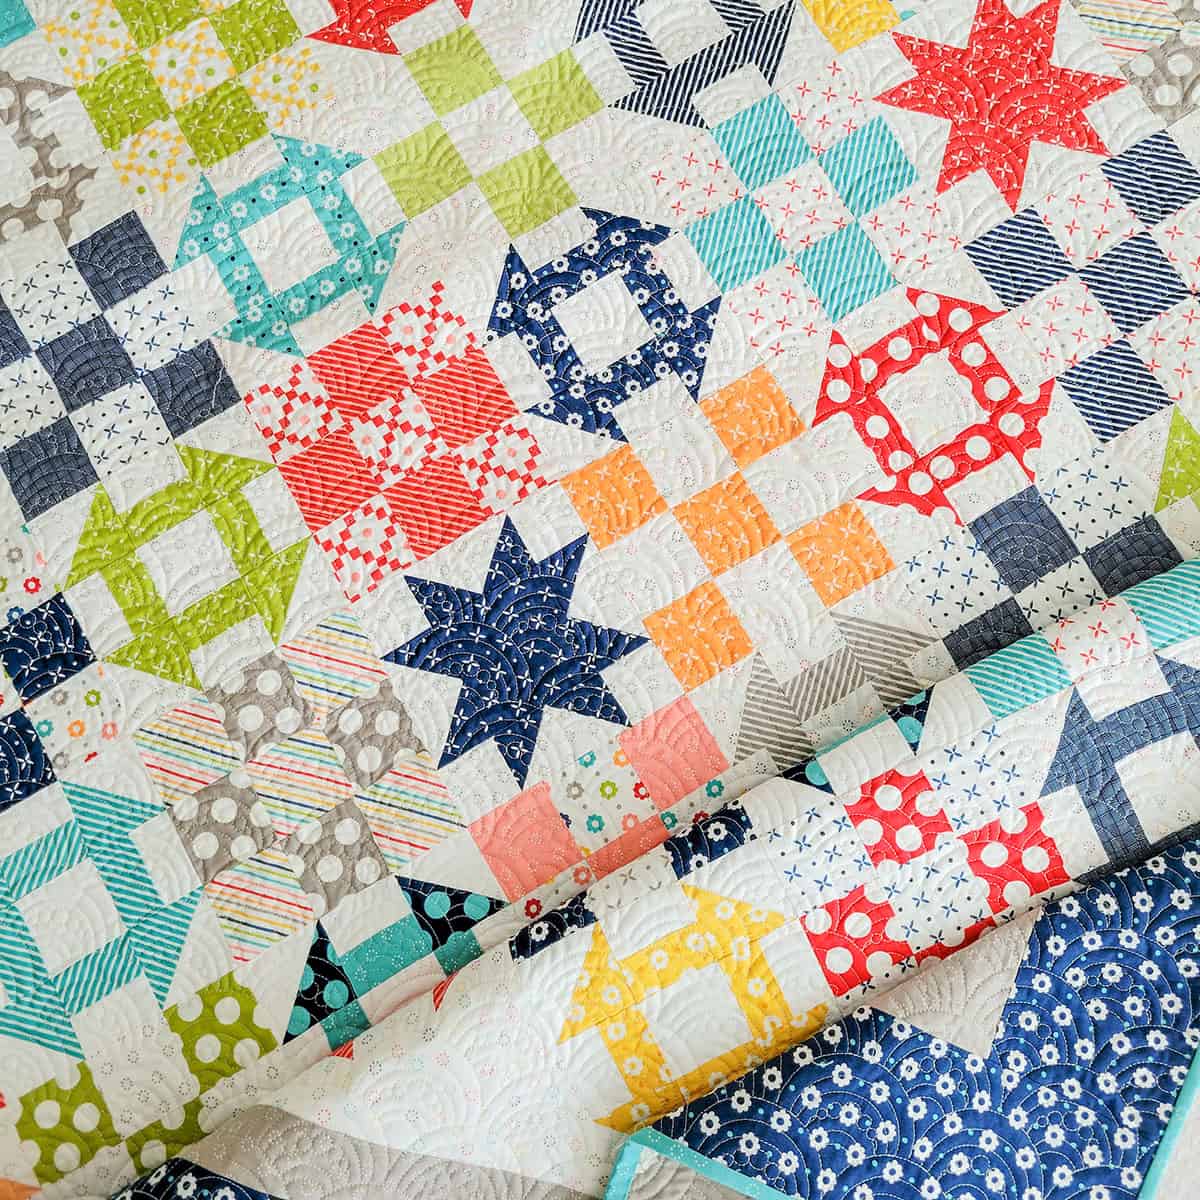
Welcome to the world of quilting! Whether you’re a seasoned quilter or just starting out, making a quilt with fat quarters is a fun and creative project that allows you to showcase charming prints and create stunning designs. Fat quarters are versatile pieces of fabric that are perfect for quilting, and in this article, we’ll guide you through the process of making a quilt using these colorful and convenient cuts of fabric.
What exactly are fat quarters? Unlike regular quarter-yard cuts, fat quarters are cut from one yard of fabric, but instead of being a long, thin strip, they are cut into a square shape. This makes fat quarters the ideal size for quilting projects, as they provide enough fabric to work with for creating quilt blocks, while also offering a variety of prints and colors to choose from.
Choosing the right fat quarters for your quilt is an exciting part of the process. Visit your local fabric store or browse online to explore the wide range of prints and motifs available. From florals and geometrics to novelty prints and batiks, there’s a fat quarter for every style and theme you can imagine. Consider selecting fat quarters that complement each other in terms of color scheme and design to create a visually cohesive quilt.
Before diving into your quilting project, gather all the necessary materials and supplies. In addition to the fat quarters, you’ll need a rotary cutter, cutting mat, quilting ruler, thread, sewing machine, and batting for the quilt sandwich. Having these items on hand will ensure a smooth and enjoyable quilting experience.
To prepare your fat quarters for quilting, give them a quick press with an iron to remove any wrinkles and creases. This step will make it easier to cut and sew the fabric accurately and neatly. If you have a particular design in mind for your quilt, take the time to plan it out. Sketching a rough layout or using design software can help you visualize how the fat quarters will come together to form a beautiful quilt.
Next, it’s time to cut the fat quarters. Use your rotary cutter, cutting mat, and quilting ruler to trim the fabric into the desired size and shape. Depending on your chosen quilt design, you may need to cut the fat quarters into rectangles, squares, triangles, or other shapes needed for your quilt blocks.
Once the fabric is cut, it’s time to start sewing the quilt blocks together. Piece by piece, stitch the fabric together according to your design, making sure to match up seams and achieve accurate seam allowances. Pressing the seams as you go will help create crisp, flat blocks that will fit together seamlessly.
Assembling the quilt top is the next step. Arrange the quilt blocks in the desired layout and sew them together row by row. Use pins or sewing clips to hold the blocks in place before sewing. Once the quilt top is complete, it’s time to add borders and sashing, which will frame and enhance your design.
The quilting process, where the layers of the quilt top, batting, and backing are stitched together, can be done by hand or with a sewing machine. Experiment with different quilting techniques, such as straight-line quilting, free-motion quilting, or using quilting stencils to add texture and interest to your quilt.
After quilting, trim any excess fabric and batting, and add the finishing touches to your quilt. This may include binding the edges with fabric strips, adding a label to mark your creation, or even embellishing with embroidery or applique.
Making a quilt with fat quarters is a rewarding and creative endeavor. Let your imagination and artistic sense guide you as you transform a collection of fabric into a beautiful quilt that is truly unique. So gather your materials, choose your fat quarters, and embark on this quilting adventure. The end result will be a quilt that you can cherish for years to come.
Happy quilting!
Key Takeaways:
- Quilting with fat quarters offers a creative and rewarding journey, from selecting fabrics to adding finishing touches. Each step reflects dedication, precision, and the artistry of quilt-making.
- The process of quilting is a labor of love, resulting in a unique masterpiece that brings comfort and beauty to those who experience its embrace. Embrace the art of quilting and let your imagination soar.
Read more: How Many Fat Quarters To Make A Baby Quilt
What are Fat Quarters?
If you’re new to the world of quilting, you may be wondering what exactly fat quarters are. In simple terms, fat quarters are cuts of fabric that measure approximately 18 inches by 22 inches. They are created by taking a half-yard of fabric and cutting it in half widthwise, resulting in a wider and shorter piece compared to a regular quarter-yard cut. The name “fat quarter” refers to the fact that this cut of fabric is wider and has more usable area compared to a standard quarter-yard cut.
So why are fat quarters so popular among quilters? The main reason is their versatility. Fat quarters provide ample fabric to create quilt blocks, patchwork projects, and small sewing projects, all while offering a variety of colors, prints, and patterns. They are also a convenient option for quilters who want to have a wide selection of fabrics in smaller quantities without buying full yards of each fabric. With fat quarters, you can build a diverse fabric stash and have endless options for designing and customizing your quilts.
Fat quarters come in a wide array of designs and fabrics, ranging from traditional prints and florals to modern geometrics and novelty motifs. They can also be found in various fabric types, such as cotton, flannel, batiks, and even specialty fabrics like silk or linen. This vast selection makes it easy to find the perfect fat quarters to suit any quilting project or aesthetic.
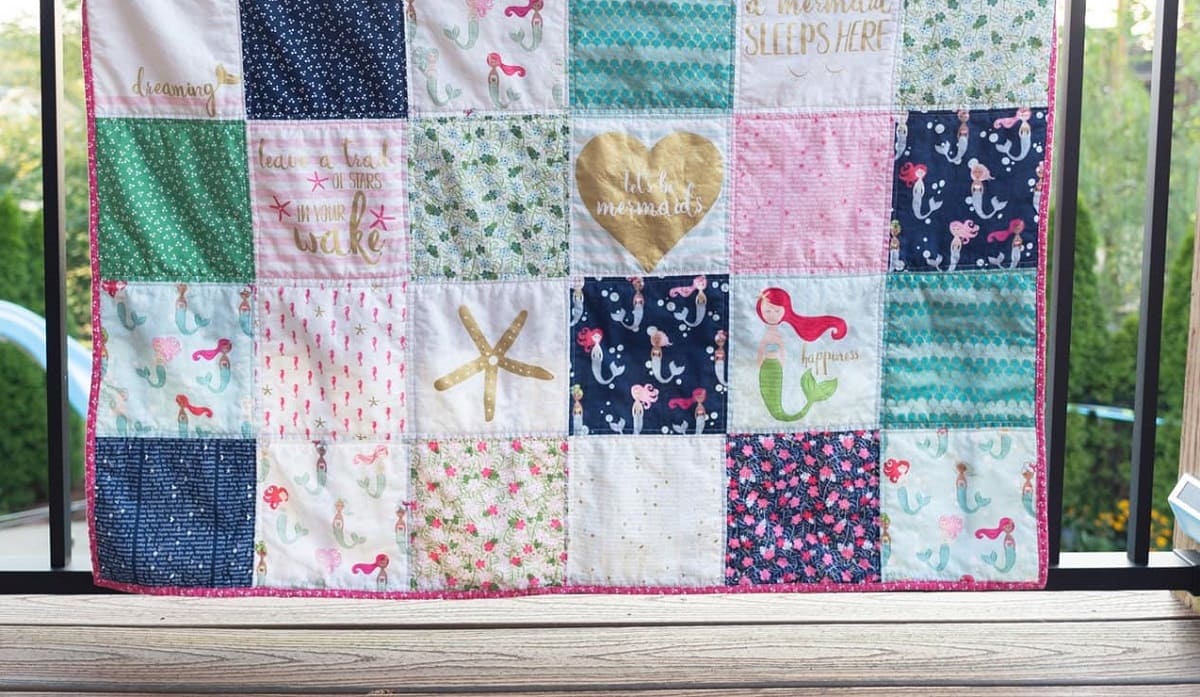
One of the advantages of using fat quarters is that they lend themselves well to creating visually appealing quilt designs. Their square shape allows for more flexibility in arranging and combining different prints, colors, and textures. Quilters can easily mix and match fat quarters to create eye-catching quilt blocks, borders, and sashing, resulting in stunning and unique quilt designs.
When it comes to purchasing fat quarters, you can find them at fabric stores, quilting shops, and online retailers that specialize in quilting supplies. Many fabric manufacturers even produce coordinated sets of fat quarters, known as fat quarter bundles, which provide a curated selection of fabrics that work well together. These bundles are perfect for quilters who prefer a cohesive look or want to quickly build a fabric collection.
Using fat quarters in your quilting projects opens up a world of possibilities. Whether you’re a beginner looking to dip your toes into quilting or an experienced quilter seeking new inspiration, fat quarters are a fantastic way to add variety and creativity to your quilts. So go ahead, explore the vast and colorful world of fat quarters, and let your imagination soar as you create beautiful quilts.
Choosing Fat Quarters for Your Quilt
Choosing fat quarters for your quilt is an exciting and essential part of the quilting process. The right selection of fabrics can make your quilt visually stunning and bring your design ideas to life. Here are some tips to help you choose the perfect fat quarters for your quilt:
1. Consider the Theme or Design: Think about the theme or design you have in mind for your quilt. Are you aiming for a traditional, modern, or eclectic look? This will guide you in selecting fat quarters with appropriate prints and colors that align with your vision. For example, if you’re creating a floral-themed quilt, choose fat quarters with beautiful floral prints or complementing colors.
2. Color Coordination: Take into account the color scheme you want to work with. Select fat quarters that harmonize well together, either through similar hues or complementary color combinations. You can opt for a monochromatic color scheme, where you use different shades of the same color, or a contrasting color scheme by pairing complementary colors on the color wheel. Remember to include light, medium, and dark shades to add depth to your quilt.
3. Scale and Pattern: Consider the scale of the prints on the fat quarters. Mixing different print sizes can add visual interest and balance to your quilt. Experiment with combining large-scale prints with smaller patterns or geometric designs. Additionally, pay attention to the pattern direction of the fabric, especially if your quilt design includes specific directional motifs.
4. Fabric Type: Decide on the fabric type based on the desired look and feel of your quilt. Cotton fabrics are commonly used for quilting due to their versatility, durability, and wide range of prints. If you prefer a more textured or cozy quilt, consider using flannel or brushed cotton fat quarters. For a more luxurious or special quilt, explore fat quarters made from silk, linen, or other specialty fabrics.
5. Pre-coordinated Fat Quarters: If you’re new to quilting or feel unsure about color and pattern combinations, consider purchasing pre-coordinated fat quarter bundles. These bundles typically contain a collection of fat quarters that work well together, often with a specific theme or color scheme in mind. This can save you time and ensure a cohesive look in your quilt.
6. Personal Preference: Ultimately, trust your instincts and choose fat quarters that resonate with you personally. Your quilt should reflect your style and preferences, so select fabrics that bring you joy and inspire your creativity. Don’t be afraid to mix and match different prints, colors, and textures to create a quilt that is uniquely yours.
As you explore various fabric stores and online shops, don’t hesitate to take swatches or reference photos of your existing fabric collection, as this will help you visualize how the fat quarters will coordinate with your existing fabrics. Remember, the process of selecting fat quarters should be enjoyable and allow you to tap into your creativity. So take your time, have fun, and create a quilt that brings you pride and satisfaction.
Gathering Materials and Supplies
Before embarking on your quilt-making journey, it’s important to gather all the necessary materials and supplies. Having everything you need at the beginning will make the process smoother and more efficient. Here’s a list of essential items to gather:
1. Fat Quarters: Of course, the star of the show is the fat quarters themselves. Choose the fat quarters that you carefully selected for your quilt. Depending on the size of your quilt and the complexity of your design, you may need several fat quarters to complete your project.
2. Rotary Cutter: A quality rotary cutter is a must-have tool for precision cutting. Look for a rotary cutter with a comfortable grip and a sharp, replaceable blade that easily glides through fabric. Having an extra blade on hand is also a good idea, as dull blades can make cutting more challenging.
3. Cutting Mat: To protect your work surface and ensure accuracy while cutting, invest in a self-healing cutting mat. These mats come in different sizes, so choose one that accommodates the size of your fat quarters and provides enough space to cut them without restrictions.
4. Quilting Ruler: A clear and accurate quilting ruler is essential for measuring and cutting fabric. Look for a ruler specifically designed for quilting, with grid lines and markings to help you achieve precise measurements and cuts. Popular sizes include 6 x 24 inches and 6.5 x 12 inches.
5. Thread: High-quality thread is necessary to ensure the longevity and durability of your quilt. Opt for cotton or polyester thread that is suitable for machine sewing. Choose thread colors that coordinate or blend well with your chosen fat quarters.
6. Sewing Machine: While quilting can be done by hand, using a sewing machine will save you time and effort. Ensure that your sewing machine is in good working condition, with a compatible needle for quilting and the appropriate presser foot for piecing and quilting.
7. Batting: Batting, also referred to as wadding or quilt batting, is the layer of material that goes in between the quilt top and the backing. Choose batting that suits your desired level of warmth and loftiness. Common options include cotton, polyester, and a blend of natural and synthetic fibers.
8. Fabric Marking Tools: These tools are used to mark fabric for cutting and sewing guidelines. Options include washable fabric markers or pens, chalk, or temporary fabric adhesive spray paired with a stencil or template.
9. Pins or Clips: Whether you prefer pins or sewing clips, having these tools on hand will help hold fabric pieces together as you sew. Ensure that your pins or clips are suitable for quilting and won’t damage delicate fabrics.
10. Iron and Ironing Board: Pressing fabric is a crucial step in achieving neat and accurate quilt blocks. A reliable iron and ironing board will make this task easier. Look for an iron with adjustable heat settings to suit different types of fabric.
11. Seam Ripper: Mistakes happen, and having a seam ripper handy is essential for undoing any stitches that need to be removed. Look for a seam ripper with a sharp and fine point that can easily slide under stitches.
12. Optional Extras: Depending on your quilting style and preferences, you may also want to gather additional supplies such as quilting stencils, embroidery scissors, batting spray adhesive, or specialized presser feet for your sewing machine.
Once you’ve gathered all of these materials and supplies, you’ll be well-equipped to start your quilting project. Having everything organized and within reach will allow you to focus on the creative process and enjoy the art of quilting.
Preparing Your Fat Quarters
Before you start cutting and sewing your fat quarters for your quilt, it’s essential to prepare them properly. Taking a few extra steps to ensure that your fabric is ready will make the cutting and sewing process easier and yield better results. Here are some tips for preparing your fat quarters:
1. Pre-Wash: While it’s not necessary to pre-wash fat quarters, it’s a good idea if you want to minimize any potential shrinkage or bleeding of colors. Some fabrics are prone to shrinking or bleeding dyes when washed, so pre-washing can help remove any excess dyes or finishes from the fabric and prevent any unwanted surprises later on. Follow the manufacturer’s instructions for pre-washing, paying attention to water temperature and detergents suitable for the fabric type.
2. Ironing: Once your fat quarters are washed and dried, it’s important to give them a thorough press with an iron. This step helps remove any wrinkles or creases that may have formed during washing and drying. Ironing the fabric will make it easier to cut precise pieces and sew accurately without any unwanted distortion. Set your iron to the appropriate heat setting for the fabric and press gently to avoid stretching or damaging the fabric.
3. Straighten the Edges: Fat quarters often come with jagged or uneven edges, especially if they were cut from the bolt in the store. To ensure that your fabric pieces are ready for cutting, take the time to straighten the edges. Line up the selvages (the finished edges of the fabric) and make a straight cut across the width of the fabric. This will create a clean and even edge that can be squared up and used as a reference when cutting your quilt blocks.
4. Trim Excess Threads: Before you start cutting your fabric into specific shapes for your quilt blocks, inspect the fat quarters for any loose threads or small imperfections. Trim away any excess threads or fabric irregularities to ensure a clean and professional-looking finish for your quilt.
5. Fold and Stabilize: To keep your fat quarters organized and easily accessible during the quilting process, consider folding them neatly and using clips or rubber bands to secure them. You can fold them into quarters or roll them up, whichever method works best for you. Stabilizing the fabric in this way will prevent it from getting tangled or unfolding while you work on other aspects of your quilt.
By taking the time to properly prepare your fat quarters, you’ll set yourself up for success in creating a beautiful quilt. Pre-washing, ironing, straightening the edges, and trimming excess threads may seem like additional steps, but they will make a significant difference in the overall outcome of your quilt. So, indulge in these pre-quilting preparations and enjoy the process of transforming your fat quarters into a stunning work of art.
Read more: How To Store Fat Quarters
Planning Your Quilt Design
Planning your quilt design is an important step that sets the stage for creating a quilt that reflects your creativity and personal style. Taking the time to carefully plan and visualize your design will help you make decisions regarding fabric placement, block arrangement, and overall aesthetic. Here are some tips to help you effectively plan your quilt design:
1. Inspiration: Start by seeking inspiration for your design. Browse quilting magazines, books, online platforms, and social media for ideas and patterns that catch your eye. Pay attention to color combinations, block arrangements, and overall designs that resonate with you. You can also find inspiration in nature, art, architecture, or even personal experiences. Collect images, sketches, or fabric swatches that inspire you and keep them handy during your planning process.
2. Sketch or Use Design Software: Visualize your quilt design by sketching it out on grid paper or using design software. Sketching allows you to experiment with different layout possibilities and block arrangements. You can also use design software specifically made for quilters, which often includes pre-set blocks and the ability to import fabric swatches for a more realistic representation of your design. Explore different quilt block patterns and placements to find the perfect combination that suits your vision.
3. Fabric Placement: Consider the placement of your fat quarters within the quilt design. Pay attention to the scale and color of the prints. Decide whether you want to distribute certain prints evenly throughout the quilt or create specific areas of focus. Experiment with different arrangements by physically laying out your fat quarters on a design wall or a large surface. This will help you visualize how the fabrics interact and ensure a balanced distribution of colors and patterns.
4. Block Arrangement: Explore various block arrangements and layouts to find the one that best complements your quilt design. Consider whether you want symmetry or asymmetry in your quilt and if you want the blocks to repeat in a specific pattern. Play with different orientations of the blocks, such as horizontal, vertical, or diagonal, to achieve different visual effects. Experiment with sashing and border options to frame the blocks and enhance the overall design.
5. Color Palette: Determine the color palette for your quilt design. Use your fat quarters as a starting point and consider adding additional coordinating fabrics as needed. Explore different color schemes, such as monochromatic, complementary, analogous, or rainbow, to achieve different effects. Pay attention to the value and intensity of the colors to create depth and visual interest within your quilt design.
6. Size and Proportions: Decide on the size and proportions of your quilt. Consider who the quilt is intended for and where it will be used. Quilts can range from small wall-hangings to large bed-sized quilts. Determine the number of blocks or rows you will need to achieve the desired size, and adjust your design accordingly.
7. Label and Document: Lastly, don’t forget to label and document your quilt design. Once you have finalized your design, create a label with your name, the date, and any additional information you want to include. This label will become part of the quilt’s story and history. Additionally, document your design process, including sketches, inspiration sources, and fabric choices. This will serve as a reference and reminder of your creative journey.
By taking the time to plan your quilt design, you will have a clear vision of the final product and can confidently move forward with cutting and sewing your fat quarters. Use your creativity and personal style to design a quilt that tells your unique story and brings joy to both the creator and the recipient.
Cutting the Fat Quarters
Once you have planned your quilt design and gathered all the necessary materials, it’s time to cut your fat quarters into the specific shapes needed for your quilt blocks. Accurate cutting is crucial in achieving precise and well-fitting quilt pieces. Follow these tips to ensure successful cutting:
1. Measure Twice, Cut Once: Before making any cuts, double-check your measurements and markings. Ensure that your ruler is aligned correctly and that you are cutting the fabric at the intended measurement. Mistakes in cutting can lead to pieces that don’t fit together properly, resulting in frustration and the need for additional adjustments.
2. Use a Rotary Cutter: A rotary cutter is a quilter’s best friend when it comes to cutting fabric accurately. Unlike scissors, a rotary cutter allows for smooth and precise cuts along straight or curved lines. Make sure you have a sharp blade in your rotary cutter for clean cuts. Always exercise caution when using a rotary cutter and keep your fingers away from the blade’s path.
3. Cutting Mat and Quilting Ruler: To ensure accurate cuts, place your fabric on a self-healing cutting mat. The mat will protect your work surface and allow the rotary cutter to glide smoothly. Use a quilting ruler, preferably transparent, to guide your cuts and ensure straight lines and consistent measurements. The grid lines on the mat and ruler will aid in aligning the fabric accurately.
4. Trim the Edges: Before cutting specific shapes, it’s a good idea to trim the edges of your fat quarters to ensure they are straight and even. Line up the selvages (finished edges) of the fabric and make a straight cut across the width of the fabric. This straightened edge will serve as a reference point for subsequent cuts and help maintain the overall shape and alignment of your quilt pieces.
5. Follow the Pattern or Template: If you are using a pattern or template for your quilt blocks, carefully follow the instructions and layouts provided. Use a fabric marking tool to trace around the pattern or template onto your fat quarters, ensuring that you include any necessary seam allowances. Make sure the pattern is aligned correctly on the fabric to achieve precise cuts.
6. Take Careful Measurements: If you are cutting freehand or making your own template, take accurate measurements for each shape or piece you need. Use your quilting ruler to measure and mark the desired dimensions on the fabric. Take into account any seam allowances or additional allowances specified in your pattern.
7. Label and Organize Cut Pieces: As you cut each shape or piece, it’s helpful to label and organize them. Use fabric markers or pins to mark or group the pieces according to their intended use in the quilt design. This will make it easier to locate and assemble the correct pieces when it comes time to sew them together.
8. Handle Bias Edges with Care: Some quilt pieces may have bias edges, which are diagonal to the straight grain of the fabric. Bias edges can be more prone to stretching, so handle them with care to avoid distortion. Consider using spray starch or a stabilizing product to help stiffen the fabric and minimize stretching as you cut and handle these pieces.
Remember, practice makes perfect when it comes to cutting fabric for quilting. With each cut, you’ll gain more confidence and precision. Take your time, stay focused, and enjoy the process of transforming your fat quarters into beautifully cut pieces for your quilt blocks.
When making a quilt with fat quarters, be sure to prewash and press the fabric to prevent shrinkage and ensure a smooth finish to your quilt.
Sewing the Quilt Blocks
Once you have cut your fat quarters into the desired shapes, it’s time to sew the quilt blocks together. Quilt blocks are the individual units that come together to form the larger design of your quilt. Follow these tips to ensure successful and accurate sewing of your quilt blocks:
1. Organize and Arrange: Before you start sewing, organize your cut fabric pieces and arrange them according to your quilt design. Lay out the pieces in the desired order to ensure that you’re sewing them together in the correct configuration. This will help you visualize how the quilt blocks will come together and ensure accuracy in your sewing.
2. Right Sides Together: When sewing quilt blocks, it’s important to place the fabric pieces with their right sides together. This means that the printed or visible sides of the fabric should be facing each other. Align the edges of the fabric pieces carefully, matching any marked points or reference lines, and pin or clip them in place to keep them secure during stitching.
3. Use a Quarter-Inch Seam Allowance: Quilting typically involves a precise quarter-inch seam allowance. To achieve accurate and consistent seam allowances, use a quilting foot or a quarter-inch seam guide on your sewing machine. This will help you maintain the desired seam allowance width as you sew the fabric pieces together. You can also mark the quarter-inch seam allowance on your machine with washi tape or a removable marker for easy reference.
4. Stitch with Accuracy: Sew with a consistent speed and maintain a steady hand as you guide the fabric pieces through the machine. Keep your eyes on the seam allowance guide and the alignment of the fabric edges to ensure accurate stitching. Backstitch at the beginning and end of each piecing to secure the threads and prevent unraveling. Take your time and sew at a pace that allows you to maintain control and accuracy.
5. Press the Seams: As you sew your quilt blocks, press the seams flat after each stitching. This will help flatten the fabric and create crisp and neat piecing. Set the seam by pressing it as it was sewn, and then open the fabric and press the seam to one side or as directed by your pattern. Pressing the seams ensures the quilt blocks lay flat and fit together smoothly when it’s time to assemble the quilt top.
6. Chain Piecing: To save time and increase efficiency, consider using the chain piecing technique. Chain piecing involves continuously stitching multiple pieces without cutting the thread in between. Simply feed the next fabric piece through the machine immediately after finishing stitching the previous piece. Once you have completed all your piecing, carefully snip the thread chains to separate the blocks. Chain piecing is a time-saving technique and reduces thread waste.
7. Check for Accuracy: After completing each quilt block, check its accuracy by measuring its dimensions and comparing them to the desired size in your quilt design. If necessary, make any adjustments or corrections to ensure all your quilt blocks are consistent in size. This will make it easier to assemble the quilt top and ensure a visually pleasing final result.
Remember, sewing quilt blocks is a repetitive but rewarding process. By sewing with accuracy and attention to detail, you’ll create beautifully pieced quilt blocks that are ready to be assembled into your finished quilt. Enjoy the journey of stitching together your individual quilt blocks, as they are the building blocks that will ultimately form a stunning quilt.
Assembling the Quilt Top
Once you have sewn all of your quilt blocks, it’s time to assemble them into the quilt top. The quilt top is the central part of your quilt and showcases the design you’ve worked so hard to create. Follow these steps to successfully assemble your quilt top:
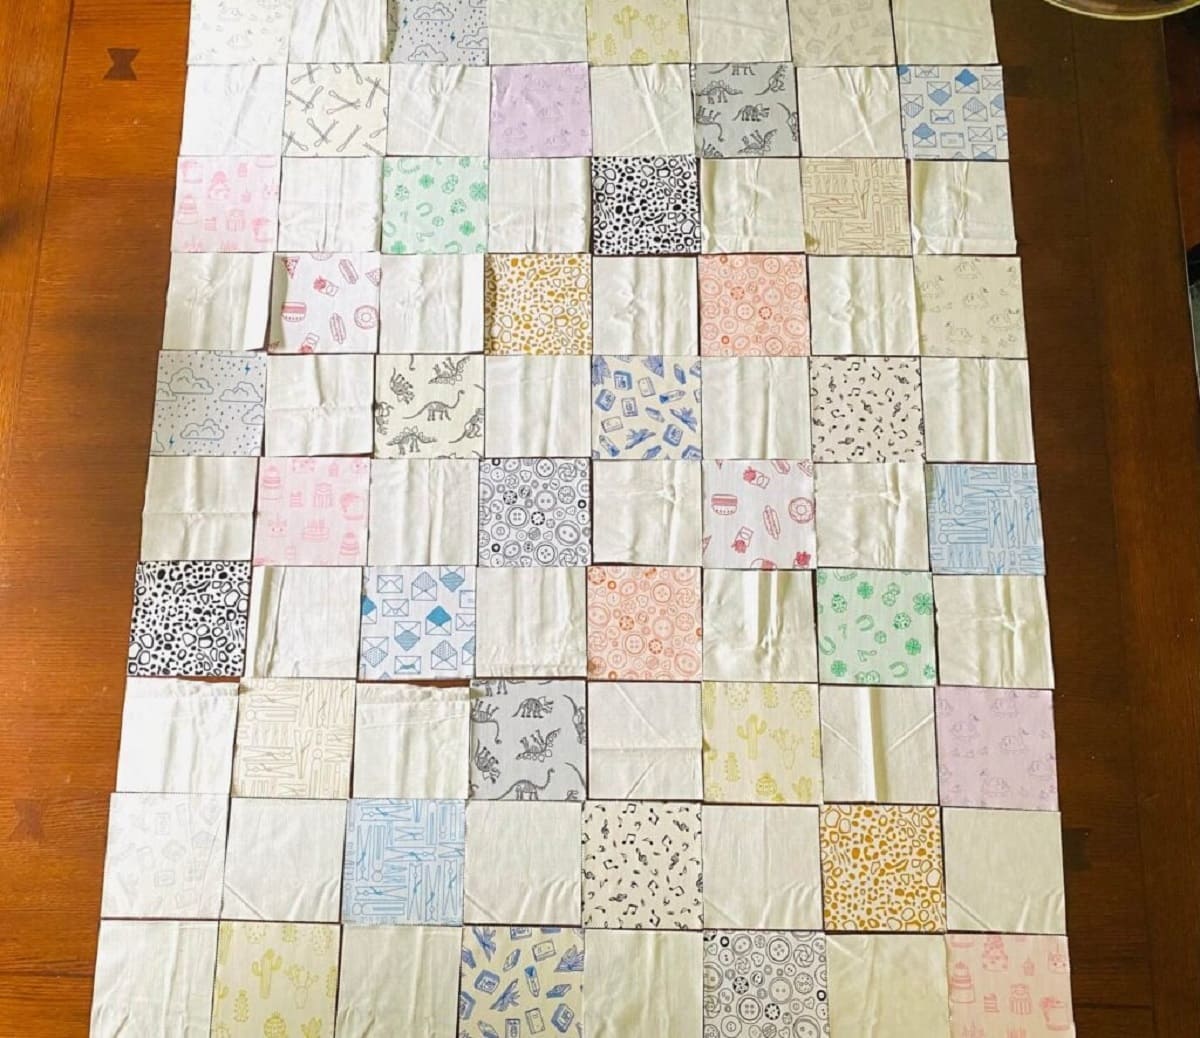
1. Layout: Before you start sewing the blocks together, lay them out on a design wall, bed, or other large surface to determine the placement and arrangement. Experiment with different configurations until you’re satisfied with the overall look and balance of your quilt. Take a photo or make notes to help you remember the arrangement if needed.
2. Block by Block: Begin assembling your quilt top one block at a time. Take the first two blocks and place them right sides together, ensuring that the seams match up accurately. Pin or clip the blocks together along the seam line to keep them aligned during sewing.
3. Stitching: Sew the blocks together along the pinned or clipped seam line, using a quarter-inch seam allowance. Backstitch at the beginning and end of each seam to secure the stitching. Take care to maintain the alignment of the blocks and prevent stretching or distortion as you sew. Repeat this process to join the remaining blocks, working in rows or sections.
4. Pressing: After sewing each seam, press it flat to one side. This helps to set the seam and allows for easier nesting of seams when joining blocks together. When pressing, be careful not to press too hard or stretch the fabric. Use an up-and-down pressing motion rather than dragging the iron across the seam, which can distort the blocks.
5. Nesting Seams: When joining blocks together, aim to nest the seams. This means that the seam allowances on adjacent blocks lie in opposite directions, allowing them to interlock and lay flat. Nesting the seams creates clean and precise intersections and helps the quilt top lie smoothly when quilted.
6. Consistent Seam Allowances: Pay attention to maintaining a consistent quarter-inch seam allowance throughout the assembly process. Consistency in seam allowances will ensure that the blocks fit together accurately and the overall quilt top maintains its desired dimensions.
7. Check for Accuracy: Periodically measure and check the size of your quilt top as you assemble it. Ensure that it is maintaining the desired dimensions outlined in your design. If necessary, make any adjustments, such as trimming or adding additional borders, to achieve the desired finished size.
8. Borders and Sashing: Depending on your quilt design, you may choose to add borders or sashing to enhance the quilt top. Borders frame the quilt and can be made from one or more contrasting fabrics, while sashing is used to separate and accentuate individual blocks. Take care to measure and cut borders and sashing accurately to maintain a balanced and visually appealing quilt top.
9. Final Pressing: Once the quilt top is fully assembled, give it a final press to set the seams and create a smooth and professional finish. Pay attention to pressing any added borders or sashing, ensuring they are flat and lie in the desired direction.
Assembling the quilt top is an exciting milestone in the quilt-making process. With careful attention to detail and precision in seam alignment, you’ll create a visually stunning quilt top that represents the culmination of your artistic vision. Take pride in your efforts as you move closer to completing your quilt.
Read more: How Many Fat Quarters For A Queen Size Quilt
Adding Borders and Sashing
Once you have assembled your quilt blocks into a quilt top, it’s time to add borders and sashing to enhance the design and create a finished look. Borders and sashing serve as framing elements that accentuate the quilt top and provide structure. Here’s a step-by-step guide to adding borders and sashing to your quilt:
1. Measure the Quilt Top: Start by measuring the length and width of your quilt top. This will help determine the size and dimensions of the borders and sashing you’ll need to cut.
2. Choosing Fabrics: Select fabrics for the borders and sashing that complement the colors and patterns in your quilt top. Consider using a fabric that contrasts or coordinates with the blocks to create visual interest. The width of the borders is a matter of personal preference, but common sizes range from 2 to 6 inches.
3. Cutting Borders: Measure and cut fabric strips for the borders according to the dimensions of your quilt top. To calculate the length of each border strip, measure the corresponding side of the quilt top and add the desired border width plus an additional ½ inch for seam allowance. Repeat for the remaining borders.
4. Sewing Borders: Place a border strip right sides together with one side of the quilt top. Align the edges and pin or clip to secure. Sew the border to the quilt top, using a quarter-inch seam allowance. Repeat for the remaining sides, ensuring the corners of the borders match up well. Press the seams after stitching.
5. Adding Sashing: If you choose to include sashing, measure and cut fabric strips for the sashing according to the desired width and length. The width of the sashing is typically narrower than the borders, ranging from 1 to 2 inches. Pin or clip the sashing strips between the blocks or along the edges of the blocks, depending on your design. Sew the sashing strips to the quilt top using a quarter-inch seam allowance and press the seams after stitching.
6. Matching Seams: When sewing borders and sashing, take care to match seams and corners accurately to maintain the overall alignment and look of the quilt top. Use pins or clips to secure the fabric layers and prevent shifting or stretching. Nesting the seams where the blocks and sashing meet can create a clean and professional finish.
7. Pressing: After adding each border or sashing strip, press the seams flat. Set the seams by pressing them as they were sewn, and then open the fabric and press the seam to one side. Take care not to stretch or distort the quilt top as you press. Pressing will help create a smooth and crisp finish.
8. Measure the Quilt Top Again: After adding borders and sashing, measure the dimensions of the quilt top to ensure it remains square and evenly sized. Trim any excess fabric or adjust the sizing of the borders and sashing if needed.
Adding borders and sashing to your quilt top is an opportunity to further enhance your design and showcase your personal style. Taking the time to accurately measure, cut, and sew these elements will result in a professionally finished quilt. As you approach the final stage of your quilt-making journey, enjoy the satisfaction of bringing your vision to life.
Quilting the Layers Together
Once you have assembled your quilt top, borders, and sashing, it’s time to quilt the layers together. Quilting is the process of stitching through the quilt top, batting, and backing to secure the layers and add texture and visual interest to your quilt. Here’s a step-by-step guide on how to quilt the layers together:
1. Prepare Your Quilt Sandwich: Lay your quilt backing fabric on a flat surface with the wrong side facing up. Smooth out any wrinkles or folds, ensuring the fabric is taut. Place the batting on top of the backing fabric, aligning the edges. Then, carefully center your quilt top on top of the batting, ensuring it is centered and aligned with the edges.
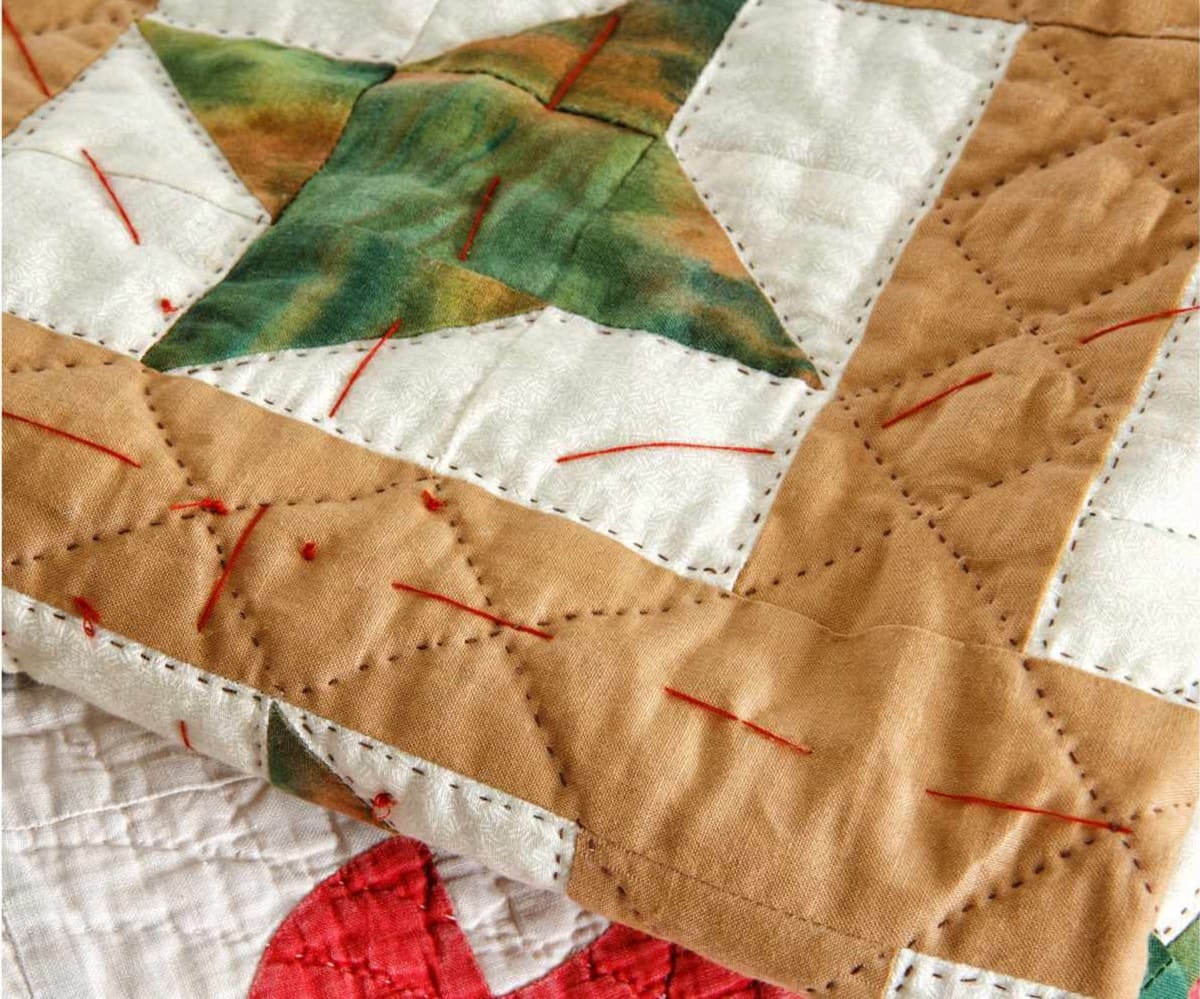
2. Baste the Layers: Basting is the process of temporarily securing the layers together to prevent shifting during the quilting process. There are several methods for basting, including using safety pins, spray basting, or hand basting with thread. Choose the method that works best for you and baste the layers at regular intervals across the quilt top.
3. Choose Quilting Techniques: Consider the look and design you want to achieve with your quilting. There are various quilting techniques you can choose from, including straight-line quilting, free-motion quilting, stippling, or using quilting stencils for specific designs. Each technique can create different effects and textures, so explore and experiment to find the one that suits your style and quilt design.
4. Plan Your Quilting Pattern: Decide on the quilting pattern or design you want to use for your quilt. You can follow the natural block shapes, create geometric or abstract designs, or emphasize certain elements of your quilt top. Sketch or mark your quilting pattern on the quilt top using fabric pens or chalk to guide your stitching as you go.
5. Quilt in Sections: When quilting, it can be helpful to work in smaller sections rather than trying to quilt the entire quilt at once. This makes it easier to maneuver the quilt under the sewing machine. Start quilting in one corner or section and gradually work your way across the quilt top, removing basting stitches as you go.
6. Take Your Time and Be Patient: Quilting requires patience and attention to detail. Stitch slowly and evenly, allowing the sewing machine to handle the thickness of the layers. Take breaks as needed to rest your hands and eyes. Being patient and maintaining a steady pace will result in more even and professional-looking quilting stitches.
7. Check Tension and Thread: Regularly check the tension of your sewing machine as you quilt to ensure that the stitches are balanced and secure. Adjust the tension as needed to prevent loose or tight stitches. Also, take note of the thread color and type. Consider using a thread color that complements or stands out from your quilt top, depending on the effect you desire.
8. Backstitch and Secure: When beginning and ending each quilting line, backstitch to secure the thread and prevent unraveling. This will add extra strength to your quilting stitches and ensure the layers are held together securely. Trim any loose threads as you go to keep your quilting lines clean and neat.
Once you have finished quilting, you can remove any remaining basting stitches and give your quilt a final press. Admire your handiwork and appreciate the unique texture and dimension that quilting has added to your piece.
Remember, quilting is a personal expression of your creativity. Enjoy the process and let your stitches weave together a beautiful quilt that will be cherished for years to come.
Finishing Touches
With the quilt top quilted and the layers securely held together, it’s time to add the final touches to your quilt. These finishing touches will give your quilt a polished, professional look and ensure that it’s ready to be used and admired. Here are some important steps to consider:
1. Trim the Excess: Carefully trim the excess batting and backing fabric to match the size of your quilt top. Use a ruler and rotary cutter to achieve clean and straight edges. Take your time to ensure that all sides are even and the corners are squared off.
2. Create the Binding: Binding is the fabric strip that wraps around the edges of the quilt to protect the raw edges and provide a finished look. Decide on the width of your binding (commonly 2.5 to 3 inches) and cut enough fabric strips to cover the perimeter of the quilt. Join the strips together to create one continuous binding strip.
3. Attach the Binding: Fold the binding strip in half lengthwise, wrong sides together, and press it lightly. Starting in the middle of one side of the quilt, align the raw edges of the binding with the raw edge of the quilt top. Pin or clip in place, and sew the binding to the quilt, using a quarter-inch seam allowance. Miter the corners for a clean finish and continue attaching the binding to all sides, leaving a few inches of overlap.
4. Join the Binding Ends: When you reach the starting point, trim the excess binding, leaving a few inches of overlap. Open up the binding ends, fold them back, and mark where they meet. Trim one end to create a diagonal edge. Place the trimmed end inside the untrimmed end, aligning the raw edges, and sew them together on the marked line. Trim the excess, press the seam open, and finish sewing the binding in place.
5. Hand or Machine Stitching: Depending on your preference, you can choose to finish the binding by hand or machine. If hand-sewing, fold the binding over the quilt edge, tucking the raw edge underneath. Use a blind stitch or whipstitch to stitch the binding to the back of the quilt, ensuring that the stitches are not visible from the front. Alternatively, if machine-sewing, use a decorative or straight stitch to secure the binding in place on the front of the quilt.
6. Add a Label: Creating a label for your quilt is a meaningful and practical addition. It serves as a permanent record of your quilt, including your name, the date it was completed, and any other relevant details. You can make a label using fabric, embroidery, or printable fabric sheets. Attach the label to the back of the quilt with hand or machine stitching.
7. Wash and Block: If desired, you can wash and block your quilt to give it a softer and crinkled appearance. Follow the fabric manufacturer’s instructions for washing and drying, taking into consideration any specific care requirements. Once washed, gently shape and stretch the quilt to ensure it lays flat and square. Allow it to air dry or tumble dry on a low setting.
8. Enjoy and Share: Finally, step back and admire your finished quilt. Celebrate the hours of work and creativity that went into bringing your vision to life. Share your quilt with family and friends or enter it into quilt shows and exhibitions to inspire others with your talent.
Remember that the finishing touches are what truly complete your quilt and give it that professional touch. Take your time with these final steps to ensure that your quilt is a beautiful and well-crafted piece of art that will be treasured for generations to come.
Conclusion
Congratulations! You have reached the end of your quilt-making journey. From selecting the perfect fat quarters to adding the finishing touches, you have poured your creativity and passion into creating a beautiful and unique quilt. The process of quilting is not just about the end result; it’s a labor of love that involves precision, patience, and artistry.
Throughout this journey, you learned about the versatility of fat quarters and how they can be transformed into stunning quilt blocks. You gathered the necessary materials and supplies, prepared the fat quarters with care, and planned your quilt design meticulously. Cutting, sewing, assembling the quilt top, and adding borders and sashing was a process of precision and attention to detail.
Quilting the layers together added texture and dimension to your quilt, while the finishing touches, such as trimming, binding, and labeling, completed the professional look of your creation. Each step along the way, you put your heart and soul into your quilt, making it a truly one-of-a-kind masterpiece.
Now, as you step back and admire your finished quilt, take a moment to appreciate the artistry and effort that went into its creation. Your quilt tells a story, reflecting your unique style, skill, and creativity. It’s a testament to your dedication and perseverance.
But a quilt is more than just fabric and stitches. It’s a source of comfort and warmth, a symbol of love and care. Whether you keep your quilt for yourself or share it with others, it will undoubtedly bring joy and beauty to the lives of those who experience its embrace.
Remember, the journey of quilting never truly ends. As you continue on your quilting path, you will consistently refine your skills, explore new techniques, and discover fresh inspiration. Each new quilt will hold its own challenges and rewards, pushing you to new heights of creativity.
So, embrace the art of quilting, enjoy the process, and let your imagination soar as you create more stunning quilts. Whether you’re quilting for practicality or as a form of artistic expression, know that your quilts have the power to touch hearts, evoke emotions, and create lasting memories.
Happy quilting!
Frequently Asked Questions about How To Make A Quilt With Fat Quarters
Was this page helpful?
At Storables.com, we guarantee accurate and reliable information. Our content, validated by Expert Board Contributors, is crafted following stringent Editorial Policies. We're committed to providing you with well-researched, expert-backed insights for all your informational needs.





0 thoughts on “How To Make A Quilt With Fat Quarters”