
Articles
How To Make A Simple Quilt
Modified: November 2, 2024
Learn how to make a simple quilt with our helpful articles. Discover step-by-step instructions and tips for creating your own beautiful quilt.
(Many of the links in this article redirect to a specific reviewed product. Your purchase of these products through affiliate links helps to generate commission for Storables.com, at no extra cost. Learn more)
Introduction
Welcome to the wonderful world of quilting! Making a quilt may seem like a complex task, but with the right guidance and a little patience, you can create a beautiful quilt that you’ll cherish for years to come. Whether you’re a beginner or an experienced crafter, this article will guide you through the process of making a simple quilt.
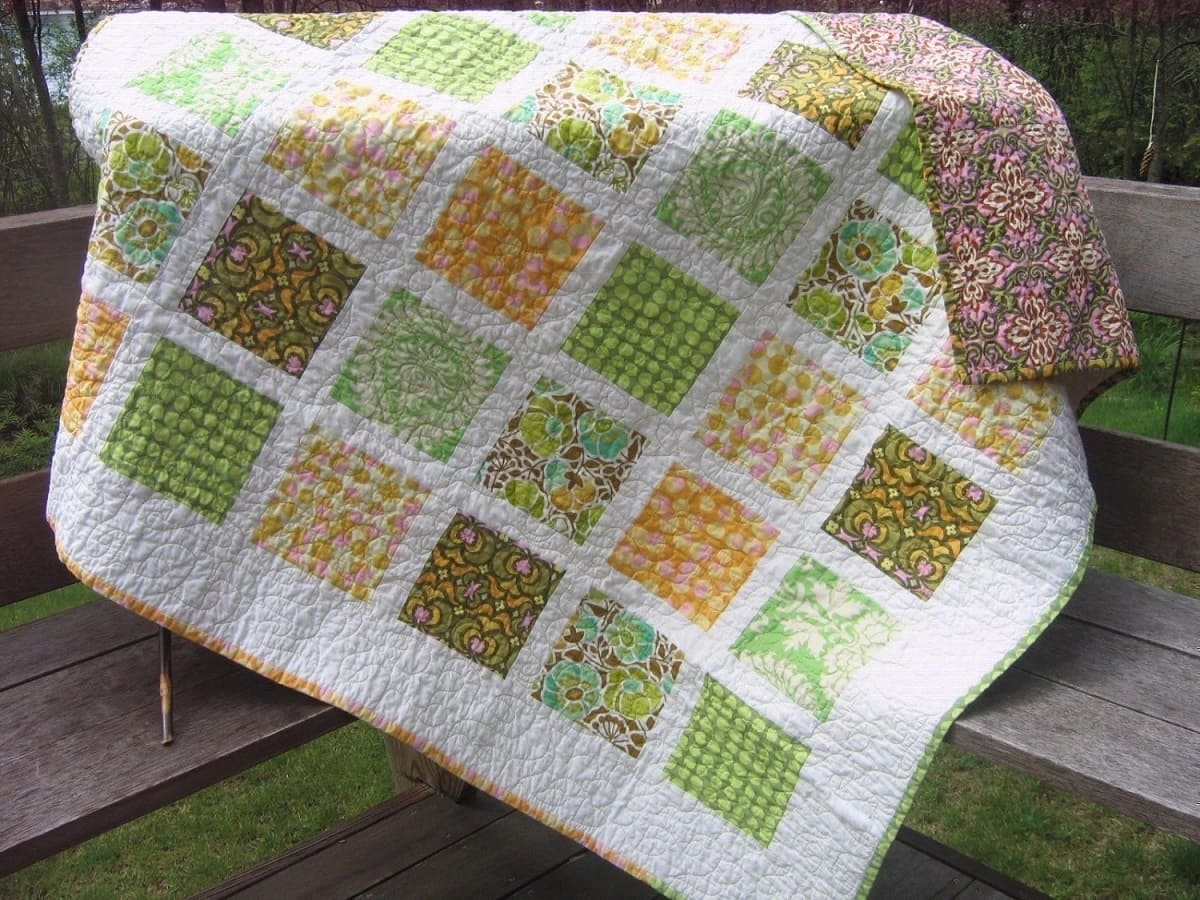
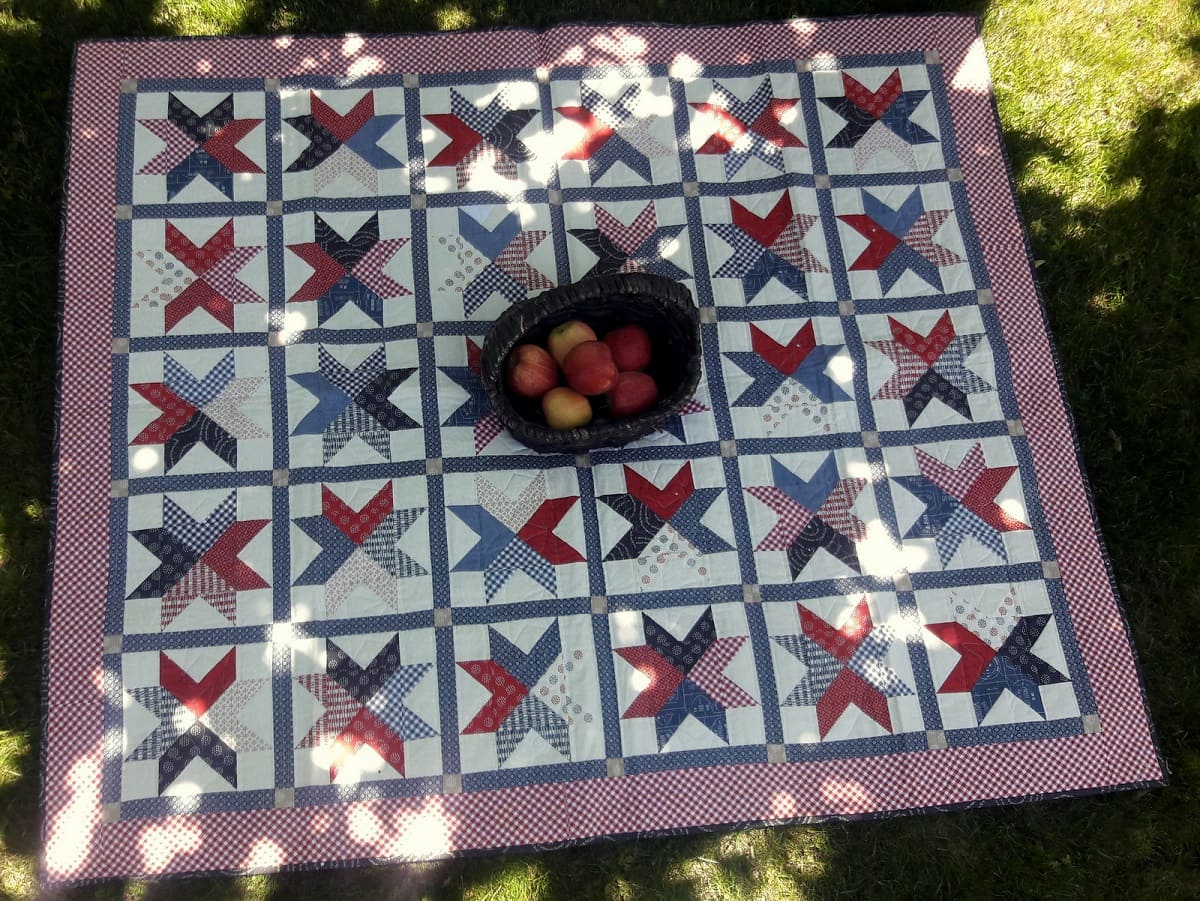
Quilting is an ancient art that involves stitching multiple layers of fabric together to create a warm and cozy blanket. Quilts can be made in a variety of styles, from intricate patchwork designs to modern minimalist patterns. In this article, we’ll focus on a simple quilt that is perfect for beginners. This project will teach you the basics of quilt-making and provide a solid foundation for more complex quilting projects in the future.
Before we dive into the step-by-step process, let’s take a look at the supplies you’ll need for this project.
Key Takeaways:
- Quilting is a creative journey that transforms fabric into cherished heirlooms. From choosing fabric to binding, each step builds skills and allows for personal expression.
- The beauty of quilting lies not only in the finished product but also in the process itself. Every quilt tells a story and represents dedication, creativity, and sentimental value.
Read more: How To Make A Simple Scrap Quilt
Supplies Needed
Before you begin your quilting journey, gather the following supplies:
- Fabric: Choose a variety of fabrics in different colors and patterns for the patchwork top of your quilt. You’ll need enough fabric to cover the desired size of your quilt.
- Scissors: Invest in a good pair of fabric scissors for cutting the fabric accurately.
- Ruler: A quilting ruler is essential for measuring and cutting fabric pieces.
- Rotary cutter: A rotary cutter makes cutting fabric easier and more precise than using scissors alone.
- Cutting mat: Use a self-healing cutting mat to protect your workspace and ensure accurate cuts.
- Sewing machine: While you can hand-sew a quilt, a sewing machine will save you time and make the process more efficient. Make sure it is in good working condition with a new needle.
- Thread: Choose a high-quality thread that matches your fabric colors.
- Pins: Use quilting pins to hold fabric layers together while sewing.
- Batting: Batting is the material that provides the warmth and structure to your quilt. Choose a batting that suits your desired level of warmth and thickness.
- Backing fabric: This is the fabric that will be on the back of your quilt. Select a fabric that complements the colors and patterns of your quilt top.
- Binding fabric: Binding is the fabric strip that finishes the edges of your quilt. Choose a fabric that coordinates with your quilt top or backing fabric.
- Iron: An iron is essential for pressing seams and ensuring crisp and flat quilt blocks.
Once you have gathered all the necessary supplies, you’re ready to move on to the next step: choosing the fabric for your quilt.
Step 1: Choosing Fabric
Choosing the right fabric for your quilt is an important decision that will greatly impact the overall look and feel of your finished project. Here are a few tips to help you make the right choice:
- Consider your quilt’s purpose and theme: Think about who the quilt is for and how it will be used. Is it for a baby, a wedding gift, or a decorative piece for your home? Determine the theme or color scheme that best reflects the intended purpose.
- Explore different fabric options: Visit a local fabric store or browse online to explore the vast array of fabrics available. Consider both solid colors and prints to add visual interest to your quilt.
- Coordinate colors and patterns: Select a combination of fabrics that coordinate well together. Consider using a mix of light and dark fabrics, as well as contrasting colors and patterns.
- Consider fabric quality: Choose high-quality quilting fabric that is durable and will withstand regular wear and washing. Cheaper fabrics may not hold up as well over time.
- Buy more fabric than you think you’ll need: It’s always better to have extra fabric on hand in case of mistakes or the need for additional blocks.
Once you have selected your fabrics, it’s time to move on to the next step: cutting the fabric.
Step 2: Cutting the Fabric
Now that you have chosen your fabric, it’s time to prepare it for piecing together your quilt top. Follow these steps to cut the fabric accurately:
- Wash and press the fabric: Before cutting, it’s a good idea to pre-wash your fabric to remove any sizing or shrinkage. Once washed, press the fabric with an iron to remove any wrinkles or creases.
- Measure and mark: Use a quilting ruler and a fabric pen or chalk to measure and mark the dimensions of each fabric piece. Follow your chosen quilt pattern or design to determine the required measurements.
- Cut with care: Use sharp fabric scissors or a rotary cutter along with a cutting mat. Align the ruler with the marked lines and cut the fabric with smooth and even strokes. Take your time and be precise to ensure accurate pieces.
- Label and organize: As you cut each piece, label them with sticky notes or fabric markers to keep track of their placement in the quilt. This will make it easier when it comes time to sew the pieces together.
Remember to double-check your measurements and cut extra fabric if needed. It’s better to have more fabric than not enough. Once all the fabric pieces are cut, you’re ready to move on to the next step: arranging the fabric.
Step 3: Arranging the Fabric
Now that you have all your fabric pieces cut, it’s time to arrange them in a way that creates a visually pleasing quilt top. Follow these steps to arrange your fabric:
- Lay out the design: Clear a large, flat surface like a table or the floor and lay out your fabric pieces according to your chosen quilt pattern or design. Take your time to experiment with different arrangements until you find a layout that you love.
- Consider color and pattern placement: Pay attention to how different colors and patterns interact with each other. Look for balance and contrast. You can create a symmetrical or asymmetrical design, depending on your preferences.
- Take a picture: Once you’re happy with the arrangement, take a picture of the layout. This will serve as a reference when it’s time to sew the pieces together.
- Group fabric pieces: As you arrange the fabric, group them into blocks or sections. This will make it easier to sew the pieces together without losing their order.
- Organize fabric placement: If you have a specific design or pattern in mind, mark the fabric pieces according to their placement using sticky notes or fabric markers. This will help you keep track of their order while sewing.
Remember that arranging the fabric is a creative process, so feel free to experiment and make adjustments until you’re satisfied with the design. Once you have finalized the arrangement, you’re ready to move on to the next step: sewing the fabric pieces together.
When making a simple quilt, be sure to prewash your fabric to prevent shrinkage and bleeding of colors. This will ensure that your quilt stays looking great for a long time.
Step 4: Sewing the Fabric Pieces Together
Now that you have your fabric pieces arranged, it’s time to start piecing them together to create your quilt top. Follow these steps to sew the fabric pieces together:
- Prepare your sewing machine: Thread your sewing machine with a coordinating thread color and insert a new needle. Set your sewing machine to a straight stitch with a medium stitch length.
- Start with a test piece: Before sewing your quilt top, it’s a good idea to practice on a scrap piece of fabric to ensure that your stitch length and tension are correct.
- Sew the fabric pieces: Take the first two fabric pieces that need to be joined together and place them right sides together. Align the edges and pin them in place to prevent shifting while sewing. Sew along the pinned edge, using a ¼-inch seam allowance.
- Press the seams: After sewing each seam, press the fabric open with an iron. This will give your quilt top a crisp and professional look.
- Continue sewing: Repeat the previous steps, sewing each fabric piece together according to your layout plan. Take your time and ensure that the seams are straight and the fabric is aligned properly.
- Join the blocks: Once you have sewn all the individual fabric pieces together, join the blocks or sections together according to your layout. Again, pin and sew the seams, pressing them open.
- Trim excess fabric: After joining all the blocks, trim any excess fabric to ensure that your quilt top is square and the edges are neat.
Remember to backstitch at the beginning and end of each seam to secure the stitches. Take breaks and step back to admire your progress. Sewing the fabric pieces together is a satisfying step in the quilt-making process. Once you have finished sewing your quilt top, you’re ready to move on to the next step: adding batting and backing.
Step 5: Adding Batting and Backing
Now that you have sewn your fabric pieces together to create the quilt top, it’s time to add the layers that will give your quilt its warmth and structure. Follow these steps to add batting and backing to your quilt:
- Prepare the backing fabric: Lay your backing fabric on a clean, flat surface, right side down. Smooth out any wrinkles or creases.
- Place the batting layer: Lay the batting on top of the backing fabric, ensuring that it is centered and covers the entire quilt top. Smooth out any wrinkles or bumps.
- Add the quilt top: Place your quilt top on the batting layer, right side up. Align the edges and ensure it is centered on the batting.
- Baste the layers: Use safety pins or basting spray to secure the three layers together. Pin or spray at regular intervals to prevent shifting while quilting.
- Trim the excess fabric: Carefully trim the excess batting and backing fabric, leaving a ½-inch seam allowance around the quilt top.
Adding the batting and backing creates the “sandwich” for your quilt. The batting provides warmth and insulation, while the backing fabric adds stability and visual appeal to the back of the quilt. Once you have completed this step, you’re ready to move on to the next step: quilting the layers together.
Step 6: Quilting the Layers Together
Quilting is the process of stitching the three layers of your quilt together to create a cohesive and durable finished piece. Follow these steps to quilt your layers:
- Select a quilting design: Choose a quilting design that complements your quilt top and enhances its overall look. You can opt for simple straight lines, intricate free-motion designs, or even use a quilting stencil for guidance.
- Secure the layers: Start quilting from the center of your quilt and work your way outwards. Begin by securing the layers with a few basting stitches or by using quilting pins or clips to hold them in place.
- Quilt the layers: Use a walking foot or a quilting foot on your sewing machine to help guide the layers smoothly. Stitch along your chosen quilting design, keeping the stitches even and consistent. Take your time and quilt at a pace that feels comfortable to you.
- Backstitch at the beginning and end of each row to secure the stitches. If you’re using free-motion quilting, practice on a scrap fabric to get comfortable with the technique before quilting your actual project.
Quilting is where your creativity can truly shine. Experiment with different quilting designs and techniques to add dimension and texture to your quilt. Once you have finished quilting the layers together, trim the excess threads, and move on to the final step: binding the quilt edges.
Step 7: Binding the Quilt Edges
The final step in completing your quilt is to bind the edges, giving it a clean and finished look. Follow these steps to bind your quilt:
- Prepare the binding fabric: Cut fabric strips for the binding, measuring about 2.5 inches wide and long enough to cover the perimeter of your quilt.
- Join the binding strips: Take the fabric strips and join them diagonally to create one continuous strip. Iron the seams open for a neater finish.
- Attach the binding: Starting in the middle of one side of your quilt, align the raw edges of the binding strip with the raw edges of the quilt. Leave a 6-inch tail at the beginning.
- Sew the binding: Using a ¼-inch seam allowance, sew the binding strip to the quilt, stopping ¼-inch away from each corner. Backstitch at the beginning and end of each seam.
- Miter the corners: To create mitered corners, fold the binding strip up and away from the quilt at a 45-degree angle, then fold it back down along the next side. Continue sewing, repeating this process at each corner.
- Join the binding: When you reach the starting point, trim the excess binding and tuck the binding end into the opening of the binding strip. Fold the binding over itself and sew it down to secure.
- Finish the binding: Fold the binding over to the backside of the quilt and hand stitch it in place using a blind stitch or a whip stitch. Take care to hide the stitches for a polished look.
- Secure the ends: At each corner, fold the corners neatly and secure them with a few hand stitches to create crisp mitered corners.
Binding is the final touch that not only adds durability to your quilt but also frames it beautifully. Once you have finished binding all the edges, give your quilt a final press with an iron, and voila! Your simple quilt is complete and ready to be enjoyed or given as a heartfelt gift.
Congratulations on completing your simple quilt! Remember, quilting is a journey of creativity and skill-building. Don’t be afraid to experiment, learn from each project, and let your imagination run wild with future quilting endeavors. Happy quilting!
Read more: How To Make A Quilt
Conclusion
Congratulations on completing your journey to create a beautiful and simple quilt! Through the process of choosing fabric, cutting, arranging, sewing, adding layers, quilting, and binding, you have transformed individual pieces of fabric into a cozy and cherished heirloom.
Quilting is not just a creative outlet; it’s a labor of love that allows you to express your personality, bring comfort to others, and create lasting memories. The skills you have acquired in this simple quilt-making project will serve as a solid foundation for future quilting endeavors.
As you embark on your quilting journey, continue to explore different fabric options, experiment with various quilt designs, and hone your sewing and quilting techniques. Gain inspiration from other quilters, attend workshops, or join quilting communities to expand your knowledge and connect with fellow enthusiasts.
Remember, the beauty of quilting lies not only in the finished product but also in the process itself. Every quilt tells a story, represents countless hours of dedication, and holds sentimental value. Whether your quilts become treasured family heirlooms, cherished gifts, or decorative masterpieces, each stitch is a testament to your creativity and skill.
Enjoy the satisfaction of snuggling up with your quilt, knowing that you have created something truly special. As you continue on your quilting journey, let your passion and imagination guide you. Embrace new challenges, try different techniques, and most importantly, have fun along the way.
Thank you for joining us on this quilting adventure. Happy quilting!
Frequently Asked Questions about How To Make A Simple Quilt
Was this page helpful?
At Storables.com, we guarantee accurate and reliable information. Our content, validated by Expert Board Contributors, is crafted following stringent Editorial Policies. We're committed to providing you with well-researched, expert-backed insights for all your informational needs.


0 thoughts on “How To Make A Simple Quilt”