
Articles
How To Move Toilet
Modified: February 11, 2024
Learn how to move a toilet with these helpful articles. Step-by-step instructions and expert tips to make your bathroom renovation a breeze.
(Many of the links in this article redirect to a specific reviewed product. Your purchase of these products through affiliate links helps to generate commission for Storables.com, at no extra cost. Learn more)
Introduction
Moving a toilet may seem like a daunting task, but with the right knowledge and preparation, it can be accomplished smoothly. Whether you’re renovating your bathroom or relocating the toilet for better functionality, knowing the steps involved in moving a toilet can save you time, money, and potential headaches.
In this article, we will guide you through the process of moving a toilet, from shutting off the water supply to reconnecting it in the new location. By following these steps, you can ensure a successful and hassle-free toilet relocation.
Before we delve into the details, it’s crucial to remember that working with toilets involves dealing with plumbing systems. If you’re not confident in your abilities or have limited experience with plumbing work, it’s always advisable to consult a professional plumber to ensure safety and prevent any potential damage to your plumbing system.
Now, let’s get started on how to move a toilet.
Key Takeaways:
- Master the art of moving a toilet with ease and confidence by following the step-by-step process outlined in this article. Proper preparation, installation, and testing are key to a successful relocation.
- While moving a toilet is a DIY possibility, it’s crucial to know your limits. Consult a professional plumber if you’re unsure. Enjoy the benefits of a renovated bathroom or improved functionality with a successfully relocated toilet.
Read more: How To Move Toilet Plumbing
Preparing for the Move
Before you begin the process of moving a toilet, it’s important to gather all the necessary tools and materials. Here’s a list of items that you will need:
- Adjustable wrench
- Bucket or towels
- Putty knife
- Plunger
- New wax ring
- A container to temporarily store the toilet components
Once you have all the tools and materials ready, follow these steps to prepare for the move:
- Clear the area around the toilet: Remove any objects, mats, or rugs near the toilet to create a clear workspace.
- Turn off the water supply: Locate the shut-off valve near the toilet and turn it clockwise to shut off the water supply. This valve is typically located on the wall or floor near the toilet.
- Flush the toilet: Flush the toilet to remove as much water as possible from the tank and bowl. This will make the disconnection process easier and minimize the risk of water spills.
- Remove excess water: Use a plunger or a sponge to remove any remaining water from the toilet tank and bowl. You can wring out the sponge into a bucket or absorb the water with towels.
- Disconnect the water supply line: Use an adjustable wrench to loosen the nut connecting the water supply line to the bottom of the toilet tank. Once loosened, carefully unscrew and detach the water supply line from the tank.
- Remove the toilet seat: Depending on your preference, you may choose to remove the toilet seat before moving the toilet for ease and safety. Simply unscrew the bolts attaching the seat to the toilet bowl.
By following these preparatory steps, you’ll ensure that the moving process goes smoothly and efficiently. Now that you’re ready to disconnect the toilet, let’s move on to the next step: shutting off the water supply.
Shutting Off the Water Supply
Before you can safely disconnect the toilet, it’s essential to shut off the water supply to prevent any water leakage. Here’s how to shut off the water supply:
- Locate the shut-off valve: The shut-off valve is typically located on the wall or floor near the toilet. It may be a round or lever-style valve.
- Turn off the shut-off valve: Rotate the valve clockwise until it is fully closed. This will shut off the water supply to the toilet.
- Test the shut-off valve: Once closed, check for any water leakage by flushing the toilet and running the faucet nearby. If no water flows, the shut-off valve is working properly.
It’s important to note that sometimes the shut-off valve may be old or faulty, and turning it off completely may not stop the water flow. In such cases, it’s advisable to consult a professional plumber to replace the valve before proceeding with the toilet removal.
By shutting off the water supply, you can prevent any potential water damage during the disconnection process. Now that the water supply is secured, you’re ready to move on to the next step: disconnecting the toilet.
Disconnecting the Toilet
Now that you have shut off the water supply, it’s time to disconnect the toilet from the plumbing. Follow these steps to safely disconnect the toilet:
- Remove the tank lid: Gently lift the tank lid and set it aside in a safe place. Be cautious as the lid can be heavy.
- Disconnect the water supply line: Using an adjustable wrench, loosen the nut that connects the water supply line to the bottom of the toilet tank. Once loose, carefully unscrew and detach the water supply line from the tank. Ensure that any water remaining in the line is drained into a bucket or towels.
- Unbolt the tank from the bowl: Locate the bolts that secure the tank to the toilet bowl. Using a wrench or screwdriver, unscrew and remove the nuts and washers from the bolts. Once removed, carefully lift the tank away from the bowl and set it aside.
- Disconnect the toilet from the floor: To disconnect the toilet bowl from the floor, locate and remove the nuts and washers on the bolts at the base of the toilet. These are typically covered by plastic caps, which can be pried off with a putty knife. Once the nuts are removed, gently rock the toilet bowl back and forth to break the seal from the wax ring.
- Remove the toilet bowl: Carefully lift the toilet bowl straight up to detach it from the floor flange and remove it from the bathroom. Be cautious as the toilet can be heavy, so it’s advisable to have someone assist you during this step.
Once the toilet bowl is removed, be sure to cap the exposed sewer pipe with a rag or cover to prevent any sewer gases from entering your home. It’s also a good idea to plug the floor flange opening with a towel or old rag to avoid any accidental debris falling into the plumbing system.
Now that you have successfully disconnected the toilet from the plumbing, you can move on to the next step: removing the wax ring.
Removing the Wax Ring
When moving a toilet, it’s important to remove the old wax ring from the floor flange to ensure a proper seal when reinstalling the toilet in its new location. Follow these steps to remove the wax ring:
- Inspect the wax ring: Take a look at the wax ring that was previously sealing the toilet to the floor. If it appears worn, damaged, or flattened, it’s best to replace it with a new wax ring.
- Scrape off the old wax ring: Use a putty knife or scraper to carefully remove the remnants of the old wax ring from the floor flange. Take your time and be gentle to avoid damaging the flange or the sewer pipe.
- Dispose of the old wax ring: Place the old wax ring into a plastic bag or a disposable container and discard it in the appropriate trash bin.
- Clean the floor flange: After removing the old wax ring, use a damp cloth or sponge to clean the floor flange and ensure it is free from any debris or residue.
It’s worth mentioning that some toilets may have an additional wax ring or gasket between the tank and the bowl. If your toilet has this extra seal, make sure to remove and replace it as well.
With the old wax ring removed, you’re now ready to prepare the new location for the toilet installation. Let’s move on to the next step: preparing the new location.
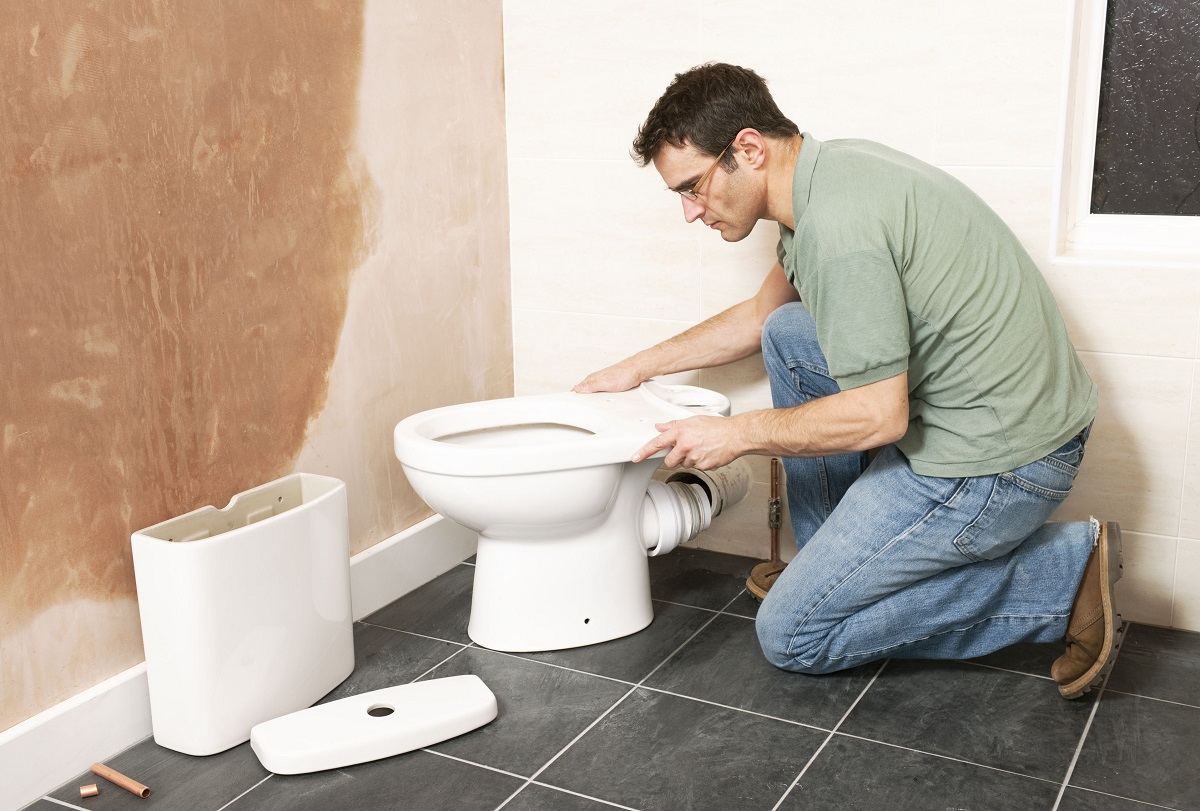
Before moving a toilet, turn off the water supply and flush to empty the tank. Disconnect the water supply line and remove the bolts securing the toilet to the floor. Use a putty knife to break the seal and carefully lift the toilet straight up to avoid damaging the wax ring.
Read more: What Causes Water In Toilet Bowl To Move
Preparing the New Location
Before you can install the toilet in its new location, it’s essential to prepare the area to ensure a stable and secure installation. Follow these steps to prepare the new location:
- Measure and mark the new toilet placement: Determine the desired position for the toilet in the new location. Use a measuring tape to ensure proper alignment and mark the floor accordingly.
- Ensure proper floor support: Ensure that the floor in the new location is strong enough to support the weight of the toilet. If necessary, reinforce the floor by adding additional support or consulting a professional contractor.
- Check the toilet’s rough-in distance: Measure the rough-in distance, which is the distance between the center of the floor flange and the wall behind the toilet. Ensure that the new location has the appropriate rough-in distance to accommodate your toilet.
- Inspect the floor flange: Examine the floor flange in the new location to ensure it is in good condition and properly secured to the floor. If the floor flange is damaged or loose, repair or replace it before proceeding with the installation.
- Prepare the floor flange: Clean the floor flange and remove any debris or residue. Ensure that the flange is level and sits flush with the floor surface. If needed, use shims or leveling compound to achieve a level surface.
By properly preparing the new location, you’ll create a solid foundation for the toilet installation and help prevent any future issues such as leaks or unstable seating. Now that the new location is ready, it’s time to install the toilet. Let’s move on to the next step: installing the toilet in the new location.
Installing the Toilet in the New Location
Now that you have prepared the new location for the toilet, it’s time to install it. Follow these steps to properly install the toilet in its new location:
- Position the wax ring: Take a new wax ring and place it onto the floor flange in the new location. Ensure that the wax ring is centered over the flange opening.
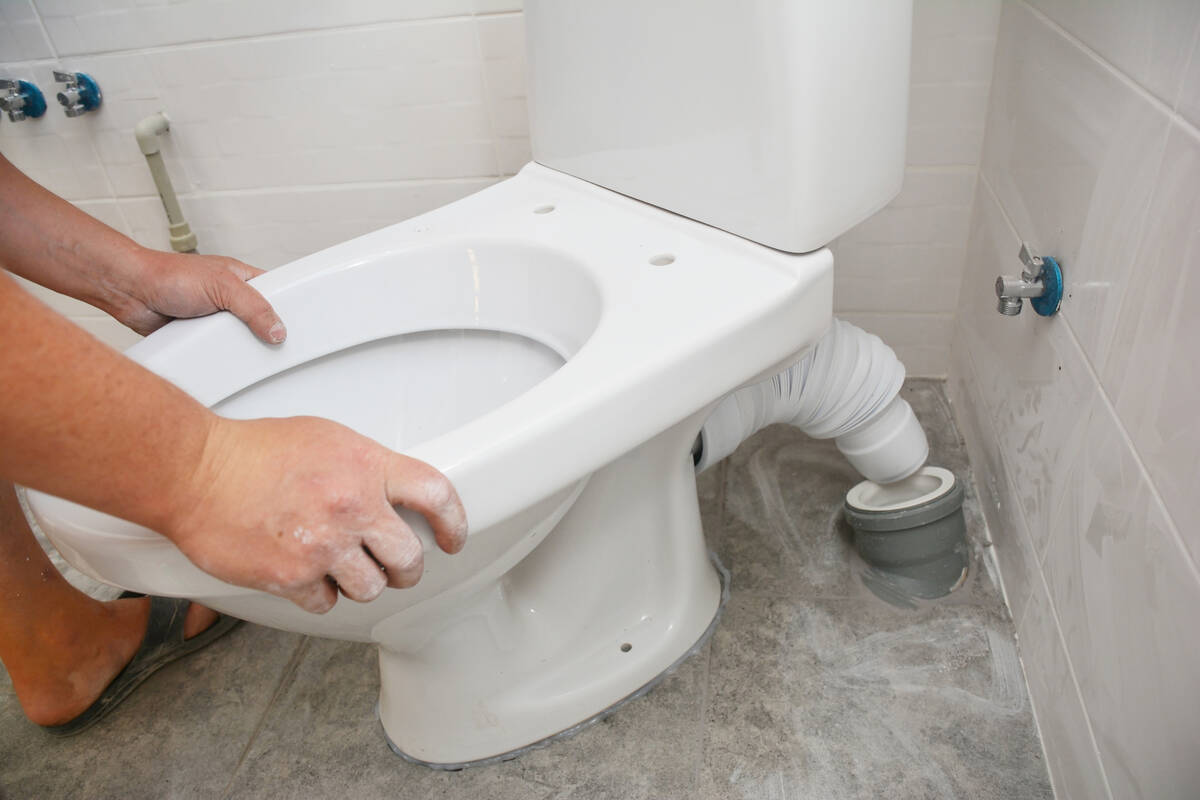
- Lower the toilet bowl: Carefully lower the toilet bowl onto the wax ring, aligning the bolt holes on the base of the toilet with the bolts in the floor flange. Apply gentle pressure to compress the wax ring and form a watertight seal.
- Secure the toilet bowl: Install the washers and nuts onto the bolts at the base of the toilet. Use an adjustable wrench to tighten the nuts, but be careful not to overtighten as it may crack the toilet bowl.
- Install the tank: Align the tank with the bowl and lower it onto the bowl, ensuring that the tank bolts align with the corresponding holes. Place the washers and nuts onto the bolts and tighten them to secure the tank to the bowl.
- Connect the water supply line: Attach the water supply line to the bottom of the toilet tank and tighten the nut with an adjustable wrench. Ensure that the connection is tight, but avoid overtightening to prevent damage.
- Adjust the alignment: Ensure that the toilet is level and sits evenly on the floor. If necessary, use shims to adjust the toilet’s position and ensure stability.
It’s worth mentioning that some toilets may require additional steps for anchoring or securing the toilet to the floor. Follow the manufacturer’s instructions or consult a professional plumber if you’re unsure about the specific installation requirements for your toilet model.
With the toilet properly installed in the new location, you’re almost done. The next step is to reconnect the water supply and test the toilet for proper operation.
Reconnecting the Water Supply
Now that the toilet is installed in its new location, it’s time to reconnect the water supply and ensure proper functioning. Follow these steps to reconnect the water supply:
- Turn on the shut-off valve: Locate the shut-off valve near the toilet and turn it counterclockwise to open the valve and restore the water supply to the toilet.
- Check for leaks: As you turn on the shut-off valve, carefully inspect the water supply line and connections for any signs of leaks. If you notice any leaks, tighten the connections or consider replacing faulty parts.
- Allow the tank to fill: With the water supply on, the toilet tank will start filling with water. Allow the tank to fill completely before continuing.
- Test the flush: Once the tank is filled, flush the toilet to ensure proper water flow and drainage. Check for any abnormalities such as slow flushing or leaks.
It’s common to experience some air bubbles or sputtering noise when first turning on the water supply after installation. This is usually due to air trapped in the plumbing system and should resolve on its own after a few flushes.
If you encounter any issues or persistent leaks after reconnecting the water supply, it’s advisable to consult a professional plumber to identify and resolve the problem.
Now that the water supply is reconnected and the toilet is functioning properly, it’s time for the final step: testing the toilet for proper operation.
Testing the Toilet for Proper Operation
After installing and reconnecting the toilet, it’s crucial to test it for proper operation to ensure that everything is functioning as it should. Follow these steps to test the toilet:
- Flush the toilet: Give the toilet a few test flushes to ensure that it flushes properly and that the water drains smoothly.
- Check for leaks: Inspect the area around the base of the toilet and the water supply connections for any signs of leaks. Pay close attention to the floor, walls, and pipes for any moisture or water drips.
- Verify proper water level: Observe the water level in the toilet tank after flushing. It should refill to the appropriate level and stop filling once the float valve reaches the correct position.
- Inspect for proper sealing: Check for any signs of water leaks or moisture around the wax ring. If you notice any leaks, it may indicate an improper seal, and you may need to reinstall the wax ring or seek professional assistance.
- Sit on the toilet: Carefully sit on the toilet and ensure that it feels stable and secure. Wiggle slightly to test for any movement or rocking. A properly installed toilet should not move or shift under normal use.
- Listen for unusual noises: While the toilet is in use, listen for any unusual noises, such as gurgling or hissing sounds. These noises may indicate a problem with the plumbing or the toilet’s internal mechanisms.
If you encounter any issues during the testing process, such as leaks, improper flushing, or unstable seating, it’s advisable to consult a professional plumber for further inspection and assistance.
Congratulations! If the toilet passes all the tests and operates properly, you have successfully moved and installed the toilet in its new location. Enjoy your newly relocated toilet and the improved functionality it brings to your bathroom!
Read more: How Do I Stop A Toilet Seat From Moving
Conclusion
Moving a toilet may seem like a daunting task, but with the right knowledge and preparation, it can be accomplished smoothly. By following the step-by-step process outlined in this article, you can successfully move a toilet to its new location and ensure proper functionality.
Remember, it’s important to gather all the necessary tools and materials before starting the process. Take your time to shut off the water supply, disconnect the toilet from the plumbing, remove the old wax ring, and prepare the new location for installation. Properly installing the toilet, reconnecting the water supply, and testing for proper operation are key steps to ensure success.
While moving a toilet can be a DIY project, it’s essential to know your limitations. If you don’t feel confident or have limited experience in plumbing work, it’s always best to consult a professional plumber. They can provide expert guidance, ensure the work is done safely, and prevent any potential damage to your plumbing system.
With the toilet successfully installed in its new location, you can enjoy the benefits of a renovated bathroom or improved functionality. Properly maintaining and caring for your toilet will help extend its lifespan and prevent future issues. Regularly check for any signs of leaks or problems, and address them promptly to avoid further damage.
We hope this article has provided you with valuable insights and guidance on how to move a toilet. By following these steps, you can tackle the task with confidence and achieve a successful toilet relocation.
Frequently Asked Questions about How To Move Toilet
Was this page helpful?
At Storables.com, we guarantee accurate and reliable information. Our content, validated by Expert Board Contributors, is crafted following stringent Editorial Policies. We're committed to providing you with well-researched, expert-backed insights for all your informational needs.






0 thoughts on “How To Move Toilet”