Articles
How To Put Christmas Lights On Roof
Modified: January 14, 2024
Learn how to put Christmas lights on your roof with our informative articles. Get step-by-step instructions and helpful tips for a beautiful holiday display.
(Many of the links in this article redirect to a specific reviewed product. Your purchase of these products through affiliate links helps to generate commission for Storables.com, at no extra cost. Learn more)
Introduction
Putting up Christmas lights on the roof can transform your home into a festive wonderland during the holiday season. The twinkling lights add a touch of magic and create a warm and inviting atmosphere that brings joy to both residents and passersby. Whether you’re a beginner or a seasoned pro, this article will guide you through the process of safely and effectively decorating your roof with Christmas lights.
Before you embark on this project, it’s important to gather the necessary tools and materials, as well as familiarize yourself with some safety precautions. Taking these steps will ensure a smooth and enjoyable experience while avoiding any accidents or mishaps. With a little planning and careful execution, you’ll be able to showcase a stunning display that will make your home the envy of the neighborhood.
In this article, we will provide step-by-step instructions on how to put Christmas lights on your roof, as well as some helpful tips and tricks along the way. So, let’s dive in and get started on transforming your home into a winter wonderland!
Key Takeaways:
- Transform your home into a winter wonderland by safely and creatively hanging Christmas lights on your roof. Prioritize safety, plan your layout, and connect multiple strands for a stunning and festive display.
- Create a magical and inviting atmosphere with a professional-looking Christmas light display. Follow safety precautions, secure lights properly, and add creative touches to enhance your home’s festive charm.
Read more: How To Put Christmas Lights On Porch Railing
Safety Precautions
Before you begin decorating your roof with Christmas lights, it’s crucial to prioritize safety. Taking the necessary precautions will help prevent accidents and ensure that you and your loved ones can enjoy the festivities without any worries. Here are some essential safety tips to keep in mind:
- Use a sturdy ladder: When accessing your roof, make sure to use a ladder that is stable and in good condition. Inspect it before each use and position it properly on a level surface. If possible, have someone hold the base of the ladder for extra stability.
- Check the lights: Examine your Christmas lights carefully before installation. Look for frayed wires, broken bulbs, or any signs of damage. Discard any faulty lights and replace them with new ones to avoid electrical hazards.
- Outdoor-rated lights: Ensure that the lights you use for outdoor decorations are specifically designed for outdoor use. These lights are weather-resistant and built to withstand rain, snow, and extreme temperatures.
- Use a ground fault circuit interrupter (GFCI): Plug your lights into a GFCI outlet to reduce the risk of electrical shock. GFCI outlets monitor the flow of electricity and automatically cut off power if it detects a fault, keeping you and your home safe.
- Avoid overloading outlets: Be mindful of the electrical load on each outlet. Do not connect too many lights to a single outlet, as it can cause overheating and potentially lead to a fire. Distribute the load evenly across multiple outlets and use extension cords sparingly.
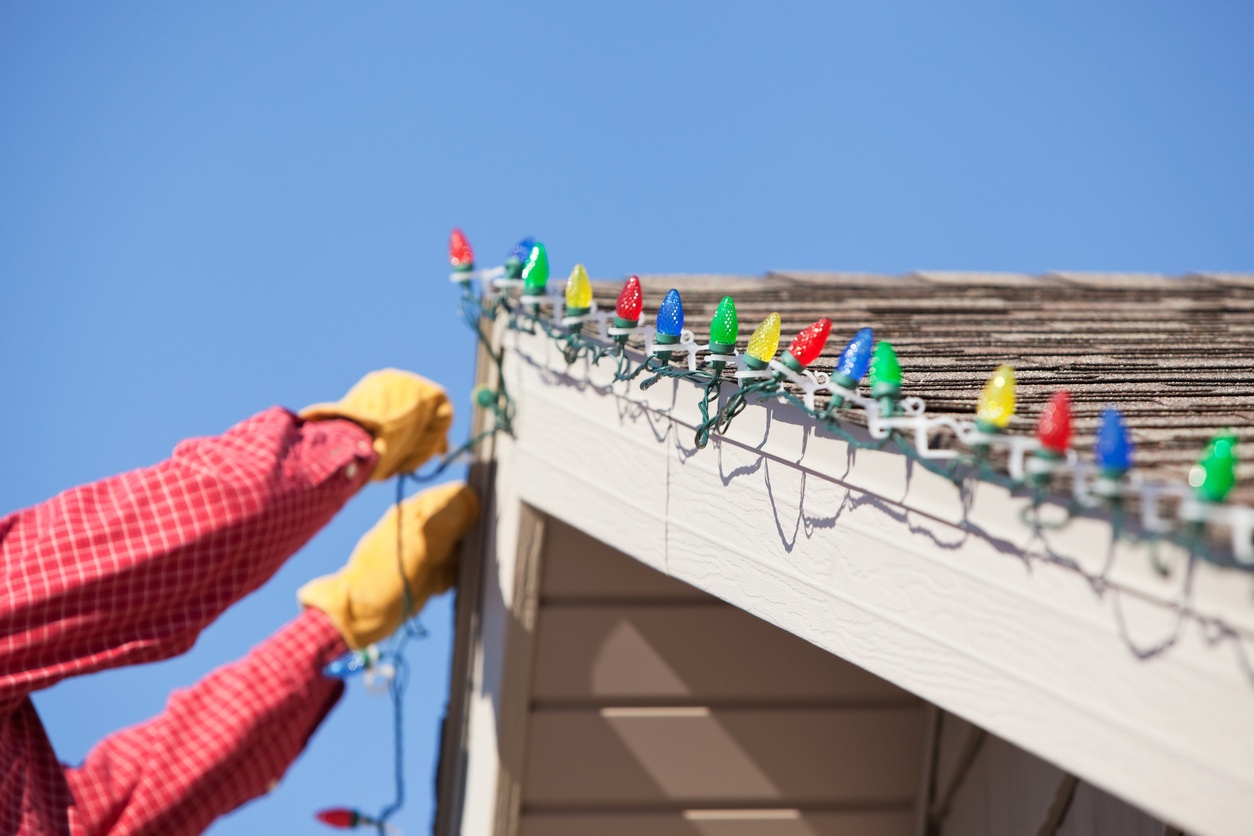
- Secure the lights properly: Use clips or hooks specifically designed for outdoor lights to attach them securely to your roof. Avoid using staples, nails, or anything that could damage the wires or compromise the integrity of your roof.
- Work in daylight or well-lit areas: It’s best to install your Christmas lights during daylight hours or in a well-lit area. This will ensure better visibility and reduce the risk of accidents due to poor lighting conditions.
- Have proper attire and footwear: Dress appropriately for the task, wearing comfortable clothing and non-slip footwear. Avoid loose clothing that could get caught on objects or tangled in your ladder.
- Turn off the lights when unattended: To avoid any potential hazards, turn off your Christmas lights when you’re not at home or while you’re sleeping. This will help conserve energy and minimize the risk of any electrical issues.
By following these safety precautions, you can ensure a safe and enjoyable experience while decorating your roof with Christmas lights. Remember, your safety is paramount, so take the time to prepare and proceed with caution. Now that we’ve covered the essential safety tips, let’s move on to measuring and planning our decorations!
Measure and Plan
Before you start hanging Christmas lights on your roof, it’s important to measure and plan your decoration layout. Taking the time to do this will help ensure that you have enough lights and that they will be evenly distributed across your roof. Here are the steps to measure and plan your Christmas light display:
- Take roof measurements: Measure the length and width of your roof to determine the total area you want to cover with lights. This will help you calculate how many strands of lights you’ll need.
- Create a layout: Sketch a rough diagram of your roof and decide where you want to place your lights. Consider any architectural features or prominent areas that you want to highlight. You can also get inspiration from photos or other decorations you’ve seen.
- Consider power supply: Take note of the location of available power outlets near your roof. This will help you plan the placement of your lights and determine if you need to use extension cords.
- Calculate the number of lights: Determine the length of each light strand and divide the total length of your roof by that number. This will give you an estimate of how many strands you’ll need. It’s always a good idea to have a few extra strands as backups.
- Choose light colors and styles: Decide on the color scheme and style of lights you want to use. Whether you prefer classic white lights, vibrant multicolor lights, or themed lights, selecting the right style will enhance the overall look of your decorations.
By measuring your roof and planning your light display in advance, you’ll be well-prepared to execute your decorating vision. This step ensures that you have enough lights, allows you to carefully consider the placement of the lights, and helps you create a cohesive and visually appealing design. Once you’ve completed the measurement and planning phase, it’s time to gather the necessary materials to bring your vision to life!
Gather Materials
Now that you have measured and planned your Christmas light display, it’s time to gather the necessary materials. Having all the tools and supplies ready before you begin will make the process smoother and more efficient. Here are the essential materials you’ll need:
- Christmas lights: Purchase the appropriate number of strands based on your measurements. Choose lights that are suitable for outdoor use and have the desired color and style for your display.
- Extension cords: If your power outlets are not conveniently located near your roof, you may need extension cords to reach them. Make sure to use outdoor-rated extension cords that can handle the electrical load of your lights.
- Clips or hooks: Get clips or hooks specifically designed for outdoor Christmas lights. These will help you securely attach the lights to your roof without causing any damage. Choose clips or hooks that are compatible with the type of lights you have.
- Ladder: Ensure you have a sturdy ladder that is appropriate for the height of your roof. Use a ladder with slip-resistant feet to minimize the risk of accidents while working at heights.
- Timer or remote control: Consider purchasing a timer or remote control for your Christmas lights. This will allow you to set a schedule for when the lights turn on and off automatically, saving you from manually operating them every day.
- Electrical tape: Have electrical tape on hand to secure any loose connections or repair any damaged wires. It’s a handy item to have in case you encounter any minor issues while setting up your lights.
Before you start decorating, double-check that you have all the materials you need. Taking the time to gather everything in advance will prevent any unnecessary delays or interruptions. Once you have your materials ready, it’s important to make sure that the lights are in working order before you begin installation.
Test the Lights
Before you start hanging your Christmas lights on the roof, it’s essential to test them to ensure they are in working order. Testing the lights beforehand will save you time and frustration later on. Here’s how you can test your lights:
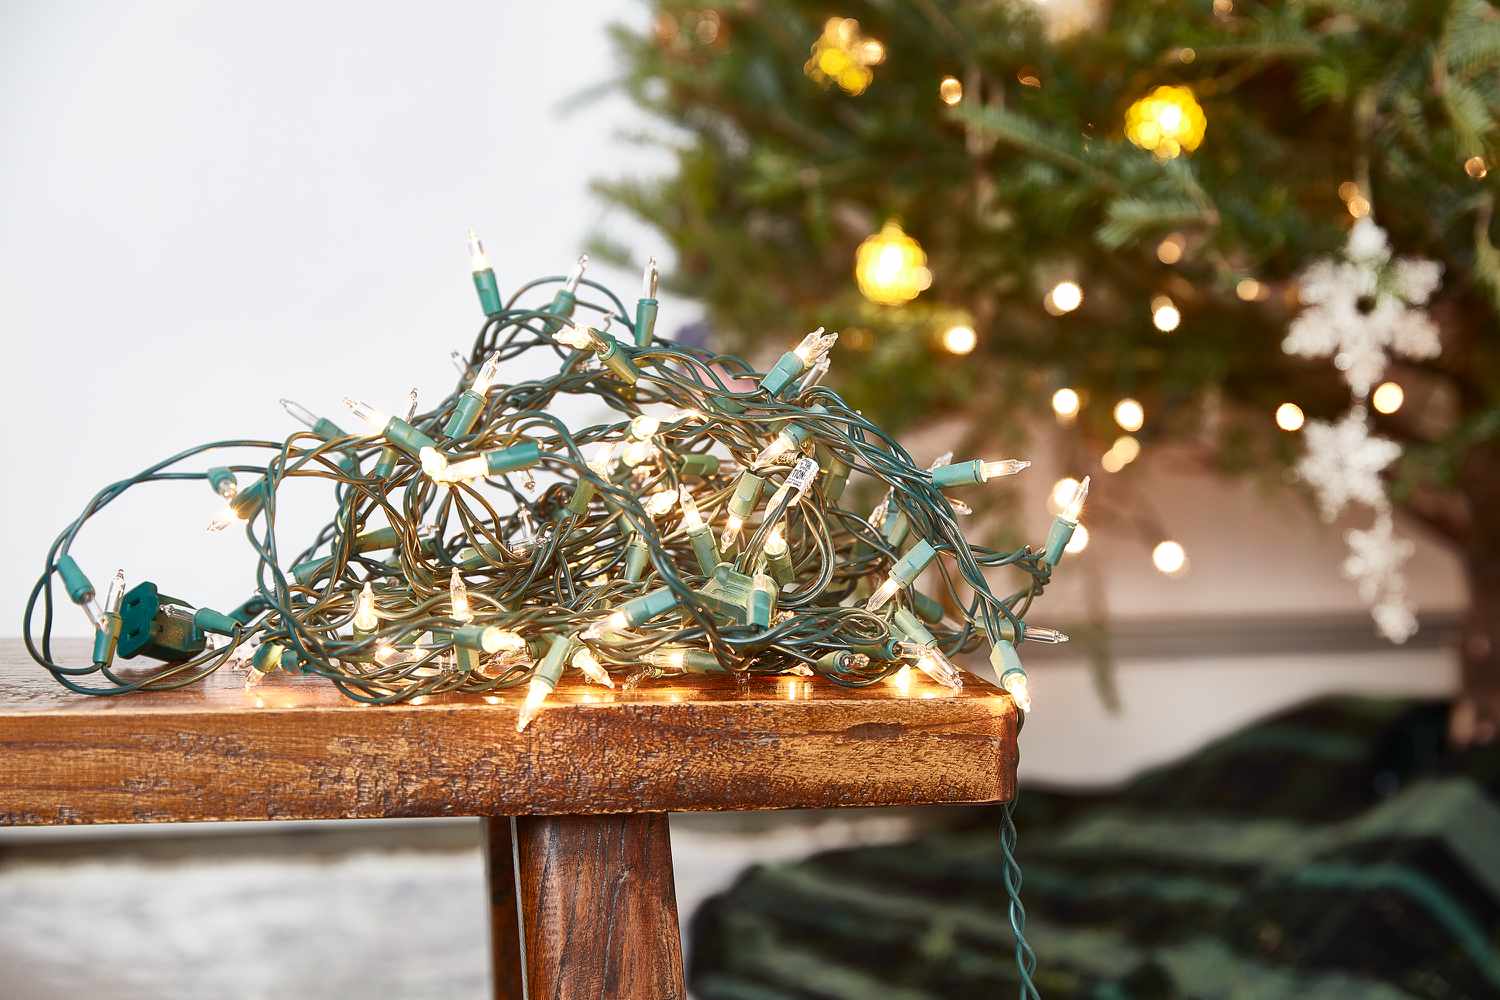
- Set up a testing area: Find a flat surface, such as a table or the floor, where you can easily unravel and test your lights. Make sure the area is clear and safe to work in.
- Unroll the lights: Carefully unravel your light strands, making sure not to tangle them. Lay them out in a straight line to allow for easier testing and troubleshooting.
- Inspect the lights: Check each light bulb for any signs of damage, such as broken or missing bulbs or frayed wires. If you come across any defective lights, replace them with new bulbs or consider getting a new strand.
- Plug in the lights: Plug your lights into a power source and make sure they are connected securely. If you’re using multiple strands, plug each one in individually to avoid overloading the circuit.
- Test the lights: Switch on the lights and carefully observe each bulb to ensure they are all lighting up. Pay attention to any flickering or dimming lights, as these may indicate a loose connection or a faulty bulb.
- Check the light modes: If your lights have different modes, such as steady, blinking, or fading, test each mode to ensure they are functioning properly. Make sure all the desired modes are working as intended.
- Secure any loose connections: If you notice any loose connections or flickering lights, try adjusting the bulbs or tightening any loose wires. You can also use electrical tape to secure any loose connections for added stability.
By testing your Christmas lights before installation, you can identify and address any issues early on, saving you time and effort. Once you’re confident that your lights are in good working condition, it’s time to move on to the installation phase.
Read more: How To Put Tarp On Roof
Attach Clips or Hooks
Once you have tested your Christmas lights and confirmed that they are in working order, it’s time to attach clips or hooks to your roof. These clips or hooks will serve as the base for securing your lights in place. Here’s a step-by-step guide on how to attach clips or hooks:
- Choose the right clips or hooks: Select clips or hooks that are specifically designed for outdoor Christmas lights. They should be durable, weather-resistant, and capable of securely holding your lights in place without damaging your roof.
- Determine the spacing: Decide how far apart you want to space your lights. This will depend on your personal preference and the length of your light strands. A general guideline is to have the clips or hooks spaced around 12-18 inches apart.
- Begin at an edge: Start at one corner or edge of your roof. This will make it easier to attach the clips or hooks in a straight line and ensure a neat and organized appearance.
- Attach the first clip or hook: Place the first clip or hook at the chosen location. If you’re using adhesive-backed clips or hooks, peel off the backing and press firmly onto the roof surface. If you’re using clips that need to be secured with screws, follow the manufacturer’s instructions for installation.
- Continue attaching clips or hooks: Working along the edge of your roof, attach the remaining clips or hooks at the desired spacing. Ensure that they are aligned and positioned securely.
- Repeat the process for other edges: Move along to the next edge of your roof and repeat the process of attaching the clips or hooks. Continue until you have covered all the edges of your roof.
- Install clips or hooks around roof features: If your roof has any architectural features, such as peaks, dormers, or gables, make sure to install clips or hooks around them as well. This will help create a more visually appealing display.
By attaching clips or hooks to your roof, you create a stable and secure foundation for your Christmas lights. These clips or hooks will provide the support needed to keep your lights in place and prevent them from slipping or falling. Once all the clips or hooks are in position, it’s time to start installing the lights themselves.
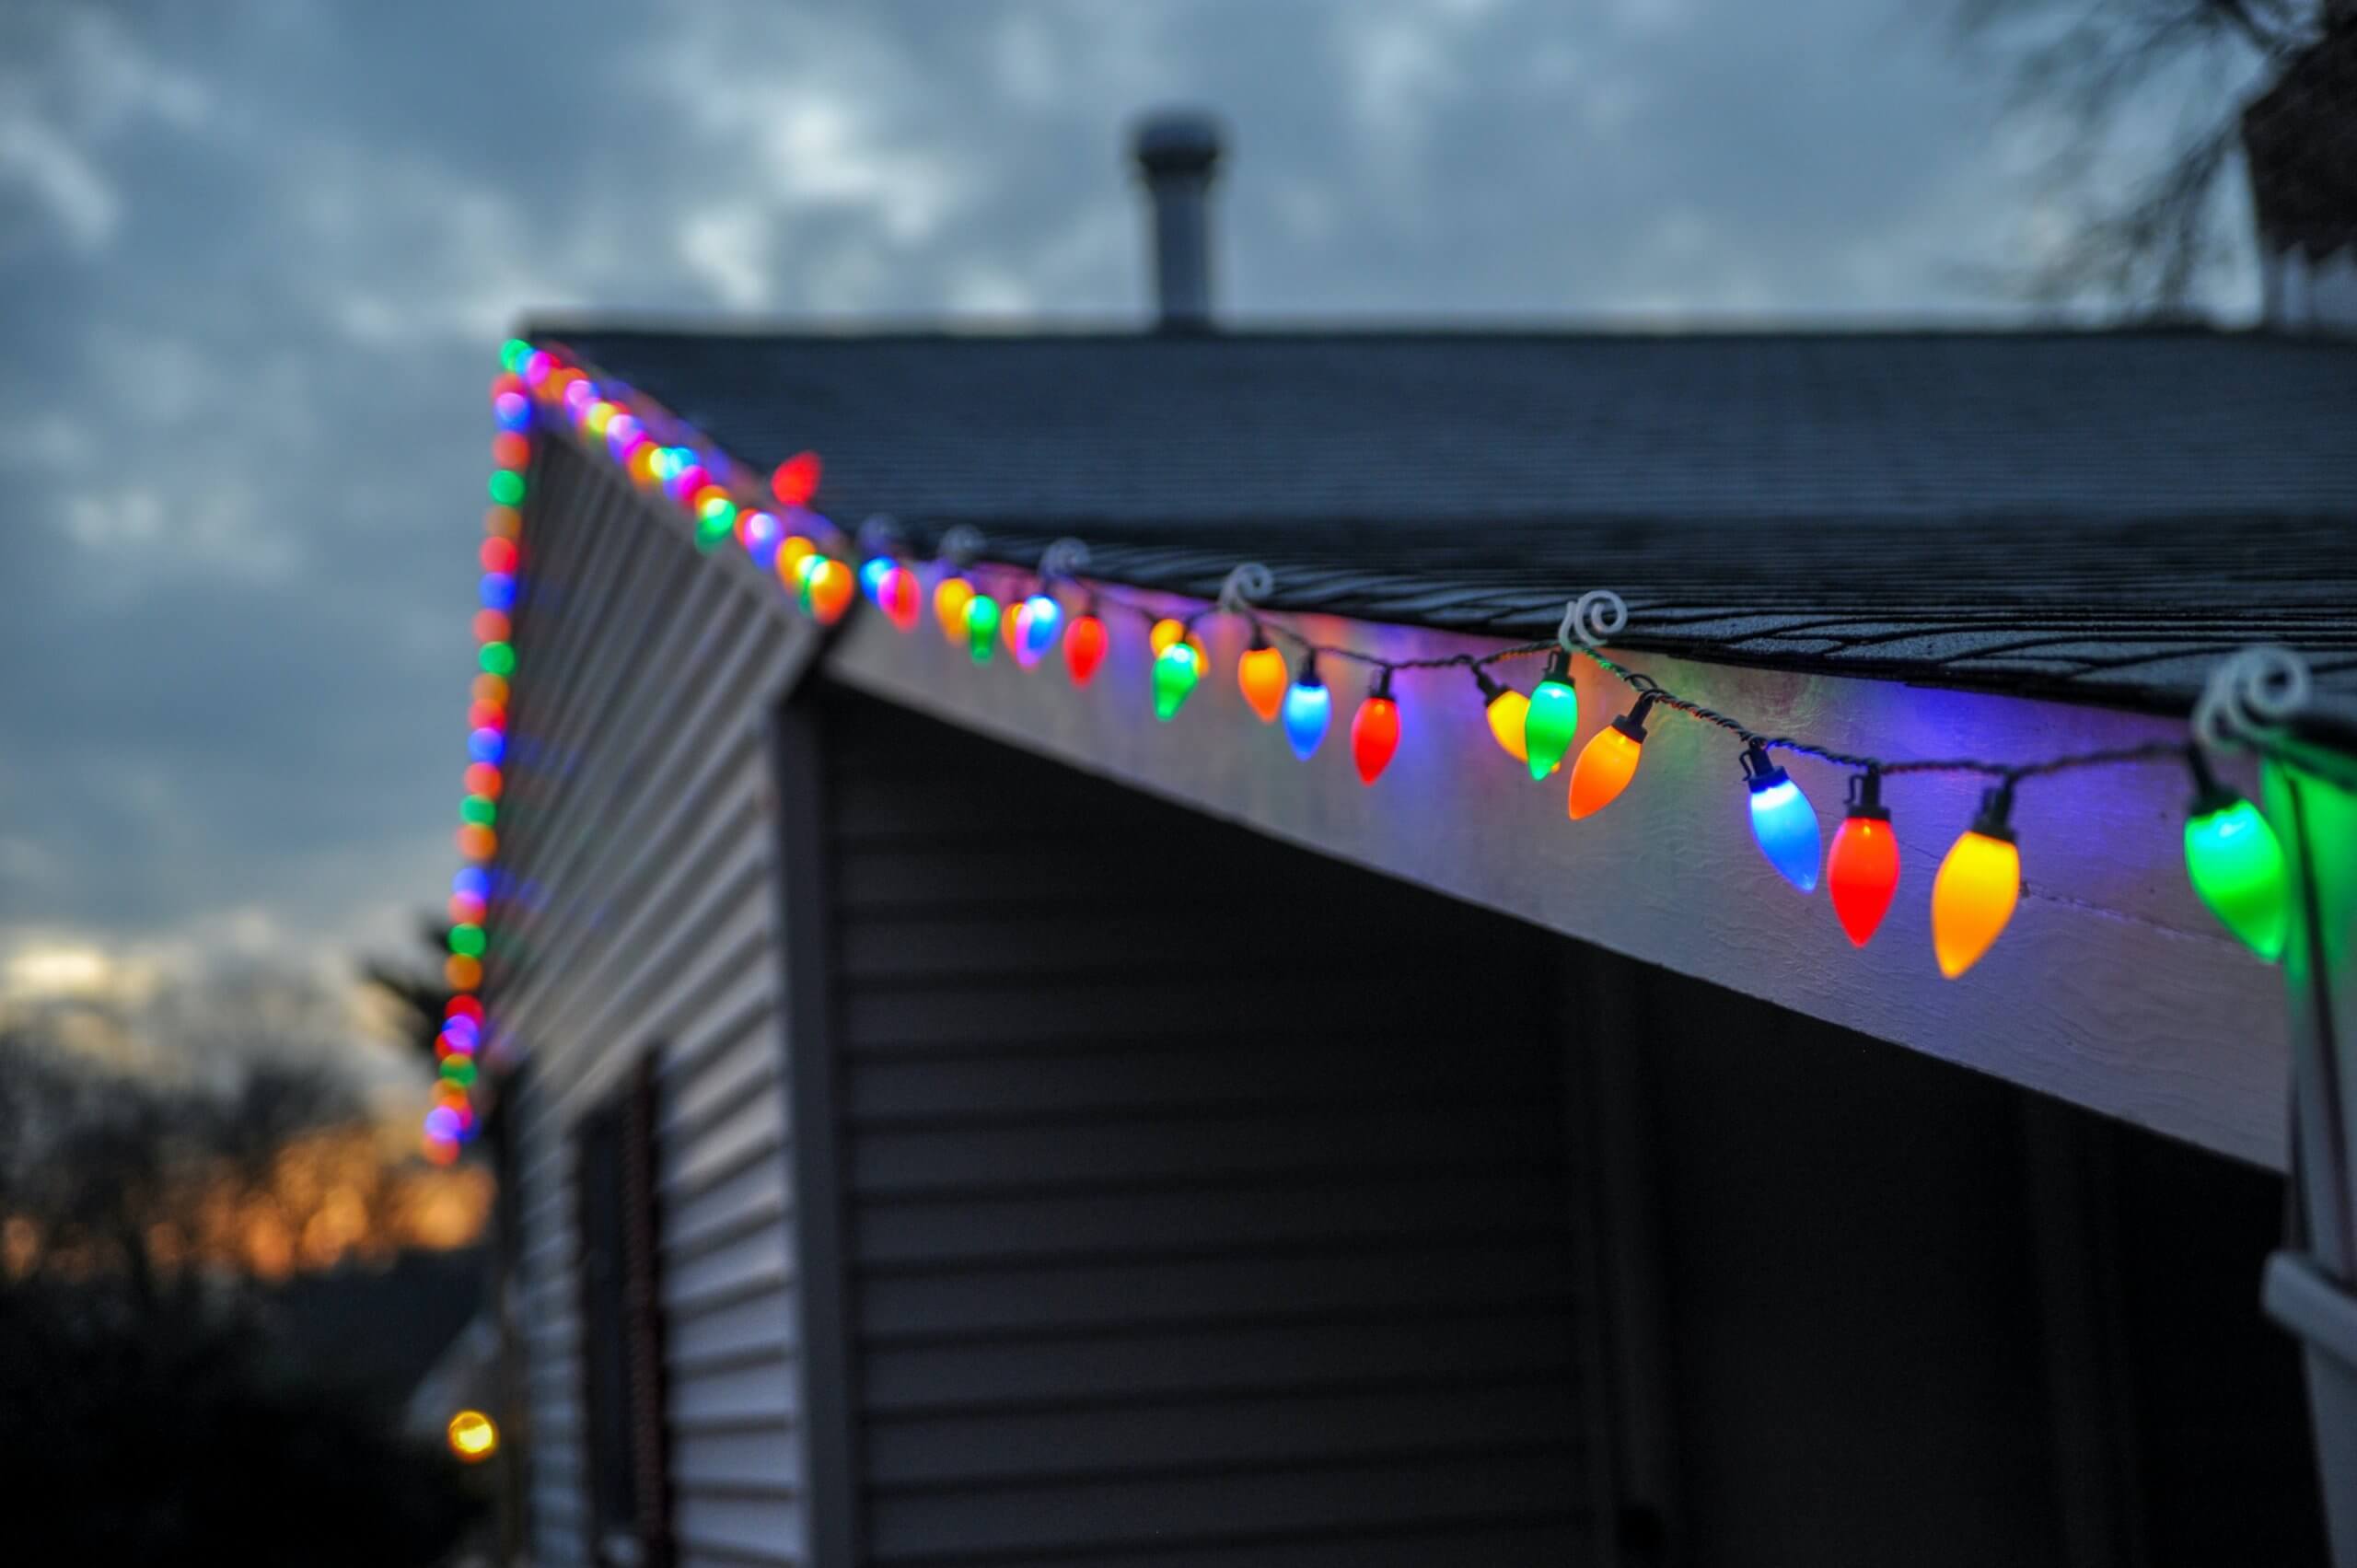
When putting Christmas lights on the roof, use clips or hooks specifically designed for outdoor use to secure the lights in place. This will help prevent damage to the roof and ensure the lights stay in position throughout the holiday season.
Start at an Edge
When it comes to hanging Christmas lights on your roof, it’s best to start at one edge and work your way across. This method allows for a more organized and controlled installation process. Here’s a step-by-step guide on how to start at an edge:
- Choose your starting point: Select the edge of your roof where you want to begin installing your lights. This could be the highest point or the edge closest to a power source.
- Secure the lights: Attach the first light strand to the clips or hooks at the starting point. Depending on the type of clips or hooks you are using, you may need to slide the light strand into the designated slots or use the provided fasteners.
- Work your way along the edge: Follow the shape of your roof as you continue attaching the light strand to the clips or hooks along the edge. Make sure to keep the lights taut and evenly spaced.
- Extend to the next edge: Once you reach the end of one edge, carefully guide the lights around the corner or along the roofline to the next edge. Use additional clips or hooks to secure the lights in place as needed.
- Repeat the process: Continue the process of attaching the lights along each edge of your roof until you have covered all sides. Remember to keep the lights straight, evenly spaced, and securely attached to the clips or hooks.
Starting at an edge allows for a more systematic and efficient installation of your Christmas lights. It ensures a neat and organized display while providing a clear path for working your way around the roof. By following this method, you’ll be able to showcase your lights in a visually appealing manner and create a stunning holiday spectacle.
Secure the Lights
Once you have attached the Christmas lights to the clips or hooks along the edges of your roof, it’s essential to secure them properly. This will help ensure that the lights stay in place, even in windy or inclement weather. Here are some tips on how to secure the lights:
- Check for loose connections: Before securing the lights, double-check that all the connections are tight and secure. This will help prevent any bulbs from flickering or going out due to loose wiring.
- Straighten the lights: As you go along, make sure the light strands are straight and evenly spaced. Adjust them as needed to create a uniform and visually pleasing display.
- Secure with zip ties or twist ties: Consider using zip ties or twist ties to secure the light strands to the clips or hooks. These will provide extra stability and prevent the lights from shifting or drooping.
- Tuck excess wiring: If you have any excess wiring between the clips or hooks, neatly tuck it away to keep it out of sight. This will give your display a cleaner and more professional appearance.
- Add additional clips or hooks as necessary: If you notice any areas where the light strands seem loose, add additional clips or hooks to secure them in place. This will help maintain a consistent and tidy look throughout your roof.
- Consider using light adhesive: For added security, you may want to consider using a light adhesive, such as outdoor adhesive putty or removable mounting strips. Apply a small amount to the back of the lights and press them firmly against the roof surface.
- Test the durability: After securing the lights, gently tug on them to ensure they are holding strong. This will help you identify any weak spots or areas that need reinforcement.
By taking the time to properly secure your Christmas lights, you can significantly reduce the risk of the lights falling or becoming dislodged. This ensures a safer and more enjoyable holiday season, knowing that your lights will stay in place throughout the festivities. With the lights securely attached, you can now move on to stringing them around any rooftop features to enhance your display.
String Around Rooftop Features
Adding a touch of creativity and charm to your Christmas light display involves stringing lights around any rooftop features or architectural elements that your home may have. These features can include peaks, dormers, columns, or any other prominent structures on your roof. Here’s how you can effectively string lights around these rooftop features:
- Identify the features: Take a close look at your roof and identify any noteworthy features that you want to highlight with lights. Peaks, dormers, or columns are ideal candidates for this step.
- Select the appropriate lights: Choose a light strand that is long enough to wrap around the rooftop feature comfortably. You may need to consider extension cords or additional light strands if the feature is larger or covers a significant area.
- Begin at the base: Start at the base of the rooftop feature and wrap the light strand around it. Make sure to space the lights evenly, creating a visually appealing pattern as you go.
- Secure with clips or hooks: Use clips or hooks specifically designed for outdoor lights to secure the light strand in place. Make sure the lights are taut and well-adjusted as you wrap them around the feature.
- Continue wrapping: Move upward or around the feature, continuing to wrap the lights in a spiral or vertical manner. Take care not to twist or tangle the lights in the process.
- Emphasize key areas: If there are any specific areas or details on the rooftop feature that you want to highlight, such as architectural accents, consider adding extra lights or focusing the lights to draw attention to these elements.
- Step back and assess the effect: Once you’ve finished stringing lights around the rooftop feature, step back and assess the overall effect. Make any necessary adjustments to ensure an aesthetically pleasing display.
By carefully stringing lights around your rooftop features, you can add depth and character to your Christmas light display. These illuminated features will catch the eye and enhance the overall visual impact of your decorations. Now that you have successfully decorated your rooftop features, it’s time to tackle the task of connecting multiple light strands to create a cohesive display.
Read more: How To Put A Roof On A Pergola
Connect Multiple Strands
If you’re planning to cover a larger area or have multiple rooflines, connecting multiple light strands is a practical solution to create a cohesive and seamless display. Here’s how you can effectively connect multiple strands of Christmas lights:
- Determine the power source: Identify the location of the power source or outlets where you’ll be plugging in your lights. Ensure that you have enough available outlets for the number of strands you’ll be connecting.
- Select compatible lights: Choose Christmas light strands that are compatible with each other. Ideally, use lights of the same brand, type, and wattage to ensure a smooth connection.
- Measure the distance: Measure the distance between the power source and the end of the first light strand. This will help you determine how much extra wiring or extension cords you’ll need to connect the strands.
- Prepare the light strands: Carefully unravel each light strand and remove any twists or tangles. Check the male and female plugs of each strand to ensure they are in good condition and clean any dirt or debris from the connections.
- Connect the strands: Plug the male end of the first light strand into the female end of the next strand. Make sure the connection is secure and that the plugs are fully inserted. If using an extension cord, plug the male end of the first strand into the extension cord, and then connect the extension cord to the next light strand.
- Test the connection: Once the strands are connected, plug in the male end into the power source and test that all the lights are functioning properly. Check for any flickering or dimming lights, which may indicate a loose connection.
- Secure the connections: After confirming that the lights are working, secure the connected plugs and extension cords using electrical tape or waterproof connectors. This will help protect the connections from moisture and ensure they stay firmly connected.
- Continue connecting strands: Repeat the process for each additional light strand until you have connected all the strands needed for your display.
By following these steps to connect multiple light strands, you can create a unified lighting display across your roof. It’s important to double-check and secure the connections to ensure the lights stay lit throughout the holiday season. With all your light strands synchronized and properly connected, you’re ready to wrap up your Christmas light installation.
Wrap Up
Congratulations, you’ve successfully hung your Christmas lights on the roof! Now, it’s time to wrap up the installation process and finalize the finishing touches. Here are some steps to help you complete the project:
- Inspect the lights: Take a final look at your lights to ensure they are secure and evenly spaced. Double-check the connections and fix any loose wires or bulbs if necessary.
- Secure any loose ends: Tuck away any excess wiring or extension cords, making sure they are out of sight and won’t be a tripping hazard. Use outdoor-rated zip ties or adhesive hooks to keep them organized and secure.
- Check the timing: If your lights have a timer option or remote control, set the desired schedule for when the lights should turn on and off. This will save you the effort of manually switching them on and off every day.
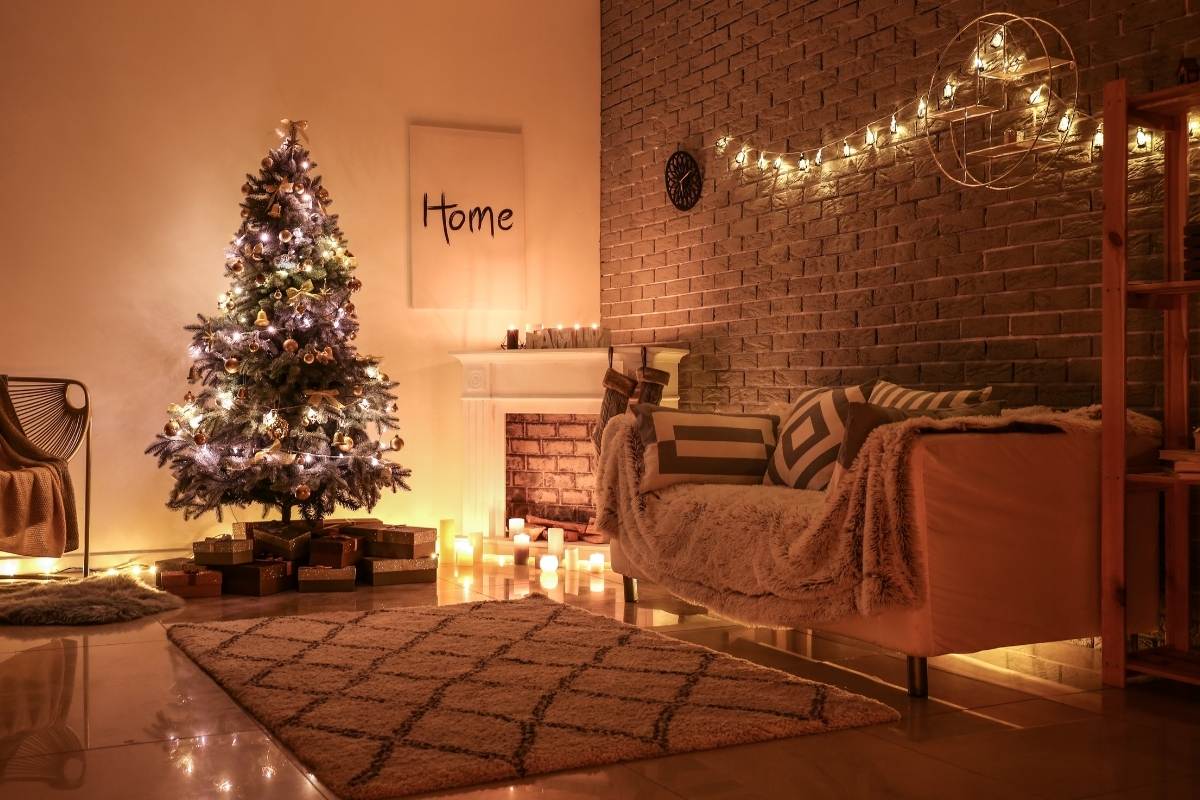
- Consider additional decorations: If you want to enhance your Christmas light display, you can add other festive decorations such as wreaths, garlands, or ornaments. Place these decorations strategically to complement the lights and create a cohesive theme.
- Document your display: Take a moment to capture some photographs of your beautifully lit roof. Share them with friends and family or on social media to spread the holiday cheer and inspire others.
- Maintain your lights: Throughout the holiday season, periodically check your lights to ensure they are functioning properly. Replace any burnt-out bulbs promptly to maintain the overall brilliance of your display.
- Safety first: Remember to observe safety precautions when taking down the lights after the holiday season. Use caution when using ladders and store your lights properly for future use.
With these final steps, you have successfully completed the installation of your Christmas lights on the roof. Your hard work and attention to detail will bring joy and delight not only to your home but to the entire neighborhood. Sit back, relax, and enjoy the festive ambiance you have created. Happy holidays!
Conclusion
Decorating your roof with Christmas lights is a wonderful way to bring festive cheer and create a magical atmosphere during the holiday season. By following the steps outlined in this guide, you have learned how to safely and effectively hang your lights, from measuring and planning to connecting multiple strands. The key to a successful installation is combining creativity, attention to detail, and a focus on safety.
Before you begin, make sure to gather all the necessary tools and materials, and always prioritize safety by inspecting your lights, using a sturdy ladder, and following proper electrical guidelines. Taking the time to test your lights, attach clips or hooks securely, and string lights around rooftop features will result in a professional-looking display that will impress your neighbors and passersby.
Remember to connect multiple strands properly and finish by securing loose ends and setting the timing for your lights. Maintaining your lights throughout the holiday season and documenting your beautiful display will ensure that the joy and spirit of the season are shared with others.
Lastly, don’t forget to enjoy the fruits of your labor. Basking in the warm glow of your Christmas lights and the festive ambiance they bring is a reward in itself. So, gather your loved ones, sip hot cocoa, and take a moment to appreciate the magic you’ve created.
Wishing you a joyful, peaceful, and bright holiday season as you spread the holiday spirit with your stunning Christmas light display!
Frequently Asked Questions about How To Put Christmas Lights On Roof
Was this page helpful?
At Storables.com, we guarantee accurate and reliable information. Our content, validated by Expert Board Contributors, is crafted following stringent Editorial Policies. We're committed to providing you with well-researched, expert-backed insights for all your informational needs.


0 thoughts on “How To Put Christmas Lights On Roof”