
Articles
How To Put Up Drywall In Concrete Basement
Modified: December 7, 2023
Learn how to put up drywall in your concrete basement with our informative articles. Find step-by-step instructions and helpful tips to ensure a successful project.
(Many of the links in this article redirect to a specific reviewed product. Your purchase of these products through affiliate links helps to generate commission for Storables.com, at no extra cost. Learn more)
Introduction
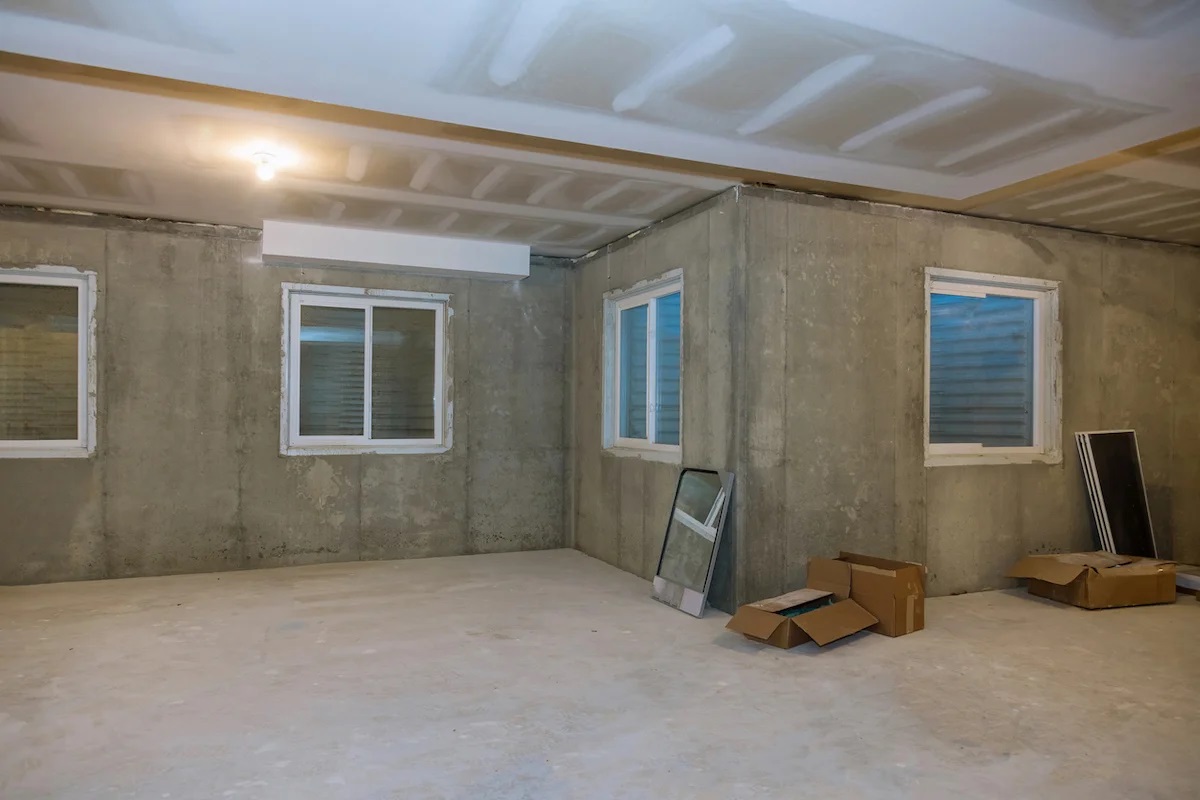
When it comes to remodeling or finishing a basement, one of the key steps is putting up drywall. Drywall not only serves as a protective barrier, but it also adds a clean and finished look to the space. However, if your basement has concrete walls, the process of installing drywall can be slightly different compared to traditional wood-framed walls.
In this article, we will guide you through the step-by-step process of putting up drywall in a concrete basement. We will cover everything from preparing the tools and materials to applying joint compound and finishing the walls for a professional look.
Before we begin, it’s important to note that working with concrete can be challenging. Concrete walls are typically uneven and require some additional preparation to ensure a successful installation. By following these steps, you can achieve a smooth and flawless drywall finish in your basement.
So, let’s get started with the first step: preparing the tools and materials.
Key Takeaways:
- Transform your concrete basement into a polished and professional space by following the step-by-step process of installing drywall. Achieve a flawless finish with patience, attention to detail, and proper maintenance.
- With the right tools, materials, and techniques, putting up drywall in a concrete basement is an achievable project. Enjoy the sense of accomplishment and a beautifully finished space for various activities.
Read more: How To Drywall A Basement Ceiling
Step 1: Prepare the Tools and Materials
Before you begin the process of installing drywall in your concrete basement, it’s essential to gather all the necessary tools and materials. Here’s a list of what you’ll need:
- Drywall sheets
- Measuring tape
- Pencil
- Utility knife
- T-square or straightedge
- Drywall screws
- Power drill or screw gun
- Masking tape
- Joint compound
- Joint tape
- Drywall sander or sanding sponge
- Primer
- Paint
- Paint roller or brush
Once you have gathered all the necessary tools and materials, it’s time to move on to the next step: measuring and cutting the drywall sheets.
Step 2: Measure and Cut Drywall Sheets
Accurate measurements and precise cuts are essential for a successful drywall installation. Before you begin cutting the drywall sheets, it’s crucial to take careful measurements of the area you will be covering.
Start by measuring the height and width of each section of the concrete wall where the drywall will be installed. Use a measuring tape to ensure accuracy, and mark the measurements with a pencil on the drywall sheets. It’s a good idea to label each piece with the corresponding wall section to avoid confusion later on.
Next, using a straightedge or T-square, draw a straight line across the drywall sheet based on your measurements. Use a utility knife to score the drywall along the line, applying gentle pressure. Once the score line is deep enough, you can carefully break the sheet along the score line and cut any remaining paper backing with the utility knife.
Repeat this process for each section of the concrete wall, ensuring that the drywall sheets fit snugly against each other and align properly with the corners and edges. If you encounter obstacles such as electrical outlets or vents, use a drywall saw to cut out the necessary openings.
Remember to wear safety glasses and gloves when cutting the drywall to protect yourself from any potential injuries. Once all the drywall sheets are accurately measured and cut, it’s time to move on to the next step: applying adhesive to the concrete walls.
Step 3: Apply Adhesive to the Concrete Walls
Applying adhesive to the concrete walls is an important step in ensuring that the drywall adheres properly and securely. This adhesive helps create a strong bond between the drywall and the concrete, preventing any potential movement or shifting over time.
Start by cleaning the concrete walls thoroughly to remove any dust, dirt, or debris. Use a broom or vacuum to sweep the surface, and wipe it down with a damp cloth to ensure a clean and smooth surface.
Next, choose an adhesive specifically designed for drywall installation on concrete surfaces. Follow the manufacturer’s instructions to prepare the adhesive. Typically, this involves mixing the adhesive with water to achieve the desired consistency and allowing it to set for a specific period.
Using a trowel or putty knife, apply a generous amount of adhesive to the back of each drywall sheet. Make sure to spread the adhesive evenly, covering the entire surface of the sheet. This will provide optimal adhesion and prevent any gaps or voids.
Position the first drywall sheet against the concrete wall, starting from one corner or edge. Press firmly against the wall, applying even pressure to ensure a strong bond. Use a level to check for straightness and adjust if necessary.
Continue applying adhesive and installing the remaining drywall sheets, ensuring a tight fit between each sheet. Take your time to align the edges and corners precisely, as any unevenness can affect the overall appearance of the finished wall.
Allow the adhesive to dry completely before moving on to the next step. The drying time may vary depending on the type of adhesive used, so refer to the manufacturer’s instructions for guidance.
With the drywall sheets securely adhered to the concrete walls, it’s time to proceed to the next step: installing the first drywall sheet.
Step 4: Install the First Drywall Sheet
Now that the adhesive has dried, it’s time to start installing the drywall sheets. Begin by positioning the first sheet in the desired location, starting from one corner or edge of the wall.
Ensure that the sheet is aligned properly with the adjacent walls and level using a carpenter’s level. Use shims or wedges if necessary to achieve a straight and even installation.
Once the sheet is in position, secure it to the concrete wall by driving drywall screws through the sheet and into the wall. Place the screws approximately 12 inches apart along the edges and corners of the sheet, and about 16 inches apart in the center. Be careful not to overtighten the screws, as this can damage the drywall.
Continue this process for the remaining sides of the first drywall sheet. Make sure that each screw is set slightly below the surface of the drywall without breaking the paper. This will allow for a smooth and seamless finish during the mudding and sanding process.
After securing the first sheet, double-check its alignment and levelness. If any adjustments are needed, gently tap the sheet with a hammer or use shims to make the necessary changes.
Repeat this step for the subsequent drywall sheets, ensuring that each sheet is tightly fitted against the previous one. Take the time to check for levelness and alignment on every sheet to ensure a professional-looking installation.
As you progress, make sure to leave a small gap, typically 1/8 inch, between each sheet to allow for expansion and contraction due to temperature and moisture changes.
With the first drywall sheet securely in place, you can now move on to the next step: securing the drywall with screws.
Read more: How To Put Electrical Box In Drywall
Step 5: Secure the Drywall with Screws
Now that all the drywall sheets are installed, it’s time to secure them to the concrete walls using screws. This step is crucial in ensuring the stability and longevity of your drywall installation.
Start by examining the drywall sheets to locate the studs or furring strips behind them. These are the vertical wooden frames or strips to which the drywall will be anchored.
Using a stud finder or tapping lightly on the walls, identify the location of the studs or furring strips. Mark their positions on the drywall surface, making it easier to know where to drive the screws.
Next, choose the appropriate length of drywall screws for your installation. Generally, 1 5/8-inch or 2-inch screws are suitable for securing drywall to concrete walls. Countersink the screws slightly below the surface of the drywall, ensuring that they are not over-tightened to avoid damaging the drywall.
Using a power drill or screw gun, drive the screws through the drywall and into the studs or furring strips. Place the screws about 8 to 12 inches apart along the edges and in the center of each stud or furring strip. Make sure to apply even pressure when driving the screws to maintain a flat and smooth surface.
Continue this process for each drywall sheet, securing them to the studs or furring strips behind the concrete walls. It’s essential to ensure that each screw is firmly anchored to provide a strong and stable installation.
As you secure the drywall with screws, be mindful to avoid overtightening them, as it can damage the drywall or cause it to crack. Aim to reach the right level of tightness where the screw heads are slightly recessed below the surface, allowing for a smooth finish.
With the drywall securely fastened to the concrete walls, you can now move on to the next step: filling in the gaps and joints with joint compound.
Before putting up drywall in a concrete basement, make sure to install a moisture barrier to prevent water damage. This will help protect the drywall and keep it in good condition for longer.
Step 6: Repeat the Process for Remaining Sheets
With the first drywall sheet securely installed and secured, it’s time to repeat the process for the remaining sheets. This step ensures that all the drywall sheets are properly aligned, level, and securely fastened to the concrete walls.
Start by positioning the next drywall sheet adjacent to the first one, making sure there is a small gap between them for expansion and contraction. Align the edges of the sheets properly, ensuring a seamless and even transition between them.
Check for levelness using a carpenter’s level and adjust as needed with shims or wedges. Once the sheet is in the desired position, follow the same steps as before to secure it with adhesive and screws.
Apply adhesive to the back of the sheet, spread it evenly, and press the sheet firmly against the concrete wall. Use drywall screws to secure the sheet to the studs or furring strips, placing them about 8 to 12 inches apart along the edges and in the center.
Repeat this process for each remaining drywall sheet, ensuring that they are tightly fitted against each other and fastened securely to the concrete walls. Take the time to carefully align the sheets, check for levelness and adjust if necessary.
As you work through the installation, periodically step back to assess the overall appearance and ensure that the seams between the sheets are aligned properly. Quality control is essential to achieve a professional and seamless finish.
Remember to maintain the gaps between the sheets for expansion and contraction, and countersink the screws slightly below the surface without damaging the drywall. Take your time and exercise caution to ensure a smooth and flawless installation of all the drywall sheets.
Once all the sheets are installed and secured, you can move on to the next step: filling in the gaps and joints with joint compound.
Step 7: Fill in the Gaps and Joints with Joint Compound
Now that all the drywall sheets are securely installed, it’s time to fill in the gaps and joints between them using joint compound. This step is crucial in creating a seamless and smooth surface, hiding any imperfections and ensuring a professional finish.
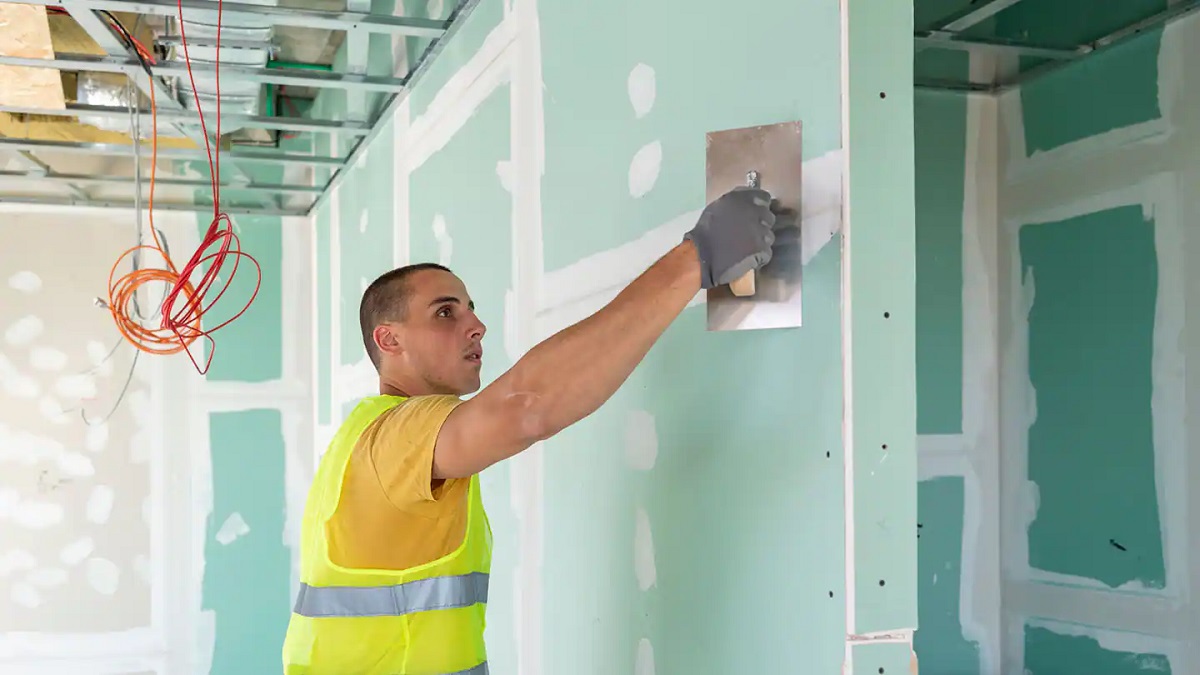
Start by applying a layer of joint compound, also known as mud, along the seams where the drywall sheets meet. Using a putty knife or drywall trowel, spread the compound evenly over the joints, covering them completely.
Press a strip of joint tape into the wet compound, ensuring that it is centered along the length of the joint. Smooth it out with the putty knife or trowel, removing any excess compound or air bubbles that may be trapped beneath.
Continue this process for all the joints between the drywall sheets, ensuring that each joint is properly covered with compound and tape. Take your time to ensure that the tape adheres well and lies flat against the surface.
Once the joints are covered and taped, apply a second layer of joint compound over the tape, extending it a few inches beyond the edges of the tape. Use a wider putty knife or trowel to feather the edges of the compound, blending it into the surrounding drywall surface.
Allow the first layer of joint compound to dry completely before moving on to the next step. This typically takes around 24 hours, but drying times may vary depending on the humidity and temperature of the room.
After the first layer is dry, lightly sand the surface with a drywall sander or sanding sponge to smooth out any ridges or imperfections. Be careful not to sand too aggressively to avoid damaging the drywall or removing too much compound.
Apply a second layer of joint compound, this time extending it past the edges of the first layer to further feather out the edges. Feathering is essential to create a seamless transition between the compound and the drywall surface.
Allow the second layer to dry completely and repeat the sanding process to achieve a smooth and even finish. Inspect the surface for any remaining imperfections and apply additional layers of joint compound as needed until the surface is perfectly smooth and free of visible seams.
With the gaps and joints filled in and the surface smoothed out, you’re ready for the next step: sanding the surface for a smooth finish.
Step 8: Sand the Surface for a Smooth Finish
After applying multiple layers of joint compound and allowing them to dry, it’s time to sand the surface to achieve a smooth and seamless finish. Sanding is a crucial step that helps eliminate any visible imperfections, rough edges, or ridges in the joint compound.
Start by using a drywall sander or sanding sponge with fine-grit sandpaper (around 120 to 150 grit) to gently sand the entire surface of the drywall. Use light and even pressure, moving the sander or sponge in circular motions or back and forth along the surface.
Avoid applying too much pressure or sanding too aggressively, as this can damage the drywall or create uneven surfaces. Be patient and take your time to ensure a smooth and even finish.
Pay extra attention to the areas where the joint compound was applied, such as the joints and the screw indentations. Sand these areas until they blend seamlessly with the rest of the drywall surface.
As you sand, periodically wipe away the dust and debris with a dry cloth or vacuum cleaner to keep the work area clean. This will allow you to better assess the progress and identify any areas that require additional sanding.
Once you’re satisfied with the smoothness of the surface, run your hand over it to feel for any remaining rough patches or imperfections. If needed, apply another thin layer of joint compound to these areas and repeat the sanding process until the surface is perfectly smooth and uniform.
Remember to wear a dust mask and safety goggles during the sanding process to protect yourself from inhaling dust particles and getting debris in your eyes.
With the surface sanded to perfection, you’re now ready for the next step: applying primer and paint for a finished look.
Read more: How Much Does It Cost To Drywall A Basement
Step 9: Apply Primer and Paint for a Finished Look
After all the hard work of installing and finishing the drywall, it’s time to apply primer and paint to achieve a polished and professional finish. Primer prepares the surface for paint, ensuring better adhesion while also helping to hide imperfections and create a smooth base.
Start by selecting a high-quality primer specifically designed for drywall surfaces. Choose a primer that is appropriate for the type of paint you plan to use, whether it’s latex or oil-based.
Using a roller or brush, apply an even coat of primer to the entire surface of the drywall, focusing on the joints and any repaired areas. Make sure to cover the surface thoroughly, working in smooth and even strokes.
Allow the primer to dry according to the manufacturer’s instructions. This usually takes around 24 hours, but drying times can vary depending on factors such as humidity and temperature.
Once the primer is dry, it’s time to apply the paint of your choice. Select a paint color and finish that suits your aesthetic preferences and the overall design of the space. For a basement, it’s often recommended to choose lighter shades to brighten the area.
Using a roller or brush, apply the paint in smooth and even strokes, working from top to bottom and left to right. Apply multiple coats of paint as needed, allowing each coat to dry completely before applying the next.
Pay attention to detail while painting, ensuring that you cover all areas evenly and avoid leaving drips or streaks. Take your time and maintain a consistent application technique for a flawless finish.
Once the final coat of paint is dry, step back and admire the beautifully finished drywall in your concrete basement. The application of primer and paint not only adds aesthetic appeal but also protects the drywall and enhances its durability.
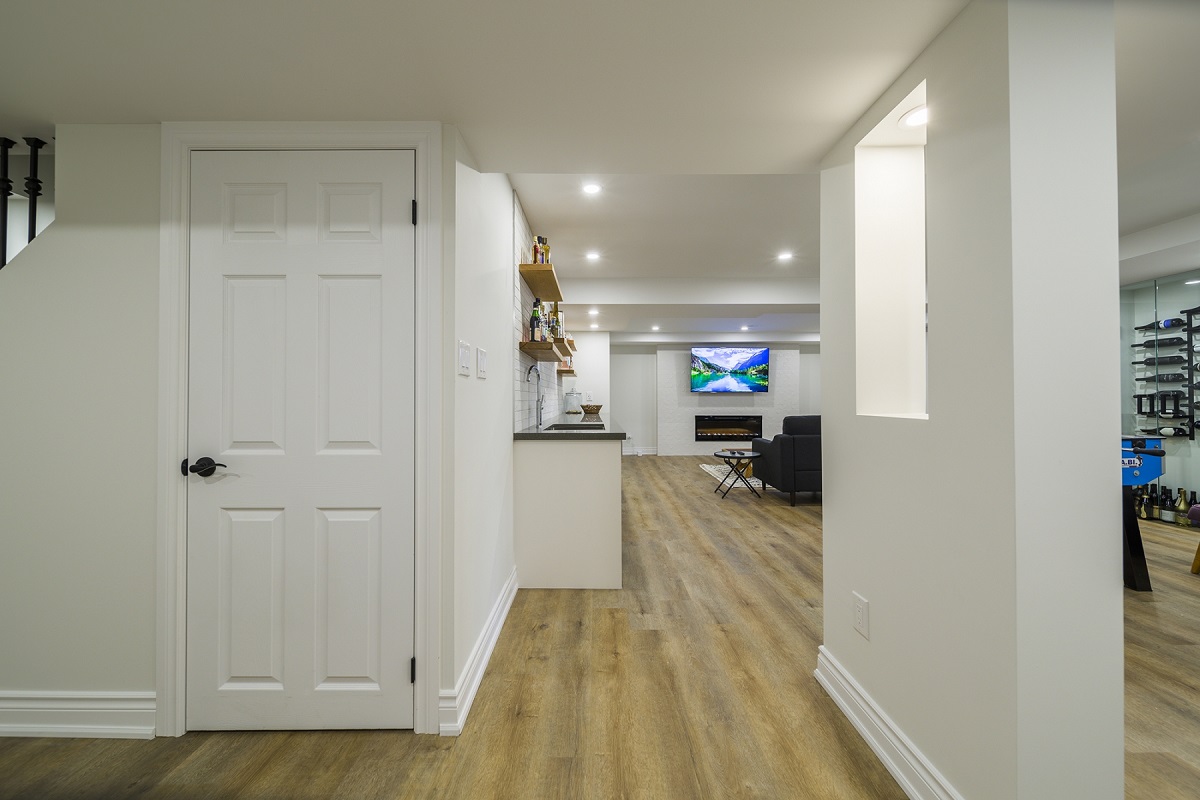
Congratulations! You have successfully completed the process of putting up drywall in your concrete basement. The space is now transformed into a clean and inviting area that can be enjoyed for years to come.
Remember to clean and properly maintain the drywall surface regularly to keep it looking fresh and in top condition. With proper care, your newly installed drywall will continue to enhance your basement and provide a functional and attractive space for various activities.
Enjoy your newly finished basement and the sense of accomplishment that comes with a job well done!
Conclusion
Putting up drywall in a concrete basement can be a challenging task, but with the right tools, materials, and techniques, it is an achievable project that can transform your space. By following the step-by-step process outlined in this article, you can successfully install drywall and create a polished and professional finish.
From preparing the tools and materials to measuring, cutting, and installing the drywall sheets, each step plays a vital role in the overall success of the project. Applying adhesive, securing the drywall with screws, filling in gaps and joints with joint compound, and sanding the surface are all critical steps that contribute to a seamless and smooth finish.
Applying primer and paint is the final touch to complete the drywall installation, providing a beautiful and finished look to your concrete basement. Choose a color and finish that best suits your style and complements the overall design of the space.
Remember, patience and attention to detail are key throughout the entire process. Take your time, measure accurately, and ensure proper alignment and levelness of the drywall sheets. Carefully follow the manufacturer’s instructions for adhesive, joint compound, primer, and paint to achieve the best results.
With a well-executed drywall installation, your basement will be transformed into a functional and inviting space. Whether you’re creating a recreation area, a home office, or an entertainment room, the newly finished drywall will provide a clean and polished canvas for your designs and decor.
Now that you have acquired the knowledge and understanding of how to put up drywall in a concrete basement, you can confidently tackle this project and enjoy the satisfaction of a job well done. With proper installation and maintenance, your drywall will stand the test of time, enhancing the aesthetics and value of your home.
So, roll up your sleeves, gather the necessary tools, and let your creativity flow as you bring your vision to life with the installation of drywall in your concrete basement.
Frequently Asked Questions about How To Put Up Drywall In Concrete Basement
Was this page helpful?
At Storables.com, we guarantee accurate and reliable information. Our content, validated by Expert Board Contributors, is crafted following stringent Editorial Policies. We're committed to providing you with well-researched, expert-backed insights for all your informational needs.


0 thoughts on “How To Put Up Drywall In Concrete Basement”