Home>Articles>How To Install Vinyl Flooring On Concrete Basement

Articles
How To Install Vinyl Flooring On Concrete Basement
Modified: August 28, 2024
Learn how to install vinyl flooring on a concrete basement with our informative articles. Transform your space with this durable and stylish flooring option.
(Many of the links in this article redirect to a specific reviewed product. Your purchase of these products through affiliate links helps to generate commission for Storables.com, at no extra cost. Learn more)
Introduction
When it comes to renovating your basement, installing vinyl flooring on concrete can be a cost-effective and practical choice. Vinyl flooring is not only durable and easy to maintain, but it also adds a touch of elegance to your basement space. Whether you’re planning to turn your basement into a cozy family room, a home office, or even a home gym, vinyl flooring can transform the space into something truly remarkable.
In this article, we’ll guide you through the process of installing vinyl flooring on a concrete basement. From preparing the concrete surface to laying down the vinyl planks, we’ll cover all the necessary steps to ensure a successful installation. So, roll up your sleeves and let’s get started!
Before we dive into the installation process, it’s important to note that proper preparation is key. Take the time to assess the condition of your concrete basement and make any necessary repairs or adjustments before moving forward. This will ensure a stable and level surface for the vinyl flooring installation.
Additionally, it’s crucial to acclimate your vinyl flooring to the environment in which it will be installed. Vinyl flooring can expand or contract with temperature and humidity changes, so allowing it to adjust to the room’s conditions will help prevent any issues down the line.
Now that you have a brief overview of what to expect, let’s dive into the specifics of installing vinyl flooring on a concrete basement.
Key Takeaways:
- Proper preparation is essential when installing vinyl flooring on a concrete basement. From cleaning and leveling the surface to acclimating the vinyl planks, attention to detail ensures a successful and long-lasting installation.
- The finishing touches, such as reinstalling baseboards and trim, adding thresholds, and incorporating decorative trims, elevate the overall look and functionality of a concrete basement with vinyl flooring. These details create a polished and inviting space.
Read more: How Thick Is Basement Concrete Floor
Preparing the Concrete Basement
Before you start installing vinyl flooring, it’s important to properly prepare the concrete basement. This will ensure that the surface is clean, smooth, and free from any imperfections that could affect the installation.
The first step in preparing the concrete basement is to remove any existing flooring, baseboards, or trim. Use a pry bar or a crowbar to gently lift and remove these items. Be careful not to damage the walls or the flooring in the process.
Once you’ve cleared the space, thoroughly clean the concrete surface. Sweep away any dust, dirt, or debris, and use a shop vacuum to remove any loose particles. You can also use a mild detergent and warm water to scrub the surface and remove any stubborn stains or grime. Allow the floor to dry completely before moving on to the next step.
Next, it’s important to check the levelness of the concrete. Uneven surfaces can cause issues with the vinyl flooring installation and may need to be addressed. Use a long level or a straight edge to check for any high or low spots. If you notice any areas that are significantly uneven, you may need to consider leveling the floor using a self-leveling compound. Consult the manufacturer’s instructions for the specific product you choose, as application techniques may vary.
After leveling the floor, it’s time to inspect the concrete for any cracks or imperfections. Fill in any cracks or gaps with a concrete patching compound and smooth it out with a trowel. Follow the instructions on the product for drying times and additional steps, if necessary.
Lastly, it’s a good idea to apply a concrete primer to the surface. A primer will create a better bond between the concrete and the vinyl flooring and help prevent any moisture-related issues. Follow the manufacturer’s instructions for the specific primer you choose, as application methods may vary. Allow the primer to dry completely before moving on to the next steps in the installation process.
By properly preparing the concrete basement, you’ll create an ideal foundation for the vinyl flooring. This will ensure a smooth and long-lasting installation.
Acclimating the Vinyl Flooring
One crucial step in the installation process of vinyl flooring on a concrete basement is acclimating the vinyl planks to the room’s environment. Vinyl flooring can expand or contract with temperature and humidity changes, so allowing it to adjust to the room’s conditions is essential to prevent any issues.
Start by unpacking the vinyl flooring planks and removing any packaging materials. Place the planks in the room where they will be installed. It’s important to leave them in this space for at least 48 hours to acclimate. This will give the vinyl planks time to adjust to the temperature and humidity of the room, ensuring that they won’t expand or contract after installation.
During the acclimation period, it’s crucial to keep the room’s temperature and humidity at their typical levels. This will provide a more accurate representation of the conditions the vinyl planks will experience after installation. Avoid exposing the planks to extreme temperatures, such as direct sunlight or heating vents. Also, ensure that there are no excessive moisture issues in the room, as this can affect the performance and longevity of the vinyl flooring.
While the vinyl planks are acclimating, take the time to inspect them for any noticeable defects or damages. Check each plank for any scratches, dents, or color variations that may have occurred during manufacturing or transportation. It’s better to address any issues before installation rather than finding them during the process.
By acclimating the vinyl flooring planks, you’re providing them with the opportunity to adjust to the room’s conditions. This will minimize the risk of any future warping or buckling and ensure a smooth and seamless installation.
Removing Baseboards and Trim
Before you proceed with installing vinyl flooring on a concrete basement, it’s essential to remove the baseboards and trim. Removing these items will create a clean and seamless transition between the flooring and the walls.
Start by carefully examining the baseboards and trim to determine the best approach for removal. In most cases, baseboards are nailed or glued to the walls, while trim may be held in place with nails or screws. Use a putty knife or a small pry bar to gently loosen the baseboards or trim from the wall, starting from one end and working your way along the length.
If the baseboards are painted, scoring the painted caulk line along the top edge with a utility knife can help prevent any paint peeling off the wall during removal. Be cautious not to dig into the drywall when scoring.
Once the baseboards or trim are loosened, carefully pry them away from the wall using a pry bar or a crowbar. Take your time to avoid damaging the drywall or the baseboard itself. If necessary, use a small block of wood between the pry bar and the wall to distribute the pressure and minimize any impact.
As you remove the baseboards or trim, mark them accordingly, ensuring you know where each piece belongs for reinstallation later. You may find it helpful to label them with a small piece of painter’s tape and a corresponding number or letter.
After removal, set the baseboards or trim aside in a safe and organized manner. Inspect them for any damage, such as chips or cracks, and take note of any pieces that may need repairing or replacing.
Removing baseboards and trim before installing vinyl flooring on a concrete basement not only creates a cleaner and more professional look but also allows for easier installation of the vinyl planks. It provides a clear and open space to work with, ensuring a seamless and visually appealing end result.
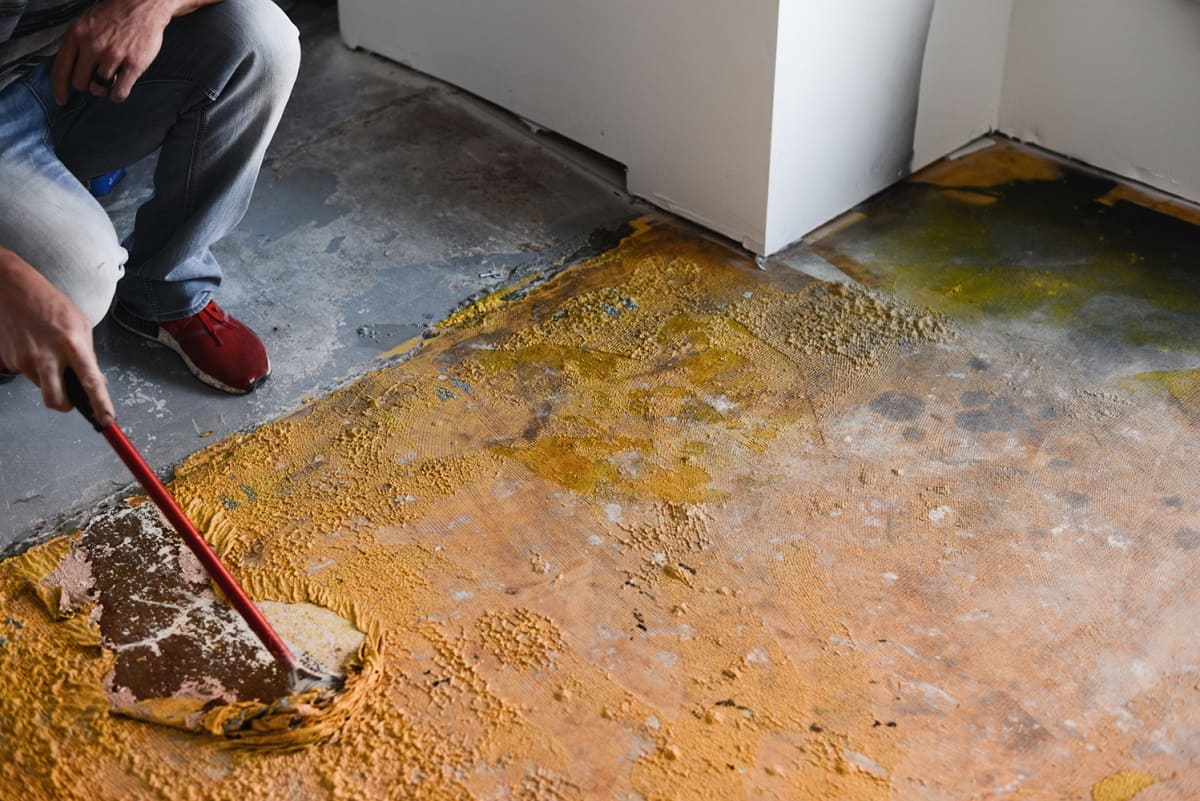
Cleaning and Leveling the Concrete Surface
Once you’ve removed the baseboards and trim, the next step in preparing the concrete surface for vinyl flooring installation is to thoroughly clean and level it. This is crucial to ensure a smooth and stable foundation for the vinyl planks.
Start by sweeping or vacuuming the entire concrete surface to remove any loose dust, dirt, or debris. Pay close attention to corners and edges where dirt may accumulate. After removing the larger particles, use a damp mop or cloth to wipe down the surface, removing any remaining dust or dirt.
If there are any stubborn stains or spills on the concrete, you may need to use a mild detergent or a concrete cleaner to remove them. Follow the manufacturer’s instructions for the specific product you choose, and make sure to rinse the area thoroughly with clean water afterwards.
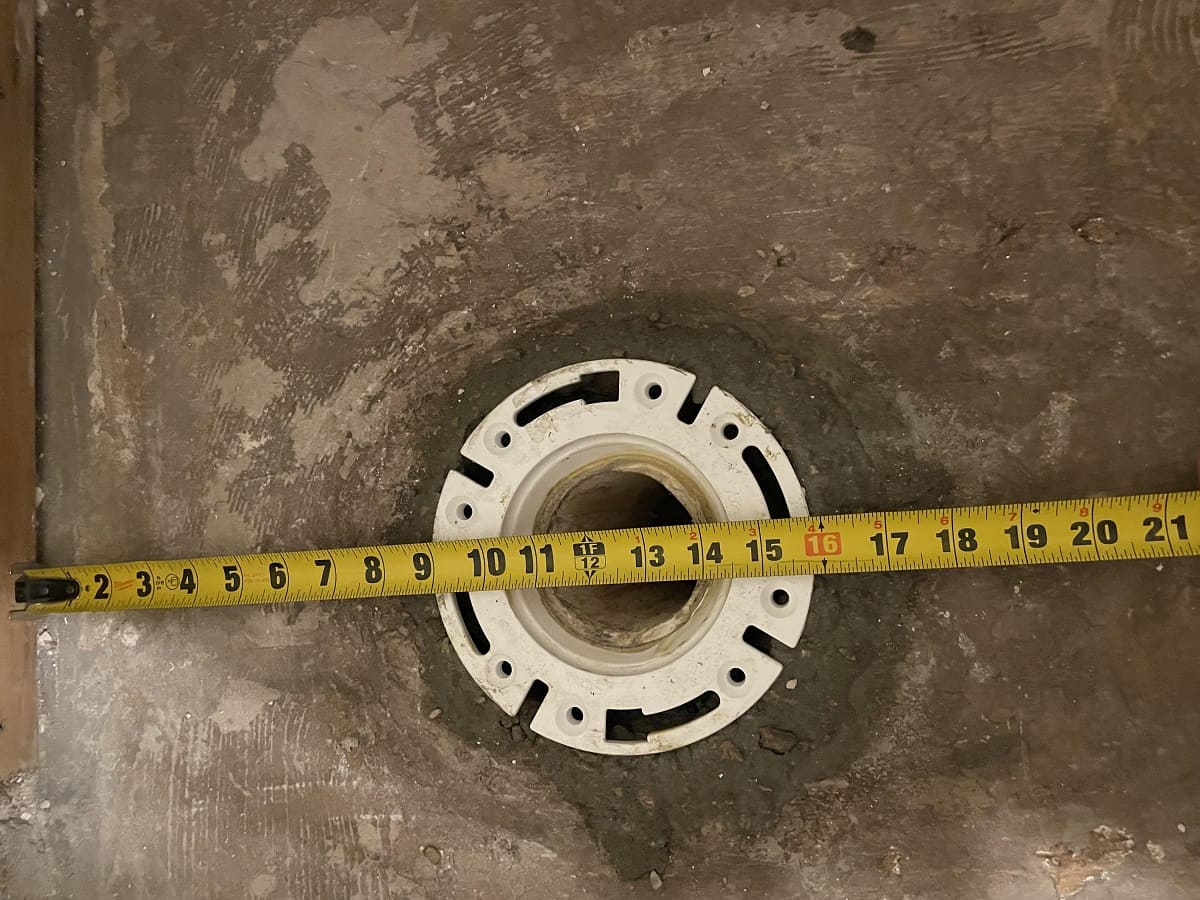
Once the surface is clean, it’s time to assess and address any unevenness in the concrete. Use a long level or a straight edge to check for any high or low spots. You may also want to use a measuring tape to measure the deviations in height.
If you notice any significant unevenness or areas where the floor slopes, you may need to level the surface using a self-leveling compound. Choose a high-quality self-leveling compound suitable for use on concrete, following the manufacturer’s instructions for mixing and application.
Prior to applying the self-leveling compound, it’s essential to prime the concrete surface. This will promote better adhesion and ensure a successful leveling process. Follow the manufacturer’s instructions for the specific primer you choose, and allow it to dry completely before proceeding with the application of the self-leveling compound.
When applying the self-leveling compound, pour it onto the low areas of the floor and use a trowel or a float to spread it evenly. Work quickly, as the compound will begin to set within a short period of time. Follow the manufacturer’s instructions regarding drying time and any additional steps required.
By thoroughly cleaning and leveling the concrete surface, you’re creating an optimal base for the vinyl flooring installation. This will ensure a stable and even floor, leading to a seamless and long-lasting result.
Read more: How To Install Vinyl Floor
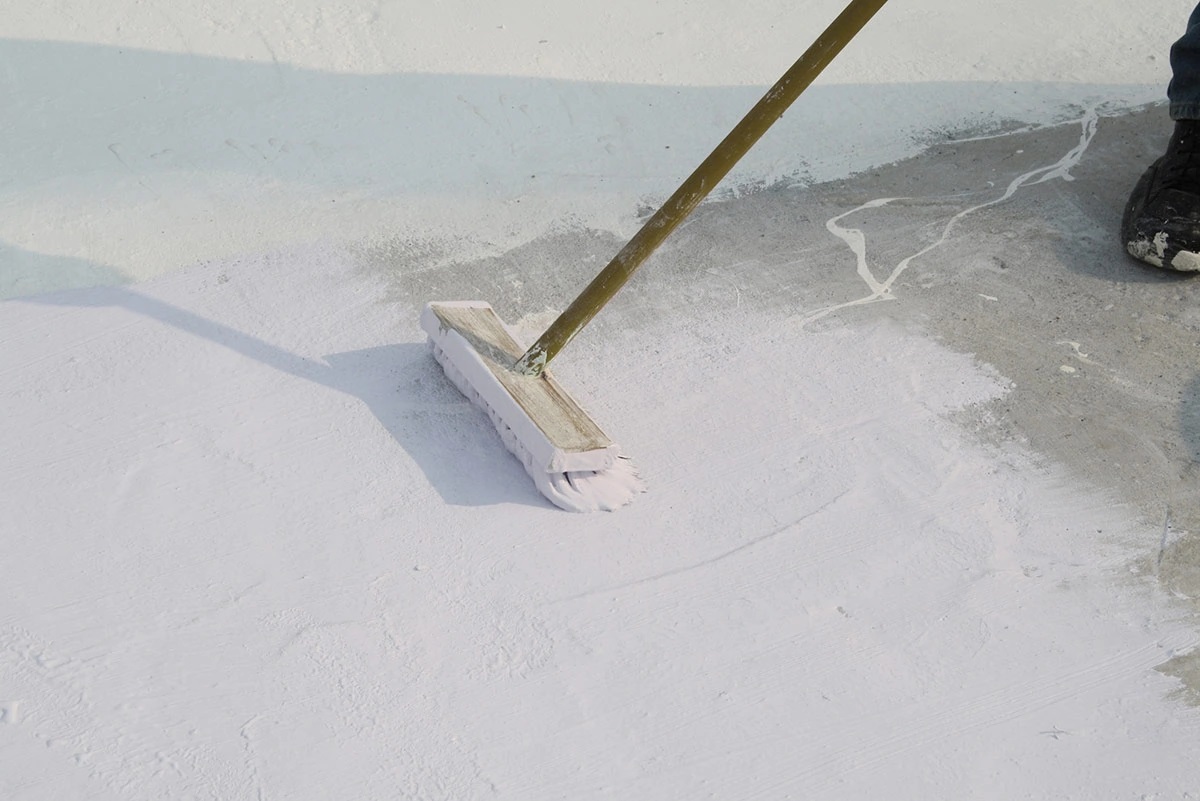
Applying a Primer
Before installing vinyl flooring on a concrete basement, it’s important to apply a primer to the surface. A primer helps create a better bond between the concrete and the vinyl flooring, improving the overall installation and long-term durability.
Start by selecting a high-quality primer that is specifically designed for use on concrete. Make sure to choose a primer that is compatible with your chosen vinyl flooring and follow the manufacturer’s instructions for proper application.
Prior to applying the primer, thoroughly clean the concrete surface to remove any dust, dirt, or debris. Sweep or vacuum the floor to remove loose particles, and use a mild detergent or concrete cleaner to eliminate any stubborn stains or spills. Rinse the area with clean water and allow it to dry completely.
Once the concrete surface is clean and dry, it’s time to apply the primer. Pour the primer into a paint tray and use a paint roller or a brush to apply an even coat to the floor. Work in small sections, making sure to cover the entire surface. Pay extra attention to the edges and corners of the room.
Be sure to follow the manufacturer’s instructions regarding drying time and any additional coats that may be required. It’s important to allow the primer to dry completely before proceeding with the vinyl flooring installation.
Applying a primer to the concrete surface serves several purposes. Firstly, it helps seal the concrete, preventing any moisture or water vapor from penetrating through and causing issues with the vinyl flooring. Secondly, it improves adhesion, ensuring that the vinyl flooring will bond securely to the concrete. Lastly, it helps create a smooth and uniform surface, allowing for a more seamless installation.
By taking the time to apply a primer to the concrete surface, you’re setting the stage for a successful vinyl flooring installation in your basement.
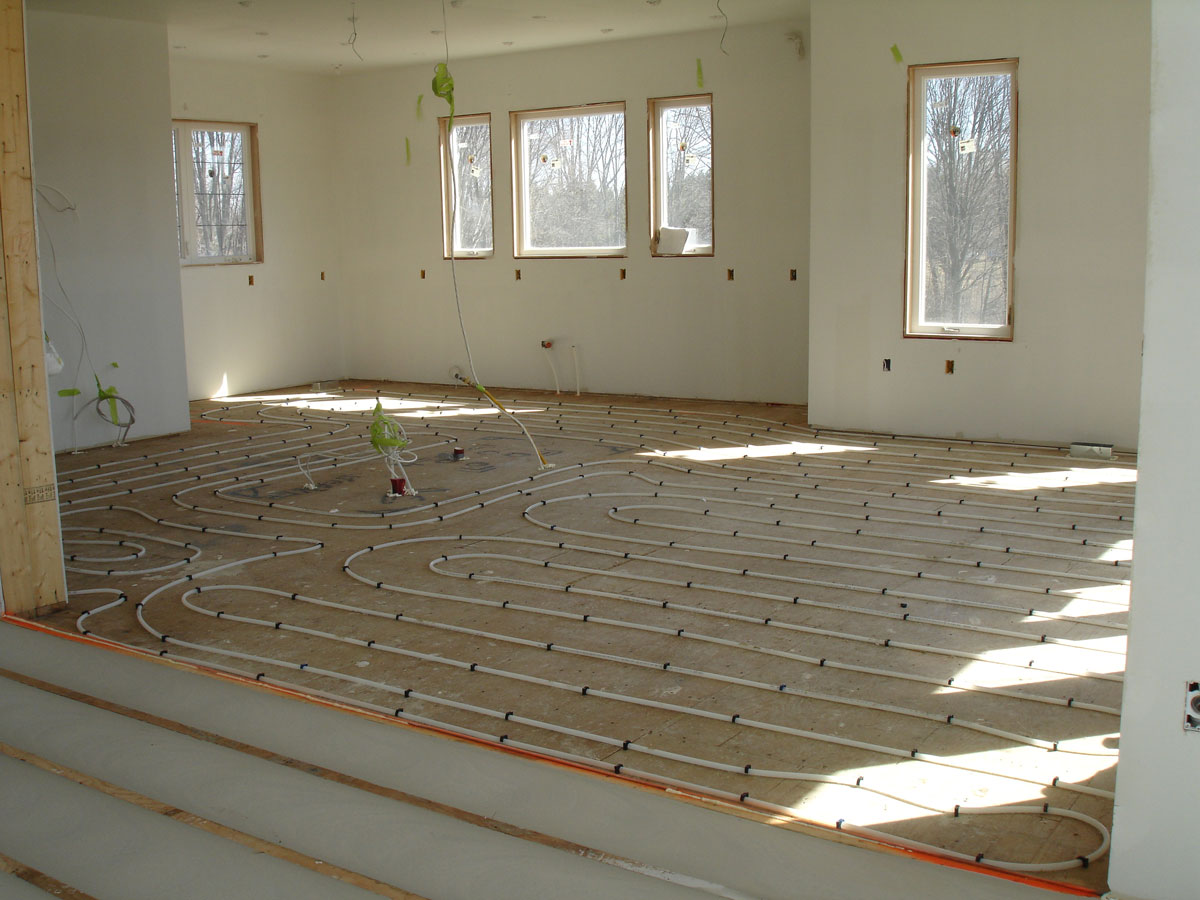
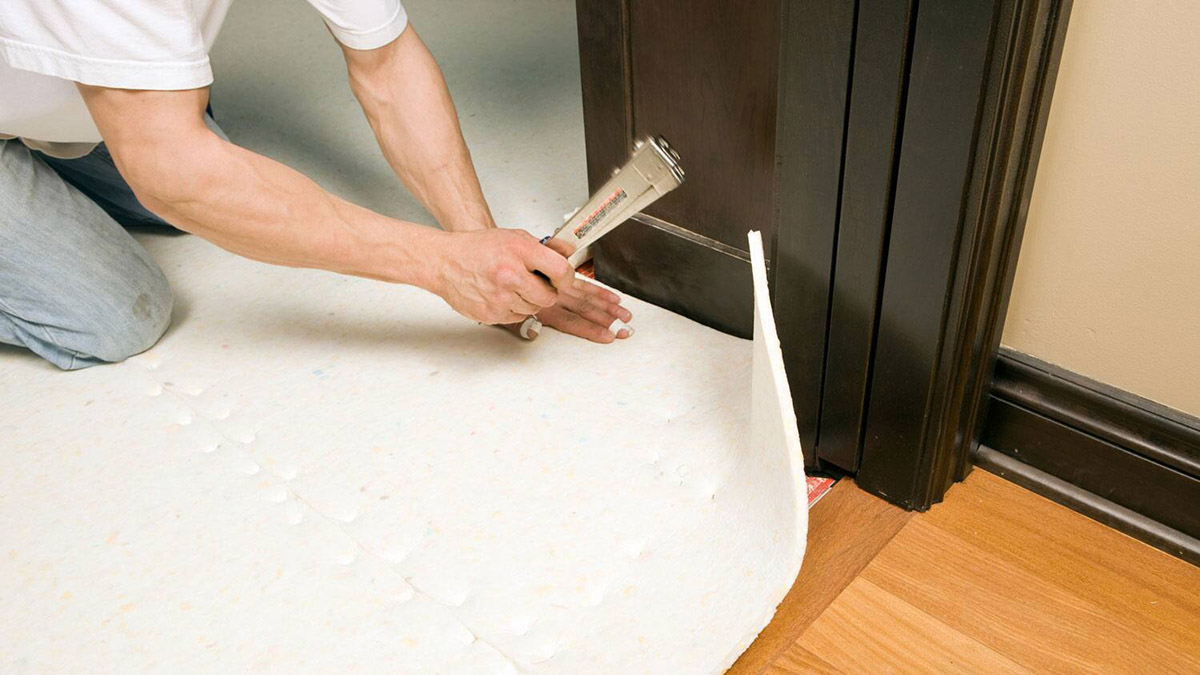
Laying the Vapor Barrier
Before proceeding with the installation of vinyl flooring on a concrete basement, it is essential to lay down a vapor barrier. A vapor barrier acts as a moisture barrier, preventing any water vapor from seeping up through the concrete and affecting the vinyl flooring.
Start by selecting a high-quality vapor barrier specifically designed for use under vinyl flooring. It is important to choose a vapor barrier that is durable, moisture-resistant, and compatible with the specific type of vinyl flooring you have chosen.
Begin by thoroughly cleaning the concrete surface to remove any dust, dirt, or debris. Sweep or vacuum the floor to eliminate loose particles and ensure a clean working surface.
Next, roll out the vapor barrier across the entire floor, allowing it to overlap the edges of the room by a few inches. It is crucial to ensure that the vapor barrier covers the entire floor and any seams are properly overlapped and sealed.
Use a utility knife to trim excess vapor barrier along the edges of the room, making sure to leave a small gap between the vapor barrier and the walls. This gap will allow for expansion of the vinyl flooring as needed.
If the vapor barrier has any seams, use a vapor barrier tape or adhesive to seal them securely. This will prevent any moisture from seeping through the seams and reaching the concrete surface.
Once the vapor barrier is in place, take the time to inspect it for any tears or punctures. These should be repaired immediately to ensure the integrity of the moisture barrier.
It is important to note that the installation of a vapor barrier may differ depending on the specific requirements and recommendations of the vinyl flooring manufacturer. Be sure to follow their guidelines to ensure proper installation and to maintain any warranty coverage.
Laying a vapor barrier is a crucial step in installing vinyl flooring on a concrete basement. It helps protect the flooring from moisture-related issues, ensuring a long-lasting and problem-free installation.
Before installing vinyl flooring on a concrete basement, make sure the surface is clean, dry, and level. Use a moisture barrier to prevent any moisture from seeping through the concrete and damaging the vinyl.
Measuring and Cutting the Vinyl Flooring
Once you’ve prepared the concrete basement and laid the vapor barrier, it’s time to move on to the exciting step of measuring and cutting the vinyl flooring. Proper measurements and precise cutting are essential to ensure a seamless and professional-looking installation.
Start by gathering the necessary tools for this task, including a measuring tape, a straight edge, and a utility knife. It’s also a good idea to have extra vinyl planks on hand in case of mistakes or miscalculations.
Begin by measuring the length and width of the room to determine the dimensions of the vinyl planks needed. Measure from wall to wall, accounting for any protrusions or obstacles on the floor. Remember to include a small gap between the vinyl flooring and the walls to allow for expansion.
When measuring, it’s important to account for any irregularities or angles in the room. Use a straight edge to measure and mark any areas that require special attention, such as corners, doorways, or odd-shaped spaces.
Once you have the measurements, transfer them onto the vinyl planks. Use a pencil or a marker to mark the dimensions on the backside of the planks, ensuring that the markings are visible and accurate.
When it comes to cutting the vinyl planks, it’s crucial to use proper technique and caution. Place the plank on a flat and stable surface, such as a workbench or sturdy table. Use a straight edge as a guide and carefully cut along the marked line using a sharp utility knife.
For straight cuts, apply firm and even pressure to guide the knife through the plank. Be sure to make multiple passes if needed, rather than attempting to cut through the plank in one stroke. This will help achieve a cleaner and more precise cut.
For more intricate cuts, such as around corners or protrusions, you may need to use a jigsaw or a specialized vinyl cutting tool. Follow the manufacturer’s instructions for these tools and take the time to practice on a spare piece of vinyl before tackling the actual installation.
As you cut the vinyl planks, organize them according to their intended placement in the room. Consider creating a layout plan to help you visualize the installation and ensure a smooth flow between the planks.
Remember to work slowly and carefully when measuring and cutting the vinyl flooring. You can always trim off small portions if needed, but it’s challenging to add material back once it’s been cut. Take your time, double-check your measurements, and strive for accuracy to achieve a flawless vinyl flooring installation.
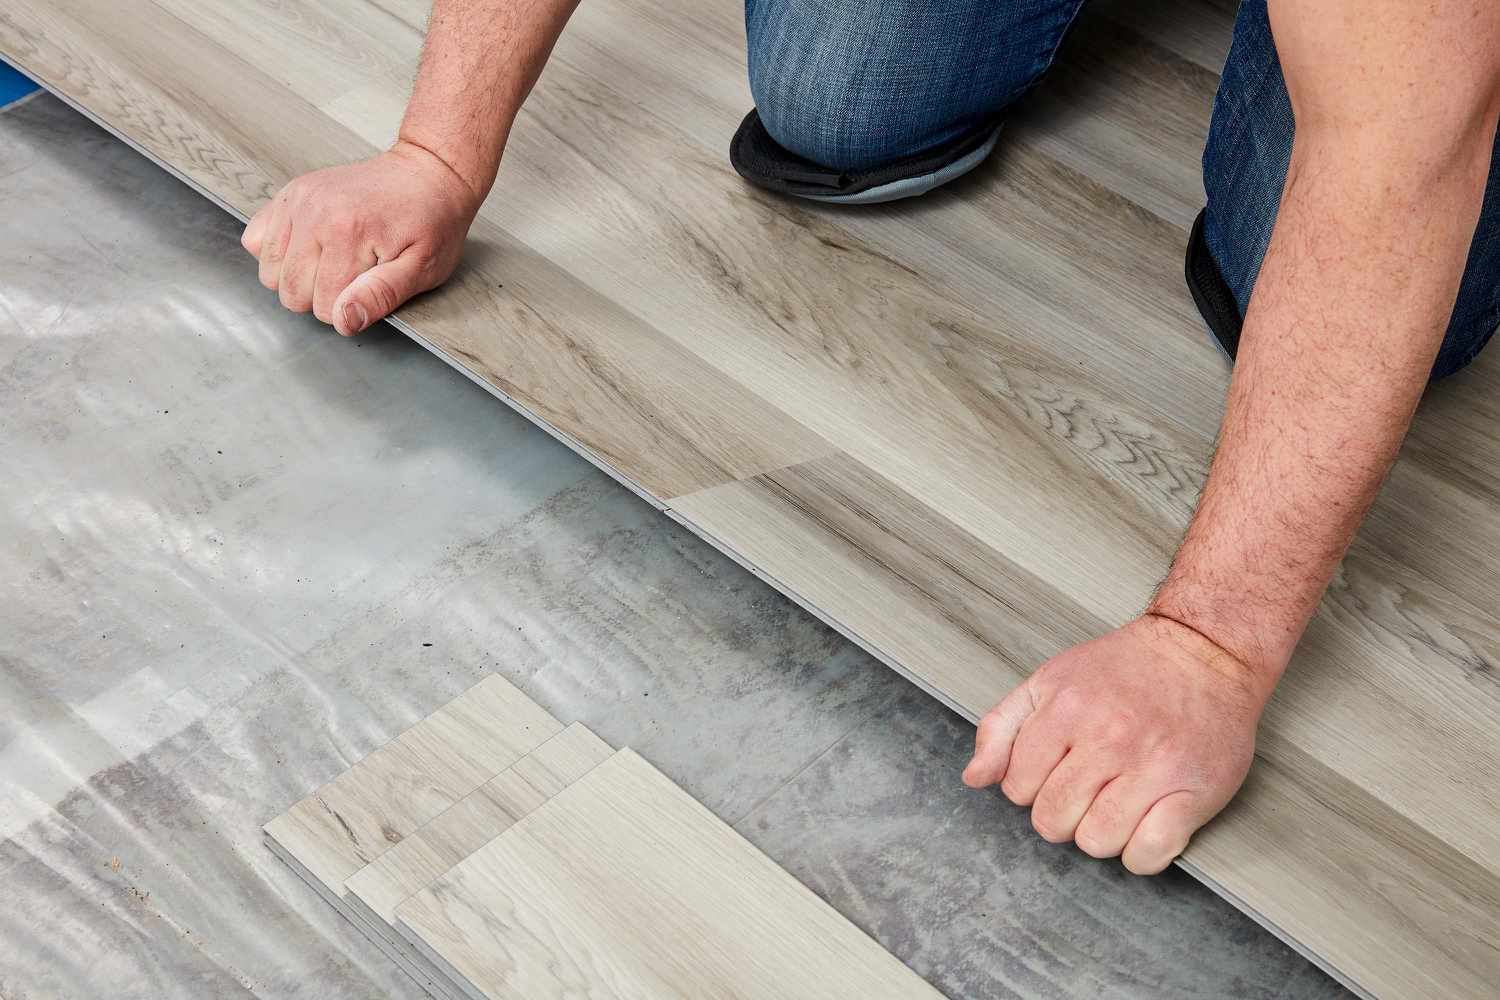
Installing the First Row of Vinyl Planks
Now that you’ve measured and cut the vinyl flooring, it’s time to start the actual installation process. The first row of vinyl planks is crucial, as it sets the foundation for the rest of the flooring. Follow these steps to install the first row of vinyl planks in your concrete basement.
1. Begin by selecting the straightest edge of the room as your starting point. This will ensure that your first row of planks is aligned and straight. Use a chalk line or a straight edge to create a guideline along this edge.
2. Apply a thin, even layer of adhesive specifically designed for vinyl flooring to the backside of the first plank. Follow the manufacturer’s instructions for the adhesive, as application methods may vary. Avoid applying too much adhesive, as it can seep out from between the planks and create a messy installation.
3. Place the adhesive-coated side of the first plank against the starting edge of the room, aligning it with the guideline you created. Press firmly to ensure good adhesion and a secure bond with the concrete surface.
4. Continue this process, adding more planks next to the first one. Slide each plank tightly against the previous one, connecting the tongue and groove edges. Be sure to stagger the end joints of the planks to create a more natural and visually appealing look.
5. As you work, periodically use a tapping block and a rubber mallet to ensure a tight fit between the planks. This will help eliminate any gaps or unevenness along the seams.
6. Repeat this process until you have installed the first row of vinyl planks along the entire starting edge of the room. Take your time to ensure that the planks are securely attached to the concrete surface and properly aligned with the guideline.
7. Finally, use a utility knife to trim the last plank in the first row to fit, leaving a small gap between the plank and the wall for expansion. Measure and mark the plank, then cut along the marked line with the utility knife.
By following these steps, you will successfully install the first row of vinyl planks in your concrete basement. This sets the stage for the rest of the installation, ensuring a solid and professional-looking finished product.
Read more: How To Finish Concrete Basement Floor
Installing the Rest of the Vinyl Planks
With the first row of vinyl planks in place, it’s time to continue the installation process by adding the rest of the planks to complete your concrete basement. Follow these steps to ensure a smooth and seamless installation:
1. Start by preparing the next row of vinyl planks. Measure and cut the first plank of the row to fit, leaving a small gap for expansion. Remember to stagger the end joints, so they do not align with the joints in the first row.
2. Apply adhesive to the backside of the first plank in the second row, following the manufacturer’s instructions. Align the plank with the edges of the first row and press it firmly in place. Use a tapping block and a rubber mallet to ensure a tight fit.
3. Continue adding planks to the second row, connecting them to each other by sliding the tongue and groove edges together. Use the tapping block and mallet as necessary to ensure a snug fit. Check periodically with a level to ensure the planks are level and properly aligned.
4. Repeat the process of measuring, cutting, and installing planks row by row until you reach the final row. Remember to leave a small gap between the planks and the walls for expansion.
5. If necessary, trim the last row of planks to fit using a utility knife, making precise cuts along the marked lines. Take your time and ensure the cuts are accurate.
6. As you work on each row, periodically check the adhesive and clean away any excess adhesive that may have seeped out between the planks. Use a damp cloth or sponge to remove the adhesive before it dries.
7. Once all the planks are installed, use a floor roller to go over the entire surface. This helps ensure good adhesion and proper bonding of the vinyl planks to the concrete basement floor.
By following these steps and taking your time, you will successfully install the rest of the vinyl planks in your concrete basement. Pay attention to detail and accuracy, as it will contribute to a beautifully finished flooring.
Trimming and Fitting the Vinyl Flooring
Trimming and fitting the vinyl flooring is the final step in the installation process. This step ensures that the flooring fits perfectly into any corners, around obstacles, and against walls or doorways. Here’s how you can achieve a professional finish by trimming and fitting the vinyl flooring:
1. Start by measuring the space where the vinyl flooring needs to be trimmed or fitted. Use a measuring tape to accurately determine the dimensions and mark them on the backside of the vinyl plank.
2. Place the plank on a stable surface and use a straight edge as a guide to make the necessary cuts. A sharp utility knife is suitable for most straight cuts, while more intricate cuts may require the use of a jigsaw or specialized vinyl cutting tool.
3. Take your time when making cuts and ensure they are precise. It’s better to make multiple passes with the knife or use a slow and steady cutting motion to achieve clean and accurate cuts.
4. When fitting the vinyl flooring around corners or obstacles, create a template using paper or cardboard. Hold the template against the area that needs to be cut and trace the shape onto the backside of the vinyl plank. Then, carefully cut along the traced lines.
5. As you trim and fit the vinyl flooring, be mindful of leaving a small gap between the flooring and the walls or other fixed structures. This expansion gap allows the flooring to naturally expand and contract with changes in temperature and humidity.
6. Once the vinyl flooring is trimmed and fitted, place it into position and ensure a proper fit. Use a tapping block or a rubber mallet to gently tap the planks into place, ensuring they are snug and secure.
7. Verify that all seams are well-aligned and that the flooring sits flush against any obstacles or corners. Make any necessary adjustments to achieve a seamless and professional finish.
Taking the time to trim and fit the vinyl flooring properly will ensure a polished and visually pleasing result. Remember to work slowly and carefully, double-check your measurements, and make precise cuts to achieve the best outcome.
Reinstalling Baseboards and Trim
Once the vinyl flooring has been successfully installed, the final step is to reinstall the baseboards and trim. This step will give the flooring a finished and polished look while also covering any gaps or edges along the walls. Follow these steps to reinstall the baseboards and trim:
1. Start by inspecting the baseboards and trim to ensure they are in good condition. If any pieces are damaged or need repair, now is the time to address them. Fill any nail holes or cracks with wood putty and allow it to dry. Sand the surface if necessary to achieve a smooth finish.
2. Before reinstalling the baseboards and trim, ensure that they are clean and free from any dirt or debris. Wipe them down with a damp cloth to remove any dust that may have accumulated during the installation process.
3. Begin by reinstalling the baseboards. Place them against the wall, aligning them with their original positions. If needed, use a level to ensure they are straight. Secure the baseboards to the wall using finishing nails or a brad nailer. Position the nails along the top edge of the baseboard, ensuring they penetrate into the wall studs.
4. As you reinstall the baseboards, take care to cover any expansion gaps left around the perimeter of the vinyl flooring. The baseboards should slightly overlap the flooring to provide a seamless transition and hide any imperfections.
5. After the baseboards are in place, reinstall the trim. This may include door trim, window trim, or any other decorative trim pieces that were previously removed. Again, align the trim with its original position, using a level if necessary, and secure it to the wall using finishing nails or a brad nailer.
6. Once the baseboards and trim are securely in place, fill any nail holes or small gaps with wood putty. Use a putty knife to smoothing it over the surface, ensuring it blends seamlessly with the surrounding material.
7. Lastly, if desired, paint or stain the baseboards and trim to match the overall aesthetic of the room. This will provide a cohesive and finished look to the entire space.
By reinstalling the baseboards and trim, you are completing the final touches of the vinyl flooring installation. This step adds a clean and professional finish to the room, enhancing the overall appearance of your concrete basement.
Finishing Touches
With the vinyl flooring installed and the baseboards and trim reinstalled, you’re almost done with your concrete basement transformation. However, there are a few additional finishing touches you can add to enhance the overall look and functionality of the space. Here are some ideas to consider:
1. Thresholds/Transitions: Install thresholds or transition strips at doorways or where the vinyl flooring meets other types of flooring, such as carpet or tile. This will provide a smooth and seamless transition between different rooms or areas of your basement.
2. Floor Mats/Rugs: Consider adding floor mats or rugs to certain areas of the basement to add warmth, comfort, and a pop of color. Make sure to choose mats or rugs that are suitable for vinyl flooring and use rug pads to prevent slippage.
3. Furniture Pads: Protect your new vinyl flooring by using furniture pads on the bottom of chairs, tables, and other furniture pieces. These pads will prevent scratches and scuffs caused by furniture movement.
4. Sealing the Joints: If you have installed luxury vinyl tiles or planks with click-lock installation, consider using a specially-formulated joint sealer or adhesive to seal the joints between the planks. This will provide extra protection against moisture and create a more seamless appearance.
5. Decorative Trims: Add decorative trims or molding along the top edges of baseboards or at the meeting point between the baseboards and wall. This can give a finishing touch to the overall aesthetic of the room and add a touch of elegance.
6. Lighting: Install appropriate lighting fixtures in your basement to improve visibility and create a more inviting ambiance. Consider recessed lighting, track lighting, or wall sconces to brighten up the space and highlight certain areas.
7. Furniture and Decor: Complete the transformation by selecting furniture, artwork, and decor pieces that complement your newly installed vinyl flooring. Choose pieces that match your personal style and create a welcoming and comfortable environment.
By adding these finishing touches, you can truly elevate the look and feel of your concrete basement. They will help tie the entire space together and create a cohesive and inviting atmosphere for you and your guests to enjoy.
Now that you've got the hang of installing vinyl flooring, why not tackle your entire basement? If you're pondering how much time a full basement renovation might take, our detailed guide walks you through every phase. From planning to execution, we'll help you set realistic timelines and expectations for transforming your basement into a functional and stylish space.
Frequently Asked Questions about How To Install Vinyl Flooring On Concrete Basement
Was this page helpful?
At Storables.com, we guarantee accurate and reliable information. Our content, validated by Expert Board Contributors, is crafted following stringent Editorial Policies. We're committed to providing you with well-researched, expert-backed insights for all your informational needs.


0 thoughts on “How To Install Vinyl Flooring On Concrete Basement”