Articles
How To Remove Carpet Pad From Hardwood Floors
Modified: October 21, 2024
Learn how to safely and effectively remove carpet pad from hardwood floors with these informative articles. Preserve the beauty of your floors and keep them looking their best.
(Many of the links in this article redirect to a specific reviewed product. Your purchase of these products through affiliate links helps to generate commission for Storables.com, at no extra cost. Learn more)
Introduction
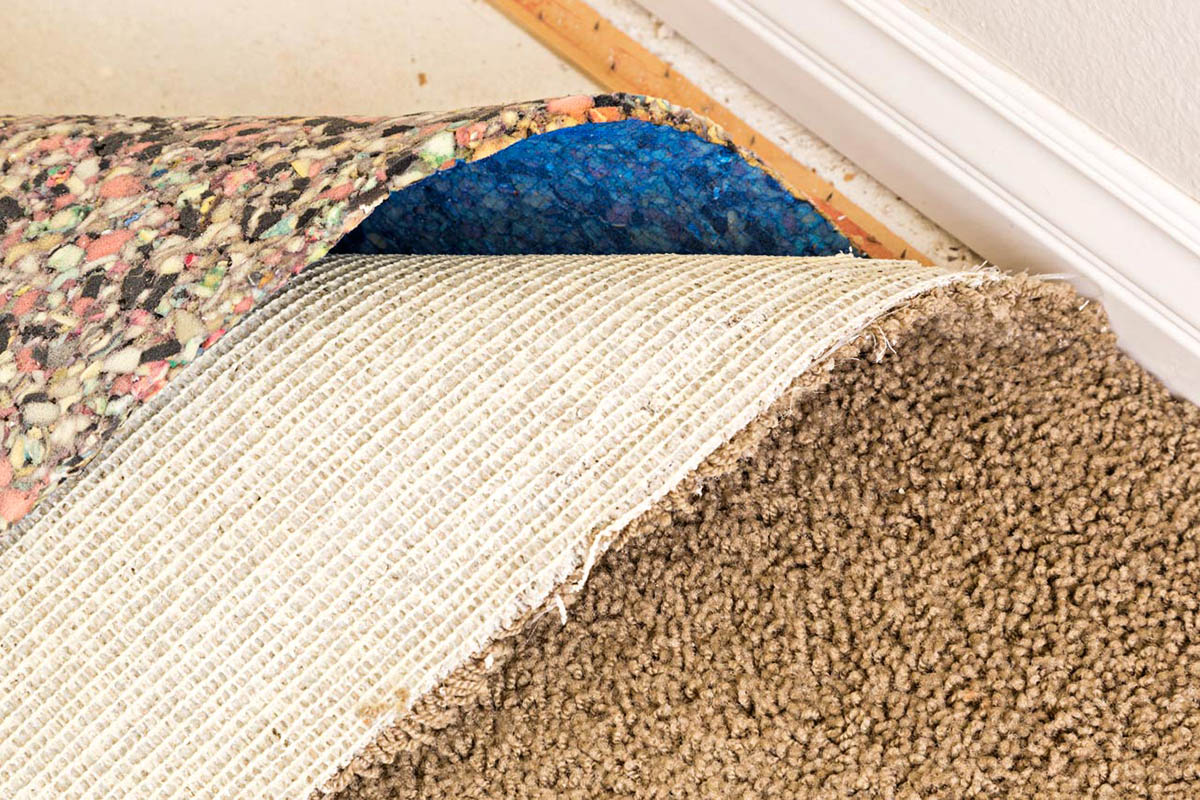
When you have carpet pad installed on your hardwood floors, whether it was for added comfort or soundproofing, there may come a time when you need to remove it. It could be due to wear and tear, a desire to refinish the floors, or simply wanting to switch to a different type of flooring. Whatever the reason may be, knowing how to properly remove carpet pad from hardwood floors is essential to avoid causing any damage.
In this article, we will guide you through the step-by-step process of removing carpet pad from hardwood floors. We will also cover the tools you will need for the task, as well as important tips and precautions to keep in mind.
Removing carpet padding can be a bit of a challenge, as it is often attached to the hardwood floor with adhesive. However, with the right techniques and tools, you can successfully remove the carpet pad without causing any damage to your hardwood floors.
Let’s dive in and get started!
Key Takeaways:
- Proper preparation, the right tools, and gentle techniques are essential for successfully removing carpet pad from hardwood floors without causing damage. Take your time, follow the steps, and enjoy the rewarding outcome of clean, beautiful hardwood floors.
- After removing the carpet pad, thorough cleaning and careful inspection of the hardwood floors are crucial to maintain their integrity and natural beauty. Address any damage promptly to ensure the longevity of your stunning hardwood floors.
Tools Needed
Before you begin the process of removing carpet pad from hardwood floors, it’s important to gather the necessary tools. Having these tools on hand will make the task easier and more efficient. Here are the tools you will need:
- Utility knife or carpet knife: This will be used to cut through the carpet pad and any adhesive.
- Pliers: Pliers will come in handy for gripping and pulling up any stubborn carpet pad or staples.
- Putty knife or scraper: You will need a putty knife or scraper to help lift up the carpet pad from the hardwood floor.
- Safety glasses and gloves: It’s always important to protect your eyes and hands while working to avoid any potential injuries.
- Vacuum cleaner: A vacuum cleaner with a brush attachment will be useful to clean up any debris or loose fibers after removing the carpet pad.
- Adhesive remover: Depending on the type of adhesive used, you may need an adhesive remover to effectively dissolve and remove any residue left on the hardwood floors.
Make sure to gather these tools before you start the process to ensure a smooth and successful removal of the carpet pad from your hardwood floors.
Step 1: Preparation
Before you begin removing the carpet pad from your hardwood floors, it’s important to properly prepare the area. This will help to ensure a smooth and efficient process, while also minimizing the risk of causing any damage. Follow these steps to prepare the space:
- Clean the area: Start by vacuuming the area to remove any loose debris, dirt, or dust. This will prevent any particles from getting trapped under the carpet pad and potentially scratching the hardwood floor.
- Wear protective gear: Safety should always be a priority when undertaking any home improvement task. Put on safety glasses to protect your eyes from flying debris and wear gloves to safeguard your hands.
- Clear the room: If possible, remove any furniture or obstructions from the room to give yourself ample space to work. This will make it easier to access the carpet pad and navigate around the area.
- Cut the carpet pad: Use a utility knife or carpet knife to cut the carpet pad into manageable sections. This will make it easier to remove and it will prevent the pad from tearing or unraveling as you work.
By following these preparation steps, you’ll be setting yourself up for a successful carpet pad removal process. With everything in place, you’re now ready to move on to the next step.
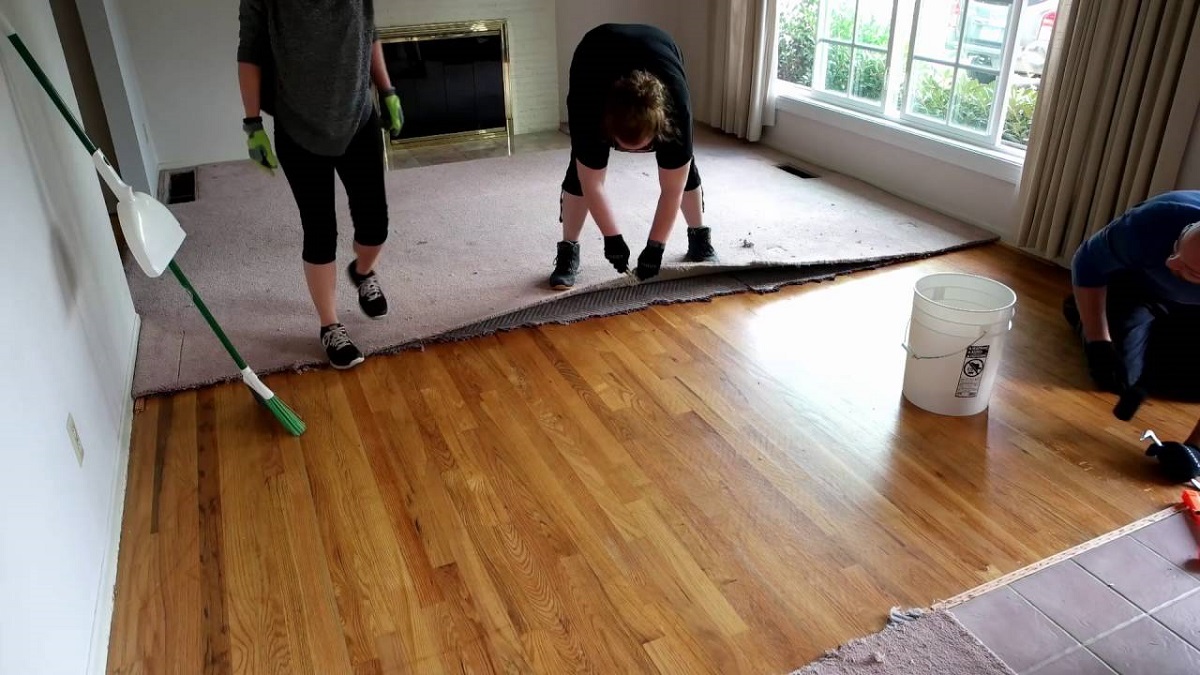
Step 2: Start with a Corner
Once you have prepared the area, it’s time to start removing the carpet pad from the hardwood floors. The best place to begin is at a corner of the room. Here’s how:
- Locate a corner: Find a corner of the room where you can easily access the carpet pad. This corner will serve as your starting point.
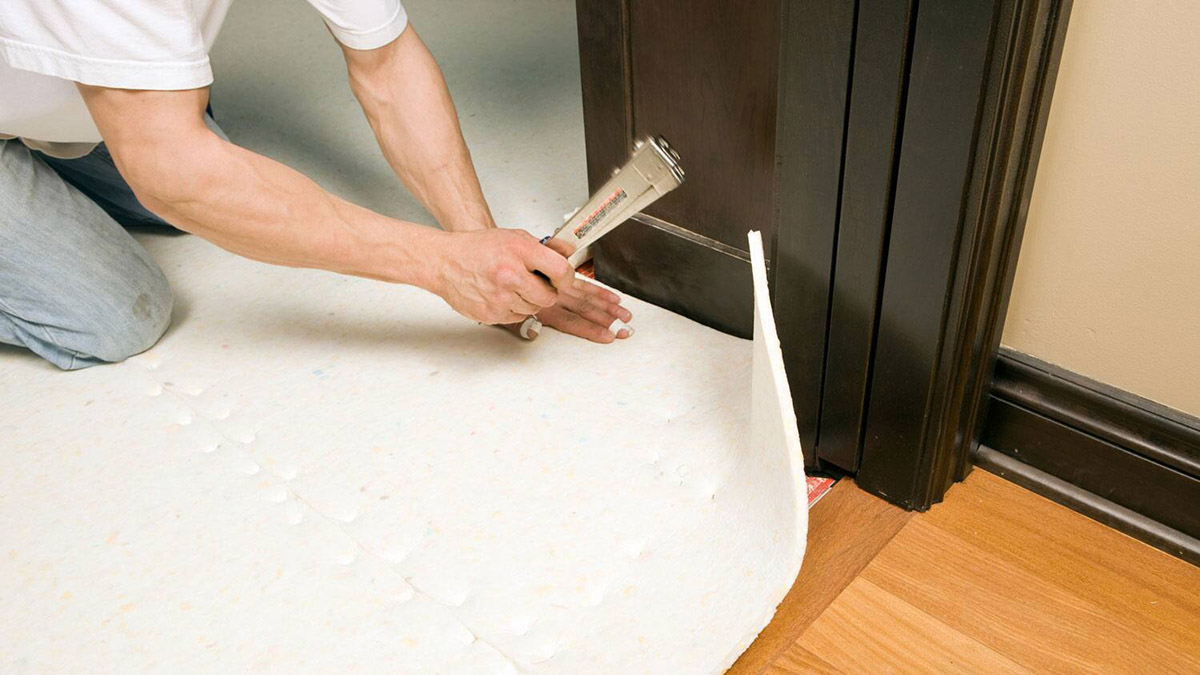
- Lift the carpet pad: Use a putty knife or scraper to lift up the corner of the carpet pad. Insert the tool under the edge of the pad and gently pry it upwards.
- Pull back the carpet pad: Once the corner is lifted, use your hands to pull back the carpet pad along the edge. Slowly work your way from the corner towards the center of the room.
- Remove any staples: As you pull back the carpet pad, you may come across staples that were used to secure it to the hardwood floor. Use pliers to grip and remove any staples you encounter along the way. Be careful not to scratch or damage the floor in the process.
Starting with a corner allows you to create a clean edge and makes it easier to lift and remove the carpet pad. By following these steps, you will be on your way to successfully removing the carpet pad from your hardwood floors.
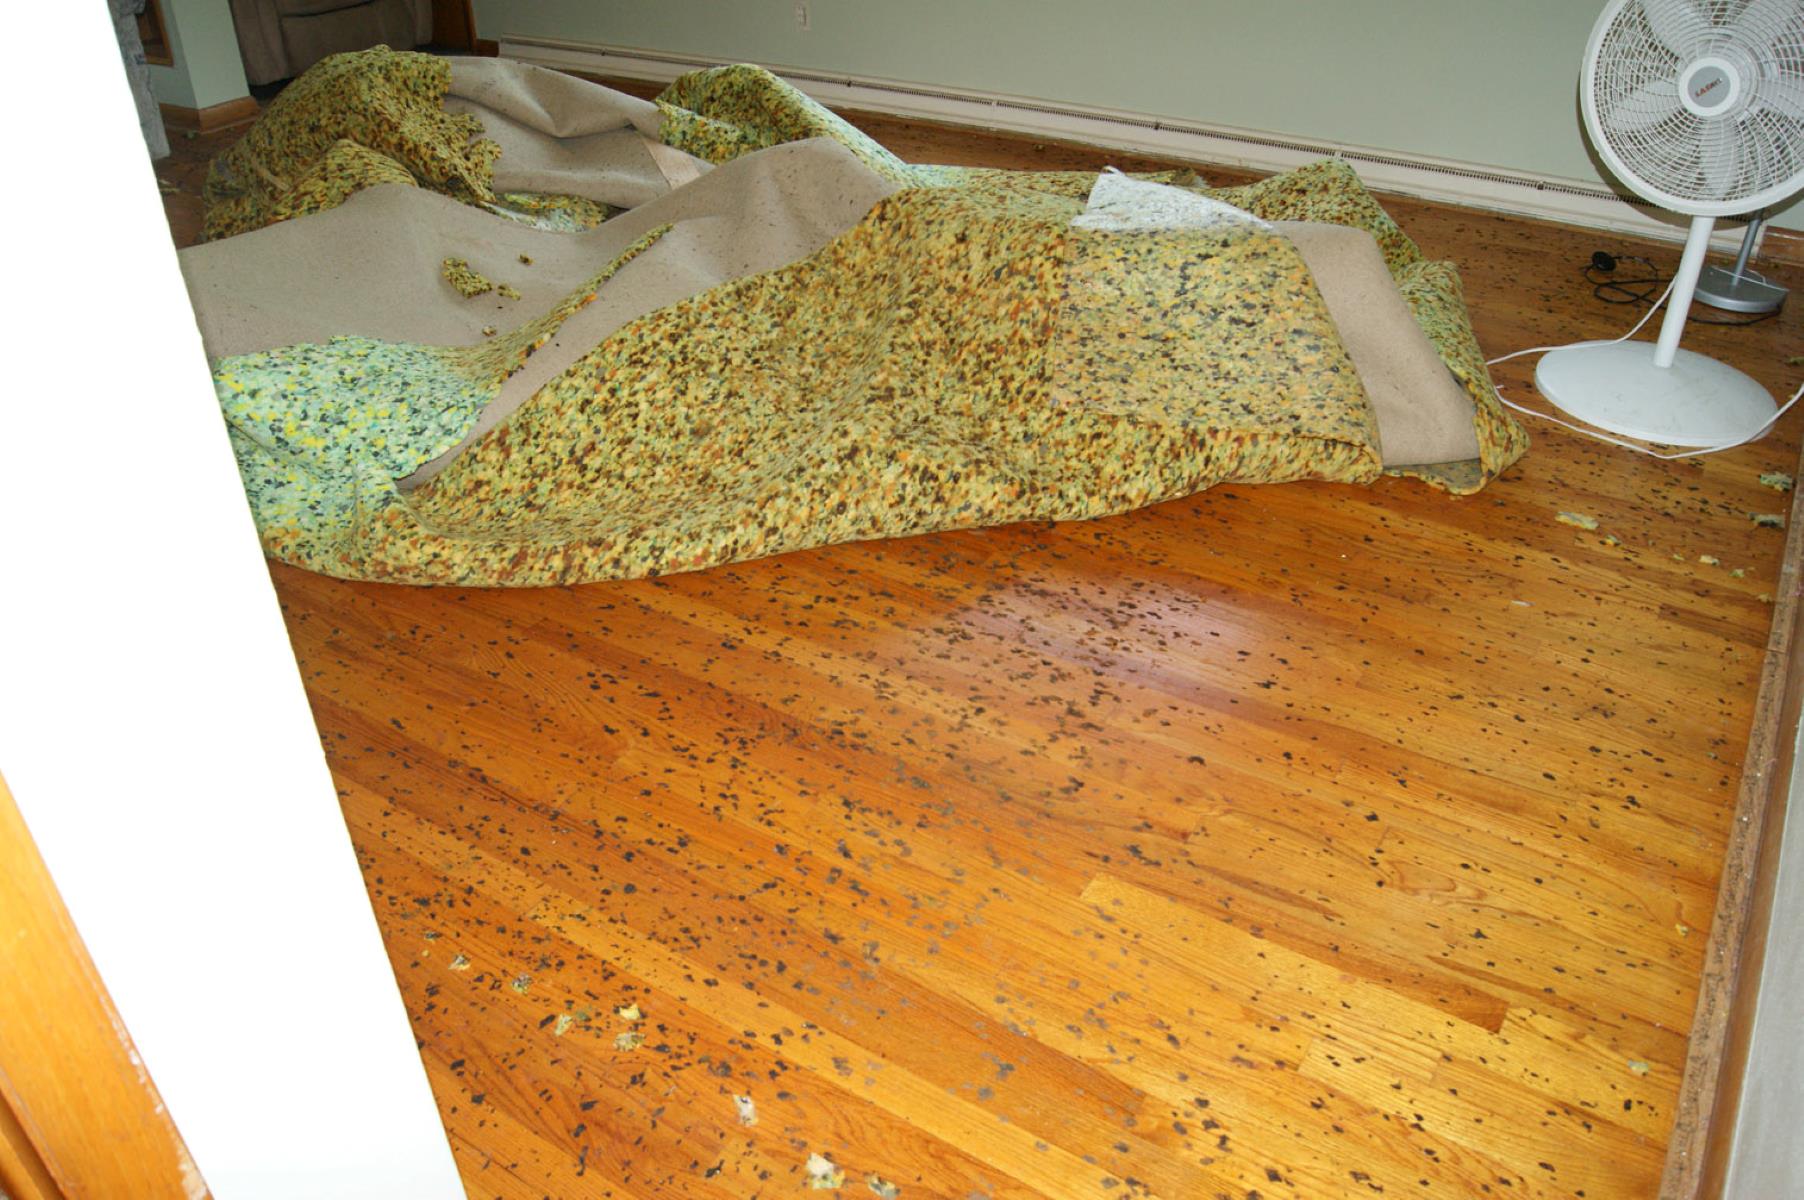
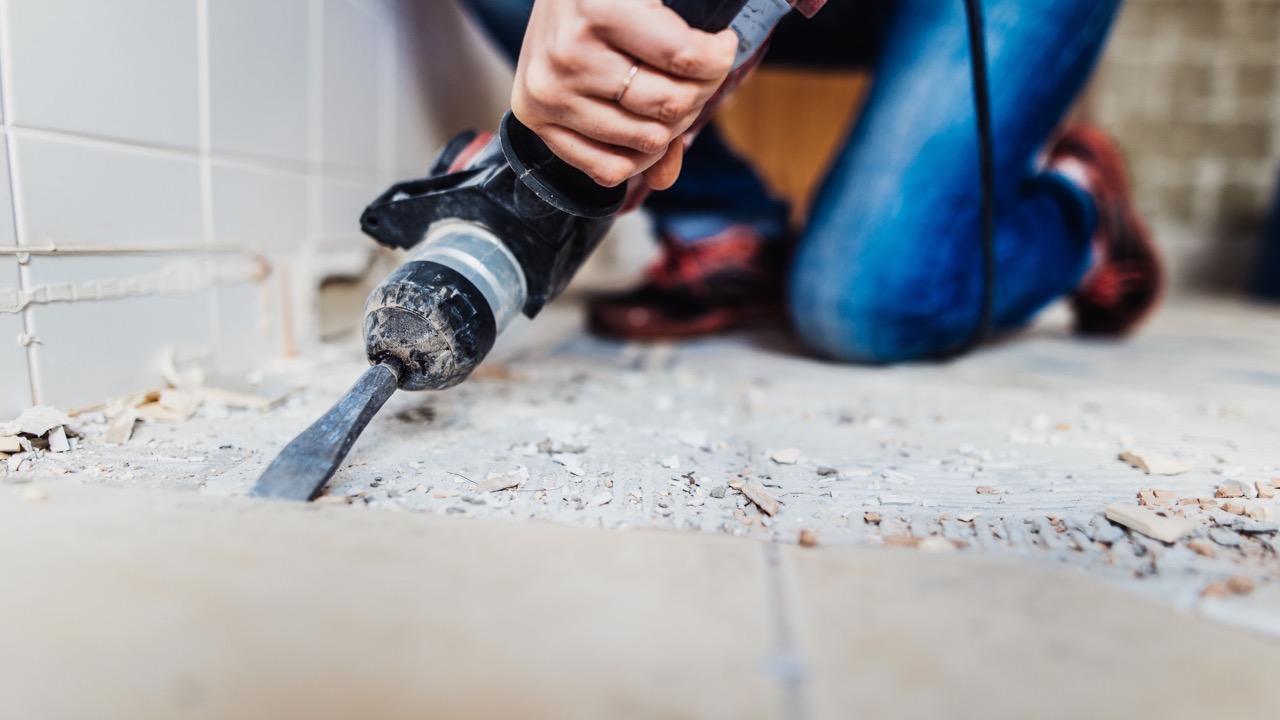
Step 3: Peel off the Carpet Pad
Now that you have started removing the carpet pad from the corner, it’s time to peel it off the hardwood floors. This step requires careful and patient handling to avoid any damage to the flooring. Follow these steps to successfully peel off the carpet pad:
- Work in sections: Divide the room into manageable sections and focus on one section at a time. This will make the process more organized and prevent the carpet pad from sticking back down before you can remove it.
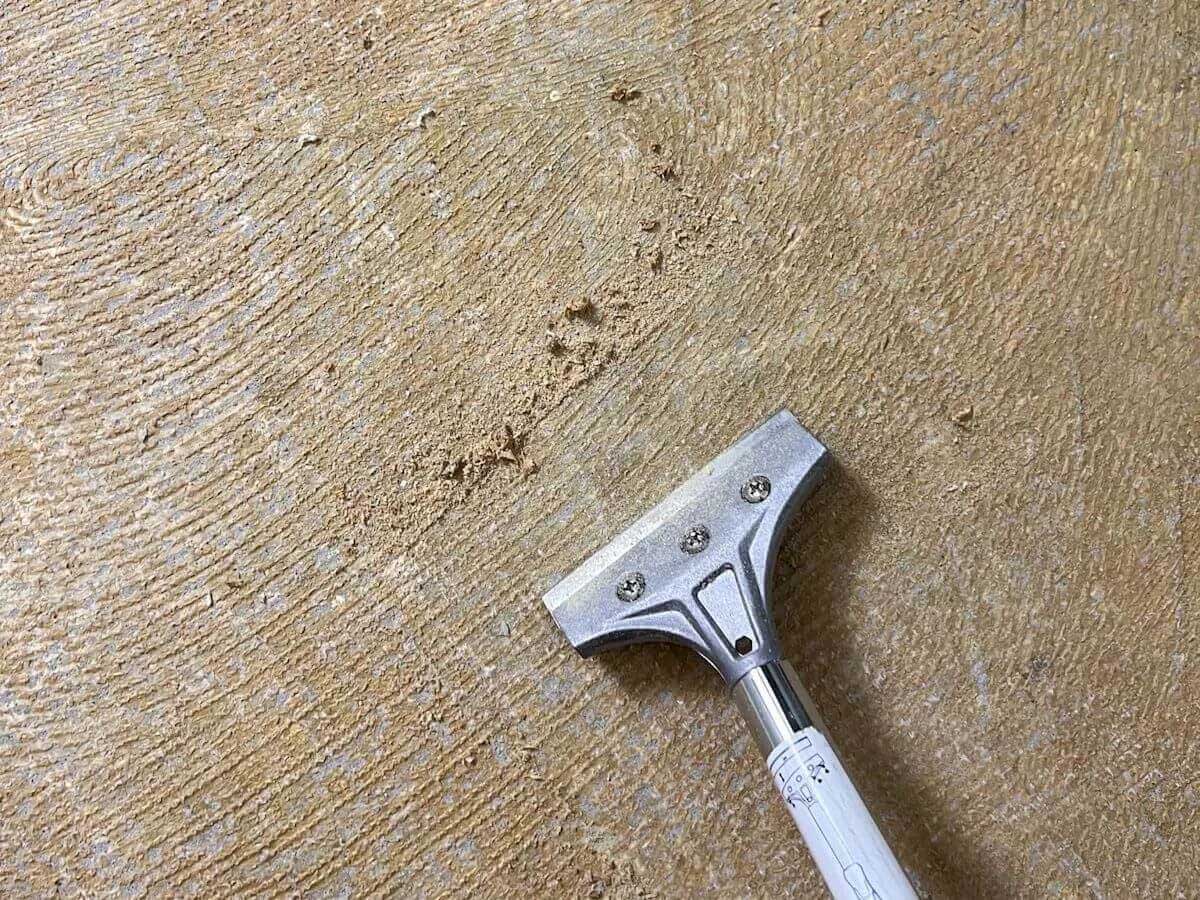
- Use a putty knife or scraper: Insert the putty knife or scraper under the carpet pad, slightly lifting it off the floor. Gently pry and scrape underneath the pad to loosen it from the adhesive.
- Peel off the pad: Once the carpet pad is loosened, slowly peel it off the hardwood floors. Pull it back in a smooth, steady motion, avoiding any sudden jerks that could damage the floor or tear the pad.
- Continue to the next section: After successfully peeling off one section of the carpet pad, move on to the next section and repeat the process. Take your time and be patient, ensuring that each section is properly removed before moving on.
It’s important to be gentle when peeling off the carpet pad to protect the integrity of the hardwood floors. By working in sections and using a putty knife or scraper, you can safely remove the pad without causing any damage.
Use a putty knife to gently scrape and lift the carpet pad from the hardwood floor. Be careful not to damage the wood. Any remaining residue can be removed with a solvent or adhesive remover.
Read more: How To Remove Glue From Hardwood Floor
Step 4: Remove Adhesive Residue
After peeling off the carpet pad, you may be left with adhesive residue on the hardwood floors. It’s essential to remove this residue to restore the smooth and clean appearance of the flooring. Follow these steps to effectively remove the adhesive residue:
- Test an adhesive remover: Before applying any adhesive remover to the floor, it’s important to test it in a small, inconspicuous area to ensure that it doesn’t cause any damage or discoloration. Read the instructions carefully and follow the manufacturer’s recommendations.
- Apply the adhesive remover: If the adhesive remover passes the test, apply it directly to the remaining residue on the hardwood floors. Use a clean cloth or sponge to apply the remover and allow it to sit for the recommended amount of time specified by the manufacturer.
- Gently scrub the area: After the adhesive remover has soaked into the residue, lightly scrub the area with a soft-bristle brush or a nylon scrub pad. Apply gentle pressure to avoid scratching the floor, but be thorough enough to remove the residue effectively.
- Wipe clean: Once the residue is loosened, wipe the area clean with a damp cloth or sponge. Make sure to remove all traces of the adhesive remover as well.
- Dry the floor: After wiping the floor, allow it to dry completely before moving on. This will prevent any moisture from seeping into the wood and causing damage.
Removing the adhesive residue may require some time and effort, but it is an important step in the process to ensure that your hardwood floors are left clean and free of any sticky residues.
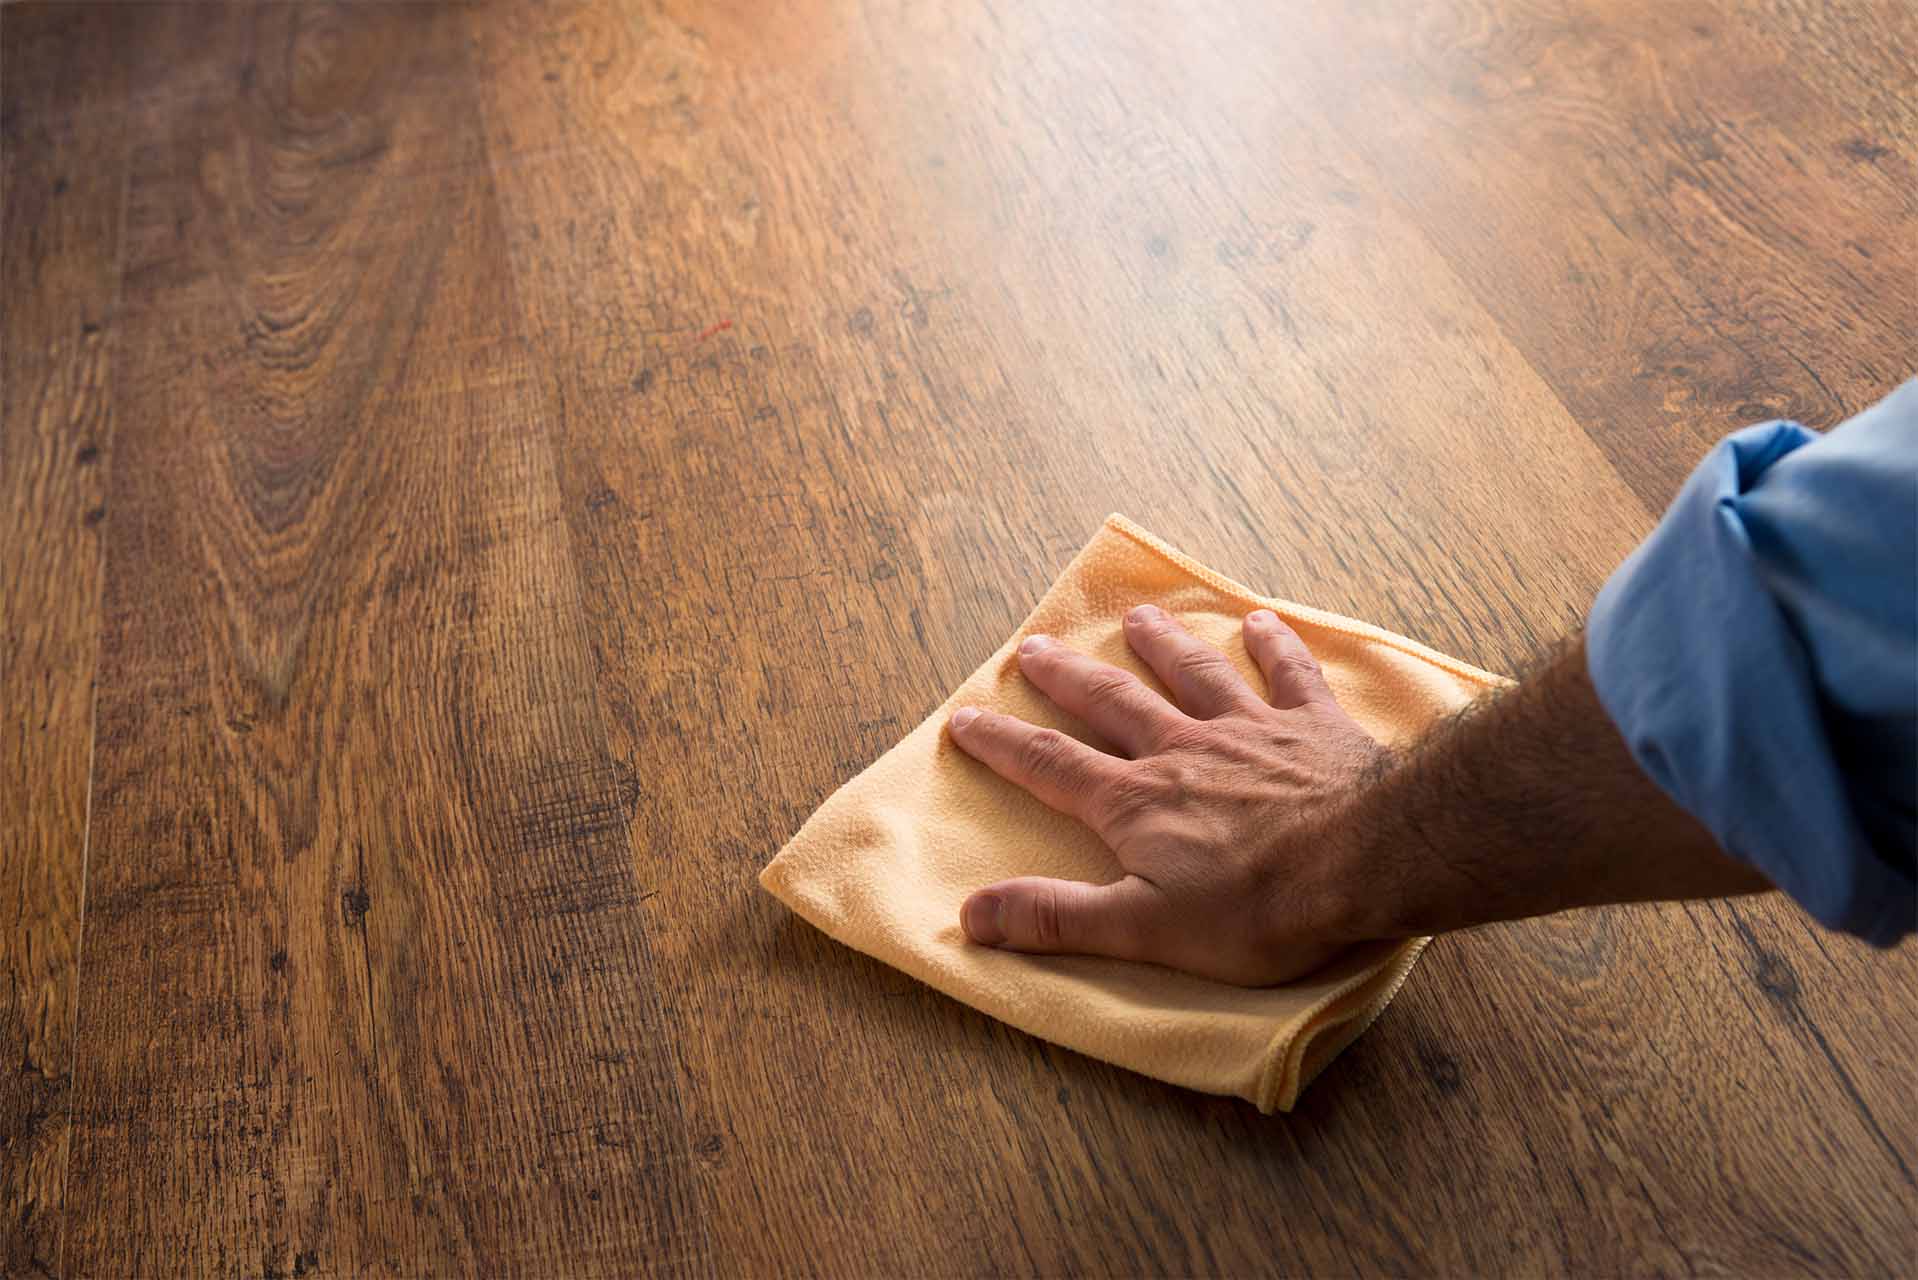
Step 5: Clean the Hardwood Floors
Once you have removed the carpet pad and adhesive residue, it’s essential to thoroughly clean the hardwood floors. This step will help restore the natural beauty of the flooring and ensure a clean and polished appearance. Follow these steps to clean your hardwood floors:
- Vacuum or sweep: Use a vacuum cleaner or broom to remove any loose dirt, dust, or debris from the surface of the hardwood floors. Pay special attention to the corners and edges of the room.
- Mop with a gentle cleaner: Mix a gentle hardwood floor cleaner with warm water according to the manufacturer’s instructions. Using a mop or microfiber cloth, dampen it in the solution and wring out any excess water. Wipe down the hardwood floors, being careful not to saturate the wood with water.
- Focus on stubborn stains: If you come across any stubborn stains or marks on the floor, use a hardwood floor cleaner specifically designed for removing stains. Follow the instructions on the cleaner and gently scrub the stained area with a soft brush or cloth.
- Dry the floors: After mopping, dry the hardwood floors thoroughly using a clean, dry mop or cloth. Make sure there is no excess moisture left on the surface, as this could potentially damage the wood.
- Apply a hardwood floor finish (optional): If desired, you can apply a hardwood floor finish to protect and enhance the appearance of the wood. Follow the instructions on the product and apply the finish with a clean mop or applicator, ensuring even coverage.
Cleaning your hardwood floors not only removes any remaining dirt or residue but also helps restore the natural shine and beauty of the wood. By following these steps, your hardwood floors will be left clean, refreshed, and ready for whatever comes next.
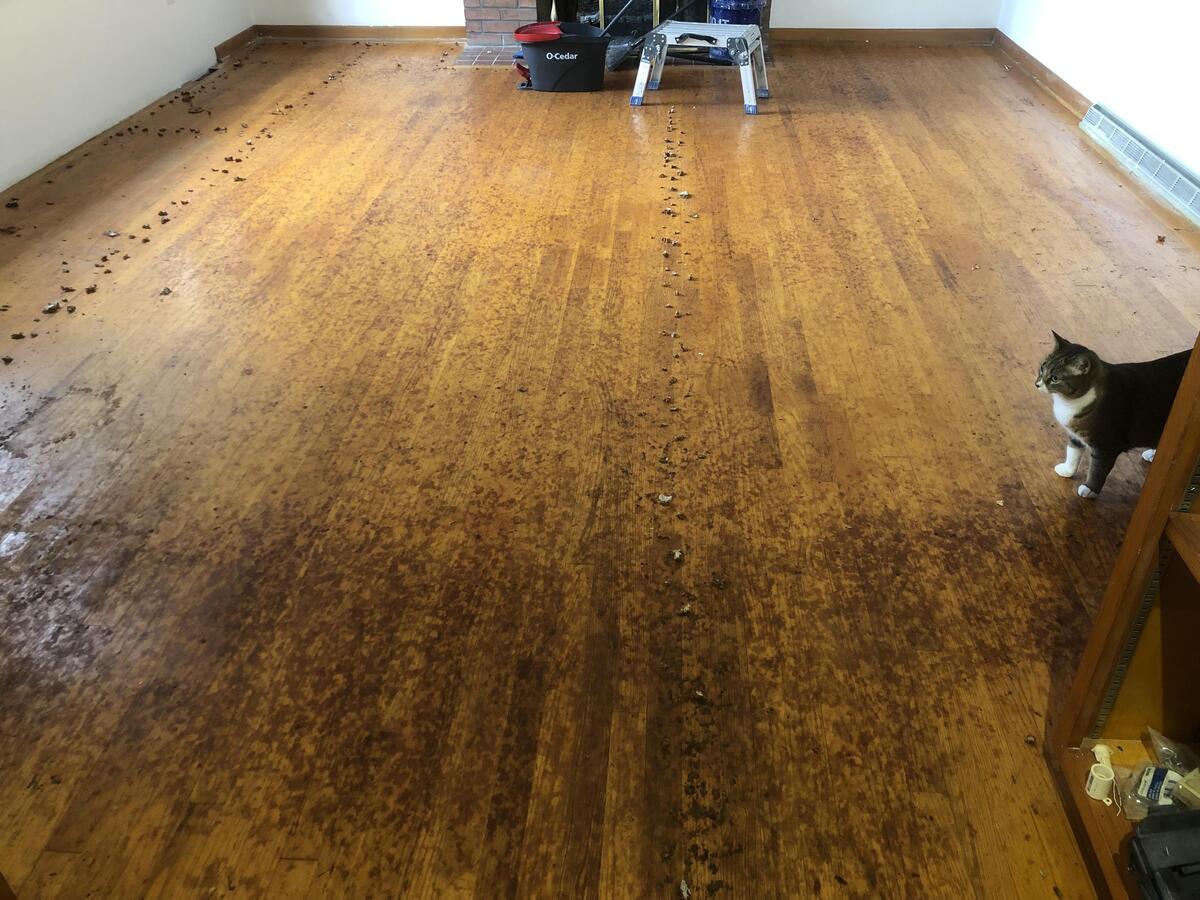
Step 6: Inspect for Damage
Once you have completed the process of removing the carpet pad and cleaning the hardwood floors, it’s important to take the time to inspect the floors for any potential damage. This step allows you to identify and address any issues that may have been caused during the removal process. Here’s how to inspect your hardwood floors:
- Look for scratches or dents: Carefully examine the surface of the hardwood floors for any visible scratches, dents, or marks. Take note of their location and severity.
- Check for discoloration: Pay attention to any areas of the hardwood floors that may have discolored or changed in appearance. This could be a result of the adhesive, cleaning solution, or other factors.
- Inspect for gaps or loose boards: Check for any gaps between the boards or any boards that may have become loose or lifted during the removal process. These issues can potentially cause further damage if left unaddressed.
- Address any damage: If you notice any scratches, dents, discoloration, or other damage, take steps to address them accordingly. This may involve using wood filler to fill in scratches, sanding and refinishing the floors, or consulting a professional for repairs.
By thoroughly inspecting your hardwood floors, you can ensure that they remain in good condition and address any potential issues before they worsen. It’s important to address any damage promptly to maintain the beauty and longevity of your hardwood floors.
Conclusion
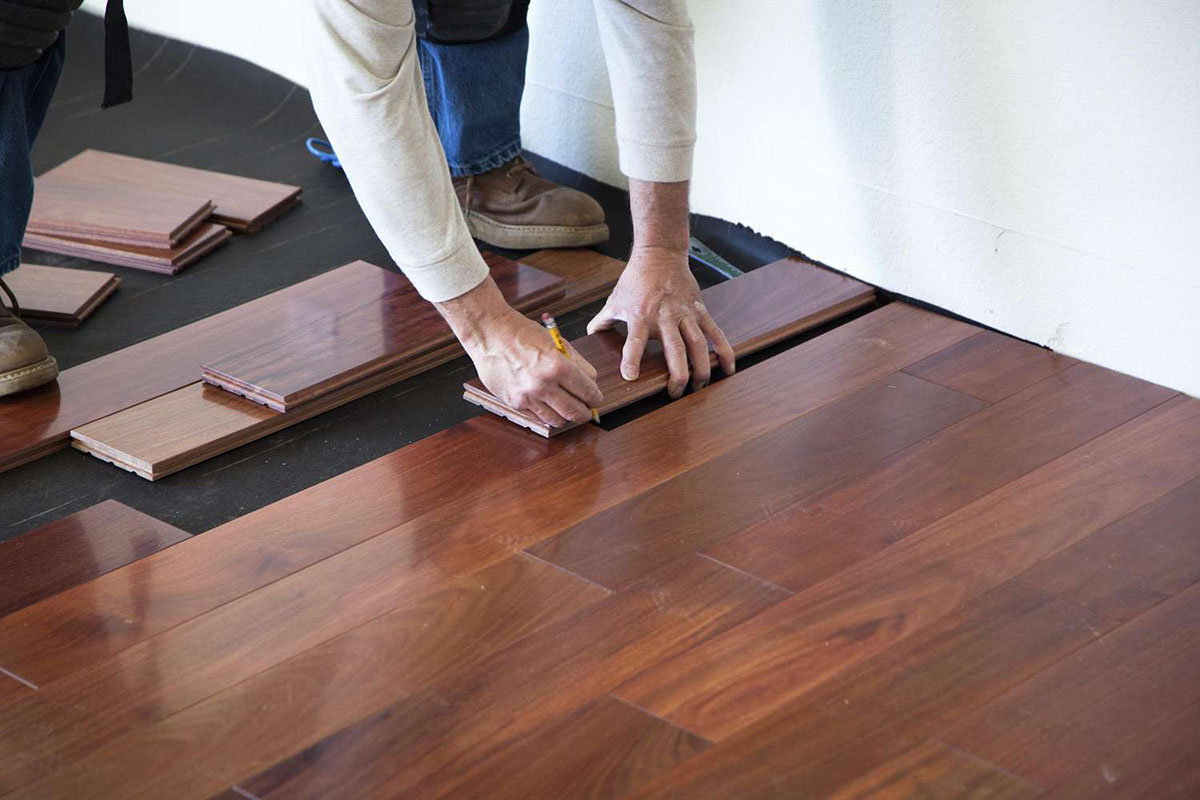
Removing carpet pad from hardwood floors may seem like a daunting task, but with the right tools, preparation, and technique, it can be done effectively and without causing damage to your flooring. By following the steps outlined in this article, you can successfully remove the carpet pad and restore the natural beauty of your hardwood floors.
Remember to start with proper preparation, gathering the necessary tools and clearing the room. Starting in a corner and carefully peeling off the carpet pad will ensure a smooth removal process. Be thorough in removing any adhesive residue, using appropriate cleaners and techniques. Once the pad and residue are gone, clean the hardwood floors thoroughly to restore their shine.
After completing the removal process, take the time to inspect the hardwood floors for any damage that may have occurred. Address any scratches, dents, or discoloration promptly to maintain the integrity of the flooring.
Removing carpet pad from hardwood floors can be a challenging task, but by following these steps, you can achieve a successful outcome. Remember to exercise caution, use the right tools, and take your time throughout the process. In the end, you will be rewarded with clean, beautiful hardwood floors that can serve as a stunning foundation for any room in your home.
Frequently Asked Questions about How To Remove Carpet Pad From Hardwood Floors
Was this page helpful?
At Storables.com, we guarantee accurate and reliable information. Our content, validated by Expert Board Contributors, is crafted following stringent Editorial Policies. We're committed to providing you with well-researched, expert-backed insights for all your informational needs.