Articles
How To Remove Ice Maker From Fridge?
Modified: August 24, 2024
Learn how to remove an ice maker from your fridge easily with our informative articles. Get step-by-step instructions and tips to complete the process efficiently.
(Many of the links in this article redirect to a specific reviewed product. Your purchase of these products through affiliate links helps to generate commission for Storables.com, at no extra cost. Learn more)
Introduction
Welcome to our comprehensive guide on how to remove an ice maker from your fridge. An ice maker is a convenient and often beloved appliance that provides a steady supply of ice cubes for your beverages or for chilling food. However, there might come a time when you need to remove the ice maker, whether it’s for maintenance, repair, or replacement.
In this article, we will walk you through the step-by-step process of safely removing an ice maker from your fridge. We will also provide you with some essential safety precautions to keep in mind before you begin. So, let’s get started!
Key Takeaways:
- Safely remove your fridge’s ice maker by following step-by-step instructions and essential safety precautions. Prioritize safety, gather necessary tools, and disconnect power and water supply before starting the removal process.
- Clean the area and store the removed ice maker properly to maintain hygiene and functionality. Follow disposal guidelines if not reusing the ice maker. With the right knowledge, you can confidently remove and address maintenance needs for your fridge’s ice maker.
Read more: How To Remove Odor From Ice Maker
Safety Precautions
Before you start removing the ice maker from your fridge, it’s important to prioritize safety. Here are some important precautions that you should take:
- Start by unplugging the fridge from the power source to avoid any risk of electric shock.
- If your fridge has a water dispenser or an ice dispenser, make sure to turn off the water supply and disconnect the water line.
- Wear protective gloves to prevent injury while handling sharp tools or components.
- Refer to the manufacturer’s manual or instructions specific to your fridge model for any additional safety guidelines.
- Be cautious of any potential water leaks or spills during the removal process. Keep towels or a bucket nearby to catch any water that may drip out.
- Work in a well-ventilated area to prevent the buildup of potentially harmful fumes or gases.
By following these safety precautions, you can ensure a smooth and secure removal process for your ice maker.
Step 1: Gather the necessary tools
Before you begin removing the ice maker, it’s crucial to gather all the necessary tools. Having the right tools on hand will make the process much easier and more efficient. Here are some tools you may need:
- Adjustable wrench or pliers
- Screwdriver (either a Phillips or flathead, depending on the screws)
- Bucket or towels to catch water
- Flashlight (optional, but helpful for better visibility)
Make sure to have these tools readily accessible before you proceed to the next step. This way, you won’t have to search for them in the middle of the removal process.
It’s also a good idea to put on a pair of gloves to protect your hands during the process. This will help prevent any accidental cuts or injuries.
Step 2: Turn off the power supply
Once you have gathered the necessary tools, the next step is to ensure that the power supply to the fridge is turned off. This is an important safety measure to prevent any potential electrical hazards during the ice maker removal process.
To turn off the power supply, locate the electrical outlet or circuit breaker that powers the fridge. If you can easily reach the outlet, simply unplug the fridge from the wall. However, if the outlet is difficult to access, you may need to switch off the circuit breaker that controls the fridge’s power.
Double-check to ensure that the power is indeed turned off. You can do this by trying to turn on the fridge or checking if the lights inside the fridge are working. If everything is off, you can proceed to the next step with confidence.
Remember, safety should always be the top priority. Taking the time to turn off the power supply will protect you from any potential electric shock or accidents while working on the ice maker removal.
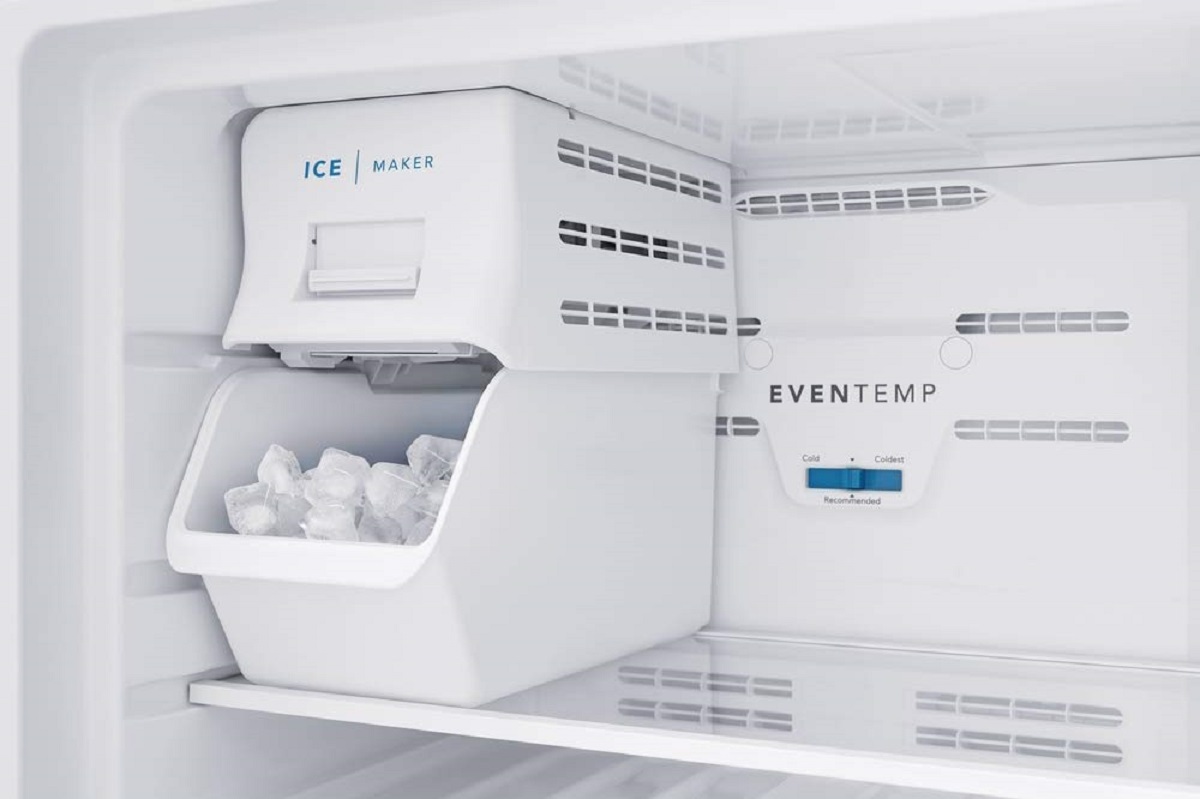
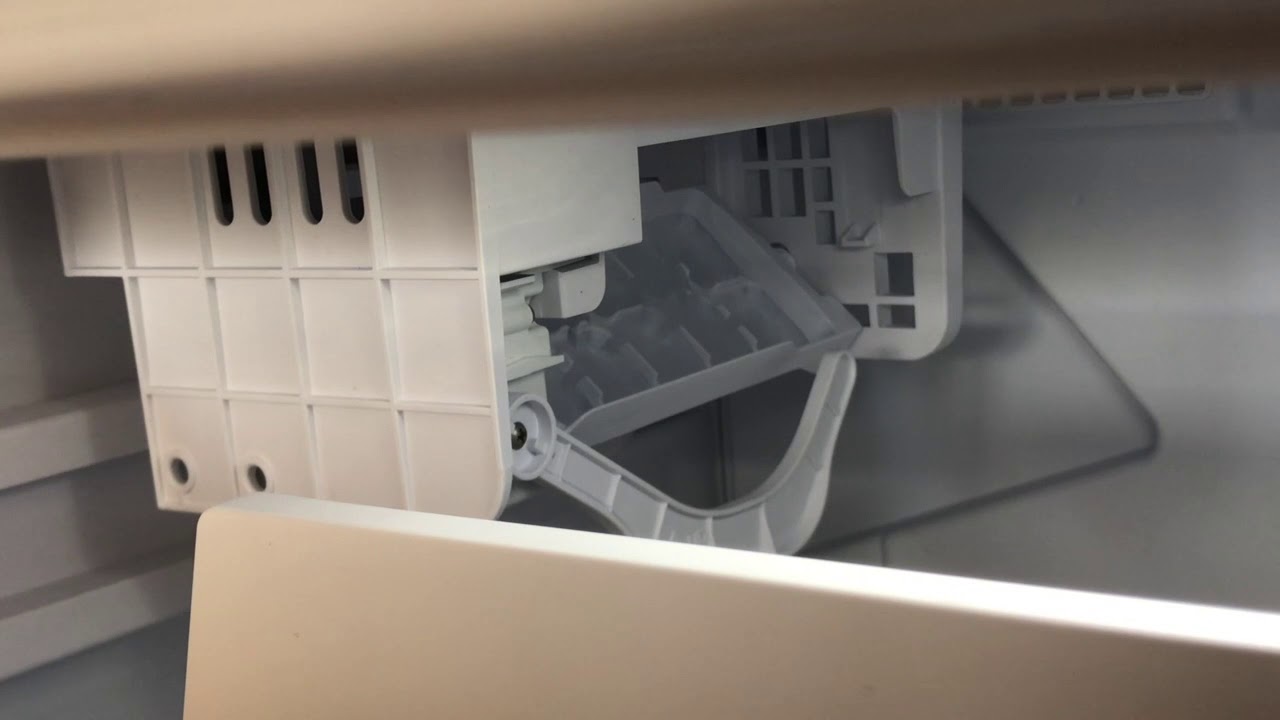
Step 3: Locate the ice maker
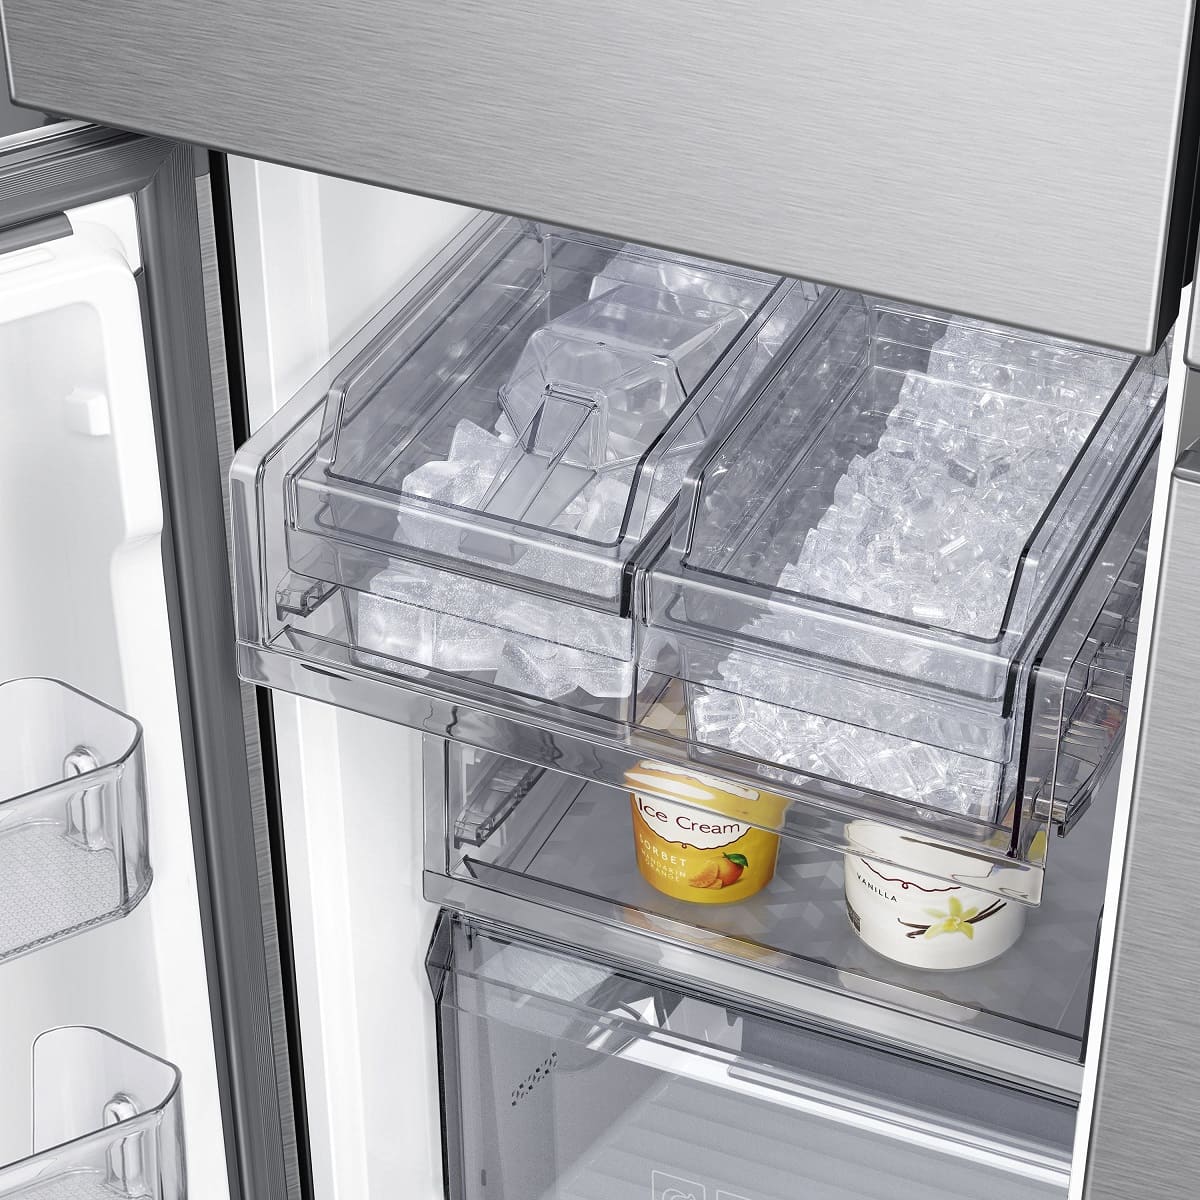
Now that you have ensured the power supply is turned off, it’s time to locate the ice maker in your fridge. The ice maker is typically located in the freezer compartment of the refrigerator, although the exact placement may vary depending on the model and brand of your fridge.
Open the freezer door and look for a rectangular or square-shaped unit attached to the side or back wall. The ice maker is usually located near the top of the freezer, above the ice bin. It may be concealed behind a panel or cover, so you might need to remove it to access the ice maker.
If you’re having trouble locating the ice maker, consult the refrigerator’s manual or look for online resources specific to your fridge model. These resources will provide you with detailed information on the ice maker’s location and any necessary steps to access it.
Once you have identified the ice maker, take a moment to examine its connections. Look for the water supply line, electrical wiring, and any mounting screws or brackets that secure the ice maker in place. Familiarizing yourself with these components will make it easier to remove the ice maker in the subsequent steps.
With the ice maker located and its connections noted, you’re now ready to move on to the next step: disconnecting the water supply line.
Read more: How To Remove Mold From Ice Maker
Step 4: Disconnect the water supply line
Before you can remove the ice maker, you need to disconnect the water supply line that provides water for ice production. This step ensures that water doesn’t leak or spray while removing the ice maker.
Start by locating the water supply line at the back of the freezer compartment or along the side wall. The water supply line is typically connected to the ice maker with a plastic or metal fitting.
Using an adjustable wrench or pliers, carefully loosen and remove the fitting that connects the water supply line to the ice maker. Be cautious of any water that may be present in the line or fitting. Keep a bucket or towels nearby to catch any water that might spill during the disconnection process.
Once the water supply line is disconnected, inspect it for any signs of damage or wear. If necessary, consider replacing the water supply line to ensure proper functionality of the ice maker when reinstalled.
With the water supply line disconnected, you can move on to the next step: removing any mounting screws or brackets that hold the ice maker in place.
Before removing the ice maker from the fridge, make sure to disconnect the power and water supply. Then, follow the manufacturer’s instructions for removing the ice maker unit.
Step 5: Remove any mounting screws or brackets
Now that you have disconnected the water supply line, it’s time to remove any mounting screws or brackets that secure the ice maker in place. These screws or brackets may vary depending on the model and design of your fridge, so refer to the manufacturer’s manual or instructions for specific guidance.
Using a screwdriver, carefully remove the screws that hold the ice maker in place. The screws are usually located on the sides or the top of the ice maker. Keep them in a safe place so that they don’t get misplaced during the removal process.
If your ice maker is held in place by brackets, locate the brackets and remove them. Brackets can often be released by sliding or lifting them, allowing you to disengage the ice maker from its mounting location.
As you remove the screws or brackets, be mindful of the weight and stability of the ice maker. Depending on the design, the ice maker could be heavy or connected to other components. Take caution not to drop or damage the ice maker during removal.
Once all the screws or brackets are removed, the ice maker should be loose and ready to be detached from the fridge. In the next step, we will guide you through the process of disconnecting the electrical wiring.
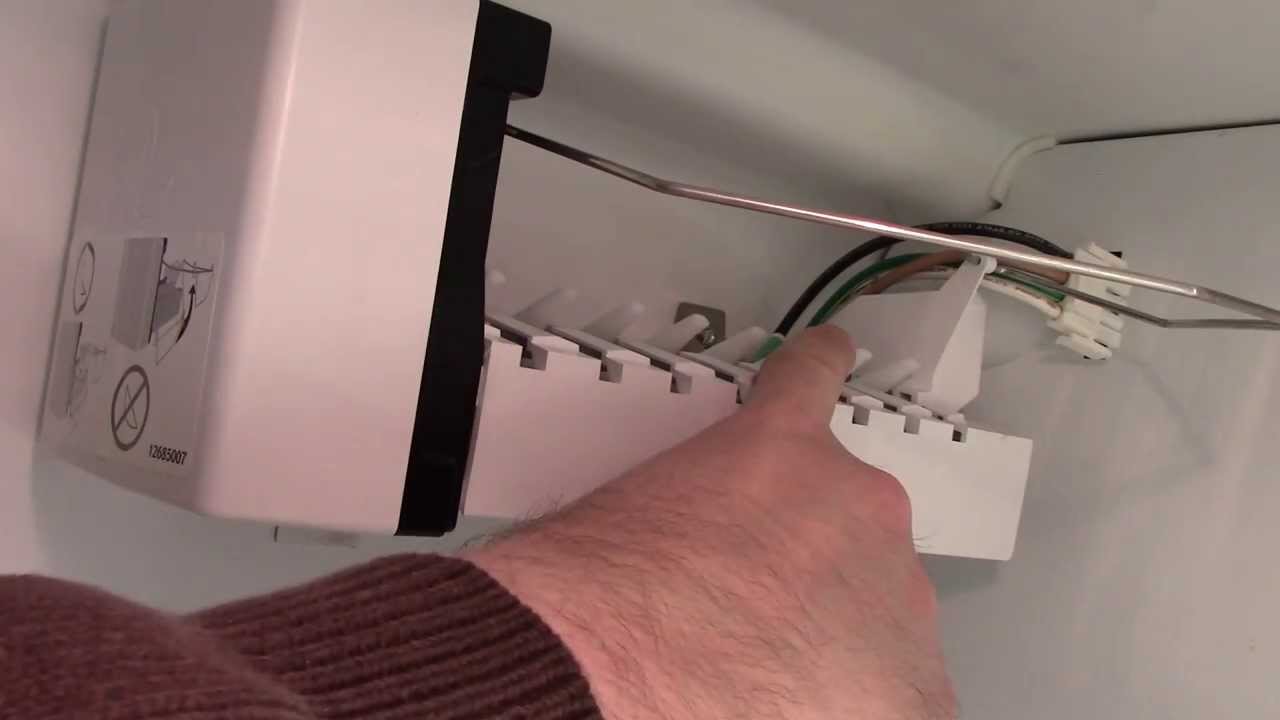
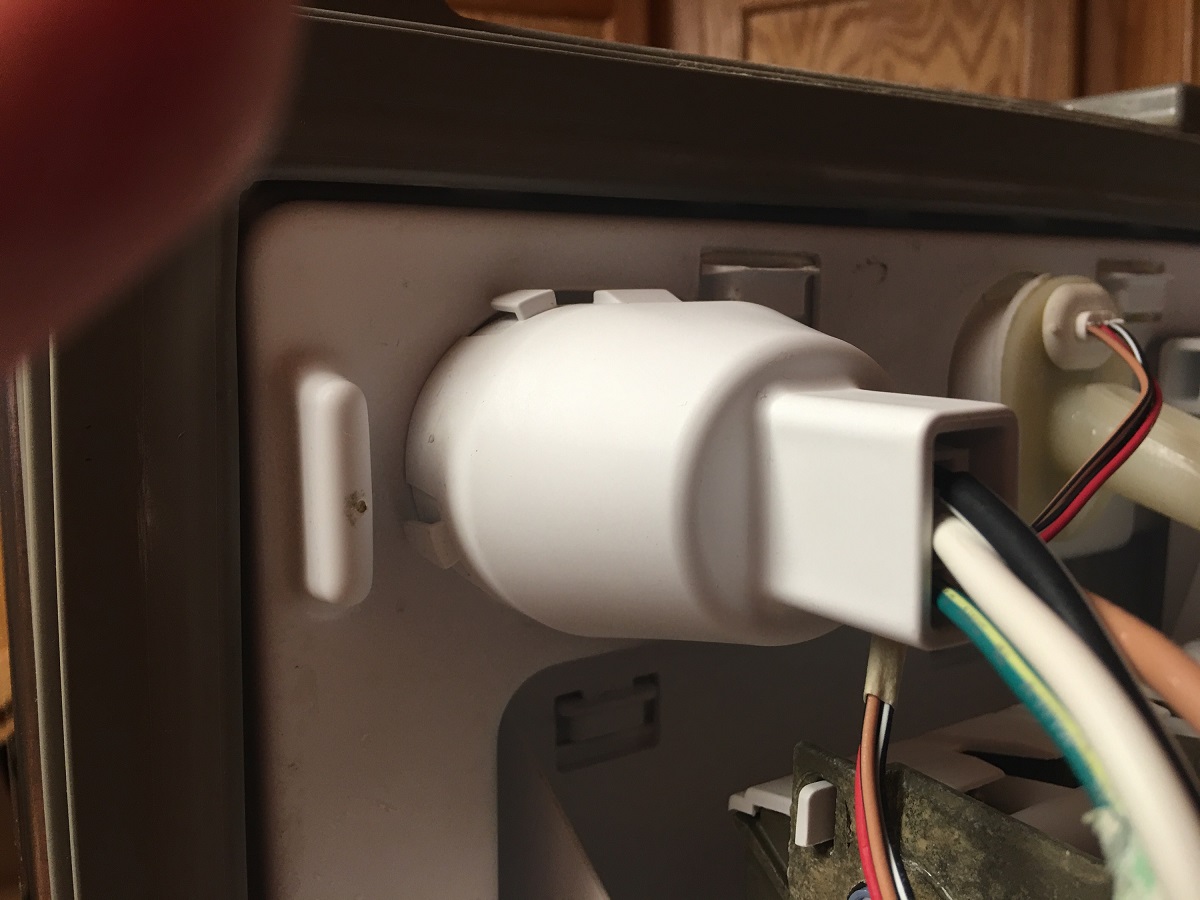
Step 6: Disconnect the electrical wiring
With the mounting screws or brackets removed, it’s time to disconnect the electrical wiring that powers the ice maker. This step ensures that there is no electricity flowing to the ice maker during the removal process.
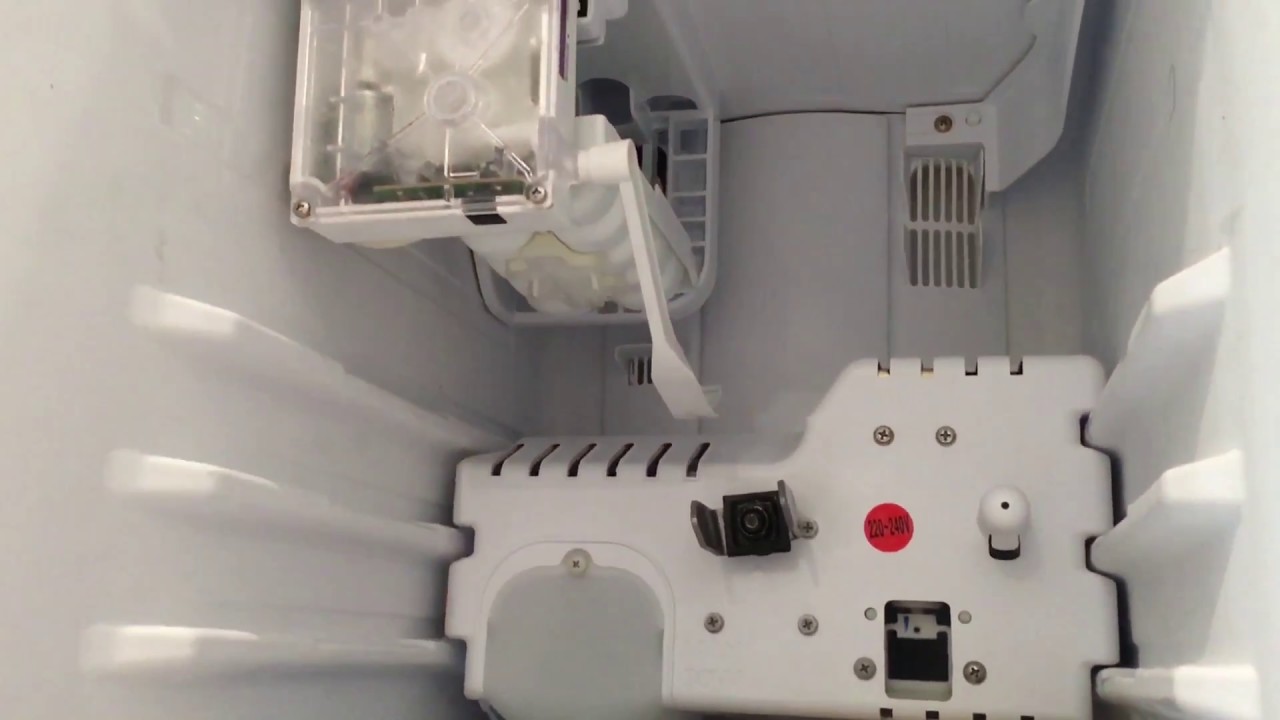
Start by locating the electrical connection point for the ice maker. This is typically located near the back of the ice maker or behind a removable panel. Carefully remove any panels or covers that may be obstructing access to the electrical connection.
Once you have a clear view of the electrical connection, identify the wire harness that connects the ice maker to the fridge’s power supply. The wire harness is usually secured with a clip or plug. Gently unclip or unplug the wire harness to disconnect the electrical connection.
When disconnecting the wire harness, be cautious not to tug or pull on the wires themselves. Apply gentle pressure to the clip or plug to release the connection smoothly. If you encounter any resistance, double-check for any additional clips or fasteners holding the wire harness in place.
After disconnecting the electrical wiring, take a moment to inspect the wires and connector for any signs of damage or wear. If you notice any issues, it may be necessary to repair or replace the damaged components before reinstalling the ice maker.
With the electrical wiring disconnected, the ice maker should be completely separated from the fridge. In the next step, we will guide you through the process of lifting and removing the ice maker.
Step 7: Lift and remove the ice maker
Now that you have disconnected the water supply line and electrical wiring, it’s time to lift and remove the ice maker from your fridge. This step requires careful handling to prevent any damage to the ice maker or the surrounding components.
Start by gripping the ice maker firmly with both hands. Lift the ice maker straight up, taking care not to twist or tilt it excessively. If the ice maker is particularly heavy or cumbersome, you may need assistance to lift it safely.
As you lift the ice maker, be mindful of any remaining connections that may restrict its movement. Check for any additional clips, wires, or hoses that may still be attached to the ice maker or the fridge.
If you encounter any resistance while lifting the ice maker, double-check for any overlooked connections or fasteners. It’s important to ensure that all connections have been disconnected before attempting to remove the ice maker completely.
Once the ice maker is lifted and free from any remaining connections, carefully set it aside on a stable surface. Avoid placing it on the floor or against any sharp objects that could cause damage.
With the ice maker successfully removed, you can move on to the final steps: cleaning the surrounding area and properly storing the ice maker.
Step 8: Clean the area and store the ice maker
Now that you have removed the ice maker from your fridge, it’s essential to clean the surrounding area to maintain optimal hygiene and functionality. This step will also prepare the space for any future installation or use of a new ice maker.
Start by inspecting the area where the ice maker was previously located. Look for any dirt, debris, or ice residue that may have accumulated over time. Use a damp cloth or sponge to wipe down the walls and surfaces, removing any build-up and ensuring a clean environment.
If there are any stubborn stains or deposits, you can create a mixture of mild soap and warm water to gently scrub the area. Be sure to rinse thoroughly to remove any soap residue.
Pay special attention to the water supply line connection point. Check for any signs of leakage or damage that may have contributed to the need to remove the ice maker. Address any issues before reinstalling a new ice maker.
After cleaning the area, it’s time to properly store the removed ice maker. If you plan on reusing the same ice maker, ensure that it is completely dry before storing it. Moisture can cause damage and mold growth over time.
Find a safe and dry storage area for the ice maker. Consider using a protective bag or wrapping it in bubble wrap or towels to prevent any scratches or damage while in storage.
If you are not reusing the ice maker, it’s important to follow proper disposal guidelines. Check with your local waste management facility for instructions on how to dispose of electronic appliances safely and responsibly.
With the area clean and the ice maker stored or disposed of appropriately, you have successfully completed the process of removing an ice maker from your fridge. Congratulations!
Conclusion
Removing an ice maker from your fridge may seem like a daunting task, but with the right knowledge and guidance, it can be a relatively simple process. By following the steps outlined in this comprehensive guide, you can safely and effectively remove an ice maker for maintenance, repair, or replacement.
Throughout the process, it’s crucial to prioritize safety by following the recommended precautions, such as turning off the power supply and disconnecting the water line. These precautions minimize the risk of accidents and ensure a smooth removal process.
Remember to gather the necessary tools before starting, such as an adjustable wrench, screwdriver, and bucket for catching water. Having the right tools on hand will make the process more efficient and hassle-free.
Each step of the removal process, from locating the ice maker to disconnecting the electrical wiring, requires careful attention and consideration. Take your time and be mindful of any connections or fasteners that may be holding the ice maker in place.
Once the ice maker is successfully removed, take the opportunity to clean the surrounding area to maintain a hygienic environment. Properly store the ice maker if you plan on reusing it, or dispose of it responsibly if it is no longer needed.
By following these steps and taking the necessary precautions, you can confidently remove an ice maker from your fridge and address any maintenance or repair needs. This knowledge empowers you to keep your fridge in optimal condition and ensures a continuous supply of refreshing ice cubes for your enjoyment.
We hope that this guide has been informative and helpful in your ice maker removal journey. If you have any further questions or need additional assistance, don’t hesitate to reach out to the manufacturer’s customer service or consult a professional technician. Happy ice maker removal!
Frequently Asked Questions about How To Remove Ice Maker From Fridge?
Was this page helpful?
At Storables.com, we guarantee accurate and reliable information. Our content, validated by Expert Board Contributors, is crafted following stringent Editorial Policies. We're committed to providing you with well-researched, expert-backed insights for all your informational needs.


0 thoughts on “How To Remove Ice Maker From Fridge?”