
Articles
How To Remove A Moen Kitchen Faucet
Modified: October 19, 2024
Looking for articles on how to remove a Moen kitchen faucet? Check out our comprehensive guide for step-by-step instructions and expert tips!
(Many of the links in this article redirect to a specific reviewed product. Your purchase of these products through affiliate links helps to generate commission for Storables.com, at no extra cost. Learn more)
Introduction
Installing a new kitchen faucet can be an exciting and rewarding project that can freshen up the look of your kitchen and improve functionality. However, before you can install a new faucet, you need to remove the old one. In this article, we will guide you through the step-by-step process of removing a Moen kitchen faucet.
Moen is a trusted and popular brand known for its durable and high-quality faucets. Removing a Moen kitchen faucet may seem like a daunting task, but with the right tools and a little bit of patience, you can easily accomplish it. Whether you are upgrading your kitchen or simply replacing a faulty faucet, this guide will help you complete the removal process successfully.
Before we dive into the step-by-step instructions, it is important to note that safety should always be a top priority. Make sure to read and understand all instructions provided by the manufacturer and take the necessary precautions to avoid any injuries or damage to your plumbing system.
Additionally, it is highly recommended to gather all the necessary tools and materials before you start. This will ensure a smooth and efficient process, allowing you to complete the removal without any unnecessary delays. Now, let’s move on to the first step of removing a Moen kitchen faucet.
Key Takeaways:
- Upgrade your kitchen with a new Moen faucet by following these step-by-step instructions to safely and efficiently remove the old one. Enjoy a refreshed and functional kitchen with ease.
- Gather the necessary tools, turn off the water supply, and carefully disassemble your Moen kitchen faucet to prepare for the installation of a new one. Follow the guide for a smooth removal process.
Read more: How To Remove Moen Faucet Aerator
Step 1: Gather the necessary tools and materials
Before you begin removing your Moen kitchen faucet, it is essential to gather all the required tools and materials. This will help you work efficiently and prevent any interruptions during the removal process. Here is a list of the tools and materials you will need:
- Adjustable wrench
- Phillips screwdriver
- Plumber’s tape
- Bucket or towel
The adjustable wrench will be used to loosen and tighten nuts and bolts, while the Phillips screwdriver will help you remove any screws that may be securing the faucet handle or other components. Plumber’s tape is necessary for creating a watertight seal when reattaching the new faucet. Finally, having a bucket or towel nearby will help catch any water that may spill during the removal.
It is important to mention that the specific tools and materials you need may vary depending on the model of your Moen kitchen faucet and the existing plumbing setup. Read the manufacturer’s instructions or check the packaging of your new faucet to ensure you have all the necessary tools and materials.
Once you have gathered all the required tools and materials, you are ready to move on to the next step: turning off the water supply. This is a crucial step to prevent any unwanted water flow while removing the faucet. Let’s proceed to Step 2.
Step 2: Turn off the water supply
Before you can safely remove a Moen kitchen faucet, you need to turn off the water supply. This will prevent any water from flowing while you are working on the faucet, reducing the risk of leaks or water damage. Follow these steps to turn off the water supply:
- Locate the shut-off valves under the sink. These valves are typically located on the hot and cold water supply lines.
- Turn the shut-off valve handle clockwise to shut off the water flow. You may need to use an adjustable wrench to turn the valves if they are difficult to operate.
- Once the water supply is shut off, turn on the faucet to drain any remaining water in the lines. This will relieve any pressure and make the removal process easier.
It’s important to note that some sinks may have a main shut-off valve for the entire plumbing system instead of individual valves for hot and cold water lines. In this case, you will need to shut off the main water supply to the house. Refer to your home’s plumbing system or consult a professional if you are unsure how to locate or shut off the main valve.
Taking the time to properly turn off the water supply will save you from potential water damage and make the removal process safer and more efficient. Once the water supply is turned off, we can proceed to the next step of removing the Moen kitchen faucet: removing the handle.
Step 3: Remove the handle
Now that you have successfully turned off the water supply, it’s time to remove the handle of your Moen kitchen faucet. The handle is typically the part of the faucet that controls the water flow and temperature. Follow these steps to remove the handle:
- Locate the handle’s set screw. This is usually located on the back or underside of the handle. Use a Phillips screwdriver to loosen and remove the set screw.
- Once the set screw is removed, you can gently lift or pry off the handle from the faucet base. If the handle is stuck, you may need to use a flathead screwdriver or a handle puller tool to assist in its removal.
Removing the handle will expose the underlying components of the faucet, such as the bonnet nut and cartridge. Take a moment to inspect the exposed components for any signs of wear or damage. This is also a good time to clean the area with a mild cleaner and a soft cloth to remove any accumulated debris.
By removing the handle, you have made progress in dismantling the Moen kitchen faucet. In the next step, we will focus on unscrewing the bonnet nut to further disassemble the faucet. Let’s move on to Step 4.
Step 4: Unscrew the bonnet nut
After removing the handle of your Moen kitchen faucet, the next step is to unscrew the bonnet nut. The bonnet nut is a large, hexagonal nut that secures the faucet cartridge in place. Follow these steps to unscrew the bonnet nut:
- Locate the bonnet nut underneath the handle base. It is usually a large nut with a hexagonal shape.
- Using an adjustable wrench, grip the bonnet nut firmly and rotate it counterclockwise to loosen it. Be careful not to apply excessive force, as this may damage the nut or other components of the faucet.
- Continue turning the bonnet nut until it is completely loosened and can be easily removed by hand.
- Set the bonnet nut aside in a safe place where it won’t get lost.
Once the bonnet nut is removed, you will have access to the faucet cartridge. The cartridge is the internal mechanism that controls the flow and temperature of the water. At this point, you can inspect the cartridge for any signs of wear or damage and determine if it needs to be replaced. If you are replacing the entire faucet, you can skip the cartridge inspection and move on to the next step.
Removing the bonnet nut is a significant step in disassembling the Moen kitchen faucet. In the next step, we will focus on disconnecting the sprayer hose (if applicable) before completely removing the old faucet. Let’s proceed to Step 5.
Read more: How To Remove Moen Bathroom Faucet Handle
Step 5: Disconnect the sprayer hose (if applicable)
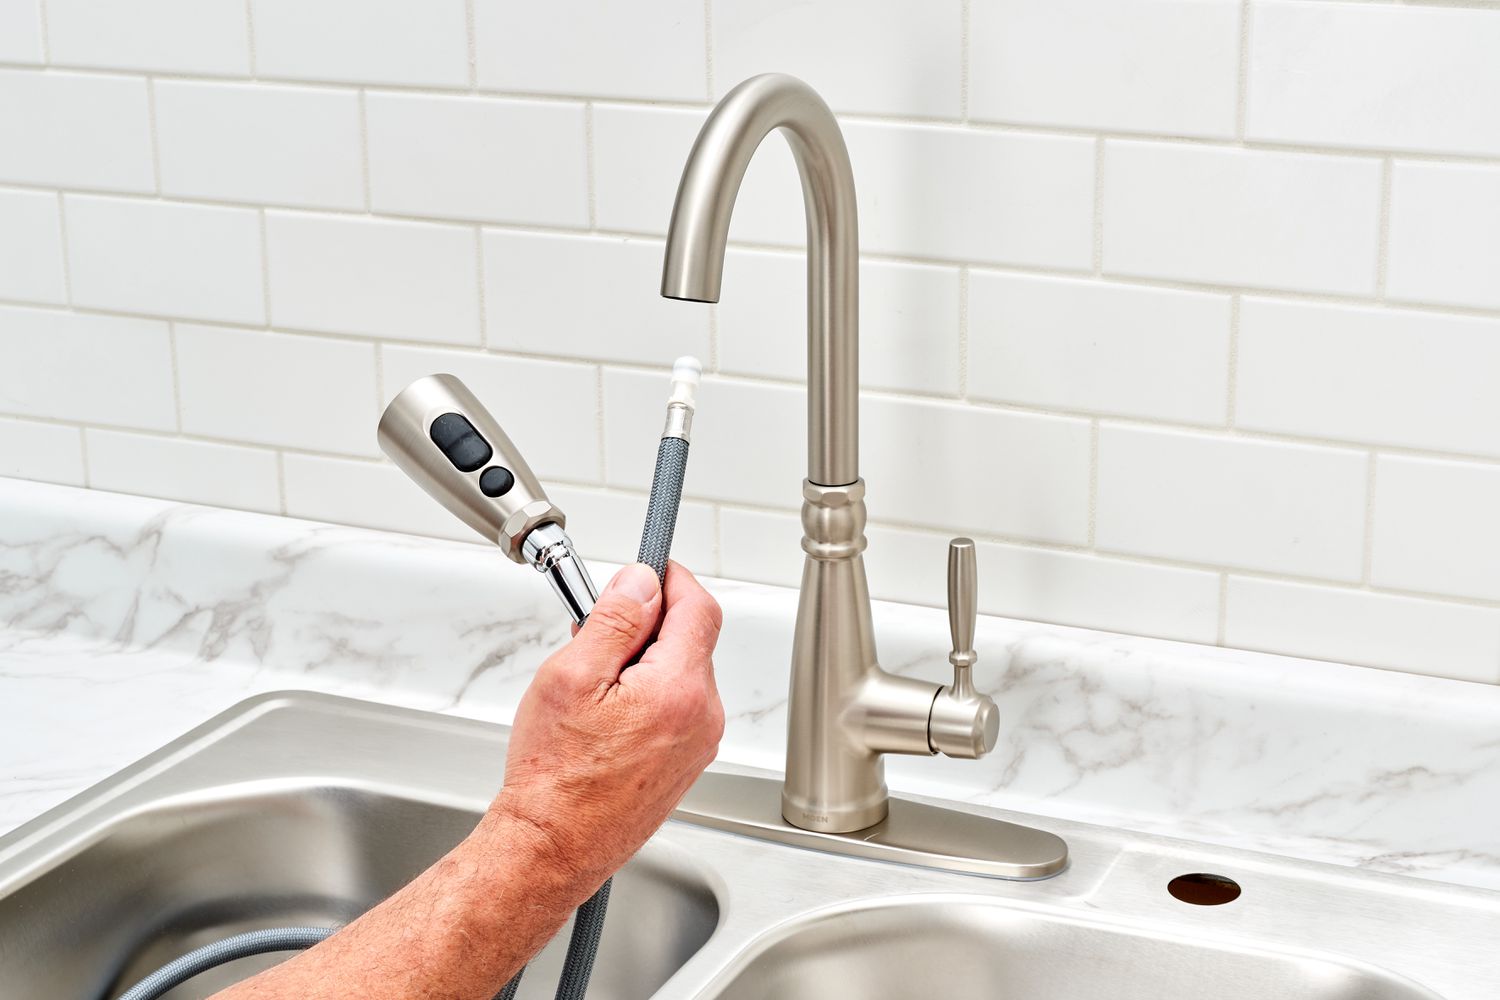
If your Moen kitchen faucet is equipped with a sprayer hose, you will need to disconnect it before removing the old faucet. The sprayer hose is responsible for delivering water to the sink sprayer, allowing you to direct water flow for various kitchen tasks. Follow these steps to disconnect the sprayer hose:
- Locate the connection point between the sprayer hose and the water supply line. This is typically located under the sink.
- Depending on the type of connection, you may need to twist or unscrew the sprayer hose from the water supply line. Alternatively, there may be a quick-connect fitting that requires squeezing and releasing to detach the hose.
- With steady pressure, gently pull the sprayer hose away from the water supply line to detach it completely.
- Take note of any washers or o-rings that may be present on the sprayer hose or water supply line. These may need to be replaced when reassembling the new faucet.
Once the sprayer hose is disconnected, you can set it aside or remove it completely depending on your replacement plans. Removing the sprayer hose will provide you with additional space and maneuverability when removing the old faucet.
With the sprayer hose disconnected, you are one step closer to removing the old Moen kitchen faucet. In the next step, we will focus on the actual removal of the faucet. Let’s proceed to Step 6.
Step 6: Remove the old faucet
Now that you have disconnected the sprayer hose (if applicable), you are ready to remove the old Moen kitchen faucet. Follow these steps to remove the faucet:
- Locate the mounting nuts that secure the faucet to the sink or countertop. These nuts are usually located underneath the sink.
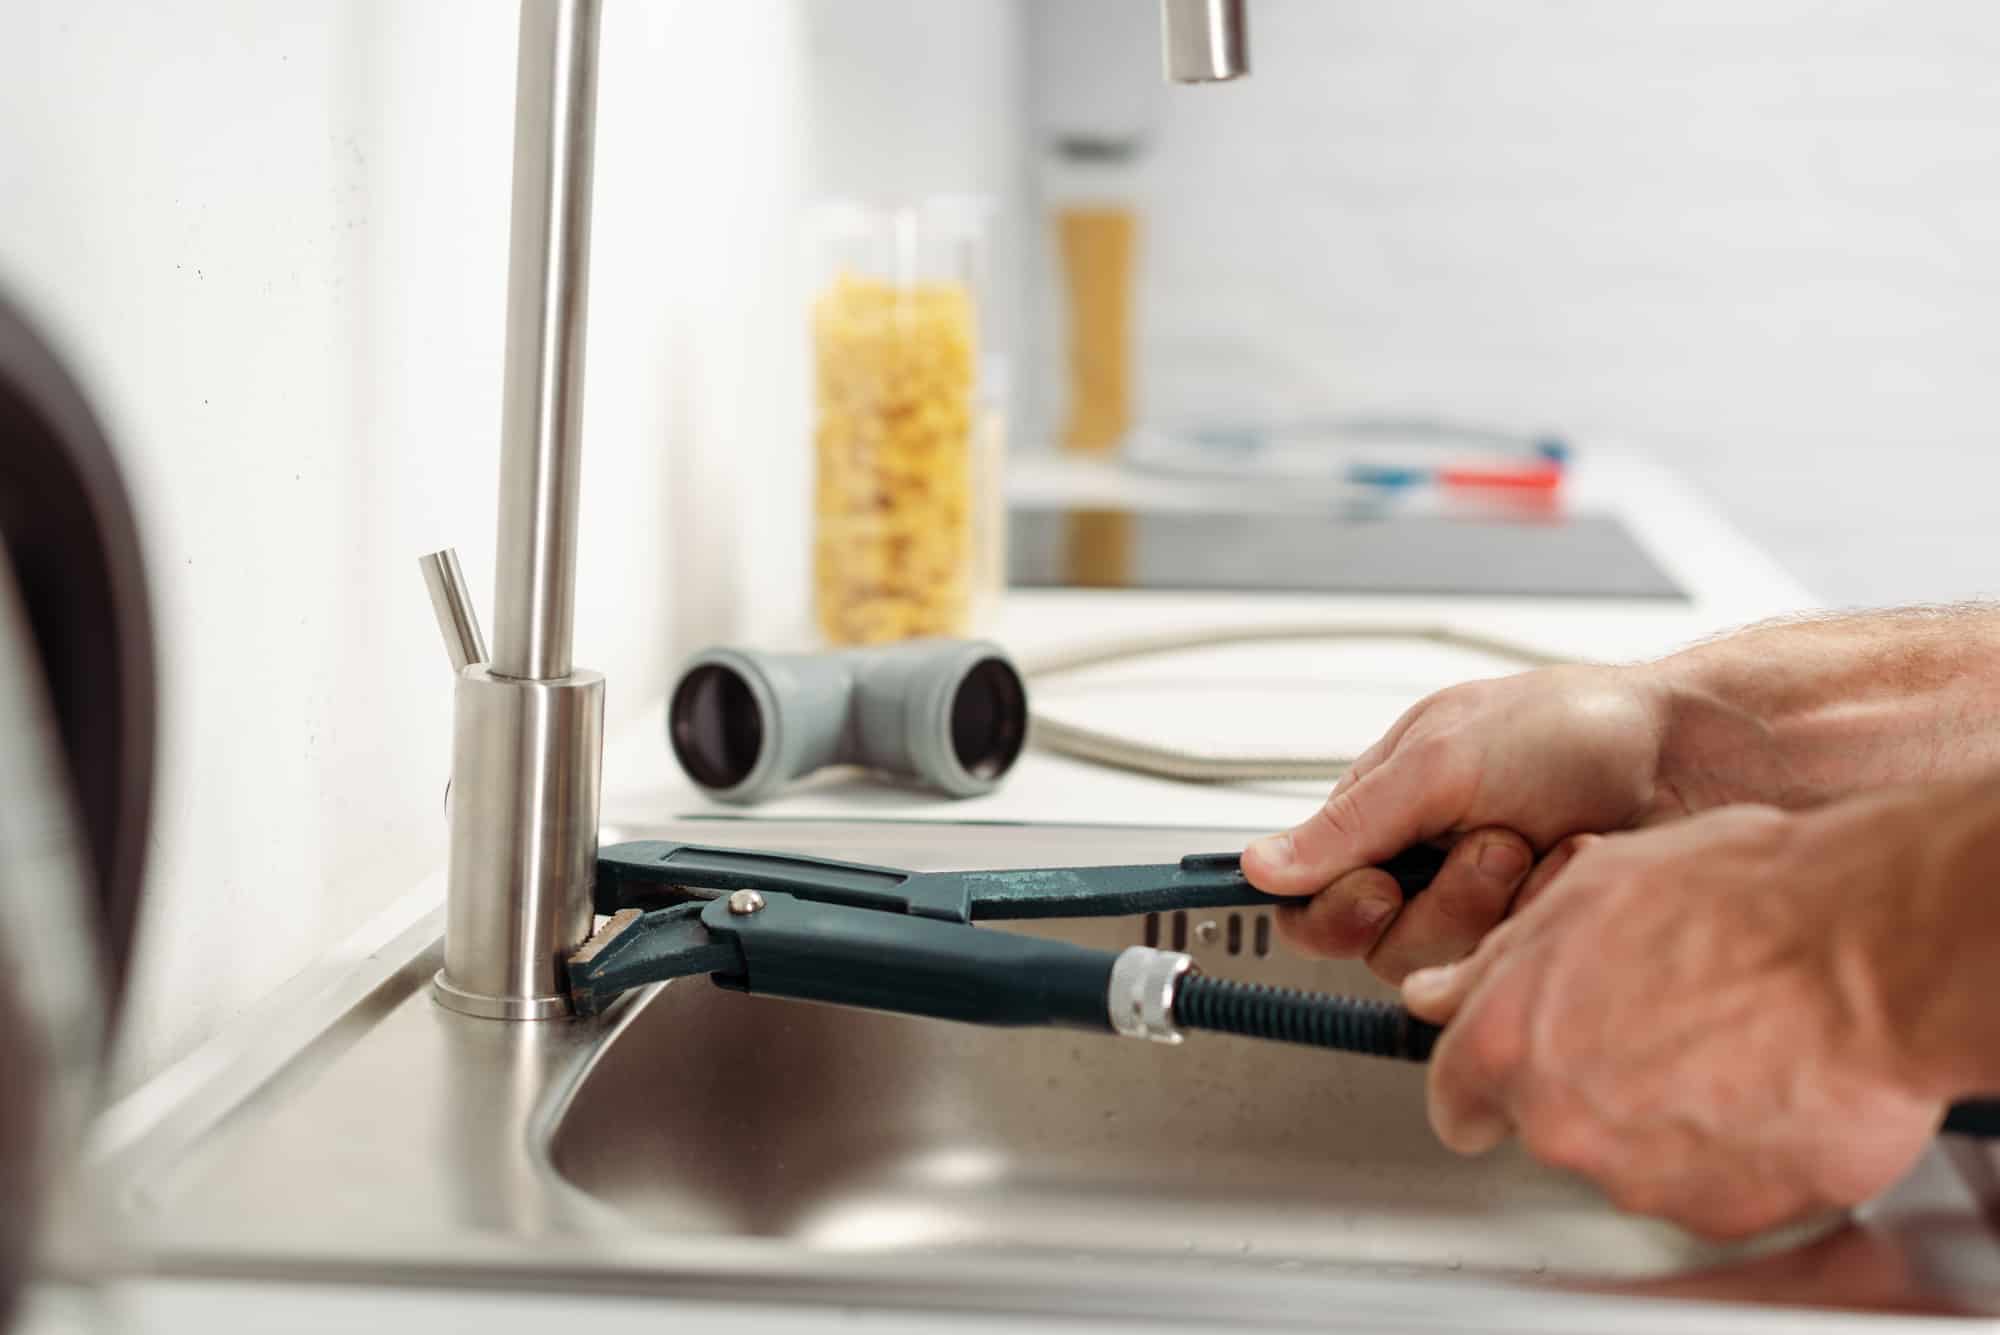
- Using an adjustable wrench, loosen and remove the mounting nuts by turning them counterclockwise. You may need to apply some force to loosen stubborn nuts.
- Once the mounting nuts are removed, gently lift the old faucet up and out of the sink or countertop. Be cautious when lifting the faucet, as it may still be connected to the water supply lines.
- Inspect the area around the mounting holes for any debris or buildup. Clean the area with a mild cleaner and a soft cloth if necessary.
As you remove the old faucet, you may notice water dripping or residual water in the supply lines. This is normal and can be managed by having a bucket or towel ready to catch any water. Alternatively, you may want to place a plug or cap on the open supply lines to prevent water from spilling further.
Now that the old Moen kitchen faucet has been successfully removed, you are ready to move on to the next step: installing the new faucet. Before we do that, make sure to inspect the new faucet and gather any additional tools or materials that may be needed for the installation process.
Congratulations on removing the old faucet! In the next step, we will guide you through the installation process of the new Moen kitchen faucet. Let’s proceed to Step 7.
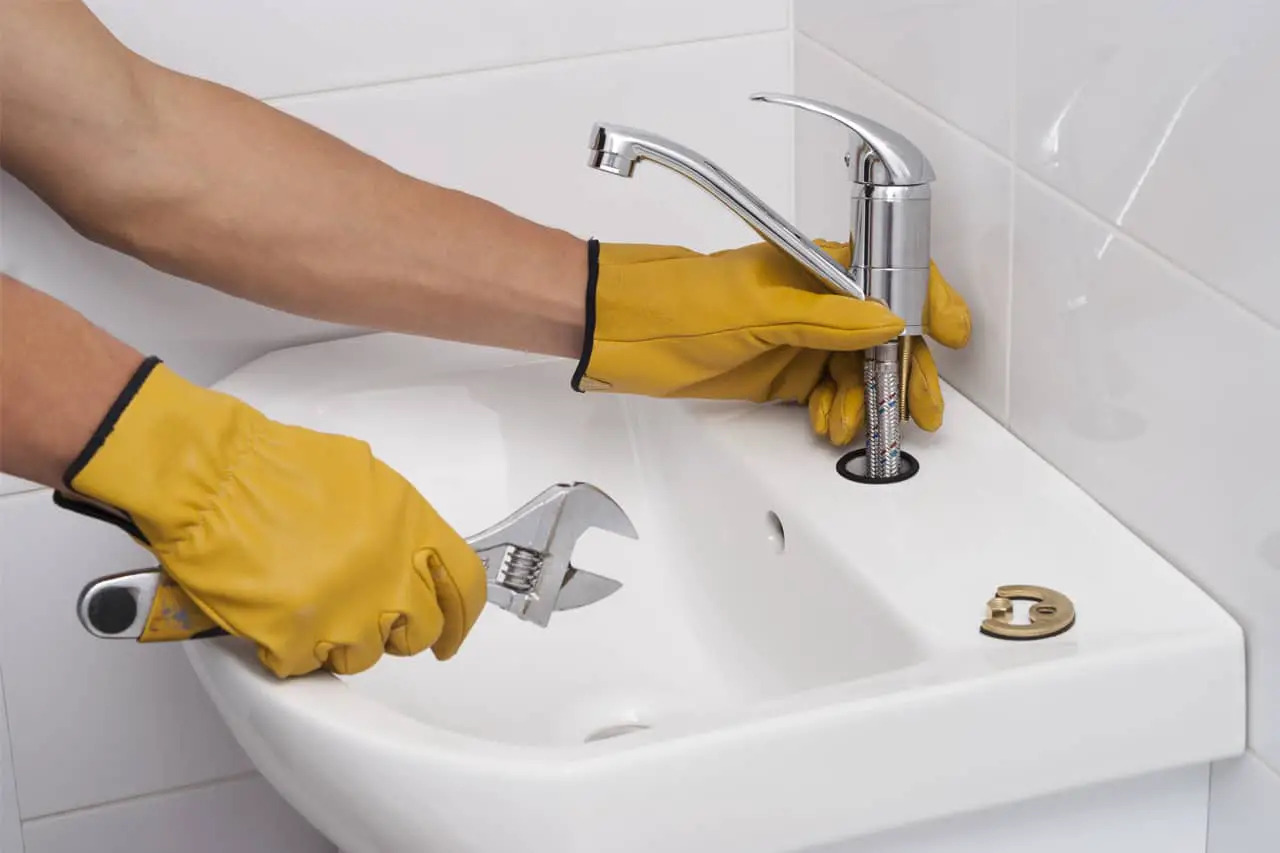
Before removing a Moen kitchen faucet, be sure to turn off the water supply. Use a basin wrench to loosen the nuts securing the faucet, and then carefully lift the faucet out of place. Keep track of the order of any parts removed for easy reassembly.
Step 7: Install the new faucet
With the old Moen kitchen faucet removed, it is now time to install the new faucet. Follow these steps to properly install the new faucet:
- Before starting the installation, read the manufacturer’s instructions that come with the new Moen kitchen faucet. Familiarize yourself with the specific requirements and recommendations for your particular model.
- Position the new faucet into the mounting holes on the sink or countertop, ensuring that the faucet is aligned with the desired location.
- From beneath the sink or countertop, secure the faucet in place by tightening the mounting nuts. Use an adjustable wrench to turn the nuts clockwise, but be careful not to overtighten as it may damage the faucet or the sink/countertop.
- Consult the manufacturer’s instructions on how to properly attach any additional components that may come with your new Moen kitchen faucet, such as a soap dispenser or side spray.
- Make sure all connections are securely fastened and check for any potential leaks or loose connections.
It is highly recommended to use plumber’s tape (also known as Teflon tape) on the threaded connections to create a watertight seal and prevent any leaks. Wrap a few layers of the tape around the male threads before connecting the water supply lines.
Once the new Moen kitchen faucet is installed and all connections are secure, you are on your way to enjoying a refreshed and functional kitchen. However, before you can start using the new faucet, there are a few more steps to complete. In the next step, we will guide you through reconnecting the sprayer hose (if applicable). Let’s proceed to Step 8.
Step 8: Reconnect the sprayer hose (if applicable)
If your new Moen kitchen faucet is equipped with a sprayer hose, you’ll need to reconnect it to the water supply. Follow these steps to properly reconnect the sprayer hose:
- Locate the connection point between the sprayer hose and the water supply line, which is typically located under the sink.
- Depending on the type of connection, you may need to screw or twist the sprayer hose onto the water supply line. Alternatively, there may be a quick-connect fitting that requires squeezing and releasing to attach the hose.
- Ensure that the connection is secure by gently tugging on the sprayer hose. It should be firmly attached and not easily come loose.
- Inspect the connection for any signs of leaks. If you notice any leaks, tighten the connection further or consider replacing any washers or o-rings that may be causing the issue.
Reconnecting the sprayer hose is an important step in completing the installation of your new Moen kitchen faucet. Double-check all connections to ensure they are secure and leak-free before moving on to the next step.
In the next step, we will focus on screwing on the bonnet nut, which will secure the faucet cartridge in place. Let’s proceed to Step 9.
Read more: How To Repair A Moen Shower Faucet
Step 9: Screw on the bonnet nut
After reconnecting the sprayer hose (if applicable), the next step is to screw on the bonnet nut. The bonnet nut secures the faucet cartridge in place and ensures a proper seal. Follow these steps to screw on the bonnet nut:
- Locate the bonnet nut, which is a large, hexagonal nut that fits over the faucet cartridge.
- Position the bonnet nut over the faucet cartridge and carefully thread it onto the faucet body.
- Using an adjustable wrench or pliers, tighten the bonnet nut by turning it clockwise. Be careful not to overtighten as it may damage the faucet or cause leaks.
As you tighten the bonnet nut, ensure that the faucet cartridge is properly aligned and seated in its position. This will ensure smooth operation and prevent any leaks. If the bonnet nut feels tight, but the faucet cartridge is not aligned correctly, loosen the nut slightly and adjust the cartridge before tightening it again.
Once the bonnet nut is securely tightened, you have successfully completed the installation of your Moen kitchen faucet. However, there are a few more steps to wrap up the process and ensure the faucet is functioning properly. In the next step, we will guide you through reattaching the handle. Let’s proceed to Step 10.
Step 10: Reattach the handle
With the bonnet nut securely in place, the next step is to reattach the handle to your Moen kitchen faucet. Follow these steps to properly reattach the handle:
- If the faucet handle has any mounting screws, align them with the screw holes on the faucet body.
- Gently slide the handle onto the faucet body, ensuring that any tabs or grooves are properly aligned.
- If applicable, reinsert and tighten the set screw using a Phillips screwdriver. This will secure the handle in place.
As you reattach the handle, make sure it is positioned correctly and operates smoothly. Test the handle by turning it on and off to ensure proper functioning of the faucets. If there is any resistance or difficulty in operating the handle, adjust the position or tighten the set screw further.
Reattaching the handle is one of the final steps in completing the installation of your Moen kitchen faucet. In the next step, we will focus on turning on the water supply. Let’s proceed to Step 11.
Step 11: Turn on the water supply
Now that you have successfully reattached the handle, it is time to turn on the water supply and test the functionality of your Moen kitchen faucet. Follow these steps to turn on the water supply:
- Locate the shut-off valves under the sink that you previously turned off.
- Turn the shut-off valve handles counterclockwise to gradually open the water flow. If you have a main shut-off valve for the entire plumbing system, make sure to turn it on as well.
As you turn on the water supply, allow the water to run for a few moments to remove any air bubbles or sediment that may have accumulated during the installation process. Check for any leaks around the faucet connections or sprayer hose attachment point. If you notice any leaks, tighten the connections as necessary or consider replacing any washers or o-rings that may be causing the issue.
Once you have confirmed that there are no leaks and the water is flowing smoothly, you have successfully turned on the water supply. In the next step, we will focus on testing the functionality of your new Moen kitchen faucet. Let’s proceed to Step 12.
Step 12: Test the new faucet
Congratulations on reaching the final step of installing your new Moen kitchen faucet! Now it’s time to test the functionality and performance of your new faucet. Follow these steps to properly test the faucet:
- Turn on the faucet by lifting the handle or operating any other control mechanisms that may be present.
- Check the water flow to ensure it is consistent and at the desired pressure.
- Run both hot and cold water to verify that the temperature control is working properly.
- Operate any additional features, such as a spray head or soap dispenser (if applicable), to confirm their functionality.
- Check for any unusual noises, vibrations, or leaks while the faucet is in operation.
During the testing phase, pay close attention to any irregularities or issues that may arise. If you encounter any problems, such as leaks or unusual noises, turn off the water supply immediately and recheck the connections. Tighten any loose fittings and retest the faucet to ensure the issues have been resolved.
It is worth noting that it may take some time to get used to the new faucet’s operation and features. Take some time to familiarize yourself with its functions and enjoy the improved functionality and aesthetics it brings to your kitchen.
With the successful testing of your new Moen kitchen faucet, you have completed the installation process. Enjoy the convenience and beauty of your new faucet, and remember to regularly maintain and clean it to prolong its lifespan and ensure its continued functionality.
Thank you for following this step-by-step guide, and we hope the installation of your new Moen kitchen faucet was a smooth and rewarding experience.
If you have any further questions or need assistance, do not hesitate to consult the manufacturer’s instructions or seek the help of a professional plumber. Happy cooking and cleaning with your new Moen kitchen faucet!
Read more: How To Fix A Moen Kitchen Faucet
Conclusion
Removing an old Moen kitchen faucet may seem like a daunting task, but with the right tools, materials, and step-by-step guidance, it can be a manageable and rewarding project. By following the steps outlined in this guide, you can successfully remove your old faucet and prepare for the installation of a new one.
It’s important to take your time throughout the process, ensuring that you follow safety precautions and carefully handle the plumbing connections. By gathering the necessary tools and materials, turning off the water supply, removing the handle, unscrewing the bonnet nut, disconnecting the sprayer hose (if applicable), removing the old faucet, installing the new faucet, reconnecting the sprayer hose (if applicable), screwing on the bonnet nut, reattaching the handle, turning on the water supply, and testing the new faucet, you can complete the removal with ease.
Remember to always refer to the manufacturer’s instructions for your specific Moen kitchen faucet model, as some steps may vary. Additionally, don’t hesitate to seek professional assistance if you encounter any difficulties or are unsure about any aspect of the removal process.
By successfully removing your old Moen kitchen faucet, you are one step closer to upgrading your kitchen space and enjoying the benefits of a new, functional, and stylish faucet. So, roll up your sleeves, gather your tools, and embark on this exciting project to improve your kitchen’s functionality and aesthetics.
We hope this guide has provided the necessary information and clarity to help you remove your Moen kitchen faucet. Good luck with your removal project, and may your new faucet bring you joy and convenience for years to come!
Just swapped out your old Moen kitchen faucet? Great work! But don't stop there—upgrading the faucet head can transform your kitchen's functionality and style even more. Dive into our guide on the best kitchen faucet head replacements for 2024. Packed with reviews and advice, this article ensures you find the perfect match for your needs in no time.
Frequently Asked Questions about How To Remove A Moen Kitchen Faucet
Was this page helpful?
At Storables.com, we guarantee accurate and reliable information. Our content, validated by Expert Board Contributors, is crafted following stringent Editorial Policies. We're committed to providing you with well-researched, expert-backed insights for all your informational needs.


0 thoughts on “How To Remove A Moen Kitchen Faucet”