Articles
How To Replace Wood Siding
Modified: February 29, 2024
Learn how to replace wood siding with helpful articles and step-by-step guides. Upgrade your home's exterior with the right techniques and materials.
(Many of the links in this article redirect to a specific reviewed product. Your purchase of these products through affiliate links helps to generate commission for Storables.com, at no extra cost. Learn more)
Introduction
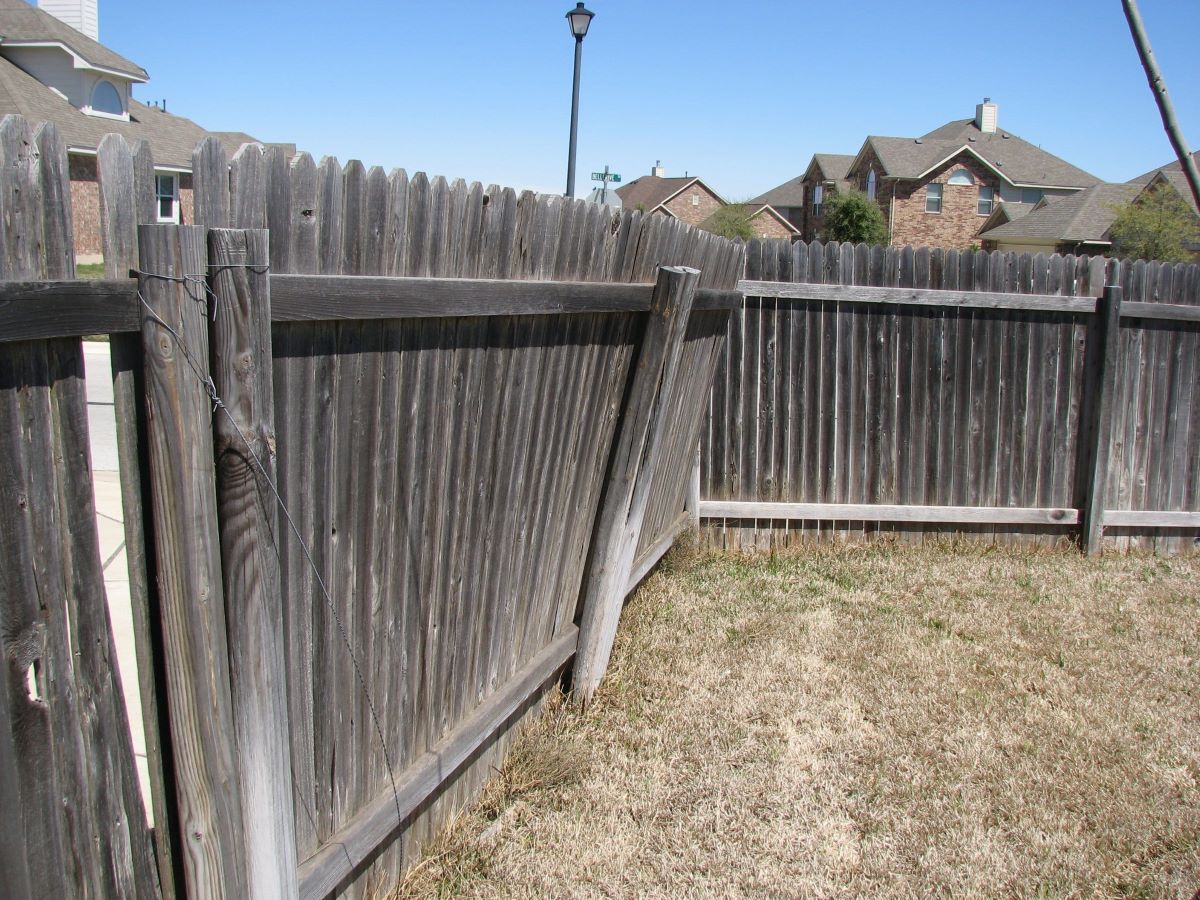
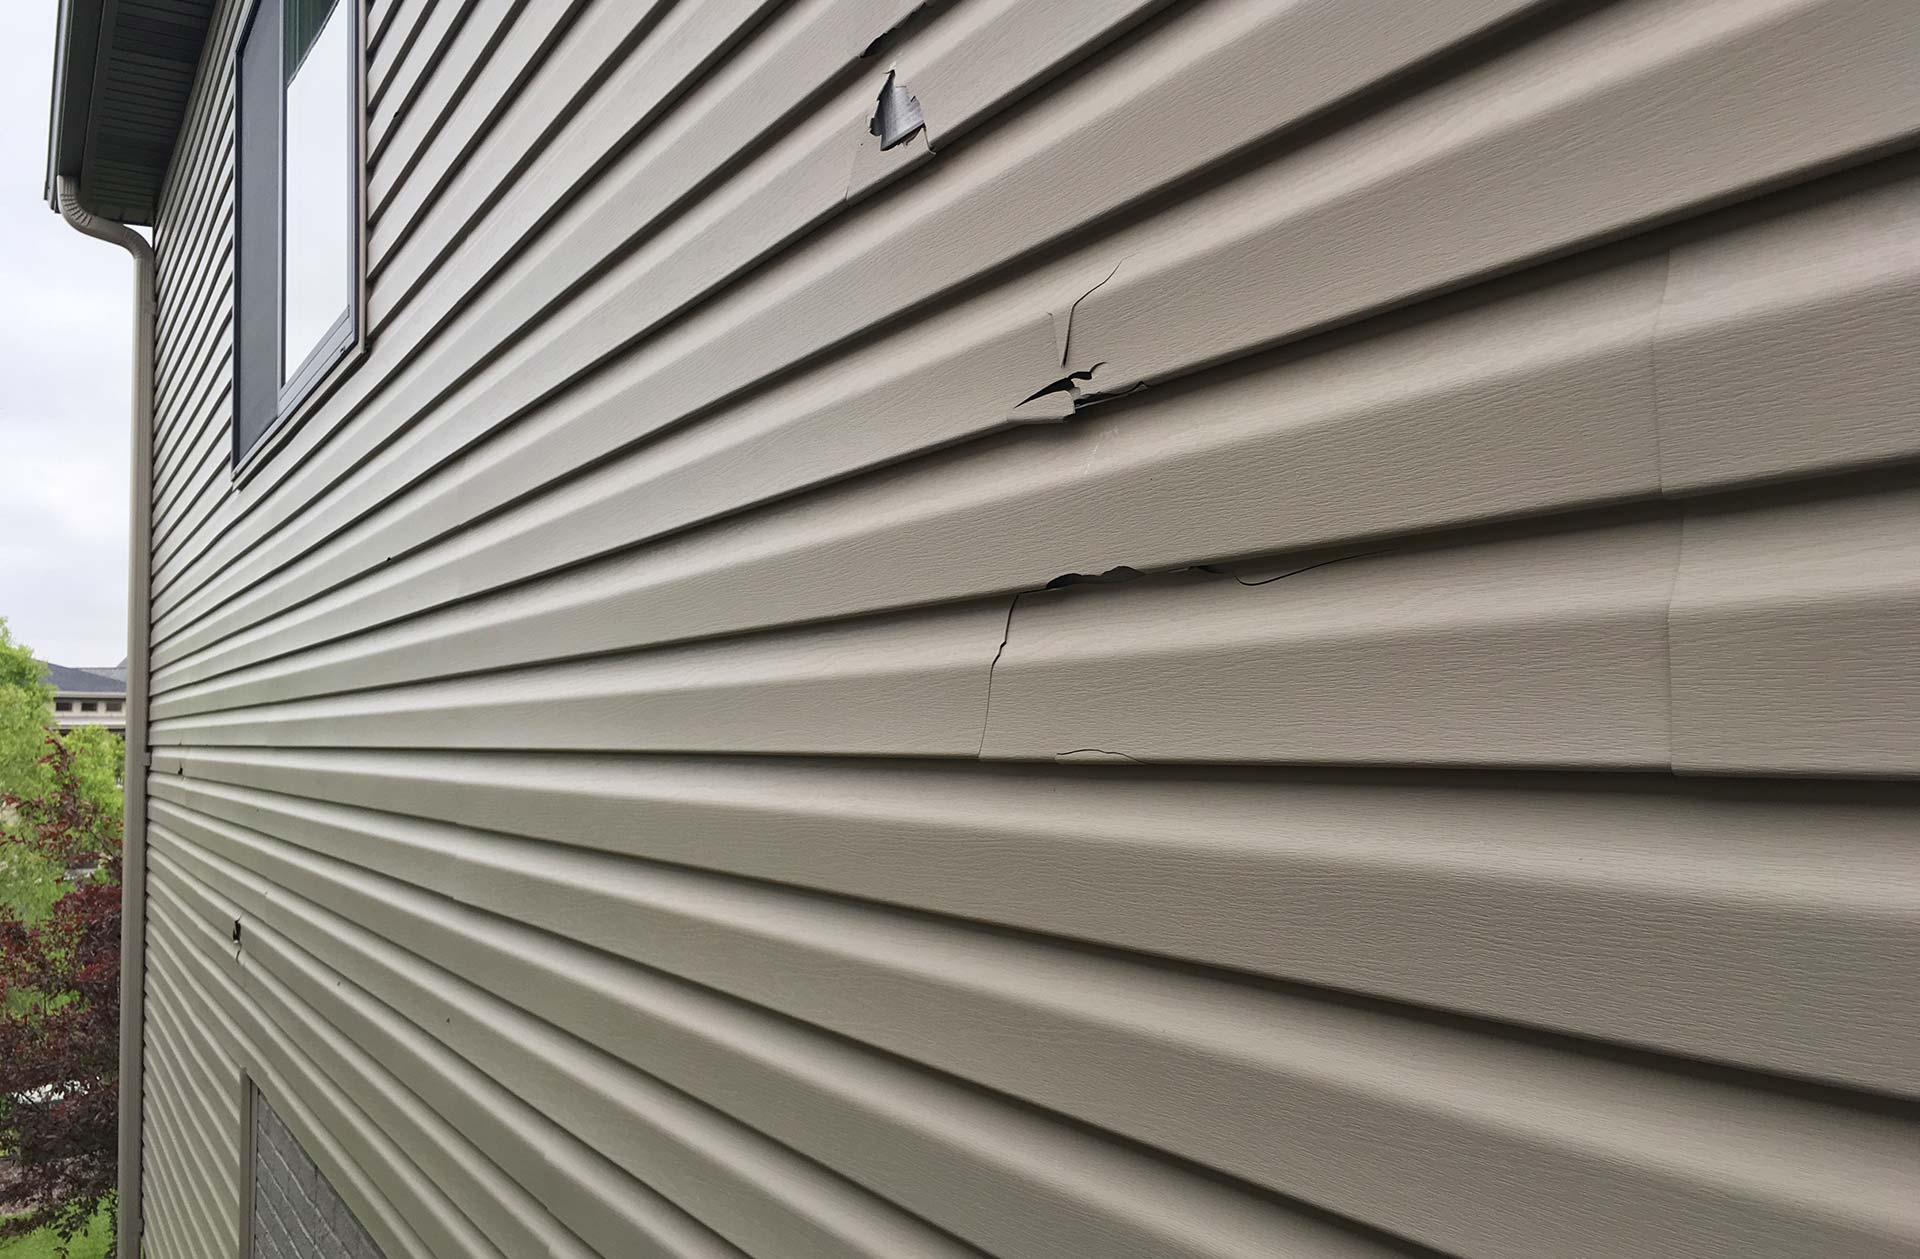
Replacing wood siding is a common home improvement project that can greatly enhance the appearance and durability of your house. Over time, wood siding may deteriorate due to exposure to the elements, pests, or general wear and tear. Additionally, outdated or damaged wood siding can make your home look outdated and reduce its curb appeal. By replacing the wood siding, you can improve the aesthetics of your home while also protecting it from further damage.
In this article, we will guide you through the step-by-step process of replacing wood siding. Whether you are a seasoned DIY enthusiast or a beginner, with the right tools and materials, you can successfully replace the wood siding on your own. So, let’s get started!
Key Takeaways:
- Replacing wood siding is a rewarding DIY project that enhances your home’s appearance and durability. From preparation to final inspection, attention to detail and safety are crucial for a successful installation.
- Properly maintaining and caring for your new wood siding will prolong its lifespan and preserve its beauty. Regular inspections, cleaning, and touch-ups are essential for protecting your home from the elements.
Read more: How To Replace Rotted Wood Siding
Step 1: Prepare the Tools and Materials
Before you begin the process of replacing wood siding, it is important to gather all the necessary tools and materials to ensure a smooth and efficient project. Here is a list of items you will need:
- Protective gear: Safety goggles, work gloves, and a dust mask
- Demolition tools: Pry bar, hammer, and a reciprocating saw
- Measuring tools: Tape measure and a carpenter’s square
- Cutting tools: Circular saw or a miter saw
- Nails or screws: Depending on your preference and the type of siding you are installing
- Replacement wood siding: Choose siding that matches the style and dimensions of your existing siding
- Sealant and caulk: To ensure a watertight installation
- Paint and primer: If you plan on painting the new siding
It is important to select high-quality materials that are suitable for your climate. Consider the durability, maintenance requirements, and overall aesthetic appeal of the siding material you choose.
Once you have gathered all the necessary tools and materials, you are ready to move on to the next step.
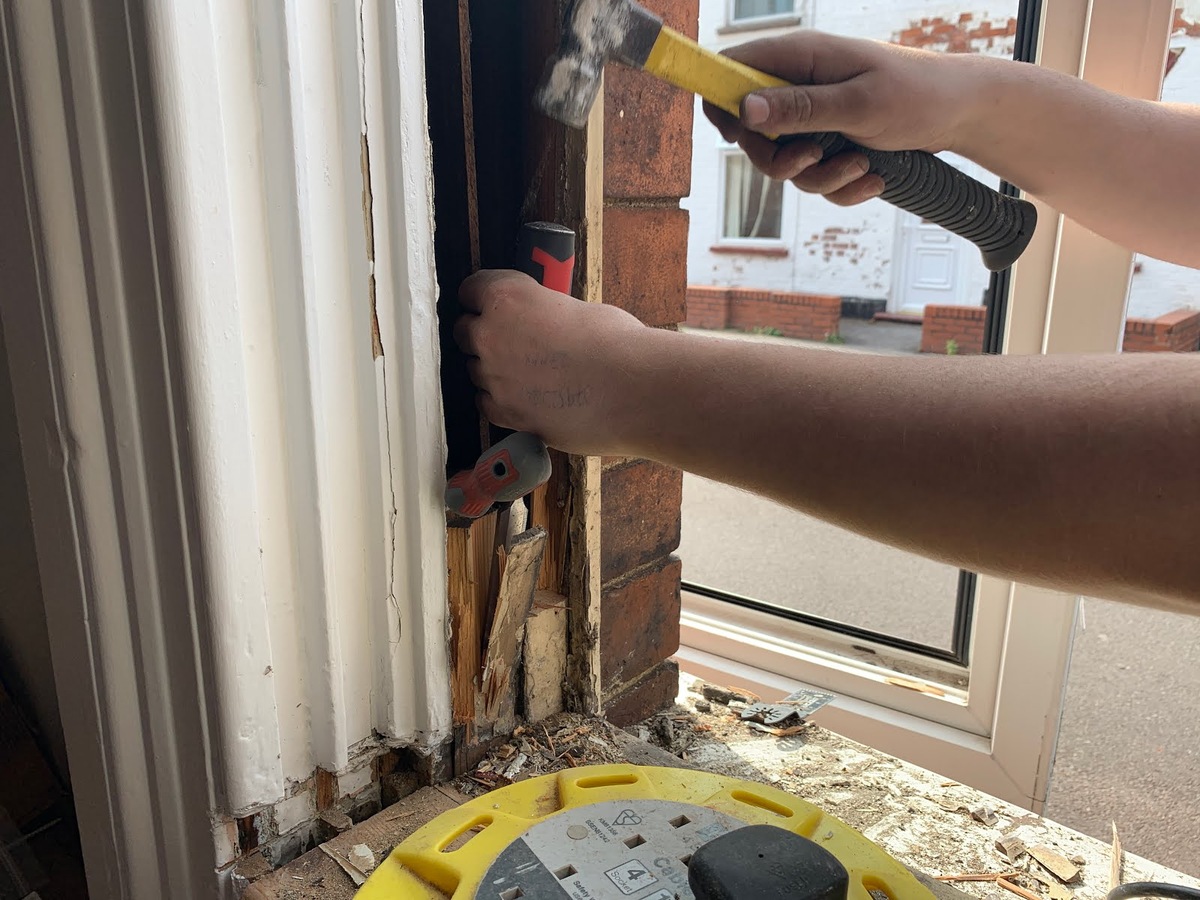
Step 2: Remove the Existing Wood Siding
Now that you have everything you need, it’s time to remove the old wood siding. This step requires careful attention and precision to avoid damaging the underlying structure of your home. Follow these steps to remove the existing siding:
- Start by removing any trim or molding around the edges of the siding using a pry bar. Take your time and work slowly to avoid any accidents or damage.
- Using a pry bar and hammer, gently remove the first piece of siding. Start at the bottom and work your way up, pulling each piece away from the wall. Be mindful of any nails or screws that may be holding the siding in place.
- If you encounter stubborn or hard-to-remove pieces, use a reciprocating saw to cut through them. Be cautious not to cut into the underlying structure or insulation.
- Continue removing the remaining pieces of siding, one by one. Take note of any areas with excessive damage or rot, as these will need additional attention during the repair process.
- Once all the siding has been removed, inspect the underlying structure for any signs of damage, decay, or pest infestation. If any issues are identified, it is crucial to address them before proceeding with the installation of the new siding.
Removing the existing wood siding can be a labor-intensive process, so make sure to take breaks as needed and stay hydrated. Dispose of the old siding responsibly, following local guidelines for waste management.
With the old siding successfully removed, you are ready to move on to the next step: inspecting and repairing the underlying structure.
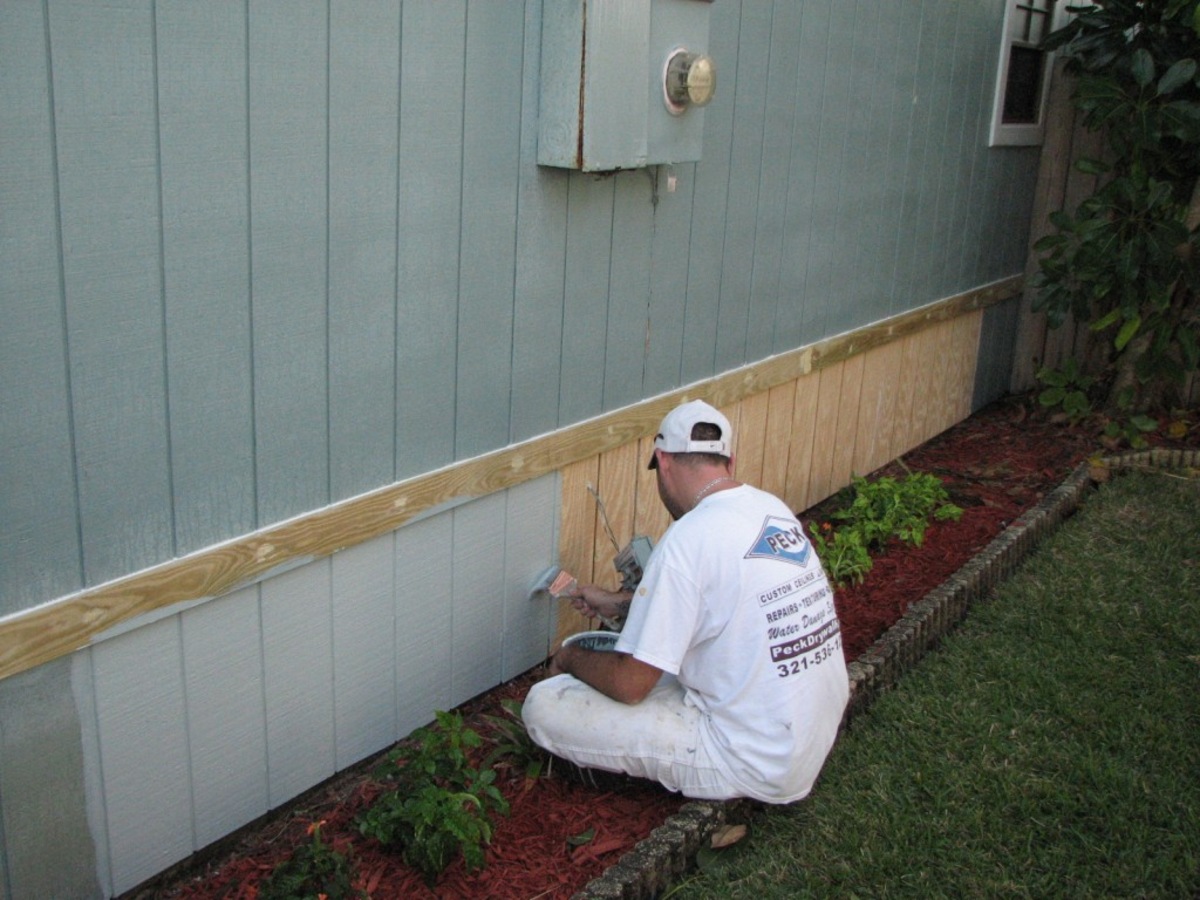
Step 3: Inspect and Repair the Underlying Structure
Now that the old siding has been removed, it’s time to inspect the underlying structure of your home. This step is crucial to ensure that the new wood siding will have a solid and stable foundation. Follow these steps to inspect and repair the underlying structure:
- Thoroughly examine the exposed sheathing or wall studs for any signs of damage, decay, or pest infestation. Look for soft spots, rot, or any areas that appear compromised.
- If you identify any damaged areas, you will need to address them before proceeding with the installation of the new siding. Depending on the extent of the damage, you may need to replace sections of the sheathing or reinforce the wall studs.
- Replace any damaged or rotting sections of the sheathing with new plywood or OSB (oriented strand board). Ensure that the replacement pieces are securely fastened and properly aligned with the surrounding structure.
- If the wall studs show signs of damage or are weakened, reinforce them with additional lumber. Use pressure-treated or rot-resistant wood to prevent future issues.
- Inspect the areas around windows, doors, and other openings for any gaps or air leaks. Apply weatherstripping or caulking as needed to ensure a tight seal.
- Take the time to properly insulate the walls to improve energy efficiency. Install insulation between the wall studs to help regulate indoor temperature and reduce heat transfer.
Properly inspecting and repairing the underlying structure is vital to prevent future problems and ensure the longevity of your new wood siding. It’s essential to address any issues promptly and thoroughly before moving on to the next step.
With the underlying structure in good shape, you are now ready to proceed to the next step: installing building paper or house wrap to provide an additional layer of protection.
Step 4: Install Building Paper or House Wrap
Before installing the new wood siding, it is essential to create a moisture barrier by installing building paper or house wrap. This layer of protection will help prevent water infiltration and improve the overall durability of your siding. Follow these steps to properly install building paper or house wrap:
- Start by ensuring that the underlying structure is clean and free of debris. Remove any nails, screws, or protrusions that may interfere with the installation process.
- Measure and cut the building paper or house wrap to fit the area of the wall where the siding will be installed. Allow for at least a 1-inch overlap at the seams.
- Begin at the bottom of the wall and secure the first piece of building paper or house wrap using staple gun or nails, ensuring it is straight and taut. Space the fasteners 12 to 16 inches apart, making sure they penetrate the sheathing or stud behind.
- Continue installing additional pieces, overlapping each one by at least 1 inch. Use a utility knife to trim any excess material as needed.
- Pay extra attention to areas around windows, doors, and other openings. Ensure that the building paper or house wrap is properly integrated and sealed to prevent potential water intrusion.
- Inspect the installed barrier for any gaps, tears, or loose sections. Make any necessary repairs before moving on to the next step.
By properly installing building paper or house wrap, you are providing an extra layer of protection against moisture and improving the overall performance of your wood siding. It is an important step that should not be overlooked.
Now that the building paper or house wrap is in place, you are ready to move on to the next step: measuring and cutting the new wood siding.
When replacing wood siding, be sure to inspect the underlying structure for any damage or rot. Replace any damaged areas before installing the new siding to ensure a solid foundation.
Read more: How To Clean Wood Siding
Step 5: Measure and Cut the New Wood Siding
With the preparation work complete, it’s time to measure and cut the new wood siding to ensure a precise and professional-looking installation. Follow these steps to measure and cut the new siding:
- Start by carefully measuring the length and height of each section where the new siding will be installed. It’s important to measure accurately to avoid any gaps or improper fitting.
- Add an additional 1/4 inch to each measurement to accommodate for expansion due to weather changes. This slight gap will prevent the siding from buckling or warping over time.
- Transfer the measurements onto the backside of the new wood siding using a pencil or marker. Double-check your measurements before making any cuts.
- Using a circular saw or miter saw, carefully cut along the marked lines. Ensure that the saw blade is appropriate for cutting wood siding to avoid splintering or damaging the material.
- For angled cuts, such as those around windows or corners, use a miter saw to achieve the desired angle. Take your time and make precise cuts for a clean and professional finish.
- Before installing the cut siding, perform a dry-fit by holding the piece against the wall to ensure that it fits correctly and aligns with adjacent pieces.
- Make any necessary adjustments or additional cuts as needed to ensure a proper fit. Take into consideration any trim or molding that may need to be installed alongside the siding.
Accurate measurements and precise cuts are crucial to achieving a seamless and visually appealing wood siding installation. Taking the time to measure and cut the siding properly will save you from headaches and potential rework in the future.
With the new wood siding accurately cut and ready for installation, you are now prepared to move on to the next step: attaching the new siding to the wall.
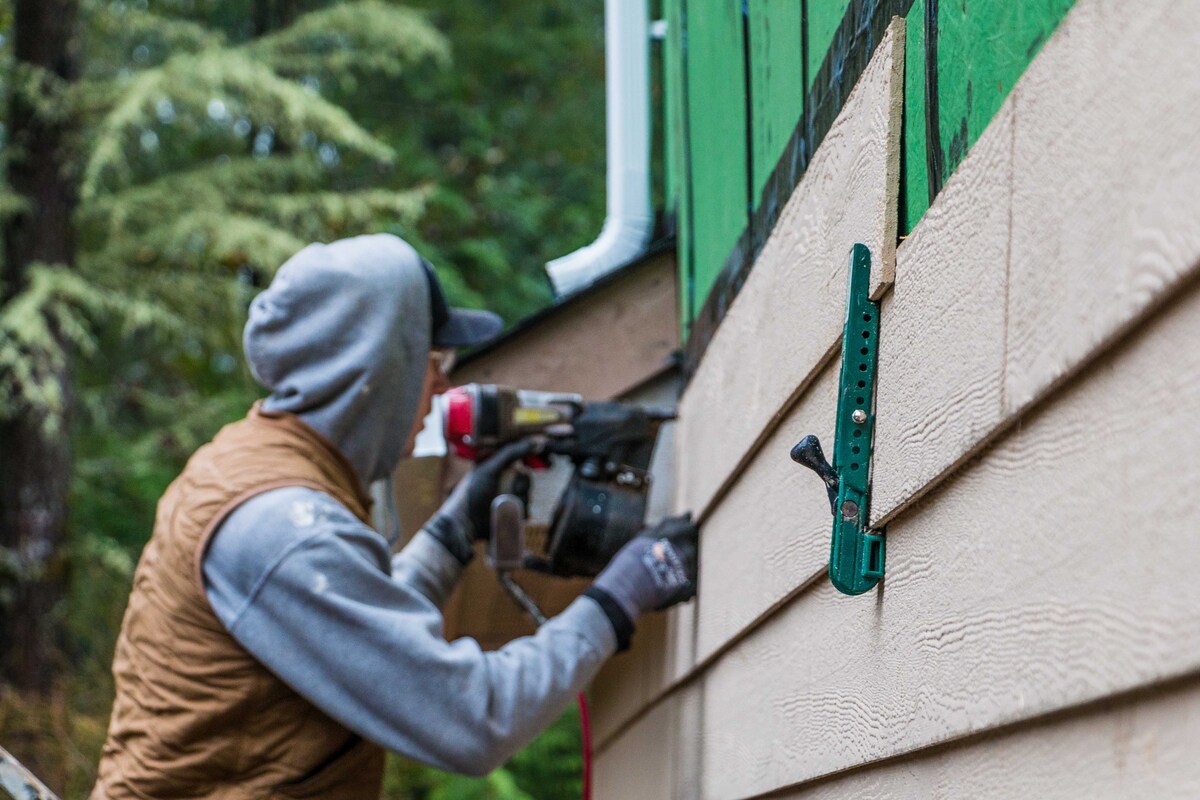
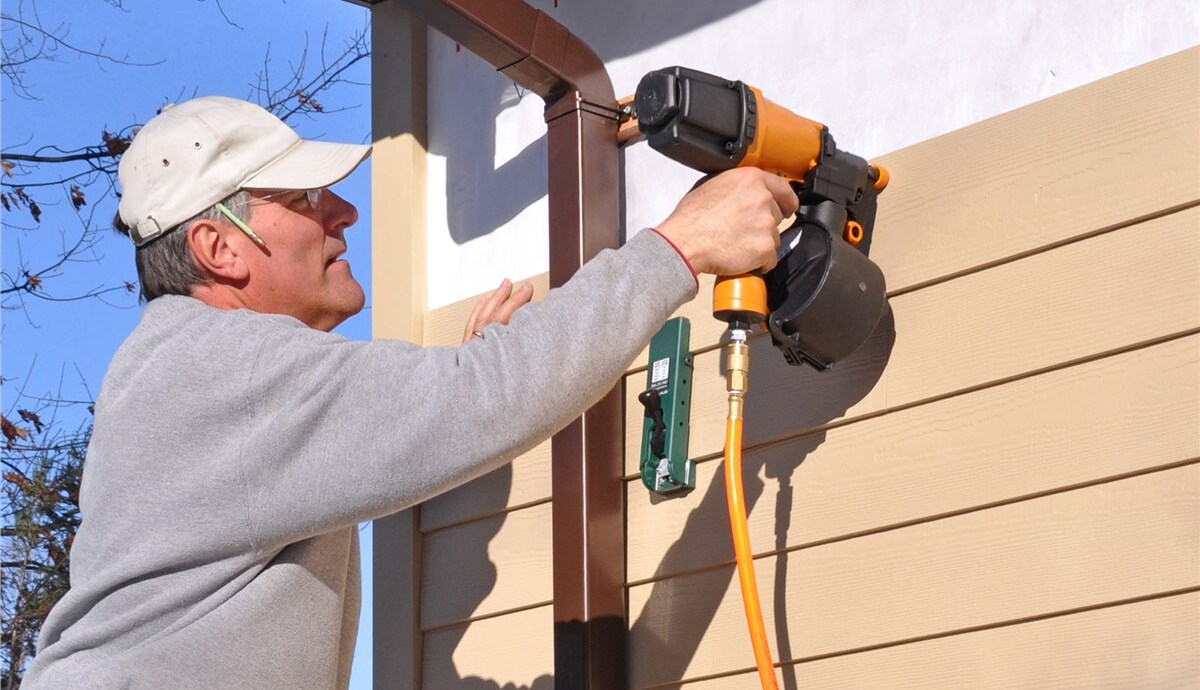
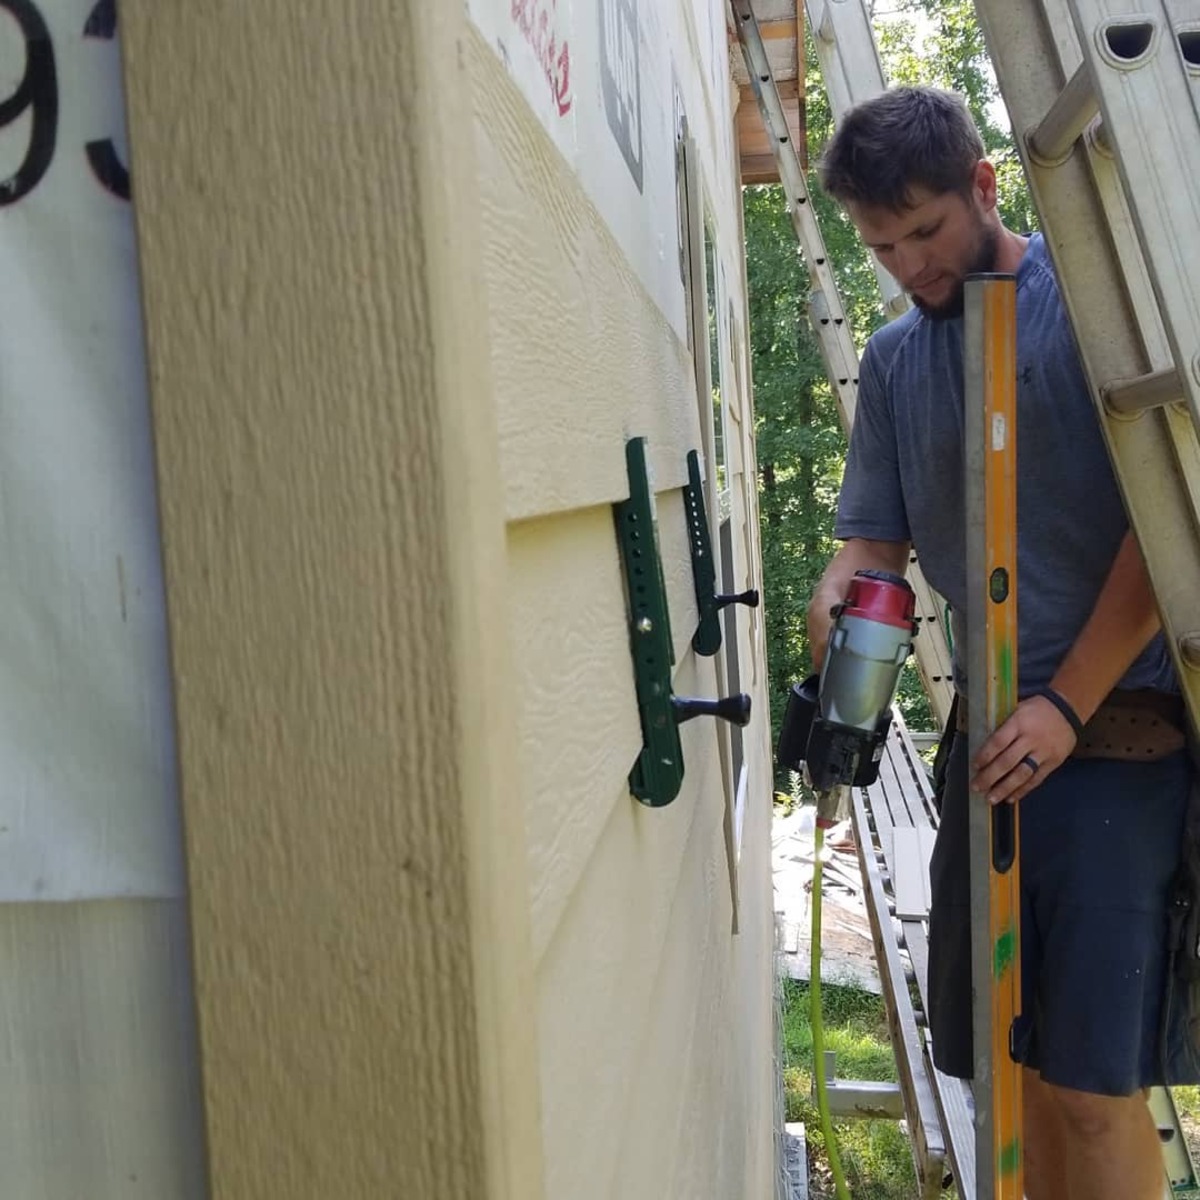
Step 6: Attach the New Siding
Now that you have prepared the new wood siding, it’s time to attach it to the wall. Proper installation is key to ensure a secure and long-lasting siding. Follow these steps to attach the new wood siding:
- Start at the bottom of the wall and align the first piece of siding with the corner trim, leaving a small gap for expansion. Use a level to ensure that the siding is straight and level.
- Secure the siding to the wall by nailing or screwing it into the wall studs or sheathing. Place fasteners approximately 6 to 8 inches apart and 1 inch from the edges of the siding.
- Continue installing the remaining pieces of siding, overlapping each one to create a weather-resistant barrier. Ensure that each piece is securely fastened and aligned with the previous piece.
- If necessary, use a pry bar to adjust the alignment of the siding or make any minor trim cuts for a better fit.
- For areas around windows, doors, or other openings, cut the siding to fit, allowing for the recommended gap for expansion. Install trim pieces to provide a finished look and to protect these vulnerable areas.
- As you install each row of siding, periodically step back and check for any irregularities, ensuring that the siding is visually appealing and aligned with the rest of the house.
- Continue the installation process until you have covered the entire wall with new wood siding.
Throughout the installation, take care to maintain proper spacing between the pieces of siding to allow for expansion and contraction due to temperature changes. This will prevent any warping or buckling of the wood siding.
Once the new wood siding is securely attached to the wall, you can proceed to the next step: applying sealant and painting the new siding.
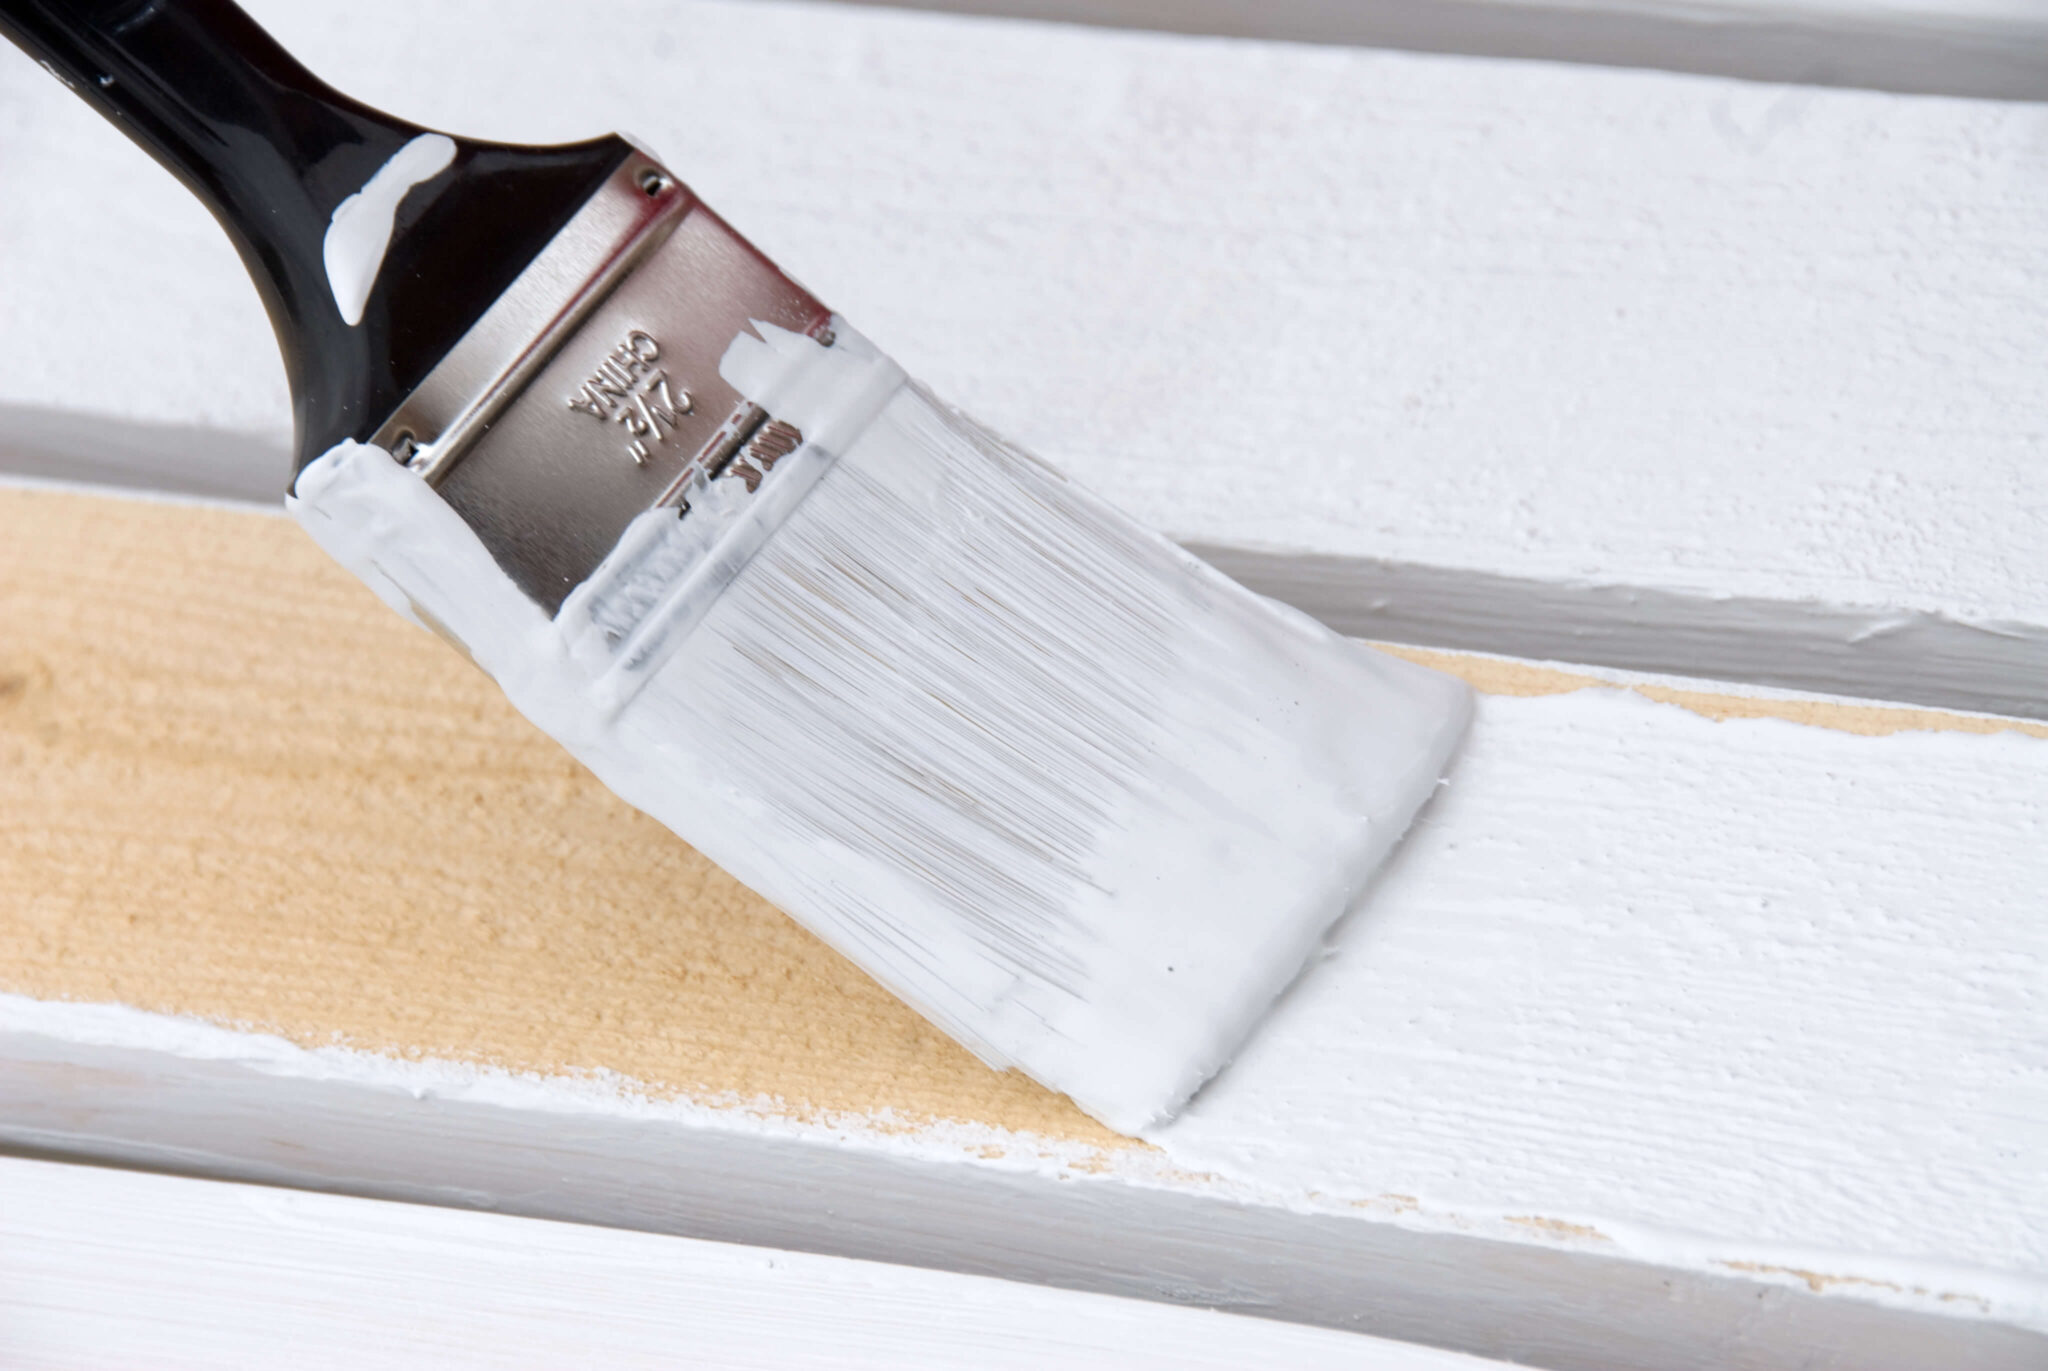
Step 7: Apply Sealant and Paint the New Siding
After attaching the new wood siding, it’s important to apply sealant and paint to protect the siding and enhance its overall appearance. Follow these steps to properly seal and paint the new siding:
- Inspect the newly installed siding for any visible gaps, cracks, or joints between the pieces. Fill these gaps with a high-quality exterior caulk to prevent water infiltration.
- Use a caulk gun to apply the sealant along the edges, corners, and any areas where the siding meets other materials, such as windows or doors. Smooth the caulk with your finger or a caulk finishing tool for a clean finish.
- Allow the caulk to fully cure according to the manufacturer’s instructions before proceeding to the next step.
- If desired, prime the wood siding with an exterior primer to ensure better adherence and coverage of the paint. This step is particularly important for unpainted or bare wood siding.
- Once the primer is dry, apply the exterior paint of your choice using a brush, roller, or sprayer. Follow the manufacturer’s instructions for application techniques and drying times.
- Apply at least two coats of paint to achieve a uniform and durable finish. Ensure that each coat is fully dry before applying the next one.
- Pay extra attention to areas that may be prone to moisture, such as the bottom edges of the siding and any joints or seams. Apply an additional layer of paint or sealant for added protection.
Applying sealant and paint to the new wood siding not only enhances its appearance but also provides an added layer of protection against the elements. The sealant helps prevent water penetration, while the paint acts as a barrier against UV rays, moisture, and general wear and tear.
With the sealant and paint applied to the new siding, you are now ready for the final step: cleaning up and conducting a final inspection.
Step 8: Clean Up and Final Inspection
As you near the completion of the wood siding replacement project, it’s important to clean up the work area and conduct a final inspection to ensure a job well done. Follow these steps to complete the process:
- Remove any debris, leftover materials, and tools from the work area. Dispose of waste responsibly, following local guidelines for disposal.
- Perform a thorough inspection of the newly installed wood siding. Check for any loose or protruding nails or screws and secure them properly to prevent any potential hazards or damage.
- Check for any visible gaps, cracks, or imperfections in the caulk and paint. Touch up as needed to ensure a seamless and visually appealing finish.
- Inspect the entire area to ensure that all trim pieces and molding are securely attached and aligned with the new siding.
- Step back and evaluate the overall appearance of the wood siding. Check for any areas that may need additional paint touch-ups, caulking, or trim adjustments.
- Once you are satisfied with the final results, take a moment to appreciate your hard work and the transformation of your home’s exterior.
Completing a thorough clean-up and conducting a final inspection will ensure that your wood siding replacement project is finished to your satisfaction. It will also help identify any minor issues that can be addressed before they become bigger problems down the line.
Congratulations on successfully replacing the wood siding on your home! With the new siding in place, you can enjoy an enhanced exterior appearance and the confidence of knowing that your home is well-protected for years to come.
Remember to properly maintain and care for your wood siding, including periodic cleaning, inspections, and touch-ups, to prolong its lifespan and maintain its beauty.
Thank you for following this step-by-step guide. We hope it has been helpful in your wood siding replacement project.
Best of luck with your home improvement endeavors!
Read more: How To Paint Wood Siding
Conclusion
Replacing wood siding is a significant home improvement project that can not only improve the aesthetics of your home but also protect it from the elements. By following the step-by-step process outlined in this article, you can successfully replace your wood siding and achieve a professional and long-lasting result.
From preparing the tools and materials to the final inspection, each step plays a crucial role in ensuring a seamless and visually appealing installation. Take your time with each phase, paying attention to detail and maintaining a high level of craftsmanship.
Remember to prioritize safety throughout the project by wearing protective gear and using caution when operating tools or working at heights. Additionally, be mindful of any building codes or regulations that may apply to your area and consult with professionals if needed.
Choosing the right materials and properly maintaining your new wood siding will contribute to its longevity. Regular inspections, cleaning, and touch-ups will help preserve the siding’s appearance and protect it from damage caused by weather, pests, or time.
Whether you are a seasoned DIY enthusiast or a beginner, with the right tools, materials, and guidance, you can successfully replace your wood siding and enjoy the benefits of a refreshed and durable home exterior.
We hope this comprehensive guide has provided you with the necessary knowledge and confidence to embark on your wood siding replacement project. Remember, take your time, be patient, and enjoy the process of transforming your home into a more beautiful and sustainable space.
Good luck, and may your new wood siding bring many years of joy and pride!
Frequently Asked Questions about How To Replace Wood Siding
Was this page helpful?
At Storables.com, we guarantee accurate and reliable information. Our content, validated by Expert Board Contributors, is crafted following stringent Editorial Policies. We're committed to providing you with well-researched, expert-backed insights for all your informational needs.


0 thoughts on “How To Replace Wood Siding”