Articles
How To Level A Concrete Floor
Modified: December 7, 2023
Learn the best techniques for leveling a concrete floor in this comprehensive guide. Our articles are filled with expert tips and step-by-step instructions to ensure a smooth and level surface.
(Many of the links in this article redirect to a specific reviewed product. Your purchase of these products through affiliate links helps to generate commission for Storables.com, at no extra cost. Learn more)
Introduction
Having a level concrete floor is essential for a variety of projects, whether you’re preparing the surface for new flooring, setting up a workshop or garage, or simply looking to improve the overall aesthetics of your space. Uneven floors can cause stability issues, compromise the installation of materials, and create an unsightly and uneven finish.
Leveling a concrete floor may seem like a daunting task, but it can be accomplished with the right materials, tools, and techniques. In this article, we will guide you through the step-by-step process of leveling a concrete floor, ensuring that you achieve a smooth and even surface.
Before diving into the details, it’s important to note that the complexity and extent of the leveling process may vary depending on the condition of your concrete floor. Minor imperfections and shallow depressions can often be easily resolved, while more significant undulations and cracks may require professional assistance. Assess the condition of your floor to determine if a DIY approach is suitable or if hiring a professional is necessary.
To successfully level a concrete floor, it’s crucial to have the right materials and tools at your disposal. Let’s take a look at what will be needed to carry out this project:
- Self-leveling compound
- Trowel or squeegee
- Pump sprayer or watering can
- Concrete grinder or floor sander (if necessary)
- Leveling or measuring tools (such as a laser level or long straightedge)
- Gloves, goggles, and a face mask for safety
Now that you have a good understanding of what is required, let’s move on to the step-by-step process of leveling a concrete floor.
Key Takeaways:
- Achieving a level concrete floor is crucial for stability and aesthetics. Proper preparation, identification of high and low spots, and strategic application of self-leveling compound are key steps in the process.
- Prioritize safety, patience, and attention to detail when leveling a concrete floor. Thorough cleaning, precise leveling of low and high spots, and allowing for proper curing time are essential for a successful outcome.
Read more: How To Self-Level Concrete Floor
Materials and Tools Needed
Before you begin leveling your concrete floor, it’s important to gather all the necessary materials and tools. Having everything on hand will make the process much smoother and efficient. Here is a list of the materials and tools you will need:
- Self-leveling compound: This is a cementitious mixture specifically designed to level uneven concrete surfaces. Make sure to choose a high-quality self-leveling compound that suits your specific needs and follow the manufacturer’s instructions for mixing and application.
- Trowel or squeegee: These tools are used to spread the self-leveling compound evenly across the surface. A trowel with a flat edge or a large squeegee with a rubber blade is commonly used for this purpose.
- Pump sprayer or watering can: You will need a pump sprayer or a watering can to dampen the concrete surface before applying the self-leveling compound. This helps in achieving better adhesion and prevents premature drying of the compound.
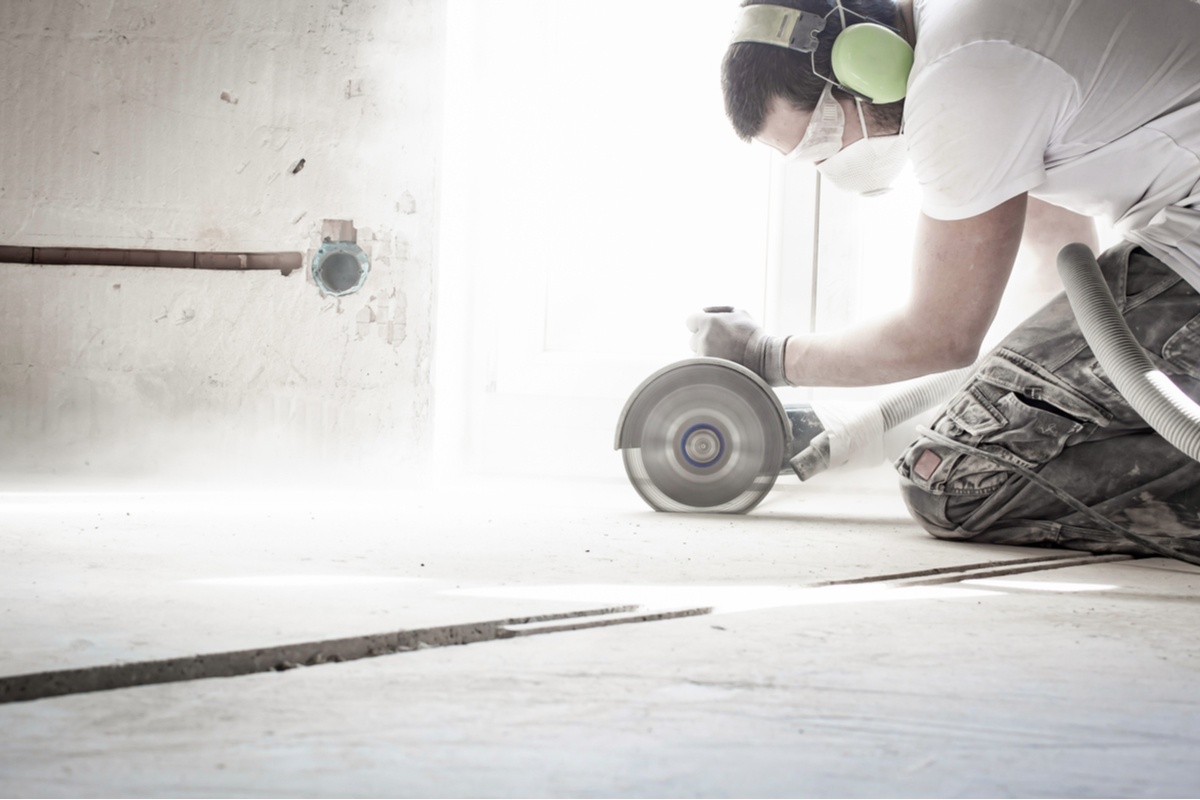
- Concrete grinder or floor sander (if necessary): If your concrete floor has raised areas or rough patches, you may need to use a concrete grinder or floor sander to smooth them out before applying the self-leveling compound. These tools are especially useful for leveling stubborn high spots.
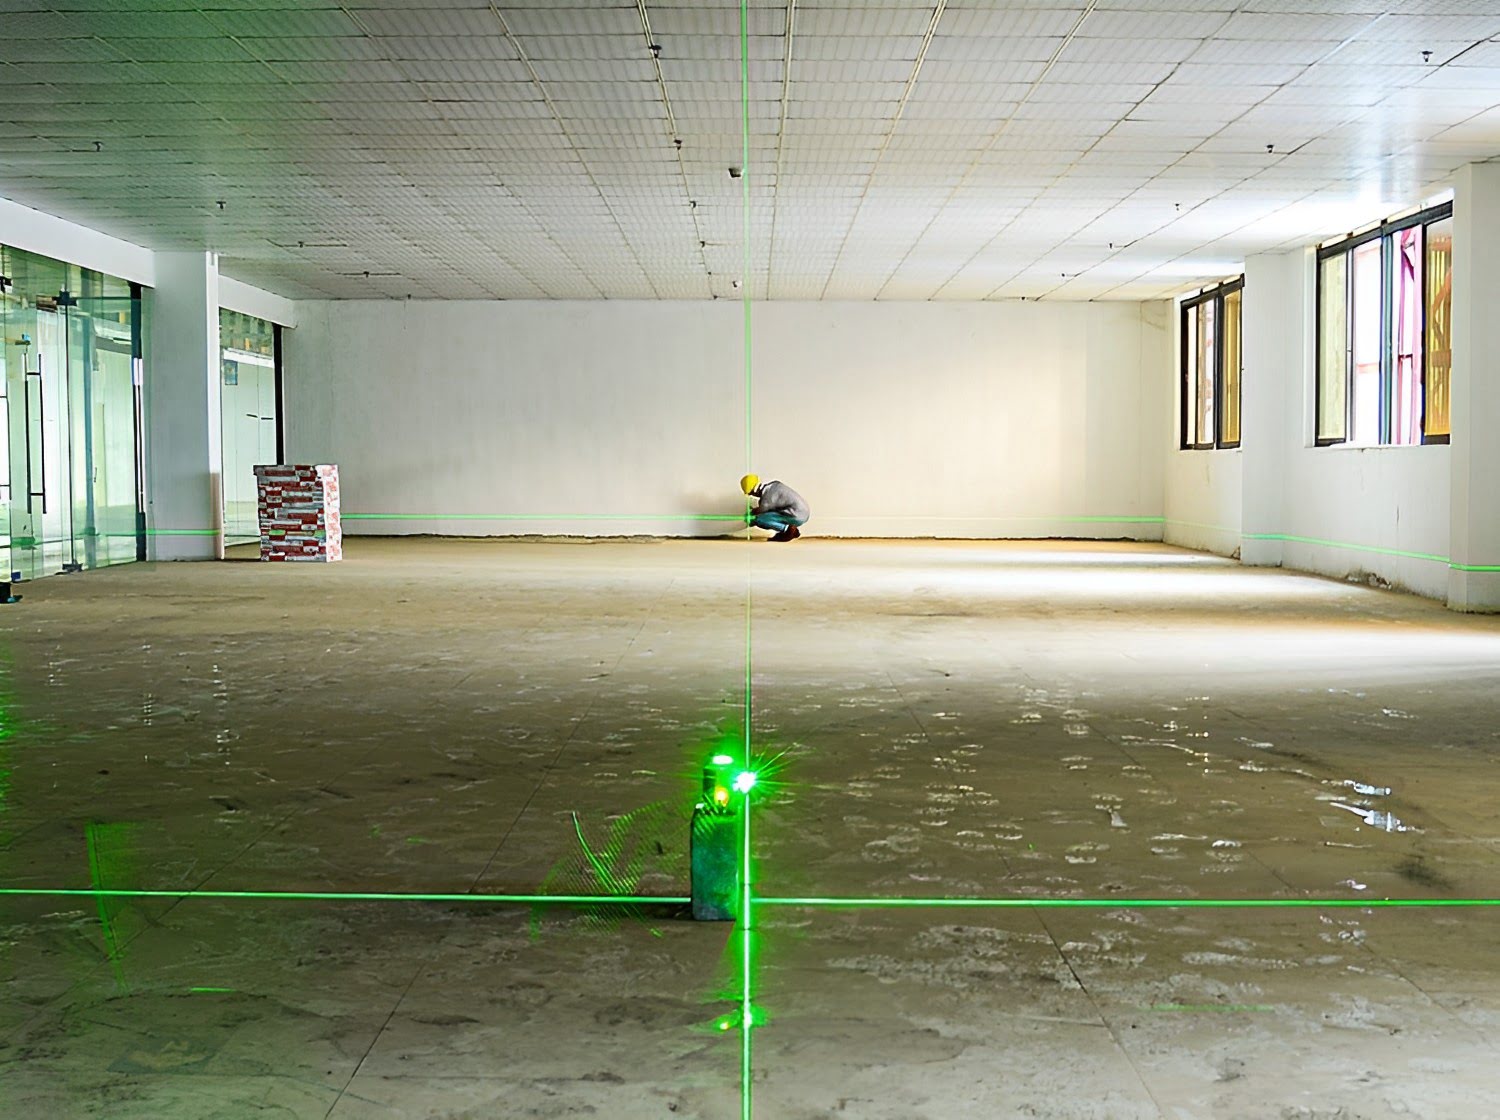
- Leveling or measuring tools: To ensure that your floor is level and even, you will need leveling or measuring tools such as a laser level, long straightedge, or bubble level. These tools will help you identify low and high spots on the concrete surface.
- Gloves, goggles, and a face mask: It’s crucial to prioritize safety during the leveling process. Wear gloves to protect your hands, goggles to shield your eyes from debris, and a face mask to prevent inhalation of dust particles or fumes.
By having these materials and tools ready, you will be well-equipped to tackle the concrete floor leveling project effectively. Remember to read and follow the safety guidelines provided by the manufacturers to ensure a safe working environment.
Step 1: Clean and Prep the Concrete Floor
Before you can begin leveling your concrete floor, it’s important to thoroughly clean and prepare the surface. This ensures proper adhesion of the self-leveling compound and helps create a smooth and even finish. Follow these steps to clean and prep your concrete floor:
- Sweep and vacuum: Start by removing any loose dirt, debris, and dust from the concrete floor. Use a broom to sweep the surface, paying close attention to corners and edges. Follow up with a vacuum cleaner to ensure a clean working area.
- Remove any existing floor coverings: If there are any old carpeting, tiles, or vinyl flooring on top of the concrete, remove them completely. This allows for a direct application of the self-leveling compound and ensures a level surface.
- Inspect for cracks and repair: Check the concrete floor for any cracks or deep damages. Fill in any cracks or large holes with a concrete patching compound or an epoxy-based filler. Smooth out the patched areas with a trowel and allow them to dry completely before proceeding.
- Remove stubborn stains: If there are any stubborn stains on the concrete floor, such as grease or oil marks, use a degreasing cleaner or a concrete stain remover to eliminate them. Follow the product instructions and rinse the area thoroughly before proceeding.
- Dampen the surface: Using a pump sprayer or a watering can, dampen the entire concrete floor with water. This helps prevent the concrete from absorbing moisture from the self-leveling compound too quickly, which could lead to uneven curing.
Once you’ve completed these steps, give the floor some time to dry before moving on to the next step. It’s important to have a clean, dry, and properly prepped concrete surface to ensure the best results when leveling.
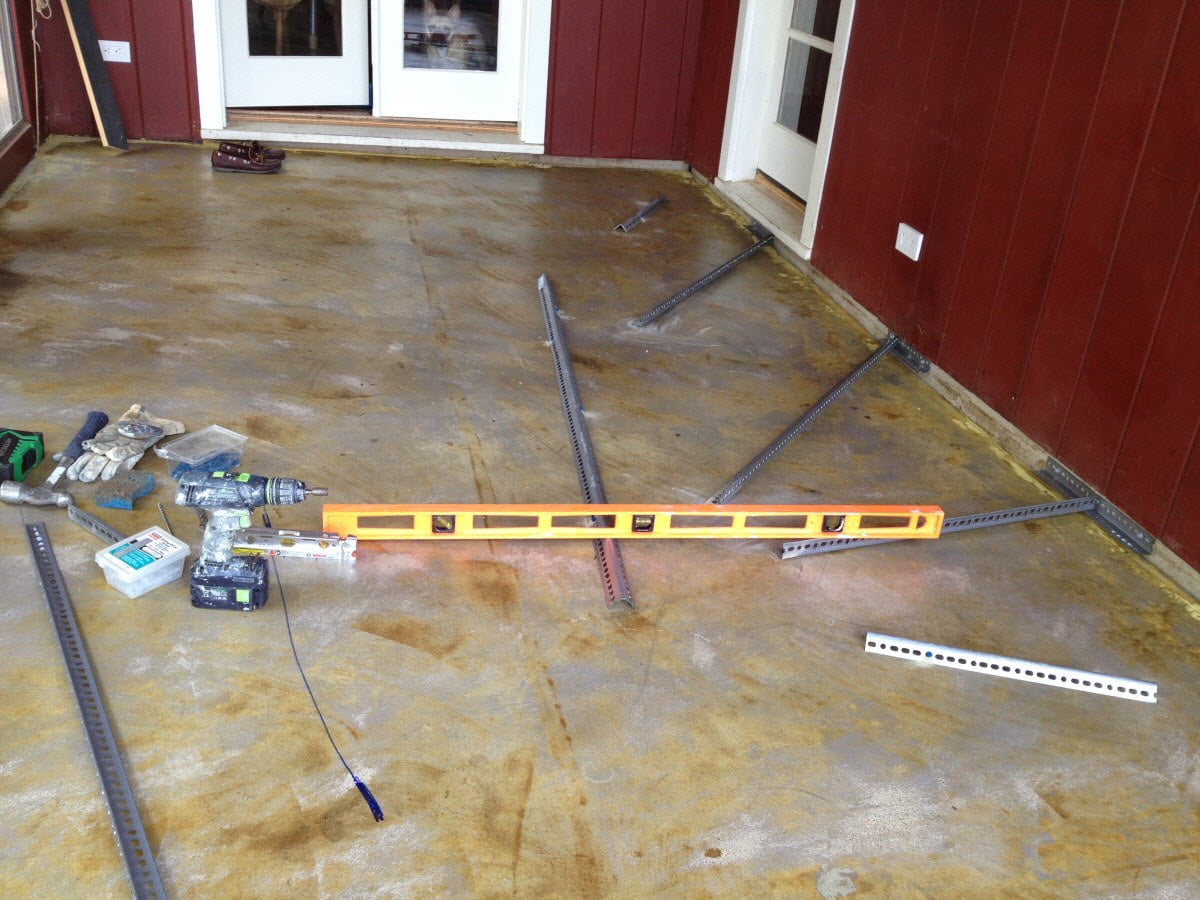
Step 2: Identify and Mark High and Low Spots
Now that you have cleaned and prepped the concrete floor, the next step is to identify the high and low spots on the surface. This will help you understand the extent of the leveling required and determine where to apply the self-leveling compound more strategically. Follow these steps to identify and mark the high and low spots:
- Use a long straightedge: Place a long straightedge, such as a level or a long piece of wood, across different areas of the floor. Observe if there are any gaps between the straightedge and the concrete surface. These gaps indicate low spots that need to be leveled.
- Check for unevenness: Walk across the floor and pay attention to any areas that feel uneven or have noticeable dips or bumps. These are also areas that will require leveling to achieve a smooth and even surface.
- Mark the high and low spots: Once you have identified the high and low spots, mark them using chalk or a marker. Use a different color for high spots and low spots to make the marking more distinguishable.
- Create a leveling plan: Analyze the markings on the floor and create a leveling plan. Consider the overall layout of the space and determine the most efficient way to distribute the self-leveling compound. This plan will guide you during the application process.
By identifying and marking the high and low spots, you will have a clear visual reference of where the leveling needs to take place. This step is crucial in ensuring that the self-leveling compound is applied strategically and effectively to achieve a level and even concrete floor.
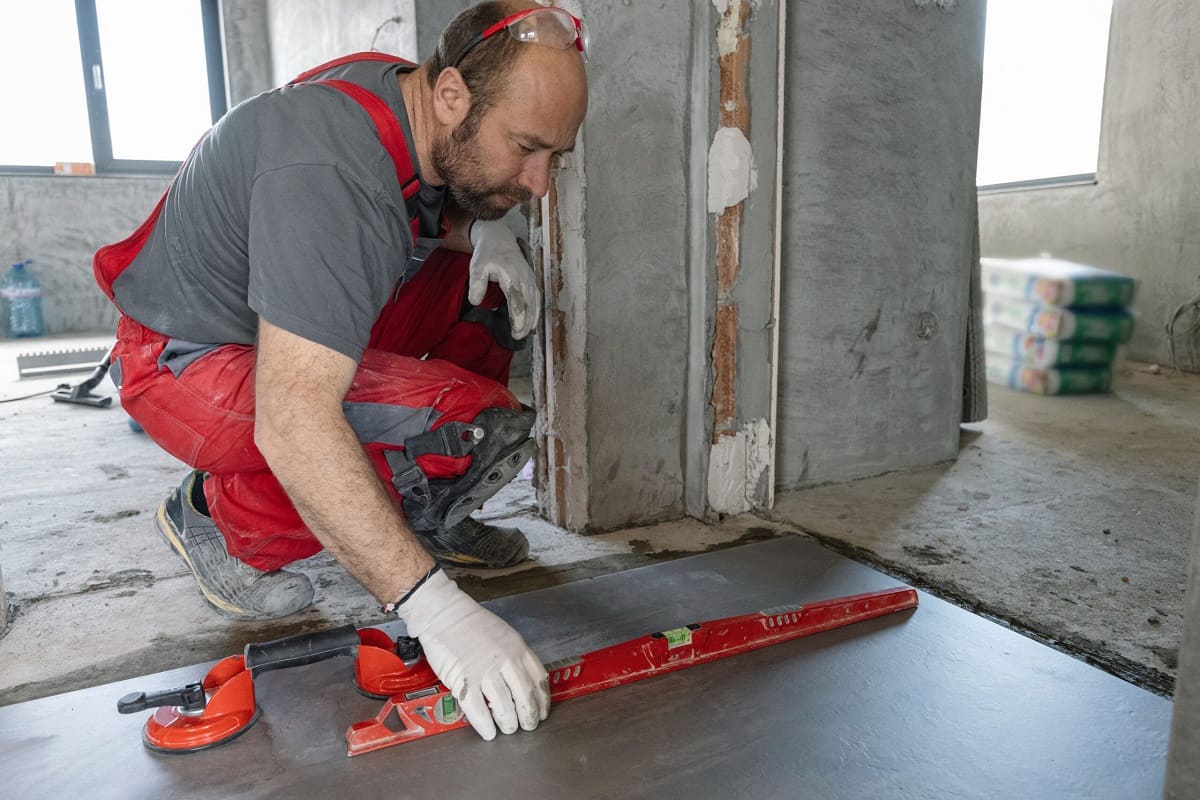
Step 3: Level the Low Spots
With the low spots on the concrete floor identified and marked, it’s time to start leveling them. This step involves filling in the depressions and bringing them up to the desired level. Follow these steps to level the low spots:
- Prepare the self-leveling compound: Mix the self-leveling compound according to the manufacturer’s instructions. Use a clean bucket and a mixing paddle attached to a drill for efficient and thorough mixing. Make sure to achieve a smooth and lump-free consistency.
- Apply the compound to the low spots: Begin by pouring the mixed self-leveling compound directly onto the low spots on the concrete floor. Use a trowel or a large squeegee to spread the compound and fill in the depressions. Work the compound into the low spots, ensuring that they are completely filled and leveled.
- Smooth out the compound: Once you have filled in the low spots, use the trowel or squeegee to smooth out the surface of the compound. Ensure an even distribution and a flat finish. Be mindful of any transitions between the leveled areas and the surrounding floor to achieve a seamless blend.
- Check the level: Use a level or a straightedge to check if the filled-in areas are level with the surrounding floor. Make any necessary adjustments by adding or removing the compound as needed. It’s important to achieve a consistent level across the entire concrete floor.
- Allow the compound to dry: Follow the manufacturer’s recommended drying time for the self-leveling compound. Avoid stepping or placing any objects on the repaired areas until the compound is fully cured.
It’s important to note that self-leveling compounds have different drying times, so be sure to follow the specific instructions provided by the manufacturer. Remember to work efficiently during the application process to ensure that the compound doesn’t dry before you have completed leveling the low spots.
Once the compound has dried, you can proceed to the next step of filling and leveling the high spots on your concrete floor.
Before pouring self-leveling compound, make sure to thoroughly clean the concrete floor and fill in any cracks or holes to ensure a smooth and even surface.
Read more: How To Level A Concrete Basement Floor
Step 4: Fill and Level the High Spots
After leveling the low spots on the concrete floor, it’s time to focus on the high spots to achieve a uniformly level surface. Here’s how to fill and level the high spots:
- Identify the high spots: Refer to the markings you made earlier to identify the high spots on the concrete floor. These are areas that are raised or uneven compared to the surrounding surface.
- Prepare the self-leveling compound: Mix a fresh batch of self-leveling compound according to the manufacturer’s instructions. Ensure that it has a smooth and consistent texture.
- Apply the compound to the high spots: Pour the self-leveling compound directly onto the high spots, using a trowel or a squeegee to distribute and fill in the raised areas. Work the compound into the high spots, ensuring that they are fully covered and leveled with the surrounding floor.
- Smooth the surface: Use the trowel or squeegee to smooth out the applied compound, blending it with the surrounding floor. Ensure a flat and even surface, making any necessary adjustments to achieve a consistent level.
- Check for levelness: Use a level or straightedge to check if the filled-in high spots are now level with the surrounding floor. Make any additional adjustments as needed to achieve an overall level surface.
- Allow the compound to dry: Follow the manufacturer’s recommended drying time for the self-leveling compound. Avoid walking or placing heavy objects on the repaired areas until the compound is fully cured.
It’s important to take your time during the application process to ensure that the self-leveling compound is evenly spread and properly fills the high spots. The goal is to achieve a seamless transition between the leveled areas and the surrounding floor, creating a uniform and level surface throughout.
Once the compound has fully dried and cured, you can proceed to the next step of smoothing out the surface of the concrete floor.
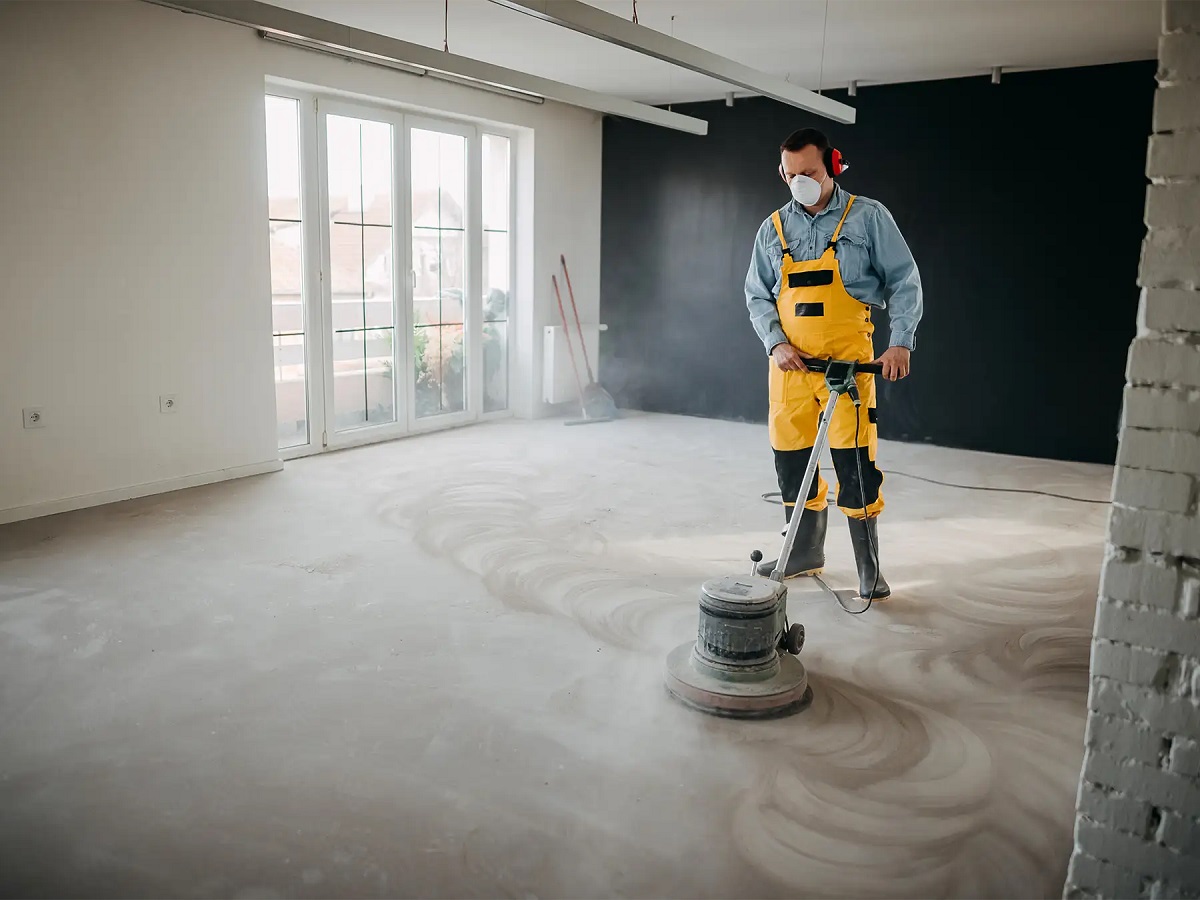
Step 5: Smooth Out the Surface
Now that you have filled and leveled both the low spots and the high spots on the concrete floor, it’s time to focus on smoothing out the entire surface. This step will help you achieve a seamless and polished finish. Follow these steps to smooth out the surface:
- Inspect the filled areas: Take a close look at the filled areas to ensure that they are level and free from any imperfections. If there are any uneven spots or rough patches, use a trowel or a putty knife to smooth them out.
- Use a concrete grinder or floor sander (if necessary): If the surface still has stubborn high spots or rough textures, consider using a concrete grinder or floor sander. These tools will help you smooth out the surface and achieve a more polished finish. Follow the manufacturer’s instructions and safety precautions when using these power tools.
- Ensure a consistent finish: Once you are satisfied with the smoothness of the surface, use a broom or a vacuum cleaner to remove any debris or dust. This will ensure that the self-leveling compound adheres properly to the entire surface.
- Mix and apply a finishing coat (optional): If desired, you can mix a thin finishing coat of self-leveling compound to apply over the entire surface. This will provide an extra layer of smoothness and a more uniform appearance. Follow the manufacturer’s instructions for mixing and applying the finishing coat.
- Allow the surface to cure: Once you have completed the surface smoothing and, if applicable, the application of the finishing coat, allow the entire surface to properly dry and cure. Follow the manufacturer’s recommended curing time before proceeding with any further steps or installations on the concrete floor.
By ensuring a smooth and polished surface, you will create an aesthetically appealing and functional concrete floor. This step is crucial for achieving a professional-looking result and ensuring the long-lasting performance of the floor.
With the surface now smoothed out, you are in the final stages of leveling your concrete floor. The last step involves allowing the floor to properly cure before any further finishing touches or installations.
Step 6: Allow the Floor to Cure
After completing the leveling and smoothing process on your concrete floor, it’s important to allow sufficient time for the floor to properly cure. Curing ensures that the self-leveling compound and any additional coatings or finishes applied to the floor can fully bond and harden. Follow these steps to allow the floor to cure:
- Check the manufacturer’s instructions: Refer to the instructions provided by the manufacturer of the self-leveling compound for the recommended curing time. Different compounds may have varying drying and curing times, so it’s important to follow the specific guidelines.
- Maintain optimal conditions: Create an environment that supports proper curing by maintaining temperature and humidity levels as recommended by the manufacturer. Extreme temperature fluctuations or excess moisture can impact the curing process and compromise the strength and durability of the floor.
- Minimize foot traffic and heavy loads: Avoid walking on the newly leveled floor during the curing process, as this could disrupt the setting of the self-leveling compound. Also, refrain from placing heavy objects or furniture on the floor until it has fully cured. This will prevent any indentations or damage to the freshly leveled surface.
- Monitor the curing process: Keep an eye on the floor during the curing period to ensure that it is progressing as expected. Check for any signs of cracking, uneven drying, or other issues. If you notice any problems, consult with the manufacturer or seek professional advice.
- Allow ample curing time: Depending on the specific product and conditions, the curing process may take anywhere from a few days to a couple of weeks. It’s important to be patient and give the floor enough time to fully cure before proceeding with any additional flooring or installations.
Proper curing is crucial in achieving a strong, durable, and long-lasting concrete floor. By allowing the floor to cure adequately, you ensure that it can withstand everyday wear and tear, as well as the stresses associated with various activities and the installation of other materials.
Once the curing process is complete, you can move on to applying any desired finishing touches, such as applying a protective sealant or installing your chosen flooring materials.
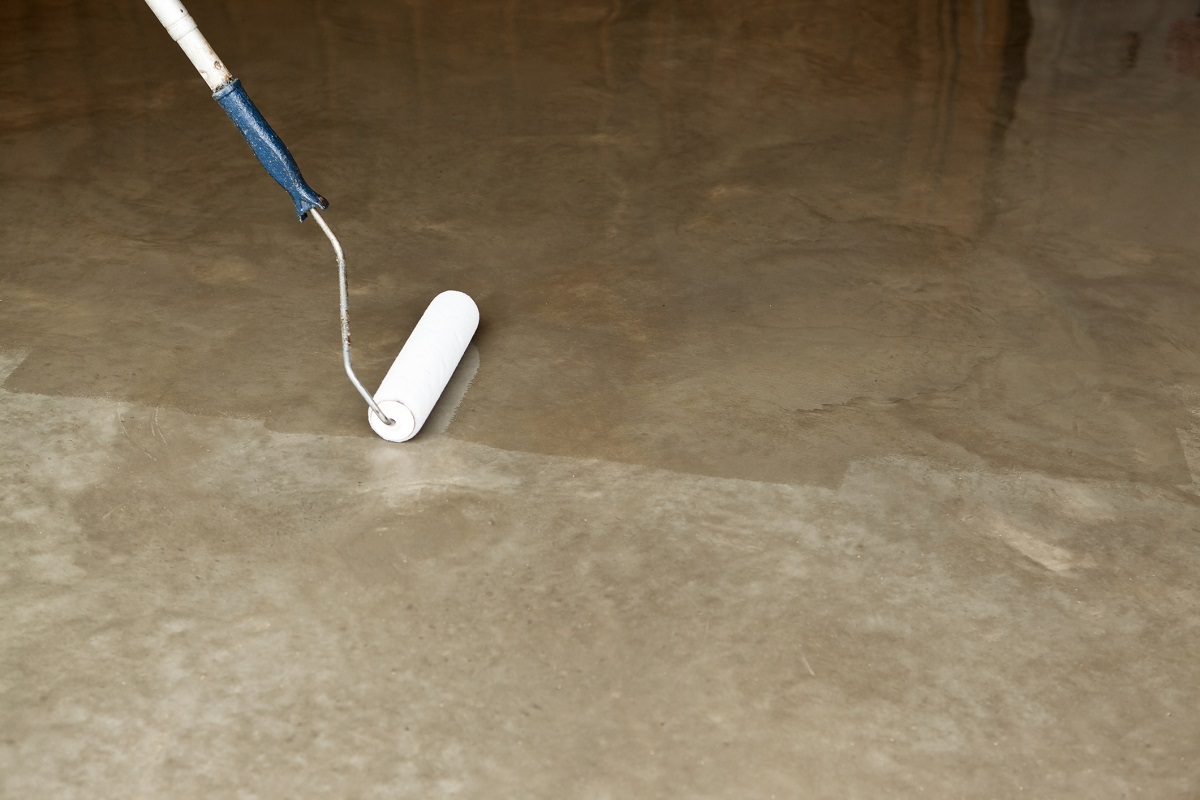
Step 7: Apply a Finishing Coat (Optional)
Applying a finishing coat to your leveled and cured concrete floor is an optional step that can enhance its appearance and provide added protection. This final step can give your floor a polished and professional finish. Follow these steps to apply a finishing coat:
- Select the appropriate finishing product: Choose a finishing product that is suitable for your specific needs, such as a concrete sealer, epoxy coating, or polyurethane coating. Consider factors like desired sheen, durability, and compatibility with the self-leveling compound.
- Read and follow the manufacturer’s instructions: Before applying the finishing coat, carefully read and follow the instructions provided by the manufacturer. This includes information on preparation, application techniques, drying time, and any safety precautions.
- Prepare the surface: Ensure that the leveled floor is clean, dry, and free from dust or debris. Remove any remaining residue or contaminants by thoroughly sweeping or vacuuming the surface. If necessary, lightly sand the floor to create a better bonding surface for the finishing coat.
- Apply the finishing coat: Depending on the specific product, use a brush, roller, or sprayer to apply the finishing coat to the concrete floor. Follow the recommended application techniques, ensuring an even and consistent coverage. Pay attention to the drying time specified by the manufacturer.
- Allow the finishing coat to dry and cure: After applying the finishing coat, allow it to dry and cure according to the manufacturer’s instructions. Maintain proper ventilation and avoid foot traffic or placing heavy objects on the floor until the finishing coat has fully dried and cured.
- Maintain the finished floor: Once the finishing coat has cured, follow any additional care and maintenance instructions provided by the manufacturer. Regularly clean the floor using appropriate cleaning methods and products to preserve the finish and ensure its longevity.
By applying a finishing coat, you can protect your newly leveled concrete floor from stains, moisture, and damage, while also enhancing its overall appearance. The choice of finishing product will depend on your personal preferences and the specific requirements of your project.
With the finishing coat applied and cured, you can now enjoy your beautifully leveled and finished concrete floor. Whether it’s for a workshop, garage, or living space, your leveled floor will provide a stable and aesthetically pleasing foundation for all your activities.
Read more: How To Level A Concrete Patio
Conclusion
Leveling a concrete floor is a task that can significantly improve the functionality and aesthetics of a space. Whether you’re preparing for new flooring installation, setting up a workshop, or revitalizing an old surface, following the steps outlined in this guide will help you achieve a smooth and even result.
Starting with cleaning and prepping the concrete floor, identifying and marking high and low spots, and leveling them using a self-leveling compound, you can create a more level and balanced surface. Smoothing out the entire floor and allowing it to properly cure ensures a durable and long-lasting finish.
Applying a finishing coat is an optional step that can enhance the appearance and protect the concrete floor. Choosing the right finishing product and following the manufacturer’s instructions will give your floor an added layer of durability and visual appeal.
Throughout the process, it’s important to prioritize safety by wearing appropriate personal protective equipment and following the manufacturer’s guidelines for each product used. Additionally, carefully read and adhere to any local building codes and regulations.
By following these steps and taking your time to properly level the concrete floor, you can create a functional and visually appealing space. A level surface provides stability, eases the installation of other materials, and enhances the overall value and appeal of your home or workspace.
Remember, if the task feels overwhelming or if you encounter significant cracks or structural issues, it may be best to seek professional assistance. A qualified expert can provide guidance, ensure proper repairs, and help you achieve the desired results.
So, roll up your sleeves, gather your materials and tools, and embark on the journey of leveling your concrete floor. With patience and careful execution, you’ll transform your space into a smooth, level, and inviting area to enjoy for years to come.
Frequently Asked Questions about How To Level A Concrete Floor
Was this page helpful?
At Storables.com, we guarantee accurate and reliable information. Our content, validated by Expert Board Contributors, is crafted following stringent Editorial Policies. We're committed to providing you with well-researched, expert-backed insights for all your informational needs.


0 thoughts on “How To Level A Concrete Floor”