Articles
How To Sand Wood Stairs
Modified: August 17, 2024
(Many of the links in this article redirect to a specific reviewed product. Your purchase of these products through affiliate links helps to generate commission for Storables.com, at no extra cost. Learn more)
Introduction
Welcome to the ultimate guide on how to sand wood stairs! If you have old, worn-out wooden stairs in your home, giving them a fresh look can greatly enhance the overall aesthetic of your interior. Sanding is an essential step in the process of refinishing or revitalizing wooden stairs, as it removes imperfections, stains, and old finishes, leaving behind a smooth and beautiful surface.
Sanding wood stairs may seem like a daunting task, but with the right tools, materials, and techniques, it can be a rewarding DIY project that you can tackle on your own. In this comprehensive guide, we will take you through each step of the process, providing you with valuable tips and insights along the way.
Before we dive into the nitty-gritty details, it’s important to note that proper preparation is crucial for achieving satisfactory results. Make sure to gather all the necessary tools and materials beforehand and allocate enough time to complete the project without any rush.
So, if you’re ready to transform your worn-out wood stairs into a stunning focal point in your home, let’s get started on this step-by-step journey of sanding wood stairs!
Key Takeaways:
- Transform worn-out wood stairs into stunning focal points with proper sanding techniques, essential tools, and thorough preparation. Achieve a smooth and beautiful finish for a DIY project that revitalizes your space.
- Patience and attention to detail are crucial for successful wood stair sanding. From gathering tools to applying a finish, follow each step carefully to achieve professional-looking, revitalized stairs.
Read more: How To Sand A Wood Floor
Step 1: Gather the Necessary Tools and Materials
Before you begin sanding your wood stairs, it’s important to make sure you have all the necessary tools and materials at hand. Having everything ready before you start will help you work efficiently and smoothly. Here are the essential tools and materials you’ll need:
- Safety gear: Start by prioritizing your safety. Wear safety goggles, a dust mask, and protective gloves to protect yourself from dust, debris, and any potential injury.
- Sanding machine: Depending on the size of your stairs and the level of sanding required, you can choose between a belt sander, a random orbital sander, or a sanding block. Consider renting a sander if you don’t have one.
- Sandpaper: Choose the appropriate grit sandpaper for your stairs. Generally, coarse grits like 80 or 100 are suitable for heavy sanding, while finer grits like 120 or 150 are ideal for smoothing out the wood surface. Have a variety of grits available to cater to different stages of sanding.
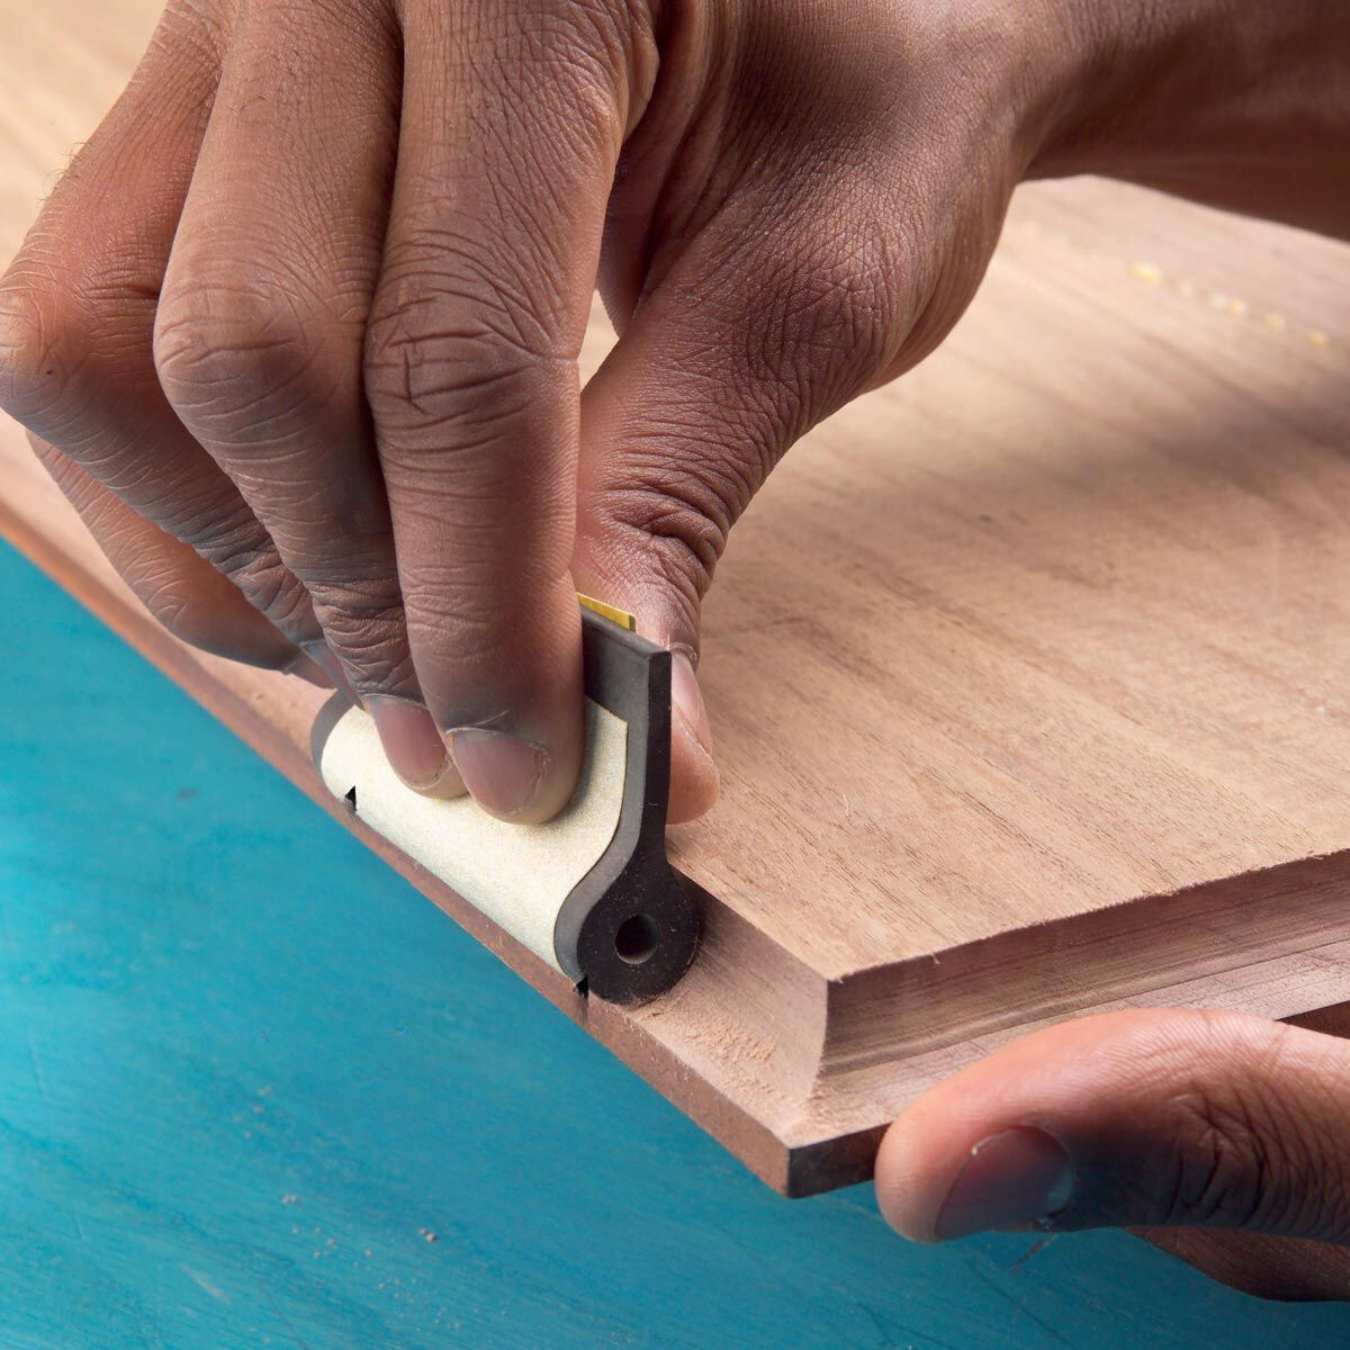
- Handheld sanding tools: In addition to a sanding machine, it’s helpful to have sanding blocks or sanding sponges at hand for hard-to-reach areas and corners. These handheld tools allow for precise sanding and finer detailing.
- Vacuum cleaner or shop vac: Sanding wood creates a lot of dust, so having a reliable vacuum cleaner or shop vac with a dust collection bag or filter is essential for maintaining a clean work environment.
- Painter’s tape: If you want to protect surrounding surfaces like walls or handrails from accidental damage during the sanding process, painter’s tape can be useful for creating a barrier.
- Wood putty or filler: If your stairs have deep scratches, holes, or gaps, you may need wood putty or filler to repair and fill these imperfections before sanding.
- Cleaning supplies: Once the sanding is complete, you’ll need cleaning supplies such as a broom, a dustpan, and a damp cloth to remove dust, debris, and any leftover residue.
Take the time to gather all these tools and materials before you begin the sanding process. It’s better to be well-prepared than to find yourself missing something crucial halfway through the project.
Step 2: Prepare the Stairs for Sanding
Before diving into the sanding process, it’s essential to adequately prepare your wood stairs to ensure the best possible results. Taking the time to prepare the stairs will help you achieve a smooth and even finish. Follow these steps to properly prepare your stairs for sanding:
- Clear the area: Start by removing any obstacles, furniture, or rugs from the staircase area. This will give you the space you need to work efficiently without any hindrances.
- Protect surrounding surfaces: If there are adjacent walls, handrails, or other surfaces that you want to shield from accidental damage, use painter’s tape to create a protective barrier.
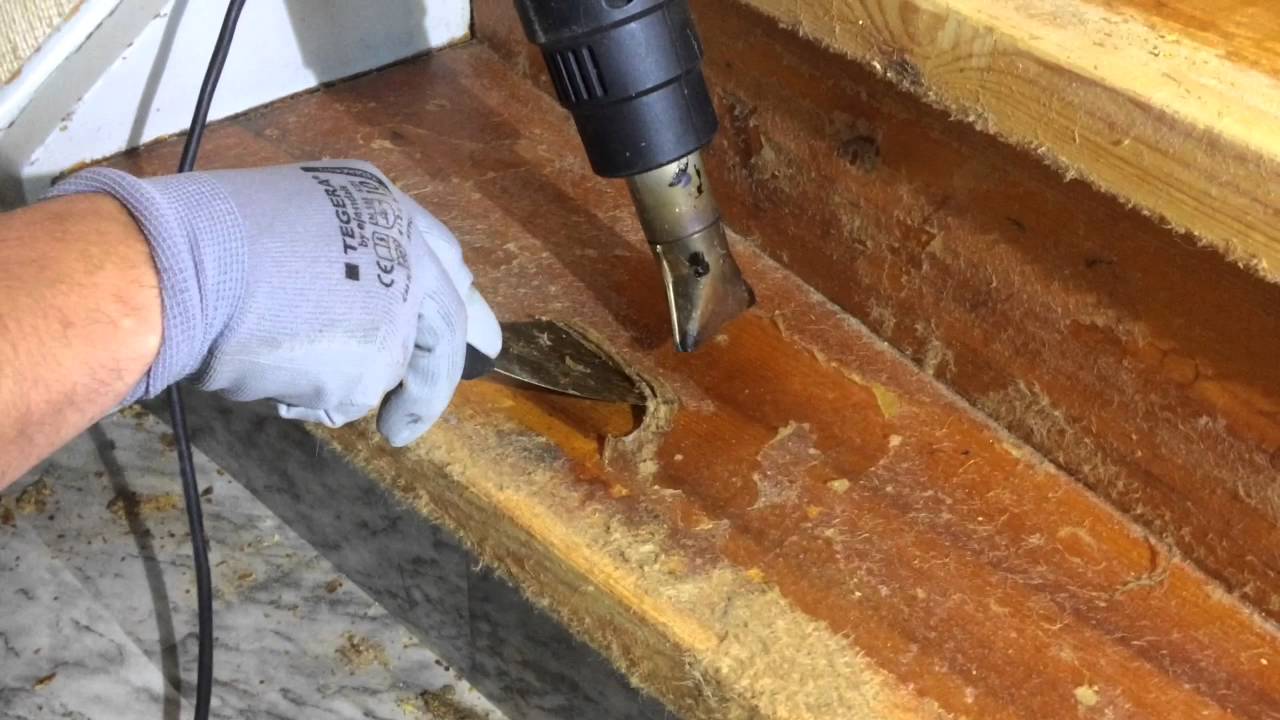
- Remove loose carpeting or old finish: If your stairs have carpeting or an old finish, remove them using a utility knife or a scraper. Make sure to pull out any loose carpet staples or nails from the wood.
- Repair any damages: Inspect the stairs for any damages, such as broken or protruding floorboards, loose nails, or deep scratches. Use a hammer and nails to fix loose boards and sand down any protruding elements. Fill deep scratches or gaps with wood putty or filler and allow it to dry according to the manufacturer’s instructions.
- Clean the stairs: Use a broom or a vacuum cleaner with a brush attachment to remove loose dirt, dust, and debris from the stairs. Pay attention to corners, edges, and tight spots that can accumulate dust over time.
By thoroughly preparing your stairs, you create a smooth canvas for the sanding process. This helps ensure that you achieve consistent results and avoid any unexpected surprises during the refinishing or revamping of your wood stairs.
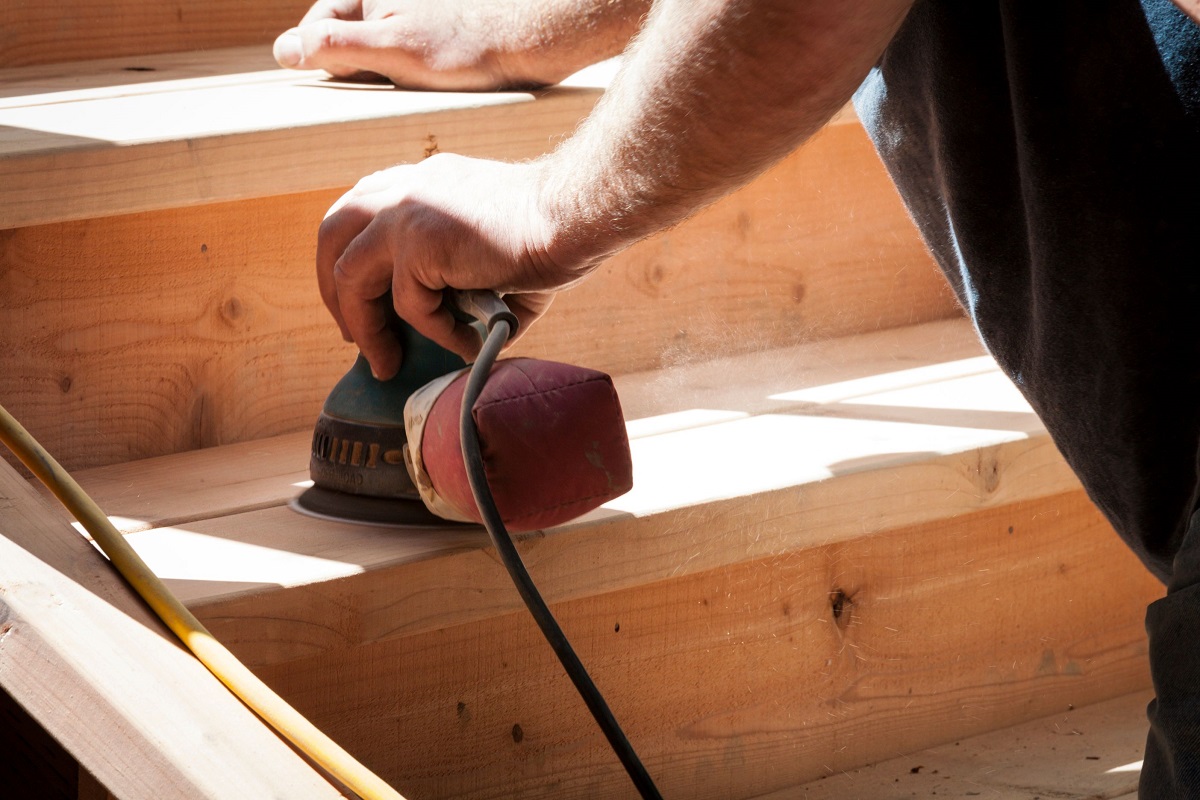
Step 3: Sanding the Stairs
Now that you’ve gathered the necessary tools and prepared the stairs, it’s time to dive into the sanding process. Follow these steps to effectively sand your wood stairs:
- Select the appropriate sandpaper grit: Start with a coarse grit sandpaper, around 80 or 100, to remove any existing finishes, stains, or imperfections. As you progress, gradually switch to finer grits like 120 or 150 to achieve a smoother surface. Remember to check the manufacturer’s recommendations for your specific sandpaper.
- Begin sanding: If you’re using a sanding machine, start at the top steps and work your way down, moving in the direction of the wood grain. Hold the sander firmly but don’t apply excessive pressure, as the weight of the machine should do the work. If you’re using a sanding block or sponge, use steady, even strokes along the wood grain.
- Overlap each pass: When using a sanding machine, make sure to overlap each pass slightly to ensure even sanding and to avoid creating visible lines or marks. With handheld tools, take care to keep your strokes consistent to prevent uneven sanding.
- Pay attention to detail: For corners, edges, or areas that are difficult to reach with a sander, switch to a sanding block or sponge. This will allow you to have more control and achieve smooth results. Take your time and be thorough in sanding these tricky areas.
- Check your progress: Periodically stop and examine your progress. As you sand away the old finish, you should start seeing a clean and smooth surface. If there are stubborn spots or imperfections that still remain, focus on those areas and apply a bit more pressure or switch to a finer grit sandpaper.
- Remove dust regularly: As you sand, dust and debris will accumulate. Use a vacuum cleaner or a hand broom to remove the dust and check your progress more accurately. Keeping the working area clean will also prevent the dust from settling back onto the stairs.
The key to successful sanding is patience and attention to detail. Take your time and focus on each step, ensuring you achieve an even and smooth finish. Sanding is a process that requires technique and precision, so don’t rush through it.
When sanding wood stairs, start with a coarse grit sandpaper to remove any existing finish or imperfections. Then, gradually move to finer grits for a smooth finish. Always sand in the direction of the wood grain to avoid scratches.
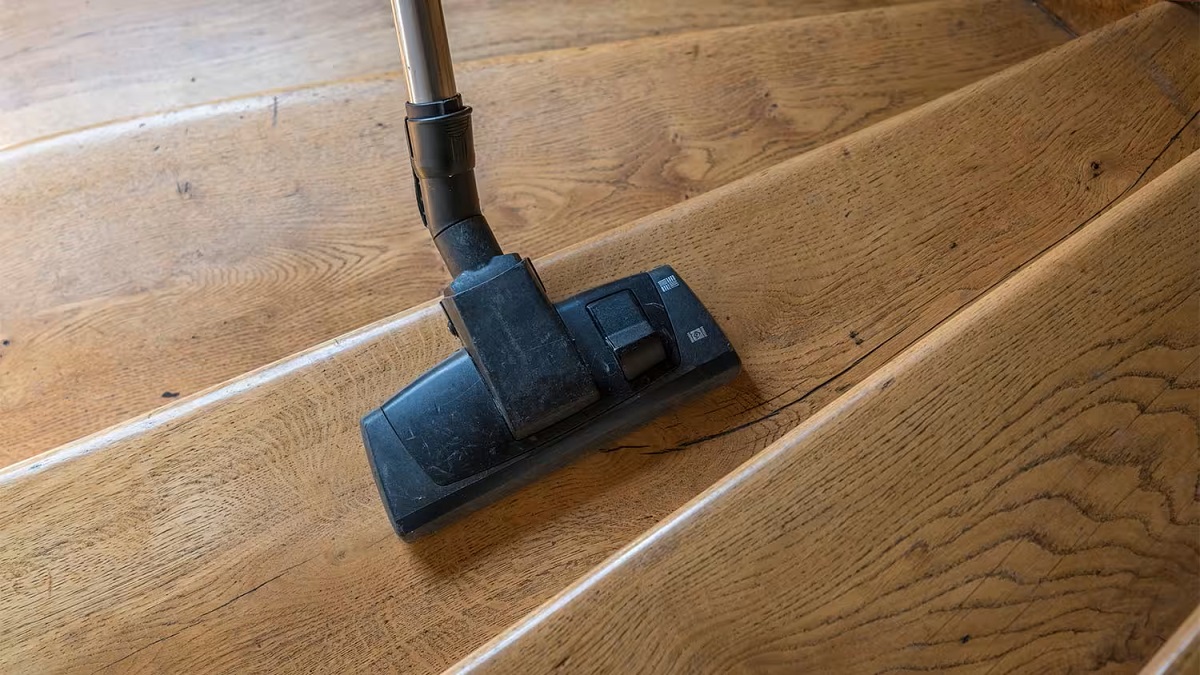
Step 4: Clean Up the Dust
Once you’ve completed the sanding process, it’s crucial to thoroughly clean up the accumulated dust and debris. Cleaning the stairs will not only give you a clear view of the results but also create a clean surface for the next steps in the refinishing process. Follow these steps to effectively clean up the dust:
- Vacuum the stairs: Use a vacuum cleaner with a brush attachment to remove the majority of the loose dust. Start from the top step and work your way down, making sure to reach the corners, edges, and any crevices where dust may have settled.
- Wipe down the stairs: Use a damp cloth or a microfiber cloth to wipe down the stairs, removing any remaining dust particles. Make sure to wring out the cloth well to avoid leaving excessive moisture on the wood surface.
- Inspect for any missed spots: Take this opportunity to carefully inspect the stairs for any areas that might have been missed during the initial cleaning. Use a flashlight to check for hidden dust in corners or under the edges of the steps.
- Repeat if necessary: If you notice any significant amounts of dust or debris still present, repeat the vacuuming and wiping down process until the stairs are clean and dust-free.
Properly cleaning up the dust is crucial before moving on to the next steps of the refinishing process, such as applying a finish or stain. Leaving excess dust on the stairs can adversely affect the adherence and appearance of the finish.
Remember to dispose of the collected dust and debris properly. Empty the vacuum bag or clean the filter, and dispose of the dust in a sealed bag to prevent it from being released back into the air.
Read more: How To Sand Wood Using Sandpaper
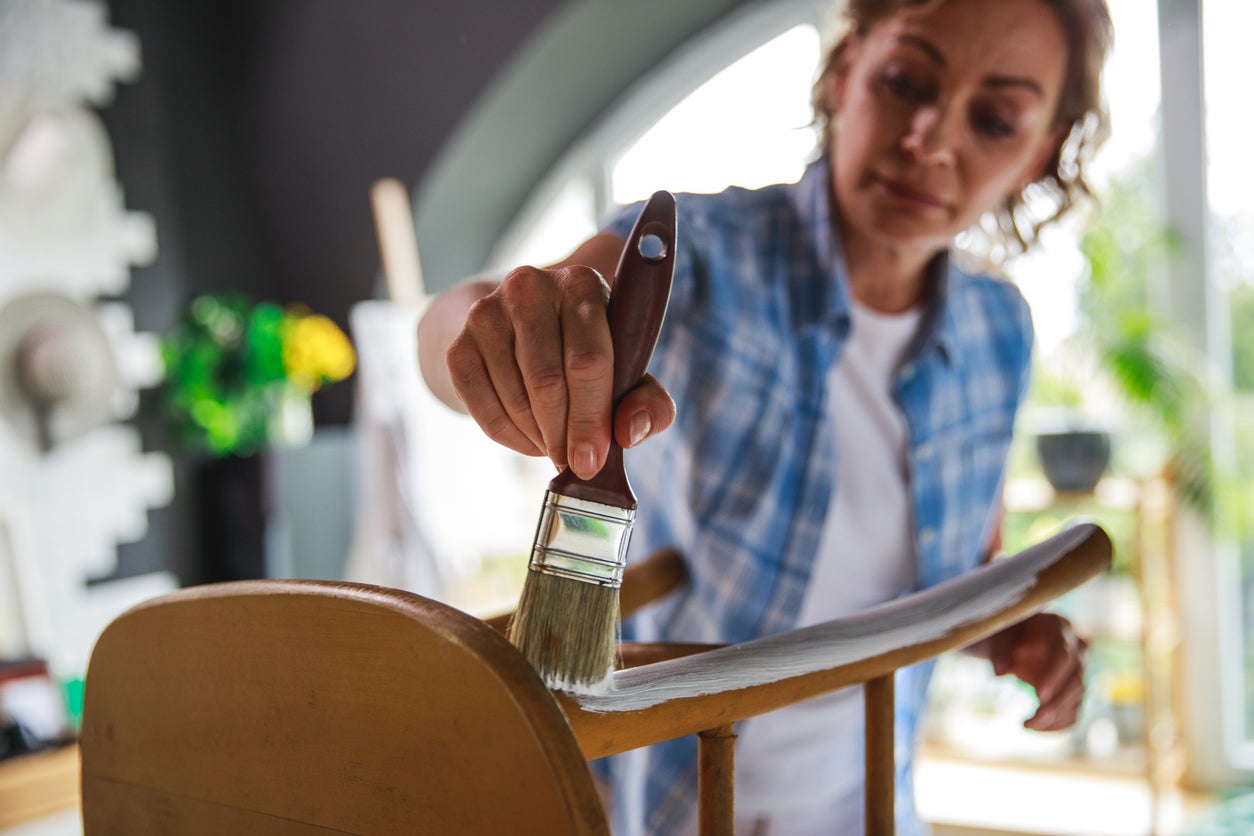
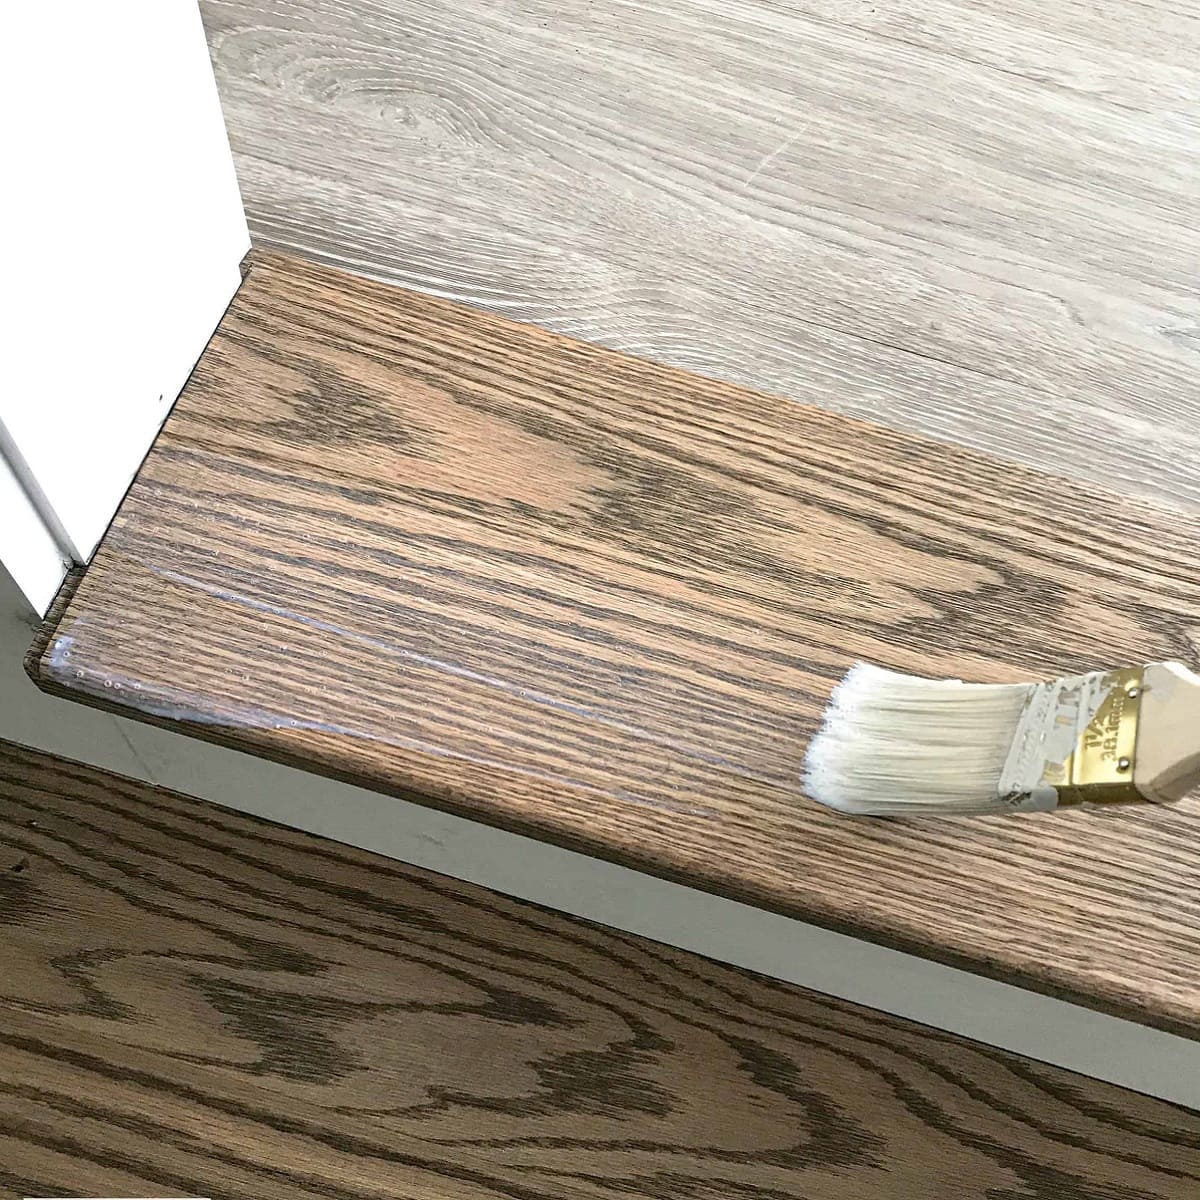
Step 5: Apply a Finish (Optional)
After sanding and cleaning the wood stairs, you have the option to apply a finish for added protection and to enhance the beauty of the wood. Applying a finish can provide a polished and professional look to your newly sanded stairs. Follow these steps to apply a finish:
- Select the appropriate finish: There are various finishes available, such as polyurethane, varnish, or wax. Consider the level of durability, desired sheen, and maintenance requirements when choosing a finish. Read and follow the manufacturer’s instructions for your chosen finish.
- Prepare the area: Ensure the area is well-ventilated by opening windows or using fans. Protect adjacent surfaces and furniture with drop cloths or plastic sheets to prevent any accidental spills or splatters.
- Apply the first coat: Using a brush, foam applicator, or a clean cloth, apply the first coat of finish following the wood grain. Start from the top of the stairs and work your way down, allowing for even coverage. Take care not to apply too much finish to avoid drips or pooling.
- Let it dry: Allow the first coat to dry according to the manufacturer’s instructions. This typically takes a few hours. Keep the area well-ventilated and avoid any foot traffic during this time.
- Lightly sand (optional): If desired, lightly sand the dried first coat with fine-grit sandpaper to smooth out any imperfections or raised fibers. Wipe away any sanding residue with a clean cloth.
- Apply subsequent coats: Apply additional coats of finish following the same process as the first coat. Most finishes require two or three coats for optimal results. Allow each coat to dry thoroughly before applying the next one.
- Let it cure: Once all the coats have been applied, allow the finish to cure completely. This can take anywhere from a few days to a few weeks, depending on the type of finish used. Follow the manufacturer’s instructions for the recommended curing time.
Applying a finish is optional, but it can provide an extra layer of protection to your newly sanded stairs. It helps to shield the wood from daily wear and tear while enhancing its natural beauty.
Remember to properly store and dispose of any leftover finish and cleaning materials according to the manufacturer’s guidelines and local regulations.
Conclusion
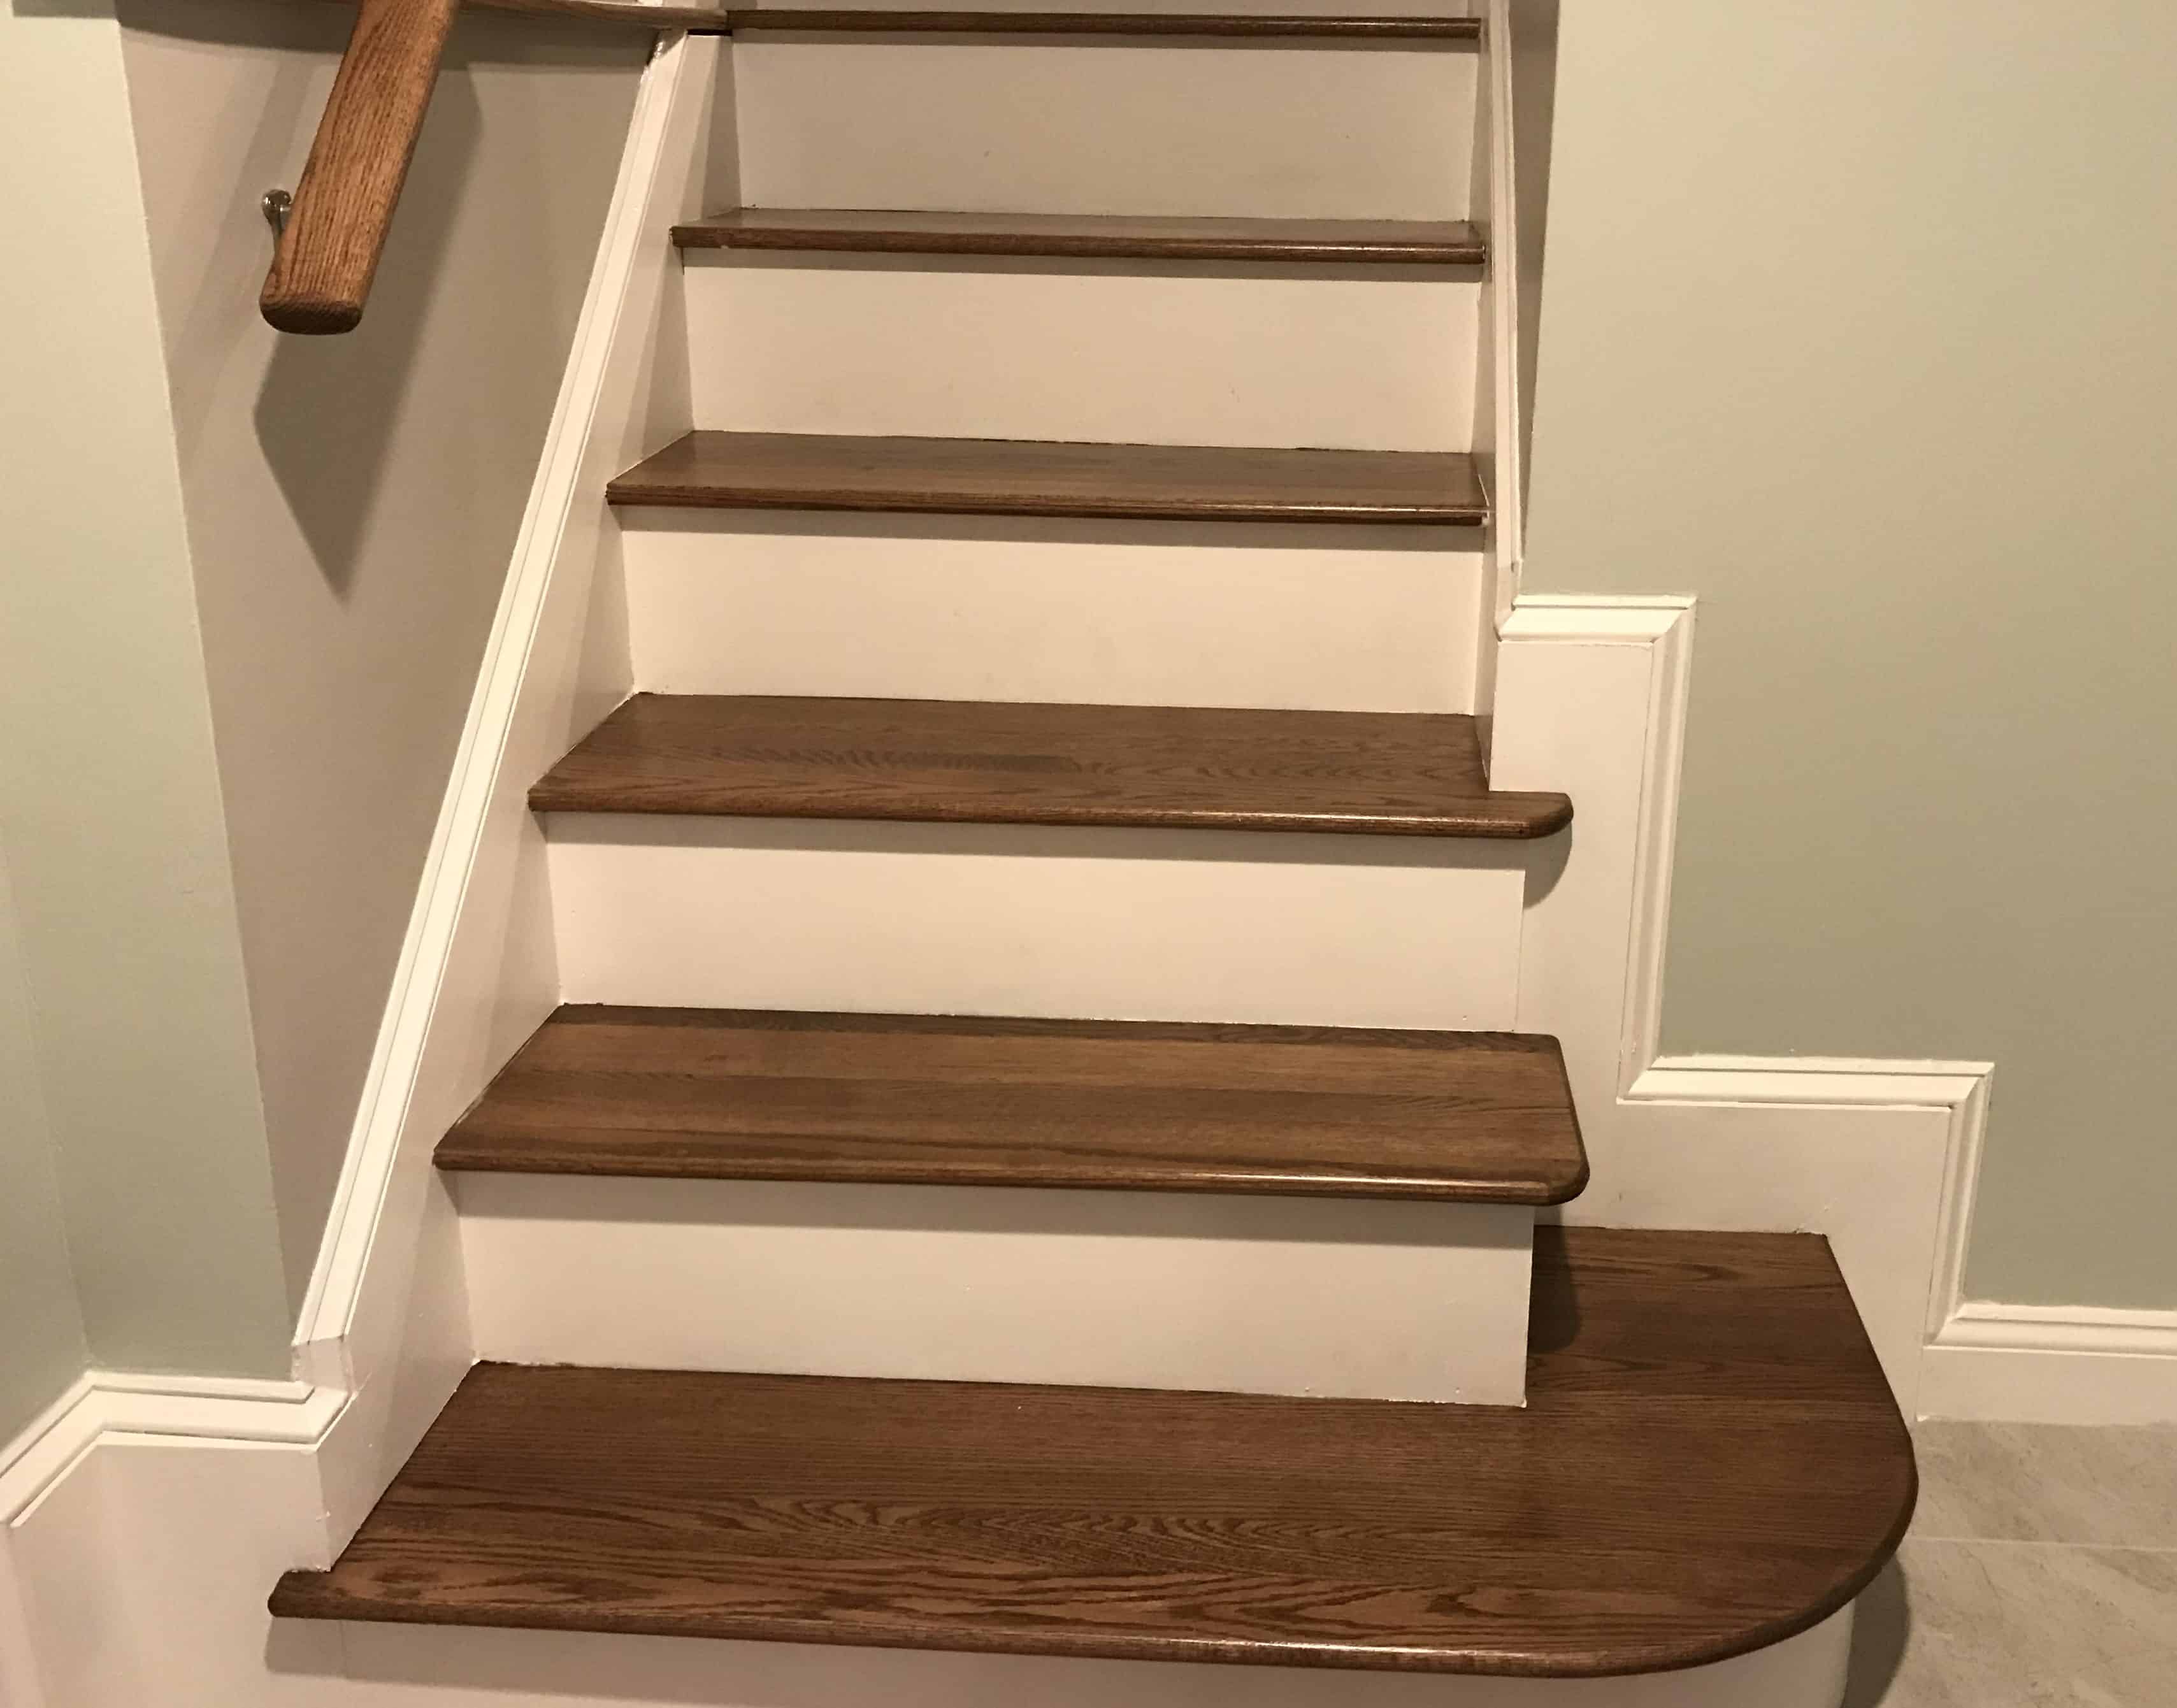
Congratulations! You have successfully learned how to sand wood stairs and bring new life to your home’s interior. Sanding wood stairs may seem like a daunting task, but with the right tools, materials, and techniques, it can be a rewarding DIY project that can transform the look and feel of your space.
Throughout this comprehensive guide, we covered the necessary steps to sanding wood stairs, from gathering the tools and materials to preparing the stairs, sanding, cleaning up the dust, and applying a finish (if desired). By following these steps, you can achieve a smooth and beautiful surface that revitalizes your wooden stairs.
Remember, patience and attention to detail are key when sanding wood stairs. Take your time, work in small sections, and pay close attention to the wood grain for the best results. Don’t rush the process, as proper preparation and execution are essential for achieving a professional-looking finish.
Whether you choose to leave your stairs with a natural, sanded finish or apply a protective coat, the end result will be stunning. Enjoy the satisfaction of completing a successful DIY project and admire the beauty of your newly sanded wood stairs.
Now, go ahead and showcase your newly revitalized wood stairs with pride!
Frequently Asked Questions about How To Sand Wood Stairs
Was this page helpful?
At Storables.com, we guarantee accurate and reliable information. Our content, validated by Expert Board Contributors, is crafted following stringent Editorial Policies. We're committed to providing you with well-researched, expert-backed insights for all your informational needs.


0 thoughts on “How To Sand Wood Stairs”