Articles
How To Secure Island Cabinets To Floor
Modified: August 28, 2024
Learn how to securely attach island cabinets to the floor with our informative articles. Ensure stability and durability for your kitchen remodel.
(Many of the links in this article redirect to a specific reviewed product. Your purchase of these products through affiliate links helps to generate commission for Storables.com, at no extra cost. Learn more)
Introduction
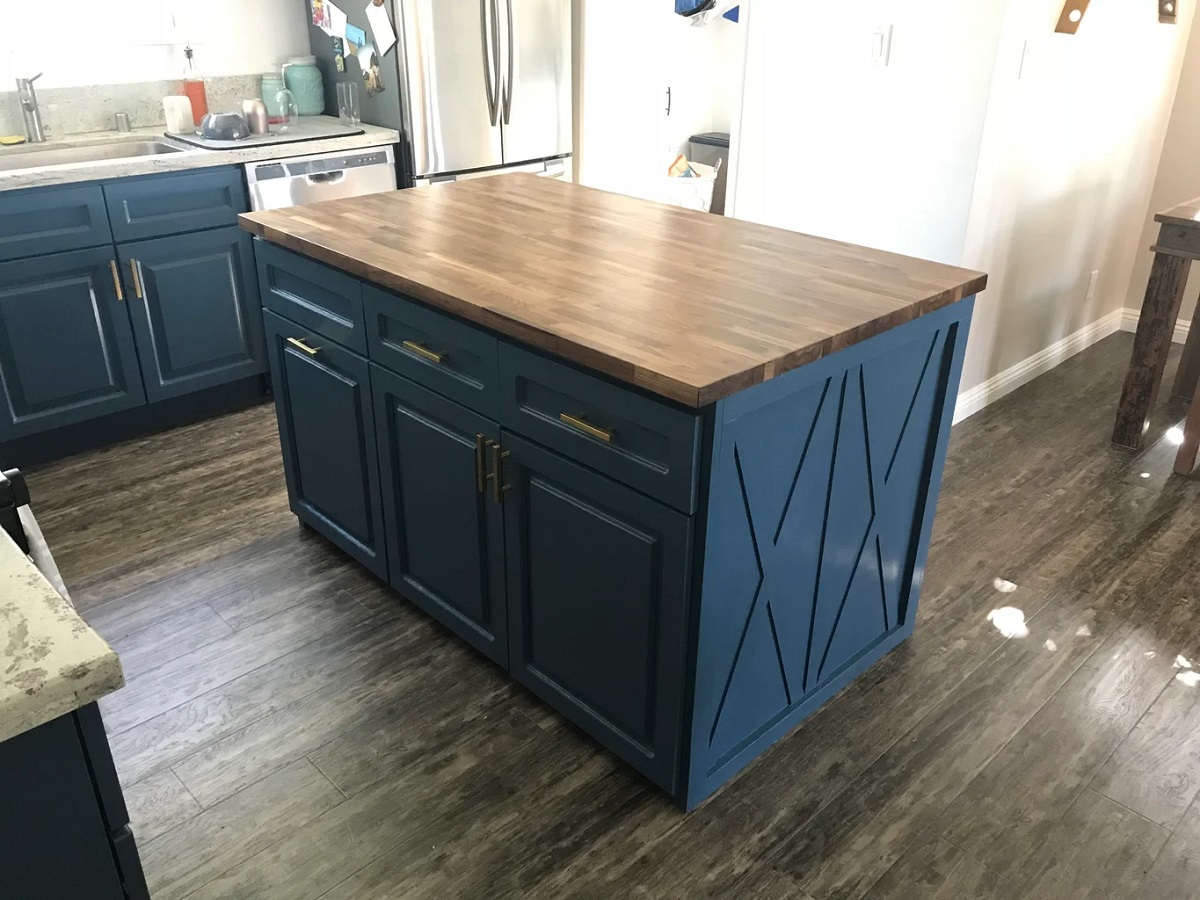
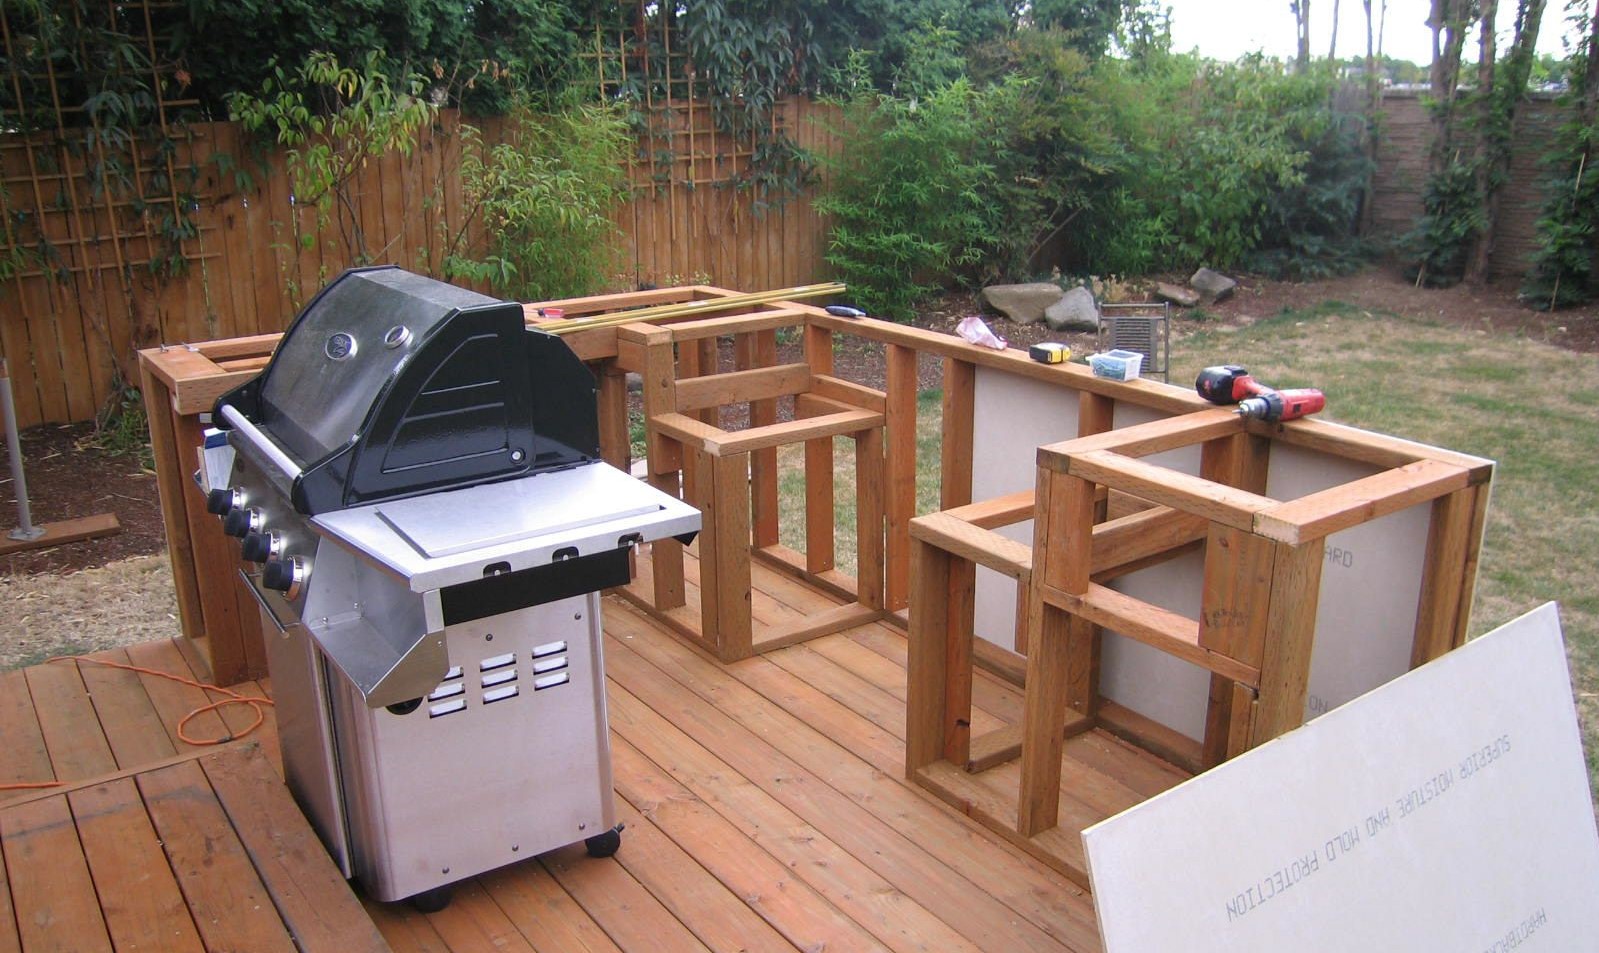
When it comes to designing a functional and stylish kitchen, an island cabinet can be a great addition. Not only does it provide extra storage and countertop space, but it also serves as a focal point in the room. However, to ensure the safety and stability of the island cabinets, it is essential to secure them to the floor.
In this article, we will guide you through the step-by-step process of securing island cabinets to the floor. By following these instructions, you can enjoy a sturdy and reliable installation that withstands daily kitchen activities.
Before we dive into the details, it’s important to note that the method of securing island cabinets may vary depending on the specific design and construction of the cabinets and the flooring material. Always refer to the manufacturer’s instructions and consult with a professional if you have any doubts or concerns.
So, let’s get started with the first step – gathering the necessary materials.
Key Takeaways:
- Ensure a sturdy and reliable installation of island cabinets by gathering high-quality materials, preparing the cabinets, and marking the floor for accurate placement. Securely attach the cabinets to the floor for a safe and visually appealing kitchen environment.
- Test the stability and make final adjustments to ensure a secure and balanced installation of island cabinets. Prioritize safety, consult professionals, and follow manufacturer’s instructions for a successful and visually appealing kitchen upgrade.
Read more: How To Secure Floor Vents
Step 1: Gathering the necessary materials
Before you begin securing your island cabinets to the floor, it’s essential to gather all the necessary materials. By having everything on hand, you can streamline the installation process and prevent any delays or interruptions.
Here’s a list of materials you’ll need:
- Island cabinets: Ensure that the cabinets are suitable for installation and can be securely anchored to the floor. Consider the weight and dimensions of the cabinets, as well as the materials they are made of.
- Anchor bolts: These sturdy bolts will provide the necessary support and stability for your island cabinets. Choose bolts that are compatible with your cabinet and floor type.
- Drill with appropriate drill bits: A power drill equipped with the correct drill bits is essential for creating anchor holes in the floor.
- Measuring tape: You’ll need a measuring tape to accurately mark the placement of the island cabinets on the floor.
- Pencil or marker: Use a pencil or marker to make visible markings on the floor for drilling anchor holes.
- Level: A level will ensure that the island cabinets are installed straight and level on the floor.
- Screwdriver or wrench: Depending on the type of anchor bolts, you may need a screwdriver or wrench to tighten them securely.
- Protective equipment: Don’t forget to prioritize safety. Wear appropriate protective equipment, such as safety goggles and gloves, while handling tools and materials.
It’s crucial to use high-quality materials that are suitable for your specific application. This ensures the longevity and stability of your island cabinets. Consider consulting with a professional if you are unsure about which materials to use or if you have any specific concerns about your kitchen layout.
Now that you have gathered all the necessary materials, you are ready to move on to the next step: preparing the island cabinets for installation.
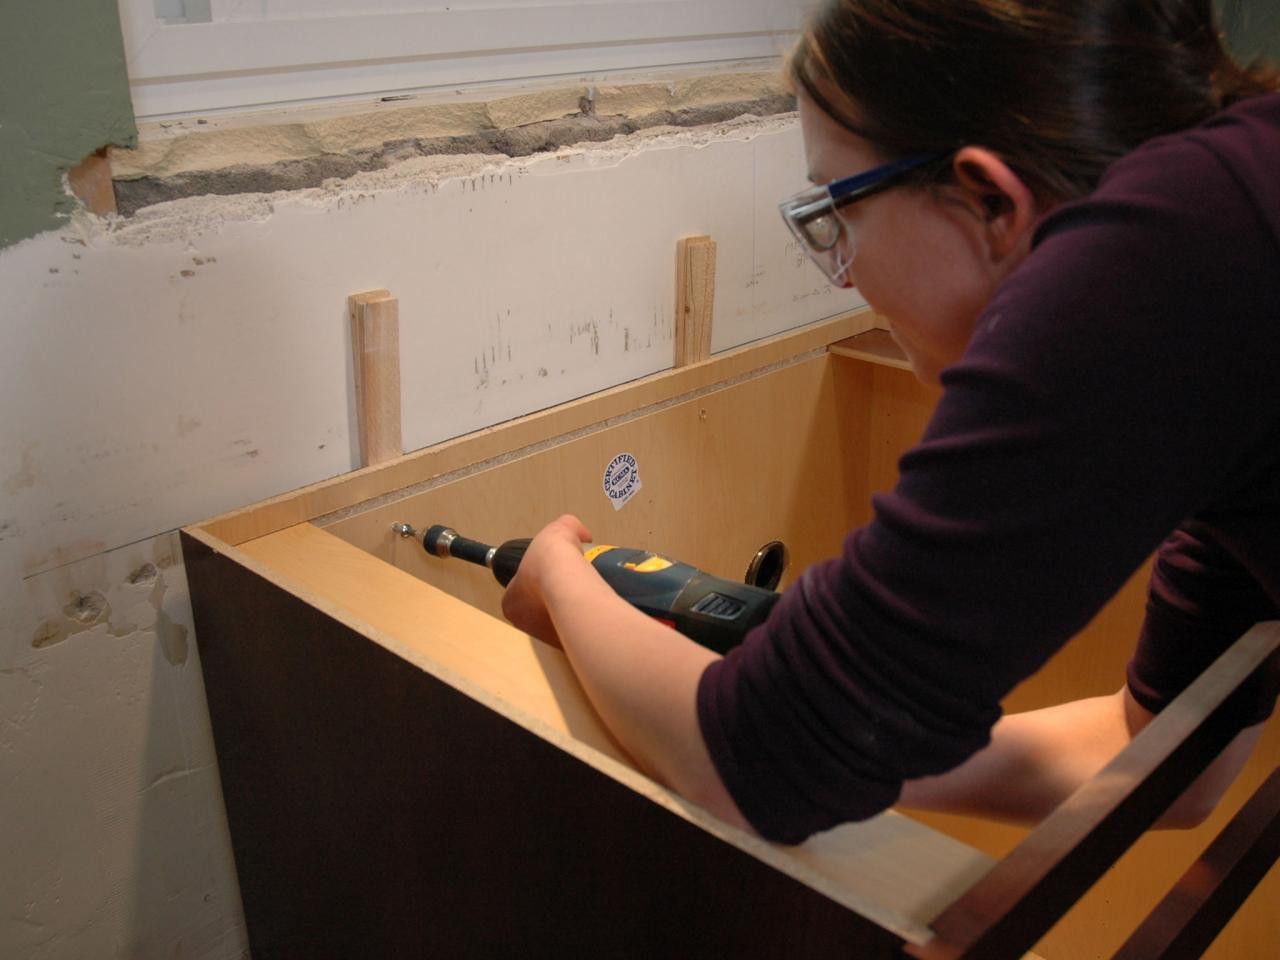
Step 2: Preparing the island cabinets for installation
Before securing your island cabinets to the floor, it’s important to properly prepare them for installation. This step ensures that the cabinets are in good condition and have the necessary components for a secure attachment.
Here’s what you need to do:
- Inspect the cabinets: Thoroughly examine the island cabinets to ensure they are free from any damage or defects. Check for loose or broken parts, such as hinges or screws. Repair or replace any damaged components before proceeding.
- Remove drawers and doors: If applicable, remove any drawers or doors from the cabinets. This will make it easier to access the underside of the cabinets and attach them to the floor. Set aside the removed components in a safe place.
- Locate anchor points: Identify the areas on the bottom of the cabinets where the anchor bolts will be installed. This will depend on the cabinet design and the recommended anchoring points provided by the manufacturer. Mark these locations lightly with a pencil or marker.
- Pre-drill pilot holes: Using a drill bit slightly smaller than the diameter of the anchor bolts, pre-drill pilot holes at the marked anchor points. This will help prevent any splitting or cracking of the cabinet material when the anchor bolts are installed.
- Check for stability: Before moving on to the installation process, check the stability of the island cabinets. Make sure they are level and secure on the floor. If needed, adjust the legs or shims to achieve stability.
Preparing the island cabinets to be securely attached to the floor is a crucial step in ensuring a successful installation. By inspecting the cabinets, removing any detachable components, and locating anchor points, you are setting the stage for a stable and secure attachment. Once you have completed these preparations, you can move on to the next step: marking the floor for secure placement.
Step 3: Marking the floor for secure placement
Marking the floor is an important step in ensuring accurate placement and alignment of your island cabinets. By following this step, you can achieve a professional and visually appealing installation. Here’s how to mark the floor:
- Clear the area: Remove any furniture or obstructions from the space where the island cabinets will be installed. This will give you a clear and unobstructed view of the floor surface.
- Measure and mark the placement: Use a measuring tape to determine the desired position of your island cabinets. Take into consideration the overall layout and functionality of the kitchen. Mark the positions lightly on the floor using a pencil or marker.
- Ensure proper spacing: Ensure that there is enough space around the island cabinets for comfortable movement and functionality. Consider factors like the clearance required for opening cabinet doors or drawer access.
- Check for alignment: Use a level or straightedge to check the alignment of the marked points on the floor. Ensure that they are straight and parallel to the walls or other fixed structures in the kitchen.
- Make adjustments if necessary: If the marked points are not aligned or spaced properly, make the necessary adjustments by repositioning the marks. This will help ensure the final installation is visually pleasing and functional.
Properly marking the floor for the secure placement of your island cabinets is essential for achieving a professional and visually appealing installation. By taking the time to measure, mark, and align the placement, you can ensure that your cabinets are positioned in the most optimal way. Once you have marked the floor, you’re ready to move on to the next step: drilling anchor holes in the floor.
Step 4: Drilling anchor holes in the floor
Drilling anchor holes in the floor is a critical step in securely attaching your island cabinets. These anchor holes will provide the foundation for the anchor bolts, ensuring stability and preventing the cabinets from shifting or toppling over. Here’s a guide on how to drill anchor holes in the floor:
- Choose the right drill bit: Select a drill bit that is appropriate for your floor type and the size of the anchor bolts you will be using. For harder materials like concrete, use a masonry drill bit. For wood or other soft materials, a regular twist drill bit should suffice.
- Wear protective gear: Prioritize safety by wearing protective eyewear and gloves to prevent any potential injuries from debris or flying particles during the drilling process.
- Mark the drill points: Identify the marked positions on the floor where the anchor bolts will be inserted. Double-check the accuracy of the markings before proceeding.
- Drill the anchor holes: Position the drill bit over the first marked point and begin drilling at a low speed, gradually increasing the speed as you penetrate the floor. Apply gentle, consistent pressure to avoid damaging the floor or causing the drill bit to get stuck.
- Monitor the depth: Ensure that you drill the holes to the appropriate depth, according to the length of the anchor bolts. Use a depth stop on your drill if available to help achieve consistent depths for each anchor hole.
- Clear away debris: After drilling each anchor hole, remove any dust or debris that may have accumulated. You can use a vacuum or a brush to clean out the holes thoroughly.
- Repeat the process: Continue drilling anchor holes at the remaining marked points, following the same technique as mentioned above. Take your time and work carefully to maintain accuracy.
By carefully drilling anchor holes in the floor, you are creating the necessary infrastructure for secure attachment of your island cabinets. Take your time and ensure that the holes are drilled to the appropriate depth and alignment. Once you have successfully drilled anchor holes, it’s time to move on to the next step: installing the anchor bolts.
Use L-brackets to secure island cabinets to the floor. Drill holes in the cabinet base and floor, then attach the brackets with screws for added stability and security.
Read more: How To Secure A Floor Mirror
Step 5: Installing the anchor bolts
Installing the anchor bolts is a crucial step in securing your island cabinets to the floor. These bolts will provide the necessary support and stability for your cabinets. Here’s how to install the anchor bolts:
- Choose the right anchor bolts: Select anchor bolts that are suitable for your floor type and can support the weight of your cabinets. Refer to the manufacturer’s recommendations or consult with a professional if you are unsure.
- Insert the anchor bolts: Insert the anchor bolts into the pre-drilled holes in the floor. Make sure they are aligned properly and securely seated in the holes.
- Tighten the bolts: Use a wrench or screwdriver to tighten the anchor bolts. Apply firm pressure while tightening to ensure a secure fit. Do not overtighten, as this may damage the floor or cabinets.
- Test the stability: Gently shake the island cabinets to test their stability. If they feel loose or wobbly, tighten the anchor bolts further until the cabinets are firmly secured to the floor.
- Double-check the alignment: Use a level to confirm that the cabinets are still level and aligned properly. If adjustments are needed, loosen the bolts slightly and make the necessary modifications. Then, retighten the bolts.
- Trim excess bolt length: If the anchor bolts protrude above the cabinet base, use a saw or bolt cutter to trim off the excess length. This will ensure a neat and flush finish.
Installing the anchor bolts is a crucial step in ensuring the stability and security of your island cabinets. Take your time and double-check the alignment and tightness of the bolts. Once you have successfully installed the anchor bolts, it’s time to move on to the next step: attaching the island cabinets to the floor.
Step 6: Attaching the island cabinets to the floor
With the anchor bolts securely in place, it’s time to attach the island cabinets to the floor. This step will finalize the installation process and ensure that the cabinets are firmly fixed in position. Here’s a guide on how to properly attach the island cabinets to the floor:
- Align the cabinets: Carefully position the island cabinets over the anchor bolts, ensuring that they align with the marked positions on the floor.
- Lower the cabinets: Gradually lower the cabinets onto the anchor bolts, making sure they are centered and level.
- Confirm stability: Gently rock the cabinets back and forth to check for any wobbling or instability. If needed, adjust the anchor bolts and tighten them further to enhance stability.
- Tighten the cabinets to the floor: Using a wrench or a screwdriver, secure the cabinets to the anchor bolts. Apply even pressure to all bolts, alternating between them, until the cabinets are firmly attached and there is no movement.
- Check alignment: Once again, use a level to confirm that the cabinets are level and aligned properly. Make any necessary adjustments by loosening the bolts slightly and repositioning the cabinets.
- Secure any removed components: If you had previously removed drawers or doors, reattach them to the cabinets. Ensure that they are properly aligned and function smoothly.
Attaching the island cabinets to the floor is the final step in the installation process. Take your time to align the cabinets correctly and ensure that they are securely fixed with no wobbling or movement. Once you have completed this step, you can proceed to the next and final step: testing the stability and making final adjustments.
Step 7: Testing the stability and making final adjustments
After attaching the island cabinets to the floor, it’s important to test their stability and make any final adjustments to ensure a secure and balanced installation. This step will help you identify any potential issues and address them before considering the project complete. Here’s how to test the stability and make final adjustments:
- Verify stability: Gently shake or apply light pressure to the island cabinets to test their stability. They should feel solid and secure, with minimal movement. If you notice any wobbling or instability, take note of the specific areas that require adjustment.
- Check for levelness: Use a level to confirm that the cabinets are level and aligned properly. Adjust the anchor bolts if necessary, loosening them slightly to make minor corrections to the cabinet position. Then, retighten the bolts.
- Address any unevenness: If you notice any unevenness in the cabinets or gaps between the cabinet base and the floor, you can use shims or adjust the cabinet legs to achieve a level and flush surface.
- Double-check doors and drawers: Open and close all doors and drawers to ensure smooth operation. Make any necessary adjustments to hinges or slides to eliminate any binding or sticking.
- Clean up: Once you are satisfied with the stability and alignment of the island cabinets, clean up any debris or dust that may have accumulated during the installation process. This will leave your kitchen looking tidy and polished.
By testing the stability and making final adjustments, you can ensure that your island cabinets are securely installed and ready for use. Taking the time to address any potential issues will contribute to the longevity and functionality of your cabinets. Once you have completed these steps, you can confidently enjoy your newly secured island cabinets.
Before concluding, it’s important to reiterate that these steps are general guidelines, and the specific methods may vary depending on the design and materials of your island cabinets. Always refer to the manufacturer’s instructions and consult with a professional if you have any doubts or concerns. Following best practices and prioritizing safety will help you achieve a successful and secure installation.
Conclusion
Securing island cabinets to the floor is essential for creating a stable and functional kitchen environment. By following the step-by-step process outlined in this article, you can ensure that your island cabinets are securely anchored and resistant to movement or instability.
We began by gathering the necessary materials, including island cabinets, anchor bolts, drill with appropriate bits, measuring tape, level, and protective equipment. Preparing the cabinets involved inspecting them for any damages, removing detachable components, and marking the anchor points on the cabinets’ underside.
Next, we moved on to marking the floor, ensuring accurate placement and alignment of the island cabinets. Drilling anchor holes in the floor provided the necessary foundation for installing the anchor bolts, which were tightened to secure the cabinets to the floor.
After attaching the cabinets, we tested their stability and made any final adjustments. This involved checking for wobbling, ensuring levelness, addressing unevenness, and verifying the smooth operation of doors and drawers.
By following these steps, you can create a safe and secure installation that not only enhances the functionality of your kitchen but also adds to its visual appeal. Remember to consult with a professional and refer to the manufacturer’s instructions for specific guidelines tailored to your cabinet design and materials.
Now that you have successfully secured your island cabinets to the floor, you can enjoy a kitchen that combines style and practicality. Take pride in your accomplishment and make the most of your newly installed island cabinets in your daily culinary adventures.
Frequently Asked Questions about How To Secure Island Cabinets To Floor
Was this page helpful?
At Storables.com, we guarantee accurate and reliable information. Our content, validated by Expert Board Contributors, is crafted following stringent Editorial Policies. We're committed to providing you with well-researched, expert-backed insights for all your informational needs.


0 thoughts on “How To Secure Island Cabinets To Floor”