Articles
How To Set Up ADT Doorbell Camera
Modified: September 1, 2024
Learn how to set up the ADT Doorbell Camera with this comprehensive guide. Discover the latest Articles and tips for installing and using this innovative home security device.
(Many of the links in this article redirect to a specific reviewed product. Your purchase of these products through affiliate links helps to generate commission for Storables.com, at no extra cost. Learn more)
Introduction
Welcome to this comprehensive guide on how to set up an ADT doorbell camera. A doorbell camera is a fantastic addition to any home security system, providing you with the ability to monitor and protect your entryway. With ADT’s advanced technology and user-friendly features, installing a doorbell camera has never been easier. In this article, we will walk you through the step-by-step process of setting up your ADT doorbell camera, ensuring that you have a seamless and secure experience.
Before we dive into the installation process, it is essential to understand the benefits of having an ADT doorbell camera. First and foremost, it serves as a deterrent to potential intruders. With the camera in plain sight, individuals with malicious intent will think twice before approaching your home. Additionally, the doorbell camera provides real-time monitoring, allowing you to see and communicate with visitors even when you are not at home.
Furthermore, the ADT doorbell camera offers convenient features such as motion detection and video recording. It will send you instant alerts on your smartphone or tablet whenever motion is detected near your front door. This is especially useful in detecting any suspicious activity or package theft. The recorded videos can also be saved for future reference, ensuring that you have a complete record of any events that may occur.
Now, let’s get started with the step-by-step guide on setting up your ADT doorbell camera. Before diving into the installation process, it is important to gather all the necessary tools and materials to ensure a smooth and successful setup.
Key Takeaways:
- Setting up an ADT doorbell camera is a seamless process that enhances home security with features like motion detection and real-time monitoring. The step-by-step guide ensures a smooth installation and connection to your home Wi-Fi network.
- Customizing camera settings and testing the doorbell camera ensures optimal functionality, providing peace of mind and convenience. Regular maintenance and updates will help you continue to benefit from the advanced features of the ADT doorbell camera.
Read more: How To Reset ADT Doorbell Camera
Step 1: Gather the necessary tools and materials
Before you begin the installation process, it’s important to gather all the necessary tools and materials. Having everything prepared will help you avoid interruptions and ensure a smooth installation. Here is a list of the essential items you will need:
- A suitable ladder or step stool (if needed)
- A power drill with appropriate drill bits
- Screws and anchors suitable for your door frame
- A screwdriver
- A smartphone or tablet with the ADT Pulse app installed
- Your home Wi-Fi network name and password
- A stable internet connection
Make sure to double-check that you have everything on this list before proceeding with the installation. Having all the necessary tools and materials at hand will save you time and frustration in the long run.
Once you have gathered all the required items, you are ready to begin the installation of your ADT doorbell camera. In the next step, we will guide you through the process of installing the doorbell camera to your doorframe.
Step 2: Install the ADT doorbell camera
Now that you have gathered all the necessary tools and materials, it’s time to install your ADT doorbell camera. Follow these steps to ensure a successful installation:
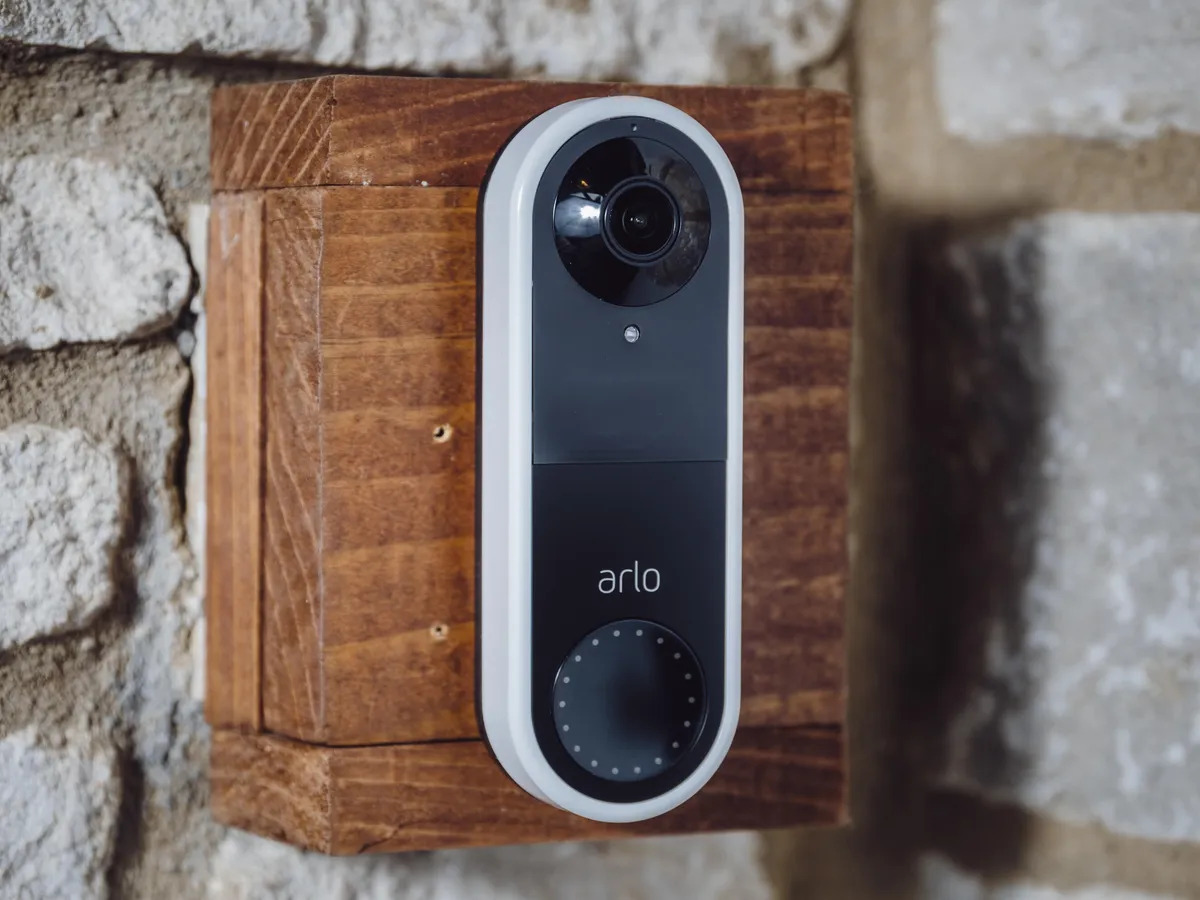
- Choose an ideal location: Start by selecting the ideal location for your doorbell camera. Typically, it is recommended to install it near your front door for optimal coverage and visibility.
- Prepare the doorframe: Use the power drill and appropriate drill bits to create holes in the doorframe. These holes will be used to secure the mounting bracket of the doorbell camera.
- Attach the mounting bracket: Using the screws and anchors, attach the mounting bracket to the doorframe. Ensure that it is securely fastened and level.
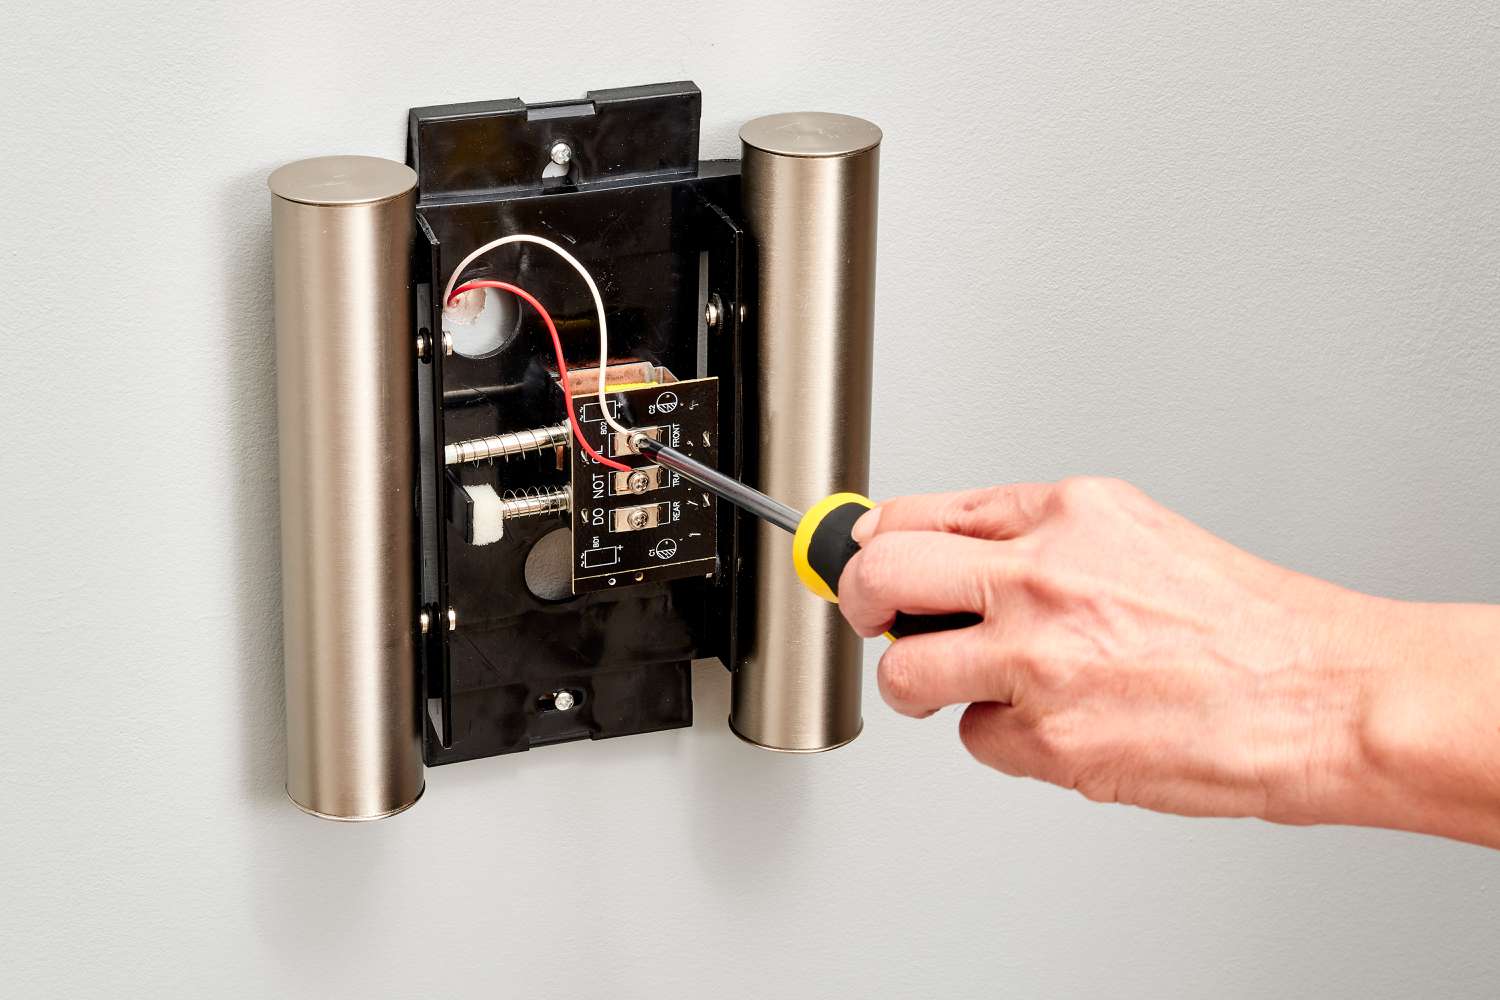
- Connect the wires: Depending on the model of your ADT doorbell camera, you may need to connect the wires to an existing doorbell or power source. Follow the manufacturer’s instructions for proper wiring.
- Secure the doorbell camera: Carefully align the doorbell camera with the mounting bracket and secure it in place using the provided screws. Ensure that it is firmly attached and level.
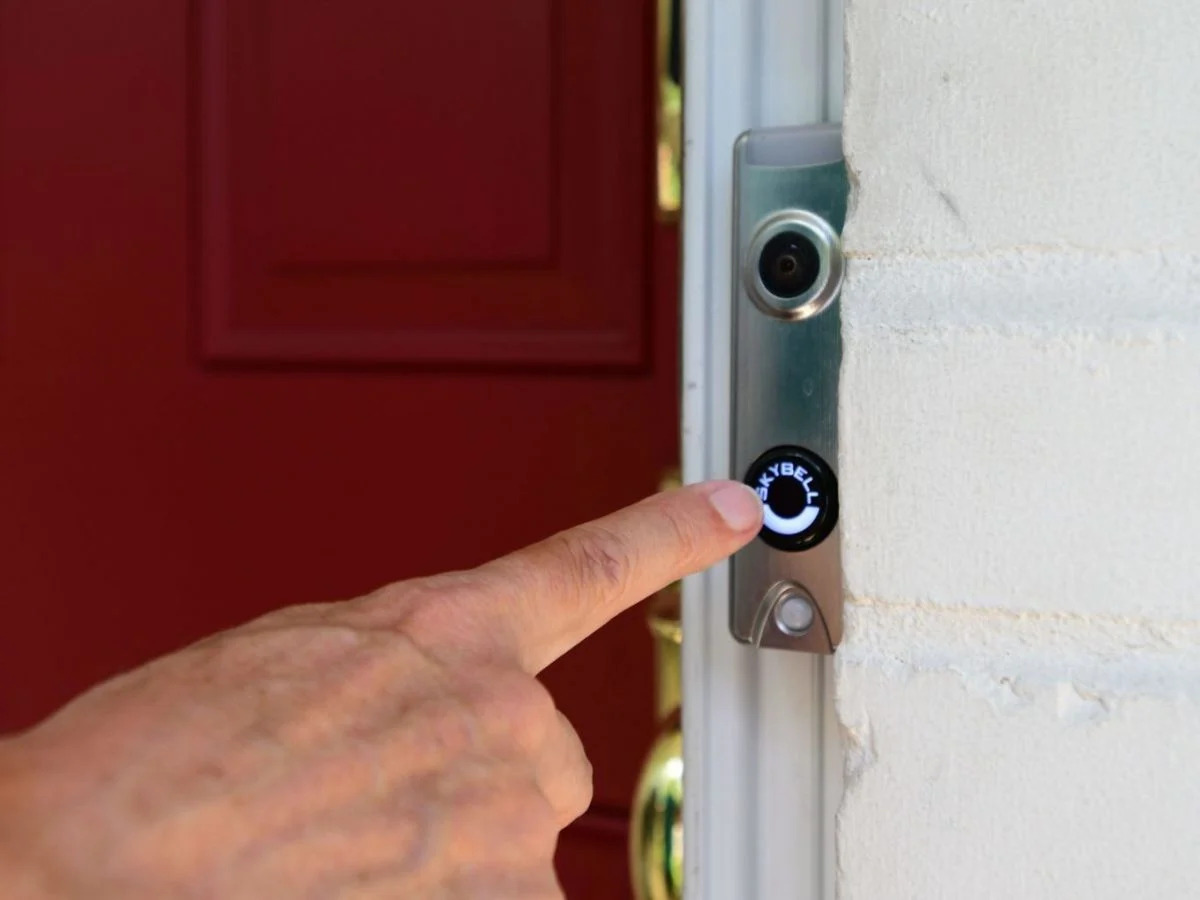
- Test the installation: Before proceeding to the next step, test the doorbell camera to ensure that it is functioning correctly. Press the doorbell button and check if it rings and activates the camera feed on your smartphone or tablet. Additionally, check if the motion detection feature is working as expected.
By following these steps, you will successfully install your ADT doorbell camera and have it securely mounted to your doorframe. Next, we will guide you through the process of connecting your doorbell camera to your home Wi-Fi network.
Step 3: Connect the doorbell camera to your home Wi-Fi network
Now that you have successfully installed your ADT doorbell camera, it’s time to connect it to your home Wi-Fi network. Follow these steps to ensure a seamless connection:
- Open the ADT Pulse app: Launch the ADT Pulse app on your smartphone or tablet. If you haven’t already, make sure you have downloaded and installed the app from the respective app store.
- Log in to your ADT account: Enter your ADT account credentials to log in to the app. If you don’t have an account, you may need to create one before proceeding.
- Add the doorbell camera: Once you have logged in, navigate to the settings or devices section within the app. Look for an option to add a new device, specifically the doorbell camera.
- Enter Wi-Fi network information: Follow the on-screen prompts to enter your home Wi-Fi network’s name (SSID) and password. Make sure to double-check the information for accuracy.
- Connect the doorbell camera: Once you have entered the Wi-Fi network information, the ADT Pulse app will guide you through the process of connecting the doorbell camera to your home network. This may involve scanning a QR code or pressing a button on the camera.
- Wait for the connection: After initiating the connection process, wait for the doorbell camera to establish a connection with your home Wi-Fi network. This may take a few moments.
- Confirm the connection: Once the connection is established, the ADT Pulse app will notify you. Verify that the doorbell camera is successfully connected by checking for a live feed of the camera on your smartphone or tablet.
By following these steps, you will successfully connect your ADT doorbell camera to your home Wi-Fi network. This will allow you to access live video feeds, receive notifications, and control various settings through the ADT Pulse app. In the next step, we will guide you through the process of downloading and setting up the ADT Pulse app on your mobile device.
When setting up an ADT doorbell camera, make sure to carefully follow the manufacturer’s instructions for installation and connection to your home’s Wi-Fi network. This will ensure that the camera functions properly and provides reliable security for your home.
Step 4: Download and set up the ADT Pulse app
Now that your ADT doorbell camera is connected to your home Wi-Fi network, it’s time to download and set up the ADT Pulse app on your smartphone or tablet. Follow these steps to ensure a smooth and seamless setup:
- Open the app store: Depending on your device’s operating system, open the Apple App Store or Google Play Store on your smartphone or tablet.
- Search for the ADT Pulse app: In the app store’s search bar, type in “ADT Pulse” and search for the official app developed by ADT.
- Install the app: Once you find the ADT Pulse app in the search results, tap on it to open the app’s page. Then, click on the “Install” or “Get” button to download and install the app on your device.
- Open the app: Once the app is successfully installed, locate the ADT Pulse app icon on your device’s home screen or app drawer. Tap on it to open the app.
- Log in to your ADT account: On the app’s login screen, enter your ADT account credentials, including your username and password. If you don’t have an account, you may need to create one before proceeding.
- Grant necessary permissions: Allow the ADT Pulse app to access your device’s location, camera, and microphone. These permissions are required for the app to function properly and provide you with the full range of features.
- Set up additional security: Depending on your ADT account settings, you may be prompted to set up additional security measures such as a PIN or biometric authentication. Follow the on-screen instructions to complete the setup process.
- Navigate the app: Once you have successfully logged in and completed the initial setup, you will be able to navigate the ADT Pulse app. Explore the different sections and familiarize yourself with the app’s features and settings.
By following these steps, you will successfully download and set up the ADT Pulse app on your smartphone or tablet. This will allow you to access your ADT doorbell camera’s live video feeds, customize settings, receive notifications, and control your home security system from the palm of your hand. In the next step, we will guide you through customizing camera settings and notifications to suit your preferences.
Read more: How To Set Up An ADT Outdoor Camera
Step 5: Customize camera settings and notifications
Once you have downloaded and set up the ADT Pulse app on your mobile device, you can customize the camera settings and notifications to suit your preferences. Follow these steps to personalize your ADT doorbell camera experience:
- Open the ADT Pulse app: Launch the ADT Pulse app on your smartphone or tablet. Ensure that you are logged in with your ADT account credentials.
- Select the doorbell camera: Navigate to the device section within the app and locate your ADT doorbell camera. Tap on its name or icon to access its settings.
- Adjust camera angles: Depending on your doorbell camera model, you may have the option to adjust camera angles to optimize the field of view. Follow the manufacturer’s instructions to make any necessary adjustments.
- Configure motion detection: Customize the motion detection settings to your desired sensitivity level. You can choose whether you want to receive notifications for all motion or only specific areas. Experiment with the settings until you find the right balance for your needs.
- Set up activity zones: Some doorbell cameras allow you to define specific activity zones where you want to receive motion alerts. Use the app’s interface to draw boundaries around these areas to focus your notifications.
- Enable two-way audio: If your doorbell camera has a two-way audio feature, make sure it is enabled in the app’s settings. This will allow you to communicate with visitors at your doorstep through the app.
- Adjust notification preferences: Fine-tune your notification preferences for motion events and doorbell rings. You can choose to receive push notifications, emails, or both. You may also set specific times or schedules during which you want to receive alerts.
- Explore additional features: Take some time to explore the additional features and settings available for your ADT doorbell camera. These may include video recording options, sharing access with family members, or integrating with other smart home devices.
By following these steps, you can customize your ADT doorbell camera settings and notifications to cater to your specific needs and preferences. Take advantage of the app’s features to optimize the camera’s functionality and make the most out of your home security system. In the final step, we will guide you through testing the doorbell camera to ensure it is working correctly.
Step 6: Test the doorbell camera and ensure it is working properly
Now that you have customized the settings and notifications for your ADT doorbell camera, it’s time to test it and ensure that everything is working as expected. Follow these steps to ensure that your doorbell camera is functioning correctly:
- Test the doorbell button: Press the doorbell button to simulate a visitor at your doorstep. Check if the doorbell sound plays through the ADT Pulse app on your smartphone or tablet. This will ensure that the audio communication is working properly.
- Check live video feed: Open the ADT Pulse app and verify that you can access the live video feed from your doorbell camera. Make sure the camera captures a clear and well-lit view of the entryway.
- Verify motion detection: Walk around the designated activity zones or create motion near the doorbell camera to trigger the motion detection feature. Check if you receive notifications on your mobile device for the detected motion.
- Test two-way audio: If your doorbell camera has a two-way audio feature, use the app to engage in a conversation with someone at your front door. Ensure that both the audio transmission and reception are clear.
- Review recordings (if applicable): If your doorbell camera has video recording capabilities, review the recorded videos to ensure that they are being captured properly and can be accessed through the ADT Pulse app.
- Check connectivity: Verify that the doorbell camera remains connected to your home Wi-Fi network consistently. Look for any issues or interruptions in the live video feed or notifications.
By following these steps and conducting thorough testing, you can ensure that your ADT doorbell camera is working properly and providing you with the desired level of security and peace of mind. If you encounter any issues during the testing process, consult the ADT support resources or contact their customer service for further assistance.
Congratulations! You have successfully set up and tested your ADT doorbell camera. Now you can enjoy enhanced home security and the convenience of monitoring and communicating with visitors at your doorstep from anywhere in the world through the ADT Pulse app.
Remember to regularly maintain and update your doorbell camera settings as needed to continue benefiting from its advanced features and enjoy optimal functionality. Stay vigilant and stay safe!
Thank you for following this comprehensive guide on how to set up an ADT doorbell camera. We hope you found it helpful and informative. If you have any further questions or need assistance, feel free to reach out to ADT’s customer support team.
Conclusion
Congratulations on successfully setting up your ADT doorbell camera! By following the step-by-step guide in this article, you have taken an important step towards enhancing the security and monitoring capabilities of your home. The ADT doorbell camera offers advanced features such as motion detection, two-way audio, and remote access through the ADT Pulse app, providing you with peace of mind and convenience.
With your doorbell camera installed, connected to your home Wi-Fi network, and customized to your preferences, you can now enjoy the benefits it offers. Monitor your front door in real-time, communicate with visitors, receive instant notifications, and have a recorded history of any events that occur. This level of control and visibility allows you to effectively secure your home and keep an eye on any potential threats or activities.
Remember to regularly test and maintain your doorbell camera to ensure it continues to work optimally. Check for software updates, clean the camera lens, and adjust the settings as needed. By doing so, you can ensure that your ADT doorbell camera remains a reliable and effective tool for home security.
We hope this guide has provided you with the information you need to successfully set up your ADT doorbell camera. Should you have any questions or encounter any issues, don’t hesitate to reach out to ADT’s customer support for assistance. Stay vigilant, stay safe, and enjoy the peace of mind that comes with having a reliable and advanced home security system.
Thank you for choosing ADT and taking the necessary steps to protect your home and loved ones.
Now that you've got your ADT Doorbell Camera set up, consider elevating your home's safety measures. Securing your residence extends beyond installation of gadgets; understanding why robust protection is necessary could be a game changer. Our next article digs into compelling reasons that justify investing in comprehensive home security systems. Don't miss out; make sure your sanctuary is as safe as can be.
Frequently Asked Questions about How To Set Up ADT Doorbell Camera
Was this page helpful?
At Storables.com, we guarantee accurate and reliable information. Our content, validated by Expert Board Contributors, is crafted following stringent Editorial Policies. We're committed to providing you with well-researched, expert-backed insights for all your informational needs.
0 thoughts on “How To Set Up ADT Doorbell Camera”