Articles
How To Sew A Minky Blanket
Modified: May 6, 2024
Learn how to sew a cozy minky blanket with this step-by-step guide. Discover helpful articles and tips to create the perfect blanket.
(Many of the links in this article redirect to a specific reviewed product. Your purchase of these products through affiliate links helps to generate commission for Storables.com, at no extra cost. Learn more)
Introduction
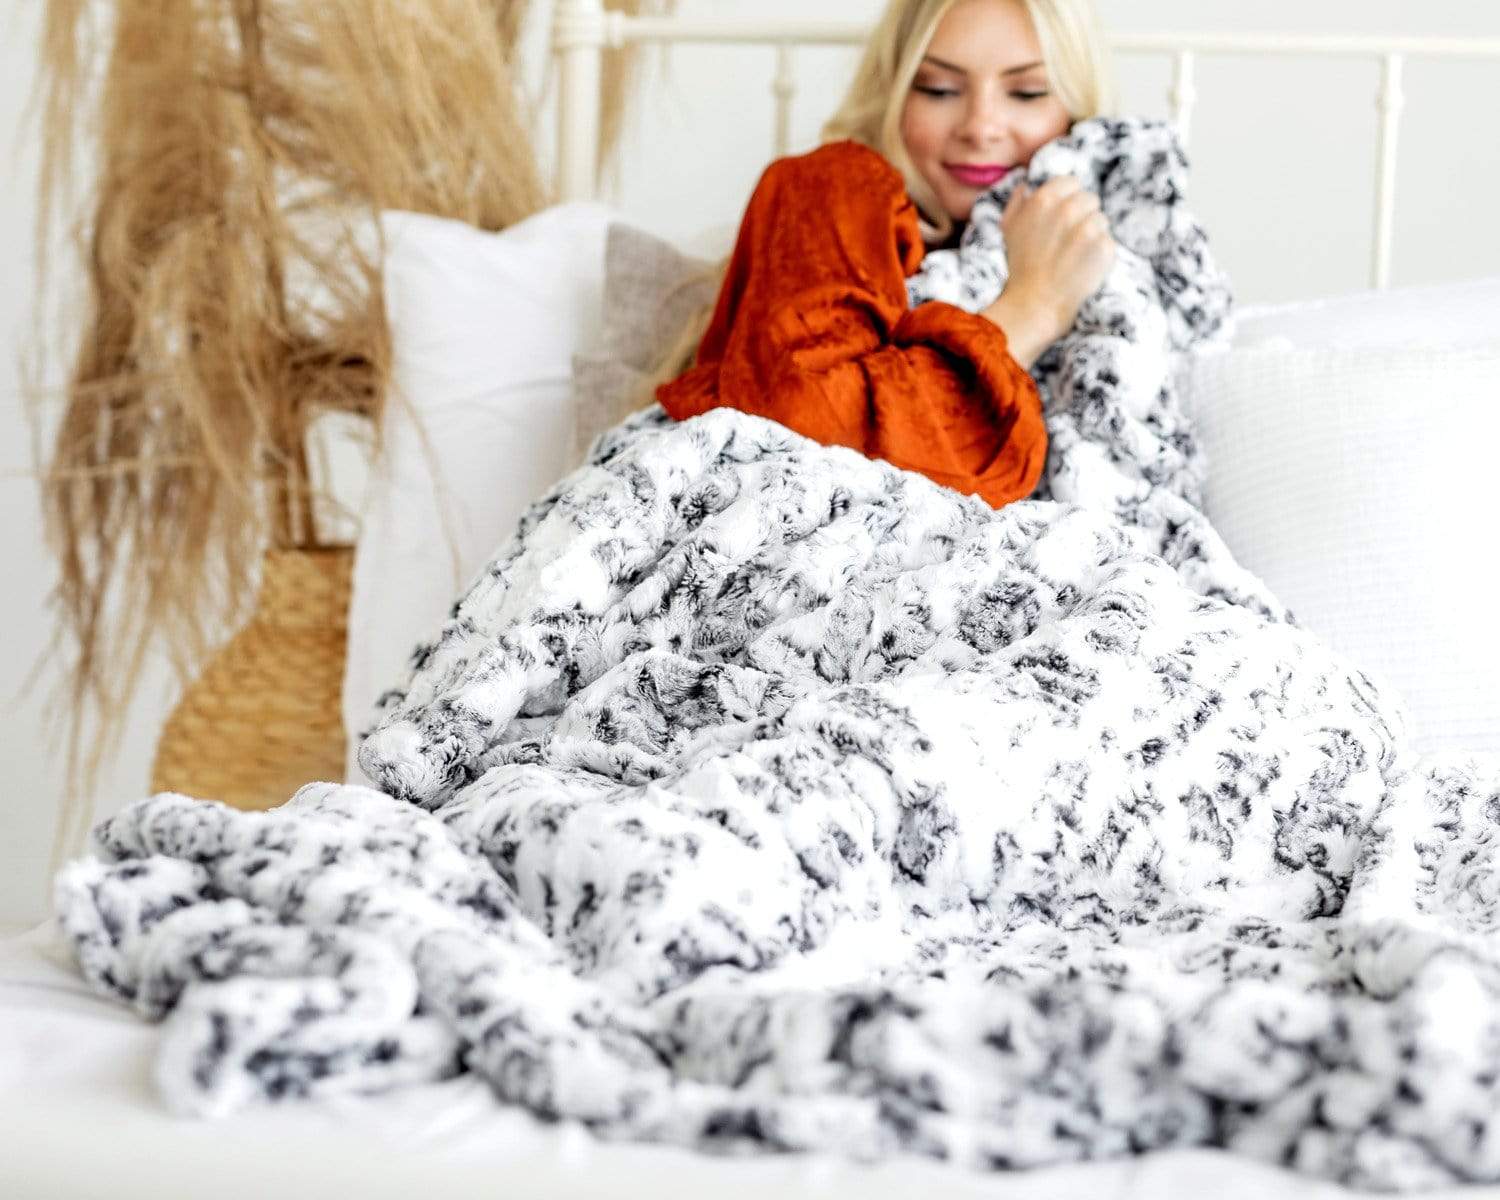
Welcome to the world of DIY sewing projects! If you’re looking to create a cozy and stylish blanket for yourself or as a thoughtful gift, then sewing a minky blanket is the perfect choice. Minky fabric, known for its softness and durability, is a popular choice for blankets due to its plush texture and vibrant colors.
In this article, we will guide you through the step-by-step process of sewing your own minky blanket. Whether you’re a beginner or an experienced sewer, this project is both enjoyable and satisfying. So, grab your sewing machine, gather the materials, and let’s get started!
Key Takeaways:
- Sewing a minky blanket is a delightful and rewarding DIY project that allows you to create a cozy and personalized masterpiece. From choosing the right fabric to adding optional embellishments, each step contributes to a unique and cherished creation.
- The softness and durability of minky fabric make it an ideal choice for creating blankets that provide years of comfort and warmth. Whether you’re a beginner or an experienced sewer, sewing a minky blanket is a fulfilling and enjoyable endeavor that allows you to express your creativity and bring joy to yourself or a loved one.
Read more: How To Sew A Blanket
Materials Needed
Before diving into the sewing process, let’s gather all the necessary materials. Here’s a list of what you’ll need:
- Minky fabric (1 ½ to 2 yards, depending on the desired size of the blanket)
- Cotton fabric for the backing (same size as the minky fabric)
- Thread (matching or contrasting, depending on your preference)
- Sewing machine
- Straight pins or clips
- Fabric scissors or rotary cutter
- Measuring tape
- Seam ripper (in case of any mistakes)
- Iron and ironing board
These are the basic materials needed to sew a minky blanket. However, feel free to add any additional embellishments or decorative elements like ribbons or appliques if you want to personalize your blanket.
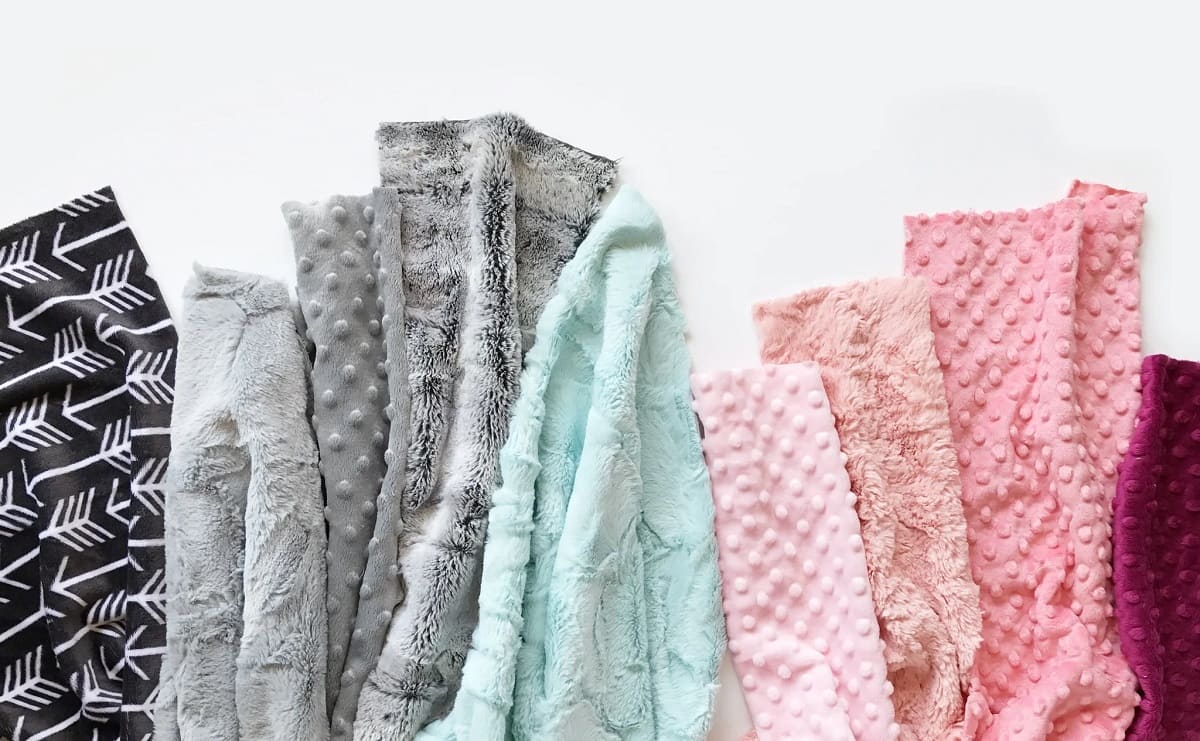
Choosing the Right Minky Fabric
When it comes to selecting the minky fabric for your blanket, there are a few factors to consider. First and foremost, choose a fabric that feels soft and luxurious to the touch. Minky fabric comes in various textures, such as smooth, dimpled, or embossed, so choose the one that appeals to you.
In addition to the texture, consider the color and pattern of the minky fabric. Whether you prefer bold and vibrant colors or subtle and soothing hues, there is a wide range of options available. Some minky fabrics even feature prints or patterns, giving your blanket a unique and stylish look. Take your time to explore different choices and find the one that matches your personal taste and the intended use of the blanket.
Another important factor to consider is the quality of the minky fabric. Look for fabrics that are thick and durable, as they will ensure the longevity of your blanket. Avoid fabrics that feel thin or have loose fibers, as they may not hold up well over time.
It’s also worth noting that minky fabrics can have different washing instructions, so be sure to check the care label before purchasing. Some may require gentle washing or air drying, while others may be machine washable. Choose a fabric that aligns with your preferred maintenance routine to ensure that your blanket stays in excellent condition.
Lastly, consider the size of the minky fabric. Depending on the desired dimensions of your blanket, you may need to purchase multiple yards. Measure the area you want to cover with the minky fabric and choose accordingly. Keep in mind that minky fabric has a tendency to stretch, so it’s better to have a slightly larger piece than what you need.
By considering these factors, you can select the perfect minky fabric for your blanket and create a cozy and visually appealing result.
Preparing the Fabric
Before you start sewing your minky blanket, it’s important to prepare the fabric to ensure a smooth and hassle-free sewing experience. Follow these steps to get your fabric ready:
- Pre-washing (optional): Depending on the type of fabric you’re using, it may be a good idea to pre-wash it before cutting and sewing. This will help remove any excess dyes or chemicals, as well as shrinkage that may occur after washing. If you decide to pre-wash, be sure to follow the manufacturer’s instructions for the fabric.
- Ironing: Lay out your minky fabric on an ironing board and gently iron out any wrinkles or creases. Be careful not to use excessive heat or press too hard, as minky fabric can melt or lose its softness when exposed to high temperatures.
- Positioning: Place your minky fabric right side up on a flat surface. Smooth out any uneven areas or fold lines for a neat appearance. If the fabric has a directional print, ensure that it is facing the right way up.
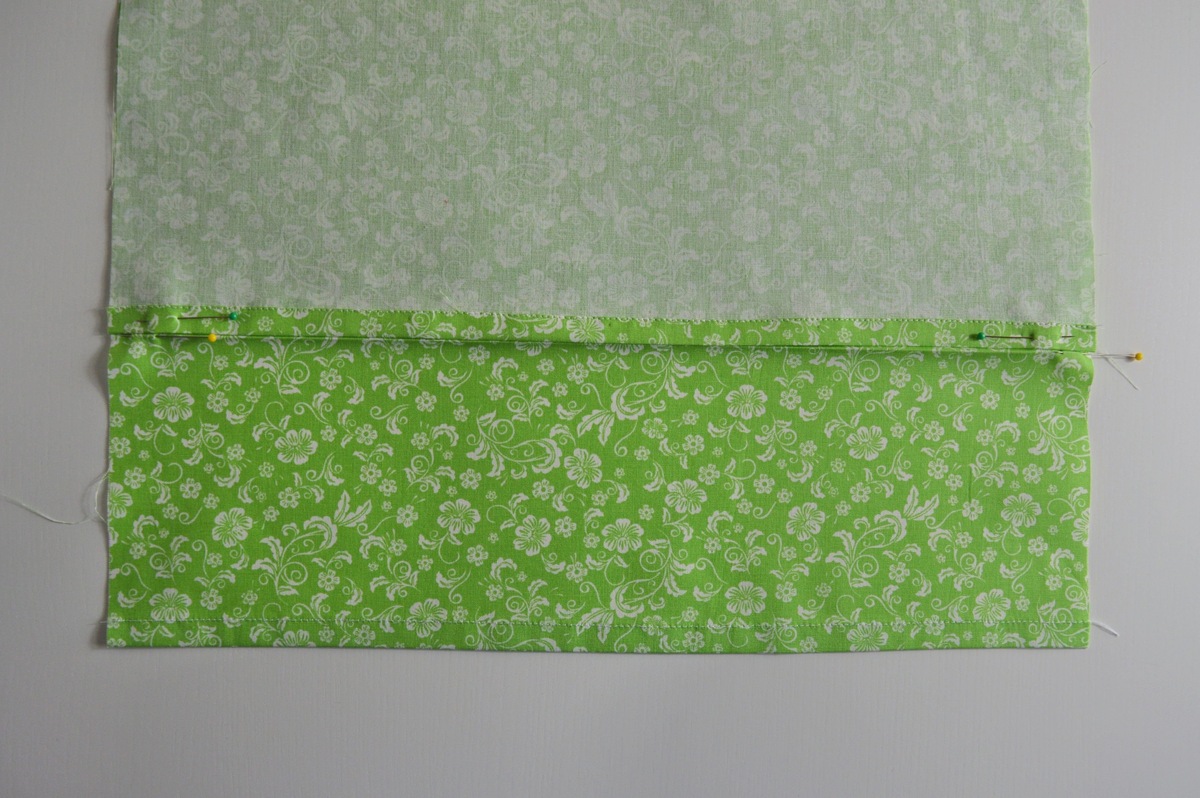
- Preparing the backing fabric: Lay your cotton fabric backing on top of the minky fabric, with the right sides together. Align the edges of the two fabrics and smooth out any wrinkles or bubbles. Use straight pins or clips around the edges to keep the two fabrics in place.
- Trimming excess fabric: If there are any excess fabric or uneven edges, use fabric scissors or a rotary cutter to trim them. Ensure that both the minky fabric and the backing fabric are evenly matched in size and shape.
By adequately preparing the fabric, you create a solid foundation for your minky blanket project. This will make the sewing process easier and result in a professional-looking finished product. Take your time during this step to ensure accuracy and precision, as it will positively impact the overall outcome of your blanket.
Cutting the Fabric
Once you have prepared the minky fabric and the backing fabric, it’s time to cut them to the desired size for your blanket. Follow these steps to ensure accurate and clean cuts:
- Taking measurements: Decide on the dimensions of your blanket. Use a measuring tape to carefully measure and mark the length and width on both the minky fabric and the backing fabric.
- Adding seam allowance: Before cutting, remember to add a seam allowance of about 1/2 inch on all sides. This will give you enough room for sewing and ensure that the blanket doesn’t end up smaller than intended.
- Cutting straight lines: Using fabric scissors or a rotary cutter, cut along the marked lines on both the minky fabric and the backing fabric. Take your time to ensure that the lines are straight and that you maintain the shape and size of the blanket.
- Removing excess fabric: Once you have cut both fabrics to the correct size, double-check for any excess or uneven edges. Trim them off using fabric scissors or a rotary cutter to create clean and even edges.
When working with minky fabric, it’s important to note that it can be a bit slippery. Use sharp scissors or a rotary cutter to ensure clean cuts, and consider using clips instead of pins to secure the fabric in place. This will prevent any shifting or stretching that may occur while cutting.
Remember to take your time and be precise with your cuts. Accuracy during this step will contribute to the overall appearance and quality of your minky blanket. Once you have finished cutting, you’re ready to move on to the sewing phase!
When sewing a minky blanket, use ballpoint needles to prevent snagging the fabric and use clips instead of pins to avoid leaving holes in the material.
Read more: How To Dry A Minky Couture Blanket
Sewing the Minky Blanket
Now comes the fun part – sewing your minky blanket! Follow these steps to bring your blanket to life:
- Choosing the stitch: Set your sewing machine to a straight stitch or a stretch stitch, depending on the type of fabric you’re using. If your minky fabric has a bit of stretch to it, using a stretch stitch or a zigzag stitch will ensure that the seams can flex without breaking.
- Leaving an opening: Starting on one side of the blanket, leave a 6-8 inch opening. This will allow you to turn the blanket right side out later on.
- Aligning the edges: With the minky fabric and the backing fabric right sides together, align the edges and pin or clip them in place. Make sure that the corners are properly aligned as well.
- Sewing the seams: Starting at one end of the opening, stitch around the edges of the blanket, backstitching at the beginning and end to secure the stitches. Sew with a 1/2 inch seam allowance, removing pins or clips as you go along. Take your time to ensure that the stitches are straight and even.
- Closing the opening: Once you have sewn around the entire blanket, go back to the opening and stitch it closed. You can either do a straight stitch or a slip stitch to close the gap neatly.
- Trimming excess threads: After sewing, trim any excess threads or loose ends to give your blanket a clean and polished look.
While sewing, be mindful of the bulkiness of the minky fabric and the backing fabric. Use your hands to guide the fabric through the sewing machine, preventing any stretching or bunching that may occur. Take breaks if needed to readjust the fabric and ensure smooth stitching.
Once you have finished sewing, turn the blanket right side out through the opening. Gently push out the corners using a blunt object like a pencil or a chopstick. Congratulations! You have successfully sewn your minky blanket.
Remember, practice makes perfect. If this is your first time sewing with minky fabric, don’t be discouraged if it takes a few attempts to get the hang of it. With each project, you’ll gain more confidence and skill.
Adding Embellishments (optional)
Adding embellishments to your minky blanket can take it to the next level of customization and personalization. While embellishments are optional, they can add a touch of creativity and uniqueness to your blanket. Here are a few ideas to consider:
- Ribbons and trims: Attach decorative ribbons or trims along the edges of your blanket. Choose ribbons in coordinating or contrasting colors to add visual interest and texture. Simply stitch them in place along the seams or edges of the blanket.
- Appliques: Consider adding fabric appliques to your minky blanket. Appliques are fabric shapes or designs that can be sewn or ironed onto the fabric. This can be a fun way to incorporate shapes, letters, or even characters into your blanket.
- Embroidery: If you enjoy embroidery, consider adding some embroidered designs to your minky blanket. You can choose to embroider simple patterns, names, or even intricate designs to make your blanket truly unique.
- Patchwork: If you have leftover fabric pieces, you can create a patchwork design on your minky blanket. Cut the fabric into squares or other shapes and arrange them in a desired pattern. Sew them together onto the minky fabric to create a beautiful patchwork effect.
- Quilting: For added warmth and texture, you can quilt the minky blanket. Quilting involves stitching through all layers of the blanket, creating a quilted pattern. This not only adds visual appeal but also helps to keep the layers of the blanket secure and prevents shifting over time.
When embellishing your minky blanket, it’s essential to consider the maintenance and care instructions for the materials you’re adding. Some embellishments may require specific washing or handling methods, so be sure to keep that in mind to preserve the integrity of your blanket.
Remember, the choice to add embellishments is completely optional. If you prefer the simplicity and elegance of a plain minky blanket, it will still be just as cozy and inviting.
Finishing Touches
As you near the completion of your minky blanket project, there are a few finishing touches you can add to enhance its overall appearance and durability. These final steps will ensure that your blanket is not only visually pleasing but also well-constructed and long-lasting.
- Pressing: Take the time to iron your completed minky blanket. Use a low heat setting and a pressing cloth to avoid damaging the fabric. Pressing will help flatten any wrinkles and give your blanket a polished look.
- Topstitching: Consider adding a topstitch around the edges of the blanket. This will help reinforce the seams and provide a professional finish. Choose a coordinating or contrasting thread color to make the stitching stand out.
- Binding (optional): If you prefer a more finished look, you can add binding to the edges of your minky blanket. Binding is a strip of fabric that is sewn around the perimeter of the blanket, covering the raw edges. This not only enhances the appearance but also adds stability and durability to the edges.
- Labeling (optional): Consider adding a personalized label to your minky blanket. This can be a small fabric tag with your name, initials, or a custom message. Sew the label onto a corner of the blanket to add a personal touch and make it truly unique.
- Care instructions: Create a small tag or label that includes the care instructions for your minky blanket. This will remind the recipient or yourself how to properly care for the blanket, ensuring its longevity and preserving its softness.
Taking the time to add these finishing touches will elevate your minky blanket to a professional and polished level. Whether you choose to incorporate all of these steps or just a few, each one contributes to the overall quality and aesthetics of your completed project.
Once you have completed the finishing touches, step back and admire your handmade minky blanket. It is now ready to be enjoyed or to be given as a thoughtful and cherished gift.
Conclusion
Congratulations on completing your minky blanket! Through the process of choosing the right fabric, preparing, cutting, sewing, and adding optional embellishments, you have created a cozy and personalized blanket that can bring warmth and comfort to your life or the life of a loved one.
Sewing a minky blanket is a rewarding and enjoyable project that allows you to explore your creativity while honing your sewing skills. The softness and durability of minky fabric make it a popular choice for blankets, ensuring that your finished creation will provide years of comfort and coziness.
Remember, each minky blanket you sew will be unique and reflective of your personal style. Experiment with different colors, patterns, and embellishments to create a one-of-a-kind masterpiece that reflects your individuality.
As you continue on your sewing journey, don’t shy away from trying new techniques or projects. Sewing is a versatile and fulfilling hobby that allows you to express yourself and create beautiful and functional items.
So, grab your sewing machine, select your favorite minky fabric, and embark on the wonderful journey of sewing a minky blanket. Whether you’re crafting it for yourself, a loved one, or as a gift, this handmade treasure will undoubtedly bring joy and warmth for years to come.
Happy sewing!
Now that you've mastered sewing a minky blanket, why not broaden your crafting horizons further? If you're eager to keep those creative juices flowing, consider making a specialized cover for the little ones. Our next article offers a curated list of the top baby blankets for the upcoming year. Find out which designs will keep babies snug and stylish. Perfect for gifts or personal use, these blankets are sure to impress. So, don't miss out; check out our recommended selections for the best baby blankets!
Frequently Asked Questions about How To Sew A Minky Blanket
Was this page helpful?
At Storables.com, we guarantee accurate and reliable information. Our content, validated by Expert Board Contributors, is crafted following stringent Editorial Policies. We're committed to providing you with well-researched, expert-backed insights for all your informational needs.