Articles
How To Self-Bind A Quilt With Minky Backing
Modified: August 27, 2024
Learn how to self-bind a quilt with minky backing in this informative article. Discover helpful tips and techniques to achieve a professional finish for your quilting projects.
(Many of the links in this article redirect to a specific reviewed product. Your purchase of these products through affiliate links helps to generate commission for Storables.com, at no extra cost. Learn more)
Introduction
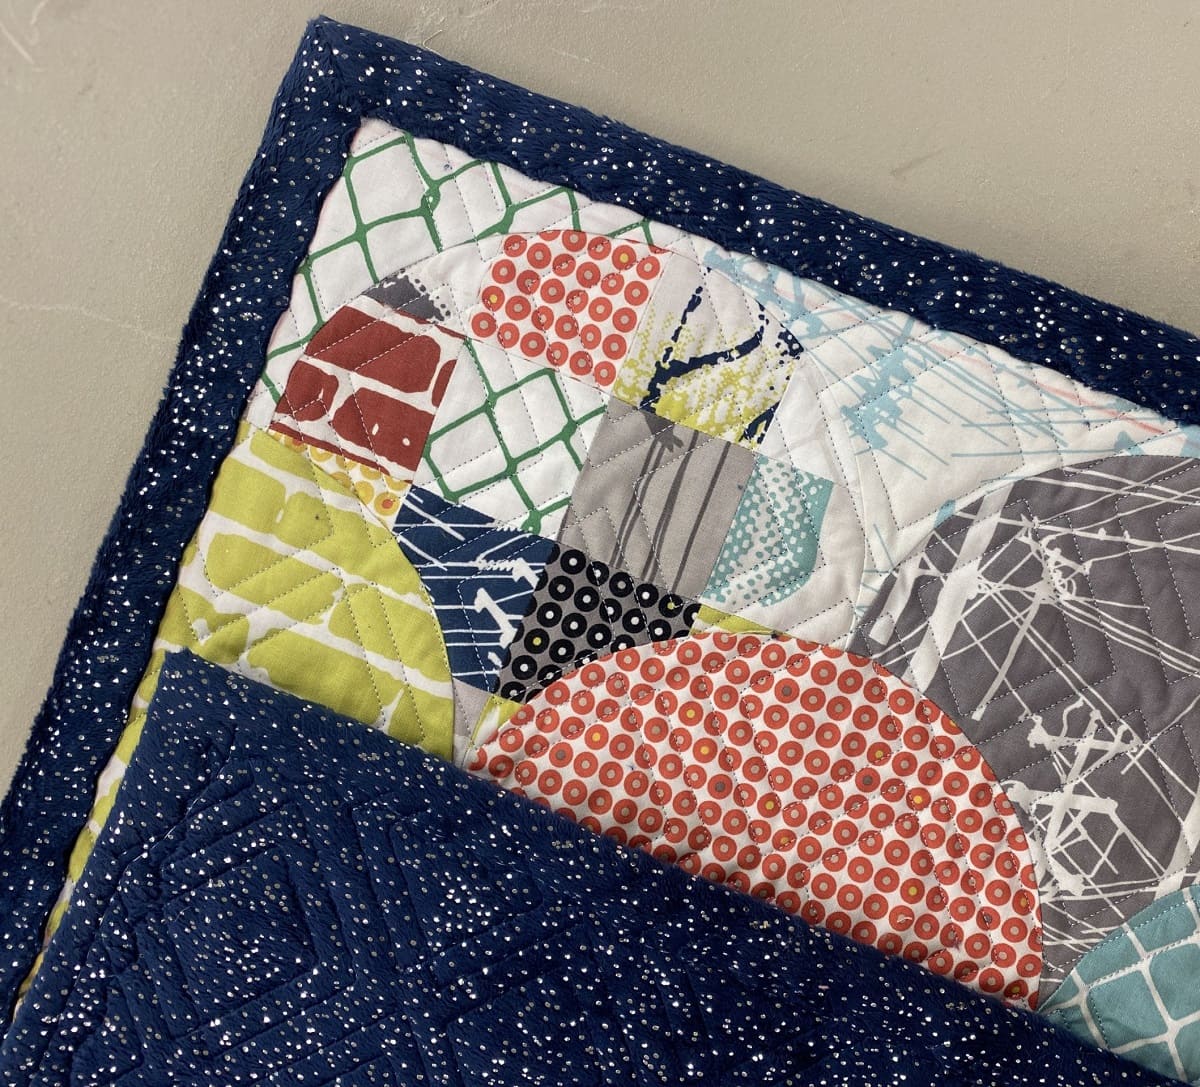
Quilting is a beloved craft that allows individuals to create beautiful, intricate designs using fabric and thread. One important step in the quilting process is binding, which provides a finished edge and holds all the layers of the quilt together. In this article, we’ll explore how to self-bind a quilt with a unique twist – using minky fabric for the backing. Minky is a soft, cozy fabric that adds an extra layer of comfort to your quilt. By following these simple steps, you’ll be able to create a professional-looking self-bound quilt with a luxurious minky backing.
Key Takeaways:
- Transform your quilt with a luxurious minky backing and self-binding technique, creating a professional, cozy, and visually stunning masterpiece that showcases your creativity and attention to detail.
- Embrace the art of quilting as a labor of love, celebrating imperfections as unique character and sharing your passion with others to inspire creativity, joy, and endless possibilities in future projects.
Read more: How To Bind A Quilt Using The Backing
Materials Needed
Before you embark on your self-binding journey, it’s important to gather all the necessary materials. Here’s a list of items you’ll need for this project:
- Quilt top – Your completed quilt top, pieced together with the desired fabric and design.
- Minky fabric – Choose a high-quality minky fabric in a color or print that compliments your quilt top.
- Quilt batting – A layer of batting that goes between the quilt top and minky backing to add loft and warmth.
- Scissors – Sharp fabric scissors for cutting fabric and thread.
- Pins or basting spray – Choose either pins or basting spray to hold the layers of the quilt sandwich together during the sewing process.
- Sewing machine – A sewing machine with a walking foot is ideal for quilting and binding.
- Thread – Select a thread color that matches or complements your quilt top and minky fabric.
- Iron and ironing board – A well-pressed quilt top and minky fabric will ensure smooth and professional results.
- Ruler or quilting ruler – A ruler with measuring markings will be helpful for cutting fabric strips.
- Binding clips or pins – These will be used to secure the binding in place before sewing.
- Binding tool or quilting ruler with a 45-degree angle – This will help you create precise mitered corners while applying the binding.
Once you have gathered these materials, you’ll be well-equipped to begin the self-binding process with minky fabric.
Preparing the Quilt Top
The first step in self-binding your quilt with minky fabric is to prepare your quilt top. Here’s how you can ensure it is ready for the binding process:
- Trimming: Start by trimming the excess batting and backing fabric from your quilt top. Use your scissors or rotary cutter and ruler to make clean, straight cuts along the edges of your quilt.
- Pressing: Next, give your quilt top a good press with an iron. Use a medium heat setting and press gently to avoid stretching or distorting the fabric. This will remove any creases and ensure your quilt top is flat and ready for the binding.
- Square up your quilt: Check if the corners of your quilt top are square. Use a ruler or square quilting ruler to measure and trim the edges if needed. Having square corners will help your quilt appear neat and professional once the binding is applied.
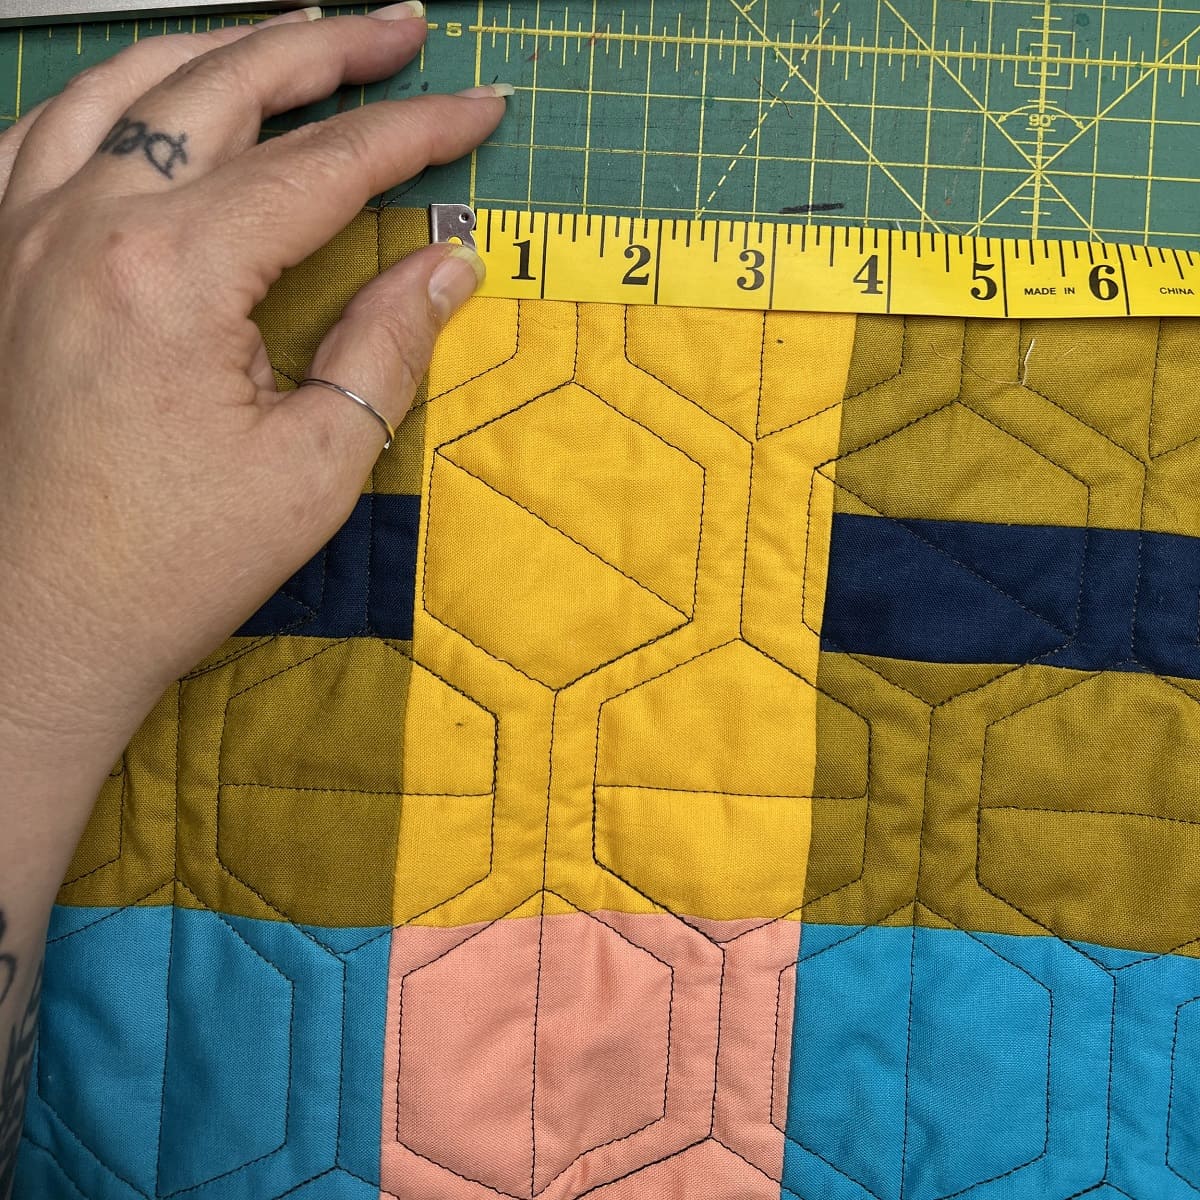
- Measure the perimeter: Measure the perimeter of your quilt top to determine the length of the binding strips you’ll need to create. Add an extra 10 inches to account for corners and overlapping.
- Optional: Marking the quilt: If you prefer, you can lightly mark the quilt top with pins or fabric markers to guide you during the binding process. Mark the center of each side and any specific points you want to align with the binding strips.
Taking the time to properly prepare your quilt top will ensure that the binding process goes smoothly and results in a beautifully finished quilt. Once your quilt top is ready, it’s time to move on to preparing the minky fabric for the backing.
Preparing the Minky Backing
Now that your quilt top is prepared, it’s time to get your minky fabric ready for the self-binding process. Follow these steps to ensure your minky backing is in perfect condition:
- Washing: Before working with minky fabric, it’s essential to wash and dry it according to the manufacturer’s instructions. This step will help eliminate any excess oils or chemicals and prevent any potential shrinkage or color bleeding. Be sure to remove any lint or stray threads from the fabric after washing.
- Ironing: After washing and drying, give your minky fabric a thorough ironing using a low heat setting. Be cautious not to apply too much heat as it may damage the fabric. Ironing will remove any wrinkles or creases, leaving you with smooth and ready-to-use minky backing.
- Trimming: If necessary, trim the edges of your minky fabric to ensure it matches the size of your quilt top. Use sharp fabric scissors or a rotary cutter and ruler to create clean, straight edges. This step will make it easier to align the quilt top and minky backing during the layering process.
- Secure the corners: Minky fabric can be quite slippery, so it’s helpful to secure the corners with binding clips or pins. This will prevent shifting and ensure that the corners are well-aligned when you sew the layers together.
By properly preparing your minky backing, you’ll create a stable foundation for your quilt and ensure a smooth and cozy finish. With both your quilt top and minky fabric ready, it’s time to move on to layering the quilt sandwich.
Layering the Quilt Sandwich
Now that your quilt top and minky backing are prepared, it’s time to layer them together to create the quilt sandwich. Follow these steps to ensure a well-aligned and smooth quilt sandwich:
- Prepare a clean workspace: Start by clearing a large, flat surface to work on. A table or floor works well for this purpose. Make sure the surface is clean and free from any debris that could transfer onto your quilt.
- Lay the minky backing: Begin by spreading out your minky fabric on the prepared workspace, with the right side facing down. Smooth out any wrinkles or creases, ensuring the fabric is taut and even. Use masking tape or fabric clips to secure the edges of the minky fabric to the table or floor, preventing it from shifting during layering.
- Place the batting: Gently lay the quilt batting on top of the minky fabric, aligning the edges. Smooth out any wrinkles or bumps in the batting, ensuring it lays flat and evenly covers the entire minky fabric.
- Add the quilt top: Carefully place your quilt top on the batting, aligning the edges with the minky fabric. Smooth out any wrinkles or folds, making sure the quilt top lies flat and is centered on the batting.
- Adjust and smooth: Take a moment to adjust and align the layers, making sure the quilt top and minky backing are properly centered. Smooth out any wrinkles or folds by running your hands gently across the layers, starting from the center and working your way to the edges.
Layering the quilt sandwich is crucial for ensuring a well-bonded and professional-looking quilt. Taking the time to properly align and smooth out the layers will eliminate any creases or lumps and make the quilting and binding process much easier. Once your quilt sandwich is securely layered, it’s time to move on to the next step: pin basting.
Read more: How To Quilt With Minky Fabric
Pin Basting
Pin basting is an essential step in securing the layers of your quilt sandwich together before quilting. By pinning the layers in place, you’ll prevent any shifting or bunching during the sewing process. Follow these steps to effectively pin baste your quilt:
- Gather your supplies: You’ll need quilt pins or safety pins for this step. Ensure that your pins are long enough to go through all layers of the quilt sandwich.
- Start from the center: Begin pin basting by folding your layered quilt sandwich in half, aligning the centers. Place a pin at the center to secure the layers together.
- Work your way out: Start pinning from the center towards the edges, spacing your pins approximately 4-6 inches apart. Ensure that all layers are flat and smooth as you go, adjusting any wrinkles or folds that may appear.
- Focus on the corners: Pay extra attention to the corners of your quilt, as they are prone to shifting. Place a few additional pins in the corner areas to keep the layers in place.
- Check for tension: Once you’ve pinned basted the entire quilt, gently tug on the fabric to check for any areas that may be too tight or loose. Adjust the layers if needed to achieve an even and balanced tension throughout the quilt.
- Trim excess batting and backing: If there are any areas where the batting or backing extends beyond the quilt top, trim them to create even edges. This will make the binding process easier later on.
Pin basting your quilt is a vital step in the quilting process, ensuring that the layers stay in place during sewing. Take your time and be meticulous in this step to achieve the best results. With your quilt securely basted, you’re now ready to move on to the next stage: sewing the quilt layers together.
Sewing the Quilt Layers Together
Once your quilt layers are securely pin basted, it’s time to sew them together. This step will involve quilting stitches that hold the quilt top, batting, and minky backing in place. Follow these steps to effectively sew the quilt layers together:
- Prepare your sewing machine: Before you start sewing, ensure that your sewing machine is set up for quilting. Install a walking foot or engage the walking foot mechanism if available. Use a thread color that matches or complements your quilt top and minky fabric.
- Start in the center: Begin sewing your quilt layers together from the center of the quilt. This will help distribute any potential puckering or distortion evenly throughout the quilt.
- Choose a quilting pattern: Decide on a quilting pattern that suits your design aesthetic. You can opt for straight lines, meandering stitches, or free-motion quilting. Take your time and follow the pattern consistently across the quilt.
- Sew with even tension: Maintain even tension on the quilt layers as you sew, guiding the fabric gently through the machine. Avoid pulling or stretching the layers too much, as it can distort the quilt. Take your time and sew at a steady pace to ensure accurate and consistent stitches.
- Continue to the edges: Sew from the center outward toward the edges of the quilt, following your chosen quilting pattern. Take care to remove the pins as you approach them to avoid sewing over them or damaging your machine’s needle.
- Backstitch or secure your stitches: Once you reach the edges of the quilt, backstitch or use another method to secure your stitches. This will help prevent unraveling and ensure the quilt layers stay intact.
Sewing the quilt layers together is an exciting and rewarding part of the quilting process. Take your time, focus on maintaining even tension, and enjoy the creative journey. With the quilt layers securely sewn, it’s time to move on to the next step: trimming the excess fabric.
When self-binding a quilt with minky backing, use binding strips that are 2.5 inches wide to accommodate the thickness of the minky fabric. This will help ensure a clean and professional finish to your quilt.
Trimming the Excess Fabric
After the quilt layers are securely sewn together, it’s time to trim the excess fabric from the edges. Trimming ensures that the quilt has straight, even edges and prepares it for the binding process. Follow these steps to effectively trim the excess fabric:
- Spread out the quilt: Lay your quilt flat on a large, clean surface. Smooth out any wrinkles or folds to ensure accurate trimming.
- Use a ruler or quilting ruler: Place a ruler along one edge of the quilt, aligning it with the desired size or shape you want for your finished quilt. Use a rotary cutter or fabric scissors to trim the excess fabric along the ruler’s edge. Repeat this process for all four edges of the quilt.
- Paying attention to corners: Take extra care when trimming the corners of the quilt. Use a ruler with a 45-degree angle or a quilting ruler to ensure accurate and uniform corners. Align the ruler with the edge of the quilt and trim the excess fabric at a 45-degree angle.
- Check for evenness: Once you’ve trimmed all four sides, check for evenness by visually inspecting the edges. If any areas appear uneven, make small adjustments by trimming off a little more fabric as needed.
- Remove any stray threads: Take a moment to check for any stray threads or loose threads along the trimmed edges. Trim them carefully to ensure a clean and professional finish.
By trimming the excess fabric, you’ll create clean, straight edges for your quilt and prepare it for the binding process. Take your time and double-check the measurements to ensure accuracy. With the excess fabric trimmed, you’re now ready to move on to the next step: creating the binding strips.
Creating the Binding Strips
The binding is the final touch that frames and finishes your quilt. Creating your own binding allows you to customize the color and fabric to perfectly complement your quilt. Follow these steps to create the binding strips:
- Measure your quilt: Measure the perimeter of your trimmed quilt to determine the length of binding strips you’ll need. Add a few extra inches to account for corners and overlapping.
- Cut fabric strips: Using sharp fabric scissors or a rotary cutter and ruler, cut 2.5-inch wide strips of fabric along the selvage or cross-grain of your chosen binding fabric. Stitch shorter strips together as necessary to achieve the desired length.
- Join the strips: Take two fabric strips with right sides together, align the ends at a 45-degree angle, and sew a diagonal seam from corner to corner. Trim the excess fabric, leaving a 1/4-inch seam allowance. Repeat this process to join all the strips together and create one continuous strip of binding.
- Press the binding: Press the binding strip in half lengthwise, wrong sides together, using a medium heat setting on your iron. This will create a clean fold along the entire length of the strip.
- Optional: Trim the fold: If desired, trim a small amount of the folded edge along the binding strip to reduce bulk. Be careful not to cut through the raw edges.
Creating your own binding strips allows you to achieve a cohesive and professional look for your quilt. Choose a fabric that complements your quilt design and take your time to accurately measure and join the strips. With the binding strips ready, it’s time to move on to attaching the binding to the quilt.
Read more: How To Join Ends Of Quilt Binding
Attaching the Binding to the Quilt
Attaching the binding is the next step in finishing your quilt. This process will secure the binding strip to the edges of the quilt, giving it a clean and polished look. Follow these steps to attach the binding:
- Starting point: Choose a starting point along one side of the quilt, leaving a few inches of binding strip unattached. This will allow for joining the ends later.
- Align the raw edge: Align the raw edge of the binding strip with the raw edge of the quilt, with the folded edge facing towards the quilt. Secure it in place with binding clips or pins.
- Stitching: Using a 1/4-inch seam allowance, start sewing along the edge of the binding strip, backstitching at the beginning to secure the stitches. Sew all the way to the next corner, keeping the edges aligned as you go.
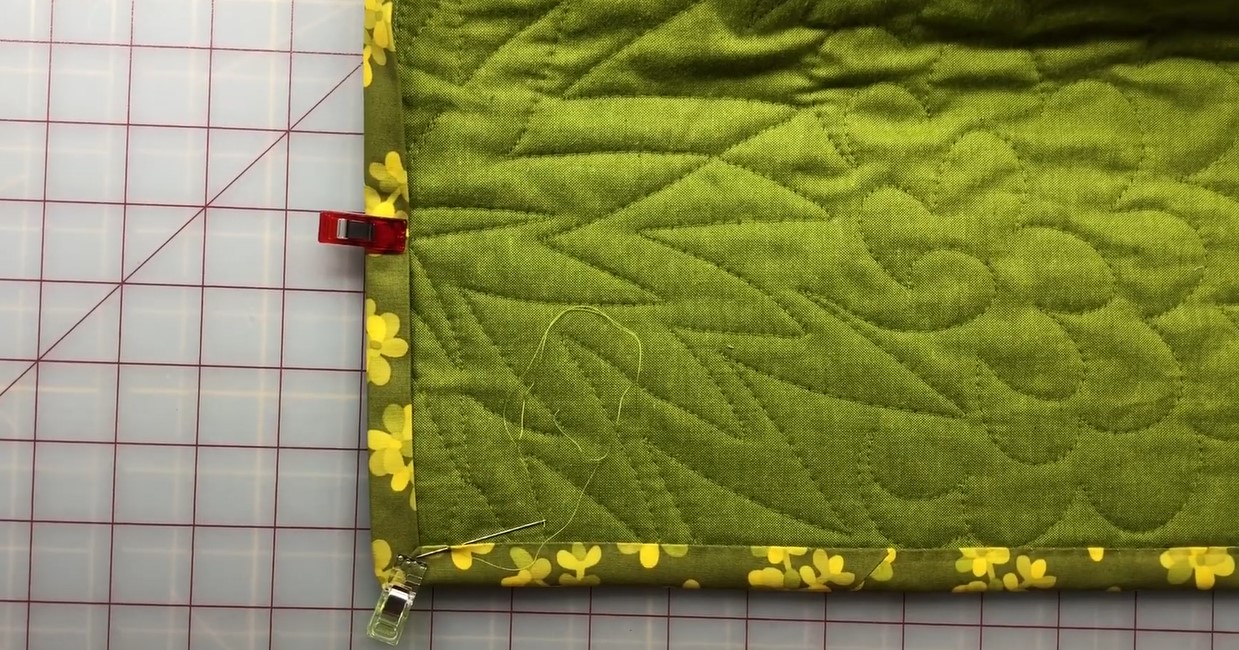
- Mitering the corners: When you reach a corner, stop sewing 1/4 inch away from the edge. Fold the binding strip up at a 45-degree angle, creating a neat mitered corner. Then, fold it back down along the adjacent side, aligning it with the next edge of the quilt. Start stitching again from the corner, continuing in the same manner.
- Continue sewing: Continue sewing the binding to the remaining sides of the quilt, mitering the corners as you go. Take your time to ensure the binding is evenly attached and the corners are crisp.
- Joining the ends: When you approach the starting point, stop stitching a few inches away. Overlap the unattached end of the binding strip over the starting point. Open up the overlapped ends of the binding and mark a line where they meet. Trim the excess to create a 1/4-inch seam allowance. Join the ends with a diagonal seam, trim and press the seam open.
Attaching the binding is an important step that adds a professional touch to your quilt. Take your time to sew accurately and ensure the corners are neatly mitered. With the binding securely attached, it’s time to move on to the next step: finishing the binding.
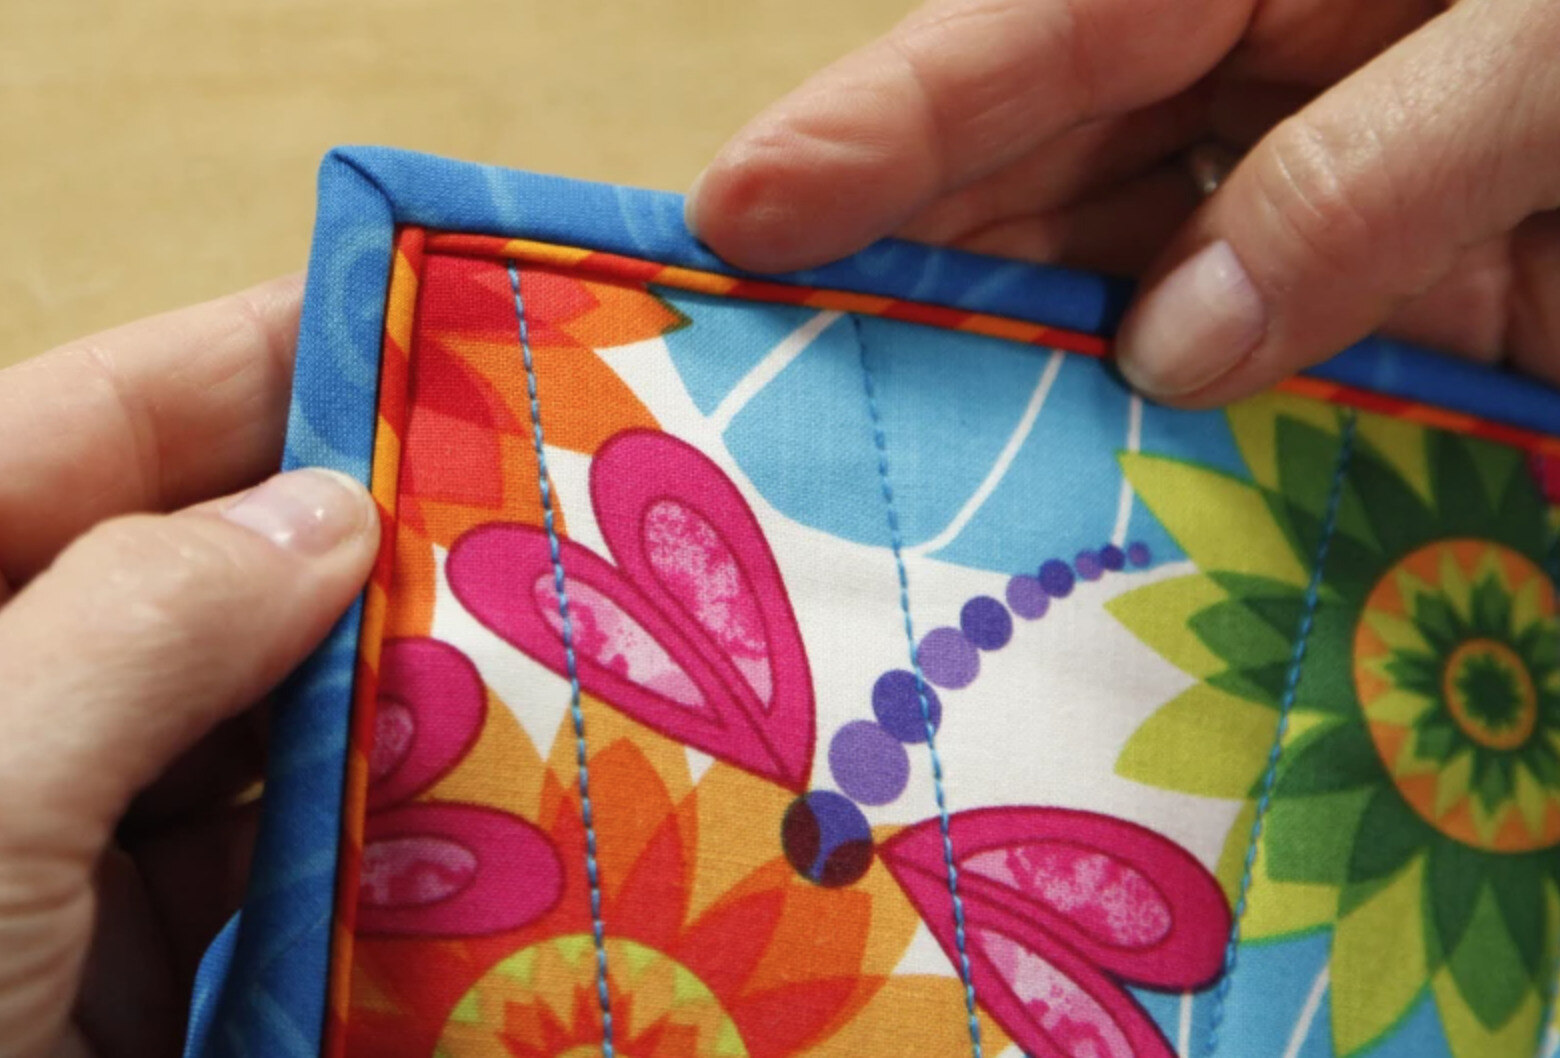
Mitering the Corners
Mitering the corners of the binding is a technique that creates clean and professional-looking corners on your quilt. It provides a neat and tidy finish to the edges. Follow these steps to miter the corners:
- Stop sewing: When you approach a corner while attaching the binding, stop stitching approximately 1/4 inch away from the edge. Leave your needle down in the fabric.
- Fold the binding strip: Take the binding strip and fold it up and away from the quilt at a 45-degree angle. Ensure that the fold aligns with the corner of the quilt.
- Fold the binding back down: Fold the binding strip back down, aligning it with the edge of the next side of the quilt. The fold should create a neat triangle at the corner.
- Secure with pins: Use binding clips or pins to hold the mitered corner in place. The corner should be crisp and the fabric edges should align perfectly.
- Continue attaching the binding: Resume stitching from the corner, ensuring that you maintain a 1/4-inch seam allowance. Sew along the next side, repeating the mitering process at each corner.
Mitering the corners of the binding adds a touch of professionalism to your quilt, giving it a crisp and finished appearance. Take your time to ensure that the folds are precise and the corners are sharp. With all the corners mitered, you’re now ready to move on to the next step: finishing the binding.
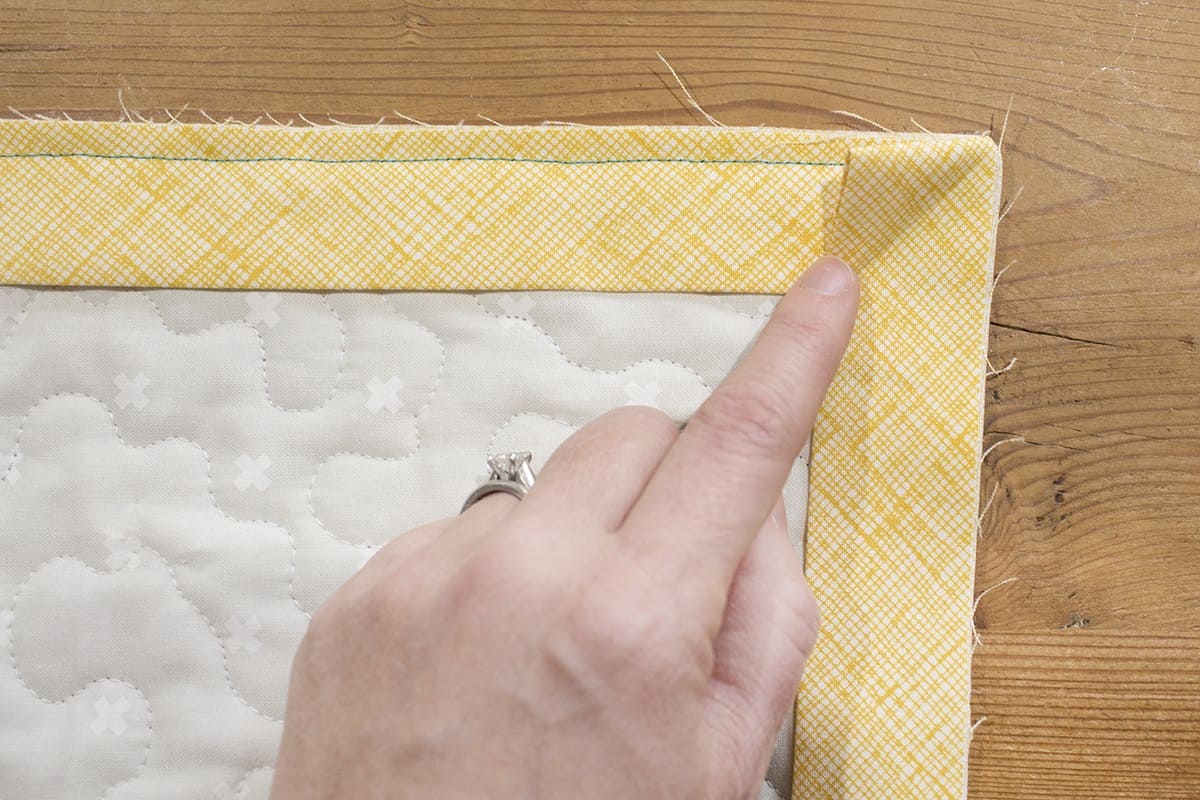
Finishing the Binding
Finishing the binding is the final step in completing your quilt. This process involves securing the binding to the back of the quilt and creating a smooth and professional finish. Follow these steps to finish the binding:
- Fold the binding to the back: Fold the binding strip over to the back of the quilt, covering the raw edges of the quilt sandwich. The folded edge should align with the stitching line on the front of the quilt.
- Secure with clips or pins: Use binding clips or pins to hold the folded binding in place. Ensure that the binding lies flat and there are no puckers or tucks.
- Hand or machine stitch: You have the option to hand stitch or machine stitch the binding to the back of the quilt. If you choose to hand stitch, use a blind stitch or whipstitch to secure the binding. If you prefer machine stitching, use a straight stitch or decorative stitch along the edge of the binding.
- Take care of the corners: When you reach a corner, fold the mitered corner neatly and continue stitching from the next side. For hand stitching, create small invisible stitches at the corners to ensure a clean finish.
- Complete the stitching: Continue stitching around the entire quilt, securing the binding to the back. Take your time to ensure that your stitches are even and the binding is securely attached.
- Finish the ends: When you reach the starting point, overlap the binding and cut it with enough extra length to tuck under. Fold the raw edge of the binding under, and hand stitch or machine stitch it down to create a clean finish.
Finishing the binding gives your quilt a polished and complete look. Whether you choose to hand stitch or machine stitch, take your time to ensure that the binding is securely attached and the corners are neatly folded. With the binding finished, your quilt is now complete and ready to be enjoyed or gifted to someone special.
Final Steps and Tips
Congratulations on completing your self-bound quilt with a luxurious minky backing! Before you wrap up your quilting journey, here are some final steps and tips to ensure your quilt looks its best:
- Press the quilt: Give your quilt a final press with a warm iron to smooth out any wrinkles or creases. Be careful not to apply too much heat to the minky fabric to avoid damaging its texture.
- Inspect and trim threads: Carefully examine your quilt for any loose threads or stray fibers. Trim them to give your quilt a clean and professional appearance.
- Consider adding a label: Add a personalized label to your quilt to mark it as your creation or a heartfelt gift. Include your name, the date, and any other relevant information that will make it a cherished keepsake.
- Give it a final check: Take a moment to inspect your quilt from all angles. Ensure that the binding is securely attached and the corners are neatly mitered. Make any final adjustments if needed.
- Celebrate your achievement: Step back and admire the beautiful quilt you’ve created! Celebrate your hard work and creative journey. You now have a one-of-a-kind quilt to enjoy or share with loved ones.
As you continue your quilting endeavors, here are a few additional tips to keep in mind:
- Choose quality materials: Select high-quality fabrics, threads, and batting to ensure your quilt looks and feels its best.
- Take your time: Quilting is a labor of love, so don’t rush the process. Take your time to ensure precise stitching, neat corners, and overall excellent craftsmanship.
- Experiment with different techniques: Explore various quilting techniques, patterns, and designs to expand your quilting skills and create unique projects.
- Embrace imperfections: Remember, quilting is an art form, and minor imperfections add character and charm to your quilt. Embrace them as a sign of your handmade creation.
- Share your knowledge and passion: Spread the joy of quilting by sharing your knowledge, tips, and techniques with fellow quilters. Engage in quilting communities or teach others the art of quilting.
By following these final steps and tips, you can ensure that your self-bound quilt with a minky backing is not only visually stunning but also a true reflection of your creative skills and dedication. So, go ahead and proudly display or gift your quilt, knowing that you’ve created something truly special!
Read more: How To Make Binding On Quilt
Conclusion
Congratulations on completing your self-bound quilt with a luxurious minky backing! By following the steps outlined in this guide, you have successfully transformed your quilt top into a beautifully finished masterpiece. The addition of minky fabric as the backing adds a touch of softness, comfort, and elegance to your quilt. Throughout this journey, you have learned essential techniques such as preparing the quilt top and minky backing, layering the quilt sandwich, pin basting, sewing the quilt layers together, trimming the excess fabric, creating the binding strips, attaching the binding, mitering the corners, and finishing the binding. Each step contributed to the overall professional appearance of your quilt. Your creativity and attention to detail have now been showcased in a unique quilt that is both visually appealing and functional. The personalized touch of self-binding adds a sense of accomplishment and pride to your creation. You can now enjoy the warmth and comfort of your self-bound quilt or share it as a heartfelt gift to be cherished by others. As you continue on your quilting journey, remember to embrace your own style and explore new techniques. Quilting is an art form that allows you to express your creativity and create unique designs. Share your knowledge, tips, and passion with others who may be inspired by your work. Remember, quilting is a process that requires patience and attention to detail. While striving for perfection, it’s important to embrace any imperfections as a testament to the handmade nature of your quilt. Each stitch and fabric choice tells its own story and adds character to your quilt. So, go ahead and celebrate your achievement! Wrap yourself in the warmth of your self-bound quilt or proudly showcase it as a stunning work of art. Quilting is a labor of love, and through it, you have created something truly special that will be cherished for years to come. Happy quilting and may your future projects be filled with creativity, joy, and endless possibilities!
Frequently Asked Questions about How To Self-Bind A Quilt With Minky Backing
Was this page helpful?
At Storables.com, we guarantee accurate and reliable information. Our content, validated by Expert Board Contributors, is crafted following stringent Editorial Policies. We're committed to providing you with well-researched, expert-backed insights for all your informational needs.


0 thoughts on “How To Self-Bind A Quilt With Minky Backing”