Articles
How To Sew A Hole In A Blanket
Modified: January 9, 2024
Learn how to sew a hole in a blanket with our informative articles. Get step-by-step instructions and expert tips to fix any tears or damages.
(Many of the links in this article redirect to a specific reviewed product. Your purchase of these products through affiliate links helps to generate commission for Storables.com, at no extra cost. Learn more)
Introduction
Do you have a cozy blanket that you love, but it has a pesky hole in it? Don’t worry, you don’t have to say goodbye to your favorite blanket just yet. Sewing a hole in a blanket is a fairly simple task that you can do at home with just a few basic tools and materials.
Whether the hole was caused by wear and tear or an accidental snag, repairing it will not only save you money from buying a new blanket but also allow you to continue enjoying the warmth and comfort of your beloved blanket. In this step-by-step guide, we’ll walk you through the process of sewing a hole in a blanket, ensuring that it’s virtually invisible and the blanket remains as good as new.
Before we get started, here’s a list of tools and materials you’ll need:
- Needle
- Thread
- Scissors
- Pins
- Thimble (optional)
- Iron (optional)
- Embroidery hoop (optional)
Now that you have everything ready, let’s dive into the step-by-step process of mending your blanket.
Key Takeaways:
- Sewing a hole in a blanket is a simple and rewarding DIY task that can save you money and extend the life of your favorite blanket. With the right tools and techniques, you can achieve a virtually invisible repair and continue to enjoy the warmth and comfort of your beloved blanket.
- Threading the needle, assessing the damage, and securing the thread are crucial steps in successfully mending a blanket. By following the comprehensive guide and taking pride in your sewing skills, you can confidently tackle future repairs and preserve the beauty of your fabrics.
Read more: How To Sew A Blanket
Tools and Materials Needed
Before starting the process of sewing a hole in a blanket, it’s important to gather all the necessary tools and materials. Having everything prepared will make the task easier and save you time.
Here’s a list of the tools and materials you will need:
- Needle: Choose a needle that is appropriate for the fabric of your blanket. A sharp needle with a thin tip is ideal for most types of fabrics.
- Thread: Use a thread that matches the color of your blanket or opt for a neutral color that blends well. Make sure to choose a strong thread that can withstand the use and washing of the blanket.
- Scissors: You’ll need a pair of sharp scissors to cut the thread and trim any excess fabric.
- Pins: Pins will help you keep the fabric in place while you sew. They can be especially useful for larger holes or for securing layers of fabric together.
- Thimble (optional): If you find it difficult to push the needle through the fabric, a thimble can protect your finger and provide extra support.
- Iron (optional): An iron can be useful for pressing the fabric and creating a smooth surface for sewing. However, be sure to check the care instructions of your blanket to ensure it can be safely ironed.
- Embroidery hoop (optional): For larger holes or if you find it challenging to keep the fabric taut, an embroidery hoop can provide stability and make the sewing process easier.
Having these tools and materials ready will ensure that you have everything you need to mend your blanket. Now that you’re well-equipped, let’s move on to the step-by-step process of sewing that hole.
Step 1: Assess the Damage
Before you begin sewing the hole in your blanket, it’s essential to assess the extent of the damage. Take a close look at the hole and determine its size and shape. This will help you decide on the appropriate sewing technique and ensure a successful repair.
Here are a few things to consider when assessing the damage:
- Size of the hole: Is the hole small and manageable, or is it larger and more challenging to repair? Understanding the size of the hole will help you determine the type of stitching required and the amount of time it will take to mend.
- Location of the hole: Where is the hole located on the blanket? Is it in a noticeable area, such as the center or an edge, or is it in a less visible spot? The location may influence your stitching technique and the level of precision required.
- Type of fabric: Take note of the fabric composition of your blanket. Different fabrics may require different sewing methods and appropriate thread choices. For example, a delicate silk or satin blanket may need a more delicate touch compared to a sturdy cotton or fleece blanket.
- Type of damage: Is the hole a clean tear, or does it have frayed edges? Assessing the type of damage will guide you on whether you need to trim and stabilize the edges before sewing or if you can simply sew over the existing hole.
Once you have a clear understanding of the damage, you can proceed confidently to the next step. Remember, assessing the damage is crucial for planning your sewing approach and ensuring a successful repair.
Step 2: Prepare the Needle and Thread
Now that you’ve assessed the damage to your blanket, it’s time to prepare the needle and thread for sewing. Proper preparation of these tools will ensure a smooth and effective sewing process.
Here’s how to prepare the needle and thread:
- Select the appropriate needle: Choose a needle that is suitable for the fabric of your blanket. For thicker fabrics, such as wool or fleece, use a larger needle. For finer fabrics like silk or satin, a smaller needle will work well. Ensure that the needle is sharp and in good condition to make sewing easier.
- Choose the right thread: Select a thread that matches the color of your blanket or choose a neutral color that blends well. It’s important to use a thread that is strong and durable to withstand frequent use and washing. If the hole is in a highly visible area, you may opt for a decorative thread or embroidery floss to add a unique touch.
- Prepare the thread: Cut a length of thread that is long enough to sew the entire hole without constantly rethreading the needle. A good rule of thumb is to use a thread length that is roughly double the length of your arm. Thread the end of the thread through the eye of the needle, leaving a tail of about 4-5 inches. Tie a knot at the end of the thread to secure it in place.
- Optional: Use a thimble: If you find it difficult to push the needle through the fabric, you can use a thimble to protect your finger and provide extra support. Simply slide the thimble onto the finger that will be pushing the needle, and you’ll have more control and leverage while sewing.
By properly preparing the needle and thread, you’ll have the right tools for a successful repair. Take a moment to ensure that the needle is suitable for your fabric, choose a thread that matches or complements your blanket, and secure the thread to the needle. With everything ready, you’re now prepared to start sewing that pesky hole in your blanket.
Step 3: Thread the Needle
With your needle and thread prepared, it’s time to thread the needle and get ready to start sewing the hole in your blanket. Threading the needle may seem like a simple task, but doing it properly will ensure that your thread remains secure during the sewing process.
Here’s how to thread the needle:
- Hold the thread: Take the end of the thread with the knot and hold it firmly between your thumb and index finger. Make sure there is enough slack in the thread to work comfortably.
- Insert the thread into the eye of the needle: With your other hand, carefully guide the end of the thread through the eye of the needle. If you’re having trouble, you can moisten the end of the thread to help it slide through more easily.
- Pull the thread through: Once the end of the thread is through the eye of the needle, gently pull it until the knot is snug against the eye of the needle. Be careful not to pull it too tightly, as this may cause the thread to break.
- Check the thread: Ensure that the thread is securely threaded through the eye of the needle and that there are no tangles or loops. Give it a gentle tug to make sure it’s firmly in place.
Threading the needle may require a bit of patience and practice, especially if you’re working with a smaller needle or thicker thread. If you find it challenging, you can use a needle threader, a small tool that helps guide the thread through the eye of the needle.
Once you’ve successfully threaded the needle, you’re one step closer to repairing the hole in your blanket. Take a moment to double-check that the thread is secure, and let’s move on to the next step: sewing!
When sewing a hole in a blanket, use a needle and thread that matches the fabric. Start by securing the thread on the inside of the blanket and then stitch the hole closed using small, even stitches. Finally, tie off the thread securely on the inside of the blanket.
Read more: How To Sew On Blanket Binding
Step 4: Start Sewing
Now that you have threaded the needle, it’s time to begin sewing the hole in your blanket. With careful stitching, you can repair the damage and make the hole virtually invisible.
Follow these steps to start sewing:
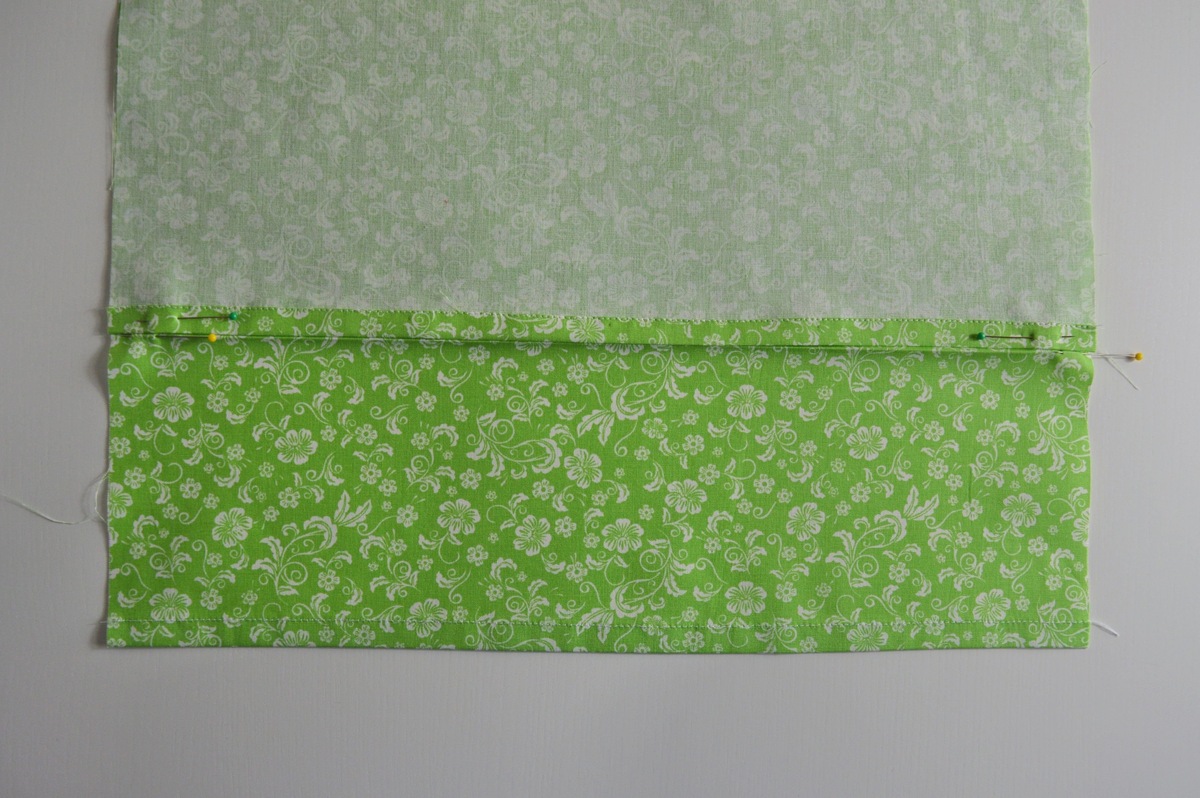
- Position the blanket: Lay the blanket on a flat surface and position the hole in a way that is accessible for sewing. If necessary, use pins to hold the fabric in place, ensuring that the edges of the hole align properly.
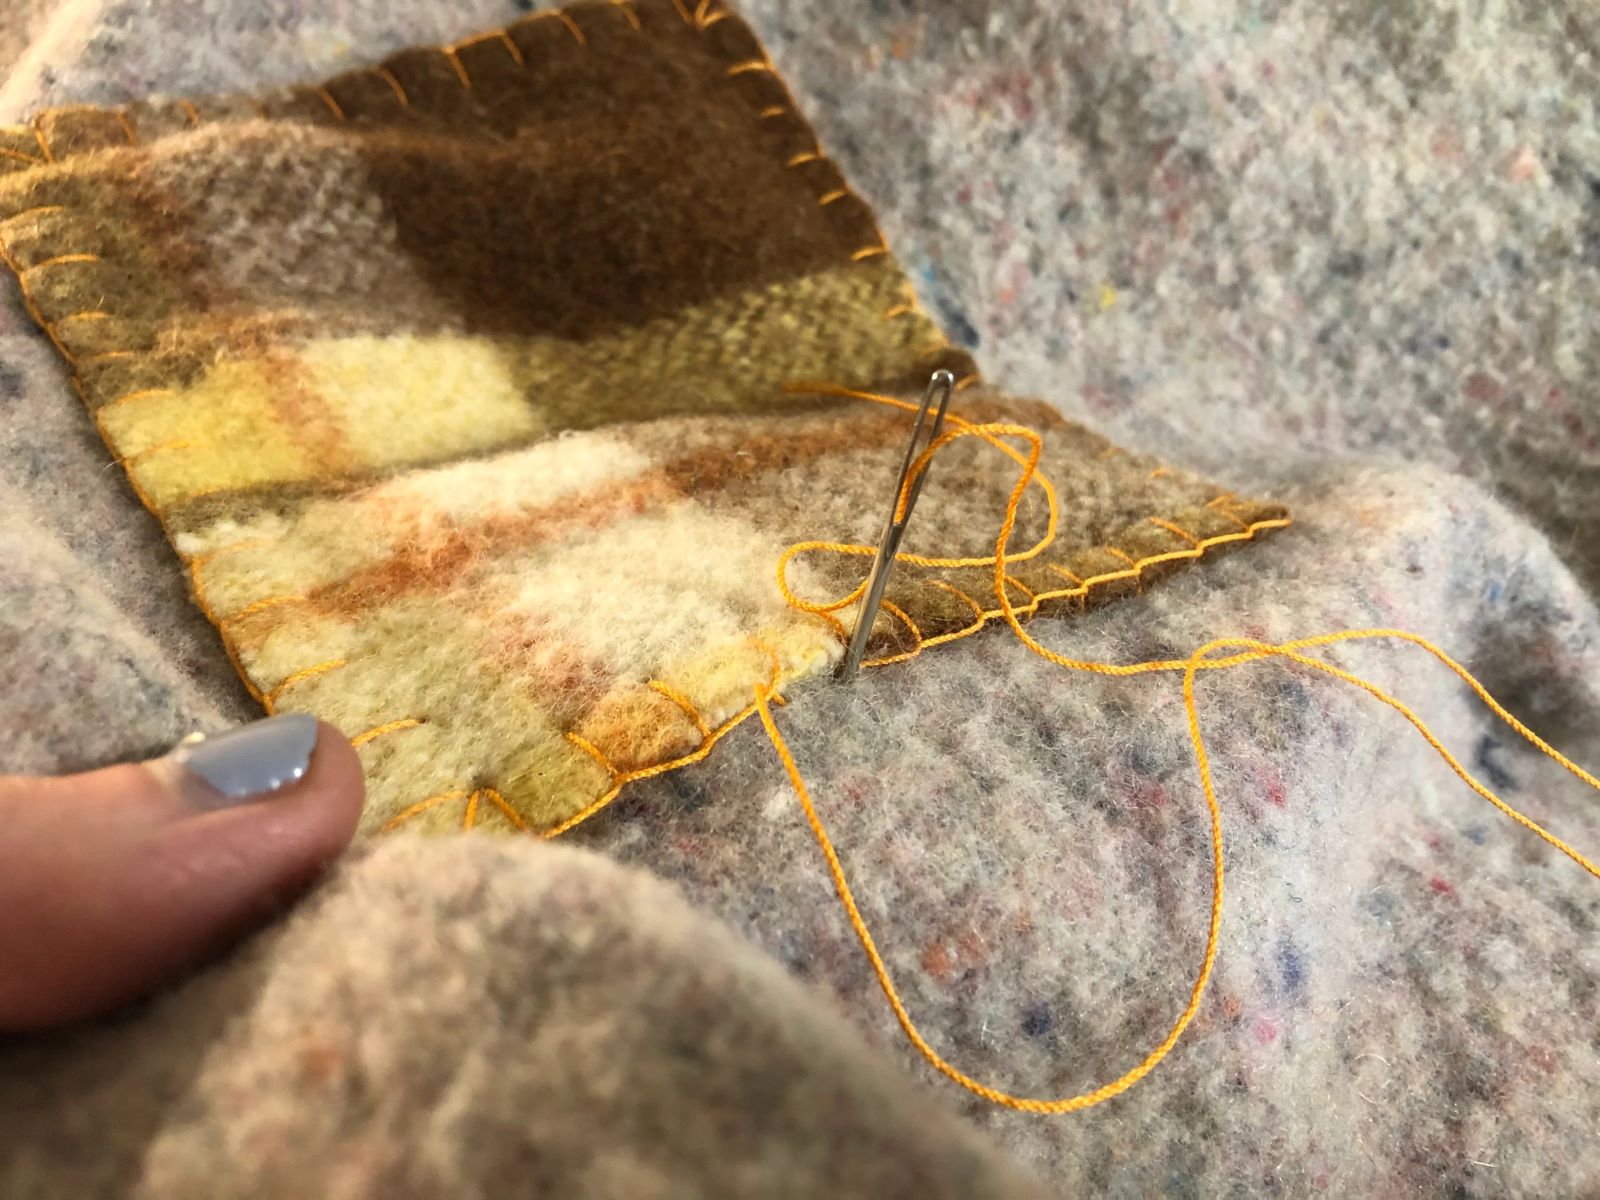
- Insert the needle from the back: Starting from the backside of the fabric, insert the needle through one edge of the hole, bringing it to the front side. Make sure to leave a small tail of thread on the backside to secure the stitch.
- Sew a small stitch: With the needle on the front side of the fabric, create a small, even stitch across the tear. The length of the stitch will depend on the size of the hole, but aim for stitches that are about 1/8 to 1/4 inch long. Try to bring the needle up through the fabric consistently to maintain even stitches.
- Continue stitching: Repeat the stitching process, moving along the edge of the hole. If the hole is large, you may need to create longer stitches to cover the entire area. Be mindful of maintaining consistent tension so that the stitches are neither too loose nor too tight.
- Overlap the stitches: As you sew along the edge, make sure to overlap each stitch slightly with the previous one. This will create a strong and secure repair. Keep stitching until you reach the other end of the hole.
Remember, when sewing, take your time and be patient. It’s better to sew slowly and accurately than to rush through the process. Pay attention to the tension of your thread and ensure that each stitch is secure.
If you’re concerned about the visibility of the stitches, you can use a matching thread color and try to blend the stitches with the surrounding fabric. With practice and careful stitching, you’ll create a seamless repair that will make the hole virtually undetectable.
Now that you’ve started sewing the hole, let’s move on to the next step to secure the thread and continue the repair process.
Step 5: Secure the Thread
After sewing the hole in your blanket, it’s important to secure the thread to ensure that your repair remains intact. By properly securing the thread, you can prevent the stitches from unraveling and maintain a strong and durable repair.
Follow these steps to secure the thread:
- Create a knot: Once you’ve reached the end of the hole or finished sewing, bring the needle to the backside of the fabric. Loop the thread around the existing stitches or create a small knot close to the fabric’s surface to secure it in place.
- Pass the needle through the fabric: After creating the knot, insert the needle through the fabric, close to where the thread comes out of the stitches. This will hide the tail of the thread and prevent it from becoming loose or snarled.
- Repeat the process: Repeat the process of passing the needle through the fabric a few more times, making sure the needle goes through the existing stitches or loops. This creates a secure anchor for the thread and reinforces your repair.
- Trim the excess: Finally, trim any excess thread close to the fabric’s surface using sharp scissors. Be careful not to cut the fabric or any surrounding stitches during this step.
By securing the thread properly, you can ensure that your stitching remains in place and withstands regular use and washing. Take the time to make sure that the thread is firmly anchored and that there are no loose ends.
If you prefer extra security, you can also apply a small drop of fabric adhesive or fray check to the knot or end of the thread. This will further secure the threads and prevent them from coming undone over time.
With the thread secured, you’re almost finished with the repair process. Let’s move on to the next step to complete the stitching and finish mending your blanket.
Step 6: Repeat the Stitch
Once you have secured the thread, it’s time to reinforce the repair by repeating the stitch along the hole in your blanket. This step will add extra strength and stability to the repair, ensuring that it withstands regular use and maintains its integrity over time.
Follow these steps to repeat the stitch:
- Position the needle: Start from the backside of the fabric near the edge of the hole, and bring the needle up through the fabric to the front side.
- Create a new stitch: Sew a new stitch parallel to the original stitches, just slightly offset. This means that the needle should pass through the fabric close to the previous stitch but not exactly on top of it.
- Continue stitching: Repeat the stitching process, moving along the edge of the hole. Make sure to maintain consistent stitch length and tension as you go. Aim for stitches that are similar in size and spacing to the initial stitches.
- Overlap the stitches: As before, overlap each new stitch with the previous one, ensuring a secure and stable repair. Continue sewing along the hole until you reach the other end or feel confident that the repair is reinforced.
Repeating the stitch helps distribute the tension and stress evenly along the repaired area, making it stronger and less likely to come undone. It adds an extra layer of reinforcement and improves the overall durability of your blanket.
Take your time during this step and focus on maintaining even stitching. The goal is to create a seamless and consistent repair that blends in seamlessly with the fabric. With each stitch, you are bringing your blanket one step closer to being fully repaired.
Now, let’s move on to the final step to complete the sewing process and finish mending your blanket.
Step 7: Finish Sewing
Congratulations, you’re in the final step of sewing the hole in your blanket! In this step, you’ll complete the stitching and ensure that your repair looks clean and seamless.
Follow these steps to finish sewing the hole:
- Secure the thread: Once you’ve reached the end of the hole or finished stitching, create a knot or loop to secure the thread. Pass the needle through the fabric and pull it tight to secure the knot.
- Hide the tail: To hide the tail of the thread, carefully insert the needle through the fabric, close to where the thread comes out of the last stitch. This will conceal the tail and prevent it from sticking out.
- Trim any excess: Use sharp scissors to trim any excess thread close to the fabric’s surface. Be careful not to cut the fabric or any surrounding stitches as you do this.
- Inspect the repair: Take a step back and inspect the repaired area. Make sure that the stitching is even, secure, and blends well with the surrounding fabric. Smooth out any wrinkles or puckering if necessary.
- Optional: Press the fabric: If your blanket’s fabric can withstand heat, you may use a low-temperature iron to press the repaired area. This can help flatten the stitches and create a smoother finish. Always check the care instructions of your blanket before using an iron.
By completing these final steps, you’ll have successfully sewn the hole in your blanket. Take a moment to admire your handiwork and appreciate the effort you put into repairing your beloved blanket.
Now, you can proudly continue to enjoy the warmth, comfort, and beauty of your blanket without any pesky holes. Your sewing skills have restored it to its former glory, ensuring its usefulness for years to come.
Remember, with practice, your sewing abilities will improve, and you’ll become more confident in repairing various types of damage. So, don’t hesitate to tackle any future holes or tears that may appear in your favorite blankets and fabrics.
Take pride in your newly repaired blanket, and don’t forget to share your sewing success story with others who may need to mend their beloved fabrics. Happy sewing!
Read more: How To Fix A Hole In A Blanket
Conclusion
Repairing a hole in a blanket doesn’t have to be a daunting task. With a few simple tools, some basic sewing techniques, and a little bit of patience, you can mend the hole and continue to enjoy the warmth and comfort of your favorite blanket.
In this comprehensive guide, we have walked you through the step-by-step process of sewing a hole in a blanket. From assessing the damage to finishing the stitching, each step plays a crucial role in achieving a seamless repair.
Remember to gather the necessary tools and materials before you begin, including a needle, thread, scissors, pins, and optional items like a thimble or embroidery hoop. Assess the damage to determine the size, location, and type of hole, as this will guide your sewing approach.
Threading the needle is a simple but important step, ensuring that the thread is securely attached and ready for stitching. Take your time to thread the needle properly, and don’t hesitate to use a thimble for extra support if needed.
Start sewing by positioning the blanket, inserting the needle, and creating even stitches along the edges of the hole. Overlap each stitch to reinforce the repair and maintain even tension throughout the sewing process.
Once you have completed the stitches, secure the thread by creating knots and passing the needle through the fabric to hide the tail. Trim any excess thread for a clean and polished finish.
Take the time to inspect your work, ensuring that the repaired area blends seamlessly with the surrounding fabric. If desired, you can gently press the fabric with an iron, if suitable for your blanket’s material, to enhance the smoothness of the stitches.
By following these steps, you can mend your blanket with confidence and give it a new lease on life. Not only will you save money on purchasing a new blanket, but you’ll also get the satisfaction of personally restoring your cherished item.
So, next time you encounter a hole in your blanket or any other fabric, don’t fret. Armed with the knowledge and skills gained from this guide, you can tackle the repair with ease and ensure that your favorite piece of fabric remains in beautiful condition for years to come.
Happy sewing!
Frequently Asked Questions about How To Sew A Hole In A Blanket
Was this page helpful?
At Storables.com, we guarantee accurate and reliable information. Our content, validated by Expert Board Contributors, is crafted following stringent Editorial Policies. We're committed to providing you with well-researched, expert-backed insights for all your informational needs.