Articles
How To Sew On Blanket Binding
Modified: November 1, 2024
Learn how to sew on blanket binding with our helpful articles. Discover step-by-step instructions and expert tips for a professional finish.
(Many of the links in this article redirect to a specific reviewed product. Your purchase of these products through affiliate links helps to generate commission for Storables.com, at no extra cost. Learn more)
Introduction
Welcome to the world of sewing! Sewing on blanket binding is a great way to add a professional and stylish finish to your blankets. Blanket binding, also known as bias tape, is a strip of fabric that is used to encase the raw edges of a blanket, providing a neat and polished look. Whether you are a beginner or an experienced sewist, this step-by-step guide will walk you through the process of sewing on blanket binding.
In this article, we will cover everything you need to know to successfully sew on blanket binding. We will start by discussing the materials you will need for the project. Then, we will provide detailed instructions on how to prepare the blanket and the binding. We will also guide you through the steps of attaching the binding and sewing it onto the edge of the blanket. Finally, we will share some finishing touches and tips to ensure that your blanket binding looks professional and pristine.
Are you ready to dive into the world of blanket binding? Let’s gather our materials and get started on this exciting sewing project!
Key Takeaways:
- Sewing on blanket binding is a versatile and rewarding technique that adds a professional and stylish finish to your blankets. With the right materials and attention to detail, you can achieve a polished and professional look for your sewing projects.
- Remember, sewing is a journey of creativity and self-expression. Embrace the learning curve, experiment with different colors and patterns, and enjoy the satisfaction of completing a project with your own hands. Happy stitching!
Read more: How To Sew Satin Blanket Binding On A Quilt
Materials Needed
Before we begin, let’s gather all the necessary materials to sew on blanket binding:
- A blanket: You can use any type of blanket you prefer, whether it’s a store-bought one or a handmade creation.
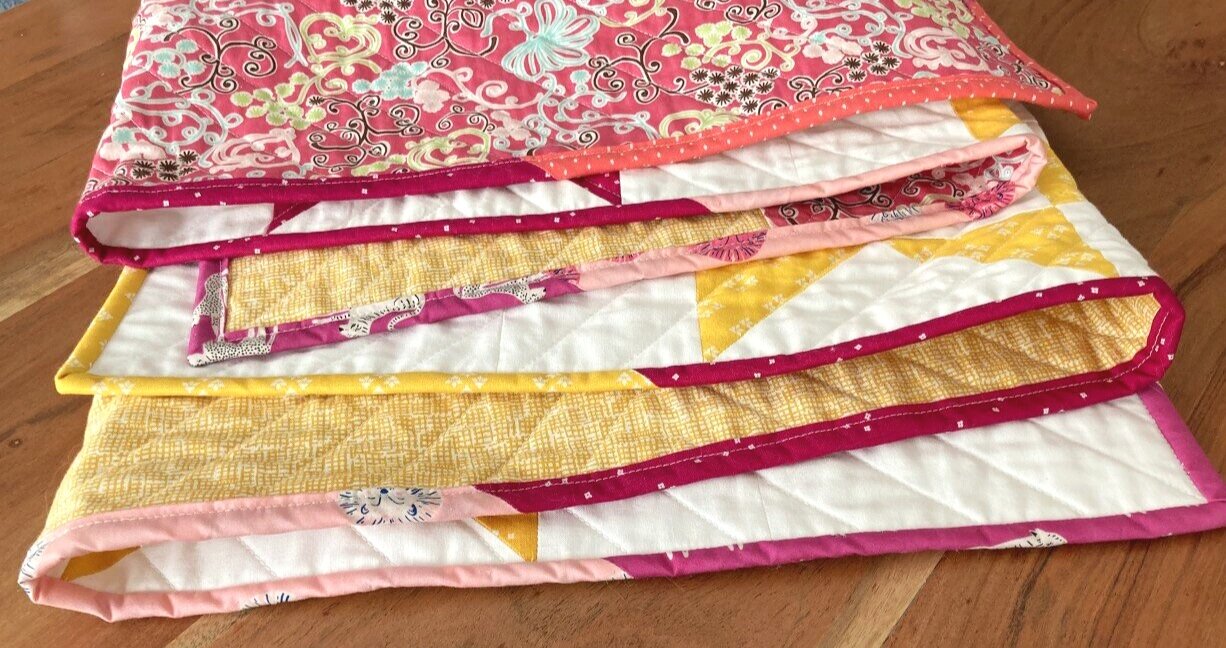
- Blanket binding: You can find premade blanket binding at fabric stores or online. It comes in a variety of colors and widths, so choose one that complements your blanket.
- Thread: Select a thread color that matches or coordinates with your blanket binding.
- Pins: Get some straight pins to hold the binding in place as you sew.
- Scissors: You’ll need scissors to cut the blanket binding to the desired length and trim excess fabric.
- Iron and ironing board: Having an iron and ironing board will help you press the binding and blanket for a crisp finish.
- Sewing machine or needle: You can either use a sewing machine with a straight stitch or hand sew with a needle for attaching the binding.
Make sure you have all these materials on hand before starting the project. This will ensure a smooth and efficient sewing process.
Step 1: Preparing the Blanket
Before sewing on the blanket binding, it’s important to properly prepare the blanket to ensure a clean and professional finish. Here’s what you need to do:
- Trim the edges: If your blanket has uneven or frayed edges, trim them with scissors to create smooth and straight edges. This will make it easier to attach the binding later on.
- Measure the blanket: Measure the length and width of the blanket to determine how much blanket binding you will need. Add a few extra inches for seam allowances.
- Press the edges: Use an iron and ironing board to press the edges of the blanket. This will create crisp folds that will make attaching the binding easier and ensure a polished look.
By taking the time to prepare your blanket before sewing on the binding, you’ll achieve better results and a more professional finish. Now that your blanket is ready, it’s time to move on to the next step of preparing the binding.
Step 2: Preparing the Binding
Now that you have prepared your blanket, it’s time to turn our attention to the blanket binding. Here’s what you need to do to prepare the binding:
- Measure and cut the binding: Measure the length needed to cover all sides of your blanket. Cut the blanket binding to the appropriate length, adding a few extra inches for overlap.
- Iron the binding: Lay the cut length of blanket binding flat on your ironing board. Use a hot iron to press the binding in half lengthwise, creating a crease down the center. This will give the binding a clean and finished look.
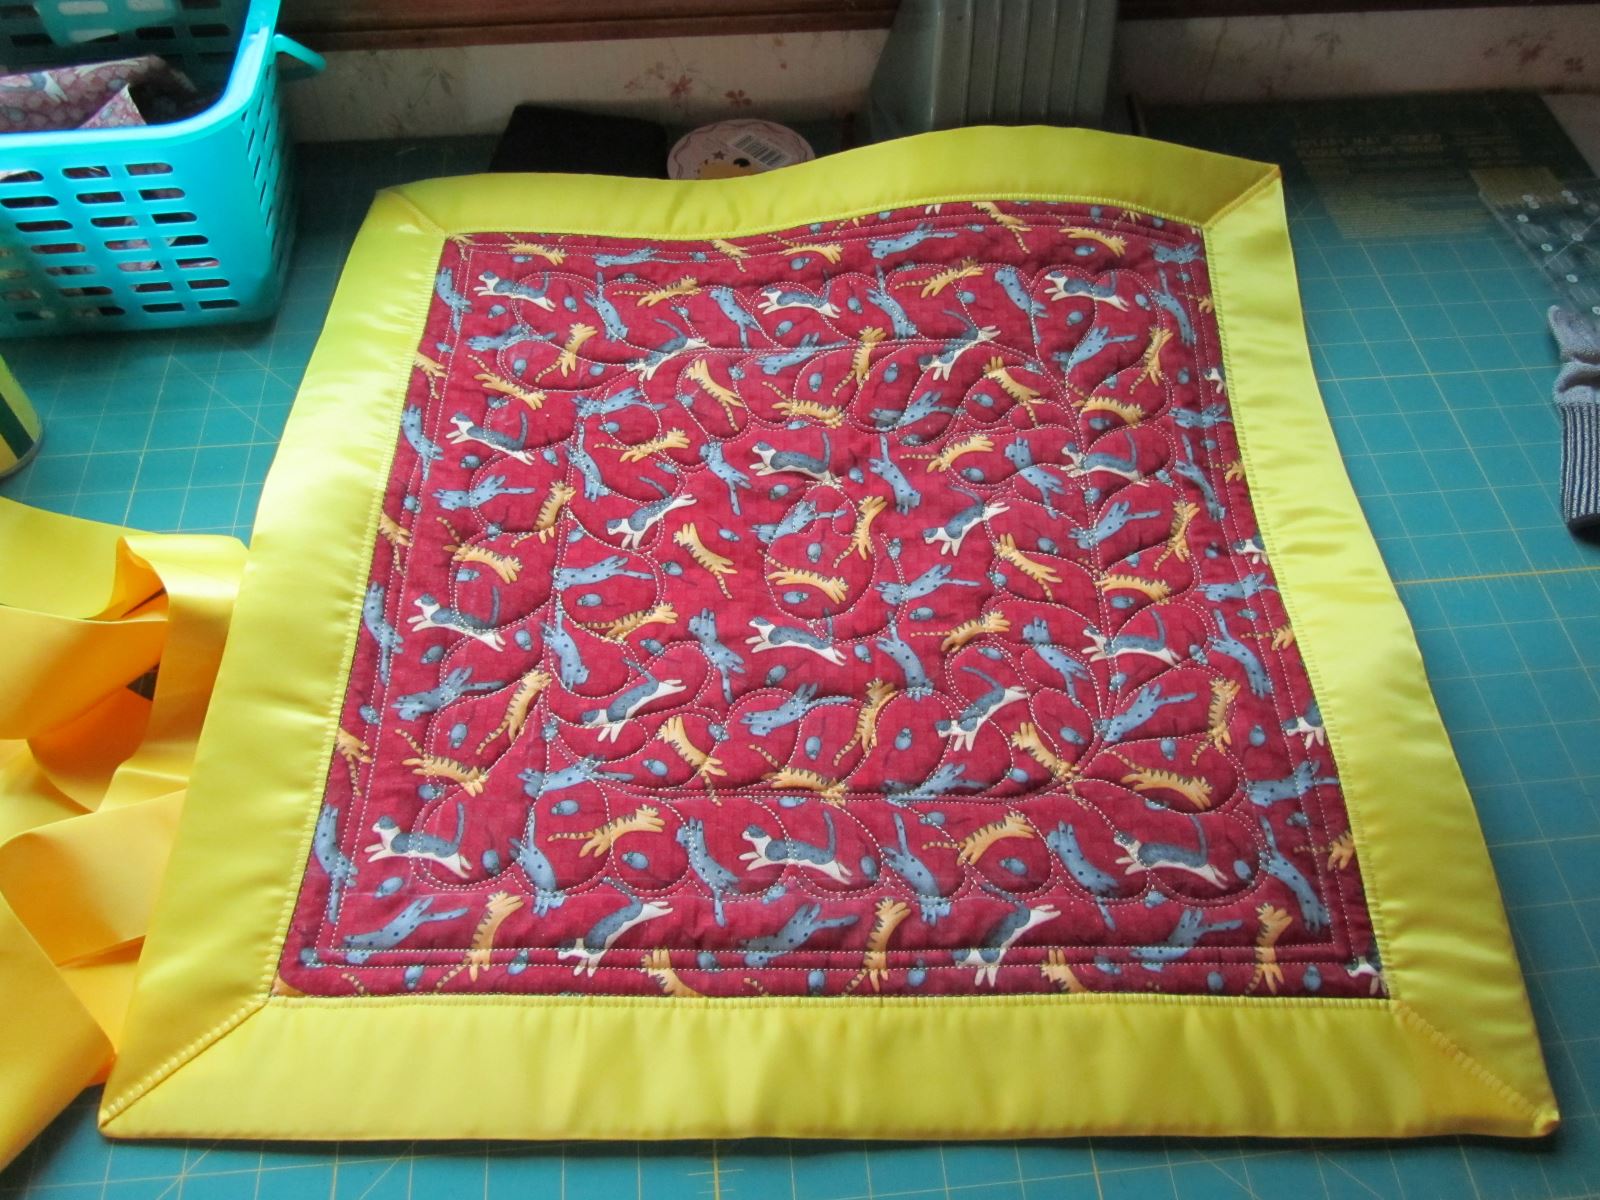
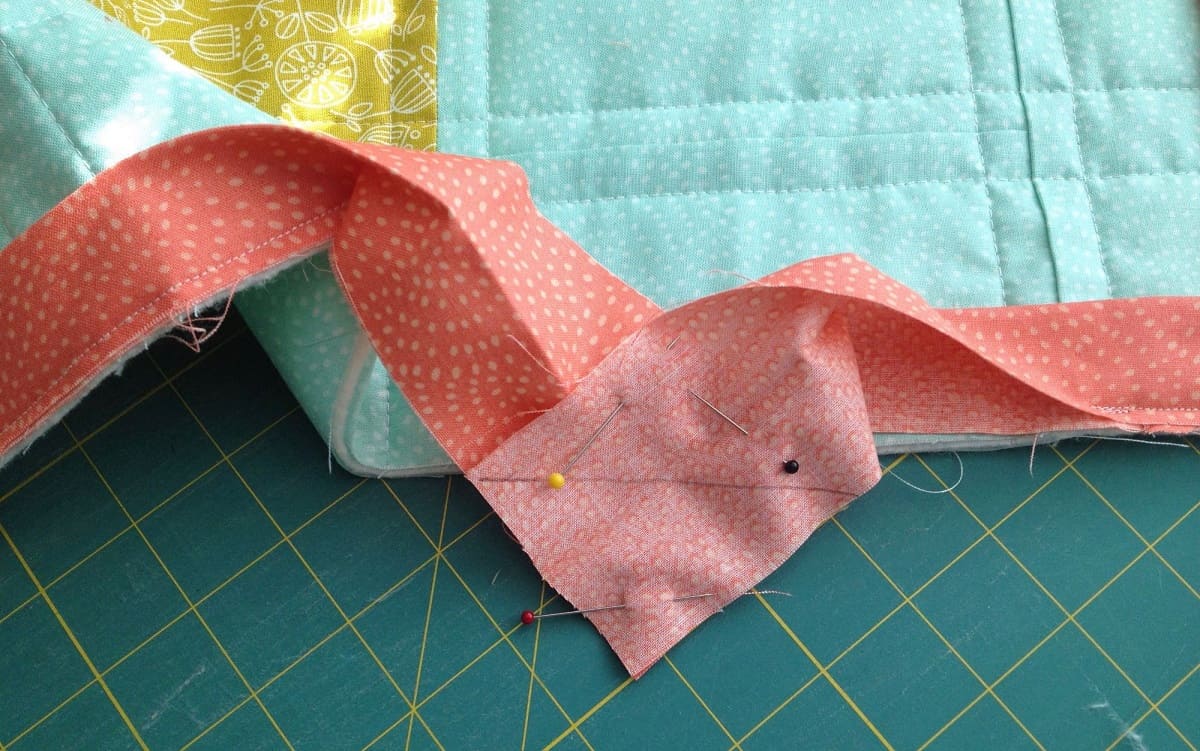
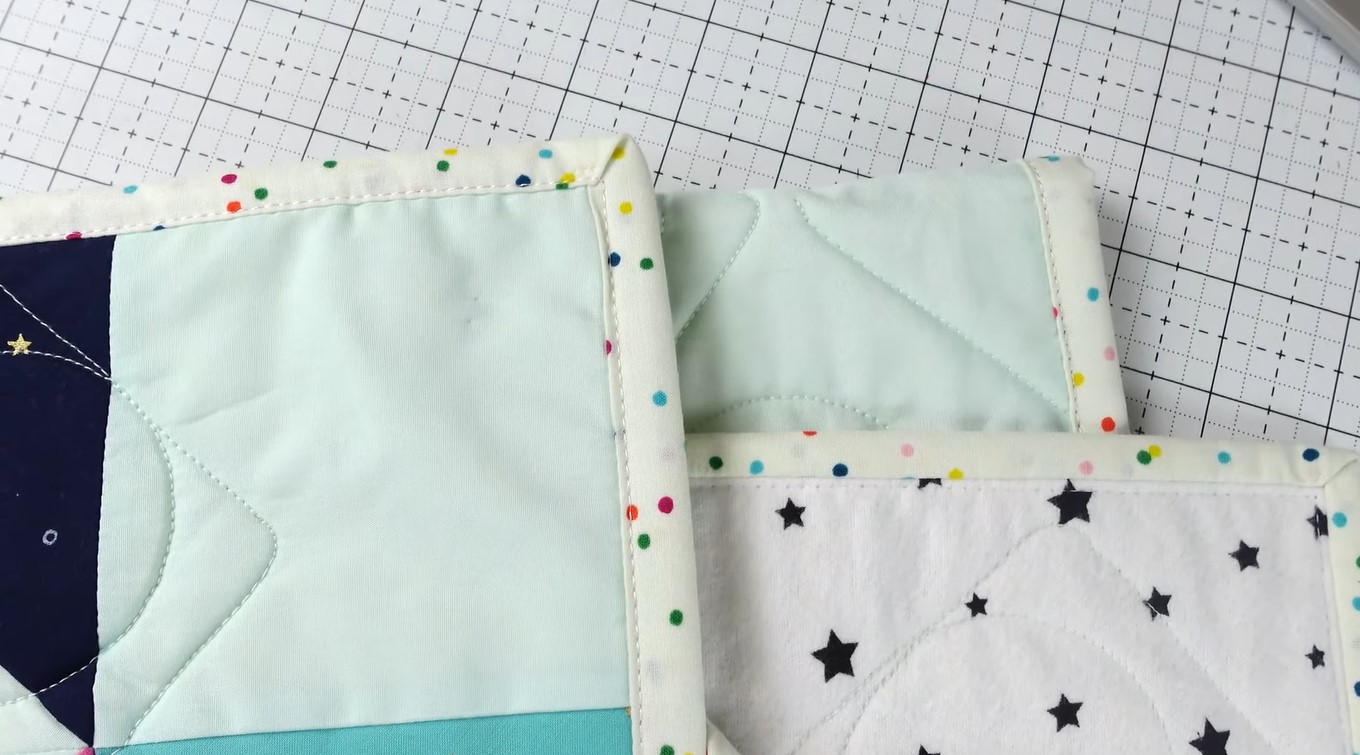
- Mitred corners (optional): If you want to give your blanket a more polished and professional look, you can choose to create mitred corners. To do this, fold the binding at a 45-degree angle when you reach a corner, and then fold it again to continue along the next side. This will create a neat and seamless corner.
By preparing the binding before attaching it to the blanket, you will ensure that the binding is the correct length and have a crisp, finished appearance. Now that your binding is ready, let’s move on to the next step of attaching the binding to the blanket.
When sewing on blanket binding, use a walking foot attachment on your sewing machine to help feed the layers evenly and prevent stretching or puckering.
Step 3: Attaching the Binding
Now that you have prepared both your blanket and the binding, it’s time to attach the binding to the blanket. Follow these steps to ensure a secure and neat attachment:
- Lay the blanket flat: Spread out your blanket on a large work surface, ensuring that it lies flat with no wrinkles or folds.
- Align the raw edge: Take your prepared blanket binding and align the raw edge of the binding with the raw edge of the blanket, starting at one corner.
- Pin or clip in place: Use straight pins or fabric clips to hold the binding in place along the edge of the blanket. Be sure to distribute the pins or clips evenly to prevent any shifting or puckering.
- Continue pinning or clipping: Move along the edge of the blanket, pinning or clipping the binding at regular intervals to keep it secure.
- Overlap the ends: When you reach the starting corner, trim the excess binding if necessary, and overlap the ends by a couple of inches. This overlap will ensure a smooth and seamless finish.
Remember to take your time when aligning and pinning the binding to the blanket, ensuring that it lies flat and straight. This will result in a clean and professional-looking final product. With the binding attached, it’s time to move on to the next step: sewing the binding in place.
Read more: How To Sew Quilt Binding By Hand
Step 4: Sewing the Binding
With the blanket binding securely pinned or clipped in place, it’s time to sew the binding onto the blanket. Follow these steps to achieve a strong and professional stitch:
- Select your stitch: If you are using a sewing machine, choose a straight stitch for sewing the binding. Alternatively, if you are hand sewing, use a strong and secure stitch such as a slip stitch.
- Start sewing: Begin sewing from one end of the binding, preferably at a corner. Sew as close to the folded edge of the binding as possible, maintaining an even stitch length.
- Remove pins or clips: As you sew, remove the pins or fabric clips that were holding the binding in place. Be careful not to sew over them and remove them as you approach them.
- Sew around the blanket: Continue sewing along the edge of the blanket, carefully guiding the binding under the presser foot of your sewing machine or hand sewing with precision. Take your time to ensure that the binding is secure and evenly stitched.
- Mitred corners (optional): If you opted for mitred corners in your binding, remember to sew the corners with precision. Pivot the fabric when you reach a corner and adjust the direction of your stitch to maintain the neat corner fold.
- Overlap and finish: When you return to the starting corner, sew a few inches past the overlap of the binding. This will secure the binding in place and create a strong finish.
Take care to sew slowly and accurately, especially around corners and overlapping sections, to ensure a seamless and professional result. Once you have completed sewing the binding, it’s time for the final step: adding the finishing touches.
Step 5: Finishing Touches
Congratulations, you’re on the final step of sewing on blanket binding! Now it’s time to add those finishing touches to ensure a polished and professional look for your blanket. Here’s what you need to do:
- Trim excess fabric: Use a pair of sharp scissors to carefully trim any excess fabric from the edges of the binding. Be careful not to cut into the binding or the blanket itself.
- Press the binding: Press the sewn binding and the surrounding area with an iron set to the appropriate temperature for the fabric. This will help set the stitching and give your binding a crisp and well-defined appearance.
- Inspect for any loose stitches: Take a close look at the sewn binding and check for any loose stitches or areas that may need reinforcement. If you notice any, go back and re-sew those sections to ensure durability.
- Give it a final press: Once you are satisfied with the binding and the stitching, give the entire blanket a final press. This will help smooth out any wrinkles and give your finished project a polished and professional look.
With these finishing touches, your blanket with binding is complete! Take a step back and admire your handiwork. You’ve successfully sewn on blanket binding, bringing a beautiful finishing touch to your blanket.
Remember, practice makes perfect, so don’t be discouraged if your first attempt isn’t flawless. With time and experience, you’ll refine your techniques and create stunning blankets with perfectly sewn binding. Enjoy the process and have fun adding your own personal touch to each project.
Conclusion
Congratulations on completing your journey to sew on blanket binding! By following the steps outlined in this guide, you’ve learned how to prepare your blanket, prepare the binding, attach it to the blanket, sew it in place, and add those essential finishing touches.
Now that you have acquired these skills, you can take your sewing projects to the next level by adding a professional and stylish touch to your blankets. Whether you’re creating blankets as gifts for loved ones or adding a personal touch to your home decor, sewing on blanket binding is a versatile and rewarding technique.
Remember to gather all the necessary materials, take your time with each step, and pay attention to detail. With practice, your sewing skills will improve, and you’ll develop your own unique style and techniques.
Don’t be afraid to experiment with different colors and patterns of blanket binding to match your personal style or the theme of a specific project. You can also explore variations such as decorative or contrasting stitching to add extra flair to your blankets.
Keep in mind that sewing is a journey of creativity and self-expression. Enjoy the process, embrace the learning curve, and don’t forget to share your beautiful creations with others. Whether you’re sewing for yourself, loved ones, or even for profit, the satisfaction of completing a project with your own hands is truly invaluable.
So, what are you waiting for? Gather your materials, select your favorite blanket, and let your creativity flow as you sew on blanket binding. Happy stitching!
Frequently Asked Questions about How To Sew On Blanket Binding
Was this page helpful?
At Storables.com, we guarantee accurate and reliable information. Our content, validated by Expert Board Contributors, is crafted following stringent Editorial Policies. We're committed to providing you with well-researched, expert-backed insights for all your informational needs.


0 thoughts on “How To Sew On Blanket Binding”