
Articles
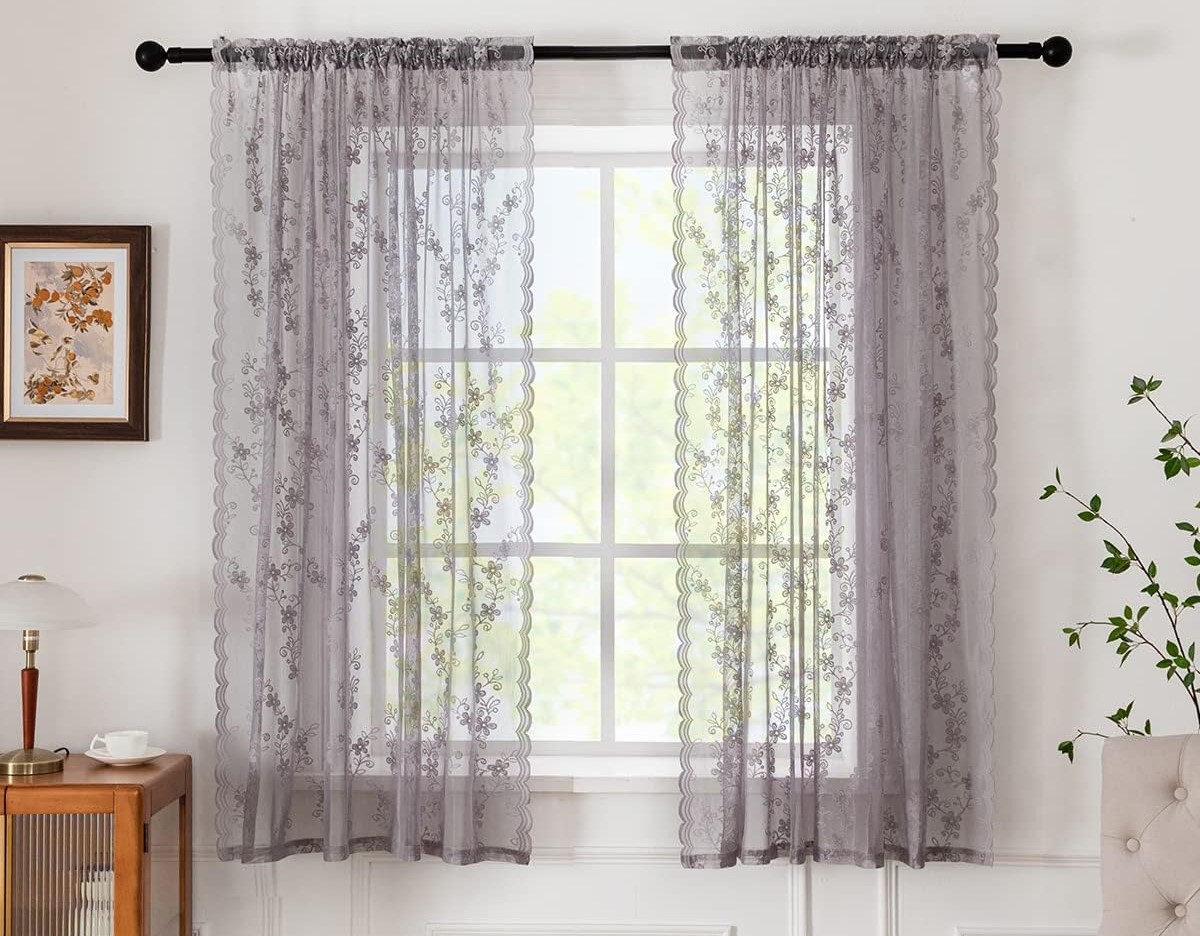
How To Sew Curtains With Lining
Modified: October 20, 2024
Learn how to sew curtains with lining in this comprehensive articles. Discover step-by-step instructions, useful tips, and expert advice for a professional-looking result.
(Many of the links in this article redirect to a specific reviewed product. Your purchase of these products through affiliate links helps to generate commission for Storables.com, at no extra cost. Learn more)
Introduction
Welcome to the world of sewing! If you’re looking to add a touch of elegance and functionality to your home, sewing your own curtains with lining is a fantastic DIY project. Not only does it give you the opportunity to customize your window treatments to suit your style, but it also offers numerous benefits that off-the-shelf curtains often lack.
Whether you’re a seasoned sewing enthusiast or a beginner looking to dive into some creative projects, sewing curtains with lining is a great way to enhance the look and functionality of your windows. In this article, we will explore the benefits of sewing curtains with lining, guide you through the process of choosing the right fabric and lining, provide step-by-step instructions for measuring, cutting, sewing, and adding finishing touches to your curtains.
So, let’s get started and transform your windows into stunning focal points that will effortlessly enhance the ambiance of any room!
Key Takeaways:
- Sewing your own curtains with lining offers enhanced privacy, improved insulation, UV protection, and a professional finish, adding functionality and elegance to your home decor.
- Choosing the right fabric and lining, precise measurements, and attention to detail are essential for creating beautiful, functional curtains that reflect your personal style and enhance your living space.
Read more: How To Sew Lined Valances
Benefits of Sewing Curtains with Lining
When it comes to window treatments, sewing curtains with a lining offers a multitude of benefits that go beyond just aesthetic appeal. Here are some key advantages:
- Enhanced Privacy: Lined curtains provide an extra layer of privacy, preventing outsiders from peering into your home while allowing natural light to filter through.
- Improved Insulation: The lining acts as a barrier, helping to regulate the temperature in your home. In colder months, the lining helps to keep drafts at bay, while in warmer climates, it helps to block out excessive heat from the sun.
- UV Protection: Sunlight can cause fading and damage to your furniture, carpets, and other décor. Lined curtains offer UV protection, preserving the vibrancy and longevity of your belongings.
- Sound Absorption: If you live in a noisy neighborhood or near busy streets, lined curtains can help reduce outside noise, creating a quieter and more peaceful interior space.
- Professional Finish: Lined curtains have a luxurious and polished look that adds a touch of elegance to any room. They hang more gracefully and have a more substantial weight, giving a high-quality feel to your window treatments.
- Customization: Sewing your own curtains provides the opportunity for customization. You can choose from a wide range of fabrics, colors, patterns, and textures to suit your personal style and home décor.
- Longevity: Lined curtains are more durable and have a longer lifespan compared to unlined curtains. The lining helps protect the fabric from wear and tear, ensuring your curtains stay in great condition for years to come.
Overall, sewing curtains with lining not only enhances the visual appeal of your home but also adds functionality and longevity to your window treatments. It’s a rewarding project that allows you to create personalized curtains that perfectly fit your style and needs.
Choosing the Right Fabric and Lining
Choosing the right fabric and lining is crucial for creating beautiful and functional curtains. Here are some factors to consider:
- Fabric: Select a fabric that complements your interior decor and fits the purpose of the curtains. Common fabrics for curtains include cotton, linen, silk, and polyester. Keep in mind that heavier fabrics drape more elegantly, while lighter fabrics allow more light to filter through.
- Lining: There are various types of lining to choose from, each offering different benefits. The most common options are cotton lining, polyester lining, and blackout lining. Cotton lining is lightweight and offers moderate light filtration. Polyester lining is more durable and provides better insulation. Blackout lining blocks out most, if not all, light for maximum privacy and light control.
- Color and Pattern: Consider the color and pattern of the fabric and lining in relation to your existing decor. Solid colors are versatile and timeless, while patterns can add visual interest and personality to the room. Make sure the colors and patterns complement each other and the overall aesthetic of your space.
- Care Instructions: Check the care instructions for both the fabric and the lining. Some may require dry cleaning, while others can be machine washed. Consider your lifestyle and choose fabrics and linings that are easy to maintain.
- Budget: Set a budget for your project and choose fabrics and linings that align with it. Keep in mind that high-quality fabrics and linings often come with a higher price tag but offer better durability and performance.
- Samples: If possible, obtain fabric and lining samples before making your final decision. This allows you to see and feel the materials in person, ensuring they meet your expectations.
Remember, the fabric and lining you choose will determine the overall look, feel, and performance of your curtains. Take your time to explore different options, consider your specific needs, and select materials that will create curtains you’ll love for years to come.
Measuring and Cutting the Fabric
Accurate measurements and precise cutting are essential to ensure your curtains fit perfectly on your windows. Here’s a step-by-step guide to help you measure and cut the fabric:
- Measure the Window: Start by measuring the width and length of the window where you plan to hang the curtains. Take measurements from the top of the window frame to where you want the curtains to end.
- Add Allowances: To calculate the fabric width, multiply the window width by 1.5 or 2. This calculation will provide enough fabric for gather and fullness. For the length, add a few inches to the measured length to account for hems and headers.
- Prepare the Fabric: Lay the fabric flat on a large working surface, such as a cutting table or the floor. Ensure that the fabric is free from wrinkles to ensure accurate cutting.
- Mark and Cut: Use a fabric marking tool to mark the measurements on the fabric. Use a straight edge, such as a yardstick or a ruler, to connect the marked points and create straight lines. Double-check the measurements before cutting the fabric.
- Repeat for Multiple Panels: If you’re making multiple curtain panels, repeat the measuring and cutting process for each panel.
- Label the Panels: To avoid confusion, label each panel with a marker or a small sticky note. Indicate which side is the top, bottom, and which end is the leading edge (where the curtain will open).
Remember to double-check your measurements and be precise when cutting the fabric. Taking the time to measure accurately will ensure that your curtains fit perfectly on your windows and hang beautifully.
Preparing the Lining
Preparing the lining is an important step in sewing curtains with lining. It ensures that the lining is properly sized and will provide the desired functionality. Here’s how to prepare the lining:
- Measure the Lining Fabric: Use the same measurements as the main fabric panel to cut the lining fabric. Ensure that the lining fabric is the same width and length as the main fabric panel.
- Iron the Lining Fabric: Before sewing, iron the lining fabric to remove any wrinkles or creases. Smooth fabric results in better sewing and a neater finished product.
- Pin the Lining to the Fabric: Lay the main fabric panel flat on your work surface, right side up. Place the lining fabric on top of the main fabric, aligning the edges. Use sewing pins to secure the lining to the fabric along the edges and at regular intervals to prevent shifting.
- Baste the Layers Together: Using a long, straight stitch, baste the lining and fabric layers together along the edges. Basting ensures that the layers stay in place during the sewing process.
- Trim Excess Lining: Carefully trim any excess lining that extends beyond the edges of the main fabric. This ensures that the lining won’t be visible from the front of the curtains.
By properly preparing the lining, you ensure that it is the correct size and securely attached to the main fabric. This step is essential in creating curtains with a professional finish and optimal functionality.
When sewing curtains with lining, be sure to pre-wash and iron your fabric before cutting and sewing to prevent any shrinkage or distortion in the finished product.
Read more: How To Sew Sheer Curtains
Sewing the Side Seams
Once you have prepared the fabric and lining, it’s time to sew the side seams of your curtains. This step joins the panels together, creating a cohesive and finished look. Follow these steps to sew the side seams:
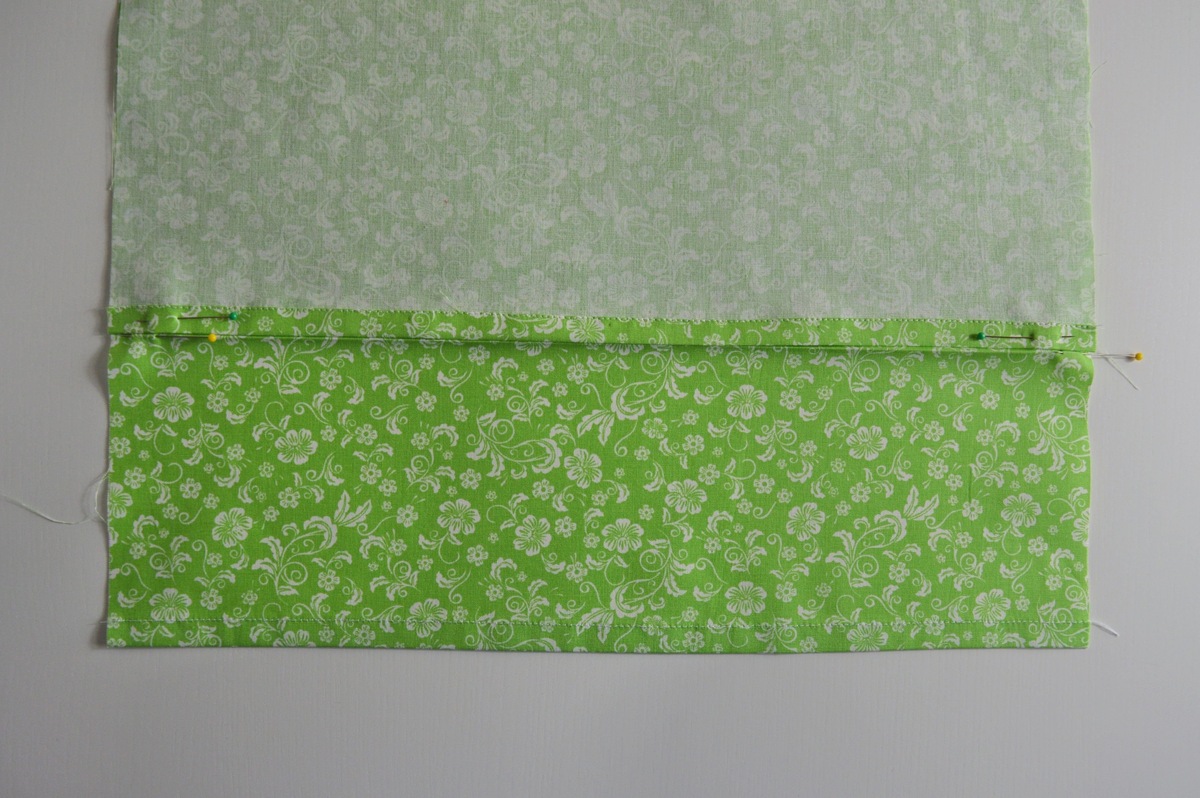
- Align the Edges: Place the fabric panels right sides together, with the lining sandwiched in between. Align the side edges and pin them in place to keep them from shifting as you sew.
- Choose a Seam Allowance: Determine the seam allowance you will use. A 1/2 inch (1.27 cm) or 5/8 inch (1.59 cm) seam allowance is commonly used for curtains.
- Sew the Side Seams: Using a straight stitch, start sewing from the top edge, making sure to backstitch at the beginning and end of the seam. Sew all the way down to the bottom edge, following your chosen seam allowance.
- Finish the Raw Edges: To prevent fraying, finish the raw edges of the seam by using a serger or a zigzag stitch on a regular sewing machine. Alternatively, you can use pinking shears to trim the edges, which helps reduce fraying.
- Press the Seams: After sewing, press the side seams open or to one side, depending on your preference and the weight of the fabric. This step gives a professional and neat finish to the seams.
- Repeat for the Other Side: Repeat the same steps to sew the side seams for the other curtain panel. Make sure to align the edges correctly and use the same seam allowance for consistency.
By sewing the side seams with precision, you ensure that your curtains are well-constructed and visually appealing. Take your time to sew straight and even seams, and remember to press the seams for a polished look.
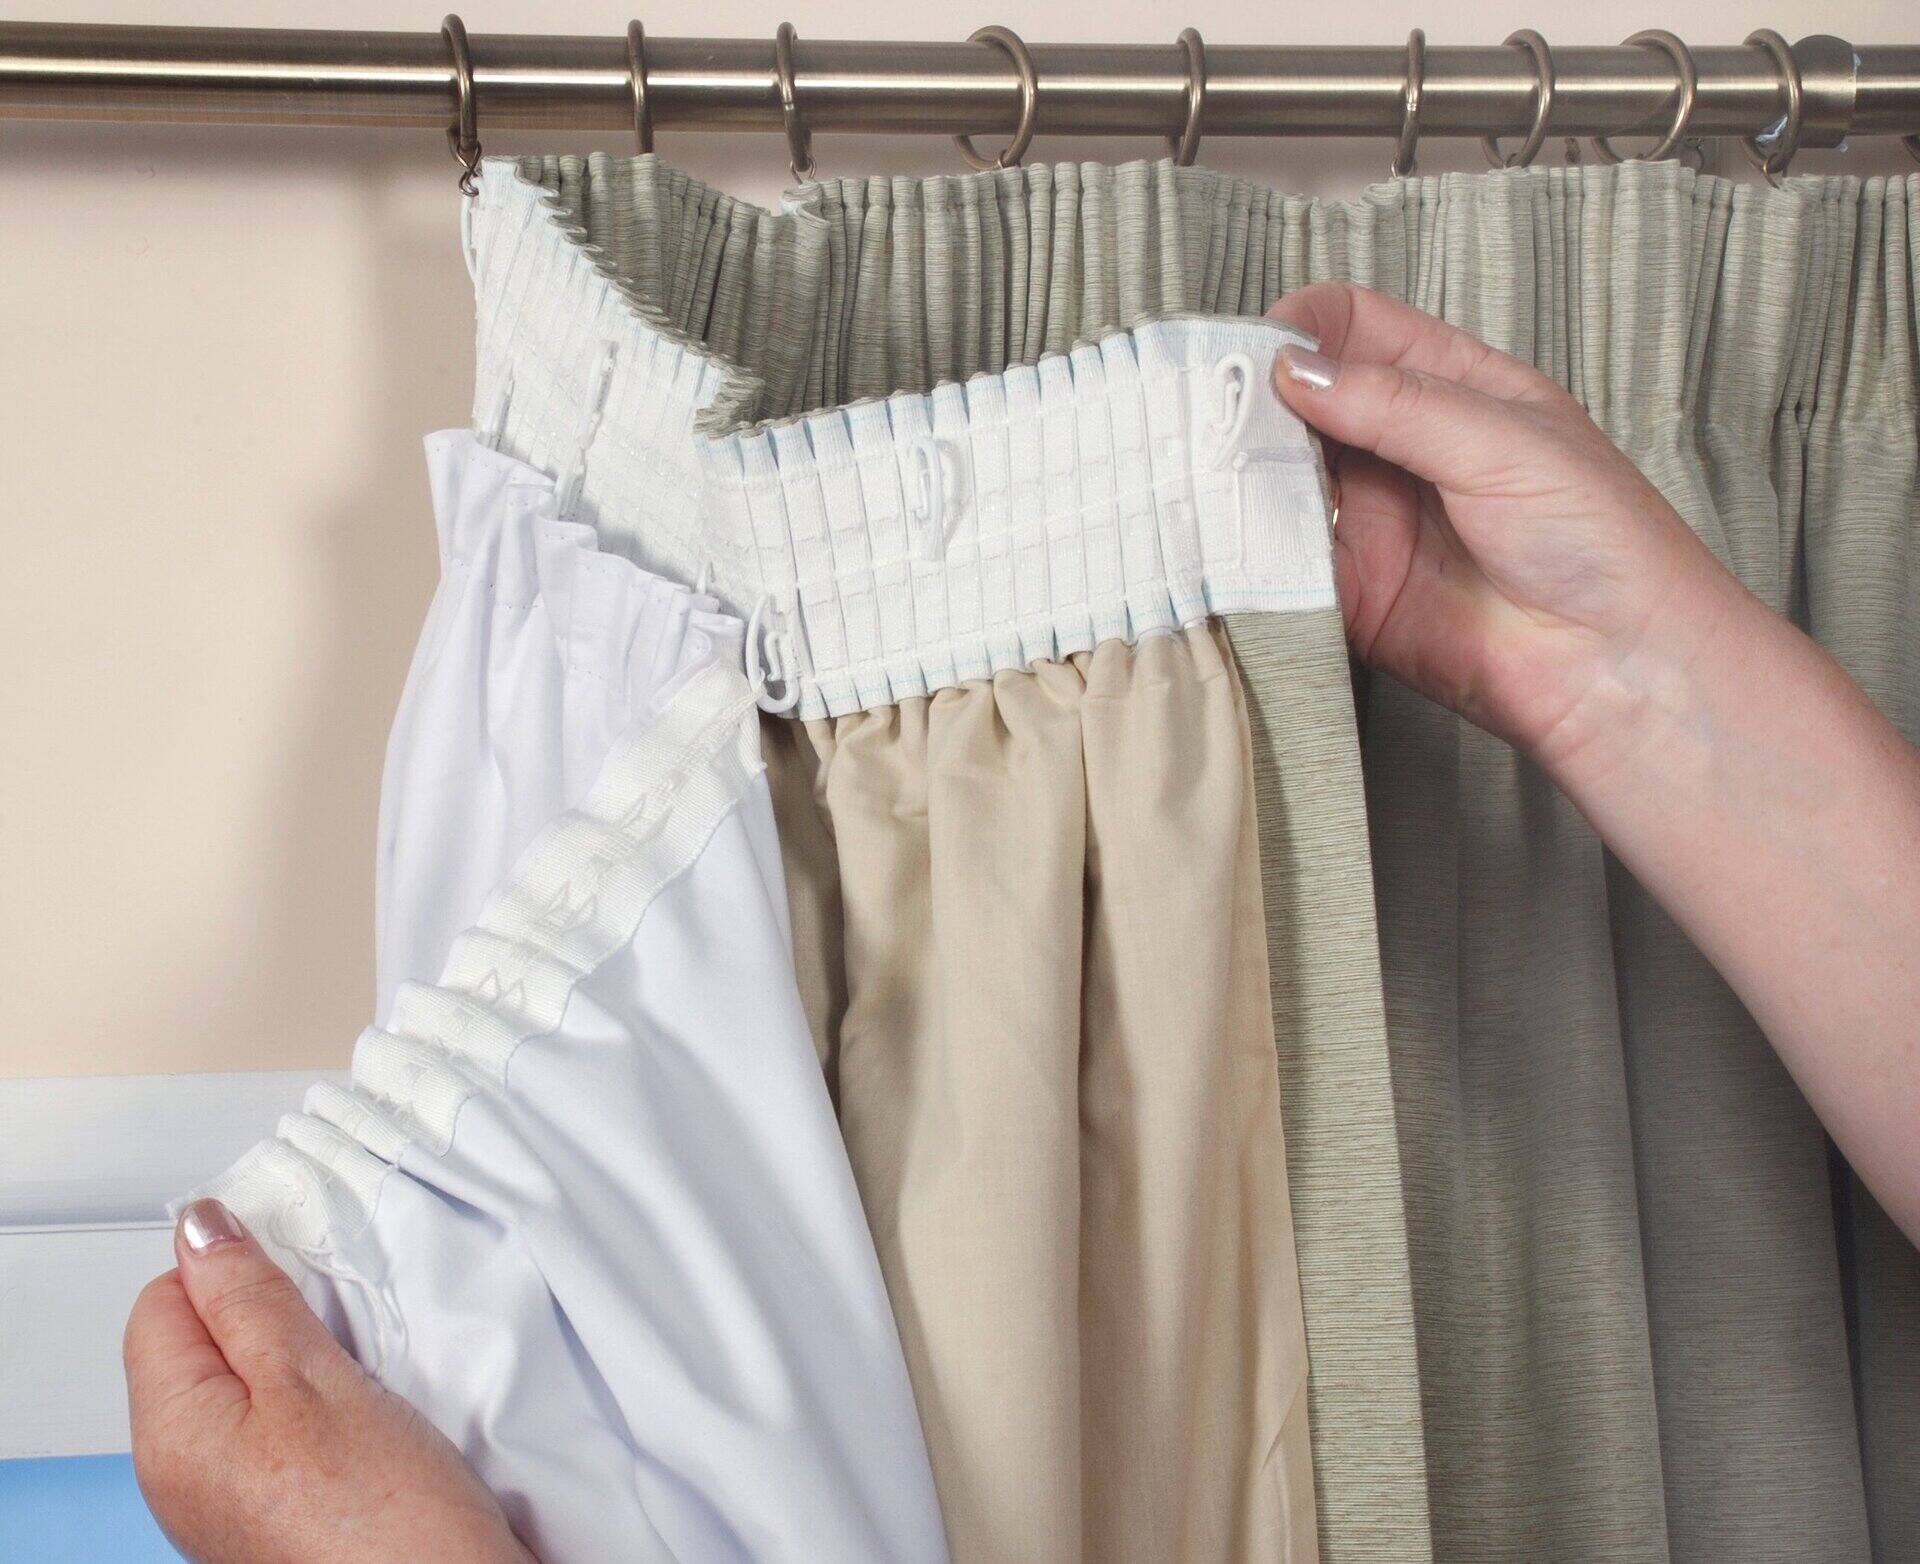
Attaching the Lining to the Fabric
Attaching the lining to the fabric is a crucial step in sewing curtains with lining. This process ensures that both layers of the curtains are securely connected, giving a professional and polished finish. Follow these steps to attach the lining to the fabric:
- Prepare the Fabrics: Lay the curtain fabric flat, right side up, and make sure the lining is properly aligned on top of it.
- Pinning the Layers: Starting at the top of one side, pin the lining and fabric together along the sides and bottom edges. Make sure to pin them securely, ensuring that the edges are aligned.
- Sewing the Top Edge: Sew across the top edge of the curtain, where the heading or rod pocket will be. Use a straight stitch and backstitch at the beginning and end of the seam to secure the layers together.
- Finishing the Side and Bottom Edges: To connect the lining and fabric along the side and bottom edges, stitch them together using a 1/2 inch (1.27 cm) seam allowance. Start sewing from one side and continue stitching until you reach the other side of the curtain.
- Trimming Excess Lining: Carefully trim any excess lining that extends beyond the edges of the fabric. This step ensures that the lining won’t be visible from the front of the curtains.
- Pressing the Seams: After sewing, press the seams open or to one side using an iron. This step helps to flatten the seams and gives the curtains a professional look.
Attaching the lining to the fabric ensures that the layers stay in place and move together as one unit. It also gives the curtains a finished appearance and helps them hang properly when installed. Take your time and sew accurately to achieve seamless and beautifully attached curtains.
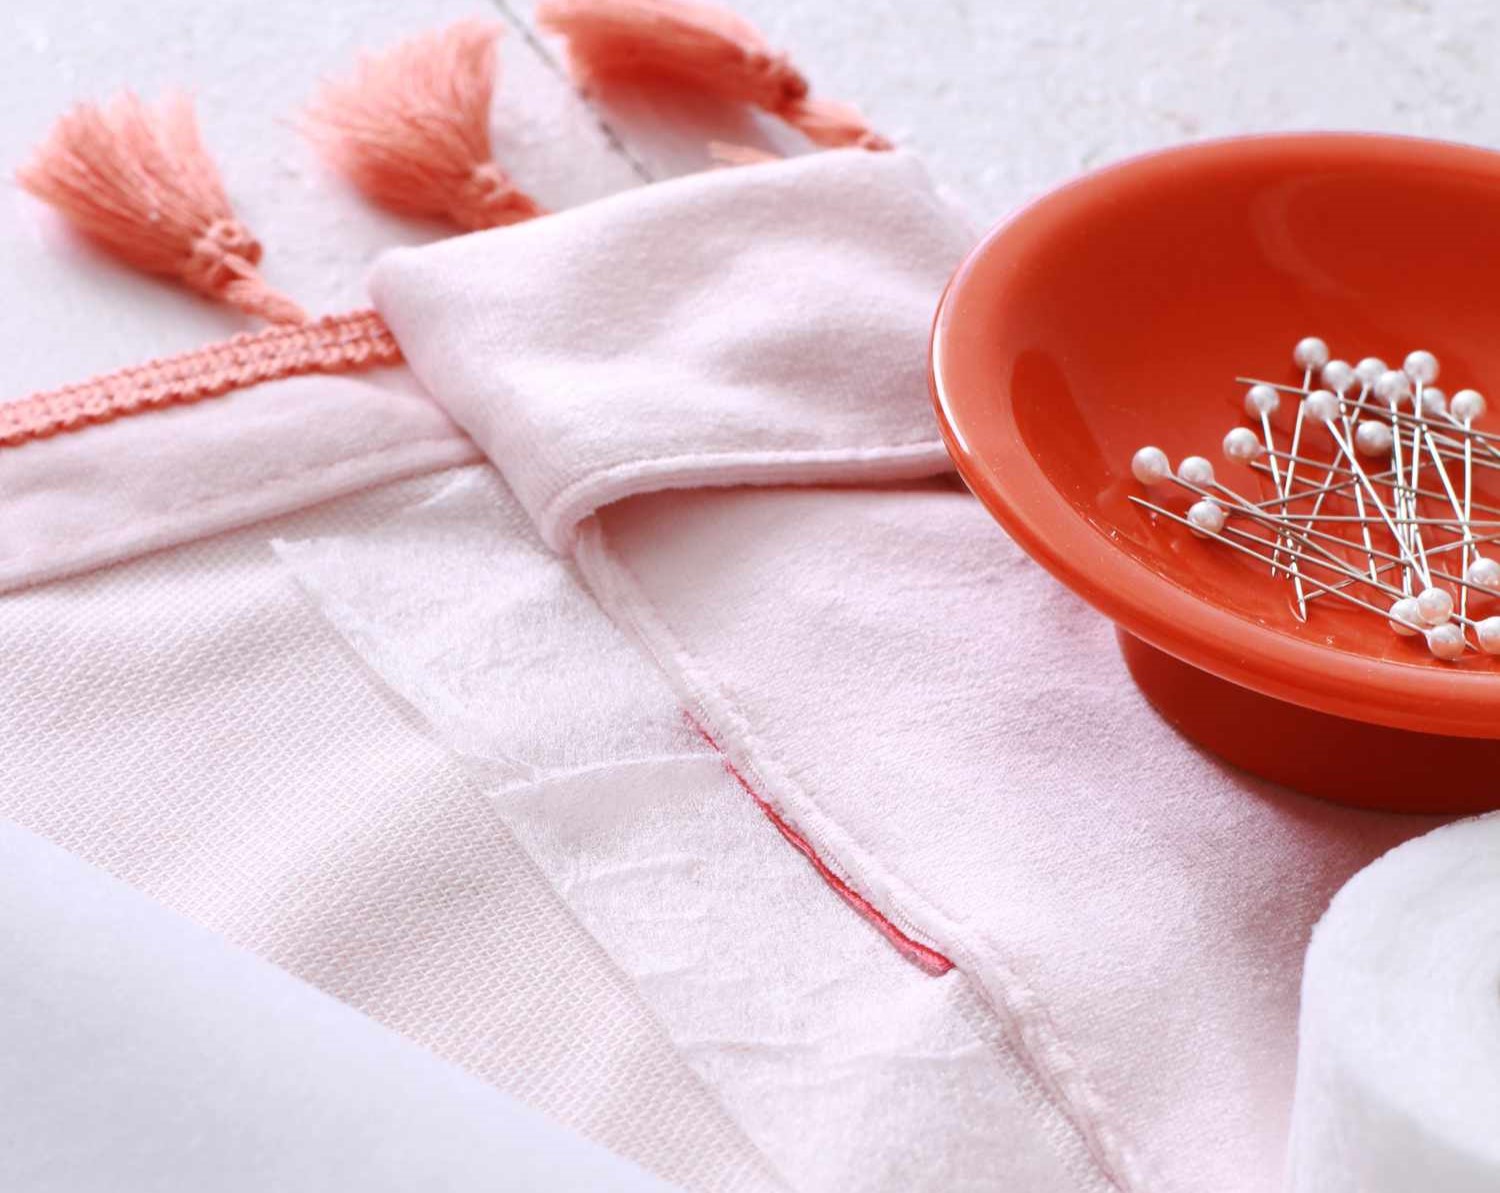
Hemming the Curtains
Hemming is the final step in sewing curtains with lining. It not only provides a polished and finished look but also helps with the overall drape and functionality of the curtains. Here’s how to hem your curtains:
- Measure and Mark: Determine the desired length of your curtains and add the hem allowance. Use a measuring tape to mark the hemline on each curtain panel. Make sure the markings are consistent across all panels.
- Prepare the Hem: Fold the bottom edge of the curtain panel up to the marked hemline. For a double-fold hem, fold it up again, encasing the raw edge inside. Pin the folded hem in place to keep it secure.
- Sew the Hem: Using a straight stitch, sew along the folded hemline, ensuring that you catch both the fabric and the lining in the stitching. Backstitch at the beginning and end of the seam to reinforce it.
- Press the Hem: After sewing, press the hem using an iron to help it lay flat and create a crisp edge.
Depending on your personal preference and the curtain style, you can choose different hem finishes. A double-fold hem is common for curtains and provides a clean look, but you can also consider other options such as a blind hem or decorative trim for added flair.
Take your time when hemming your curtains to ensure precise measurements and neat sewing. Hemming is the final touch that elevates your curtains and gives them a professional look that will enhance any room.
Adding Finishing Touches
Once you have sewn the side seams and hemmed the curtains, it’s time to add the finishing touches that will truly complete your project. These final details will enhance the appearance and functionality of your curtains. Here are some ideas to consider:
- Header or Rod Pocket: Depending on your preferred curtain style, you can create a header or rod pocket at the top of the curtains. This will allow you to easily hang them on a curtain rod or track.
- Pleats or Gathers: If you want a more tailored or decorative look, consider adding pleats or gathers across the top of the curtains. This will add texture and visual interest to your window treatments.
- Decorative Trims: To further enhance the aesthetic appeal of your curtains, you can add decorative trims such as lace, ribbon, or fringe along the edges or at specific locations on the curtains.
- Tiebacks or Holdbacks: For added functionality and style, you can incorporate tiebacks or holdbacks to keep your curtains open and create an elegant drape when desired.
- Curtain Weights or Hooks: To ensure that your curtains hang smoothly and stay in place, you can sew curtain weights or hooks along the bottom hem or sides of the curtains.
These finishing touches allow you to personalize your curtains and create a unique look that matches your style and home decor. Be creative and experiment with different options to achieve the desired effect.
Before considering your curtains completely finished, don’t forget to give them a final press with the iron to ensure they are free from wrinkles and creases, and ready to be hung.
With the addition of these finishing touches, your curtains will not only provide privacy, insulation, and light control but also serve as a beautiful and functional element in your home decor.
Read more: How To Sew Balloon Curtains
Conclusion
Congratulations! You’ve learned how to sew curtains with lining, and by now, you should be equipped with the knowledge and skills to tackle this DIY project confidently. Sewing your own curtains with lining offers a range of benefits, including enhanced privacy, improved insulation, UV protection, sound absorption, a professional finish, customization, and increased longevity.
Choosing the right fabric and lining, measuring and cutting accurately, preparing the lining, sewing the side seams, attaching the lining to the fabric, hemming, and adding finishing touches are the key steps involved in creating beautiful, functional curtains. Each stage requires attention to detail and precision to achieve the desired result.
Remember to take your time, be patient, and enjoy the process of creating curtains that perfectly complement your home decor. Don’t be afraid to experiment with different fabric choices, colors, patterns, and decorative trims to add your personal touch and create curtains that reflect your style.
By sewing your own curtains with lining, you not only save money but also have the opportunity to customize your window treatments and create a truly unique and personalized look for your home. So, get started on your sewing journey and transform your windows into stunning focal points that effortlessly enhance the ambiance of any room.
Now that you have the knowledge and confidence to sew curtains with lining, grab your sewing machine, fabrics, and tools, and embark on this exciting DIY project. Happy sewing!
Frequently Asked Questions about How To Sew Curtains With Lining
Was this page helpful?
At Storables.com, we guarantee accurate and reliable information. Our content, validated by Expert Board Contributors, is crafted following stringent Editorial Policies. We're committed to providing you with well-researched, expert-backed insights for all your informational needs.


0 thoughts on “How To Sew Curtains With Lining”