
Articles
How To Store Photos From Phone
Modified: January 6, 2024
Learn how to store and organize your phone photos easily with our helpful articles. Find step-by-step guides, tips, and tricks for efficient photo management.
(Many of the links in this article redirect to a specific reviewed product. Your purchase of these products through affiliate links helps to generate commission for Storables.com, at no extra cost. Learn more)
Introduction
With the ever-increasing quality of smartphone cameras, we are capturing more photos than ever before. Whether it’s breathtaking landscapes or unforgettable moments with loved ones, these digital memories hold great sentimental and sometimes even professional value. However, storing these photos on our phones for an extended period can take up valuable space and put them at risk if the device is lost, damaged, or stolen.
Fortunately, there are various storage options available to help you safeguard and organize your precious photos. In this article, we will explore different methods for storing photos from your phone. From transferring them to your computer to backing them up on cloud storage or using external devices, we’ll guide you through the process and help you choose the best solution for your needs.
Before diving into the specifics, it’s important to understand the different storage options available to you.
Internal Storage: The built-in storage capacity on your smartphone is where photos are initially saved. However, this space is often limited and can fill up quickly, especially when you capture photos and videos in high resolution.
Cloud Storage: Cloud storage refers to storing your files on remote servers accessed through the internet. With cloud storage, you can back up and access your photos from any device with an internet connection.
External Storage: This refers to using external devices such as computers, external hard drives, or solid-state drives (SSDs) to store and transfer your photos from your phone.
Now that we understand the different storage options, let’s explore how to choose the right method for storing your photos from your phone.
Key Takeaways:
- Safeguard your memories by choosing the right storage method, transferring photos to a computer, utilizing cloud storage, using external devices, organizing your photos, deleting unnecessary ones, and troubleshooting storage issues effectively.
- Preserve your precious memories by transferring photos to a computer, backing up photos to cloud storage, using external hard drives or SSDs, organizing your photos for easy access, deleting unnecessary photos, and troubleshooting storage issues.
Read more: How To Add Photos To Alexa Show From Phone
Understanding Different Storage Options
When it comes to storing photos from your phone, there are several options available, each with its own advantages and considerations. Let’s take a closer look at each option:
- Internal Storage: The most common and convenient way to store your photos is on your phone’s internal storage. This is the default place where photos are stored when you capture them. However, the amount of available storage can vary depending on the phone model. If you have a phone with limited internal storage, you may quickly run out of space, especially if you take a lot of photos or record videos. It’s important to periodically transfer your photos to another storage option to free up space on your phone.
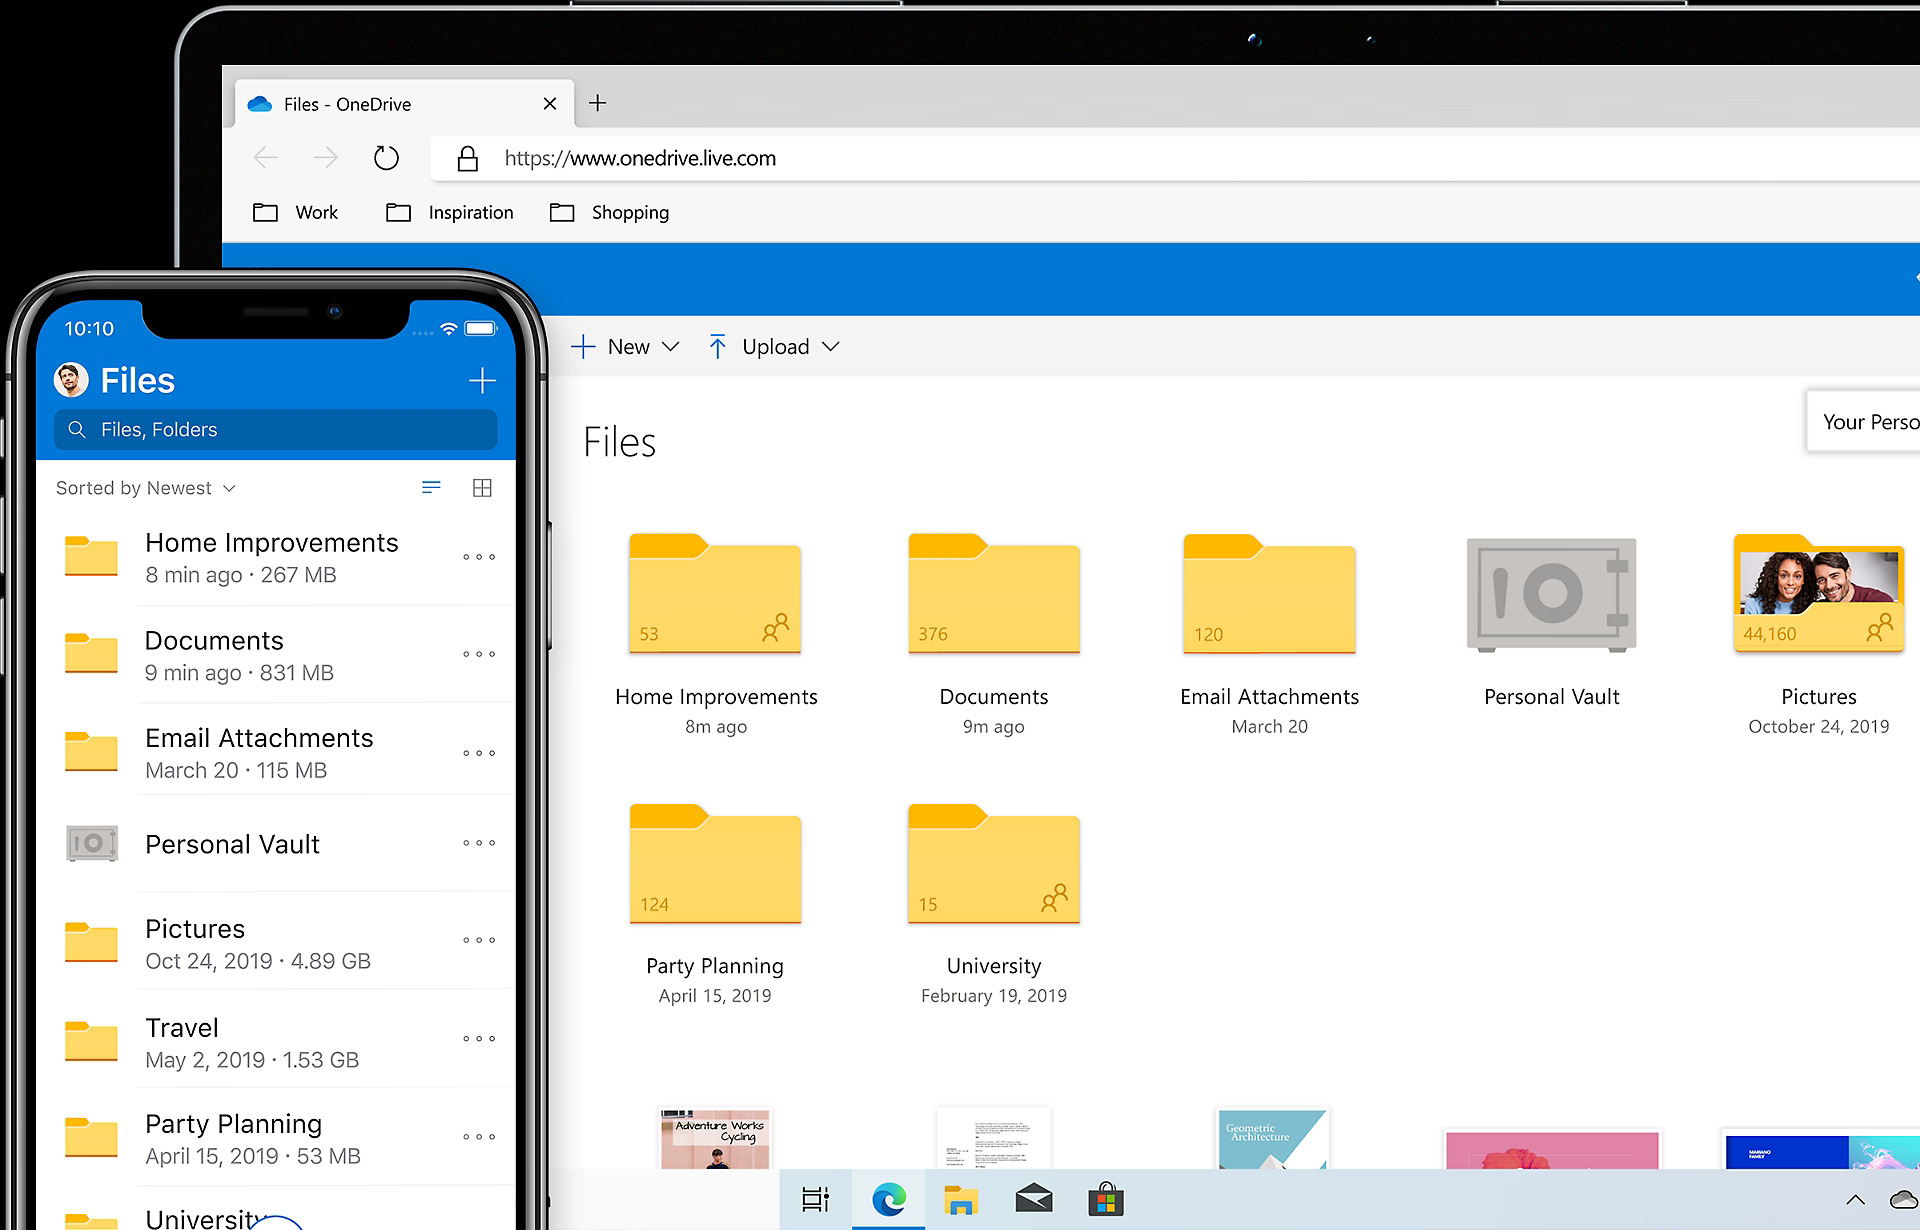
- Cloud Storage: Cloud storage allows you to store your photos securely on remote servers accessed through the internet. Services like Google Photos, iCloud, Dropbox, and OneDrive offer free or paid options with varying storage limits. The advantage of cloud storage is that it provides a convenient way to access your photos from any device with an internet connection. You can also enable automatic backups to ensure that your photos are continually synced and protected. However, it’s important to keep in mind that cloud storage may require a subscription fee for larger storage capacities.
- External Storage: If you prefer to have direct control over your photo storage and don’t want to rely solely on the cloud, using external storage options may be the right choice for you. This can include transferring your photos to your computer’s hard drive, using external hard drives, or solid-state drives (SSDs). External storage provides a physical backup of your photos, safeguarding them against potential data loss. However, it’s important to regularly back up your external storage to prevent any loss or damage to your photos.
Now that you have a better understanding of the different storage options available, let’s discuss how to choose the right method for storing your photos from your phone.
Choosing the Right Storage Method
Choosing the right storage method for your photos depends on your specific needs, preferences, and priorities. Here are some factors to consider when making this decision:
- Storage Capacity: Assess how much storage capacity you require based on the number of photos you take and their file sizes. If you have a large collection of photos or frequently capture high-resolution images, you might need a storage option with ample space.
- Accessibility: Consider how easily you want to access your photos. Cloud storage allows you to access your photos from any device with an internet connection, while external storage may require the physical connection of a device.
- Security: Evaluate the level of security you desire for your photos. Cloud storage typically provides encryption and safeguards against data loss, but relying solely on cloud storage may carry the risk of unauthorized access or breaches. External storage, on the other hand, provides a physical backup that you have control over.
- Convenience: Think about the level of convenience that each storage method offers. Cloud storage often provides automatic backups, seamless syncing, and easy sharing options. External storage may require more manual efforts for transferring and organizing your photos.
- Cost: Consider any potential costs associated with different storage options. Cloud storage may have free or low-cost plans, but larger storage capacities may require a subscription fee. External storage options may require initial investment in devices such as external hard drives or SSDs.
Based on your assessment of these factors, you can determine the best storage method for your needs. It’s important to note that using a combination of storage options can provide a more comprehensive approach to storing and backing up your photos. For example, you can utilize internal storage for immediate access and convenience, back up your photos to cloud storage for added security and accessibility, and maintain a physical backup using external storage devices.
Now that you have an understanding of the different storage methods and how to choose the right one, let’s explore how to transfer your photos from your phone to your chosen storage option.
Transferring Photos to Your Computer
Transferring your photos from your phone to your computer is a common and effective way to free up space on your device and create a backup. Here are the steps to transfer photos to your computer:
- Connect Your Phone to Your Computer: Use a USB cable to connect your phone to your computer. Make sure to unlock your phone and choose the appropriate “Transfer Files” or “File Transfer” option when prompted on your phone.
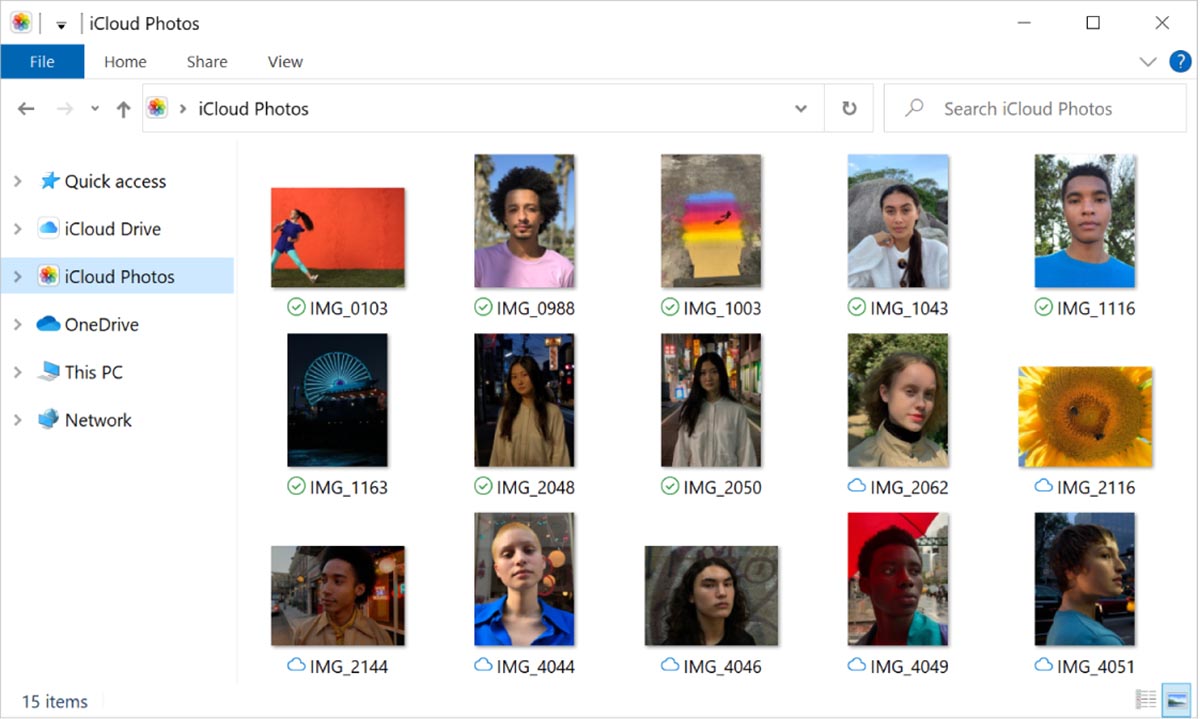
- Open File Explorer or Finder: On your computer, open File Explorer (Windows) or Finder (Mac) to browse your files.
- Locate Your Phone: Look for your phone’s name or icon in the list of available devices. Click on it to open the file directory of your phone.
- Select and Copy Photos: Navigate to the folder on your phone that contains the photos you want to transfer. Select the desired photos or folders, then right-click and choose “Copy” or use the keyboard shortcut (Ctrl+C on Windows, Command+C on Mac).
- Paste Photos to Your Computer: Go to the destination folder on your computer where you want to store the transferred photos. Right-click and choose “Paste” or use the keyboard shortcut (Ctrl+V on Windows, Command+V on Mac) to paste the photos into the folder.
- Eject and Disconnect Your Phone: Once the transfer is complete, safely eject your phone from your computer. On Windows, right-click on your phone’s icon and choose “Eject.” On Mac, drag your phone’s icon to the trash bin. Unplug the USB cable to disconnect your phone.
It’s essential to organize your transferred photos on your computer for easy access and management. Create folders and subfolders to categorize your photos by date, location, or any other criteria that make sense to you.
Remember to regularly transfer and backup your photos to keep your phone’s storage free and your memories safe. Transferring photos to your computer is a straightforward method, but it does require the device and cable connection. If you prefer a wireless transfer option, you can explore using cloud storage or other wireless transfer methods.
Next, let’s discuss another popular storage option – backing up your photos to cloud storage.
Backing Up Photos to Cloud Storage
Backing up your photos to cloud storage is a convenient and secure method of preserving your digital memories. Here’s how you can back up your photos to cloud storage:
- Choose a Cloud Storage Provider: Select a cloud storage provider that suits your needs and preferences. Popular options include Google Photos, iCloud, Dropbox, and OneDrive. Sign up for an account if you don’t already have one.
- Install the Cloud Storage App: Download and install the cloud storage app on your phone from the respective app store. Sign in to your account using your credentials.
- Enable Automatic Backup: Open the app and navigate to the settings. Enable the automatic backup option, which will continually back up your photos as you capture them. You can usually specify whether to include videos in the backup as well.
- Choose Backup Quality: Depending on the cloud storage provider, you may have the option to choose between original quality and optimized/compressed quality. Original quality retains the full resolution of your photos, but it may count towards your storage quota. Optimized/compressed quality may reduce the file size of your photos but still maintain a good level of quality.
- Monitor and Manage Backup: Regularly check the cloud storage app to ensure that your photos are being backed up successfully. You may also have the option to manage your backup settings, such as excluding specific folders or albums.
- Access and Sync Photos: You can access your backed-up photos on any device with the cloud storage app installed and connected to your account. Changes made to your photos (e.g., organizing, editing) will sync across all devices.
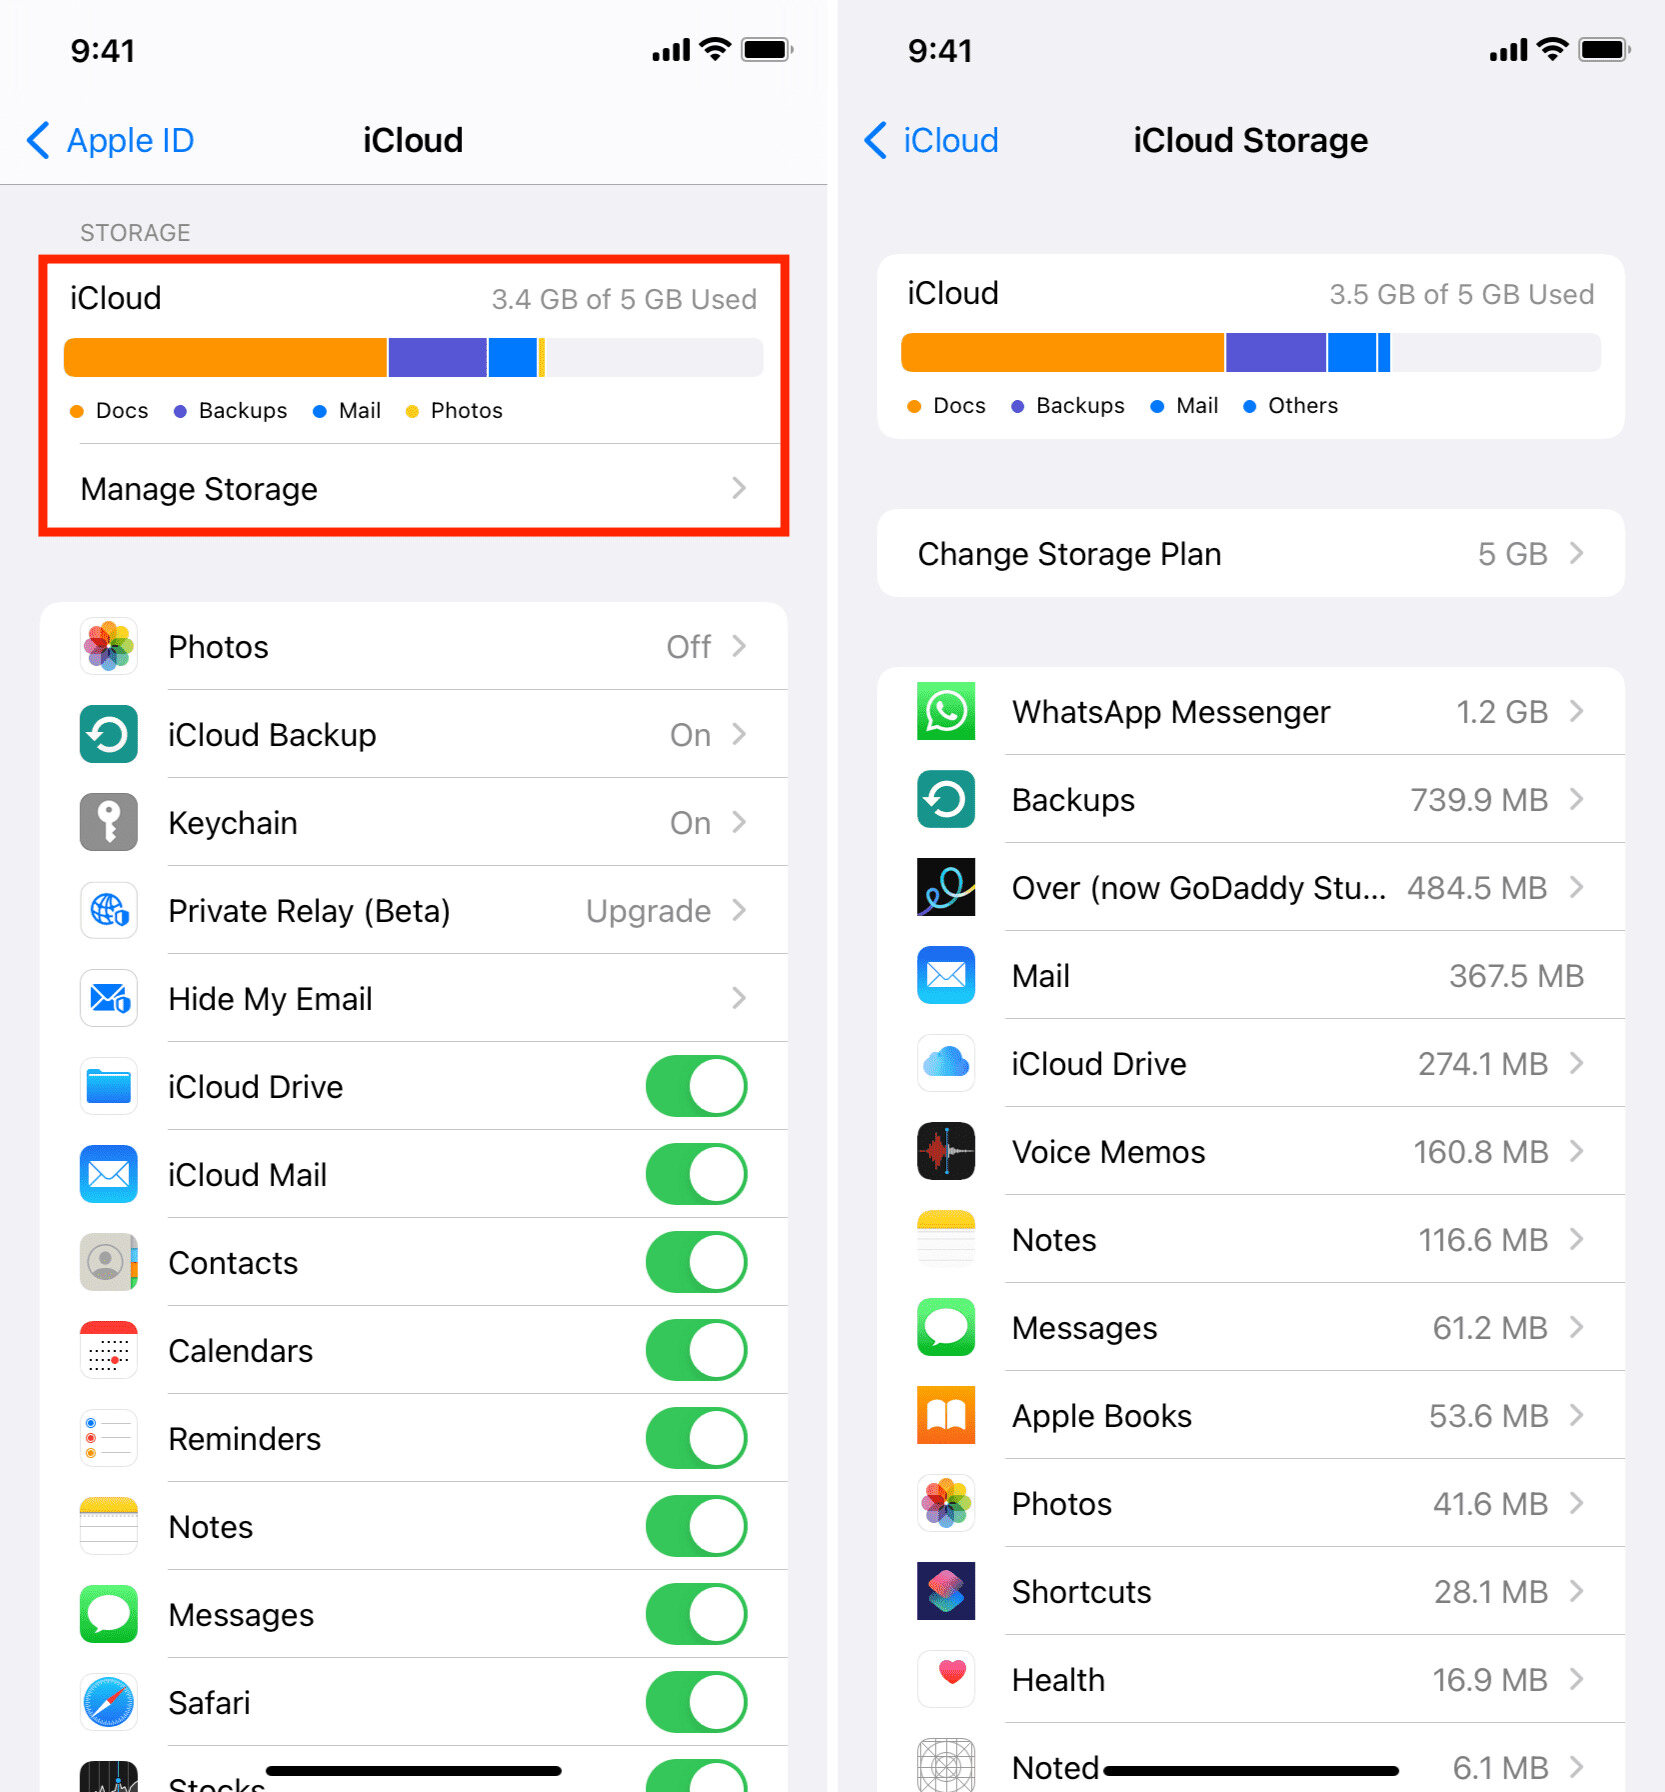
- Upgrade Storage Plan (If Necessary): If your cloud storage quota fills up, you may need to upgrade to a higher storage plan to accommodate more photos. Evaluate your needs and consider the available options provided by the cloud storage provider.
Backing up your photos to cloud storage offers peace of mind knowing that your precious memories are safely stored off-site. It also provides the convenience of accessing your photos from any device, allowing you to share and relive moments with friends and family.
However, it’s important to keep in mind that cloud storage is not invulnerable to data breaches or service disruptions. To further protect your photos, consider using two-factor authentication and regularly reviewing your security settings.
Next, let’s explore using external storage options to store and backup your photos from your phone.
Use cloud storage services like Google Photos or iCloud to automatically back up your photos from your phone. This ensures that your photos are safely stored and easily accessible from any device.
Read more: How To Store Videos From Phone
Using External Hard Drives or SSDs
If you prefer to have physical control over your photo storage and backup, using external hard drives or solid-state drives (SSDs) is a reliable option. Here’s how you can utilize external storage device for your photos:
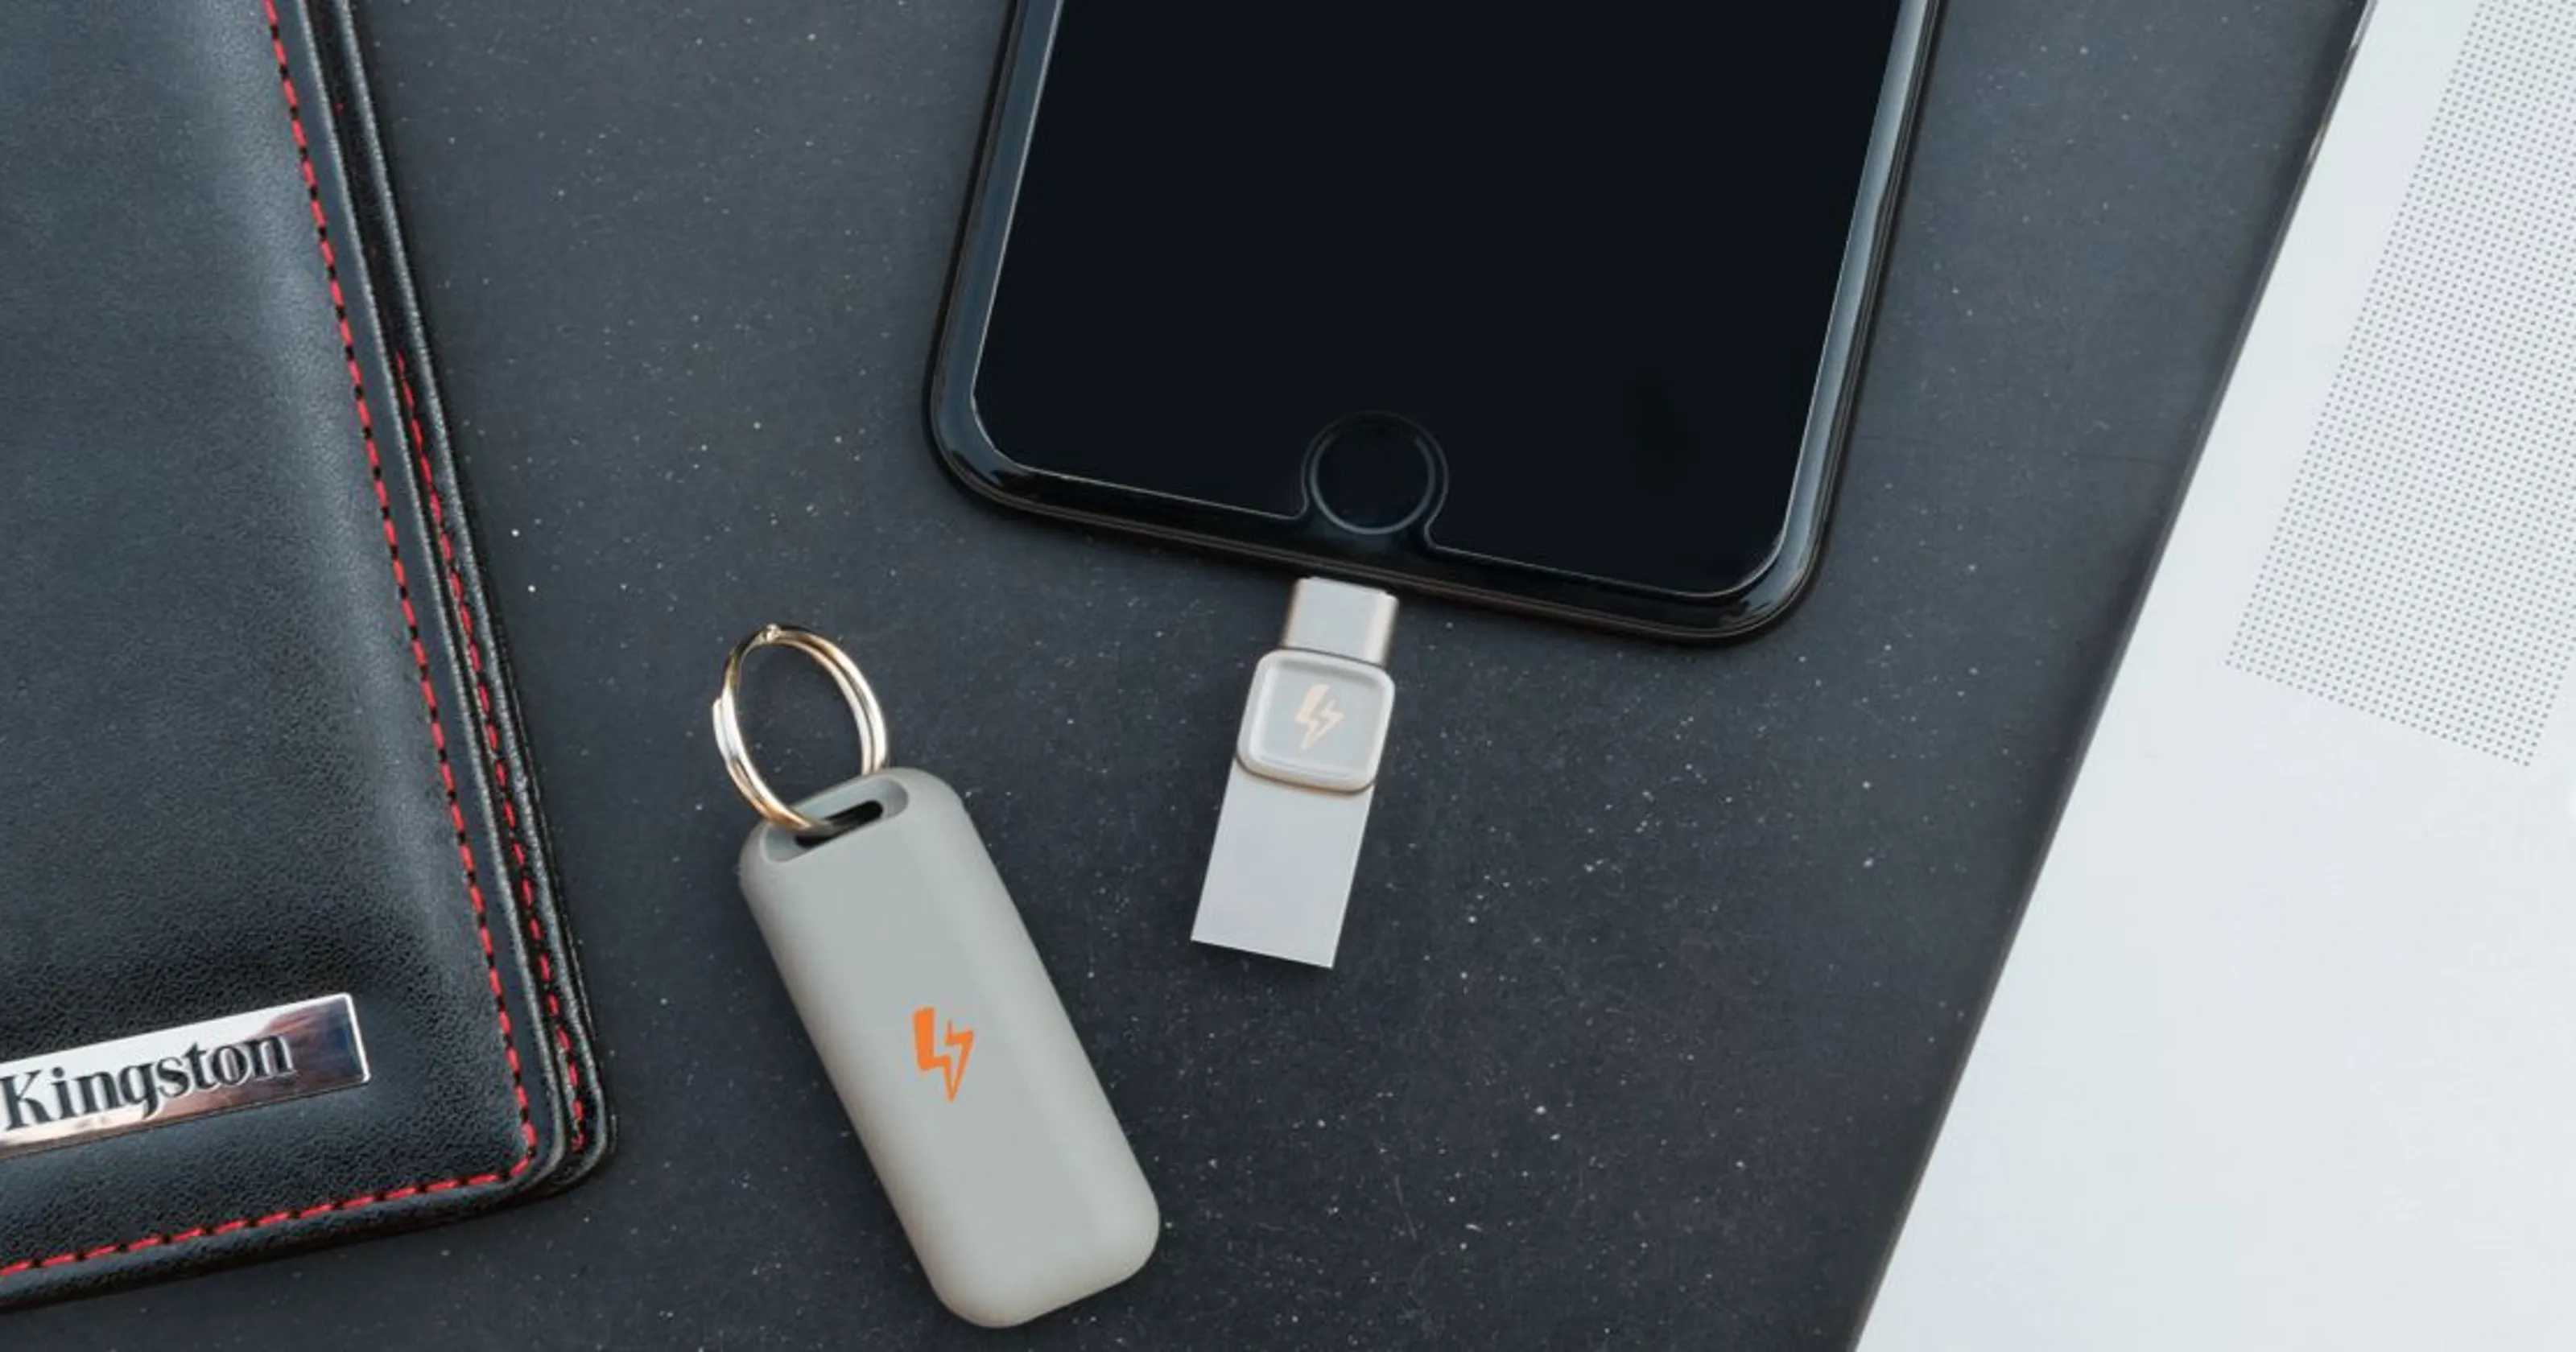
- Purchase an External Storage Device: Choose an external hard drive or SSD with sufficient storage capacity to accommodate your photo collection. Consider factors such as USB compatibility, speed, and durability when making your selection.
- Connect the Device to Your Computer: Use the provided USB cable to connect the external storage device to your computer. Ensure that the device is detected and recognized by your computer.
- Create a Folder Structure: On the external storage device, create a folder structure to organize your photos. You can create folders based on date, event, location, or any other organizational scheme that suits your needs.
- Transfer Photos to the External Storage: Open the folder containing your photos on your computer. Select the desired photos or folders, then right-click and choose “Copy” (or use the keyboard shortcut Ctrl+C on Windows, Command+C on Mac).
- Paste Photos to the External Storage: Navigate to the corresponding folder on the external storage device and right-click, then choose “Paste” (or use the keyboard shortcut Ctrl+V on Windows, Command+V on Mac) to transfer the photos to the external storage.
- Backup and Safeguard Your External Storage: It’s crucial to create additional backups of your external storage to protect against data loss. Consider making copies on other external drives, storing in a separate location, or utilizing cloud storage as an additional backup option.
- Disconnect and Store the Device Securely: Safely remove the external storage device from your computer before disconnecting it. Store it in a safe and dry place to prevent physical damage or loss.
Using external hard drives or SSDs provides a physical backup of your photos, offering an additional layer of security and control over your data. These devices are portable, allowing you to access and transfer your photos to different computers or devices as needed. Additionally, external storage devices do not rely on an internet connection, providing offline access to your photos.
Remember to regularly back up your external storage device and keep it updated with your latest photos. Consider organizing your files and folders on the external storage device to facilitate easy searching and retrieval of specific photos in the future.
Now that you have learned about using external storage devices, let’s discuss how to organize your photos for easy access and management.
Organizing Your Photos for Easy Access
Keeping your photos organized is essential for easy access and efficient management. When your photo collection grows, finding specific photos can become a daunting task if they are not properly organized. Here are some tips to help you organize your photos:
- Create Folders or Albums: Use folders or albums to categorize your photos based on different criteria such as date, location, event, or subject. This will make it easier to locate specific photos in the future.
- Date-Based Organizing: If you take a lot of photos, organizing them by date can be a logical and straightforward method. Create main folders for each year and subfolders for each month or specific occasions within that year.
- Location-Based Organizing: If your photos revolve around different locations, consider organizing them based on these locations. This can be particularly useful for travel photos or events that took place in specific places.
- Tagging and Keywording: Assigning tags or keywords to your photos can significantly simplify the search process. Use descriptive tags or keywords that represent the content or theme of the photo, making it easier to locate specific images using search features.
- Use Photo Management Software: Utilize photo management software such as Adobe Lightroom, Google Photos, or Apple Photos to help you organize and manage your photo library. These tools often provide features like facial recognition, automatic tagging, and advanced search options.
- Regularly Review and Delete Unwanted Photos: Periodically review your photo collection and delete any duplicate, blurry, or unnecessary photos to free up storage space and keep your collection streamlined. This will ensure that you only keep the best and most meaningful photos.
- Backup Your Organized Photos: Whatever organizational method you choose, make sure to regularly back up your organized photo collection. This includes creating backups on external drives, using cloud storage services, or a combination of both.
Remember that organizing your photos is a personal preference, so choose a method that suits your needs and makes sense to you. It may take some time initially to organize your existing photos, but once you establish an organizational structure, it will be easier to maintain and manage moving forward.
By organizing your photos, you’ll have a comprehensive system in place that allows you to easily locate and enjoy your digital memories for years to come.
Now that you’ve learned how to organize your photos, let’s discuss the importance of periodically deleting unnecessary photos to save space.
Deleting Unnecessary Photos to Save Space
As your photo collection grows, it’s important to periodically review and delete unnecessary photos to free up storage space on your device or storage solution. Here are some reasons why deleting unnecessary photos is crucial:
- Save Storage Space: Deleting unnecessary photos helps you reclaim valuable storage space on your phone, computer, or external storage devices. This allows you to make room for new photos and ensures that your devices operate efficiently.
- Improved Organization: Removing unwanted photos helps streamline your photo library and makes it easier to find and browse through your cherished memories. With fewer irrelevant or duplicate photos, you can focus on the best and most meaningful images.
- Enhanced Photo Quality: Deleting unnecessary photos ensures that you maintain a collection of high-quality images. By removing blurry, underexposed, or poorly composed photos, you can showcase your best work and eliminate distractions when viewing your photos.
- Reduced Clutter: Getting rid of unnecessary photos eliminates visual clutter and makes it easier to navigate through your photo collection. A clutter-free collection allows you to enjoy and share your photos without distractions.
- Effective Backup Management: When backing up your photos, deleting unnecessary ones helps optimize the backup process. By removing unwanted photos, you can reduce backup time, storage requirements, and costs associated with utilizing cloud storage services or external storage devices.
When deciding which photos to delete, consider the following guidelines:
- Duplicates: Remove duplicate photos that serve no purpose other than occupying additional storage space. Use software tools or manual sorting to identify and remove duplicates efficiently.
- Blurry or Unfocused Images: Delete photos that are out of focus, poorly composed, or too blurry to salvage. These photos generally do not contribute to the quality of your collection.
- Similar or Near-Identical Shots: If you have multiple photos that are nearly identical, choose the best one and delete the rest. This helps avoid redundancy and ensures that you keep the best representation of a particular moment or subject.
- Irrelevant or Irredeemable Photos: Remove any photos with no significant meaning or that are irrelevant to your collection. This could include accidental shots, test shots, or images that no longer hold any sentimental or informational value.
Remember to exercise caution when deleting photos and double-check your selection to avoid deleting any important or cherished images. Consider creating a backup of your entire photo library before performing any large-scale deletion to be on the safe side.
By regularly deleting unnecessary photos, you can keep your photo collection lean, organized, and optimized for future use, making it easier to manage and enjoy your most cherished memories.
Now that you have learned about deleting unnecessary photos, let’s address some common troubleshooting tips for storage issues.
Troubleshooting Storage Issues
While storing photos from your phone, you may encounter various storage-related issues. Here are some common storage issues and their corresponding troubleshooting steps:
- Insufficient Storage Space: If you run out of storage space on your phone, consider transferring your photos to a computer or external storage device to free up space. Alternatively, delete unnecessary apps, files, or documents to create more room for your photos.
- Syncing or Backup Failures: If you experience difficulties syncing or backing up your photos to cloud storage, check your internet connection. Ensure that you have a stable and reliable internet connection to facilitate the upload process. Restart the app or device if necessary and verify that you have sufficient storage space on your cloud storage account.
- Slow Data Transfer Speed: If you notice slow data transfer when transferring photos, check the USB cable and ports for any damage or debris. Try using a different cable or port to see if it improves the transfer speed. Additionally, close any unnecessary background applications or processes on your computer or phone that may be consuming resources.
- Corrupted or Inaccessible Files: If you encounter corrupted or inaccessible photo files, try using file repair tools or software to restore or repair the files. If the issue persists, you may need to revert to a backup copy of the affected files or consider seeking professional assistance for data recovery.
- Cloud Storage Quota Exceeded: If you reach your cloud storage quota, consider upgrading your storage plan to accommodate more photos. Alternatively, delete unnecessary files or purchase additional cloud storage space to continue your backup process.
- Device Compatibility Issues: When using external storage devices, ensure that your device is compatible with the storage device’s format (e.g., NTFS, FAT32). Some devices may require formatting before use, so be cautious as formatting will erase all existing data on the external storage device.
If you encounter persistent storage issues or are unsure how to troubleshoot a specific problem, consult the documentation or support resources provided by your device manufacturer, cloud storage provider, or external storage device manufacturer. They can provide specific instructions or assistance tailored to your particular situation.
Remember to regularly update and maintain your storage devices, including keeping your operating systems, apps, and cloud storage apps up to date. Regularly perform backups and ensure that your storage solutions have sufficient capacity for your growing photo collection.
By being proactive in troubleshooting storage issues, you can ensure a smooth and efficient photo storage and retrieval process, preserving your memories for years to come.
Now that we’ve covered troubleshooting, let’s summarize the key points of this article.
Conclusion
Storing photos from your phone is crucial for preserving your precious memories. In this article, we explored various storage options, including internal storage, cloud storage, and external storage devices, such as hard drives or SSDs. Each storage method has its own benefits and considerations, requiring you to assess your storage capacity, accessibility, security, convenience, and cost preferences to make the right choice.
Transferring photos to your computer allows you to free up space on your phone and create a backup. You can easily connect your phone to your computer, open the file explorer or finder, locate your phone, select and copy the desired photos, and paste them into your computer’s folder.
Backing up photos to cloud storage provides convenience, accessibility, and automatic backups. By choosing a cloud storage provider and enabling automatic backup, you can securely store your photos in the cloud, access them from any device, and easily sync changes across devices.
Using external hard drives or SSDs offers physical control and additional backup options. By connecting the external device to your computer, creating a folder structure, and transferring photos, you can safeguard your photos and have offline access whenever needed.
Organizing your photos is key to easy access and management. Whether you organize them by date, location, or using tags and keywords, a well-organized photo library allows you to quickly find and enjoy your favorite memories.
Deleting unnecessary photos periodically helps save storage space, improves organization, and enhances photo quality. By removing duplicates, blurry images, and irrelevant photos, you can maintain a streamlined and high-quality photo collection.
In case you encounter storage issues, troubleshoot them by ensuring sufficient space, stable internet connections, compatible devices, and proper device maintenance. Seek assistance from device manufacturers, cloud storage providers, or external storage device manufacturers if needed.
In conclusion, storing photos from your phone involves choosing the right storage method, transferring photos to a computer, utilizing cloud storage, using external devices, organizing your photos, deleting unnecessary ones, and troubleshooting storage issues effectively. By following these steps, you can safeguard your memories, free up space, and easily access and manage your photo collection for years to come.
Frequently Asked Questions about How To Store Photos From Phone
Was this page helpful?
At Storables.com, we guarantee accurate and reliable information. Our content, validated by Expert Board Contributors, is crafted following stringent Editorial Policies. We're committed to providing you with well-researched, expert-backed insights for all your informational needs.


0 thoughts on “How To Store Photos From Phone”