Articles
How To Tile Around A Window Recess
Modified: October 20, 2024
Learn how to tile around a window recess with our comprehensive articles. Expert advice and step-by-step instructions to ensure a professional finish.
(Many of the links in this article redirect to a specific reviewed product. Your purchase of these products through affiliate links helps to generate commission for Storables.com, at no extra cost. Learn more)
Introduction
Installing tile around a window recess can add a beautiful finishing touch to any room. It not only enhances the overall aesthetics but also provides protection to the window frame from moisture. While it may seem like a daunting task, with the right materials and a step-by-step approach, tiling around a window recess can be a manageable DIY project.
In this article, we will guide you through the process of tiling around a window recess, providing you with the necessary materials, expert tips, and a detailed step-by-step guide to ensure successful results. So, let’s get started!
Materials Needed
Before you begin, gather the following materials to ensure a smooth tiling process:
1. Tiles: Choose tiles that complement the overall décor and style of your space.
2. Tile adhesive: Select a high-quality tile adhesive suitable for the type of tiles you are using.
3. Tile spacers: These will help you maintain an even and consistent spacing between the tiles.
4. Tile cutter or wet saw: Depending on the type of tiles you are using, you will need a tile cutter or wet saw to make accurate cuts.
5. Grout: Choose a grout color that complements your tiles and fills the gaps between them.
6. Grout float: This tool will help you apply the grout smoothly.
7. Sponge: Use a sponge to clean the excess grout from the tiles.
8. Tile sealer: A tile sealer will protect the grout and tiles from stains and moisture.
9. Measuring tape and level: These tools will assist you in accurately measuring and ensuring level installation.
10. Safety equipment: Don’t forget to wear safety glasses and gloves while handling tools and materials.
Now that you have gathered all the necessary materials, let’s move on to the step-by-step process of tiling around a window recess.
Key Takeaways:
- Proper preparation is key. Measure accurately, choose high-quality materials, and follow step-by-step instructions to achieve a professional and durable tile installation around a window recess.
- Attention to detail pays off. From precise tile cutting to thorough cleaning and finishing, each step contributes to a stunning and long-lasting tiled area.
Read more: How To Tile Around Range Hood
Materials Needed
Before you begin, gather the following materials to ensure a smooth tiling process:
1. Tiles: Choose tiles that complement the overall décor and style of your space. Consider the size, color, and texture of the tiles, as well as their durability and moisture resistance for areas prone to water exposure, such as bathrooms or kitchens.
2. Tile adhesive: Select a high-quality tile adhesive suitable for the type of tiles you are using. The adhesive should be compatible with the surface you are tiling on, whether it is drywall, cement board, or a similar substrate. Consult with experts at your local home improvement store to determine the proper adhesive for your project.
3. Tile spacers: These small, plastic pieces are essential for maintaining an even and consistent spacing between the tiles. The size of the spacers will depend on the desired grout line width. Common sizes range from 1/16 inch to 1/4 inch.
4. Tile cutter or wet saw: Depending on the type of tiles you are using, you will need a tile cutter or wet saw to make accurate cuts. A manual tile cutter is suitable for ceramic or porcelain tiles, while a wet saw with a diamond blade is necessary for cutting more robust materials like natural stone or glass.
5. Grout: Choose a grout color that complements your tiles and fills the gaps between them. Grout comes in various colors and types, including sanded and unsanded. Sanded grout is suitable for wider grout lines, while unsanded grout is used for thinner lines.
6. Grout float: This tool is essential for applying the grout smoothly and evenly. It features a rubber pad that distributes the grout into the gaps between the tiles.
7. Sponge: Use a damp sponge to clean the excess grout from the tiles after applying it. Make sure the sponge is not too wet to avoid washing away the grout.
8. Tile sealer: Applying a tile sealer is optional but recommended. It helps protect the grout and tiles from stains and moisture, extending their lifespan and making them easier to clean and maintain. Select a sealer appropriate for the type of tiles and grout you have.
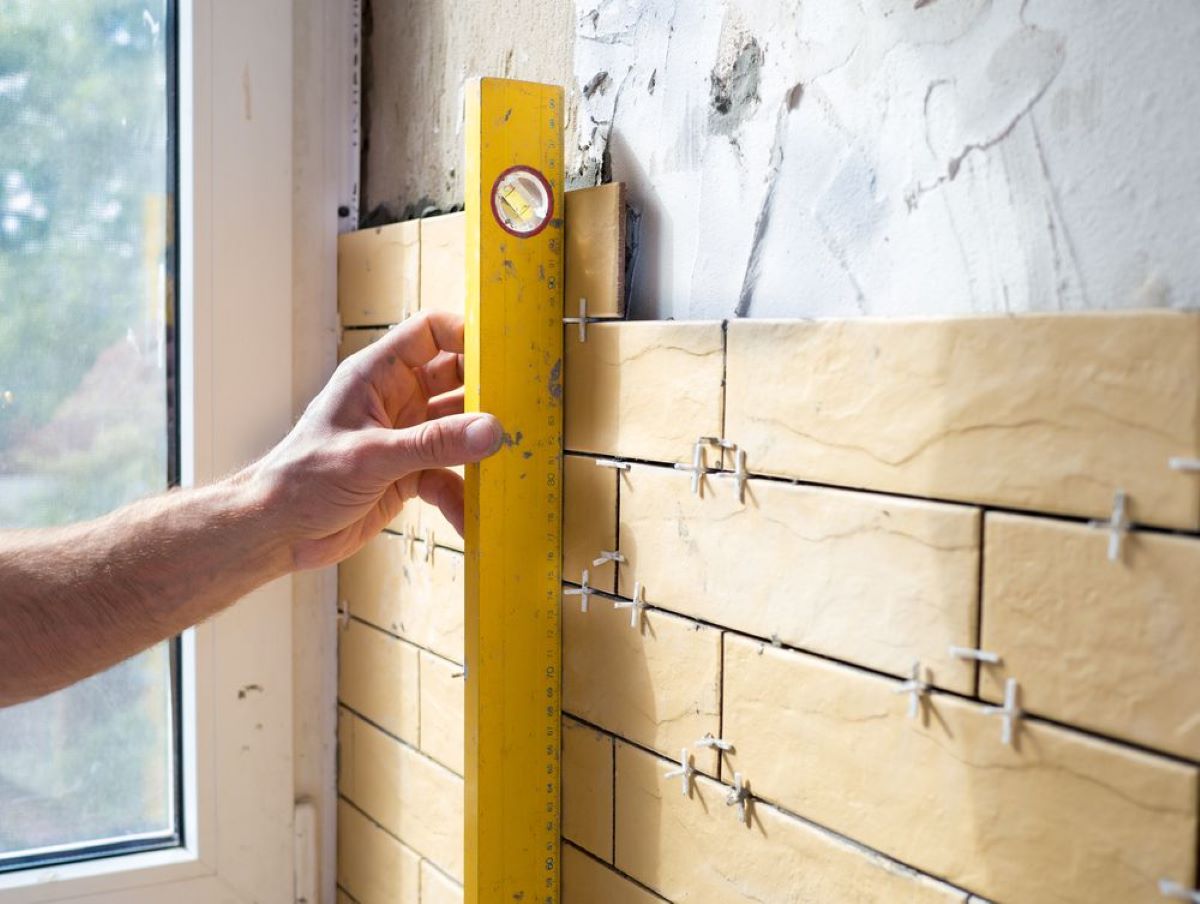
9. Measuring tape and level: These tools are crucial for accurate measuring and ensuring level installation. Use a measuring tape to determine the tile dimensions, and a level to verify that the tiles are correctly aligned.
10. Safety equipment: Don’t forget to wear safety glasses and gloves while handling tools and materials. It is essential to protect yourself from any potential accidents or injuries that may occur during the tiling process.
Now that you have gathered all the necessary materials, you are ready to move on to the step-by-step process of tiling around a window recess.
Step 1: Measure and Prepare the Tile
Before you start tiling around a window recess, it’s essential to measure the area accurately and prepare the tiles accordingly. Follow these steps to ensure a precise and seamless installation:
1. Measure the window recess: Use a measuring tape to determine the height and width of the window recess. Take precise measurements, accounting for any irregularities or uneven surfaces.
2. Calculate tile layout: Calculate the number of tiles you will need to cover the window recess. Take into account the tile size, the desired grout line width, and any necessary adjustments for cutting tiles to fit around corners or obstacles.
3. Prepare the tiles: If you need to cut any tiles to fit the window recess, mark them with a pencil or tile marker. Use a tile cutter or wet saw to make precise cuts according to your measurements.
4. Lay out the tiles: Lay out the tiles along the window recess to ensure they fit properly and provide an aesthetically pleasing arrangement. Adjust as necessary to achieve the desired tile pattern and spacing.
5. Dry-fit the tiles: Before applying adhesive, dry-fit the tiles in the window recess to verify their placement and make any final adjustments. This step helps ensure that the tiles will line up correctly and fit snugly before permanently adhering them.
6. Prepare the tile adhesive: Follow the manufacturer’s instructions to prepare the tile adhesive. Ensure that the consistency is correct and allows for proper adhesion.
7. Pre-soak the tiles: If you are working with porous tiles such as natural stone or unglazed ceramics, pre-soak them in water before applying adhesive. This step prevents the tiles from absorbing moisture from the adhesive too quickly, ensuring a more secure bond.
By measuring accurately and properly preparing your tiles, you set the stage for a successful tiling project. Taking the time to plan and prepare saves you time and effort in the long run and helps achieve a professional-looking finish around your window recess.
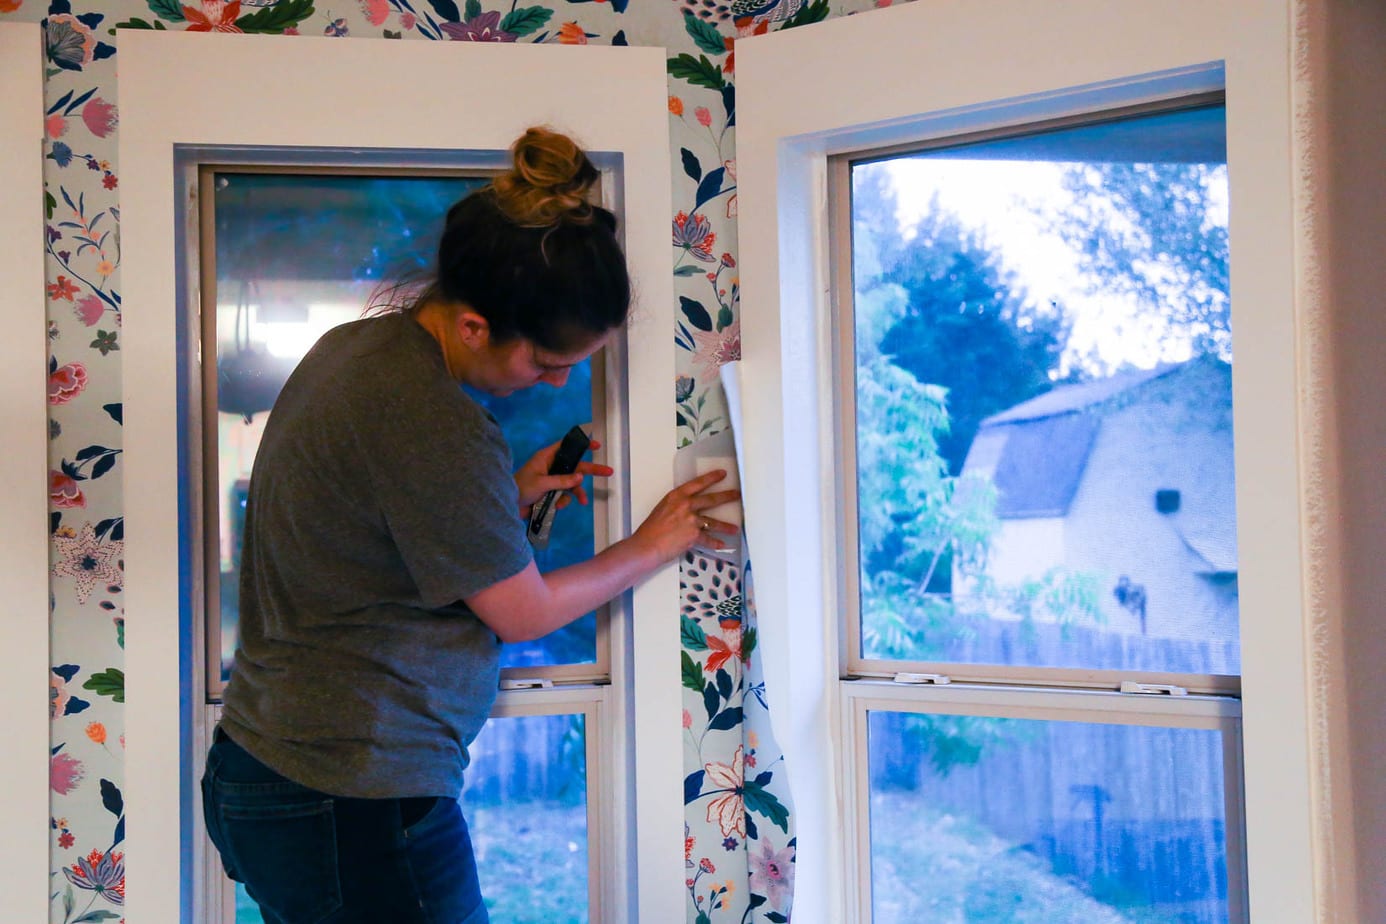
Step 2: Prepare the Window Recess
Preparing the window recess is a crucial step in tiling around a window. Proper preparation ensures a sturdy base for the tiles and helps achieve a professional and long-lasting result. Follow these steps to prepare the window recess:
1. Remove any existing materials: If there is any existing tile, wallpaper, or paint on the window recess, remove it using the appropriate tools. Ensure that the surface is clean, flat, and free from any debris or loose material.
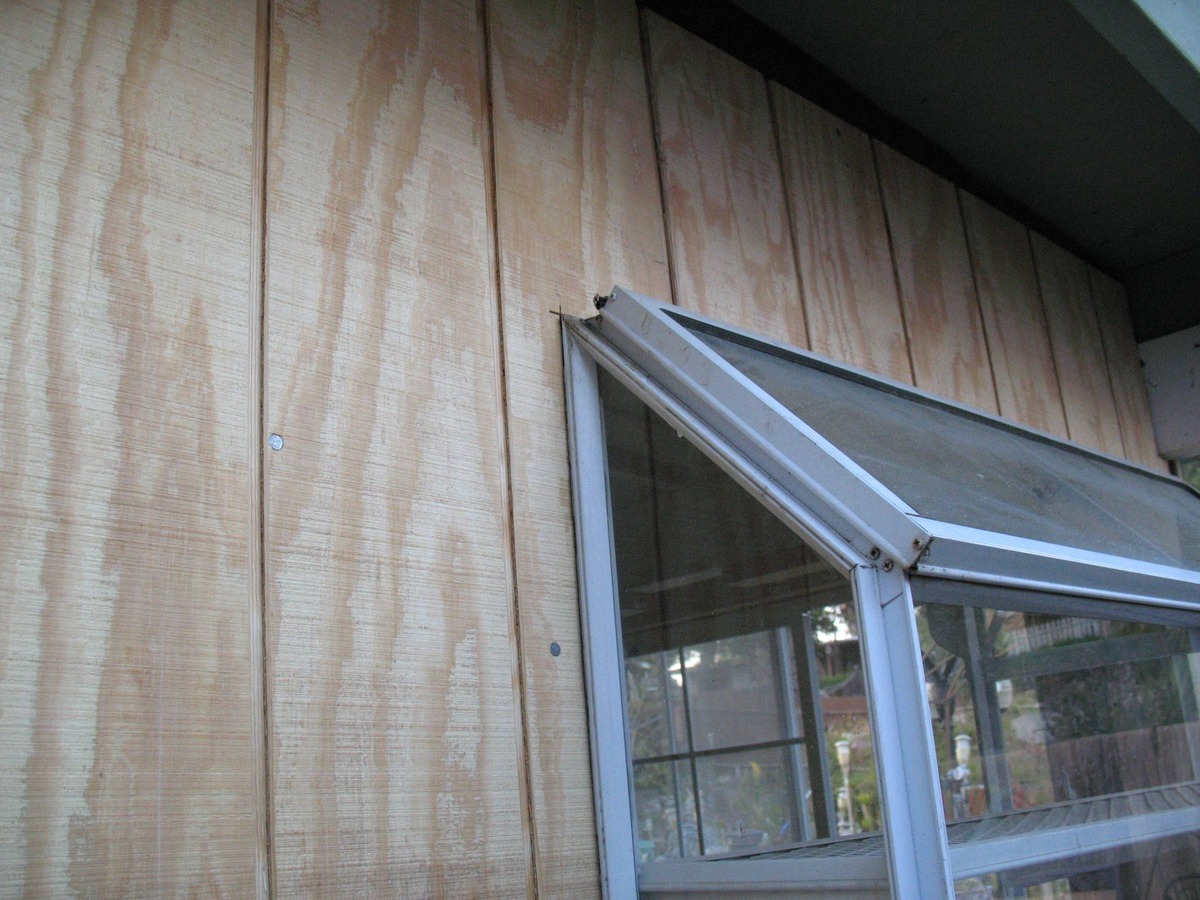
2. Repair any damage: Inspect the window recess for any cracks, holes, or uneven areas. Fill in any gaps or imperfections with a suitable filler or patching compound. Smooth out the repaired areas with sandpaper or a putty knife, ensuring a level surface.
3. Clean the window recess: Thoroughly clean the window recess, removing any dirt, dust, or grease. Use a mild detergent and warm water to wash the surface. Rinse the area and allow it to dry completely before proceeding.
4. Apply a primer: In some cases, it may be necessary to apply a primer to the window recess before tiling. This is especially important if you are working on a porous or uneven surface. Consult with experts at your local home improvement store to determine if a primer is necessary and choose the appropriate type.
5. Protect the surrounding areas: Use painter’s tape to protect any adjacent surfaces, such as window frames or walls, from getting adhesive or grout on them. This step helps maintain a clean and polished look, preventing any damage to surrounding areas.
By properly preparing the window recess, you ensure a stable and suitable surface for tiling. Taking the time to repair, clean, and prime the area sets the foundation for a successful tiling project and helps achieve a professional finish around your window recess.
Step 3: Apply Tile Adhesive
Applying tile adhesive is a crucial step in tiling around a window recess. Proper application of adhesive ensures a strong bond between the tiles and the prepared surface. Follow these steps to apply tile adhesive:
1. Choose the right adhesive: Select a high-quality tile adhesive that is suitable for the type of tiles you are using and the surface you are tiling on. Consult with experts at your local home improvement store to determine the best adhesive for your project.
2. Mix the adhesive: Follow the manufacturer’s instructions to mix the tile adhesive correctly. Use a mixing paddle and a drill to achieve a smooth and consistent texture. Avoid mixing more adhesive than you can use within the working time recommended by the manufacturer.
3. Apply the adhesive: Use a notched trowel to apply the adhesive to the prepared window recess. Hold the trowel at a slight angle and spread the adhesive evenly over a small section of the recess. Make sure to create ridges or grooves in the adhesive using the notched edge of the trowel. This helps ensure a good bond between the tiles and the adhesive.
4. Start placing the tiles: Begin placing the tiles onto the adhesive, starting from the bottom and working your way up. Press each tile firmly into the adhesive, wiggling it slightly to ensure full coverage and a strong bond. Use tile spacers to maintain consistent spacing between the tiles.
5. Check for level: Use a level to ensure that the tiles are horizontal and vertical. Adjust as needed by applying slight pressure or lifting and resetting the tiles.
6. Clean up excess adhesive: As you work, periodically check for any adhesive that may squeeze through the gaps between the tiles. Immediately remove any excess adhesive with a damp cloth or sponge before it dries.
7. Continue tiling: Repeat the process of applying adhesive and placing tiles section by section until the entire window recess is tiled. Work in manageable sections to ensure that the adhesive does not dry before you can place the tiles.
By applying tile adhesive correctly, you create a secure and durable bond between the tiles and the window recess. Take your time and work in small sections to ensure a smooth and efficient tiling process. With the adhesive in place, you are now ready to move on to the next step: installing the tiles.
When tiling around a window recess, start by measuring and cutting tiles to fit around the window. Use tile spacers to ensure even spacing, and consider using a tile trim to create a clean edge around the window. Always double-check your measurements before cutting to avoid mistakes.
Read more: How To Replace Tile Around Fireplace
Step 4: Install the Tiles
Installing the tiles is an exciting step in the tiling process. It brings your vision to life and transforms the window recess into a beautiful focal point. Follow these steps to install the tiles:
1. Place the first tile: Start by placing the first tile at the bottom of the window recess, pressing it firmly into the adhesive. Ensure that it is aligned with the guidelines you established during the tile layout process.
2. Continue with the next tiles: Place the subsequent tiles, working your way up the window recess. Press each tile firmly into the adhesive, using tile spacers to maintain even spacing between them. Check periodically with a level to verify that the tiles are straight and align with the desired pattern.
3. Fill in the corners: When reaching the corners of the window recess, you may need to cut tiles to fit. Use a tile cutter or wet saw to make precise cuts that align with the layout. Apply adhesive to the back of each cut tile and press it into place, ensuring a snug fit.
4. Adjust tile spacing: As you work, periodically check and adjust the tile spacing using the tile spacers. Ensure that the grout lines are consistent and aesthetically pleasing.
5. Trim tiles if necessary: If the tiles at the top row of the window recess are too large, you may need to trim them to fit. Measure and mark the tiles, and then use a tile cutter or wet saw to make the necessary cuts. Always wear safety glasses and follow the manufacturer’s instructions for using cutting tools.
6. Clean excess adhesive: Throughout the installation process, be vigilant about cleaning up any excess adhesive or smudges on the tiles. Use a damp sponge or cloth to remove the adhesive before it dries.
7. Double-check alignment: Before the adhesive sets, carefully double-check the alignment and position of the tiles. Make any necessary adjustments to ensure a flush and seamless installation.
By following these steps, you can install the tiles around the window recess with precision and confidence. Take your time to ensure that each tile is placed carefully and aligned correctly. With the tiles in position, you are ready to move on to the next step: cutting tiles to fit around the window recess.
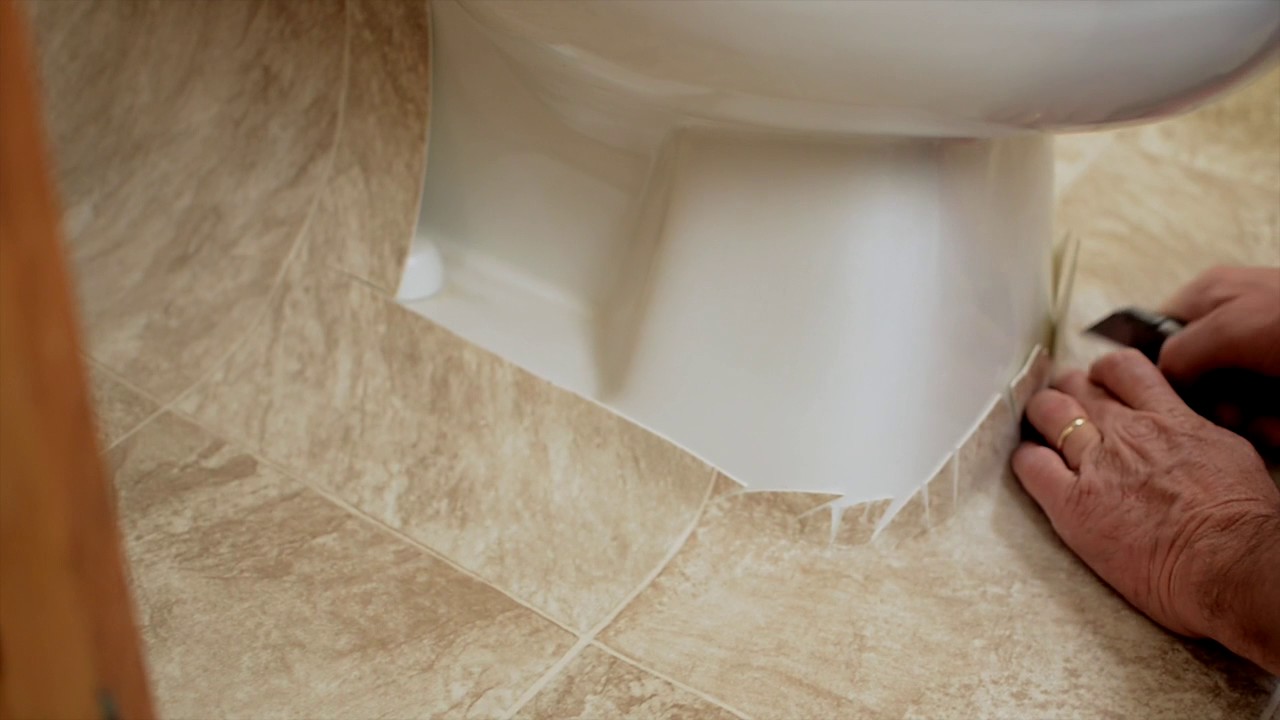
Step 5: Cut Tiles to Fit Around the Window Recess
Cutting tiles to fit around the window recess is often necessary to achieve a professional and seamless look. Follow these steps to cut tiles accurately and ensure a precise fit:
1. Measure the space: Use a measuring tape to measure the dimensions of the space that needs a tile cut. Take precise measurements, accounting for any irregularities or obstacles within the window recess.
2. Mark the tile: Transfer the measurements onto the tile that needs to be cut. Use a pencil or tile marker to create clear and accurate cutting lines on the tile’s surface.
3. Safety first: Put on safety glasses and gloves to protect yourself. When using a tile cutter or wet saw, always follow the manufacturer’s safety guidelines and instructions.
4. Tile cutter method: If you’re using a tile cutter, place the tile inside the cutter along the cutting line. Apply gentle pressure to score the tile’s surface. Once scored, use the cutter’s handle to apply pressure on both sides of the score line, snapping the tile in two along the line.
5. Wet saw method: If you’re using a wet saw, set it up according to the manufacturer’s instructions. Align the marked line on the tile with the cutting guide on the wet saw. Slowly push the tile through the saw, allowing the blade to cut through the tile. Ensure that you maintain a steady and controlled motion throughout the cutting process.
6. Finishing touches: After cutting the tile, smooth any rough edges using sandpaper or a tile file. This step helps achieve a clean and professional look.
7. Test the fit: Place the cut tile into the window recess to test its fit. Make any necessary adjustments by further trimming the tile if needed. It’s essential to have a precise fit for a seamless appearance.
8. Repeat the process: If multiple tiles need to be cut to fit around the window recess, repeat the measuring, marking, and cutting process for each tile. Take your time to ensure accuracy and consistency.
By carefully measuring and cutting the tiles, you can ensure a precise fit around the window recess. Remember to prioritize safety and follow the manufacturer’s instructions when using cutting tools. With the tiles cut and fitted, you are ready to move on to the next step: allowing the adhesive to dry.
Step 6: Allow the Adhesive to Dry
Allowing the adhesive to dry is a critical step in the tiling process. It ensures that the tiles are firmly bonded to the surface and prevents any movement or displacement. Follow these steps to allow the adhesive to dry properly:
1. Check the manufacturer’s instructions: Refer to the tile adhesive manufacturer’s guidelines for recommended drying time. The drying time can vary depending on the type of adhesive used and environmental conditions. It is important to follow these instructions for the best results.
2. Avoid traffic on the tiled area: During the drying period, avoid walking on the tiled area to prevent shifting or displacement of the tiles. Take care to protect the newly tiled surface from any unnecessary pressure or impact.
3. Maintain proper ventilation: Ensure that the room is properly ventilated to facilitate drying. Good ventilation will help the adhesive cure properly and prevent any moisture buildup that could affect the tile installation.
4. Prevent water exposure: Avoid water exposure to the newly tiled area during the drying period. Keep the space dry and avoid any water-related activities that could compromise the adhesive’s integrity.
5. Regularly inspect the tiles: Periodically inspect the tiles to ensure they remain in place and aligned correctly. If you notice any tiles that have shifted or become loose, address the issue promptly. If necessary, consult a professional for guidance on how to fix the problem.
6. Be patient: Allow sufficient time for the adhesive to dry completely. Rushing this step could negatively impact the overall outcome of your tiling project. Follow the recommended drying time to ensure that the adhesive sets and provides a strong bond.
By allowing the adhesive to dry properly, you ensure that the tiles are securely attached to the surface, minimizing the risk of future problems. Patience and adherence to the manufacturer’s instructions are key during this crucial step. Once the adhesive is fully dried, you can move on to the next step: applying grout.
Step 7: Apply Grout
Applying grout is an essential step in the tiling process that adds strength and stability to the tiled area while enhancing its overall appearance. Follow these steps to apply grout effectively:
1. Choose the right grout: Select a grout color that complements your tiles and desired aesthetic. Consider factors such as tile spacing, grout line thickness, and the location of the tiled area (e.g., bathroom or kitchen) when choosing the type of grout. Consult with experts or refer to the manufacturer’s instructions for guidance.
2. Prepare the grout mixture: Follow the manufacturer’s instructions to prepare the grout mixture. Mix the grout thoroughly until it reaches a smooth and consistent texture. Take care to achieve the proper ratio of water to grout to ensure optimal results.
3. Apply the grout: Use a grout float to apply the grout mixture to the tiled area. Hold the float at a 45-degree angle and spread the grout diagonally across the tiles, ensuring that the grout fills all the spaces and gaps between them. Work in small sections to prevent the grout from drying before you can finish.
4. Remove excess grout: After applying the grout, use the grout float at a 45-degree angle to scrape off the excess grout from the tile surfaces. Make sure to wipe away the excess grout before it dries, as it can be more challenging to remove later.
5. Clean the tiles: Wait approximately 15-20 minutes for the grout to set slightly. Then, use a damp sponge or cloth to gently wipe away any remaining grout residue from the tile surfaces. Rinse the sponge frequently and continue cleaning until the tiles are free from grout haze.
6. Cure the grout: Allow the grout to cure as per the manufacturer’s instructions. This typically involves keeping the area dry and protecting it from foot traffic for a specified period. Follow the recommended curing time to ensure that the grout fully sets and hardens for long-lasting results.
7. Apply sealer (optional): Depending on the type of grout used and personal preference, you may choose to apply a grout sealer. A grout sealer provides an additional layer of protection against stains and moisture. Follow the manufacturer’s instructions for proper application and drying time.
By applying grout correctly, you ensure the stability and durability of your tiled area while enhancing its visual appeal. Proper grouting also reduces the potential for water damage and keeps the tile installation looking fresh and well-maintained. With the grout applied, you are nearly finished with your tiling project and can move on to the final step: cleaning and finishing the tile.
Read more: How To Apply Stucco Around Windows
Step 8: Clean and Finish the Tile
Cleaning and finishing the tile is the final step in your tiling project. It is crucial for achieving a polished and professional look. Follow these steps to clean and finish the tile:
1. Clean the tile surface: Once the grout has dried and cured, thoroughly clean the tile surfaces. Use a mild tile cleaner or a mix of water and vinegar to remove any remaining grout haze or stubborn stains on the tiles. Scrub gently with a soft sponge or brush. Rinse with clean water and dry with a clean cloth.
2. Polish the tile: Depending on the type of tiles you have installed, you may want to polish them to enhance their shine and luster. Use a suitable tile polish or a microfiber cloth to gently buff the tiles, following the manufacturer’s instructions. This step can make the tiles appear even more vibrant and reflective.
3. Apply tile sealer (optional): Applying a tile sealer can protect the tiles and grout from staining and moisture. If you choose to use a sealer, ensure that the tiles and grout are clean and dry before application. Follow the manufacturer’s instructions for proper application and drying time. Wipe away any excess sealer from the tiles to avoid a sticky residue.
4. Inspect the tile installation: Take a close look at the tiled area to ensure that everything is in order. Check for any loose tiles, grout lines that may need touch-ups, or any other issues that need to be addressed.
5. Maintenance tips: Once the tile installation is complete, it’s important to maintain its appearance and longevity. Regularly clean the tiles with a mild cleaner and avoid using abrasive materials that could scratch the surfaces. Promptly address any spills or stains to prevent them from setting into the tiles or grout.
6. Enjoy your beautifully tiled area: Now that you have successfully cleaned and finished the tile, take a step back and admire your hard work. Whether it’s a kitchen backsplash, bathroom wall, or any other tiled space, you can now fully enjoy the aesthetics and functionality of your newly installed tiles.
By cleaning and finishing the tile, you ensure that your tiling project looks its best and remains in excellent condition for years to come. Regular maintenance will help preserve the beauty of the tiles and keep your space looking fresh and inviting. Congratulations on completing your tiling project!
Frequently Asked Questions about How To Tile Around A Window Recess
Was this page helpful?
At Storables.com, we guarantee accurate and reliable information. Our content, validated by Expert Board Contributors, is crafted following stringent Editorial Policies. We're committed to providing you with well-researched, expert-backed insights for all your informational needs.


0 thoughts on “How To Tile Around A Window Recess”