Articles
How To Change Recessed Light Bulb
Modified: October 20, 2024
Learn how to change a recessed light bulb with step-by-step instructions in this informative article. Find out the best methods and tips to easily replace your recessed light bulb.
(Many of the links in this article redirect to a specific reviewed product. Your purchase of these products through affiliate links helps to generate commission for Storables.com, at no extra cost. Learn more)
Introduction
Changing a recessed light bulb may seem like a daunting task for some, but fear not! With a little bit of knowledge and the right approach, you can easily replace a recessed light bulb yourself. Whether you are trying to replace a burnt-out bulb or looking to upgrade to a more energy-efficient option, this guide will walk you through the process step by step.
Recessed lighting, also known as can lights or downlights, is a popular choice for many homeowners due to its sleek and modern appearance. These lights are installed into the ceiling, creating a seamless and unobtrusive lighting solution. However, when it comes time to replace a bulb, it can be tricky to figure out how to access and remove it. But don’t worry, we’ve got you covered!
Before we dive into the step-by-step process, it’s important to note a few key safety precautions. Whenever you are dealing with electrical components, always make sure to turn off the power supply before starting any work. This will reduce the risk of electrical shock and ensure your safety.
Now that we have covered the necessary safety precautions, let’s move on to the actual steps involved in changing a recessed light bulb. By following these instructions carefully, you’ll be able to successfully replace the bulb and restore your lighting to its former glory.
Key Takeaways:
- Prioritize safety by turning off the power supply and wearing protective gear when changing a recessed light bulb to ensure a successful and accident-free process.
- Consider energy-efficient options like LED or CFL bulbs to not only brighten up your space but also contribute to a greener and more sustainable environment.
Safety Precautions
Before you begin the process of changing a recessed light bulb, it is crucial to prioritize safety. Working with electricity can be dangerous, so taking the necessary precautions is paramount to avoiding accidents or injuries. Here are some important safety measures to keep in mind:
- Turn off the power: Prior to any work, locate the circuit breaker or fuse box and turn off the power supply to the room where the recessed light fixture is located. This will ensure that there is no electrical current flowing to the fixture, reducing the risk of electric shock.
- Use protective gear: It is always a good idea to wear protective gear such as gloves and safety goggles when dealing with electrical components. This will protect you from any potential hazards, such as broken glass or electrical sparks.
- Don’t touch hot bulbs: If you have recently used the light fixture, give the bulb ample time to cool down before attempting to replace it. Hot bulbs can cause burns, so always use caution when handling them.
- Don’t force anything: If you encounter any resistance or difficulty while removing the trim or the bulb, do not force it. Applying too much pressure can result in damage to the fixture or the bulb. Take your time and be gentle to avoid any mishaps.
- Ask for assistance if needed: If you are unsure about any aspect of the process or you are uncomfortable working with electricity, it is always wise to seek assistance from a qualified professional. They will have the necessary expertise and experience to handle the task safely and efficiently.
Remember, safety should always be your top priority. By following these precautions, you can ensure a safer and more successful experience when changing a recessed light bulb. Let’s move on to the step-by-step process of replacing the bulb!
Step 1: Identify the Type of Recessed Light Fixture
Before you begin to change a recessed light bulb, it’s important to identify the type of fixture you have. This will help you determine the proper approach for accessing and replacing the bulb. There are generally two types of recessed light fixtures:
- Fixed Trim: If your recessed light fixture has a fixed trim, it means that the trim is permanently attached to the housing. In this case, the bulb is accessed by removing the trim itself. The trim may be held in place by clips or screws, so make sure to inspect it closely to see how it is secured.
- Removable Trim: Some recessed light fixtures have a removable trim, which allows for easier access to the bulb. In this case, you will need to remove the trim to reach the bulb. The trim is typically held in place by springs or wire clips. Carefully examine the trim to identify the mechanism used to secure it.
Identifying the type of recessed light fixture you have will guide you in the subsequent steps of the process. Take a close look at the fixture and determine whether it has a fixed trim or a removable trim.
If you are unsure or unable to determine the type of fixture you have, consult the manufacturer’s instructions or seek assistance from a professional. They will be able to provide guidance and clarify any uncertainties.
Once you have identified the type of recessed light fixture, you are ready to proceed to the next step: turning off the power supply. This is a crucial safety measure that must be followed to ensure your well-being. Let’s move on to Step 2.
Step 2: Turn off the Power Supply
Before you begin working on the recessed light fixture, it is essential to turn off the power supply. This step is crucial to prevent any electrical accidents or injuries. Follow these steps to safely turn off the power:
- Locate the circuit breaker or fuse box: Identify the circuit breaker or fuse box that controls the power supply to the room where the recessed light fixture is located. In most cases, the circuit breaker panel is situated in the basement, garage, or utility room of your home.
- Turn off the appropriate circuit breaker: Once you have located the circuit breaker panel, look for the breaker that corresponds to the room where the recessed light fixture is installed. Flip the switch to the “off” position to cut off electricity to the fixture.
- Double-check the power: To ensure that the power has been properly switched off, test the light switch connected to the recessed light fixture. If the light does not turn on, it means you have successfully turned off the power supply.
- Verify the power: For an extra layer of precaution, use a voltage tester to confirm that there is no electrical current flowing to the recessed light fixture. Simply touch the tester to the wires or connections inside the fixture and ensure that there is no voltage detected.
Turning off the power supply eliminates the risk of electric shock or other electrical accidents while you work on the recessed light fixture. Remember, safety should always be your top priority. Take the time to perform these steps diligently before proceeding to the next steps.
Now that you have successfully turned off the power supply, you can move on to Step 3: removing the trim or cover. This will grant you access to the old light bulb that needs to be replaced. Let’s continue on our journey of replacing the recessed light bulb!
Step 3: Remove the Trim or Cover
With the power supply safely turned off, you are now ready to remove the trim or cover of the recessed light fixture. The trim or cover is the component that conceals the bulb and provides a finished look to the fixture. Follow these steps to remove the trim or cover:
- Inspect the trim: Take a close look at the trim or cover of the recessed light fixture. Look for any visible screws, clips, or springs that are holding the trim in place. Note the specific mechanism used to secure the trim, as it may vary depending on the fixture.
- Remove screws or clips: If your recessed light fixture has screws or clips securing the trim, use the appropriate tool, such as a screwdriver or pliers, to remove them. Unscrew or unclip the trim carefully, making sure to keep track of any small pieces or hardware.
- Release spring-loaded trim: In the case of spring-loaded trim, applying gentle pressure or squeezing the springs will release the trim. Use your fingers or a small flathead screwdriver to compress and release the springs, allowing the trim to come loose.
- Detach the trim: Once the screws, clips, or springs are released, carefully pull or twist the trim to detach it from the recessed light fixture. Be cautious not to force or damage the trim during this step.
As you remove the trim or cover, some fixtures may require a slight twist or turn to disengage from the housing. Pay close attention to any specific instructions or indications provided by the manufacturer.
With the trim or cover successfully removed, you have now gained access to the old light bulb inside the recessed light fixture. In the next step, we will guide you through the process of removing the old bulb safely. Let’s move on to Step 4!
Before changing a recessed light bulb, make sure to turn off the power to the fixture at the circuit breaker to avoid the risk of electric shock. Use a stable ladder and wear gloves to protect your hands from broken glass.
Read more: How To Change A Light Bulb
Step 4: Remove the Old Light Bulb
Now that you have removed the trim or cover of the recessed light fixture, it’s time to proceed with removing the old light bulb. Follow these steps to ensure a safe and smooth removal process:
- Inspect the bulb: Before removing the old light bulb, take a moment to examine it. Look for any signs of damage or discoloration. If the bulb appears to be broken, cracked, or has blackened areas, avoid touching it directly to prevent any potential injuries
- Wear gloves (optional): If you prefer an extra layer of protection, you can wear gloves while handling the old light bulb. This will help prevent any accidental cuts or injuries in case the bulb breaks during removal.
- Unscrew the bulb: In most cases, recessed light bulbs are screwed into a socket. Carefully grip the bulb, and gently twist it counterclockwise to loosen and remove it from the socket. Avoid applying excess force to prevent the bulb from breaking.
- Dispose of the old bulb: Once the old bulb is removed, safely dispose of it in accordance with your local recycling guidelines or regulations. It’s important to properly dispose of old light bulbs to minimize any environmental impact.
As you remove the old light bulb, it’s common for some fixtures to have a trim with an attached socket assembly. In such cases, the bulb and socket will be removed together as a unit. Simply twist the assembly counterclockwise to detach it from the housing and then proceed with disposing of the bulb accordingly.
With the old light bulb successfully removed, you are now one step closer to replacing it with a new one. In the next step, we will guide you through the process of installing the new light bulb. Let’s move on to Step 5!
Step 5: Install the New Light Bulb
Now that you have successfully removed the old light bulb from the recessed light fixture, it’s time to install the new one. Follow these steps to ensure a proper and secure installation:
- Select the right bulb: Before installing the new light bulb, make sure you have chosen the correct type and wattage for your recessed light fixture. Most fixtures require standard screw-in bulbs, while others may require specific types such as GU10 or MR16. Refer to the manufacturer’s instructions or consult a lighting professional if you are unsure.
- Hold the bulb correctly: When handling the new light bulb, make sure to hold it by the base and avoid touching the glass part. Touching the glass can leave fingerprints and oils, which can reduce the lifespan of the bulb.
- Align the base and socket: Align the pins or base of the bulb with the corresponding slots or sockets in the fixture. Carefully insert the light bulb into the socket, ensuring a snug and secure fit. For screw-in bulbs, rotate the bulb clockwise until it is fully tightened.
- Don’t overtighten: While it’s important to ensure a secure connection, be careful not to overtighten the bulb. Applying excessive force can damage the bulb or the socket, making it difficult to remove in the future.
- Test the bulb: Once the new light bulb is installed, turn the power supply back on, and test the recessed light fixture to ensure it is working properly. If the bulb does not light up, double-check the connection and make sure the power supply is switched on.
When selecting a new light bulb, consider energy-efficient options such as LED or CFL bulbs. These types of bulbs consume less energy and have a longer lifespan, making them environmentally friendly and cost-effective in the long run.
With the new light bulb securely installed, you’re almost done! In the next step, we will guide you through replacing the trim or cover to complete the process. Let’s move on to Step 6!
Step 6: Replace the Trim or Cover
Now that you have successfully installed the new light bulb in the recessed light fixture, it’s time to replace the trim or cover. Follow these steps to ensure a proper and secure reinstallation:
- Inspect the trim: Before replacing the trim or cover, check for any dust or debris that may have accumulated during the bulb replacement process. Wipe it clean if necessary, ensuring a clean and polished appearance.
- Align the trim: Align the trim with the opening of the recessed light fixture and position it correctly. For fixed trim, make sure the clips or screws line up with the corresponding slots or holes on the housing. For removable trim, ensure the wire clips or springs are properly aligned with the fixture.
- Secure the trim: Depending on the type of trim, secure it in place using the appropriate method. For fixed trim, reattach any screws or clips and tighten them until the trim is firmly in place. For removable trim, press or attach the wire clips or release the springs to engage and secure the trim against the ceiling.
- Ensure a flush fit: Make sure the trim sits flush against the ceiling, without any gaps or misalignments. This will create a seamless look and ensure proper functionality of the recessed light fixture.
When replacing the trim, take care not to overtighten any screws or clips as this can damage the fixture or the trim itself. Pay attention to any specific instructions provided by the manufacturer for securing the trim in place.
With the trim or cover properly replaced, your recessed light fixture is almost back to its original state. In the next step, we will guide you through turning the power supply back on, allowing you to enjoy your newly installed light bulb. Let’s move on to Step 7!
Step 7: Turn the Power Back On
Congratulations! You have successfully replaced the light bulb in your recessed light fixture. The final step is to turn the power supply back on, allowing the light to illuminate your space. Follow these steps to safely restore the power:
- Double-check the installation: Before restoring the power supply, take a quick moment to ensure that the new light bulb is securely installed and the trim or cover is properly replaced. Check for any loose connections or misalignments that may cause issues once the power is turned on.
- Return to the circuit breaker: Go back to the circuit breaker or fuse box where you turned off the power in Step 2. Locate the breaker that corresponds to the room or area where the recessed light fixture is located.
- Turn on the breaker: Flip the circuit breaker switch back to the “on” position to restore the power supply to the room. This will provide electricity to the recessed light fixture, allowing it to function.
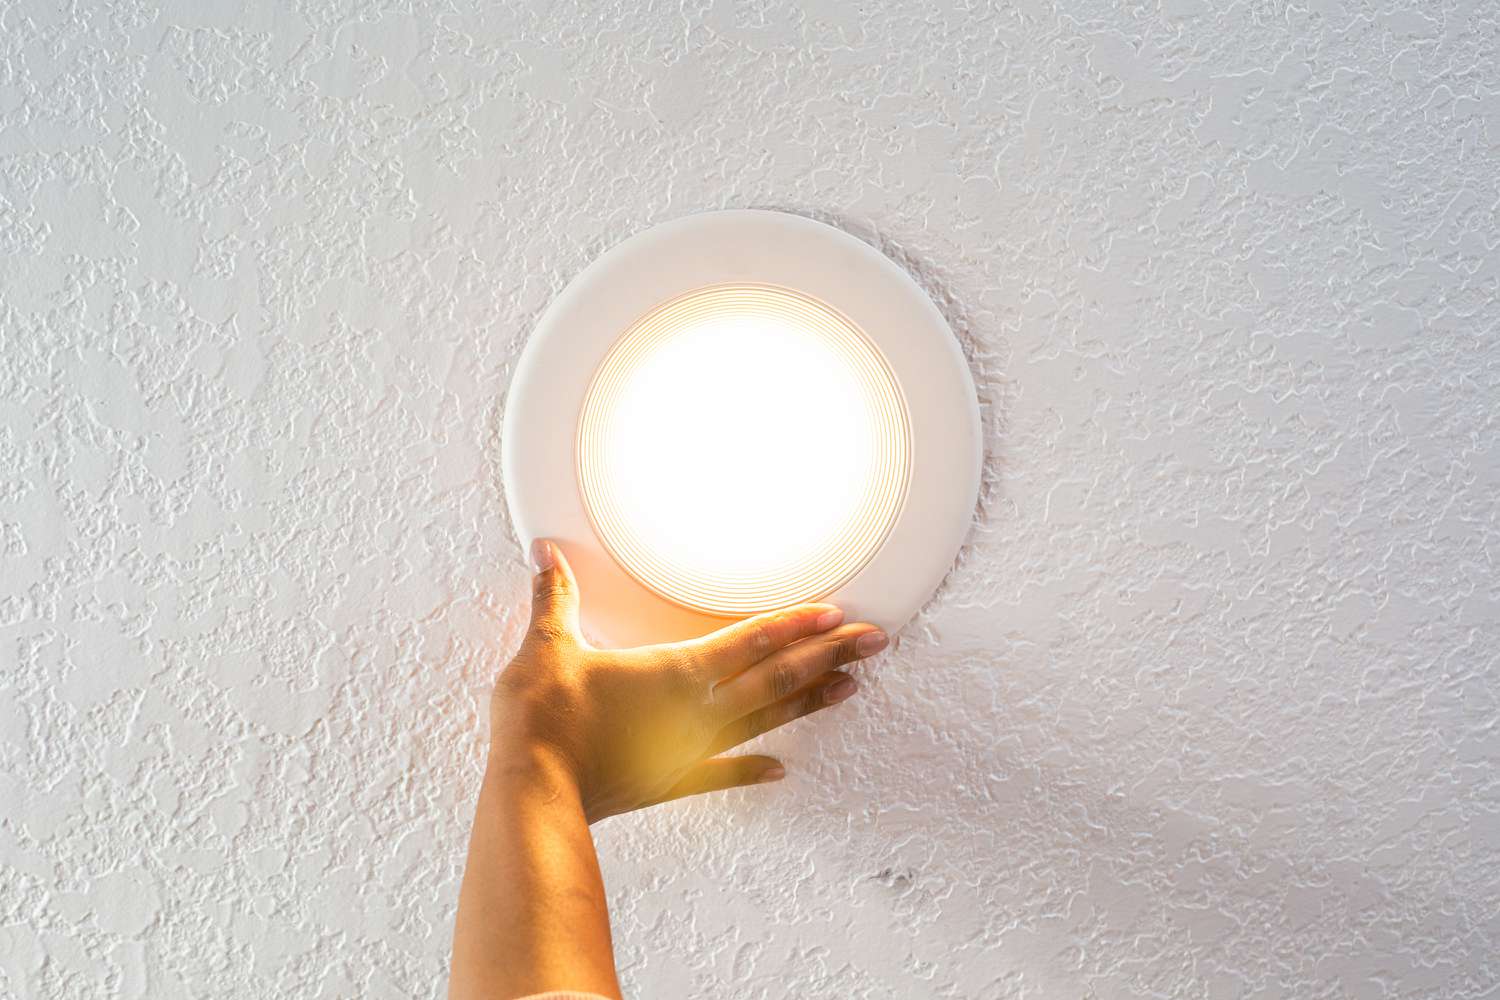
- Test the light: With the power restored, flip the light switch connected to the recessed light fixture to the “on” position. The new light bulb should now illuminate, providing you with the desired lighting in your space.
- Verify functionality: Take a moment to ensure that the replaced light bulb functions correctly. Check for any flickering, dimness, or other irregularities that may indicate an issue with the installation. If you notice any problems, double-check the connections and consult a professional if needed.
By following these steps, you have not only successfully changed the recessed light bulb but also ensured the safe operation of the fixture. Remember, if you encounter any difficulties or are unsure about any aspect of the process, it’s always wise to seek assistance from a qualified electrician or lighting professional.
With the power back on, you can now enjoy the renewed illumination of your recessed light fixture. Sit back, relax, and bask in the warm, inviting ambiance brought by your newly installed light bulb. Well done!
We hope this step-by-step guide has been helpful in assisting you with changing a recessed light bulb. Remember to always prioritize safety and consult professional assistance when needed. Happy lighting!
Read more: How To Change A Brake Light Bulb
Conclusion
Changing a recessed light bulb may have initially seemed like a daunting task, but with the right knowledge and approach, it becomes a manageable and easily accomplished project. By following the step-by-step guide outlined in this article, you can confidently replace a recessed light bulb and restore the illumination in your space.
Throughout the process, it is crucial to prioritize safety by turning off the power supply and wearing protective gear. Identifying the type of recessed light fixture, removing the trim or cover, and safely replacing the old light bulb with a new one are essential steps to ensure a successful outcome.
By embracing energy-efficient options like LED or CFL bulbs, you can not only brighten up your space but also contribute to a greener and more sustainable environment. So, next time you replace a recessed light bulb, consider choosing an energy-efficient option that will save electricity and reduce your carbon footprint.
Remember, if you ever feel unsure or uncomfortable with any step of the process, it is always wise to consult a qualified professional. They have the expertise and experience to assist you and ensure a safe and efficient installation.
Changing a recessed light bulb is a simple yet rewarding task that can make a significant difference in the illumination and ambiance of your space. Now that you have the knowledge and confidence, go ahead and tackle those burnt-out bulbs or upgrade to more energy-efficient options. Illuminate your surroundings and enjoy the enhanced lighting experience!
Now that you've mastered changing recessed light bulbs, why not brighten up your space even more? Consider upgrading your mirrors with stylish LED options that not only illuminate but also add flair to your interiors. And while you're enhancing your home, don't forget regular upkeep is key to maintaining its charm and functionality. Check out our guide on essential home maintenance tasks to keep your living space in top condition year-round.
Frequently Asked Questions about How To Change Recessed Light Bulb
Was this page helpful?
At Storables.com, we guarantee accurate and reliable information. Our content, validated by Expert Board Contributors, is crafted following stringent Editorial Policies. We're committed to providing you with well-researched, expert-backed insights for all your informational needs.


0 thoughts on “How To Change Recessed Light Bulb”