Articles
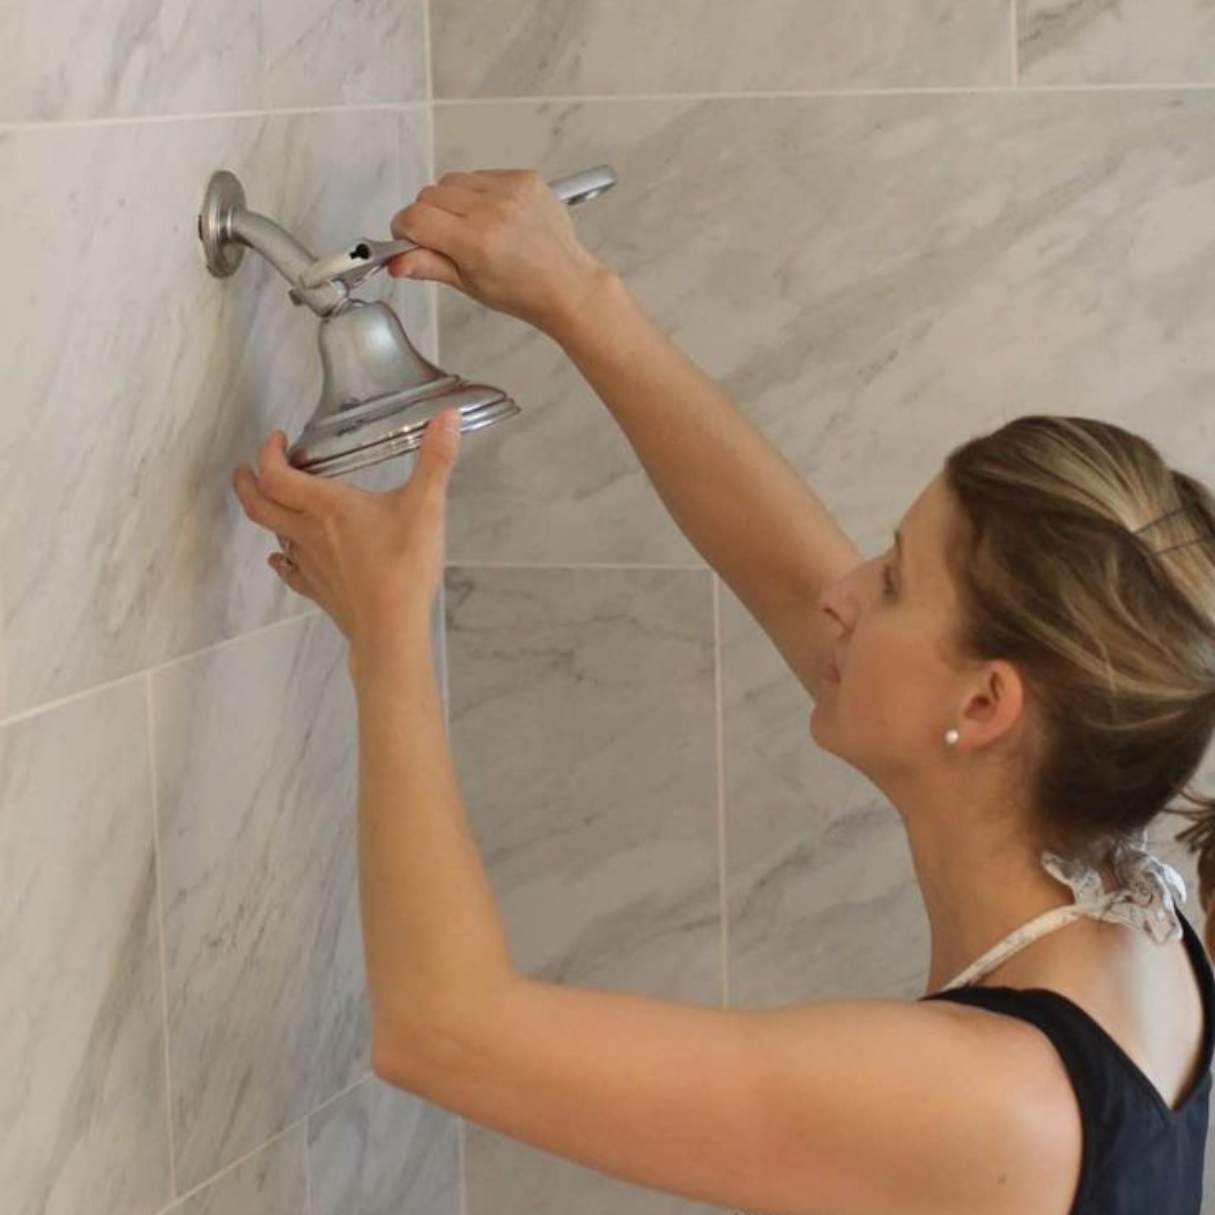
How To Unscrew A Stuck Showerhead
Modified: August 28, 2024
Learn effective techniques and expert tips in this informative article on how to easily unscrew a stubborn showerhead. Follow these steps to fix your showerhead hassle-free!
(Many of the links in this article redirect to a specific reviewed product. Your purchase of these products through affiliate links helps to generate commission for Storables.com, at no extra cost. Learn more)
Introduction
There’s nothing more frustrating than a stuck showerhead. It can be a hassle to deal with, especially when you’re in a hurry to take a refreshing shower. However, with a little bit of patience and the right technique, you can easily unscrew a stuck showerhead and get it functioning properly again.
In this article, we will explore the reasons why a showerhead may become stuck, the materials you’ll need to successfully unscrew it, and the step-by-step instructions to follow. We’ll also discuss alternative methods for loosening a stubborn showerhead and provide you with some helpful tips and precautions along the way. So, let’s dive in!
Key Takeaways:
- Don’t let a stuck showerhead ruin your day. With the right tools and techniques, you can easily unscrew it and restore your showering experience to its former glory.
- Understanding the reasons behind a stuck showerhead and following step-by-step instructions can help you successfully remove it. Remember to take precautions and seek professional help if needed.
Reasons why a showerhead may become stuck
There are several reasons why a showerhead may become stuck, making it difficult to unscrew. Understanding these reasons can help you approach the situation with the right knowledge and tools. Here are some common causes:
- Mineral deposits: Over time, mineral deposits from hard water can build up inside the showerhead. These deposits can create a solid barrier, making it challenging to loosen and remove the showerhead.
- Rust and corrosion: If your showerhead is made of metal, prolonged exposure to water can lead to rust and corrosion. This can cause the threads to seize up, making it hard to unscrew the showerhead.
- Previous improper installation: If the showerhead was not installed correctly in the first place, it may become stuck due to cross-threading or overtightening. This can make it nearly impossible to loosen the showerhead without the right technique.
- Excessive use of sealing tape: While sealing tape is commonly used to create a watertight seal when installing a showerhead, using too much tape can cause the threads to bind together tightly, resulting in a stuck showerhead.
- Deteriorated rubber gasket: The rubber gasket or washer inside the showerhead assembly can deteriorate over time, causing it to stick or bind to the threads. This can make it difficult to unscrew the showerhead.
These factors can contribute to a showerhead becoming stuck, but rest assured, there are solutions to tackle this pesky problem. With the right approach, you’ll be able to loosen and remove your stuck showerhead, restoring your showering experience to its former glory.
Materials needed for unscrewing a stuck showerhead
Before you begin the process of unscrewing a stuck showerhead, it’s important to gather the necessary materials. Having these items on hand will ensure a smooth and successful removal. Here are the materials you’ll need:
- Adjustable wrench or pliers: These tools are essential for providing a firm grip and leverage when attempting to unscrew the showerhead. An adjustable wrench is ideal because it can be adjusted to fit the size of the showerhead.
- Pipe or strap wrench (optional): If the showerhead is extremely stuck and difficult to grip, a pipe or strap wrench can be helpful. These wrenches provide a strong grip on objects and can make the removal process easier.
- The right-sized hex key or Allen wrench (if applicable): Some showerheads have a hexagonal-shaped hole on the underside, requiring a hex key or Allen wrench for removal. Check your showerhead to determine if this tool is necessary.
- Penetrating oil or lubricant: If the showerhead is stuck due to rust or corrosion, applying a penetrating oil or lubricant can help loosen the threads. Look for products specifically designed for loosening rusted or seized parts.
- Cloth or rag: You’ll need a cloth or rag to protect the showerhead finish from scratches or damage while applying pressure with the wrench or pliers.
- Teflon tape: Once you successfully unscrew the stuck showerhead, you may want to apply fresh Teflon tape to the threads before reattaching it. Teflon tape helps create a tight seal and prevents leaks.
Make sure to gather these materials before beginning the unscrewing process. Having everything you need at your disposal will save you time and ensure you’re prepared for any challenges that may arise during the removal process.
Step-by-step instructions for unscrewing a stuck showerhead
Now that you have the necessary materials ready, it’s time to tackle the task of unscrewing a stuck showerhead. Follow these step-by-step instructions to successfully remove the stuck showerhead:
- Turn off the water supply: Before you begin, ensure that the water supply to the shower is turned off. This will prevent any accidental leaks or water damage.
- Prepare the showerhead: Clean the area around the showerhead and remove any debris or buildup. This will make it easier to access and grip the showerhead.
- Apply penetrating oil or lubricant: If your showerhead is stuck due to rust or corrosion, apply a generous amount of penetrating oil or lubricant to the threaded connection. Allow it to sit for a few minutes to penetrate the stuck area.
- Grip the showerhead: Depending on the shape and size of your showerhead, use an adjustable wrench or pliers to grip the base firmly. Take care not to apply excessive force that could damage the showerhead.
- Turn counterclockwise: With a firm grip on the showerhead, apply steady pressure in a counterclockwise direction. If it doesn’t budge initially, you may need to use a pipe or strap wrench for a stronger grip.
- Use a hex key or Allen wrench (if applicable): If your showerhead has a hexagonal-shaped hole on the underside, insert the correct-sized hex key or Allen wrench into the hole. Turn it counterclockwise to loosen the showerhead.
- Continue turning and removing: With the wrench, pliers, or hex key in place, continue turning counterclockwise until the showerhead is completely loosened. Be patient and apply steady pressure, exercising caution to avoid damaging the shower pipe.
- Inspect and clean: Once the showerhead is removed, inspect the threaded connection for any debris, rust, or buildup. Clean the threads thoroughly to prepare for reinstallation.
Following these step-by-step instructions will help you successfully unscrew a stuck showerhead. Remember to take your time, be patient, and use the appropriate tools for a safe and effective removal process.
Try using a pair of adjustable pliers to grip the showerhead and gently twist it counterclockwise to loosen it. If it’s still stuck, try using a penetrating oil to help loosen the threads.
Alternative methods for loosening a stuck showerhead
If you’ve tried the step-by-step instructions and the showerhead is still stuck, don’t worry. There are alternative methods you can try to loosen a stubborn showerhead. These methods can provide extra leverage or help break through stubborn rust or corrosion. Here are a few alternative methods you can attempt:
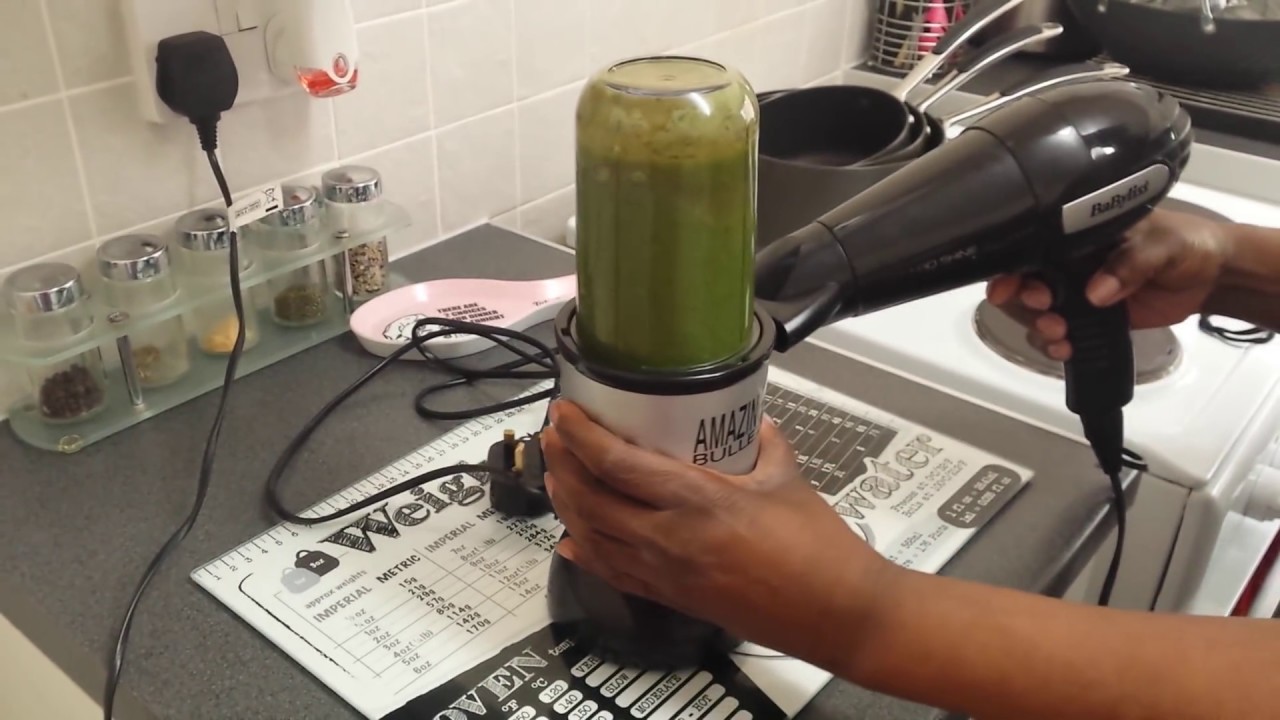
- Heat the showerhead: Using a heat source, such as a hairdryer or heat gun, apply heat to the showerhead for a few minutes. The heat can cause the metal to expand and loosen the grip, making it easier to unscrew the showerhead.
- Apply a vinegar solution: Create a mixture of equal parts vinegar and water, and then soak a cloth or rag in the solution. Place the vinegar-soaked cloth around the base of the showerhead for about 10-15 minutes. The acidity of the vinegar can help dissolve mineral deposits and corrosion, making it easier to remove the showerhead.
- Use a rubber mallet or hammer: If you’re comfortable using a bit more force, you can try lightly tapping the side of the showerhead with a rubber mallet or a hammer. This method can help loosen the grip and break through any rust or corrosion that might be causing the sticking.
- Apply a rust dissolver: Rust dissolver products can be found at most hardware stores. Apply the rust dissolver directly to the threaded connection, following the manufacturer’s instructions. Allow it to sit for the recommended amount of time, and then attempt to unscrew the showerhead.
- Seek professional help: If all else fails, and you’re unable to remove the stuck showerhead using the methods mentioned, it might be time to seek assistance from a professional plumber. They have the tools and experience to handle stubborn showerheads and can ensure the removal is done safely and effectively.
Remember, safety should always be a priority when attempting to loosen a stuck showerhead. If a method feels unsafe or you’re unsure how to proceed, it’s best to call a professional for assistance. They can help you avoid any damage to your plumbing system and ensure a successful resolution.
Read more: How To Open A Stuck Window
Tips and precautions
When dealing with a stuck showerhead, it’s important to keep these tips and precautions in mind. Following these guidelines will help you approach the task safely and effectively:
- Turn off the water: Before you begin any work on the showerhead, always remember to turn off the water supply. This will prevent any accidental leaks or water damage while you’re working on removing the showerhead.
- Protect the showerhead finish: To prevent scratching or damaging the finish of the showerhead, wrap a cloth or rag around it before gripping it with any tools. This will provide a layer of protection and help maintain the appearance of the showerhead.
- Apply appropriate force: When using tools like an adjustable wrench, pliers, or a hammer, be cautious and apply gentle but firm pressure. Avoid excessive force that could cause damage to the showerhead or the plumbing system.
- Be mindful of delicate showerhead materials: If your showerhead is made of plastic or other delicate materials, take extra care during the removal process. These materials are more prone to damage, so use lighter force when unscrewing and be cautious not to overtighten during reinstallation.
- Use lubrication or penetrating oil: Applying a lubricant or penetrating oil to the threaded connection can significantly help in loosening stuck showerheads. Allow the lubricant to penetrate for a few minutes before attempting to remove the showerhead.
- Consider using plumbing tape: To create a watertight seal when reinstalling the showerhead, use Teflon tape on the threads. This tape helps prevent leaks and ensures a secure connection.
- Consult the manufacturer’s instructions: If you have the manufacturer’s instructions for your showerhead, it’s always a good idea to refer to them before attempting any removal or installation. They may provide specific guidance or precautions to follow.
- Call a professional if needed: If you’re unsure about the process, encounter any difficulties, or feel uncomfortable with the task, it’s best to seek help from a professional plumber. They have the knowledge and expertise to handle stuck showerheads safely and efficiently.
By keeping these tips in mind and taking the necessary precautions, you can navigate the process of removing a stuck showerhead successfully and without any major complications. Remember, there’s no shame in asking for professional help if you encounter any challenges or feel uncertain about the task at hand.
Conclusion
Dealing with a stuck showerhead can be a frustrating experience, but with the right approach and some patience, you can successfully unscrew it and restore your showering experience. Understanding the reasons why a showerhead may become stuck, gathering the necessary materials, and following the step-by-step instructions can help you overcome this common household issue. Additionally, alternative methods and helpful tips can provide you with additional options should the initial attempts prove challenging.
Remember to turn off the water supply before starting the removal process, protect the showerhead finish, and apply appropriate force when using tools to avoid damage. Utilizing lubrication, heat, vinegar solutions, or rust dissolvers can aid in loosening stubborn showerheads. However, if you’re unsure or encounter difficulties, it’s always wise to seek professional assistance.
By following the recommended steps and taking necessary precautions, you can successfully unscrew a stuck showerhead and restore the functionality of your shower. Enjoy the satisfaction of completing the task and the enhanced showering experience that awaits you!
Frequently Asked Questions about How To Unscrew A Stuck Showerhead
Was this page helpful?
At Storables.com, we guarantee accurate and reliable information. Our content, validated by Expert Board Contributors, is crafted following stringent Editorial Policies. We're committed to providing you with well-researched, expert-backed insights for all your informational needs.


0 thoughts on “How To Unscrew A Stuck Showerhead”