Articles
How To Use A Long Arm Quilting Machine
Modified: August 17, 2024
Looking for informative articles on how to use a long arm quilting machine? Explore our comprehensive guide to master the art of quilting with ease.
(Many of the links in this article redirect to a specific reviewed product. Your purchase of these products through affiliate links helps to generate commission for Storables.com, at no extra cost. Learn more)
Introduction
Welcome to the fascinating world of long arm quilting machines! If you’re an avid quilter or someone who enjoys the art of quilting, then you know the importance of having the right tools to create beautiful and intricate designs. A long arm quilting machine is a game-changer for anyone looking to take their quilting skills to the next level.
Unlike traditional sewing machines, long arm quilting machines offer an extended workspace and specialized features that make quilting larger projects more efficient and convenient. Whether you’re a professional quilter or a passionate hobbyist, using a long arm quilting machine can significantly enhance your quilting experience.
In this article, we’ll guide you through the ins and outs of using a long arm quilting machine. You’ll learn how to set it up, prepare your quilt, adjust tension and stitch length, and utilize the machine controls to achieve the best results. We’ll also explore basic and advanced quilting techniques, troubleshoot common issues, and discuss the cleaning and maintenance of your long arm quilting machine.
By the end of this article, you’ll have a solid understanding of how to make the most of your long arm quilting machine and create stunning quilts with ease.
So, let’s delve into the world of long arm quilting machines and unlock the secrets of this powerful tool!
Key Takeaways:
- Mastering the art of long arm quilting involves setting up, preparing, and loading your machine, adjusting tension and stitch length, and exploring basic and advanced quilting techniques. Embrace the journey of creativity and learning!
- Troubleshooting common quilting issues and maintaining your long arm quilting machine are essential for achieving optimal results and ensuring its longevity. Practice, patience, and proper care will elevate your quilting experience.
Read more: How To Load A Quilt On A Long Arm Machine
Understanding Long Arm Quilting Machines
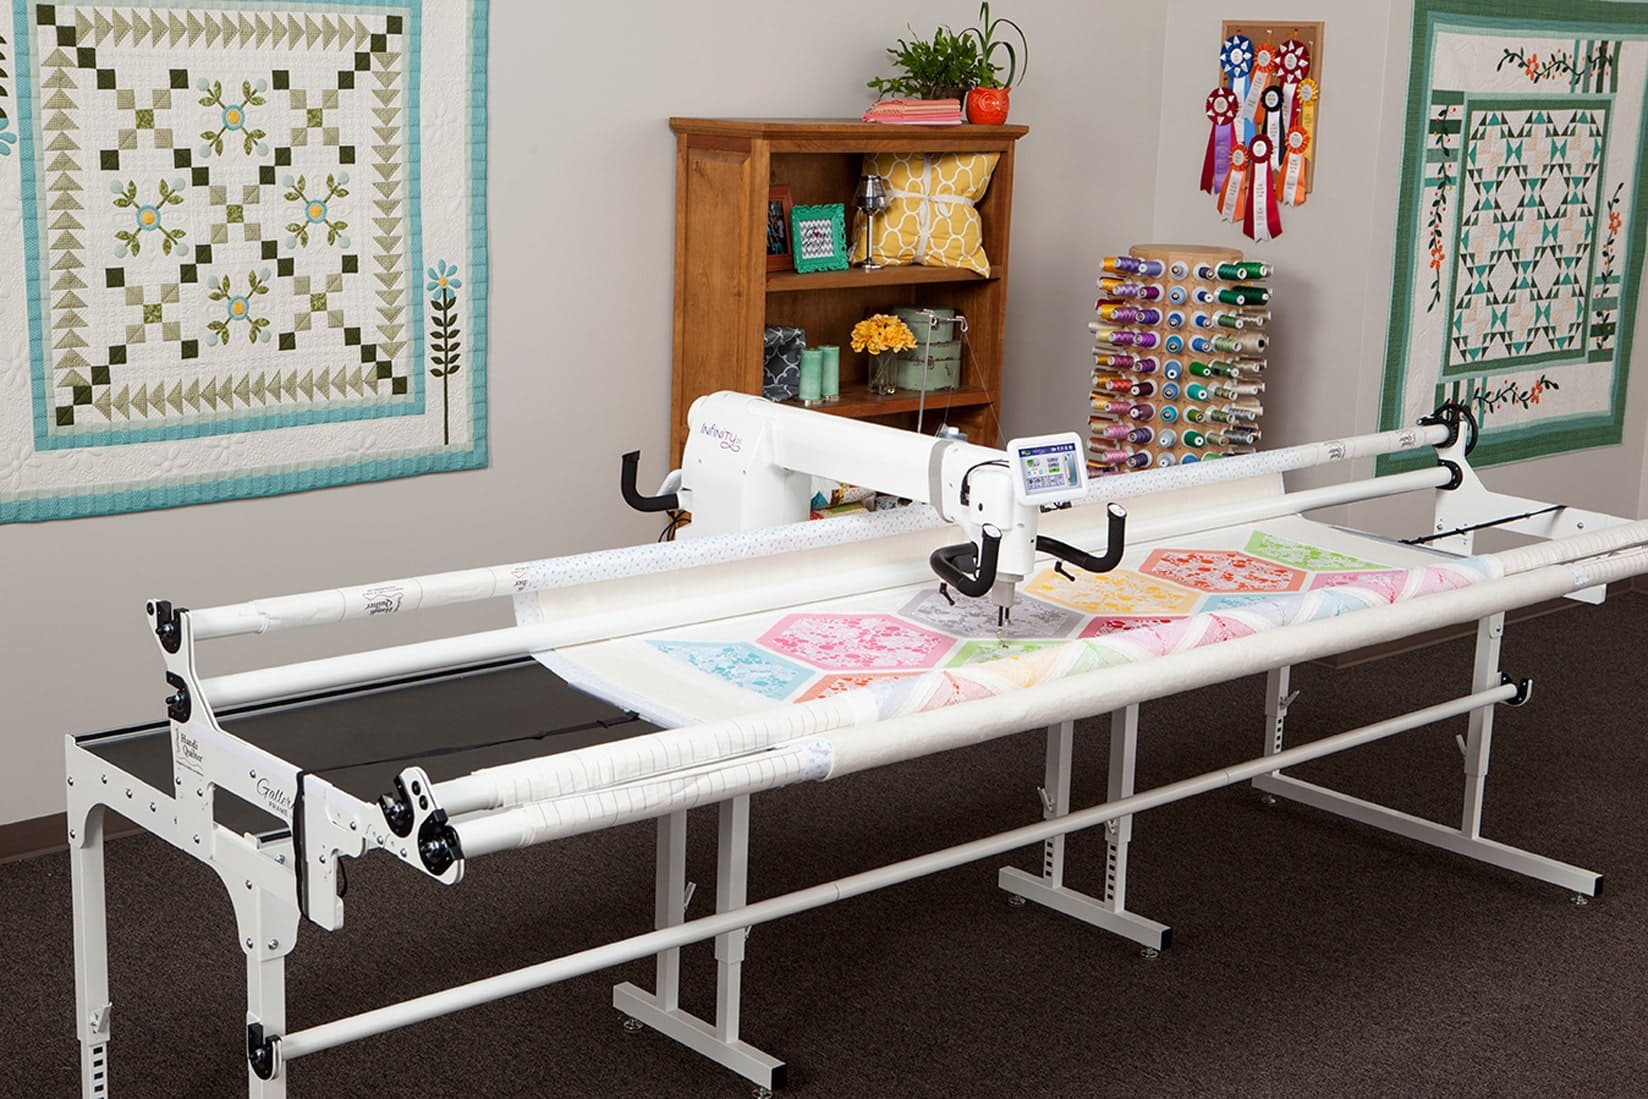
Long arm quilting machines are a specialized type of sewing machine designed specifically for quilting larger projects. Unlike traditional sewing machines, which have a limited throat space, long arm quilting machines feature an extended and wide workspace that allows you to maneuver large quilts and create intricate designs.
These machines consist of three main components: a frame, a sewing machine head, and a set of rollers. The frame provides a stable and sturdy base for attaching the other components. The sewing machine head is suspended above the frame and can move freely in any direction, allowing you to quilt in all directions without having to rotate your project.
The set of rollers, typically located on the frame, hold the layers of the quilt in place as you work on different sections. With long arm quilting machines, you have the flexibility to easily adjust the tension of the fabric and ensure smooth and even stitching throughout your quilt.
Long arm quilting machines offer a variety of features and capabilities that make them ideal for quilting professionals and enthusiasts. Some machines come with advanced computerized systems that allow you to program intricate quilting patterns. Others have built-in stitch regulators that automatically adjust the speed of the machine to maintain consistent stitch length.
When choosing a long arm quilting machine, consider factors such as throat space, stitch options, frame size, and additional features like a bobbin winder and LED lighting. Throat space refers to the distance between the needle and the machine’s body and determines the maximum width of the quilt that can be quilted on the machine.
Long arm quilting machines can be a significant investment, so it’s important to do thorough research and choose a machine that suits your quilting needs and preferences. Look for reviews, attend quilting shows or demonstrations, and test out different models if possible before making a decision.
Now that you have a better understanding of long arm quilting machines, let’s move on to setting up your machine to get ready for the quilting process!
Setting Up Your Long Arm Quilting Machine
Before you can start quilting with your long arm quilting machine, you’ll need to properly set it up. Follow these steps to ensure a smooth and efficient setup process:
- Choose a suitable location: Find a dedicated space in your home or studio where you can set up your long arm quilting machine. Ensure that there is enough room for the machine, frame, and ample space to move around comfortably.
- Assemble the frame: If your machine comes with a separate frame, follow the manufacturer’s instructions to assemble it. Make sure the frame is level and stable to provide a solid foundation for your quilting machine.
- Attach the sewing machine head: Once the frame is ready, securely attach the sewing machine head to the carriage or gantry system provided by the manufacturer. Follow the specific instructions for your machine to ensure proper attachment and alignment.
- Level the machine: Check that the machine is level both horizontally and vertically. Most long arm quilting machines come with built-in leveling features, so refer to the machine’s manual for instructions on how to level it.
- Thread the machine: Load your chosen thread onto the machine’s bobbin and thread it through the machine’s threading path. Consult your machine’s manual for exact threading instructions, as they can vary depending on the model.
- Test the tension: To ensure proper tension, thread a test piece of fabric through the machine and sew a few stitches. Adjust the tension as needed until you achieve balanced and even stitches.
- Position the quilt: Lay out your quilt on a clean and flat surface. If necessary, press the quilt top and backing to remove any wrinkles. Smooth out the layers and align them properly, ensuring that there is enough extra fabric on the sides to roll onto the machine’s rollers.
- Attach the quilt to the frame: Start by attaching the backing fabric to the leaders or clamps on the frame, making sure it is straight and smooth. Next, align and attach the quilt top, being careful to keep it taut and wrinkle-free.
- Roll the quilt onto the frame: Using the machine’s rollers, roll the quilt onto the frame, maintaining tension throughout the process. Take your time to ensure that the layers are properly aligned and tightened.
- Check the alignment: Double-check the alignment of the quilt layers, making sure there are no wrinkles or puckers. Adjust the tension and smooth out any imperfections if necessary.
Once you’ve completed these steps, your long arm quilting machine should be set up and ready for quilting. In the next section, we’ll discuss how to prepare your quilt before starting the quilting process.
Preparing Your Quilt
Preparing your quilt before quilting is an essential step that ensures smooth and successful stitching with your long arm quilting machine. Follow these steps to properly prepare your quilt:
- Press and trim the quilt top: Start by pressing your quilt top to remove any wrinkles or creases. Use a hot iron and press from the center outward, being careful not to stretch the fabric. Once pressed, trim any excess threads or loose threads.
- Make a quilt sandwich: Lay out your quilt backing fabric, right side down, on a clean, flat surface. Smooth out any wrinkles or folds. Next, place your batting on top of the backing fabric, ensuring that it covers the entire area. Finally, place your quilt top, right side up, on top of the batting. Smooth out any wrinkles or puckers.
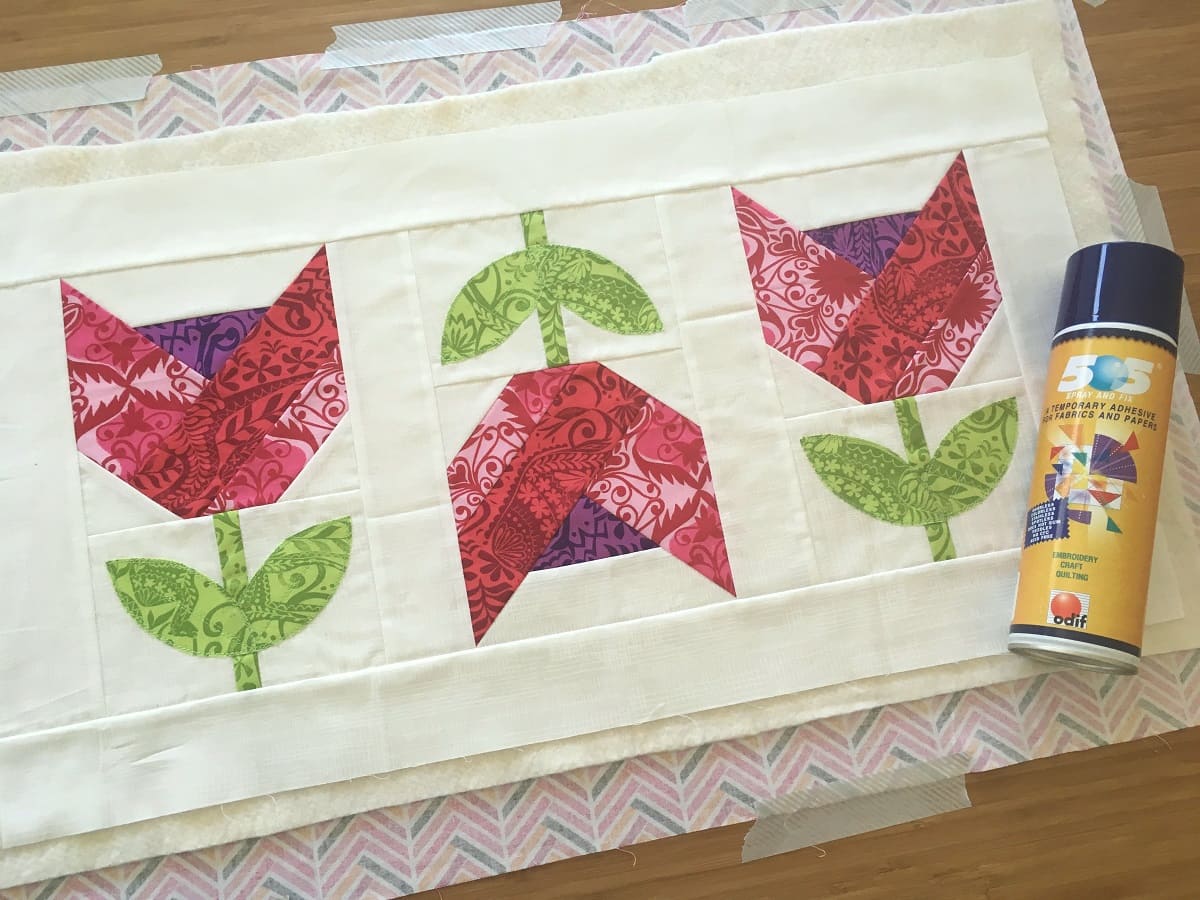
- Baste the layers: To keep the quilt layers together during the quilting process, basting is necessary. There are several methods you can use to baste your quilt, such as thread basting, spray basting, or using adhesive basting. Choose the method that works best for you and secure the layers together with even and regular basting stitches or adhesive spray.
- Trim the excess batting and backing fabric: Once the layers are basted, trim the excess batting and backing fabric so that they align with the edges of the quilt top. Use a ruler and rotary cutter for precise trimming.
- Stay-stitch the edges: To prevent the edges of your quilt from fraying or unraveling during the quilting process, stay-stitch around the perimeter of the quilt top, about ¼ inch from the edge. This will secure the layers and provide a clean finish.
- Mark your quilting design (optional): If you have a specific quilting design or pattern in mind, you can mark it onto your quilt top before quilting. There are various marking tools available, such as fabric pens, chalk, or quilting stencils. Take your time to mark the design accurately and lightly to avoid any permanent markings.
- Inspect for any repairs or adjustments: Before loading your quilt onto the long arm quilting machine, carefully inspect it for any loose threads, holes, or areas that require repairs. Make any necessary fixes or adjustments to ensure a smooth quilting process.
- Press the quilt sandwich: Finally, give your quilt sandwich one more press with a hot iron to ensure that all the layers are flat and smooth. This step will help eliminate any remaining wrinkles and provide a crisp foundation for quilting.
Once you’ve completed these steps, your quilt will be well-prepared and ready to be loaded onto your long arm quilting machine. In the next section, we’ll discuss how to properly load the quilt onto the machine for quilting.
Loading the Quilt onto the Machine
Once you have prepared your quilt, the next step is to load it onto your long arm quilting machine. Properly loading the quilt ensures that it is secure and taut, allowing for smooth and precise quilting. Follow these steps to load your quilt onto the machine:
- Position the machine carriage: Start by moving the machine carriage to one end of the frame, leaving enough space for the quilt to be attached. This will allow you to gradually roll the quilt as you progress with the quilting process.
- Attach the quilt top and backing: Lay the quilt top on the frame, aligning it with the bottom edge of the frame. Smooth out any wrinkles or puckers, and use quilt clips or pins to secure it to the fabric leaders or clamps. Repeat the process with the quilt backing, ensuring it is taut and straight.
- Roll the quilt onto the frame: Begin rolling the quilt onto the machine’s rollers, starting from the end where the machine carriage is positioned. Use the provided handles or controls to rotate the rollers, gradually moving the quilt from the bottom to the top. Ensure that the quilt is evenly rolled, with no creases or bunching.
- Tighten the rollers: Once the quilt is rolled onto the frame, tighten the rollers to hold the layers securely in place. Adjust the tension according to your preferences, making sure the quilt is taut but not overly stretched. Double-check that the quilt is aligned and centered on the frame.
- Smooth and adjust the layers: As you roll the quilt, periodically smooth out the layers to ensure they are flat and even. Adjust the tension and position of the quilt if necessary, making any necessary tweaks to achieve a balanced and well-positioned quilt.
- Secure the sides: Depending on the design and size of your quilt, you may need to attach the sides of the quilt top and backing to the side clamps or rails of the machine frame. This will prevent the edges of the quilt from falling over and interfering with the quilting process.
- Double-check the tension and alignment: Before starting the actual quilting, double-check the tension of the layers and the alignment of the quilt top, batting, and backing. Make any final adjustments to ensure a smooth and even quilting experience.
Once you have successfully loaded your quilt onto the long arm quilting machine, you are ready to start quilting. In the next section, we’ll discuss how to adjust the tension and stitch length on your machine for optimal results.
Read more: How To Wash A Quilt In A Washing Machine
Adjusting Tension and Stitch Length
One of the key factors in achieving high-quality quilting results with your long arm quilting machine is the proper adjustment of tension and stitch length. These two settings work in tandem to ensure balanced and smooth stitches throughout your quilt. Follow these steps to adjust the tension and stitch length for optimal quilting:
- Understand tension and stitch length: Tension refers to the tightness of the stitches along the quilt layers. Proper tension ensures that the thread is evenly balanced between the top and bottom layers of the quilt. Stitch length, on the other hand, determines the distance between consecutive stitches.
- Test your machine’s default settings: Start by quilting a small test swatch to see how your machine is set up by default. Check the tension and stitch length, and evaluate the quality of the stitches. This will give you a baseline for making adjustments.
- Adjusting tension: If the stitches are too loose or uneven, you may need to increase the thread tension. Most long arm quilting machines have a tension dial or control that allows you to make these adjustments. Turn the dial gradually in small increments, testing the stitches after each adjustment until you achieve balanced and even tension.
- Adjusting stitch length: Depending on your desired quilting style and fabric type, you may need to make adjustments to the stitch length. Smaller stitch lengths create denser quilting, while longer stitch lengths produce more visible stitches. Use your machine’s stitch length control to make these adjustments. Test different lengths on scrap fabric to find the desired result.
- Balancing the tension and stitch length: The overall goal is to find a balance between tension and stitch length. The stitches should be even and balanced, with no loose thread loops or tightly pulled threads. Continuously test and make subtle adjustments until you achieve the desired results.
- Consider the fabric and thread: Different fabrics and threads may require specific tension and stitch length adjustments. For example, thicker fabrics or threads may require looser tension and longer stitch lengths, while delicate or lightweight fabrics may need tighter tension and shorter stitch lengths. Experiment with different combinations to find what works best for your specific project.
- Regularly check and adjust: As you quilt, periodically stop and check the tension and stitch length. The tension may need to be readjusted as the quilt layers and thickness change throughout the process. Stay attentive and make any necessary adjustments to maintain consistent stitching.
By properly adjusting the tension and stitch length on your long arm quilting machine, you can achieve beautiful and professional-looking results. Now that you have the settings dialed in, let’s move on to exploring the controls and functions of your machine in the next section.
When using a long arm quilting machine, start by securing the backing fabric to the leaders and then loading the quilt top and batting. This will ensure a smooth and even quilting process.
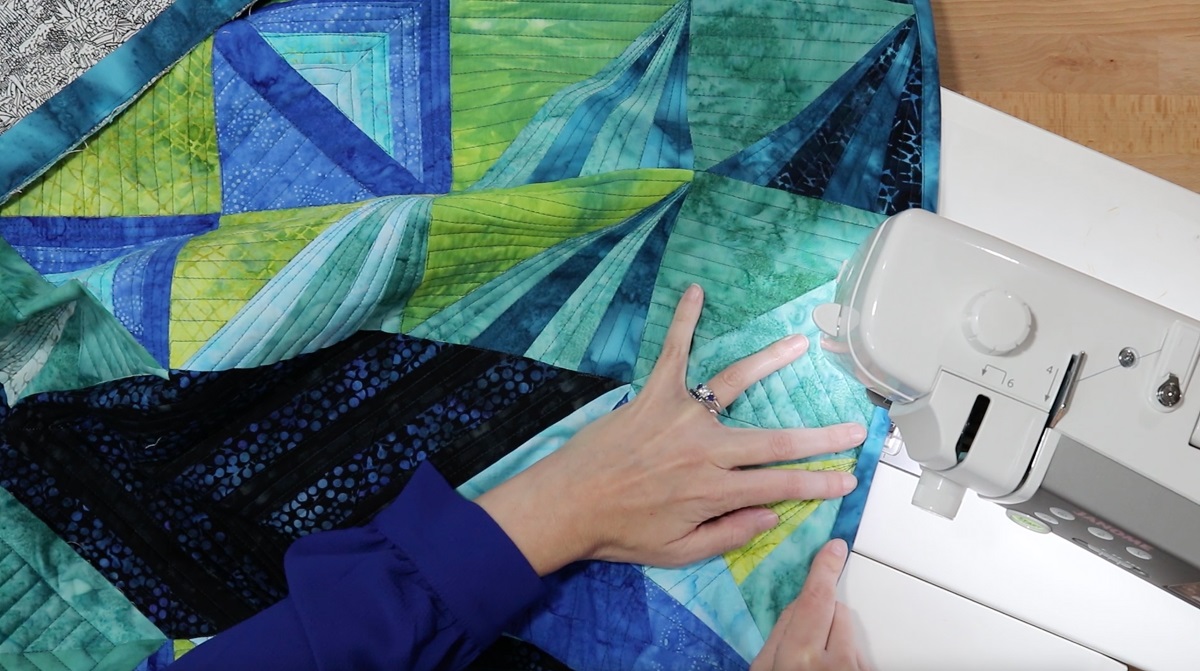
Using the Machine Controls
Understanding and effectively using the controls of your long arm quilting machine is essential for achieving precise and smooth quilting. While the specific controls may vary depending on the model and brand of your machine, here are some common controls and functions you’ll encounter:
- Power switch: The power switch turns the machine on and off. Locate the power switch and ensure that it is in the proper position before starting or ending your quilting session.
- Speed control: Most long arm quilting machines have a speed control feature that allows you to adjust the sewing speed. This feature is especially helpful for intricate designs or when working with challenging fabrics. Adjust the speed to a comfortable level that matches your quilting style and skill level.
- Start/Stop button: The start/stop button allows you to control the machine’s motion without using the foot pedal. Press the start button to begin sewing and the stop button to pause or stop the machine. This feature can be useful when you need to make precise adjustments or when taking breaks during quilting.
- Needle position control: The needle position control allows you to move the needle to the desired position. This is particularly useful when pivoting, turning corners, or following detailed quilting patterns. Take advantage of this control to achieve accurate stitching and maneuverability.
- Thread cutter: Many long arm quilting machines come equipped with an automatic thread cutter. This feature allows you to trim the thread quickly and conveniently. Depending on your machine, the thread cutter may be located on the machine head or included as a separate accessory.
- Stitch regulator: Some advanced long arm quilting machines have built-in stitch regulators. These regulators automatically adjust the machine’s speed to maintain consistent stitch length. If your machine has this feature, refer to the manual for instructions on how to calibrate and utilize it effectively.
- Built-in stitch patterns: Certain long arm quilting machines offer built-in stitch patterns or designs. These patterns can be selected and programmed on the machine’s control panel or through the machine’s computerized system. Explore the available stitch patterns and experiment with different designs to add variety and creativity to your quilting projects.
- Tension adjustment controls: As mentioned earlier, tension is an important aspect of achieving high-quality stitches. Locate the tension adjustment controls on your machine and use them to fine-tune the tension according to the fabric and thread you’re working with. Consult the machine’s manual for specific instructions on how to adjust the tension on your particular model.
It’s crucial to familiarize yourself with the controls and functions of your specific long arm quilting machine. Take the time to read the user manual provided by the manufacturer, as it will provide detailed information on the machine’s features and how to operate them effectively.
Now that you’re acquainted with the machine controls, let’s delve into the basic and advanced quilting techniques you can utilize with your long arm quilting machine in the next section.
Basic Quilting Techniques
When it comes to quilting with a long arm quilting machine, there are various techniques you can utilize to create stunning designs and textures. Here are some basic quilting techniques to get you started:
- Stitch in the Ditch: This technique involves quilting along the seams of the quilt top, following the existing seam lines. Stitching in the ditch adds stability and texture to the quilt without overpowering the overall design.
- Meandering: Meandering is a free-motion quilting technique where you create organic and flowing curves and shapes with the stitches. This technique is often used as background filler or to add texture to the quilt.
- Echo Quilting: Echo quilting involves quilting parallel lines around a specific shape or motif, creating concentric outlines. This technique adds dimension and emphasis to the featured design while creating an interesting visual effect.
- Grid Quilting: Grid quilting involves stitching straight lines in a grid pattern across the quilt top. This technique creates a structured and geometric look and is often used to highlight specific areas or create a modern aesthetic.
- Feather Quilting: Feather quilting is a classic and elegant technique that involves stitching feathery motifs throughout the quilt top. This technique requires more advanced skill and control, but it adds a luxurious and traditional touch to your quilts.
- Pebble Quilting: Pebble quilting refers to stitching small, circular shapes closely together to create a pebbled texture. This technique is great for filling in background areas or adding visual interest to solid fabric.
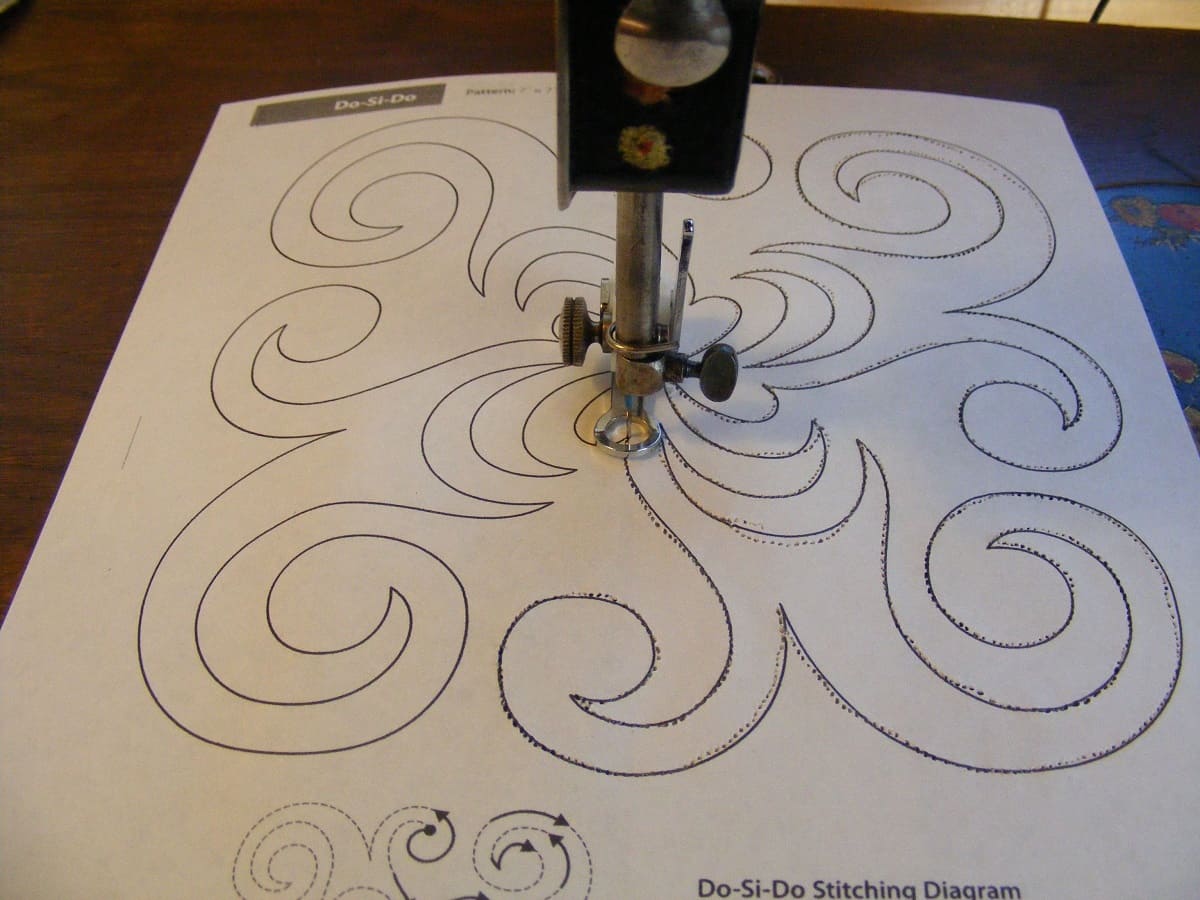
- Continuous Line Quilting: Continuous line quilting involves quilting an entire design using a single, continuous line of stitching without breaking the thread. This technique is commonly used for intricate designs such as feathers, flowers, or geometric shapes.
- Outline Quilting: Outline quilting is the process of stitching along the outer edge of specific shapes or motifs in the quilt top. This technique creates a defined and crisp outline, adding emphasis and highlighting specific elements of the design.
- Trapunto: Trapunto is a technique that involves stuffing certain areas of the quilt to create raised textures. This technique adds depth and dimension to the quilt, making the design elements stand out.
- Bobbin Work: Bobbin work is a technique where you wind specialty thread onto the bobbin and stitch from the back of the quilt, allowing the decorative thread to show on the quilt top. This technique is perfect for adding texture, color, and dimension to your quilts.
Remember, these are just a few examples of basic quilting techniques you can explore with your long arm quilting machine. Feel free to experiment, combine techniques, and develop your unique style to create beautiful and personalized quilts. In the next section, we’ll dive into advanced quilting techniques that will take your quilting to the next level.
Advanced Quilting Techniques
Once you’ve mastered the basic quilting techniques with your long arm quilting machine, it’s time to dive into more advanced techniques that will elevate your quilting to new heights. These techniques require practice, patience, and a strong understanding of your machine’s capabilities. Here are some advanced quilting techniques to explore:
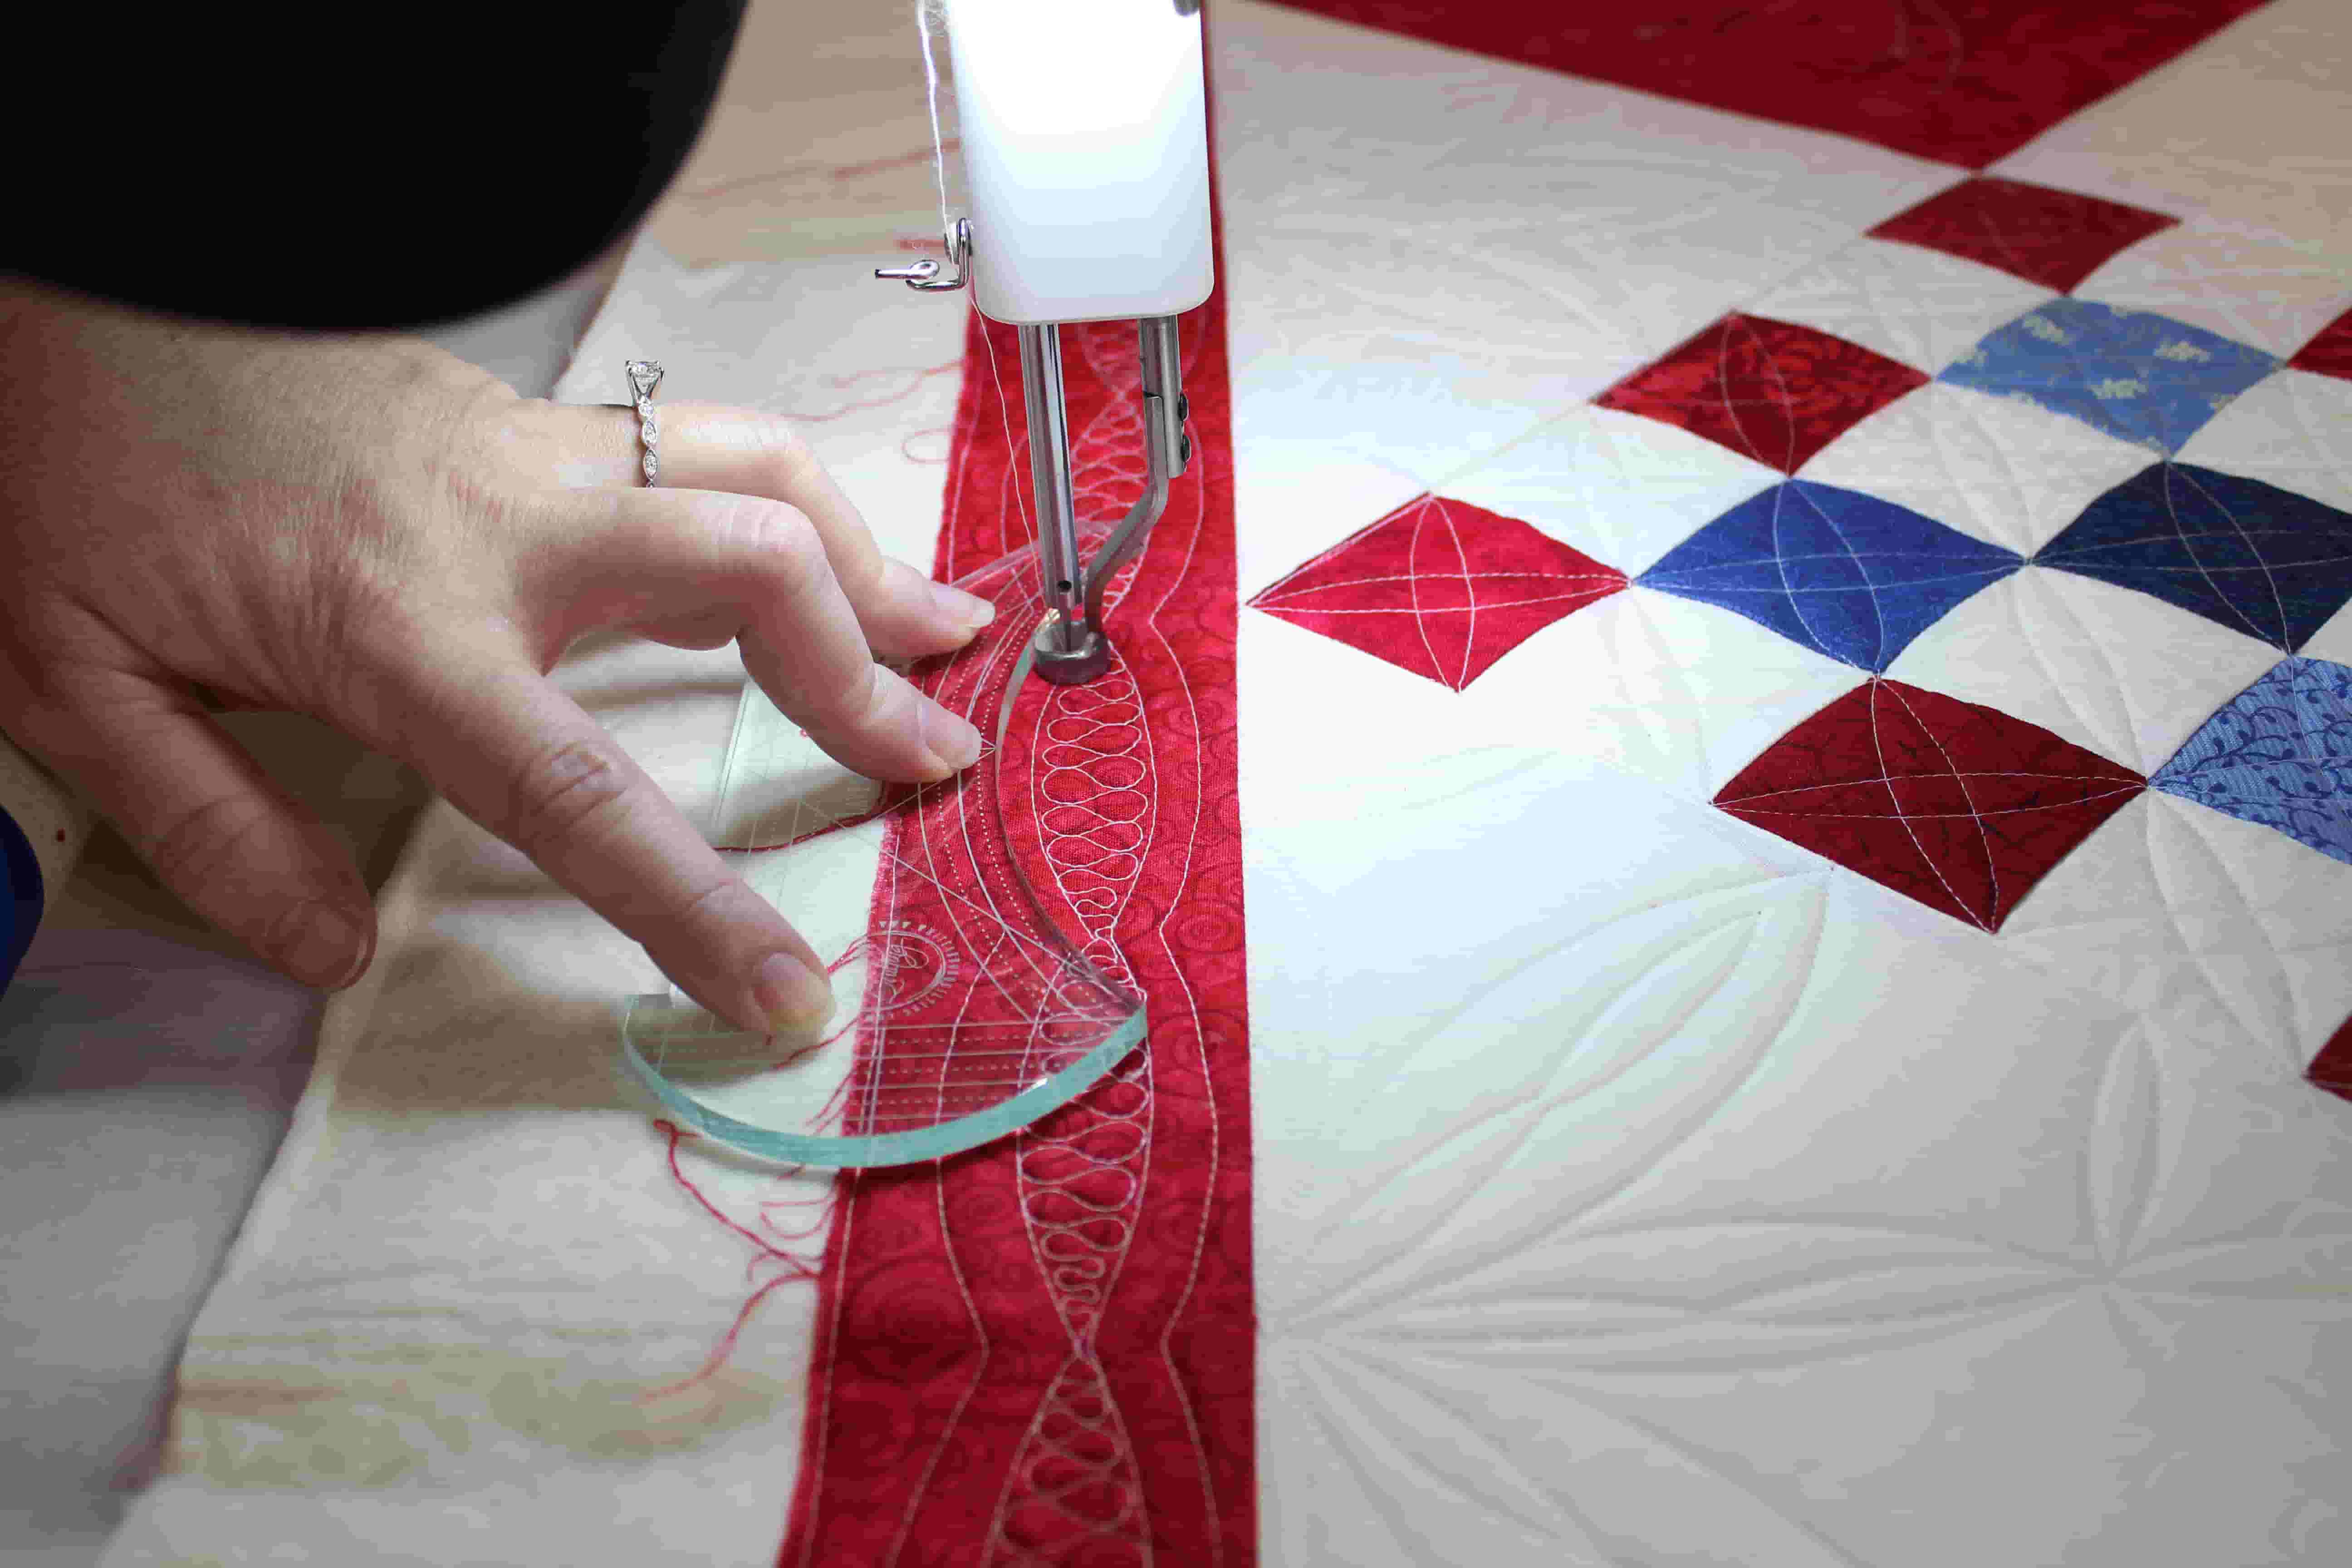
- Custom Designs: Custom quilting involves creating unique and intricate designs tailored to specific areas of the quilt. This technique allows you to highlight focal points, add personalized touches, and showcase your creativity. It often combines various quilting motifs, textures, and fills to enhance the quilt’s overall aesthetic.
- Thread Painting: Thread painting is a technique where you use contrasting thread colors to create detailed and realistic designs. By controlling the movement and speed of the machine, you can create shading, texture, and depth that resemble a painted picture.
- Background Fills: Experiment with different background fill patterns to enhance the overall texture and look of your quilts. Examples include stippling, swirls, pebbles, and various geometric designs. These fills can add depth and visual interest to the negative spaces in the quilt.
- Appliqué Quilting: Incorporate appliqué techniques into your quilting by stitching around intricate shapes or motifs on the quilt top. This technique adds dimension and texture to the appliqué pieces, seamlessly blending them into the overall design.
- Curved Crosshatching: Take crosshatching to the next level by incorporating curved lines instead of straight lines. This technique requires precision and control to achieve smooth and even curves while maintaining the desired spacing.
- Channel Quilting: Channel quilting involves stitching parallel lines of quilting stitches to create channels across the quilt top. This technique adds structure, dimension, and a modern touch to your quilts. Experiment with different spacing and widths to achieve different effects.
- Trapunto with Detailing: Combine trapunto techniques with intricate detailing to create visually stunning effects. By selectively adding extra padding and quilting in specific areas, you can make certain elements of the design pop while incorporating intricate quilting details in contrasting areas.
- In-the-Hoop Quilting: If your long arm quilting machine has embroidery capabilities, explore in-the-hoop quilting techniques. This involves using embroidery designs that are quilted directly onto the quilt top, creating quilting motifs with precise placement and stunning detail.
- Thread Sketching: Thread sketching is a technique where you use free-motion stitching to create artistic and detailed designs. This technique allows you to draw with thread, adding texture, depth, and interest to your quilts.
- Thread Embellishments: Experiment with adding thread embellishments to your quilts, such as couching, decorative hand stitches, or attaching special threads and fibers to create unique textures and visual interest.
These advanced quilting techniques will push your creativity and skill to new levels. Remember to practice, experiment, and enjoy the process of discovering your own individual quilting style. In the next section, we’ll cover some common issues you may encounter during the quilting process and how to troubleshoot them effectively.
Read more: How To Use A Quilt As A Slipcover
Troubleshooting Common Issues
While quilting with a long arm quilting machine can be a rewarding experience, it’s not uncommon to encounter certain challenges along the way. Here are some common issues you may come across during the quilting process and some troubleshooting tips to help you overcome them:
- Thread Breakage: If you experience frequent thread breakage, check the tension settings first. Adjust the tension if necessary and ensure that the thread is properly threaded through the machine’s pathways. Also, make sure you’re using a suitable thread weight and type for your project.
- Uneven Stitches: Uneven stitches can be caused by issues with tension, stitch length, or improper machine setup. Double-check the tension settings and adjust as needed. Verify that the stitch length is consistent and adjust it if required. Ensure that the machine is level and that the quilt layers are well stabilized.
- Puckering Fabric: Puckering occurs when the fabric gets bunched up and creates visible wrinkles in the quilt. To prevent this issue, ensure that the quilt layers are taut and well-basted together. Pay attention to the tension settings, as overly tight tension can lead to puckering. If needed, adjust the tension or practice quilting techniques that involve less dense stitching.
- Skipped Stitches: Skipped stitches can be caused by various factors, including incorrect needle size, dull or damaged needles, or machine maintenance issues. Make sure you’re using the appropriate needle size for your fabric and project. Replace the needle if it appears dull or damaged. Additionally, regularly clean and maintain your machine to prevent lint buildup that can affect stitch quality.
- Quilt Dragging or Getting Stuck: If you find that the quilt is dragging or getting stuck as you move the machine, ensure that the roller tension is adjusted properly. Check that the quilt layers are feeding smoothly and that there are no obstructions or friction points. Adding a quilt glide or quilt-friendly spray can help reduce friction and improve movement.
- Quilt Backing Wrinkles: Wrinkles on the quilt backing can occur if the fabric is not properly aligned or tensioned. Make sure the quilt backing is securely attached and wrinkle-free before loading it onto the machine. Smooth out any wrinkles during the loading process and maintain even tension throughout the quilting.
- Tangled or Nesting Bobbin Thread: If your bobbin thread keeps tangling or nesting underneath the quilt, check that you’ve loaded the bobbin correctly. Ensure that the bobbin tension is properly set and that the bobbin case is clean and free from lint or debris. Proper threading, correct bobbin winding, and using high-quality thread will also help prevent this issue.
- Breaking Needles: Breaking needles can occur due to various reasons, such as using the wrong needle size for the fabric, bent or damaged needles, or sewing over thick seams. Double-check that you’re using the correct needle size and replace any bent or damaged needles. Be cautious when quilting over thick or multiple layers, and adjust your quilting speed accordingly.
Remember that practice, patience, and troubleshooting skills are key to overcoming these common quilting issues. Don’t get discouraged if you encounter challenges along the way, as they are opportunities for growth and learning. Learn from each experience and don’t hesitate to seek advice from experts or fellow quilters to help resolve any issues you encounter.
Now that you’re equipped with troubleshooting knowledge, let’s explore how to effectively clean and maintain your long arm quilting machine in the next section.
Cleaning and Maintenance of the Long Arm Quilting Machine
Proper cleaning and maintenance of your long arm quilting machine are crucial for its optimal performance and longevity. Regular maintenance helps prevent issues and ensures that your machine runs smoothly. Here are some essential cleaning and maintenance tips to keep your machine in top shape:
- Read the Manual: Familiarize yourself with the manufacturer’s instructions and recommendations regarding cleaning and maintenance for your specific machine. The manual will provide valuable insights and guidance tailored to your machine’s requirements.
- Clean the Machine Regularly: Remove lint, dust, and thread fragments from your machine regularly to prevent build-up that can affect its performance. Use a small brush or a lint roller to clean the bobbin area, feed dogs, and other accessible parts. Be gentle to avoid damaging delicate components.
- Oil as Recommended: Follow the manufacturer’s guidelines for oiling your machine. Apply a few drops of machine oil to the designated areas according to the manual’s instructions. This helps lubricate moving parts and ensures smooth operation. Be sure to use the recommended oil type for your machine.
- Replace Needles: Replace the needle regularly to maintain optimal stitching quality. Dull or damaged needles can cause skipped stitches, fabric damage, and other issues. As a general rule, change the needle after every 8 to 10 hours of quilting or if you notice any visible damage.
- Tension Adjustment: Check and adjust the thread tension as needed. The tension may need to be reevaluated when changing thread types, fabrics, or quilting techniques. Test the tension on a practice piece before starting on a new project to ensure balanced stitching.
- Check Belts and Cords: Regularly inspect the belts and cords for wear and tear. Look for any signs of fraying, stretching, or damage. If you notice any issues, contact the manufacturer or a qualified technician for assistance in replacing the parts.
- Keep the Workspace Clean: Maintain a clean and clutter-free workspace around your machine. Remove any fabric scraps, threads, or other debris that may interfere with the machine’s movement or functioning. A tidy workspace promotes safe and efficient quilting.
- Protect the Machine When Not in Use: When your machine is not in use, cover it with a dust cover or case to protect it from dust, moisture, and accidental damage. This helps preserve the machine’s condition and prevents unnecessary wear and tear.
- Schedule Professional Servicing: Consider scheduling regular professional servicing for your long arm quilting machine. Professional technicians can thoroughly clean, inspect, and address any internal issues that may not be visible to you. This ensures that your machine remains in optimal condition in the long run.
By following these cleaning and maintenance practices, you’ll keep your long arm quilting machine in excellent working condition. Remember that proper care and attention to maintenance will contribute to the longevity and consistent performance of your machine, allowing you to enjoy quilting for years to come.
Now that you’re equipped with the knowledge of cleaning and maintenance, it’s time to wrap up. Happy quilting!
Conclusion
Congratulations! You have reached the end of this comprehensive guide on using a long arm quilting machine. Armed with the knowledge gained from this article, you are well-equipped to embark on your quilting journey with confidence and skill.
We started by understanding what long arm quilting machines are and how they differ from traditional sewing machines. We then walked through the steps of setting up your machine, preparing your quilt, and loading it onto the frame. Adjusting tension and stitch length is a crucial aspect of achieving optimal quilting results, and we covered the essentials of that as well.
From basic quilting techniques such as stitch in the ditch and meandering to advanced techniques like thread painting and background fills, you now have a repertoire of quilting techniques to explore and experiment with. We also touched on troubleshooting common issues that may arise during the quilting process and provided maintenance tips to keep your machine running smoothly.
Remember that quilting is a journey of creativity and learning. Practice, patience, and a willingness to explore new techniques will help you hone your skills and develop your unique quilting style. Don’t be afraid to try new designs, experiment with different fabrics and threads, and push the boundaries of your quilting abilities.
As you embark on your quilting adventures, continue to seek inspiration from other quilters, participate in quilting communities, and share your quilting achievements. The quilting world is filled with passionate individuals who are always eager to share their knowledge and experiences.
Whether you’re quilting for personal enjoyment, gifting your creations to loved ones, or even considering turning your passion into a business, a long arm quilting machine opens up a world of possibilities for creating beautiful and intricate quilts.
So, gather your tools, select your favorite fabrics, and let your creativity flow as you embark on your long arm quilting journey. Enjoy the process, embrace the challenges, and revel in the joy of creating unique and stunning quilts that will be cherished for generations to come.
Frequently Asked Questions about How To Use A Long Arm Quilting Machine
Was this page helpful?
At Storables.com, we guarantee accurate and reliable information. Our content, validated by Expert Board Contributors, is crafted following stringent Editorial Policies. We're committed to providing you with well-researched, expert-backed insights for all your informational needs.


0 thoughts on “How To Use A Long Arm Quilting Machine”