
Articles
How To Quilt Using A Sewing Machine
Modified: October 18, 2024
Learn how to quilt using a sewing machine with our informative articles. Discover tips, techniques, and step-by-step guides to create stunning quilts.
(Many of the links in this article redirect to a specific reviewed product. Your purchase of these products through affiliate links helps to generate commission for Storables.com, at no extra cost. Learn more)
Introduction
Welcome to the wonderful world of quilting! If you have a sewing machine and a desire to create beautiful and functional quilts, you’re in the right place. Quilting is a time-honored craft that allows you to express your creativity while also making something practical and long-lasting.
In this article, we will guide you through the process of quilting using a sewing machine. Whether you’re a beginner or have some quilting experience, we’ll cover everything you need to know to get started. So, dust off your sewing machine, gather your supplies, and let’s dive into the exciting world of quilting!
Before we get started, it’s important to note that quilting can be a personal and unique experience. Everyone has their own style and preferences when it comes to fabric choices, quilt designs, and sewing techniques. Feel free to experiment and find what works best for you. The journey of quilting is not only about the finished product but also about the joy and satisfaction you feel while creating it.
Whether you want to make a small quilt for a baby, a cozy lap quilt for yourself, or a full-size bed quilt as a gift, the process remains the same. With a sewing machine, quilting can be a faster and more efficient way to achieve stunning results. It allows you to stitch fabric layers together quickly and adds beautiful decorative stitches to enhance the design.
Throughout this article, we will cover all the essential steps involved in quilting with a sewing machine. From choosing the right machine and gathering supplies to setting up the machine, learning basic quilting techniques, and troubleshooting common issues, we’ve got you covered.
Whether you’re a seasoned quilter looking to refine your skills or a newbie just starting, this comprehensive guide will assist you throughout your quilting journey. So, grab a cup of tea, get comfortable at your sewing station, and get ready to explore the art of quilting using a sewing machine. Let’s create something beautiful together!
Key Takeaways:
- Embrace the journey of quilting with a sewing machine, from choosing the right equipment to troubleshooting common issues. Let your creativity shine and enjoy the process of creating beautiful and unique quilts.
- Practice patience and perseverance as you explore essential quilting techniques, add borders and binding, and troubleshoot common issues. Join quilting communities for support and inspiration on your quilting journey.
Read more: How To Sew A Hexagon Quilt
Choosing the Right Sewing Machine
When it comes to quilting, having the right sewing machine can make all the difference. There are several factors to consider when choosing a machine that will best suit your quilting needs. Let’s explore these factors to ensure you select the perfect sewing machine for your quilting adventures.
- Type: There are various types of sewing machines available, including mechanical, electronic, and computerized machines. Mechanical machines are simple and budget-friendly, while electronic and computerized machines offer more advanced features and settings. Depending on your skill level and the complexity of quilts you plan to make, choose a machine that meets your requirements.
- Throat Space: The throat space is the area between the needle and the body of the machine. For quilting, you’ll need a machine with a larger throat space to accommodate bulky quilt layers. Look for a machine with a generous throat space to ensure hassle-free quilting.
- Stitch Options: Quilting often involves various stitch types, such as straight stitches, decorative stitches, and appliqué stitches. Make sure the sewing machine you choose offers an adequate range of stitch options to allow for creative freedom and versatility in your quilting projects.
- Adjustable Speed: Quilting requires precision and control, so it’s beneficial to have a sewing machine with adjustable speed settings. This feature allows you to sew at a slow and steady pace when needed, ensuring accurate quilting stitches.
- Needle Position: A machine with multiple needle positions is advantageous for quilting, as it allows you to adjust the needle to your desired position. This feature is particularly helpful when quilting in intricate patterns or when using specialty quilting feet and attachments.
- Quilting Feet Compatibility: Quilting feet are attachments that help guide the fabric layers smoothly through the machine. Check if the sewing machine you’re considering is compatible with various quilting feet, such as the walking foot, free-motion foot, and 1/4″ foot.
- Price and Warranty: Consider your budget and compare prices across different brands and models. Look for a sewing machine that not only fits within your price range but also comes with a warranty to protect your investment.
It’s also helpful to read reviews from other quilters and seek recommendations from experienced sewers or quilting communities. They can provide insights into the performance and reliability of different sewing machines for quilting purposes.
Remember, choosing the right sewing machine is personal and depends on your individual needs and preferences. Take your time, do thorough research, and consider the factors mentioned above to find a sewing machine that will be your trusted companion on your quilting journey.
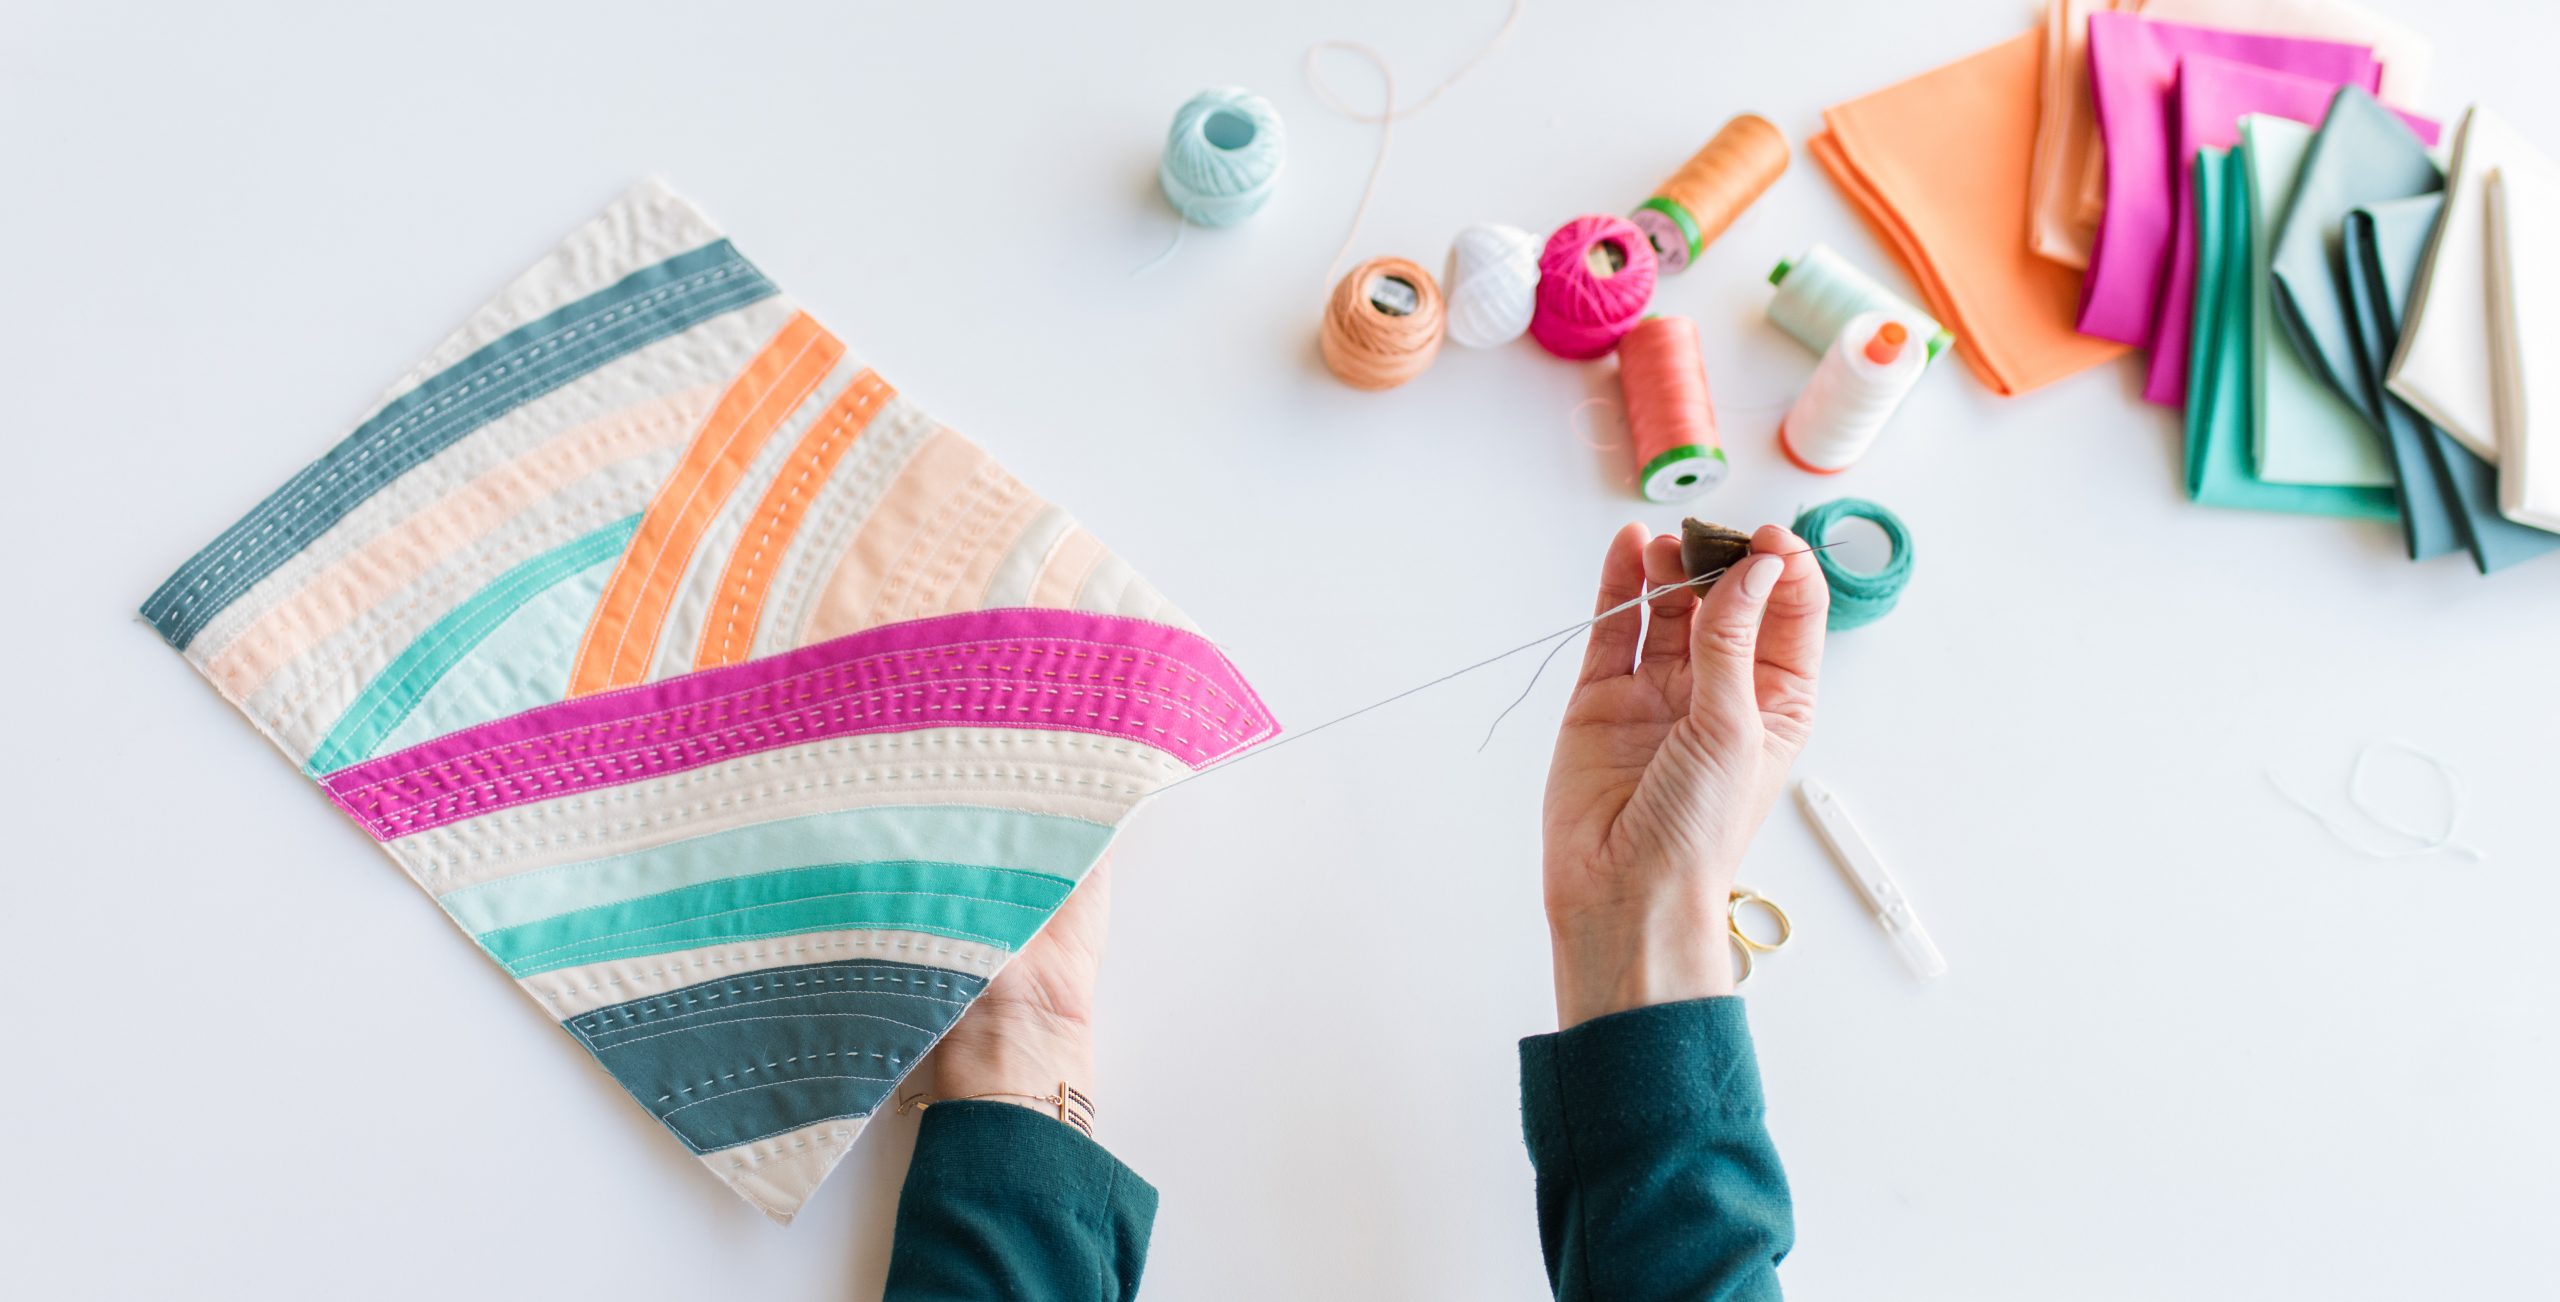
Gathering Supplies
Before diving into quilting, it’s essential to gather all the necessary supplies. Having the right tools and materials will not only make your quilting process smoother but also ensure the best results. Here are some essential supplies you’ll need to gather before you get started:
- Fabric: Choose fabrics that coordinate well together and suit the design of your quilt. Consider the color scheme, pattern, and texture. Opt for high-quality 100% cotton fabric, as it is durable, easy to work with, and provides a beautiful finish to your quilts. Calculate the total yardage needed based on your quilt pattern.
- Thread: Select a good-quality thread that matches or complements your fabric colors. Cotton thread works well for quilting, providing strength and flexibility. Consider using a slightly thicker thread for topstitching or decorative stitching to add a special touch to your quilt.
- Batting: Batting is the layer of material that goes between the quilt top and backing. Choose a batting that suits your desired quilt thickness and warmth. Common options include cotton, polyester, and wool batting. Read the manufacturer’s instructions for the recommended size and type of batting for your quilt.
- Backing Fabric: The backing fabric is the fabric that goes on the back of your quilt. Select a fabric that complements your quilt top and is wide enough to cover the entire quilt. Be sure to prewash and press the backing fabric before using it.
- Quilt Ruler and Cutting Mat: A clear acrylic quilt ruler and a self-healing cutting mat are essential for accurately measuring and cutting fabric pieces. Invest in a ruler that has various measurements and angles for versatility in your quilting projects.
- Rotary Cutter: A rotary cutter is a handy tool for cutting fabric swiftly and accurately. Pair it with a sharp cutting blade and use it in conjunction with your quilt ruler and cutting mat for precise cuts.
- Pins and Needles: Ensure you have an ample supply of quilting pins and needles. Quilting pins are longer than regular sewing pins and have a flat head, making them easier to work with. Choose needles specifically designed for quilting and consider having a few different sizes on hand to suit different fabric thicknesses.
- Quilting Marking Tools: These tools are used to transfer pattern markings onto the fabric. Options include washable fabric markers, fabric chalk, or water-soluble pens. Choose a marking tool that is suitable for your fabric and easy to remove after quilting.
- Iron and Ironing Board: Pressing is a crucial step in quilting to ensure accurate piecing and professional-looking results. Have a reliable iron and ironing board nearby for pressing fabric seams and flattening quilt blocks.
- Quilting Gloves: Quilting gloves provide grip and control when maneuvering the fabric during free-motion quilting. They help reduce hand fatigue and improve stitch accuracy. Look for gloves with a breathable and comfortable fabric.
- Seam Ripper: Mistakes happen, and a seam ripper is invaluable for undoing stitches and fixing errors. Invest in a good-quality seam ripper with a sharp blade to easily remove unwanted stitches without damaging the fabric.
Additionally, gather other basic sewing supplies, such as scissors, a seam gauge, a tape measure, and a sewing machine manual. Having all these supplies organized and readily accessible will save you time and ensure a smooth quilting process.
Now that you have all your supplies gathered, it’s time to prepare your fabric for quilting. In the next section, we’ll discuss the importance of properly preparing your fabric before you start quilting.
Preparing the Fabric
Preparing the fabric before quilting is an essential step that ensures accurate piecing, prevents fabric shrinkage, and leads to a professional-looking finished quilt. Follow these steps to properly prepare your fabric for quilting:
- Pre-wash the Fabric: Unless your fabric is labeled as “pre-washed,” it’s advisable to pre-wash your fabric before quilting. This step helps remove any excess dyes, chemicals, or shrinkage that may occur during washing. Simply machine wash the fabric in cold water and mild detergent, then tumble dry on a low setting or air dry.
- Press the Fabric: After pre-washing, press the fabric using a steam iron on a medium heat setting. This ensures that the fabric is smooth, wrinkle-free, and ready for cutting and piecing. Pay attention to pressing the seams open or to one side, following your quilt pattern’s instructions.
- Square the Fabric: It’s important to have straight and square edges on your fabric before cutting. Align the fabric’s selvage edges together and check if the cross-grain is perpendicular. Make any necessary adjustments to ensure the fabric is squared before cutting.
- Trim Excess Threads: Take the time to trim any excess threads or loose threads from the fabric. This helps prevent thread tangles while quilting and ensures a clean and professional look to your finished quilt.
- Apply Stabilizer (Optional): If you’re working with lightweight or stretchy fabrics, you may want to apply a stabilizer to the wrong side of the fabric. Stabilizer adds some extra stability and prevents the fabric from stretching or shifting during quilting.
- Consider Fabric Direction: Plan the direction of your fabric prints and patterns in relation to your quilt design. Consider how they will look when cut and sewn together. This step is especially important for directional prints or fabrics with motifs that need to be aligned properly.
By following these steps, you’ll ensure that your fabric is clean, pressed, and ready to be transformed into a beautiful quilt. Taking the time to prepare your fabric sets a solid foundation for the quilting process and enhances the overall quality of your finished quilt.
Once the fabric is prepped and ready, it’s time to set up your sewing machine for quilting. In the next section, we’ll guide you through the process of setting up your machine for optimal quilting performance.
Setting Up the Sewing Machine
Before you start quilting, it’s important to properly set up your sewing machine to ensure smooth and efficient quilting. Here are the steps to follow for setting up your sewing machine for quilting:
- Clean and Oil: Begin by cleaning your sewing machine. Remove any lint and dust that may have accumulated in the bobbin case, feed dogs, and needle plate. Refer to your sewing machine manual for specific cleaning instructions. Then, oil the machine as indicated in the manual to ensure smooth operation.
- Attach a Quilting Foot: Change your regular presser foot to a quilting foot that is suitable for the quilting technique you plan to use. A walking foot is ideal for straight-line quilting, while a free-motion foot is necessary for free-motion quilting. Consult your machine’s manual or the foot manufacturer’s instructions for attaching the quilting foot.
- Insert the Needle: Select an appropriate size and type of needle for quilting. A universal needle or quilting needle in size 80/12 or 90/14 is generally suitable for most quilting projects. Insert the needle according to your machine’s instructions, ensuring it is properly aligned and at the correct height.
- Thread the Machine: Wind a bobbin with the desired thread color and insert it into the bobbin case. Thread the machine according to your machine’s threading diagram, ensuring the thread passes through all necessary guides and tensions discs. Use a thread that complements your fabric and suits your quilting needs.
- Tension Adjustment: Set the thread tension to a suitable level for quilting. Test the tension by sewing on a scrap piece of fabric and checking for balanced stitches – neither too loose nor too tight. Adjust the tension as needed to achieve even and balanced stitches.
- Select the Stitch: Choose the stitch pattern that best suits your quilting design. For straight-line quilting, a basic straight stitch or a decorative stitch can be used. For free-motion quilting, select the appropriate stitch or switch your machine to the free-motion setting.
- Test and Adjust: Run a test piece of fabric to ensure that the machine is stitching properly and the tension, stitch length, and width are all adjusted as desired. Make any necessary adjustments to achieve the desired results.
Once your machine is set up and ready to go, take a moment to familiarize yourself with the various features, buttons, and knobs. Practice some stitches on scrap fabric to get a feel for the machine before starting on your quilt. Understanding and becoming comfortable with your machine’s capabilities will help you quilt with ease and confidence.
Now that your sewing machine is set up, it’s time to explore basic quilting techniques. In the next section, we’ll cover some essential quilting techniques that will serve as a foundation for your quilting journey.
Read more: How To Quilt On A Brother Sewing Machine
Basic Quilting Techniques
Now that you have your sewing machine set up, let’s explore some basic quilting techniques that will serve as a foundation for your quilting projects. These techniques will allow you to create beautiful designs and securely stitch your fabric layers together. Let’s dive in!
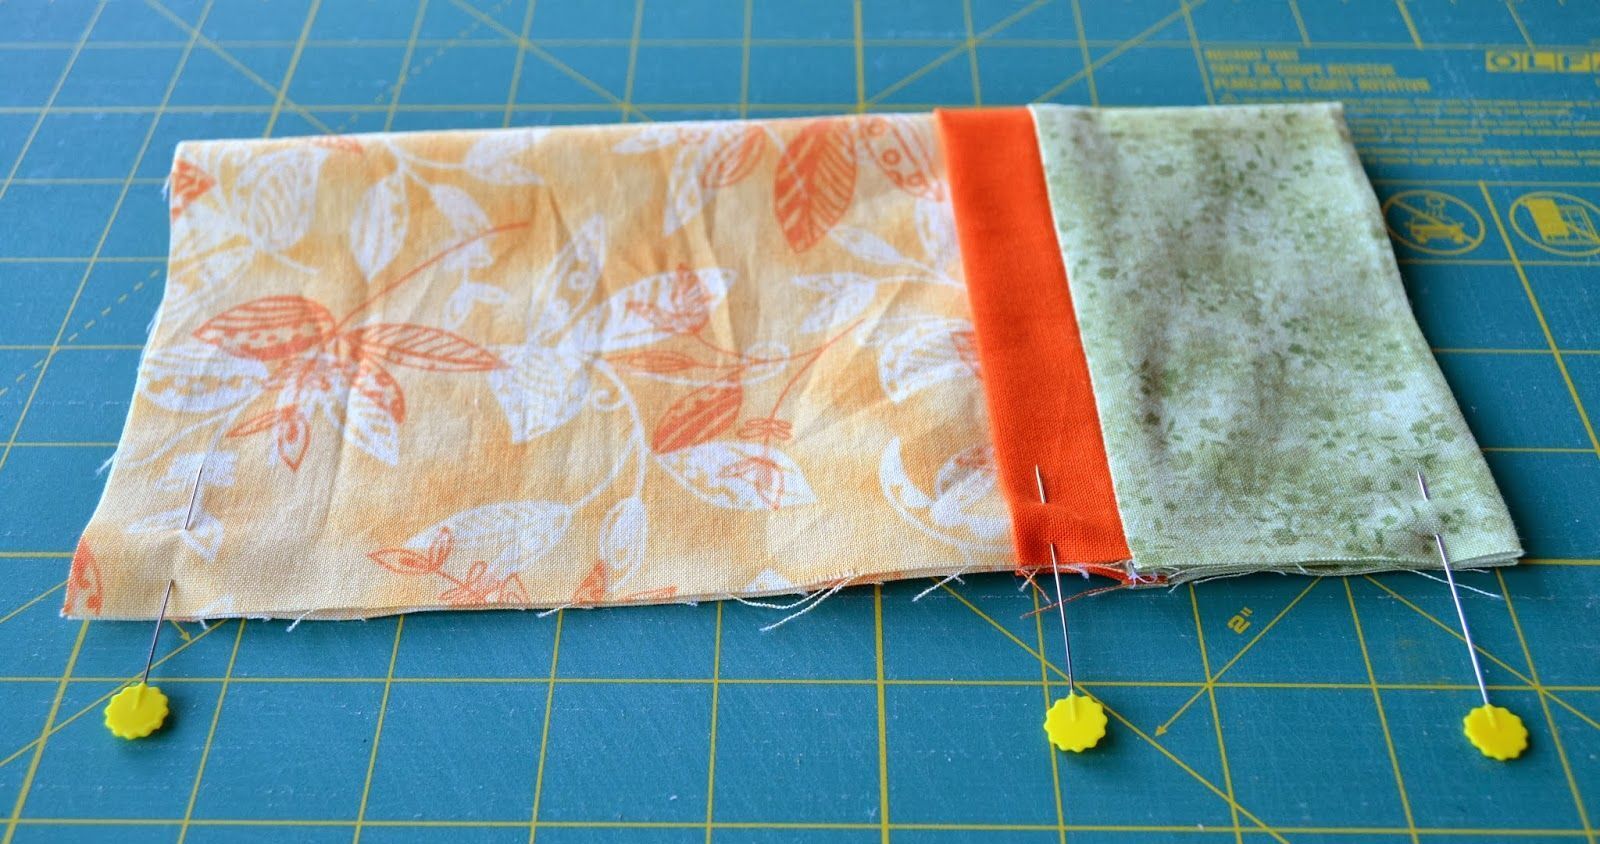
- Piecing: Piecing is the process of sewing together fabric pieces to create blocks or larger sections of your quilt. Use a 1/4″ seam allowance for accurate and consistent piecing. Press the seams either open or to one side to reduce bulk and achieve flat quilt blocks.
- Straight-Line Quilting: Straight-line quilting involves stitching parallel or diagonal lines across your quilt top. You can use the edge of the quilting foot or a quilting ruler as a guide for straight and even stitching. Choose a stitch length that suits your quilt design and desired quilting effect.
- Free-Motion Quilting: Free-motion quilting allows you to stitch unique and intricate designs by moving the fabric freely under the needle. Drop or cover the feed dogs of your sewing machine to disengage the fabric feed mechanism. Use a free-motion foot and practice on scrap fabric to gain control and confidence in your movements.
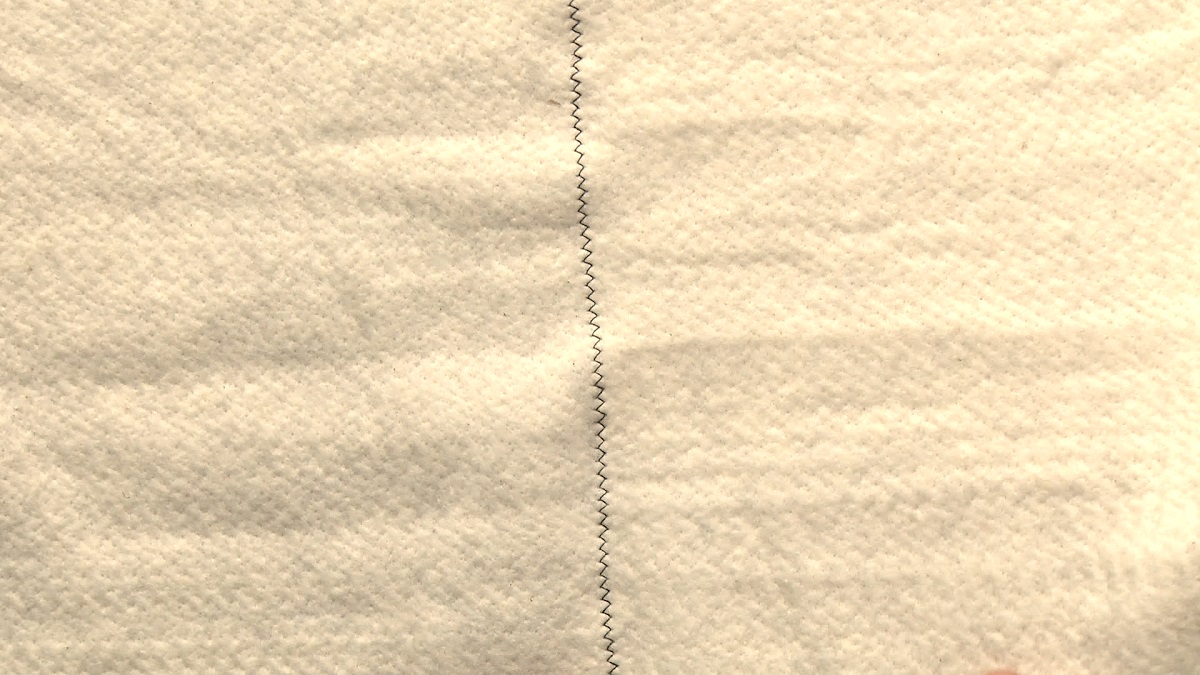
- Quilting in the Ditch: “Quilting in the ditch” refers to stitching along the seams of your quilt top, following the natural lines between piecing blocks. This technique helps secure the layers and adds subtle texture to your quilt without overpowering the design.
- Echo Quilting: Echo quilting involves stitching parallel lines around a shape or motif, creating a series of concentric lines that “echo” the outline. This technique can be used to highlight specific areas, add emphasis, or create depth in your quilting design.
- Stitch-in-the-Ditch Binding: When attaching the binding to your quilt, consider utilizing a stitch-in-the-ditch technique. Stitching along the seam lines between the quilt top and the binding helps secure the binding in place and creates a clean and polished finish.
As you practice these techniques, start with small projects like mini quilts or quilted coasters before embarking on larger quilts. The more you practice, the more comfortable you will become, and your quilting skills will improve with time.
Experiment with different thread colors, decorative stitches, and quilting designs to personalize your quilts and add your unique touch. The beauty of quilting is that there are no rules when it comes to creativity, so don’t be afraid to let your imagination run wild and explore new possibilities in your quilting projects.
Now that you are familiar with these basic quilting techniques, you can begin creating stunning quilts. In the next sections, we will explore specific quilting stitches and techniques to enhance the beauty of your quilts.
When quilting with a sewing machine, use a walking foot to help feed the layers of fabric evenly and prevent shifting. This will result in more precise and professional-looking quilting.
Quilting with Straight Stitches
Quilting with straight stitches is a classic and versatile technique that can add both structure and decorative elements to your quilt. Straight-line quilting can be done using a walking foot or the regular sewing foot on your sewing machine. Here’s how to quilt with straight stitches:
- Prepare Your Quilt Sandwich: Layer your quilt top, batting, and backing fabric together to create a “quilt sandwich.” Baste the layers together using safety pins or spray basting, ensuring they are flat and taut.
- Mark Your Quilt Top: Use quilting marking tools or quilting rulers to mark your desired quilting lines on the quilt top. You can create straight lines parallel to the seams, crosshatch patterns, or any other designs that complement your quilt’s aesthetic.
- Attach the Walking Foot (Optional): If you’re using a walking foot, attach it to your sewing machine according to the manufacturer’s instructions. This foot helps evenly feed the layers of fabric and batting through the machine, preventing shifting or puckering.
- Select Your Stitch Length: Choose a stitch length that suits your quilting design. For most straight-line quilting, a stitch length of 2.5mm to 3.0mm works well. Test the stitch length on a scrap piece of fabric to ensure it gives you the desired result.
- Begin Quilting: Position your quilt under the sewing machine needle, starting at one end of your marked quilting line. Lower the presser foot and begin quilting by sewing along the marked line. Take your time and maintain a consistent speed to ensure even stitches.
- Guide the Fabric: Use the edge of the quilting foot or a quilting ruler as a guide to help you maintain straight and even stitches. Keep the fabric layers smooth and avoid tugging or pulling them as you quilt.
- Backstitch or Knot the Ends: At the beginning and end of each quilting line, backstitch or knot the threads to secure them. This prevents your stitches from unraveling and ensures a secure hold on the quilt layers.
- Continue Quilting: Move along the marked quilting lines, stopping and starting as needed to reposition your quilt and adjust the direction of the quilting lines. Take breaks as necessary to rest your hands and maintain focus.
- Inspect and Adjust: Regularly check your quilting stitches to ensure they are even and consistent. If needed, adjust the tension or stitch length on your sewing machine. It’s normal for your stitching to improve as you gain more experience, so don’t be too hard on yourself in the beginning.
- Finishing Touches: Once you have quilted all the desired lines, admire your work! Trim any excess threads and gently press the quilt to remove any creases or wrinkles.
Quilting with straight stitches allows you to create clean and geometric designs while enhancing the structure and durability of your quilt. Experiment with different quilting patterns, spacing between lines, or even varying stitch lengths to add texture and visual interest to your quilt.
Remember, practice makes perfect, so don’t be discouraged if your first straight-line quilting attempts aren’t flawless. With time and experience, your stitching skills will improve, and you’ll have the satisfaction of creating beautiful quilts with straight stitches.
In the next section, we’ll explore another popular quilting technique: quilting with free-motion stitches.
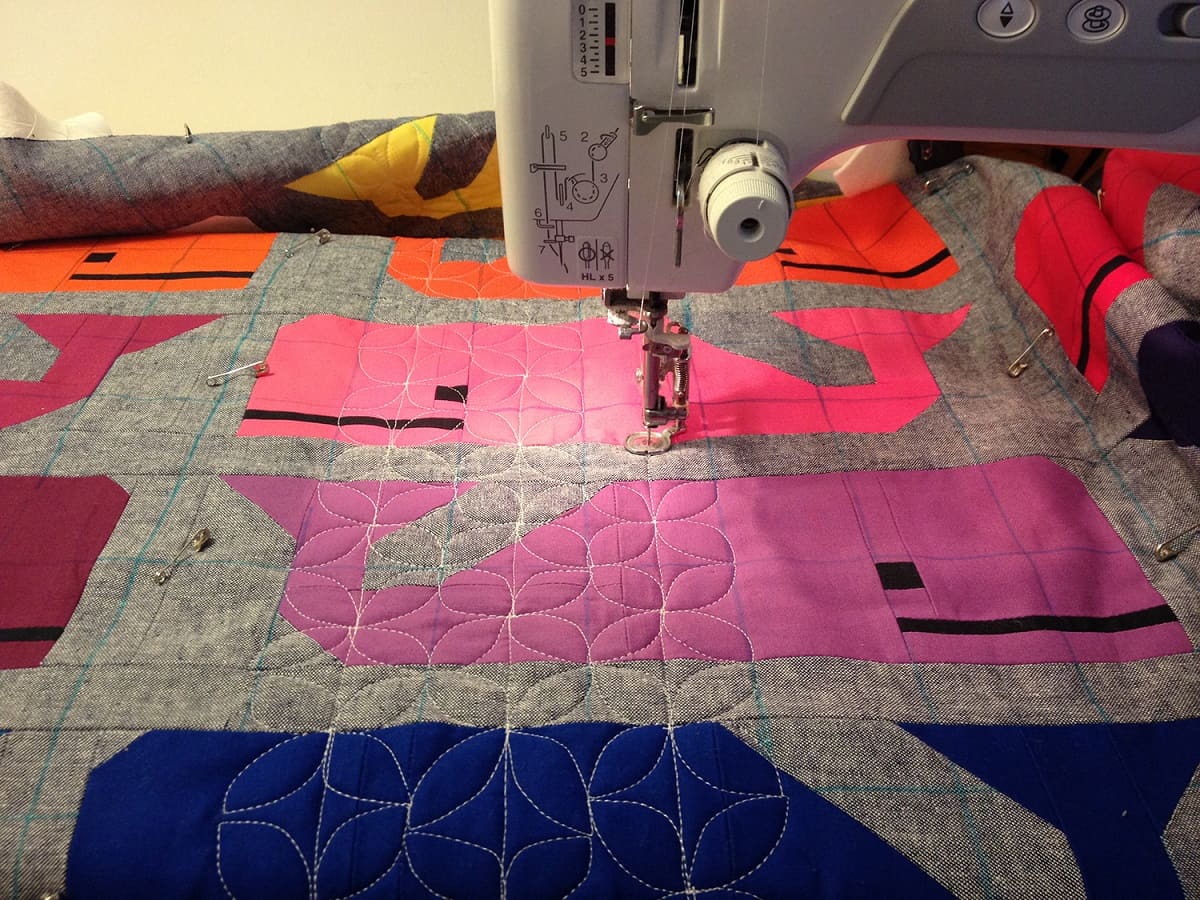
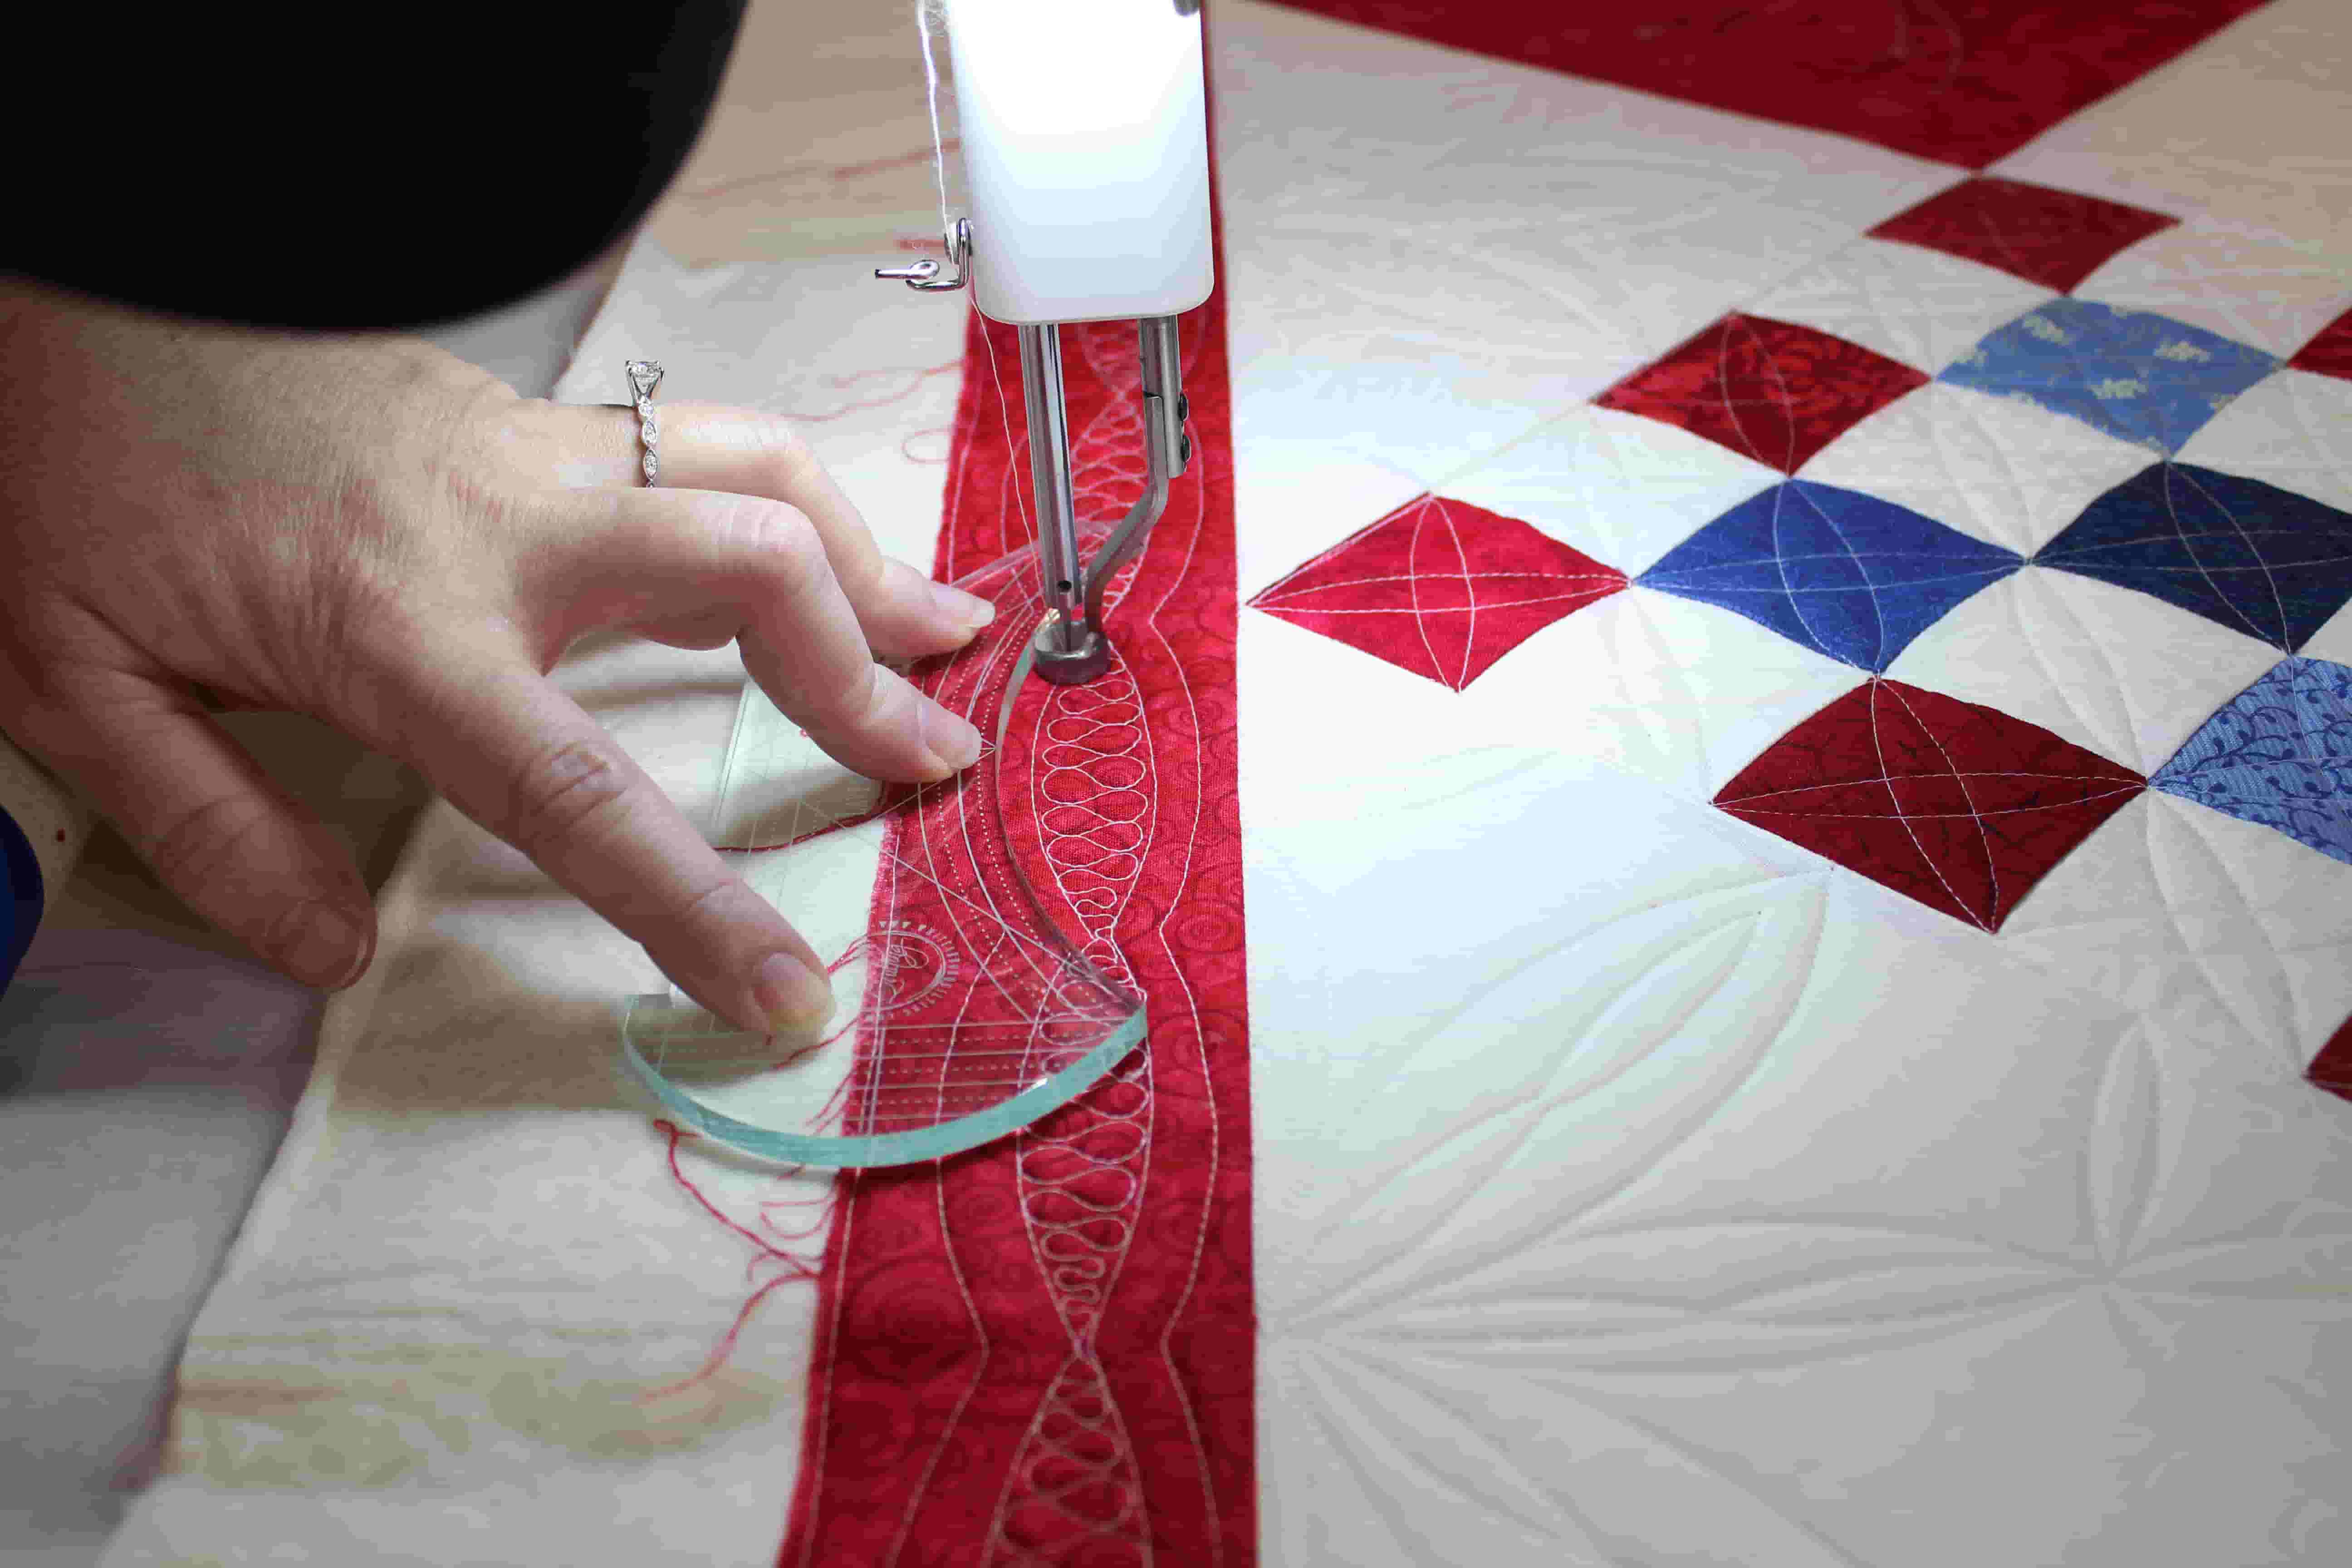
Quilting with Free-motion Stitches
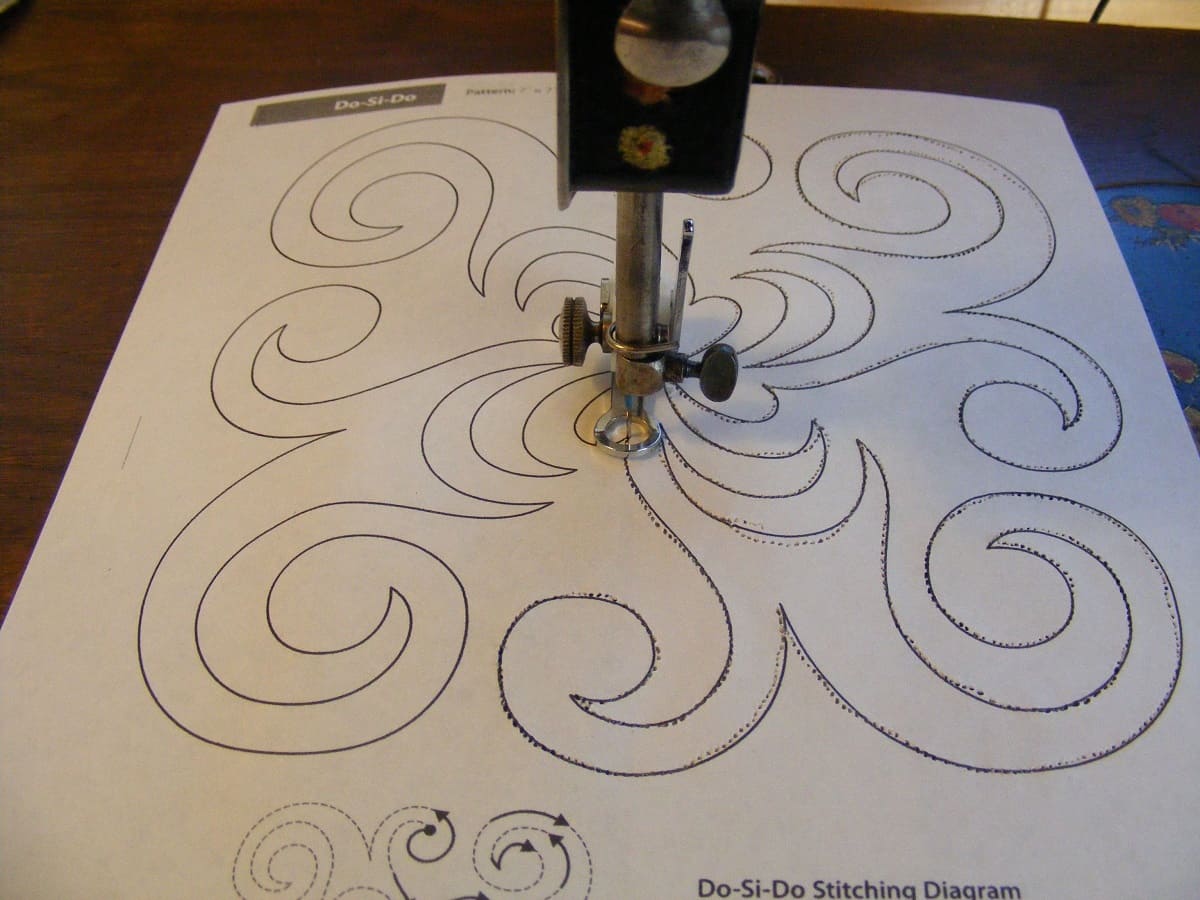
Quilting with free-motion stitches gives you the creative freedom to add intricate designs, motifs, and textures to your quilt. Unlike straight-line quilting, free-motion quilting involves moving the fabric freely under the needle to create unique and decorative stitches. Here’s how to quilt with free-motion stitches:
- Prepare Your Quilt Sandwich: Layer your quilt top, batting, and backing fabric together to create a “quilt sandwich.” Baste the layers together using safety pins or spray basting, ensuring they are flat and taut.
- Lower or Cover the Feed Dogs: Drop or cover the feed dogs of your sewing machine using the appropriate method as indicated in your machine’s manual. This disengages the fabric feed mechanism, allowing you to freely move the fabric under the needle.
- Attach a Free-motion Quilting Foot: Replace your regular presser foot with a free-motion quilting foot or a darning foot. Ensure it is securely attached and follow the manufacturer’s instructions for proper installation.
- Select Your Stitch and Adjust Tension: Choose a straight stitch or a decorative stitch that suits your desired quilting design. Adjust the tension on your sewing machine as needed to achieve balanced and even stitches. Test the tension and stitch on a scrap piece of fabric before starting on your quilt.
- Start Quilting: Position your quilt under the needle, lower the presser foot, and start stitching. Use both hands to guide and move the fabric under the needle. Begin by quilting simple shapes or patterns, such as loops, swirls, or stippling, to get comfortable with the free-motion technique.
- Practice Control and Speed: Develop control and rhythm by practicing moving the fabric smoothly and at a consistent speed. Keep a steady pace, moving the fabric in different directions and curves to create various shapes and designs.
- Fill the Quilt Areas: Gradually fill in the quilt areas with your chosen free-motion designs. Explore different motifs, such as flowers, feathers, or geometric shapes, that complement your quilt pattern. Feel free to sketch your designs on paper beforehand or let your creativity guide you.
- Backstitch or Knot the Ends: Secure the ends of each quilting line by backstitching or knotting the threads. This prevents them from coming undone and maintains the integrity of your quilting stitches.
- Take Breaks and Rest: Free-motion quilting can be physically demanding on your hands and arms. Take breaks when needed to relax your muscles and regain focus. Stretch your fingers, wrists, and shoulders to prevent stiffness and fatigue.
- Inspect and Adjust: Regularly check your quilting stitches for consistency and adjust the tension, stitch length, or speed as needed. Remember that minor imperfections add character to handmade quilts, so embrace and learn from any mistakes or inconsistencies.
- Finishing Touches: Once you have quilted all the desired areas, trim any excess threads and gently press the quilt to remove any creases or wrinkles.
Quilting with free-motion stitches allows you to unleash your creativity and add a personal touch to your quilts. The key is to practice and experiment with different designs and techniques. As you gain confidence and experience, you’ll develop your own unique style and discover new ways to enhance your quilting projects.
Remember, free-motion quilting requires patience and practice. Don’t be discouraged if your stitches aren’t perfect at first. With time and dedication, you’ll improve your skills and create stunning quilted masterpieces.
In the next section, we’ll delve into the final steps of quilt finishing, including adding borders and binding.
Adding Borders and Binding
Adding borders and binding is the final step in completing your quilt. Borders not only enhance the design but also provide a finished look, while binding secures the edges of your quilt. Here’s how to add borders and binding to your quilt:
- Measure and Cut Borders: Measure the width and length of your quilt top. Based on these measurements, cut fabric strips for the borders. The width of the strips can vary depending on your desired border size. Remember to add an extra ½ inch to each border strip length for seam allowances.
- Prepare Borders: Sew the border strips together end-to-end, if necessary, to create the desired length. Press the seam allowances open or towards one side. Measure and trim the borders to match the width of your quilt top.
- Attach Borders: Lay your quilt top flat, right side up. Align and pin the borders along the sides of the quilt, starting and stopping at each corner. Sew the borders onto the quilt top using a ¼ inch seam allowance. Press the seam allowances towards the borders.
- Measure and Cut Binding: Measure the perimeter of the quilt to determine the length of binding needed. Cut fabric strips for binding, usually 2.5 to 3 inches wide. Calculate the number of strips needed based on the length of the perimeter and the width of your binding strips.
- Join Binding Strips: Sew the binding strips together diagonally to create one continuous strip. Trim the seam allowances and press them open or towards one side for a neater finish.
- Prepare Binding: Fold the binding strip in half lengthwise, wrong sides together, and press. This creates a double-fold binding with the raw edges enclosed inside.
- Attach Binding to Quilt: Starting on one side of the quilt, align the raw edges of the binding with the raw edges of the quilt. Leave a few inches of binding unstitched at the beginning. Begin sewing the binding to the quilt, using a ¼ inch seam allowance. Stop stitching a few inches before reaching the starting point.
- Miter Corners: When you approach a corner, stop stitching ¼ inch away from the corner’s edge. Fold the binding strip up, away from the quilt, creating a diagonal fold. Then, fold the binding strip back down, aligning it with the next side of the quilt. Continue stitching from the folded edge, creating a mitered corner. Repeat this process for all corners.
- Finish Binding: Continue stitching until you reach the starting point, leaving another few inches of binding unstitched. Trim the excess binding, leaving a bit extra to overlap. Fold the ending edge of the binding strip inside, overlapping it with the starting point. Finish stitching the binding, overlapping the starting stitches.
- Secure Binding: Fold the binding over the raw edges of the quilt and hand-stitch it in place using whipstitch or ladder stitch. Alternatively, you can use a sewing machine to topstitch the binding down. Be sure to catch the folded edge of the binding on the backside for a tidy finish.
Once you’ve completed the binding, your quilt is almost ready to be showcased or snuggled up with. Give it a final press to smooth any seams or wrinkles, and trim any loose threads.
Adding borders and binding to your quilt not only frames the design but also provides durability and a polished look. Take your time and enjoy this final step that brings your quilt to completion. The process may seem a bit intricate at first, but with practice and patience, you’ll become proficient in adding borders and binding to your quilts.
Congratulations! You have now learned the essential techniques for quilting, from piecing to straight-line and free-motion quilting, and adding borders and binding. With these skills, you can embark on quilting projects of various sizes and complexity.
Remember to have fun and let your creativity shine as you embark on your quilting journey. Happy quilting!
Read more: How To Sew A Chevron Quilt
Tips and Tricks for Successful Quilting
As you dive deeper into the world of quilting, it’s helpful to have some tips and tricks up your sleeve to ensure successful and enjoyable quilting experiences. Here are some valuable tips to help you in your quilting journey:
- Practice Proper Seam Allowances: Accurate seam allowances are crucial for well-pieced quilt blocks. Use a 1/4 inch foot or mark the proper seam allowance on your sewing machine. Consistency in seam allowances will result in precise and well-aligned quilt blocks.
- Press Seam Allowances: Press seams either open or to one side to reduce bulk and create flat quilt blocks. Use a hot iron and press without stretching the fabric. This step ensures your quilt top lays flat, and the seams are neatly pressed.
- Choose the Right Thread: Select a good-quality thread suitable for quilting. Use 100% cotton thread for piecing and quilting, as it provides strength and blends well with the fabric. Consider using a slightly thicker thread for topstitching or decorative stitching to enhance the quilt design.
- Don’t Rush the Cutting Process: Take your time when cutting fabric pieces. Use a rotary cutter, ruler, and cutting mat for precise and accurate cuts. Measure twice and cut once to avoid mistakes.
- Experiment with Quilting Designs: Don’t be afraid to try new quilting designs and techniques. Experiment with different stitch patterns, textures, and thread colors. It’s all part of the creative process, and it’s how you develop your unique quilting style.
- Practice Free-motion Quilting on Scraps: Before quilting on your actual quilt, practice free-motion quilting on scrap fabric to get a feel for the technique. This helps refine your control and allows you to experiment with different designs before committing to your quilt top.
- Take Breaks and Rest: Quilting can be a time-consuming and physically demanding task. Take regular breaks to rest your eyes, stretch your body, and prevent fatigue. Quilting should be enjoyable, so listen to your body’s needs throughout the process.
- Embrace Imperfections: Remember that quilting is a handmade craft, and slight imperfections add character to your quilt. Don’t stress about perfect stitches or flawless designs. Enjoy the process, and don’t be too hard on yourself. Each quilt is a unique work of art.
- Join Quilting Communities: Connect with other quilters, either in person or online, to seek support and inspiration. Quilting communities offer a wealth of knowledge, advice, and encouragement. Share your work, ask questions, and learn from fellow quilting enthusiasts.
- Document Your Journey: Keep a quilting journal or take photos of your quilting projects. Documenting your progress and the techniques you’ve learned can serve as a reference for future projects. It’s also a beautiful way to chronicle your quilting journey and see how you’ve grown as a quilter over time.
Remember, quilting is a creative process that allows you to express yourself and bring beauty into the world. Enjoy the journey, embrace the learning curve, and celebrate your quilting accomplishments along the way.
Utilize these tips and tricks to enhance your quilting skills and create stunning quilts that you can be proud of. Each project is an opportunity to learn and grow as a quilter, so have fun exploring new techniques, challenging yourself, and uncovering your own unique quilting style.
Now that you’re equipped with these valuable tips, go forth and continue to create beautiful quilts that will be cherished for years to come. Happy quilting!
Troubleshooting Common Issues
While quilting is a rewarding and enjoyable hobby, it’s not without its challenges. Fortunately, many common quilting issues can be easily resolved with a bit of troubleshooting. Here are some tips for troubleshooting common quilting issues:
- Uneven or Puckered Quilt Blocks: Uneven or puckered quilt blocks can occur if the fabric shifts or stretches during sewing. Ensure you are using an accurate 1/4 inch seam allowance and that you are not pulling or tugging on the fabric as you sew. Pinning your fabric layers together before sewing can also help keep them aligned and prevent shifting.
- Thread Breakage: Thread breakage can be frustrating, but it can often be resolved with simple solutions. First, check if your needle is dull or bent and replace it if necessary. Make sure your thread tension is properly adjusted—too much tension can cause the thread to break. Also, check that you’re using the right thickness of thread for your project and that the thread is properly threaded through the machine and bobbin.
- Skipped Stitches: Skipped stitches can occur if the machine isn’t properly threaded or if the needle is dull. Check that the needle is inserted correctly and that it’s the appropriate size for the fabric thickness. It’s also a good idea to regularly change the needle to ensure it stays sharp and in good condition.
- Fabric Bunching or Gathering: Fabric bunching or gathering can happen if the fabric isn’t being fed properly through the machine. First, check that the feed dogs are engaged and moving the fabric smoothly. If needed, adjust the presser foot pressure to ensure the fabric is feeding evenly. It’s also important to use the correct type and size of needle for your fabric to prevent unnecessary fabric puckering.
- Uneven Quilting Stitches: Uneven quilting stitches can result from inconsistent speed or tension. Make sure you’re maintaining a steady speed as you quilt and taking your time to guide the fabric evenly under the needle. Check the tension settings on your machine and adjust as needed to achieve balanced and even stitches.
- Breaking Needles: Breaking needles can occur if the needle is too dull or bent, or if you’re sewing over thick seams without a proper needle for heavy-duty sewing. Ensure you’re using the correct needle size and type for your fabric, and replace the needle if it becomes damaged or worn out.
Remember, practice and patience are key when troubleshooting quilting issues. If a problem persists, don’t hesitate to consult your sewing machine manual or seek advice from experienced quilters. They may offer additional insight and solutions to resolve the specific issue you’re facing.
By troubleshooting these common quilting issues, you’ll be able to overcome challenges and continue enjoying the quilting process. Keep a positive attitude, be open to learning, and celebrate every quilting accomplishment along the way.
Now that you’re armed with troubleshooting tips, you can confidently tackle any issues that arise during your quilting projects. Happy quilting!
Conclusion
Congratulations on completing this comprehensive guide to quilting using a sewing machine! You have learned essential techniques, from choosing the right machine to troubleshooting common issues. With this knowledge, you’re well-equipped to embark on your quilting journey and create stunning quilts that showcase your creativity and skill.
Quilting is a wonderful blend of artistry, precision, and patience. As you practice and gain experience, you’ll discover your own unique style and approaches to quilting. Remember, there are no right or wrong answers in quilting—each quilt is a reflection of your personal journey and expression.
Be open to trying new techniques, exploring different designs, and embracing the imperfections that make each quilt unique. View challenges as opportunities to learn and grow, and celebrate every quilt you complete, whether big or small.
Don’t forget to enjoy the process along the way. Quilting can be a time-consuming hobby, but it is also deeply rewarding. It allows you to unwind, express yourself artistically, and bring joy to others through your creations.
Consider joining local quilting groups or online communities to connect with fellow quilters. These supportive communities offer a wealth of knowledge, inspiration, and encouragement. Share your work, seek advice, and inspire others with your passion for quilting.
Remember, quilting is a journey. Each quilt you make will teach you something new and allow you to hone your skills. Take pride in every finished project, regardless of the result. Each quilt represents hours of dedication, creativity, and love.
Now that you have a solid foundation in quilting with a sewing machine, grab your fabrics, gather your supplies, and let your imagination run wild. Start with small projects and gradually work your way up to larger and more intricate quilts.
Whether you’re quilting for yourself, loved ones, or for the pure joy of creation, remember that quilting is a labor of love. Enjoy the process, cherish each stitch, and be proud of the quilts you create with your own hands. Happy quilting!
Frequently Asked Questions about How To Quilt Using A Sewing Machine
Was this page helpful?
At Storables.com, we guarantee accurate and reliable information. Our content, validated by Expert Board Contributors, is crafted following stringent Editorial Policies. We're committed to providing you with well-researched, expert-backed insights for all your informational needs.


0 thoughts on “How To Quilt Using A Sewing Machine”